Just Another Angle
Changing the pitch of a bevelled cutting edge is as much about a changed attitude as the physical change in steel. My hand tool woodworking is indeed high-demand woodworking, and guess what? We want it. When I plough out a groove using a plough plane, I am making a statement that says I want and prefer this exercise over the couch. I want the action, the demands of it and then too the risk. This kind of demand makes me breathless, occasionally a bit sweaty and possibly slightly achy. "Why do that to yourself, Paul?" 'Because IT'S JUST PLAIN GOOD FOR MY BODY AND my MIND!' I have done this every single day for close to 61 years. I doubt I will change now, and my 'medical professionals' say, "Keep doing what you are doing, Paul."
I forget to mention some things sometimes. On bevel-down planes like plough planes and bevel down router planes too, you might consider changing the pitch of the cutting bevel to a steeper angle to give it a stronger, more resilient cutting edge; the benefit of this being that the cutting edge stays sharper that bit longer because it reduces edge fracture which is quite different than dulling by wear which is more likely the reason that edges deteriorate more by fracture than by wear. The seat of a 'thicker' edge is broader, so steel doesn't break away. Because the bevel of the cutting edge is underneath rather than on top, as in bevel-up planes, the increased bevel angle to the underside makes no difference to the resistance factor as it would in bevel-ups.
I find that the narrow blades in plough planes especially benefit from increasing the bevel from 30º to around 33-35º. I generally advocate woodworker establish sharpening with a single bevel over two bevels as in secondary or micro-bevel sharpening. There is no need to regrind the former 30º bevel, as simply sharpening at the steeper pitch will eventually establish the more expedient macro-camber I prefer and advocate people establish in all sharpening of edge tools anyway. To do this, just lift up a couple of degrees and go for whatever comes out. Use a guide as shown here below if you need to. As I said, I prefer freehand for speed and efficiency. A few rubs gets you there, and you're back to task.

Absolutely no difference in the quality of cut and no increase in effort to effect each stroke. These key features are important to hand woodworking and the way we want to establish our work.
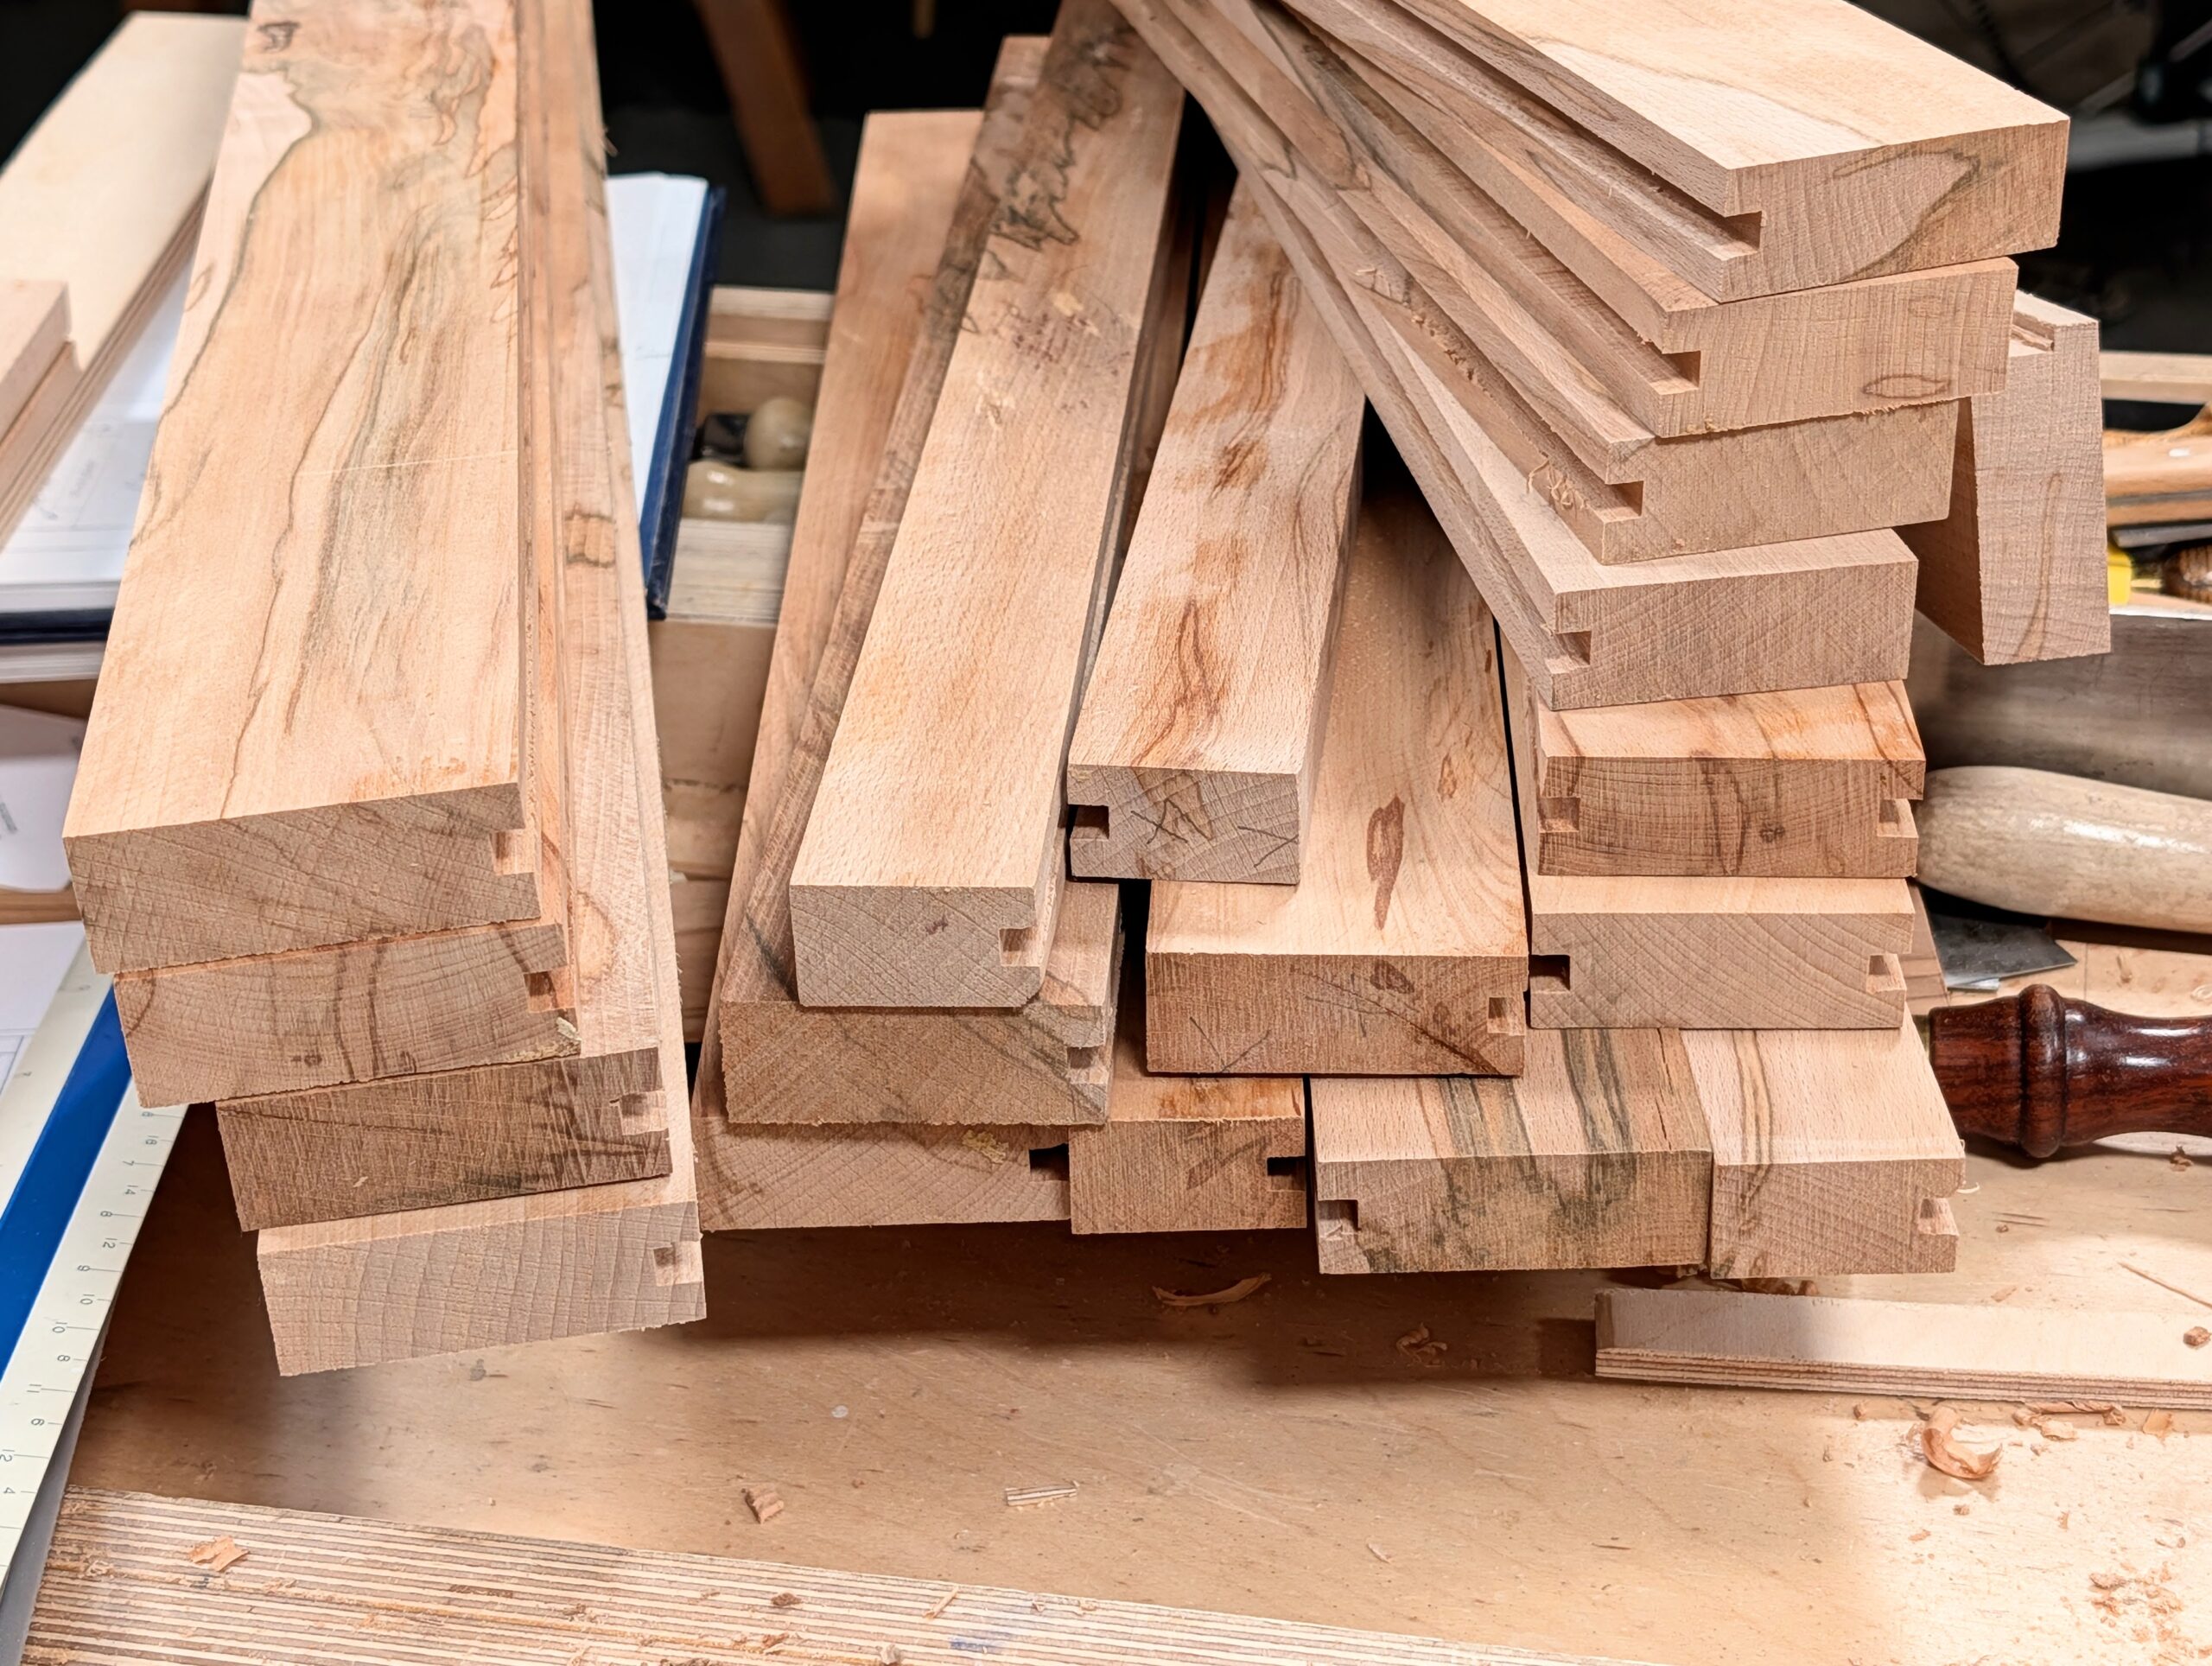
Today, I ploughed 28 grooves in beech. I don't own a tablesaw nor a power router, and neither would I have used them had I owned them. Skill and exercise is a mainstay for me and demands a maintenance programme that's no different than that which any sport requires, if not more. Here's the thing––twenty minutes of ploughing out grooves or planing and sawing would will and should leave anyone moderately breathless and in need of a half-minute break to recover air to the lungs and pump blood to the muscles and brain. No couch potatoes here...just absolute pure and energised woodworking.
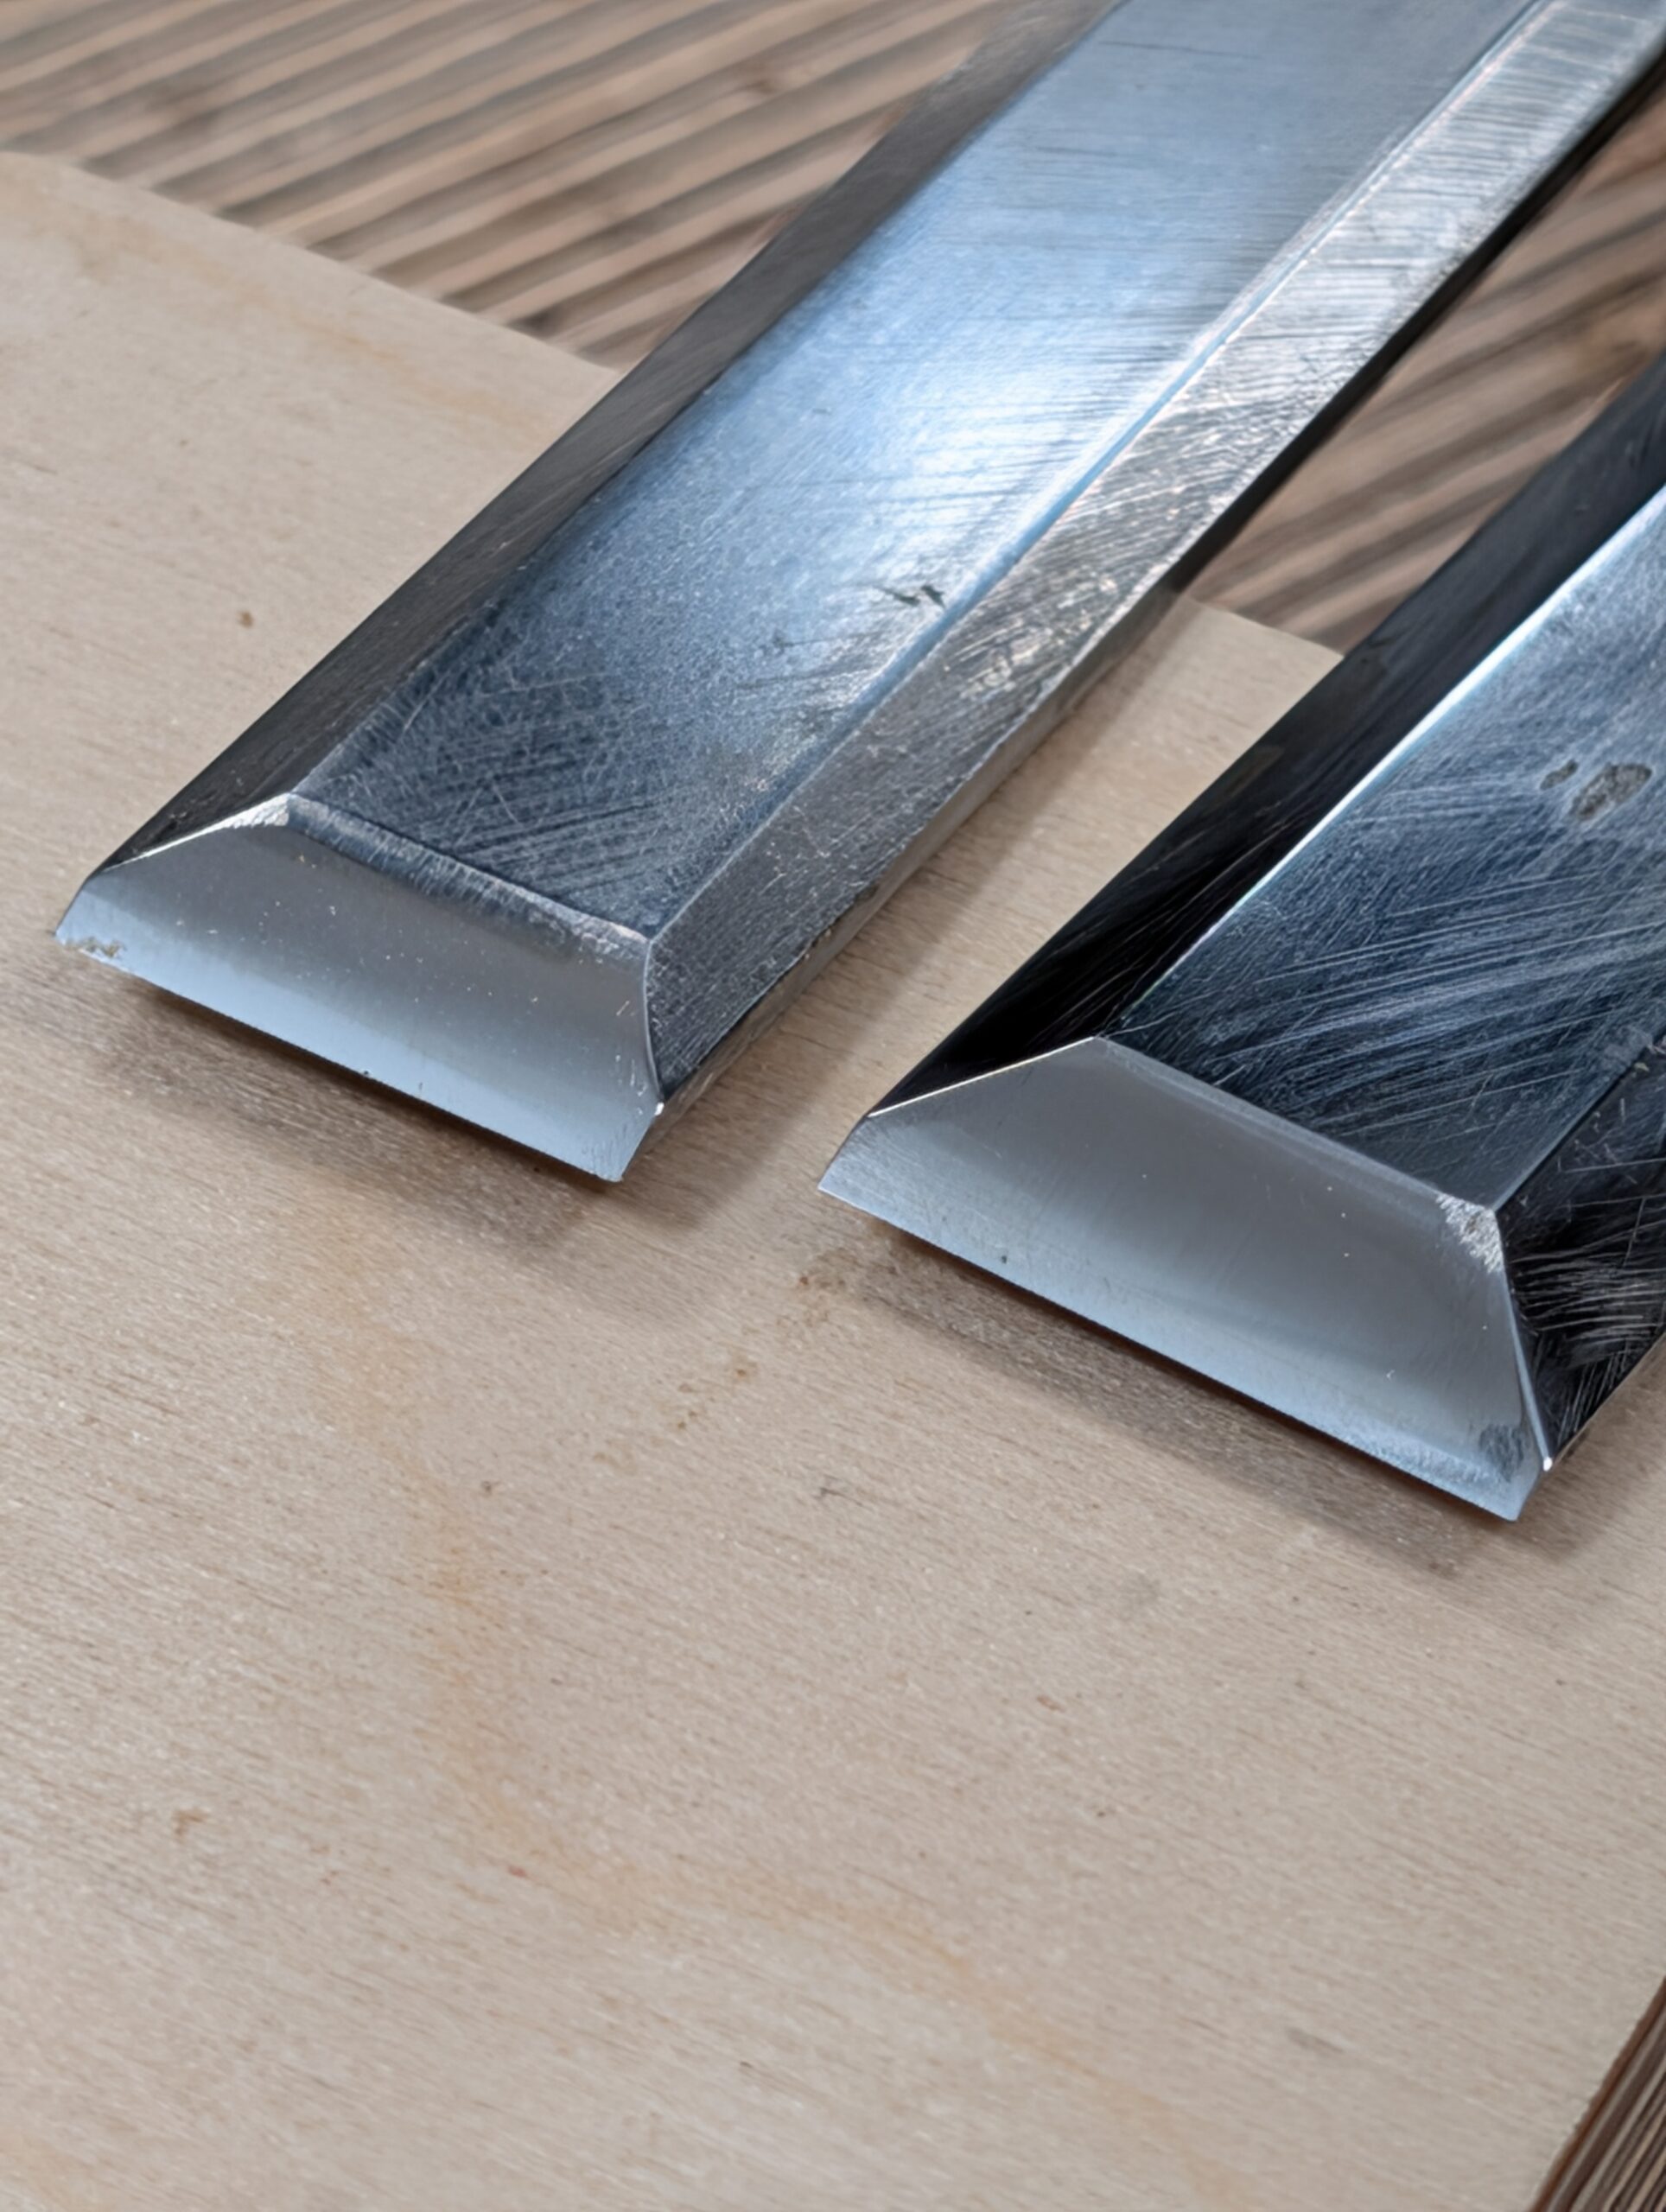
Below is how all of my cutting edges look in the day to day. An even camber starts at around a 30º offering of the chisel or plane iron and with the push forward, without moving the upper body, an even camber develops perfectly naturally through progressive strokes and progressive levels of abrasive. I take under one minute to sharpen any edge of any kind of tool, unless I have been neglectful, which I rarely if ever am. Usually, I am self-disciplined enough to sharpen up just before needed and then when I do I sharpen three or four edge tools at the same time for economy and that often means that two or three of them are still reasonably sharp, but I top up anyway. These two are my now fifteen-year-old Aldi supermarket chisels, which take and hold a keen edge like no other and certainly have proven to be one of my greatest investments. People often comment on Aldi products reflecting poor grade tools because of them, being cheaper and coming from a supermarket chain. That was not the case back in 2010. The only chisels I have known to snap have been the so-called premium versions. I have twenty sets of these from my classes here in the UK and will be letting them go with a full set of woodworking tools soon.
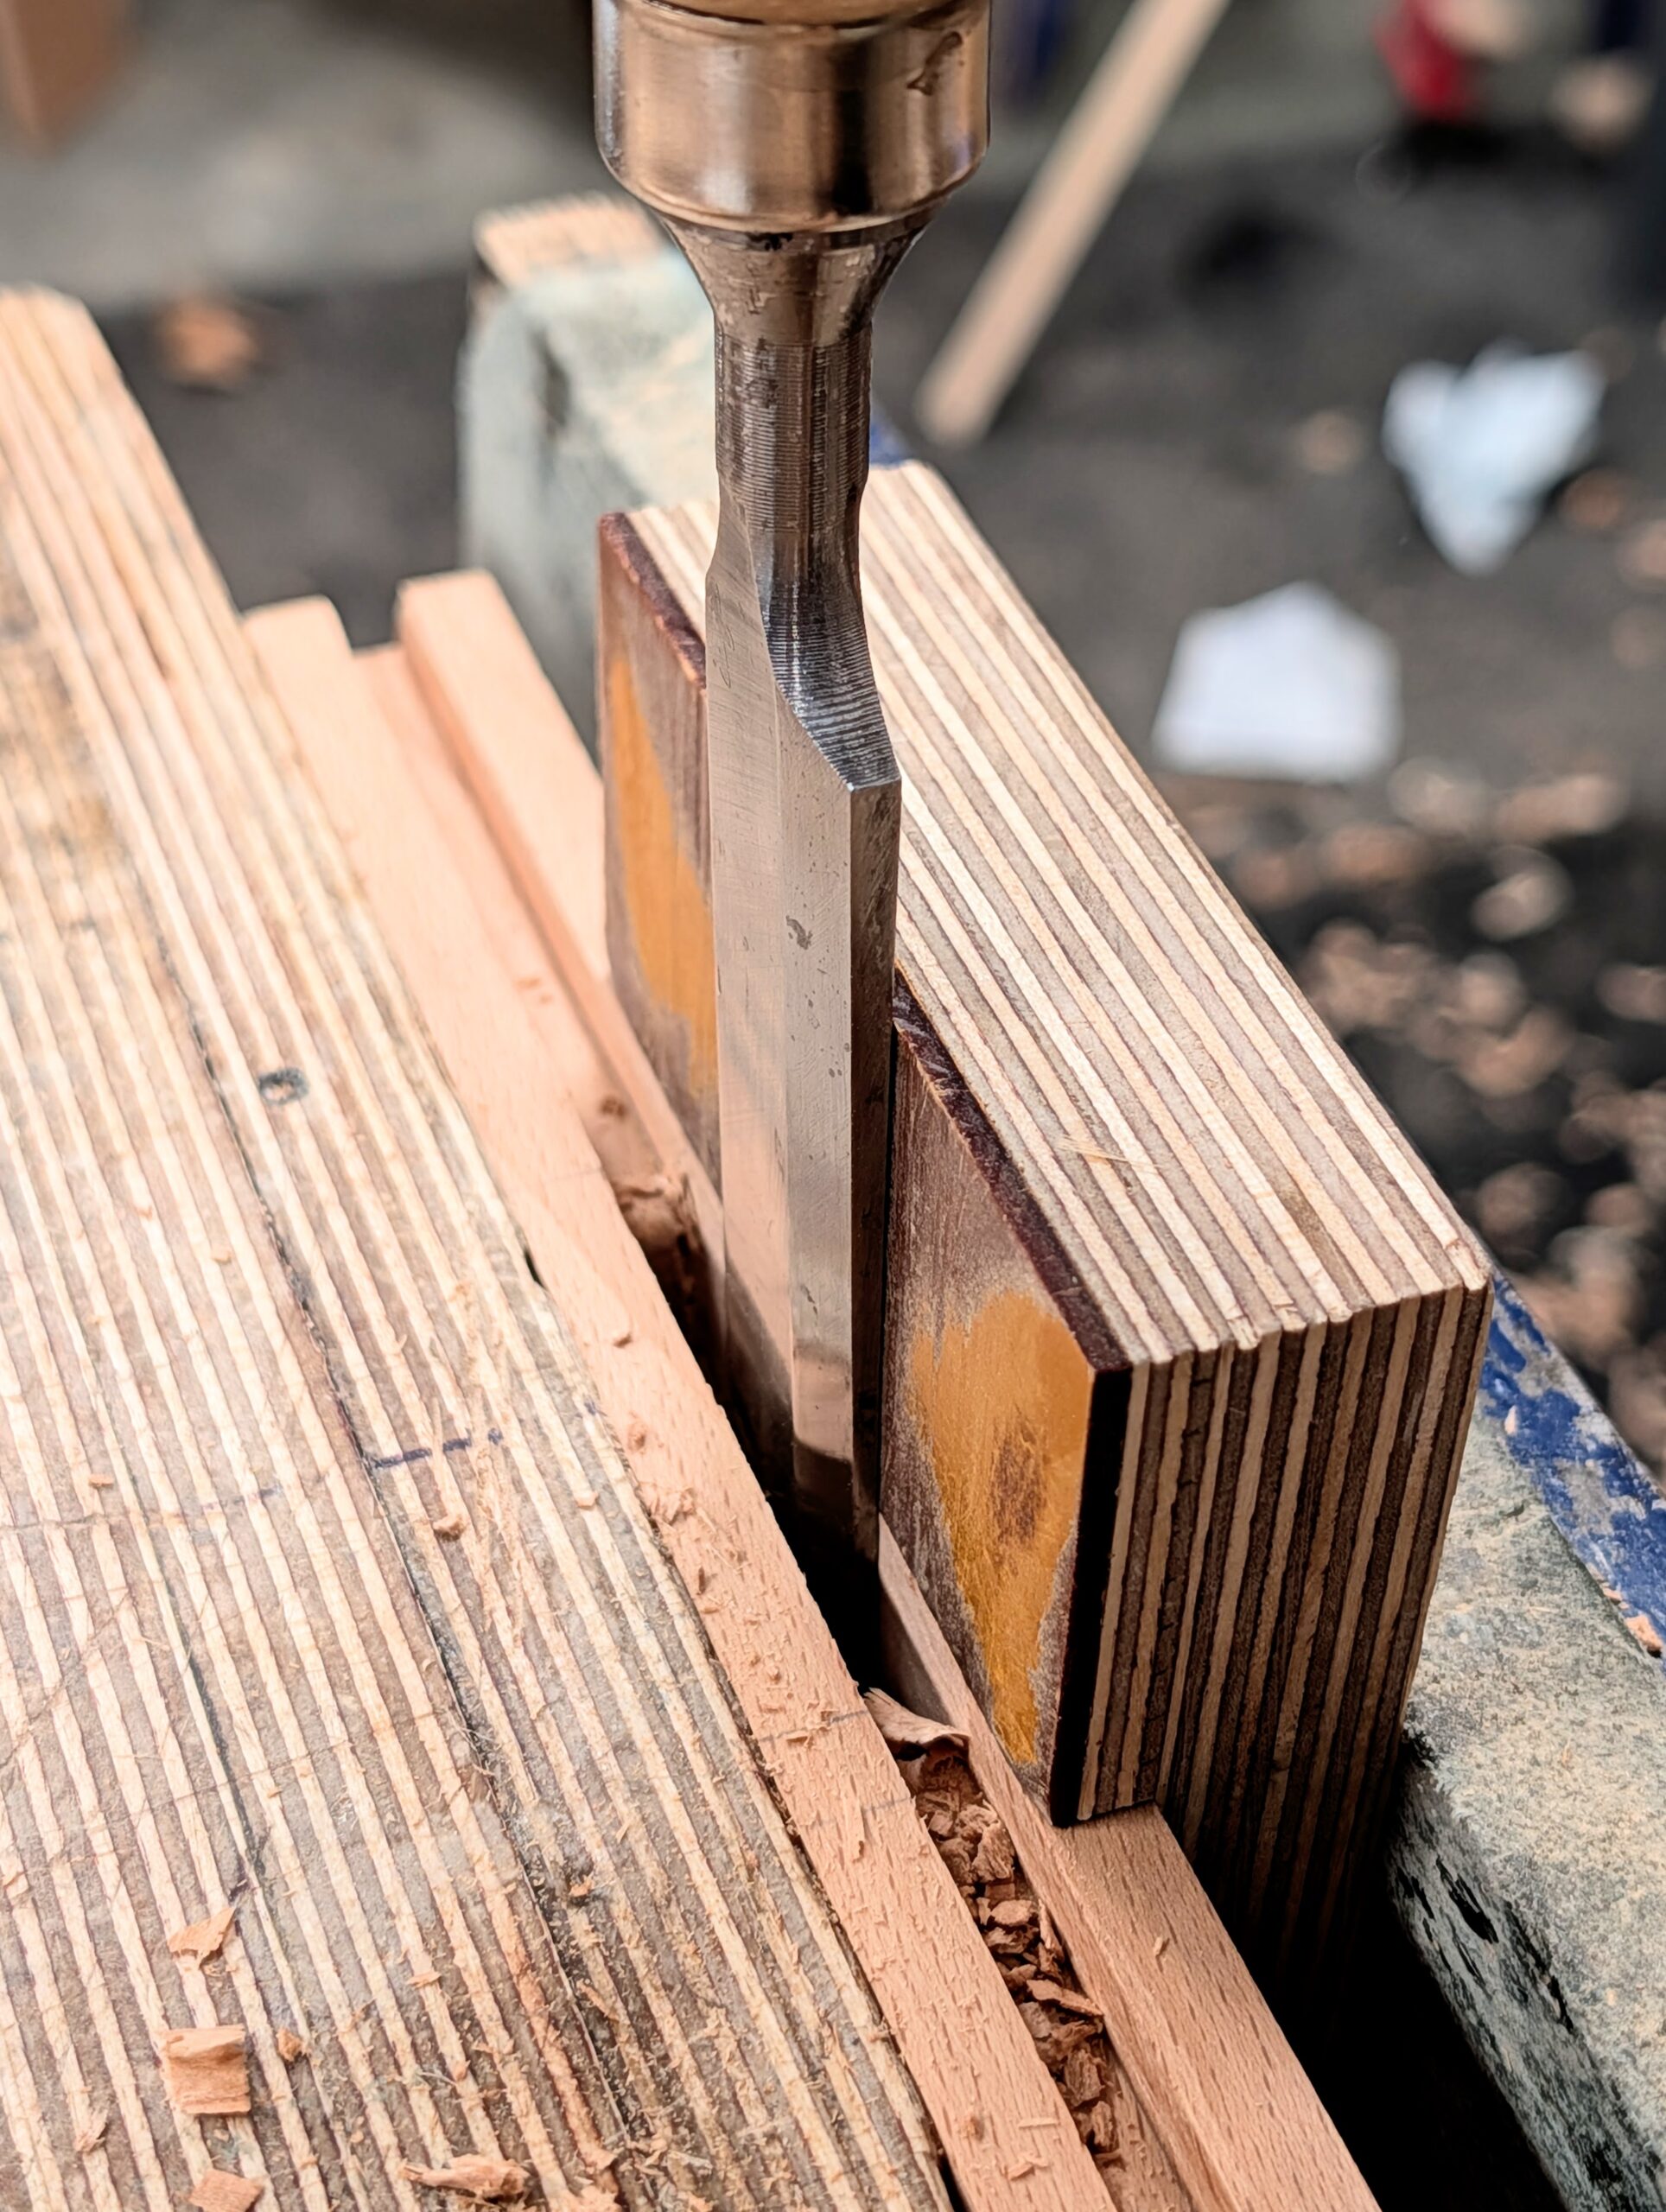
My work on my newest project, a blanket chest, is progressing well. I have just cut the first ten of 26 mortises that take me about 4–5 minutes apiece to chop by hand with a chisel and chisel hammer. Half a dozen passes from left to right to deepen the pockets to take a two-inch long tenon to a depth of one-and-a-quarter-inches is relatively simple woodworking.

Whilst I am in no way interested in matching the speed of machining mortises, using my mortise guide guarantees the walls of the mortise are truly parallel to the outside faces, whilst at the same time establishing muscle along with muscle memory that leads to establishing speed in freehand mortising with an accuracy that ensures precision in many ways, something every woodworker finds difficulty achieving.
Strategies For Crisp Corners
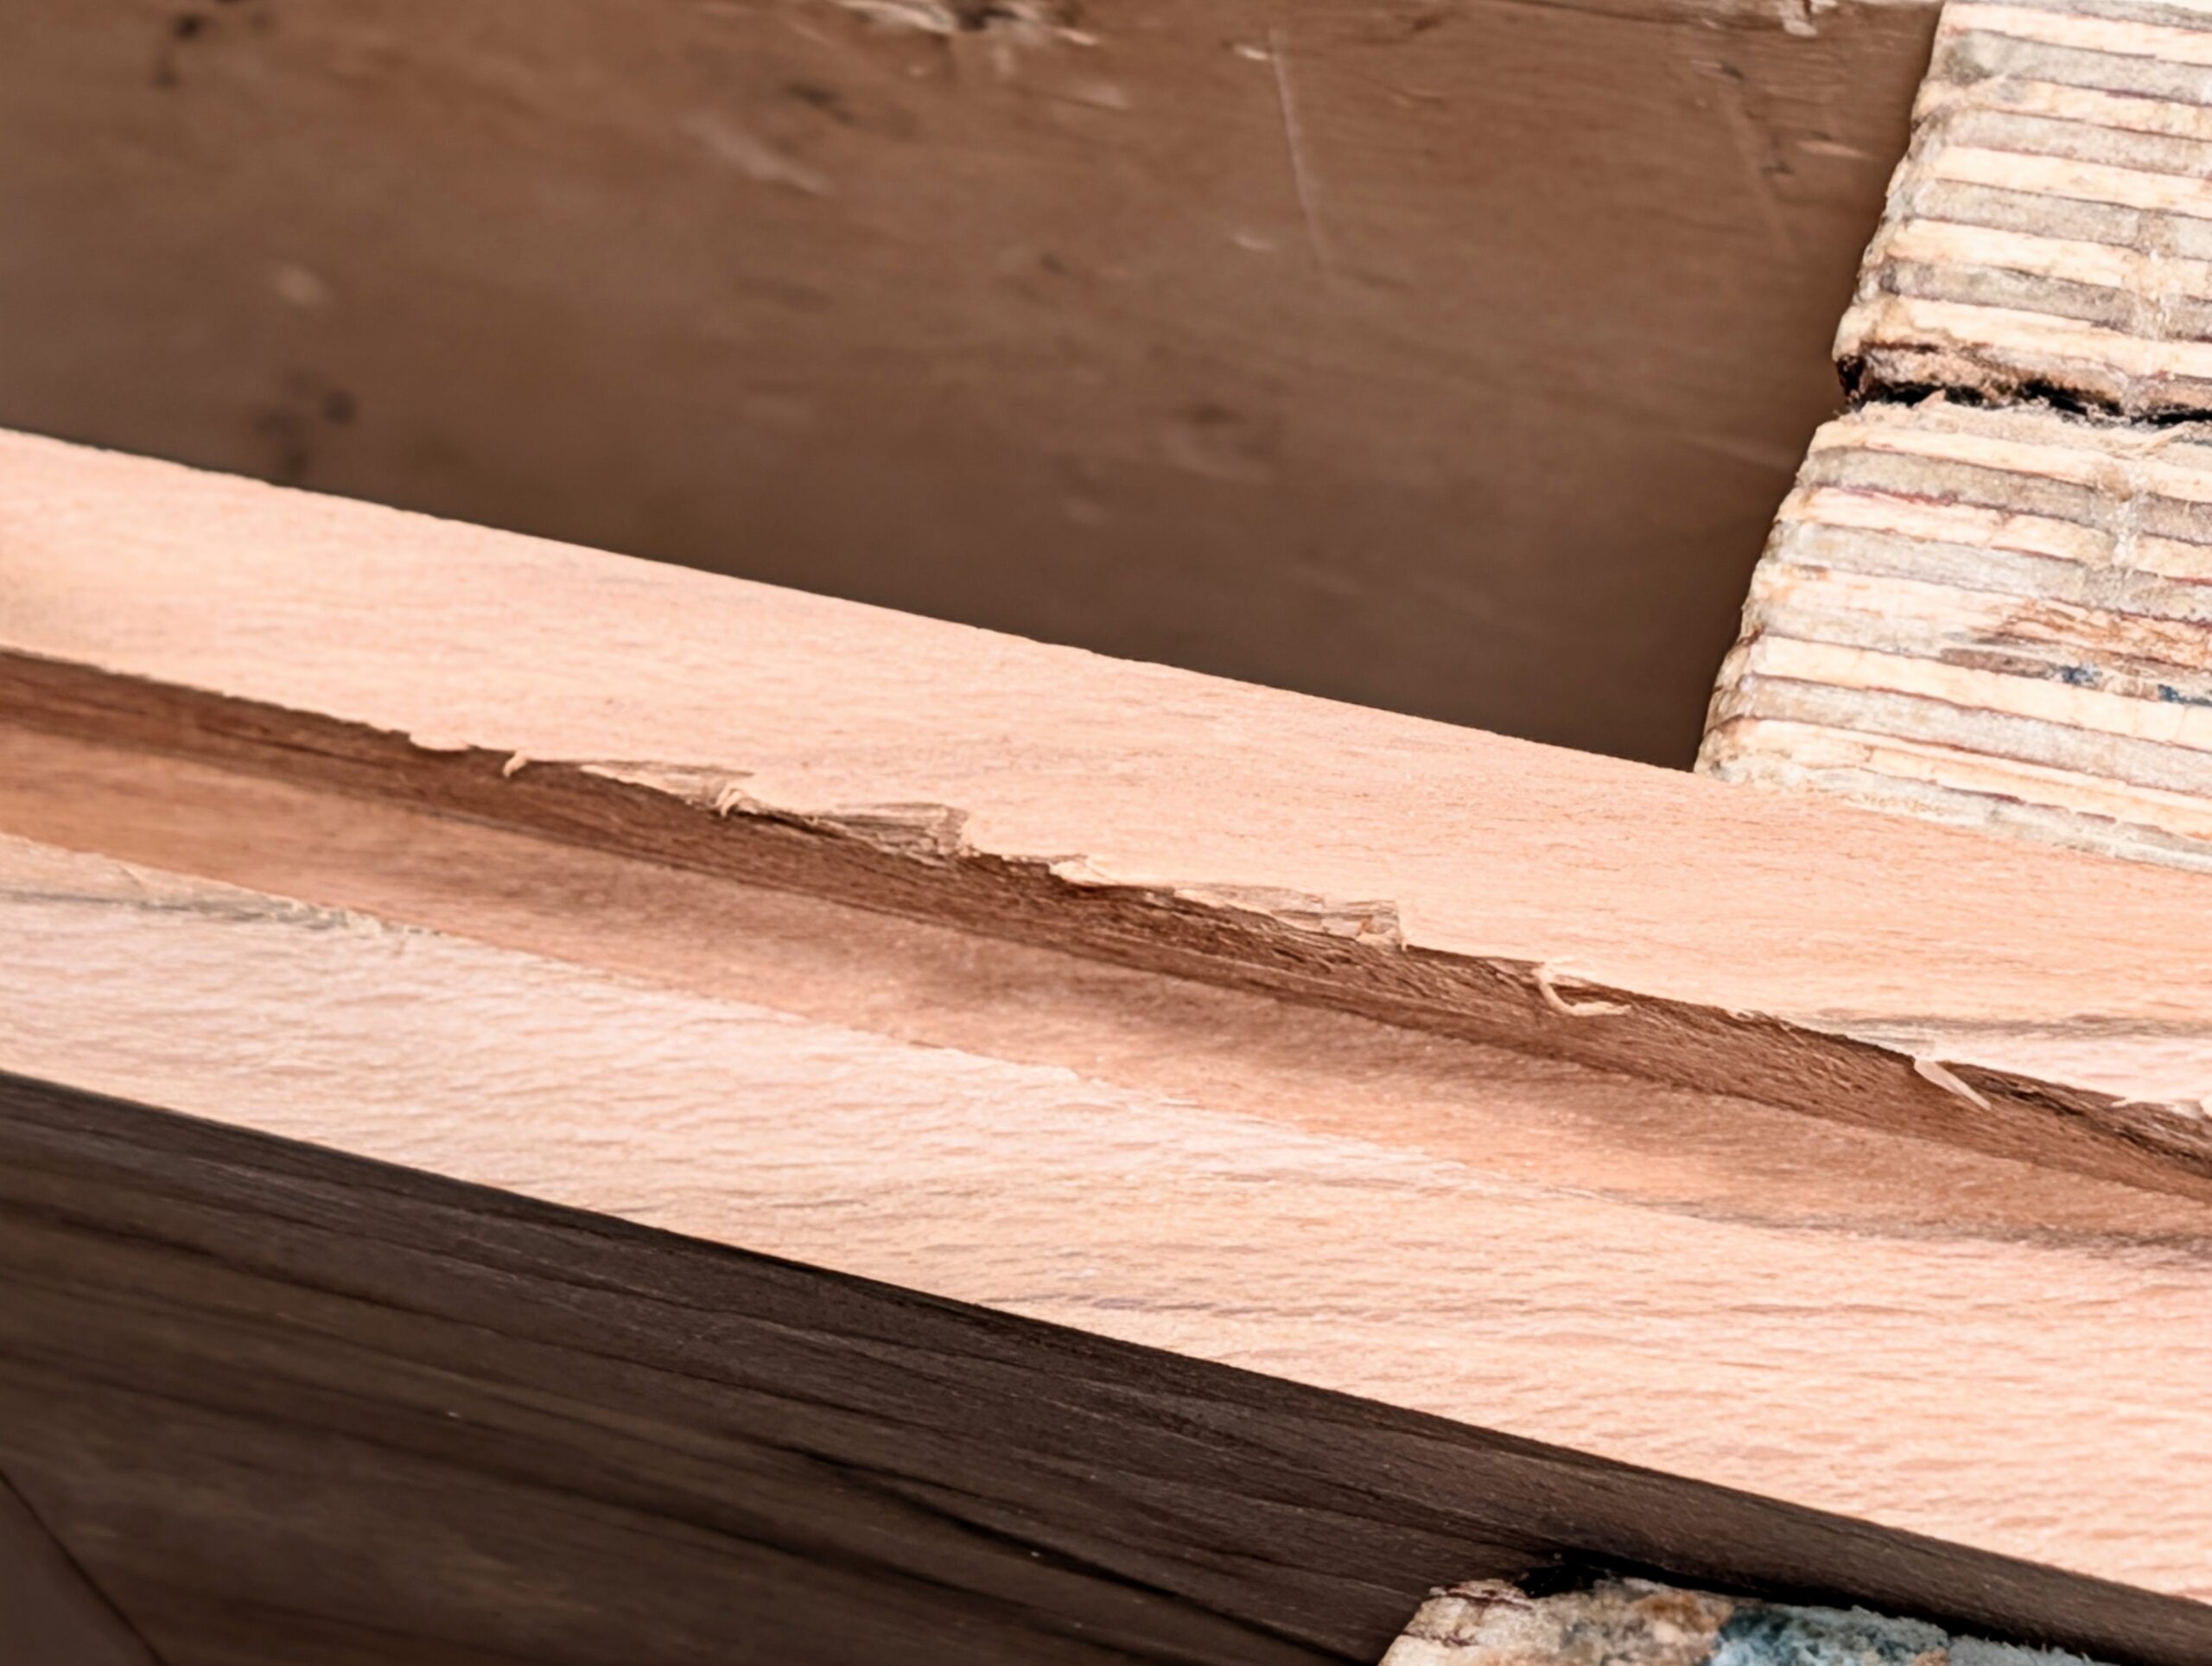
We often start plough planing with a deeply set iron, which is always a big mistake for the opening cuts, however, sometimes it still tears and we've done nothing wrong. The deep bulldozing attitude is definitely a no-no because it sends the cutting iron deep into the wood ahead of any side sheer cuts and the resulting up-cut from the deep then lifts the grain from beneath the surface and the depth and push forward results in an action that then rips as the plane progresses the cut. The jaggedness mostly corresponds to the hard and soft elements of the growth rings, but also there is also the physics of it; Newton's Third Law of motion where with every action, there is an equal and opposite reaction. Pushback from the wood itself in our case comes as an opposite force that ends up exerting a reverse thrust through fibre compression that explodes at the point of least resistance, the corners. All of this to say, we end up with fractured corners, which looks ugly. Generally, the best starting depth is a shallow cut that reduces the impact at this critical point. After three or four strokes along the length, deepen the depth of cut and the successive strokes will generally work without tearing the visible grain.
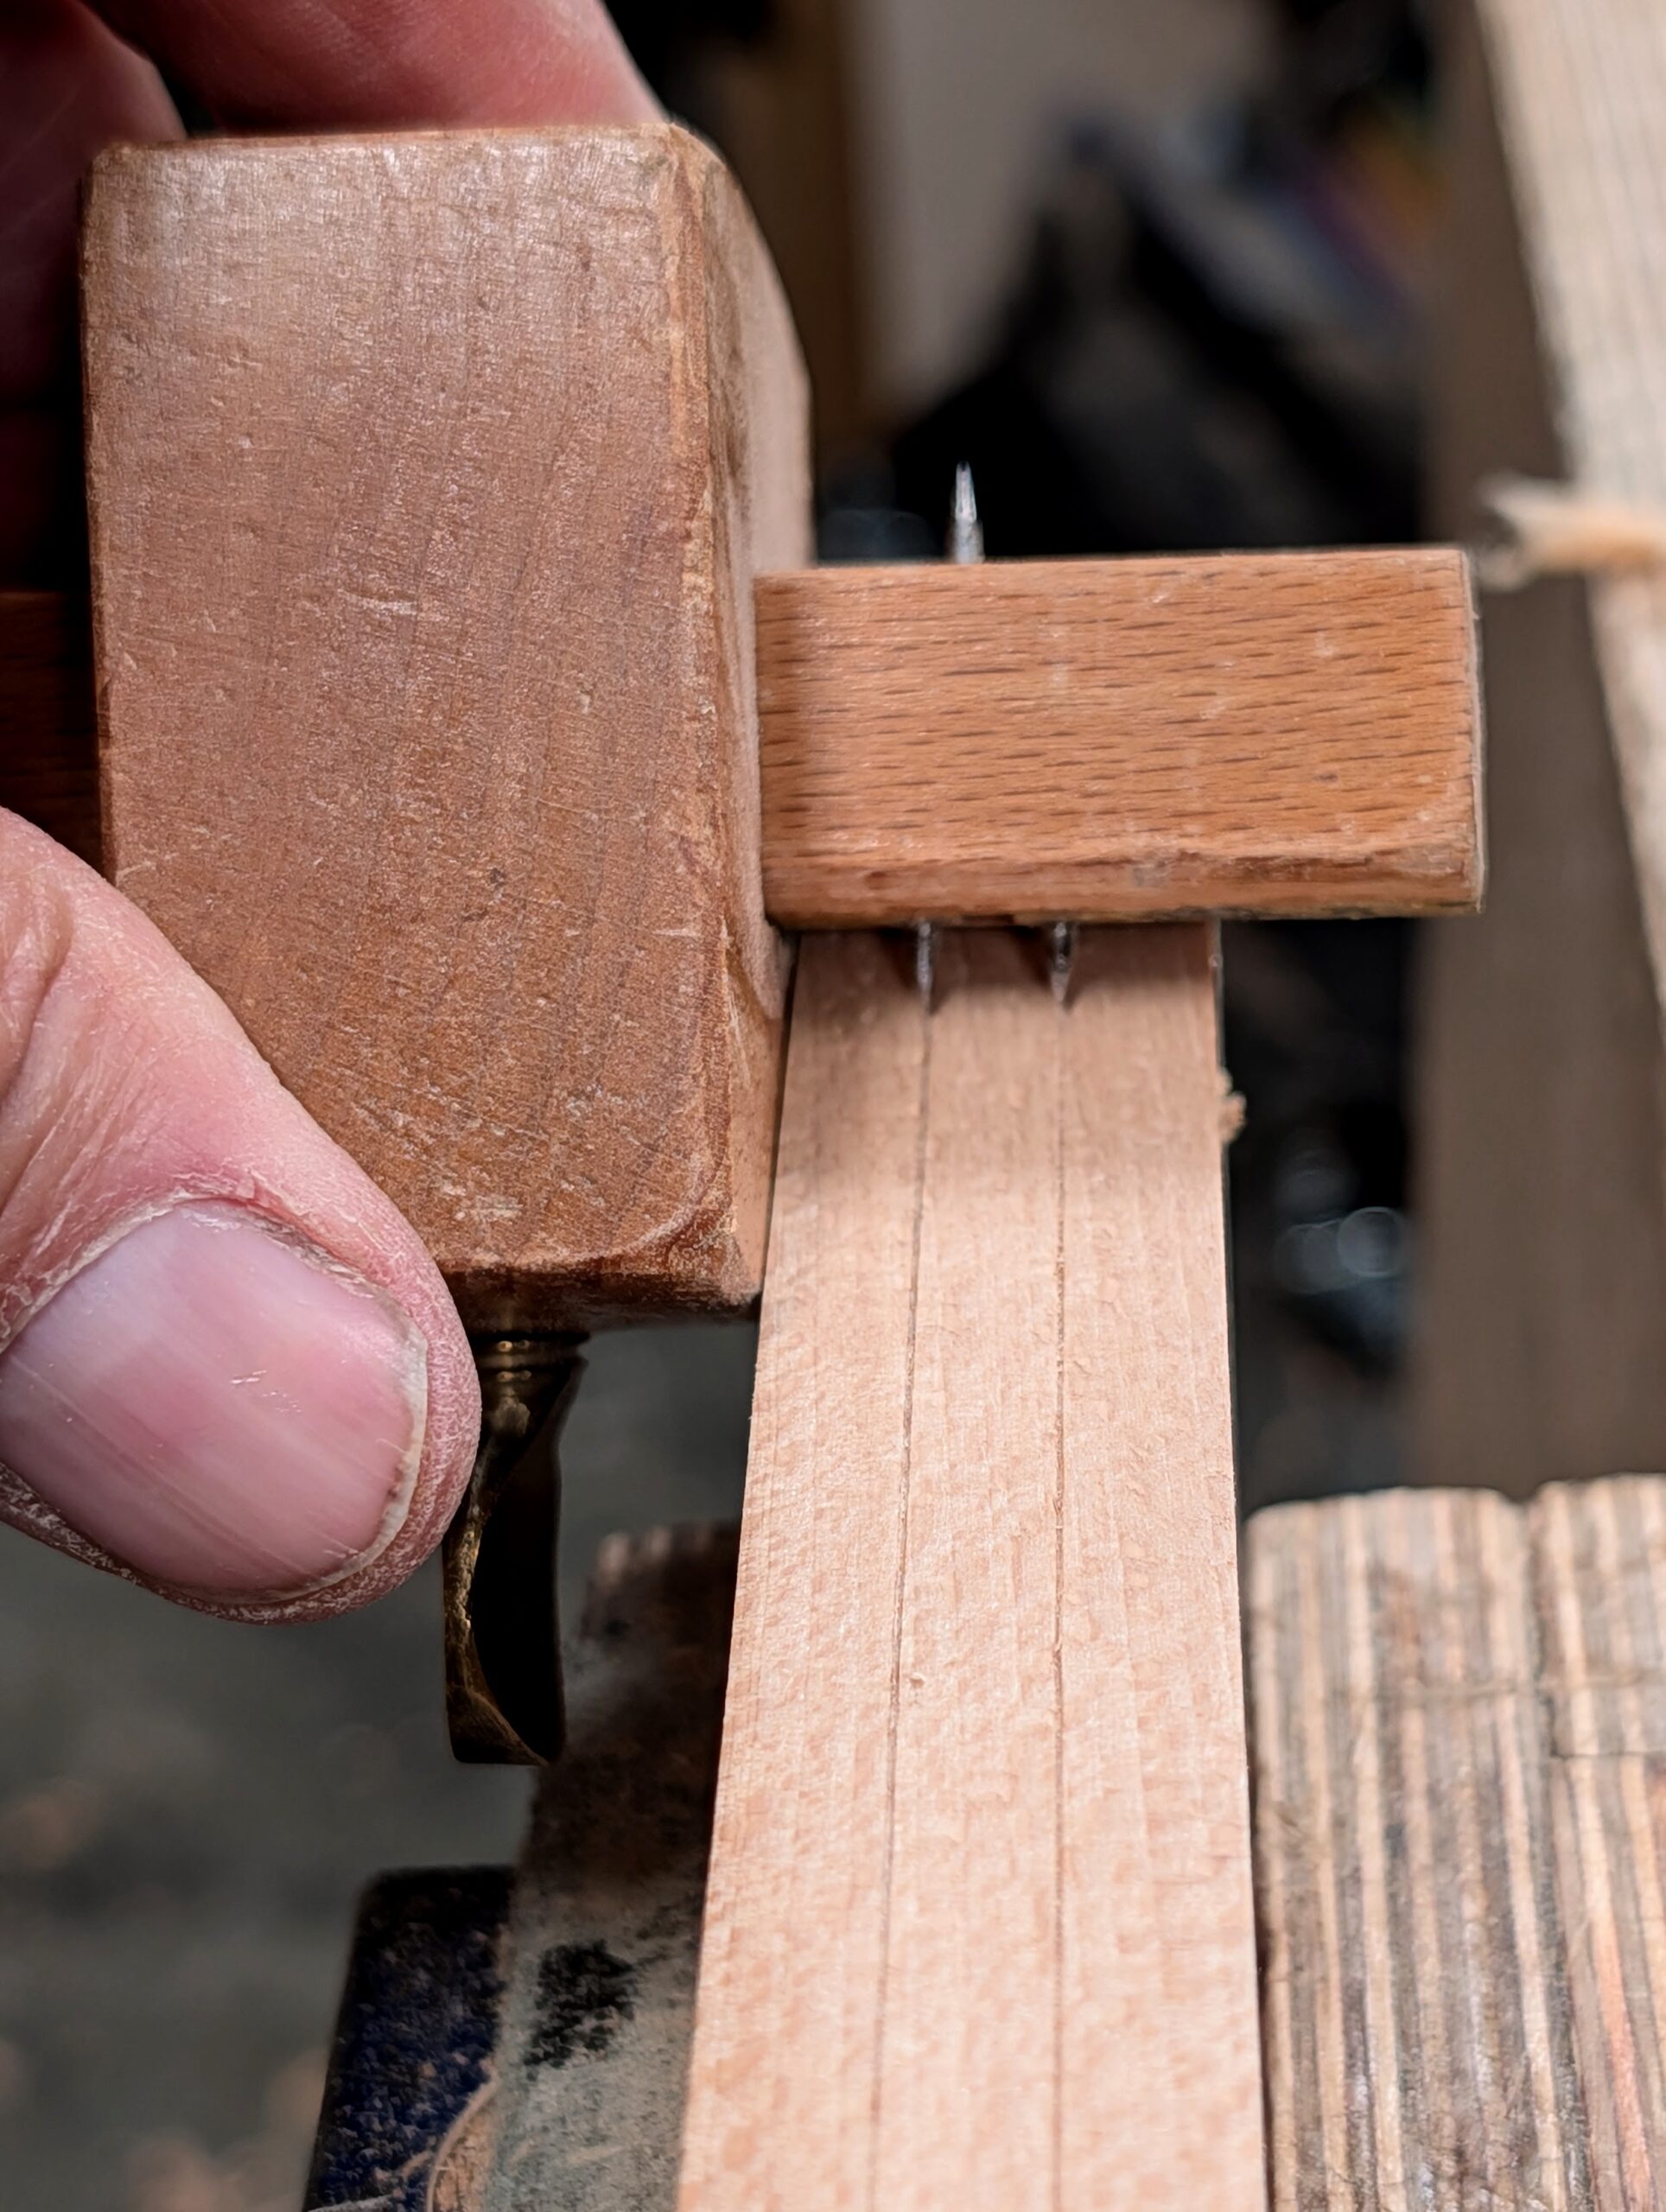
Another strategy is to use a mortise gauge set to the groove size and running the gauge through the surface fibres. This alone works very well, as the two pins usually penetrate the wood to between 1-2mm.
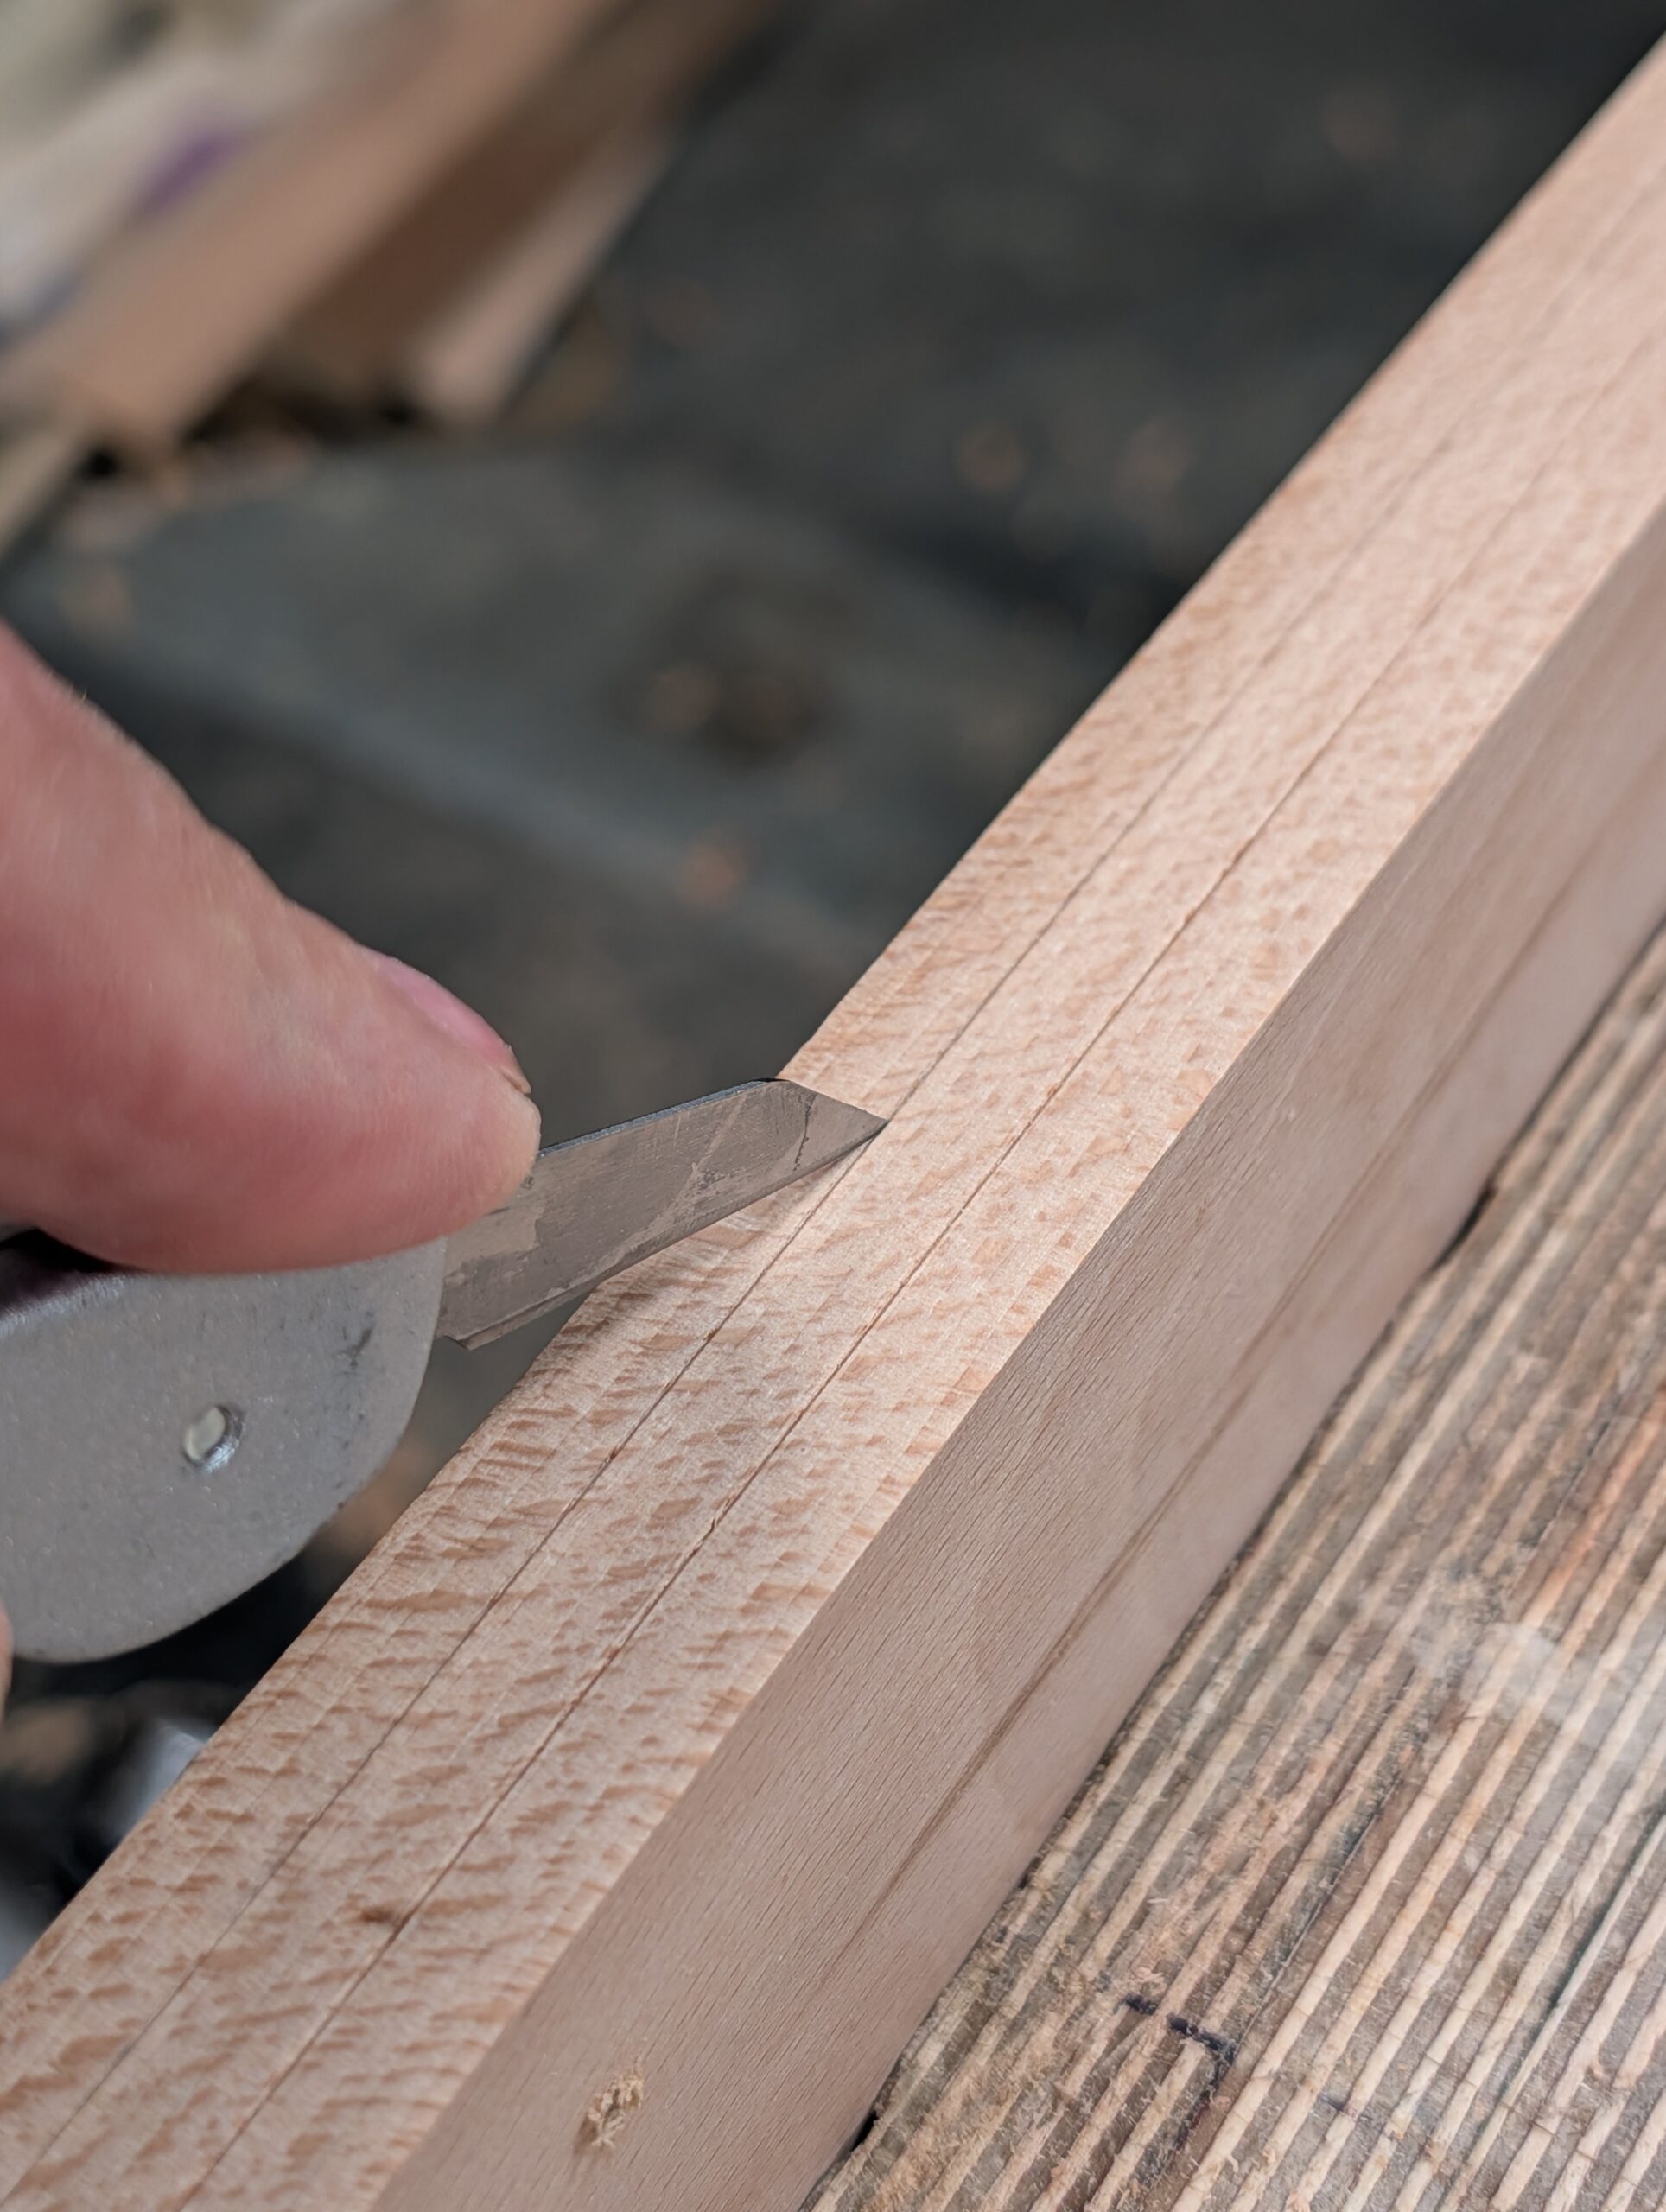
If the work is very critical, and you can't risk it, follow on with a sharp, pointed knife and run this into the centre of gauge lines created by the mortise gauge. It's important not to press too deeply with the mortise gauge, as the conical points will widen the lines from the centrepoint of the lines, which can look like a gap when panelling is installed later.
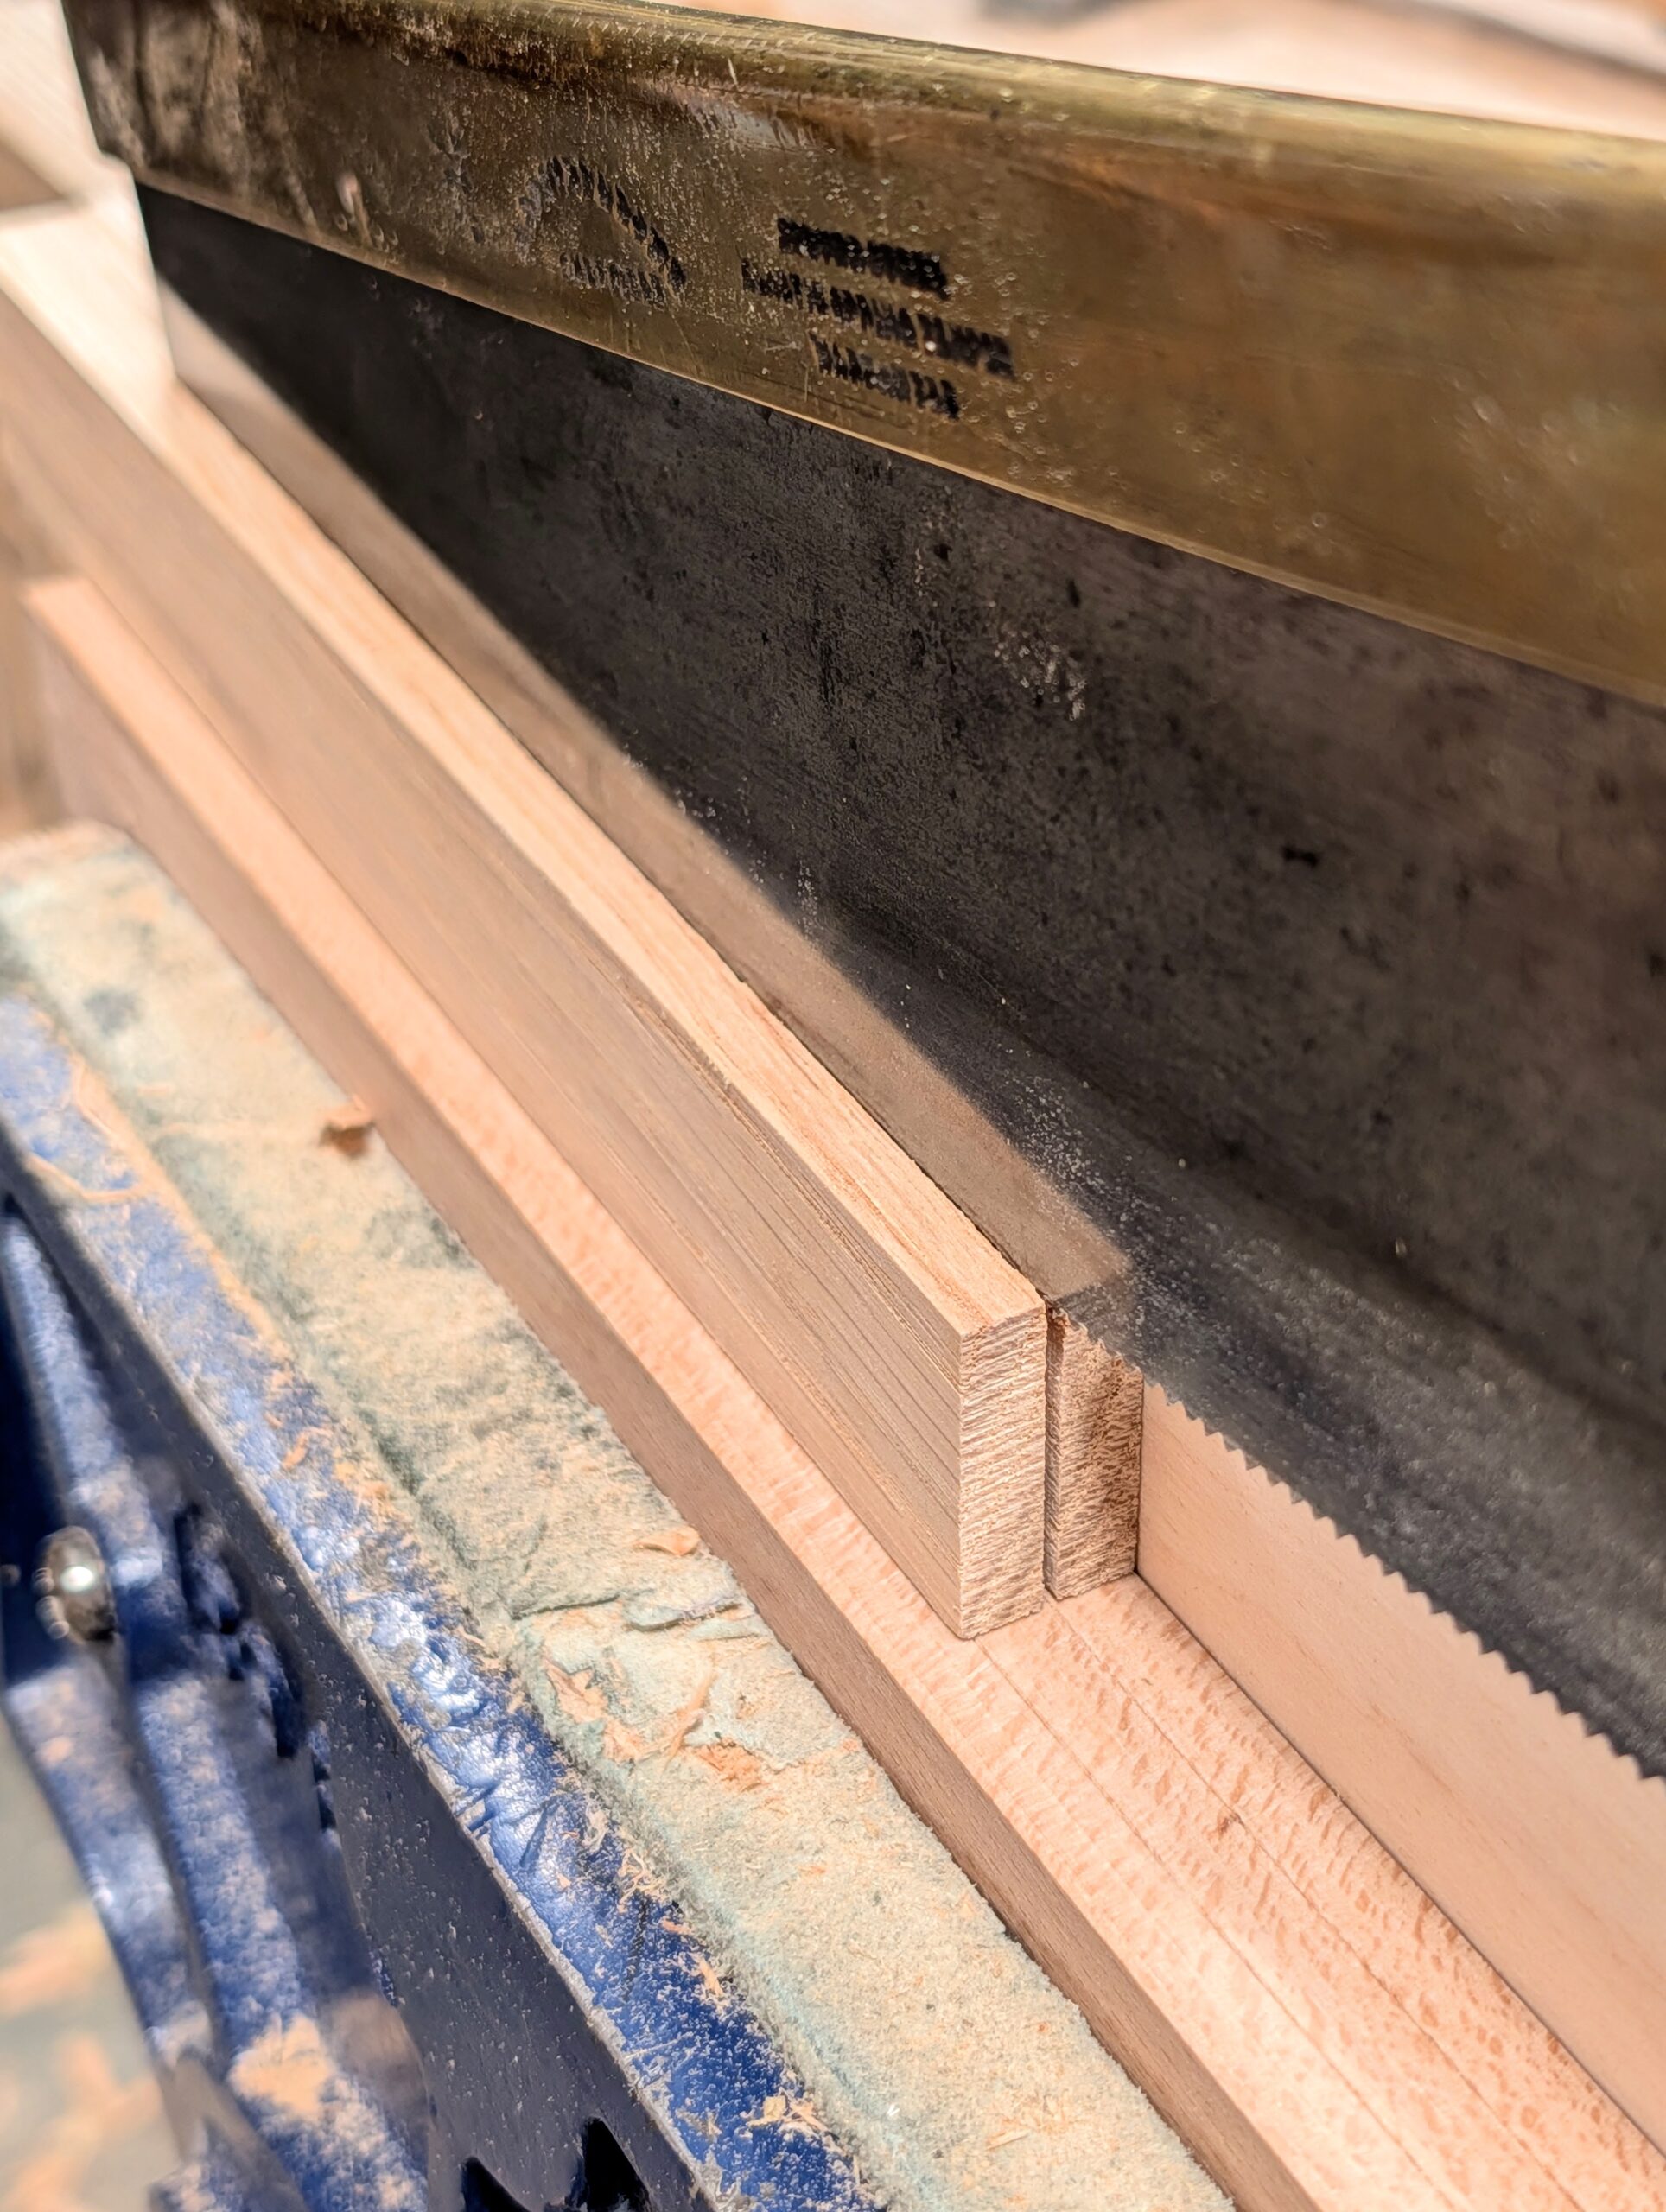
Along with my mortise guide, I have developed another guide that guarantees the surface fibres never tear. The guide does two things. It guides the saw into the surface fibres to perfectly align the saw parallel to the edge of the wood and stops any of the tear out you might associate with ploughing: and the now severed fibres each side makes the ploughing much easier. It's up to you how deep you want to saw: half a dozen strokes will usually suffice for a depth of 1/16" or so, but you can go down all the way if you want to.
Two Ways to Make the Guide
Sawing down a gauge line with a handsaw of the right sized kerf can be tricky and less realistic an expectation when it really relies on accuracy in parallelity throughout. I'm giving two methods here: the first is the bandsaw and the second is a little bit more fiddly but easy to make too:
Bandsaw Version
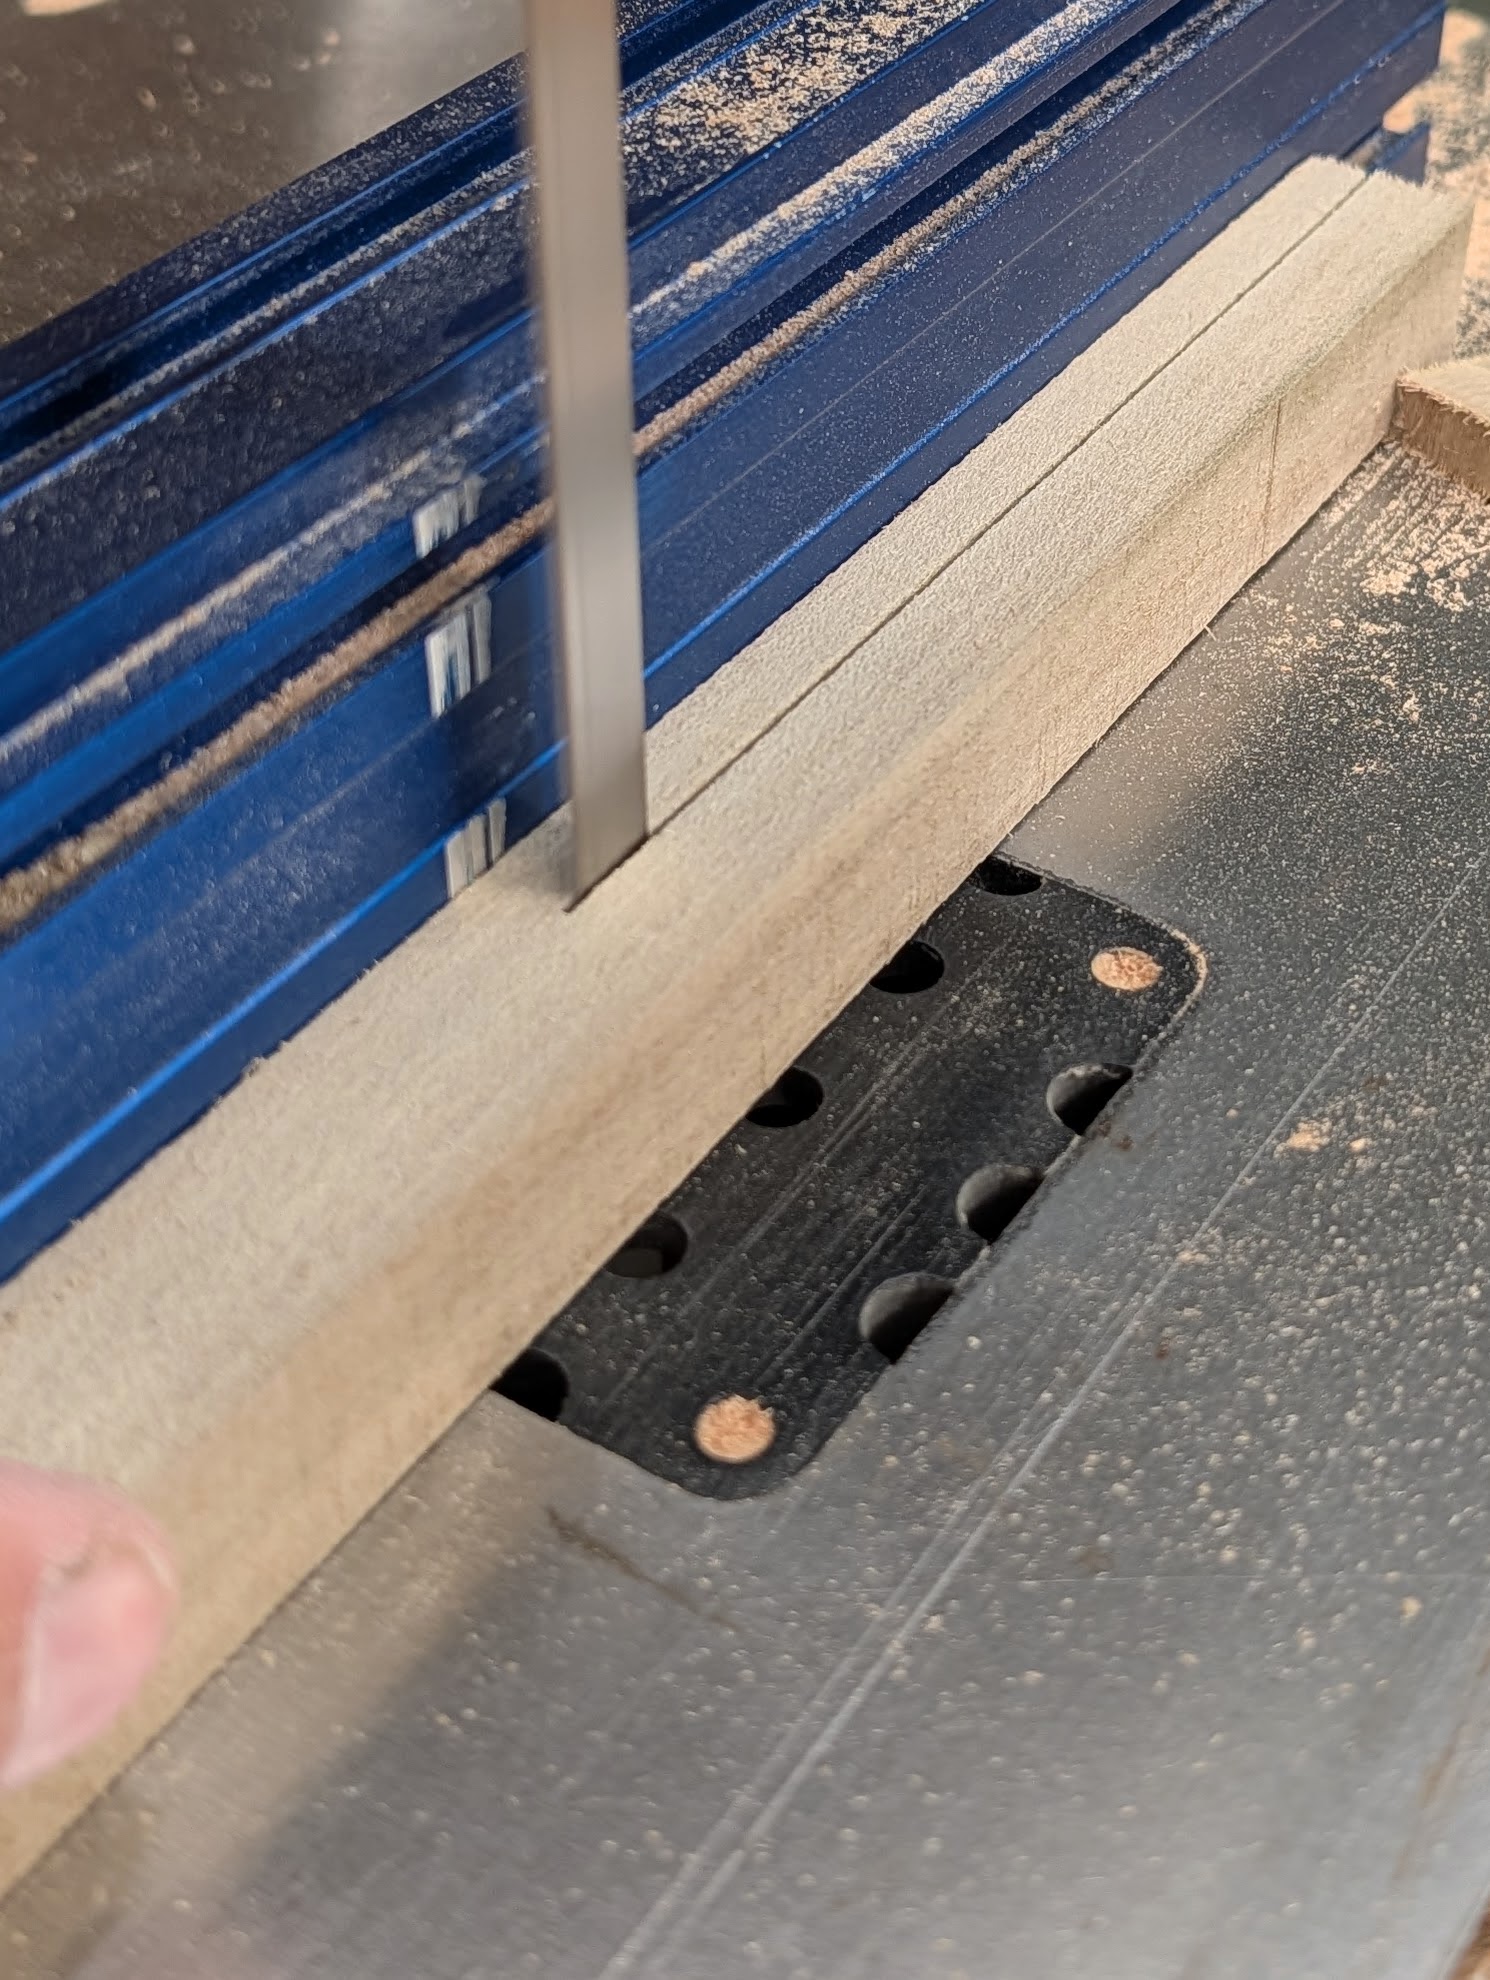
Set the bandsaw fence the distance you need to run a saw kerf. This distance will be the distance from the face of the ploughed piece to that side of the groove. In my case, it's 5/16" from each side so that the groove is in the middle, leaving a 1/4" groove in the edges of the stock. Take a stick, mine happens to be 7/8" by 7/8", and rip down a cut on the bandsaw dead on 5/16" so that the saw kerf is on the waste side of the gauge line. If you plan to use your tenon saw, stop shy of the end by a couple of inches. Now add a fence by gluing or screwing a 2 1/2" wide piece to the 5/16" side of the guide that clamps to the workpiece, preferably in the vise with the workpiece. I extend the width of the fence that clamps to the rail or stile quite deeply. In this, case, 2 1/2" is enough.
I prefer superglue to attach the fence part to the kerfed piece. The superglue accelerator sets everything in five seconds and I can use the guide straightaway.
The Planed version
Don't give up if you don't have access to a bandsaw. It's a matter of minutes to make one with a handsaw and a plane. Rip and plane a strip to the 5/16" thickness. Use a marking gauge on the wood to establish your cut lines. Rip slightly oversize and plane down to the gauge line, checking yourself as you go to end up dead on thickness. I would also use a vernier calliper to check my work. Plane the other piece level and smooth. Now we must attach some wood at one end of the first strip, two-inches long. Cut this thin strip oversize; that's slightly thicker than your saw plate, and glue it to the end of the 5/16" piece using the superglue and accelerator. You can now plane it down evenly to the saw plate thickness. Give or take, this will allow for the saw kerf when you glue or screw the adjacent strip on.
Using the Guide
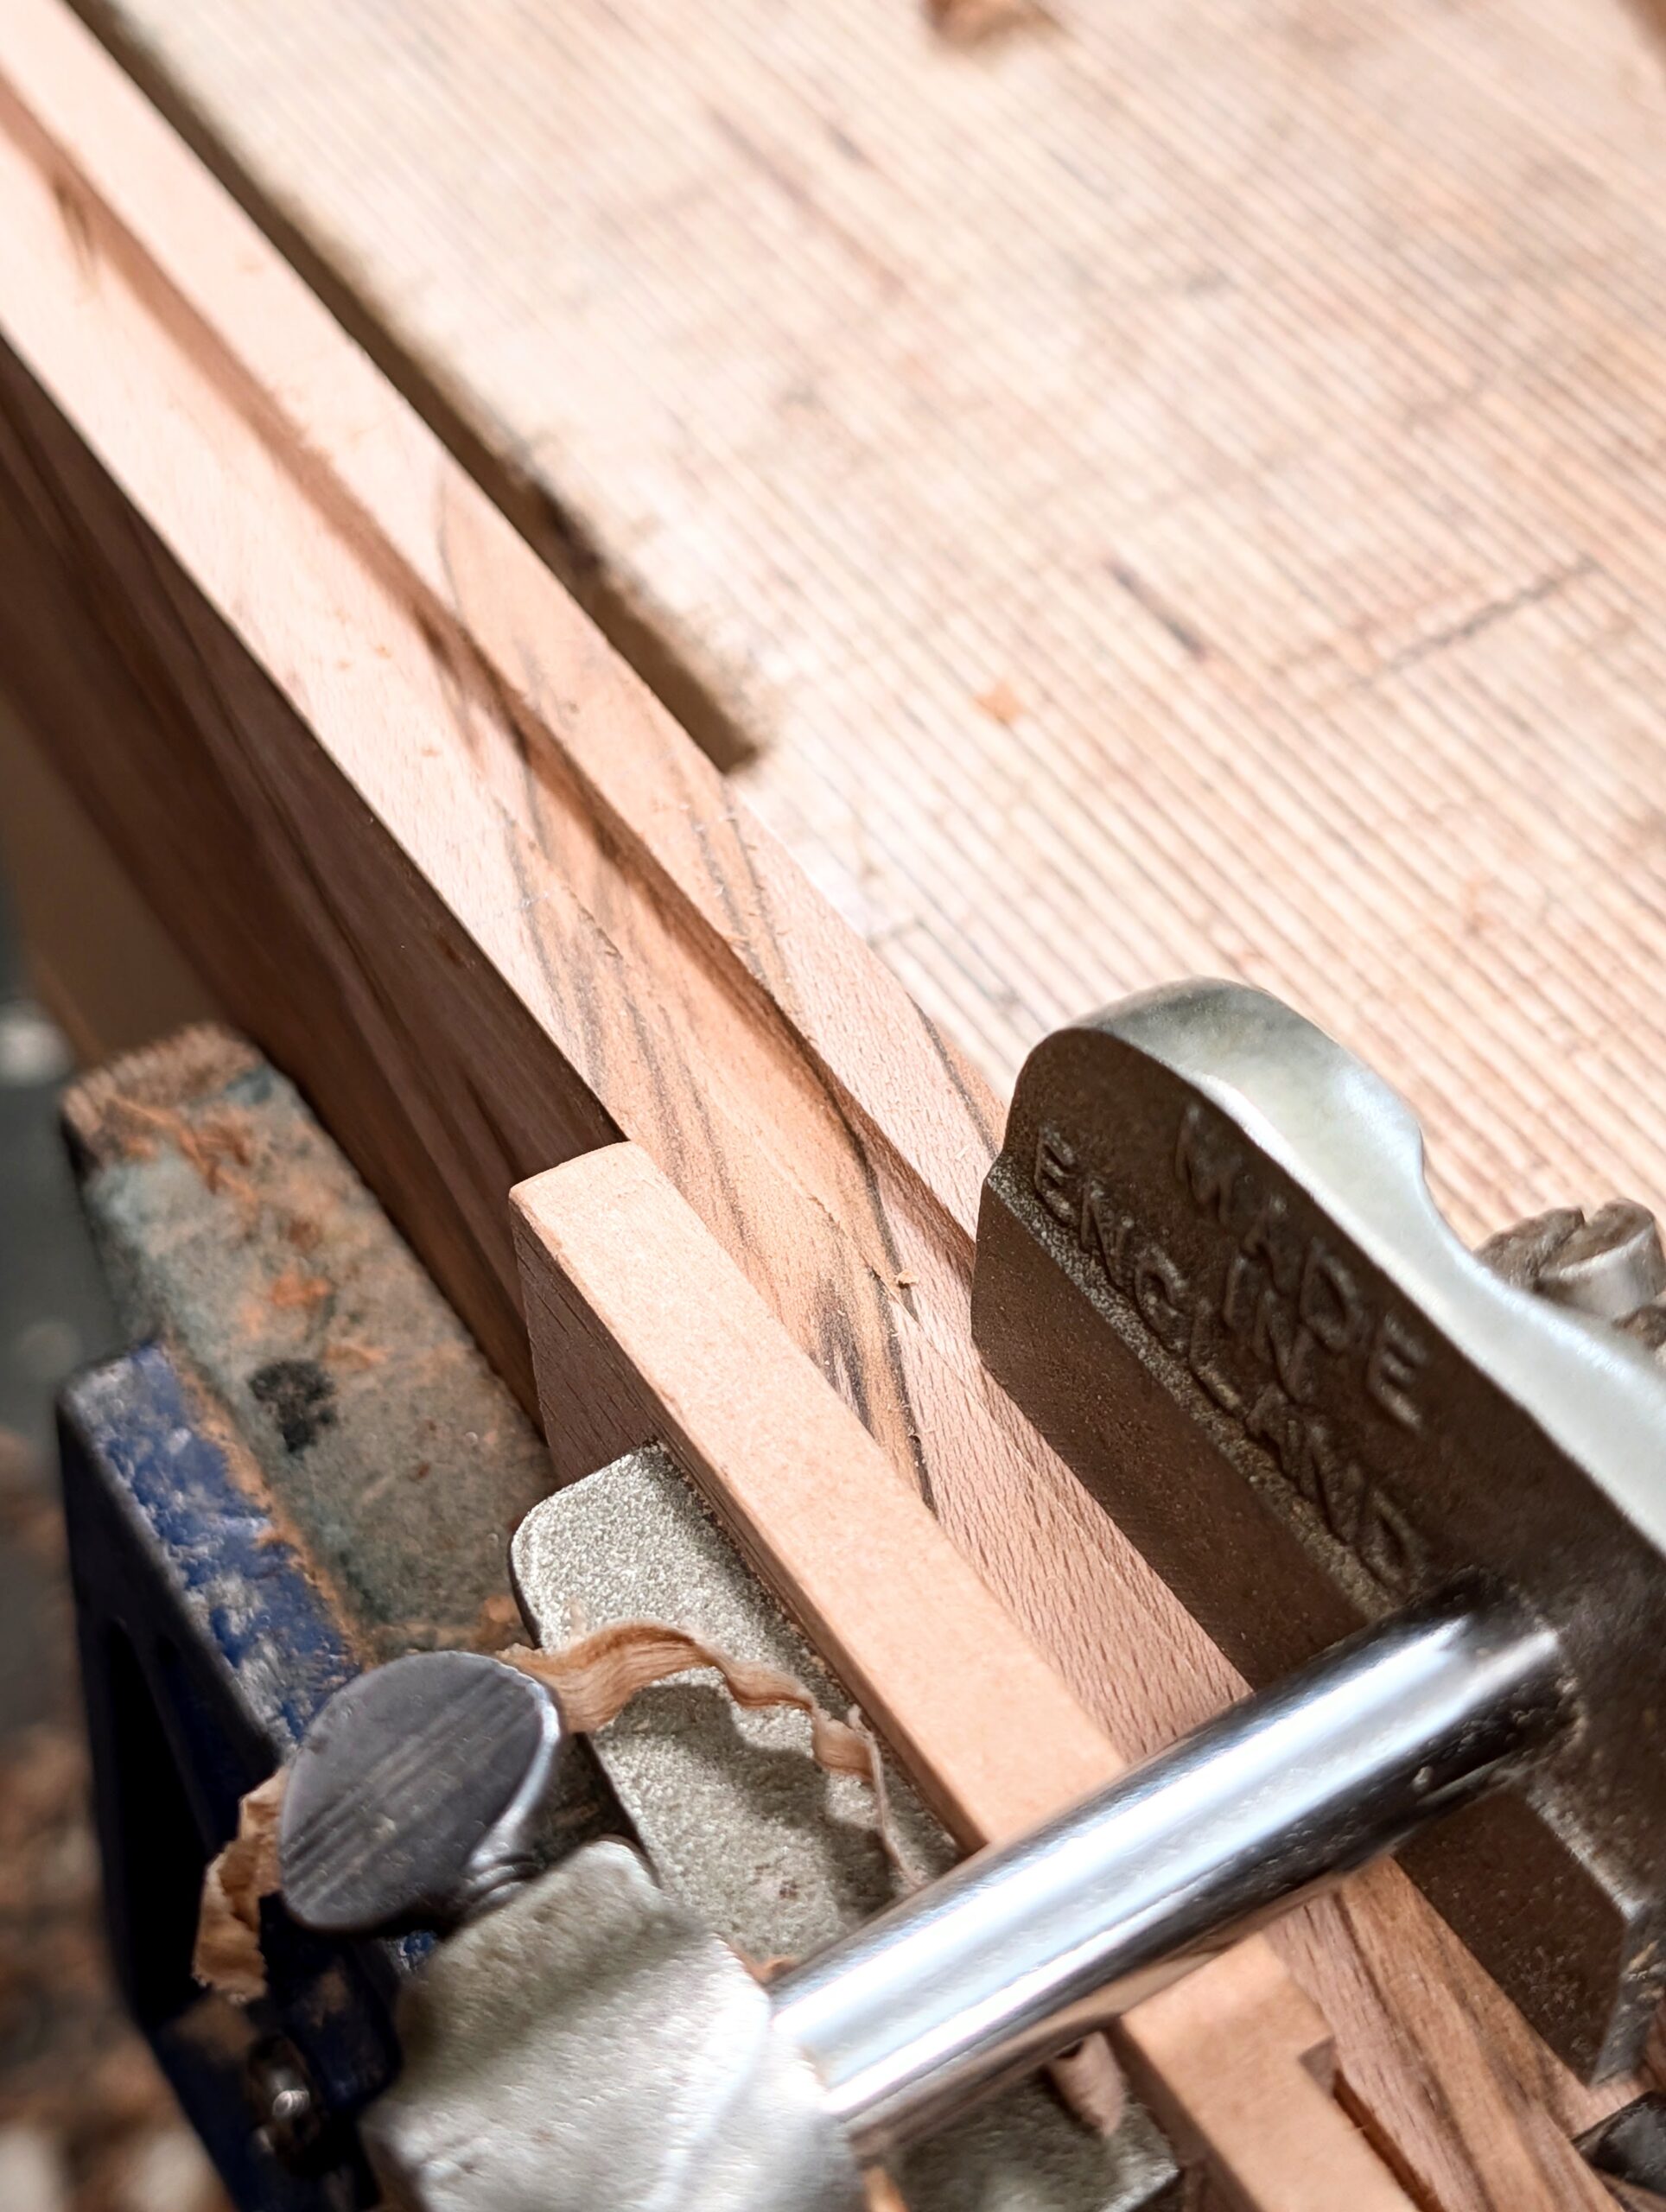
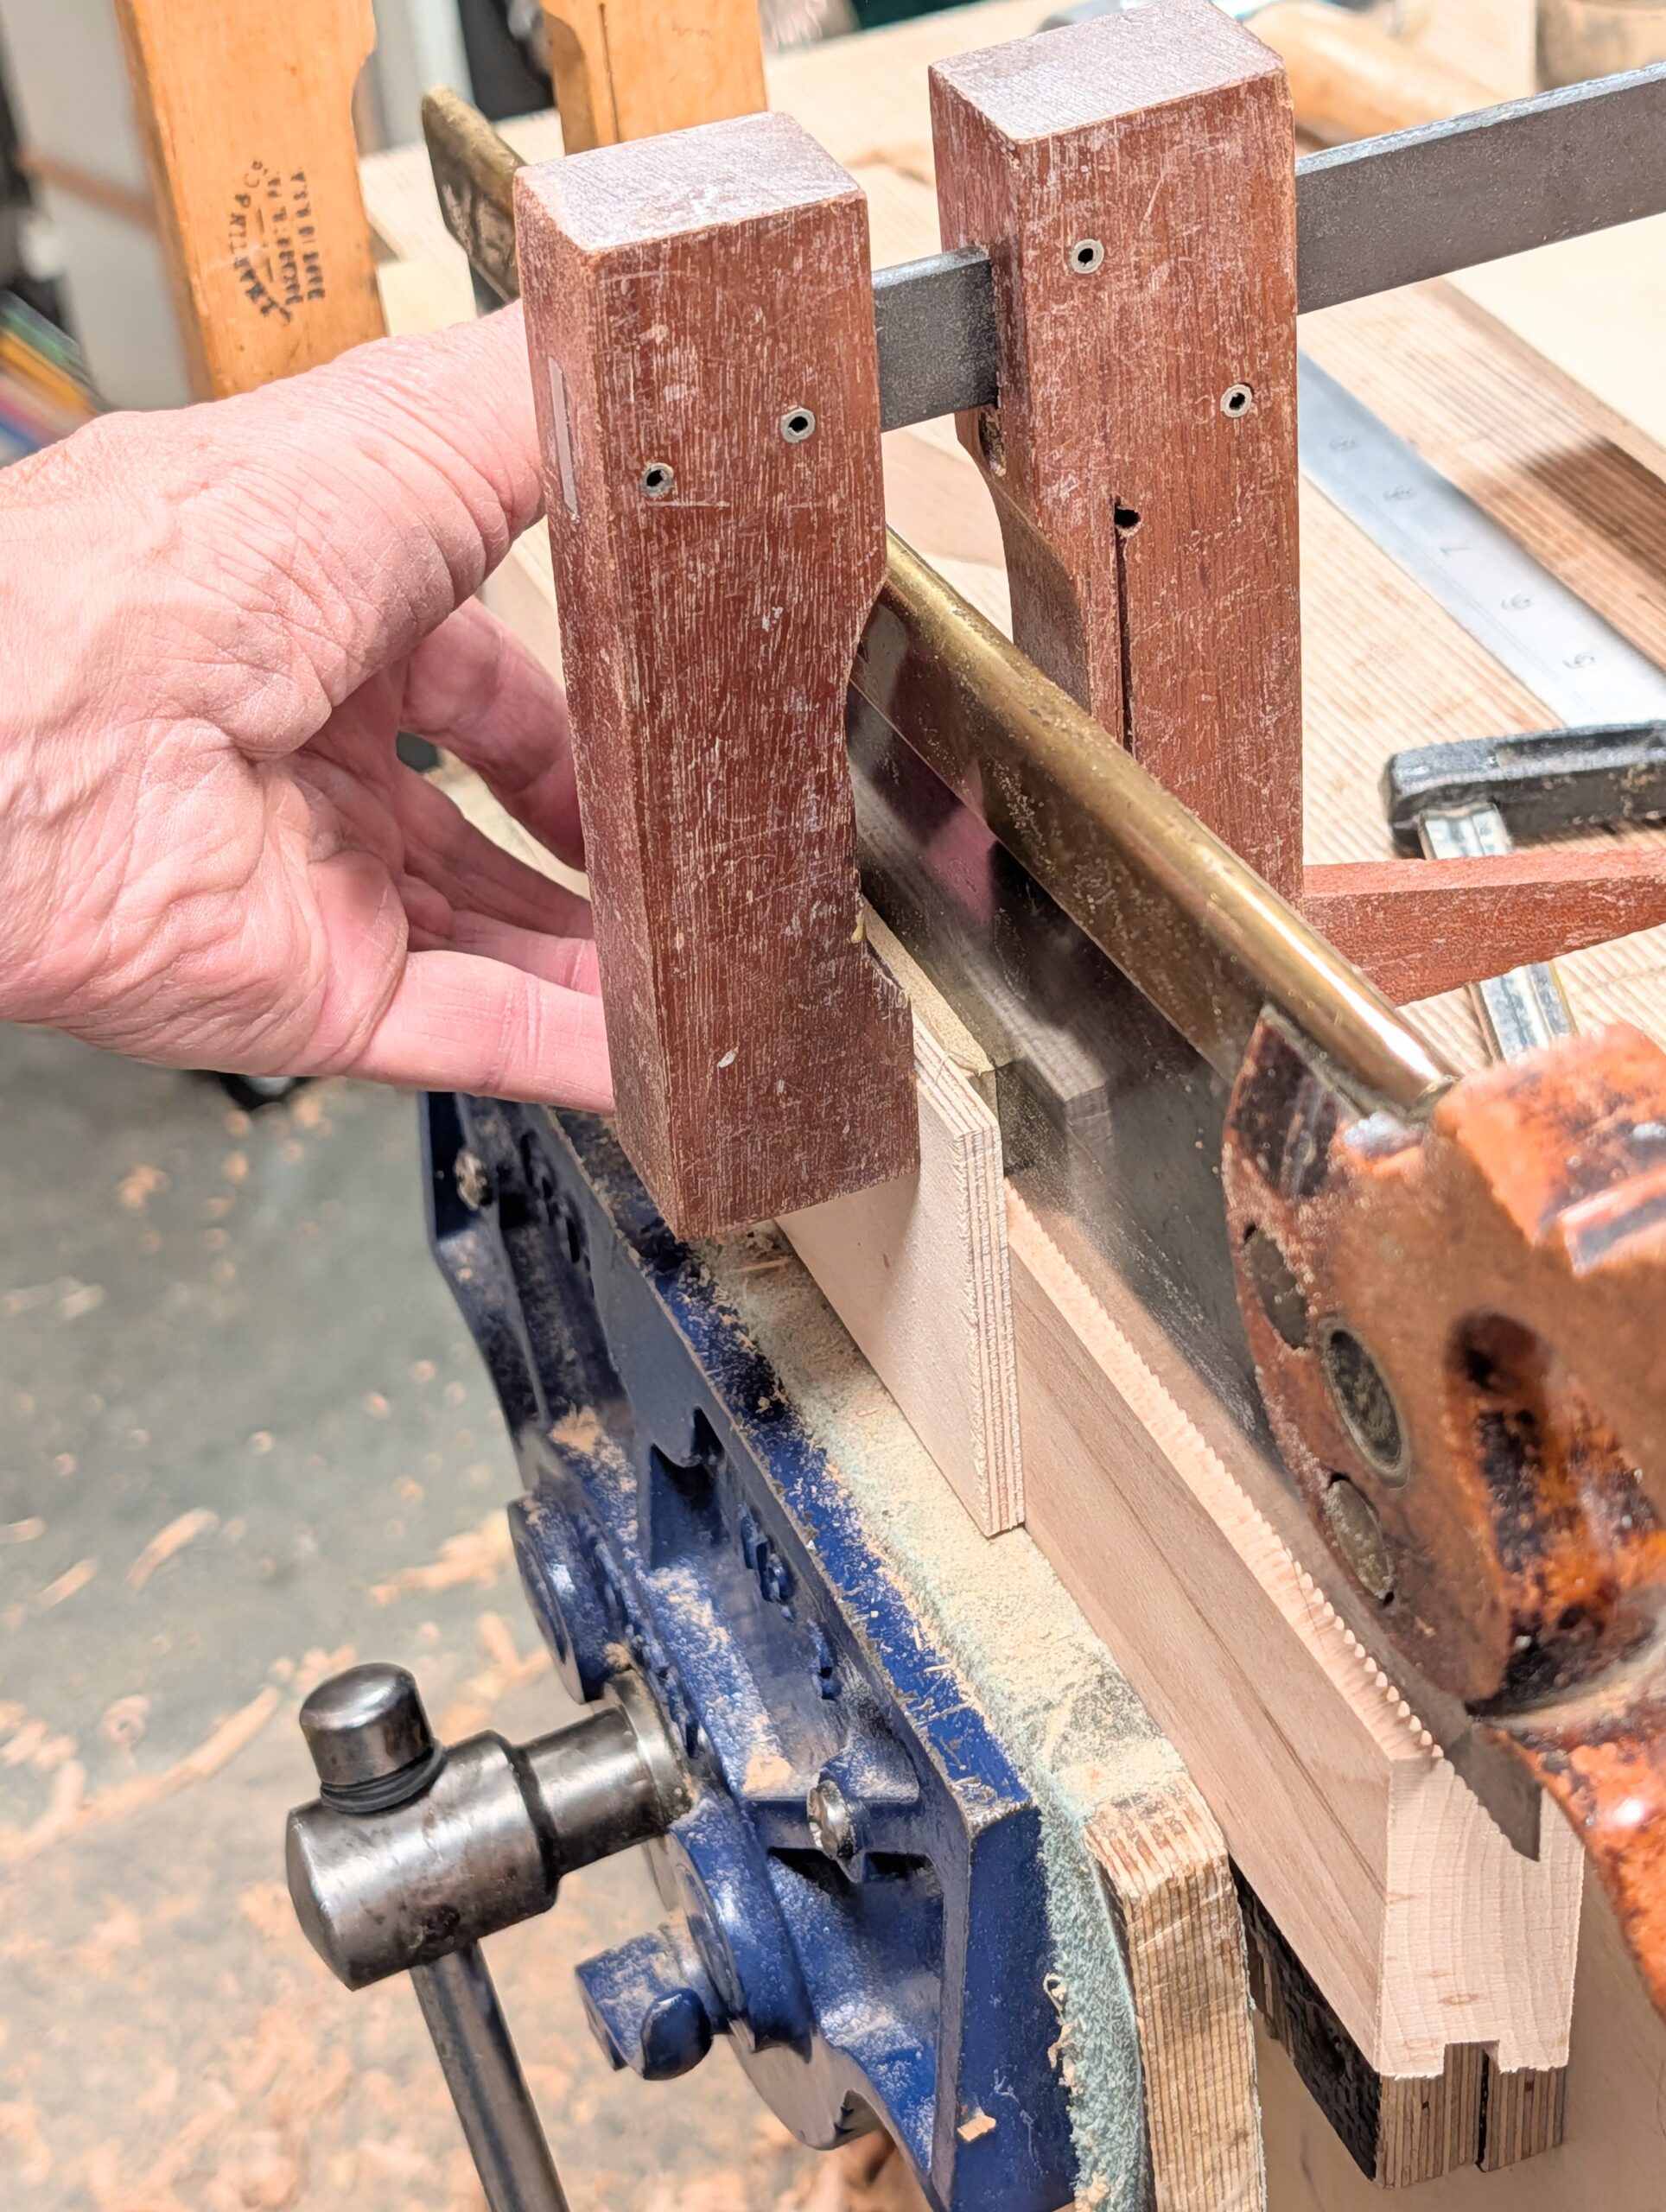
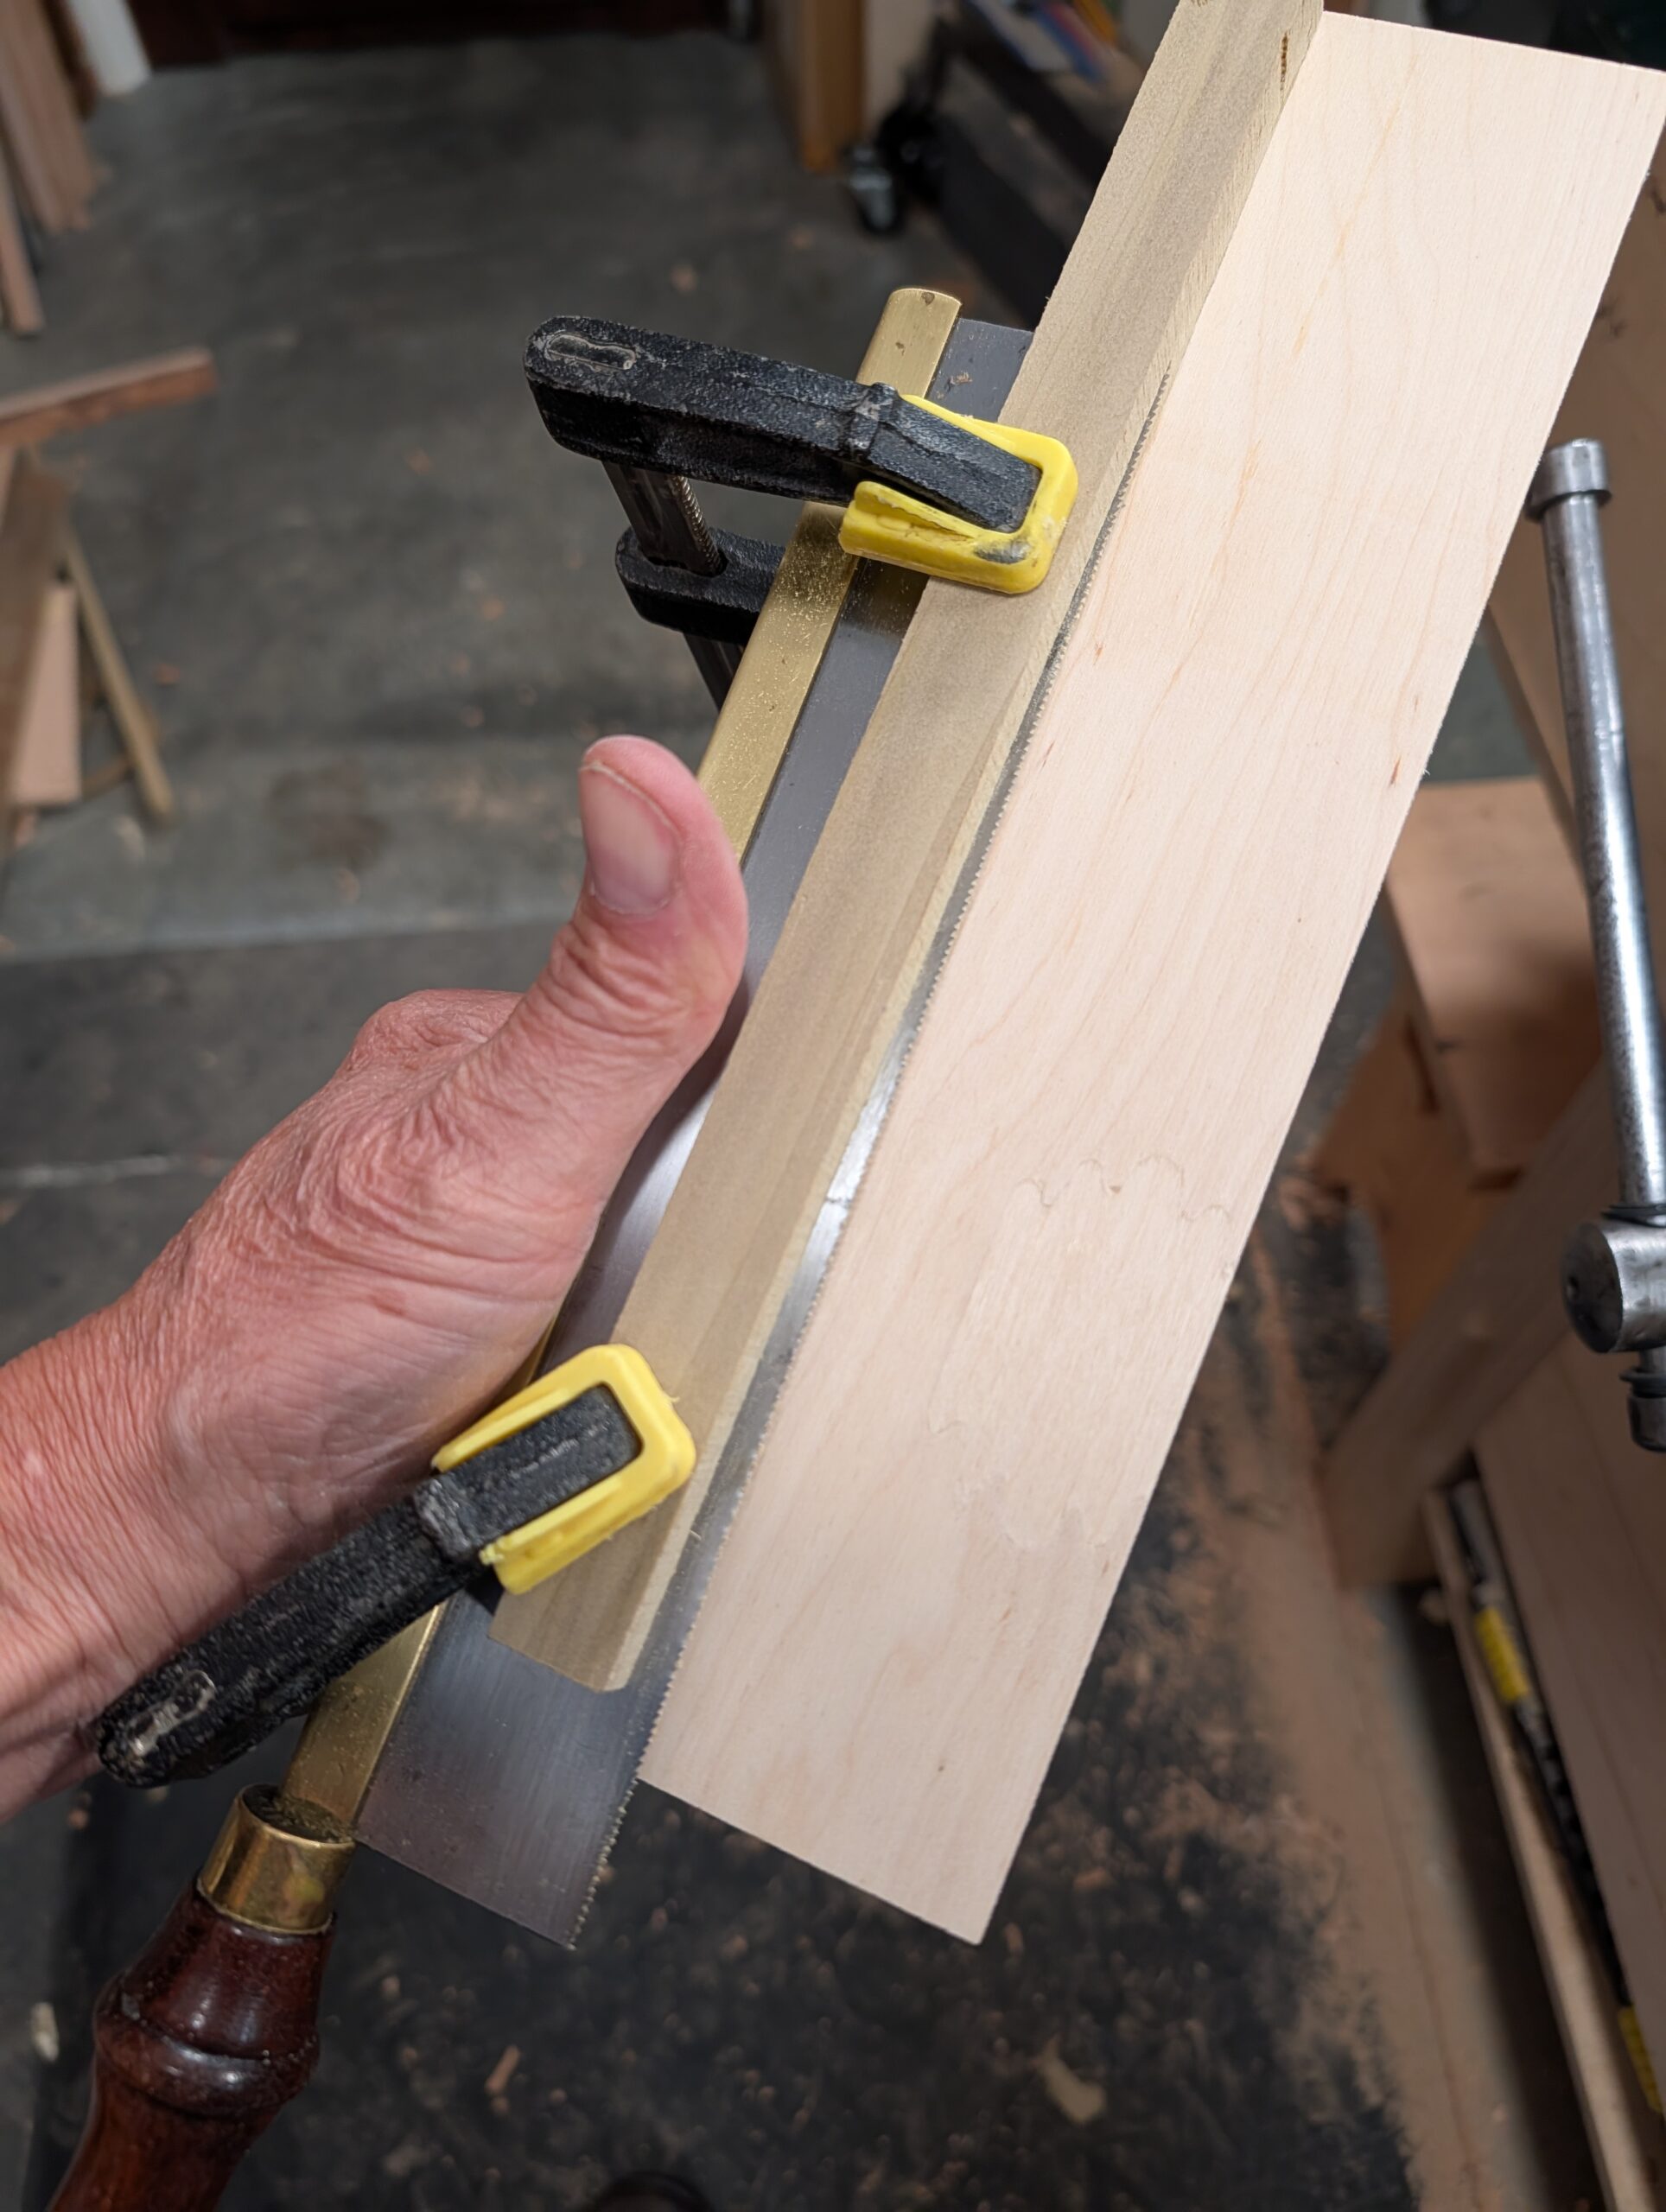
It cannot be simpler and there are two options: for a one-off or two-off kerfs, simply clamp the guide to the workpiece together in the vise or use clamps and the vise and simply slide the saw into the guide keeping it tight to the fence side (see above pic). We are not necessarily looking for full-length saw strokes to begin with but see how you feel on your own practice run. The depth on face grain like this need only be cut to about 1/16".
For the second option, set the saw in the guide with the toe of the saw flush or retarded slightly as shown and at the opposite end set the depth anywhere from 1/16" to a 1/4" depth. This tapered installation makes for an easy start. Starting at the nose of the saw, start taking sawing passes and start to move backwards with subsequent strokes. Gradually, you will feel the saw bottom out in the cut, and you will have established an even depth along the kerf. As long as you have planed your workpiece wood to dead size, simply flip the guide end for end and do the same for the opposite side of the groove. Now you are ready to plough.
A Third Type
If you are a bandsaw user and have an old bandsaw blade you can snap a short length off, the blade will usually still be good enough to make this tool perform well. Snapping off the blade by folding completely and using pliers to cinch the final squeeze will result in a clean snap.
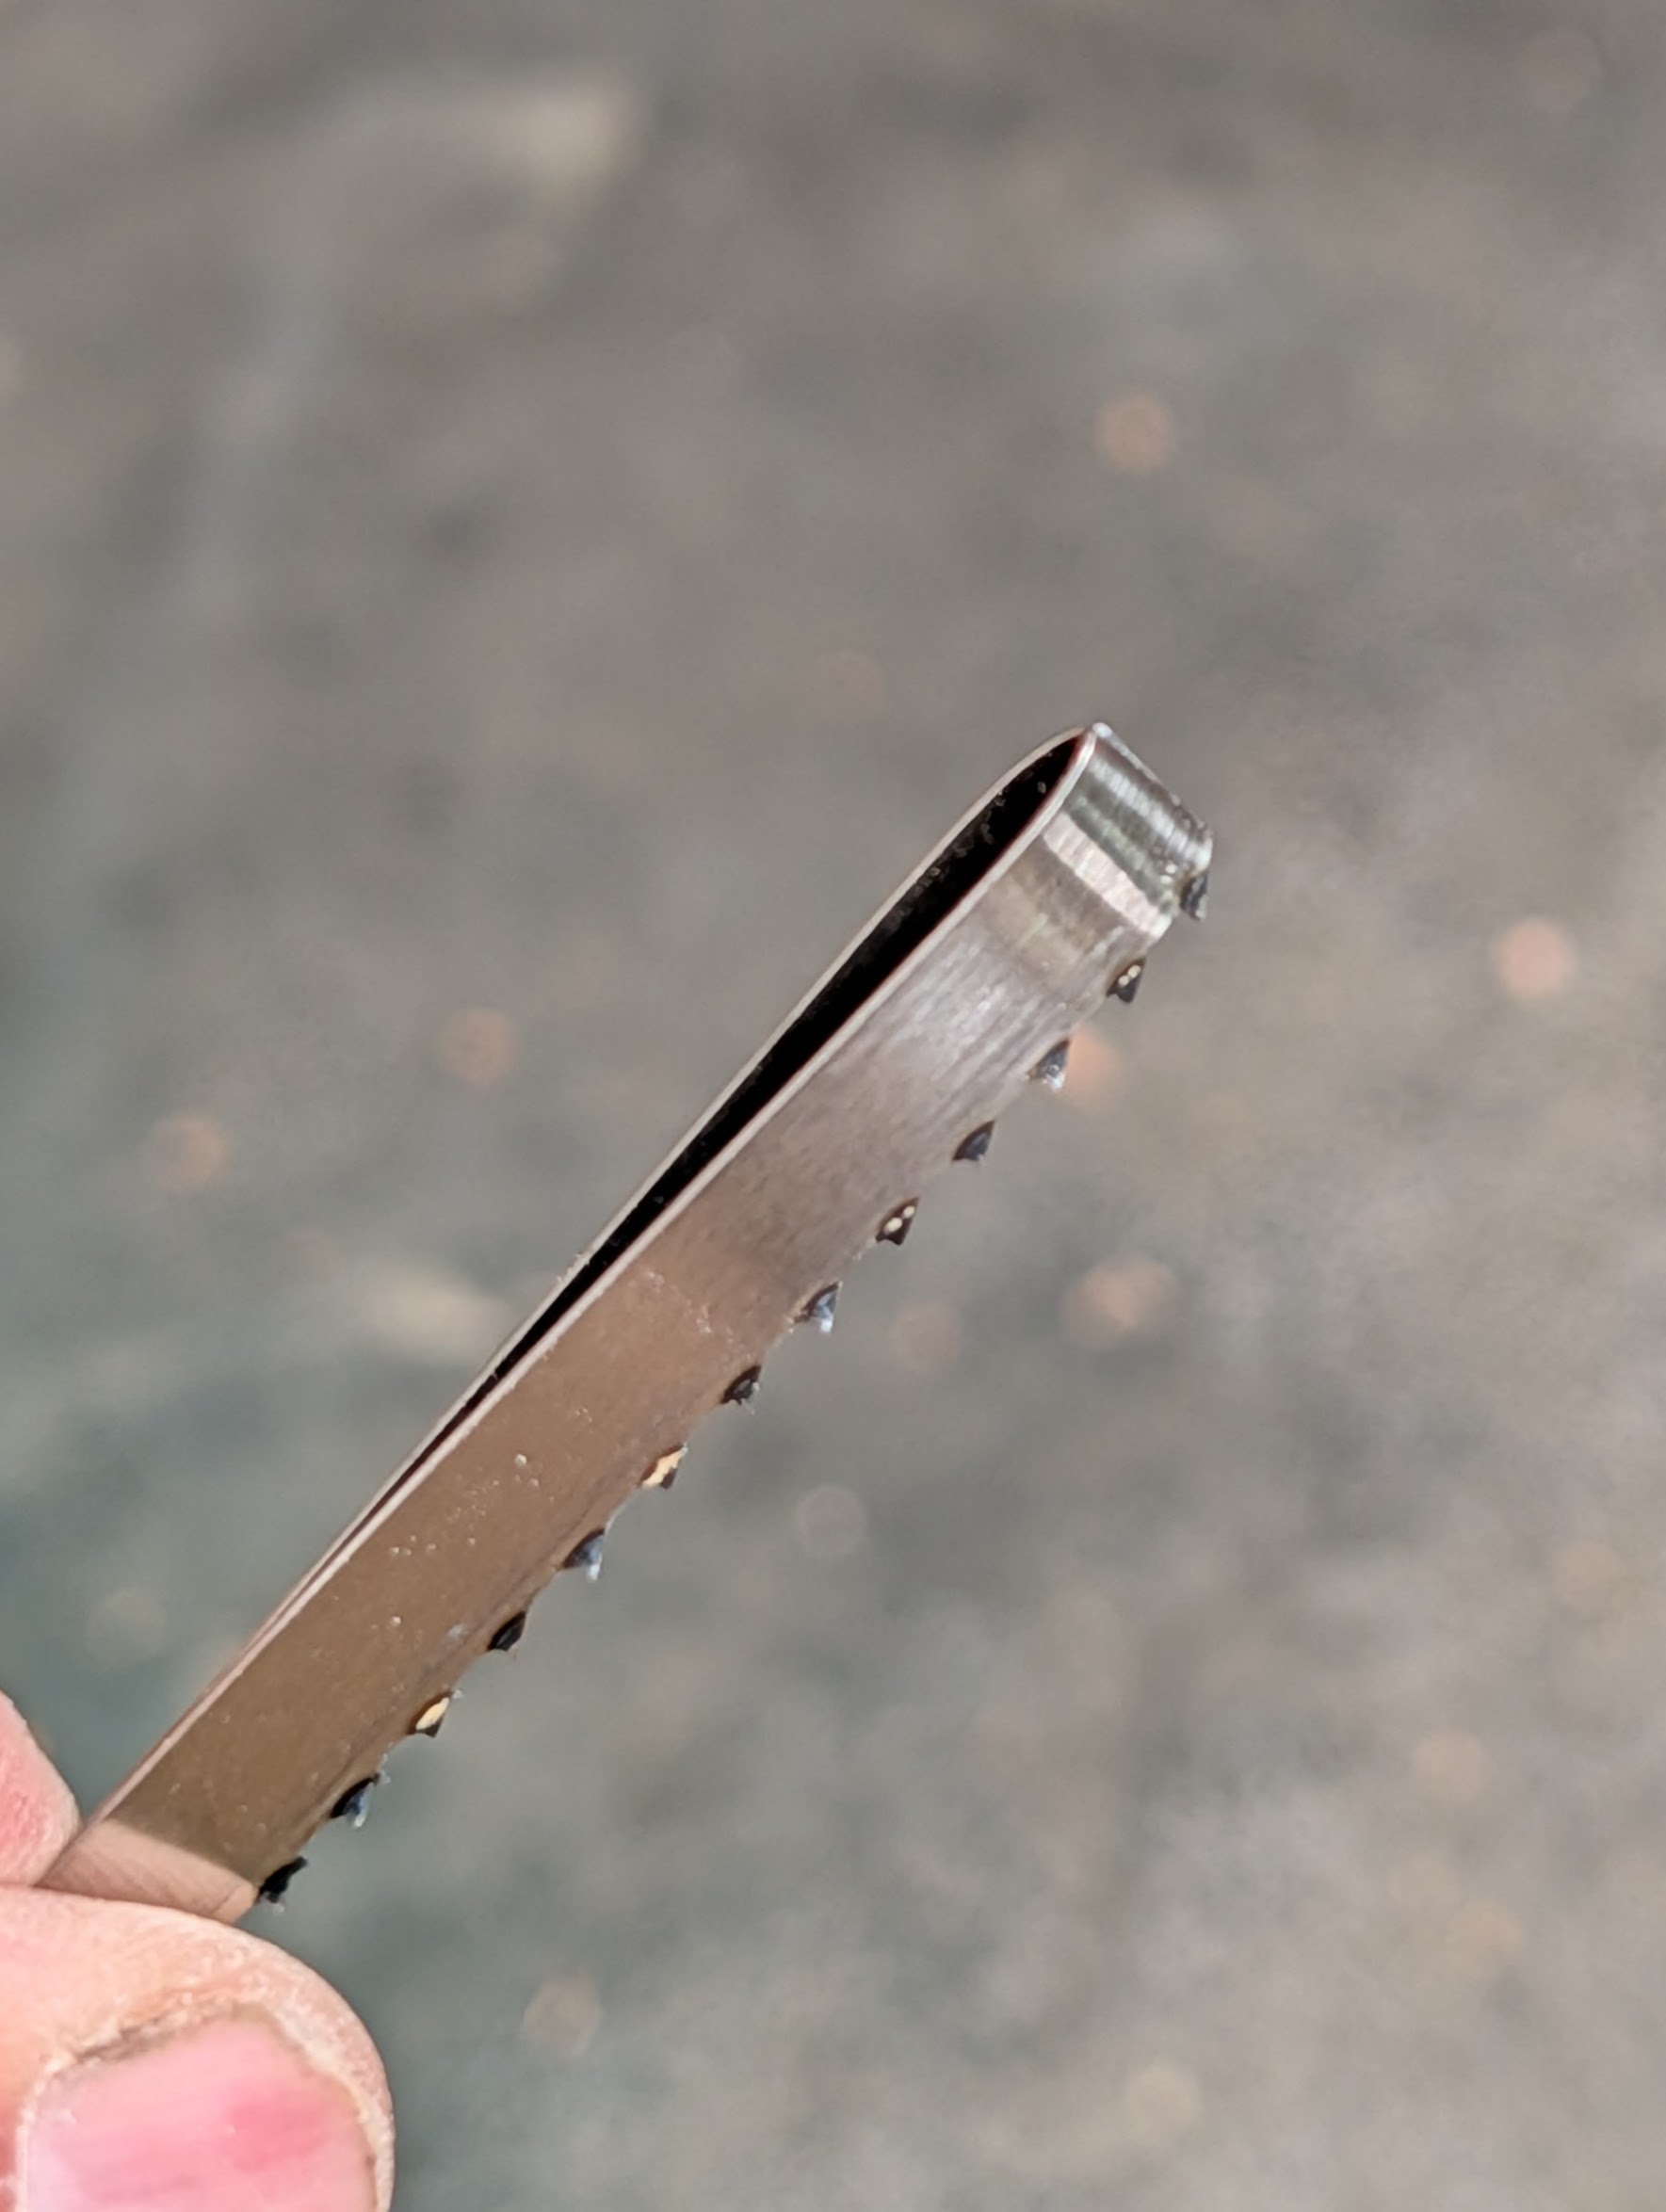
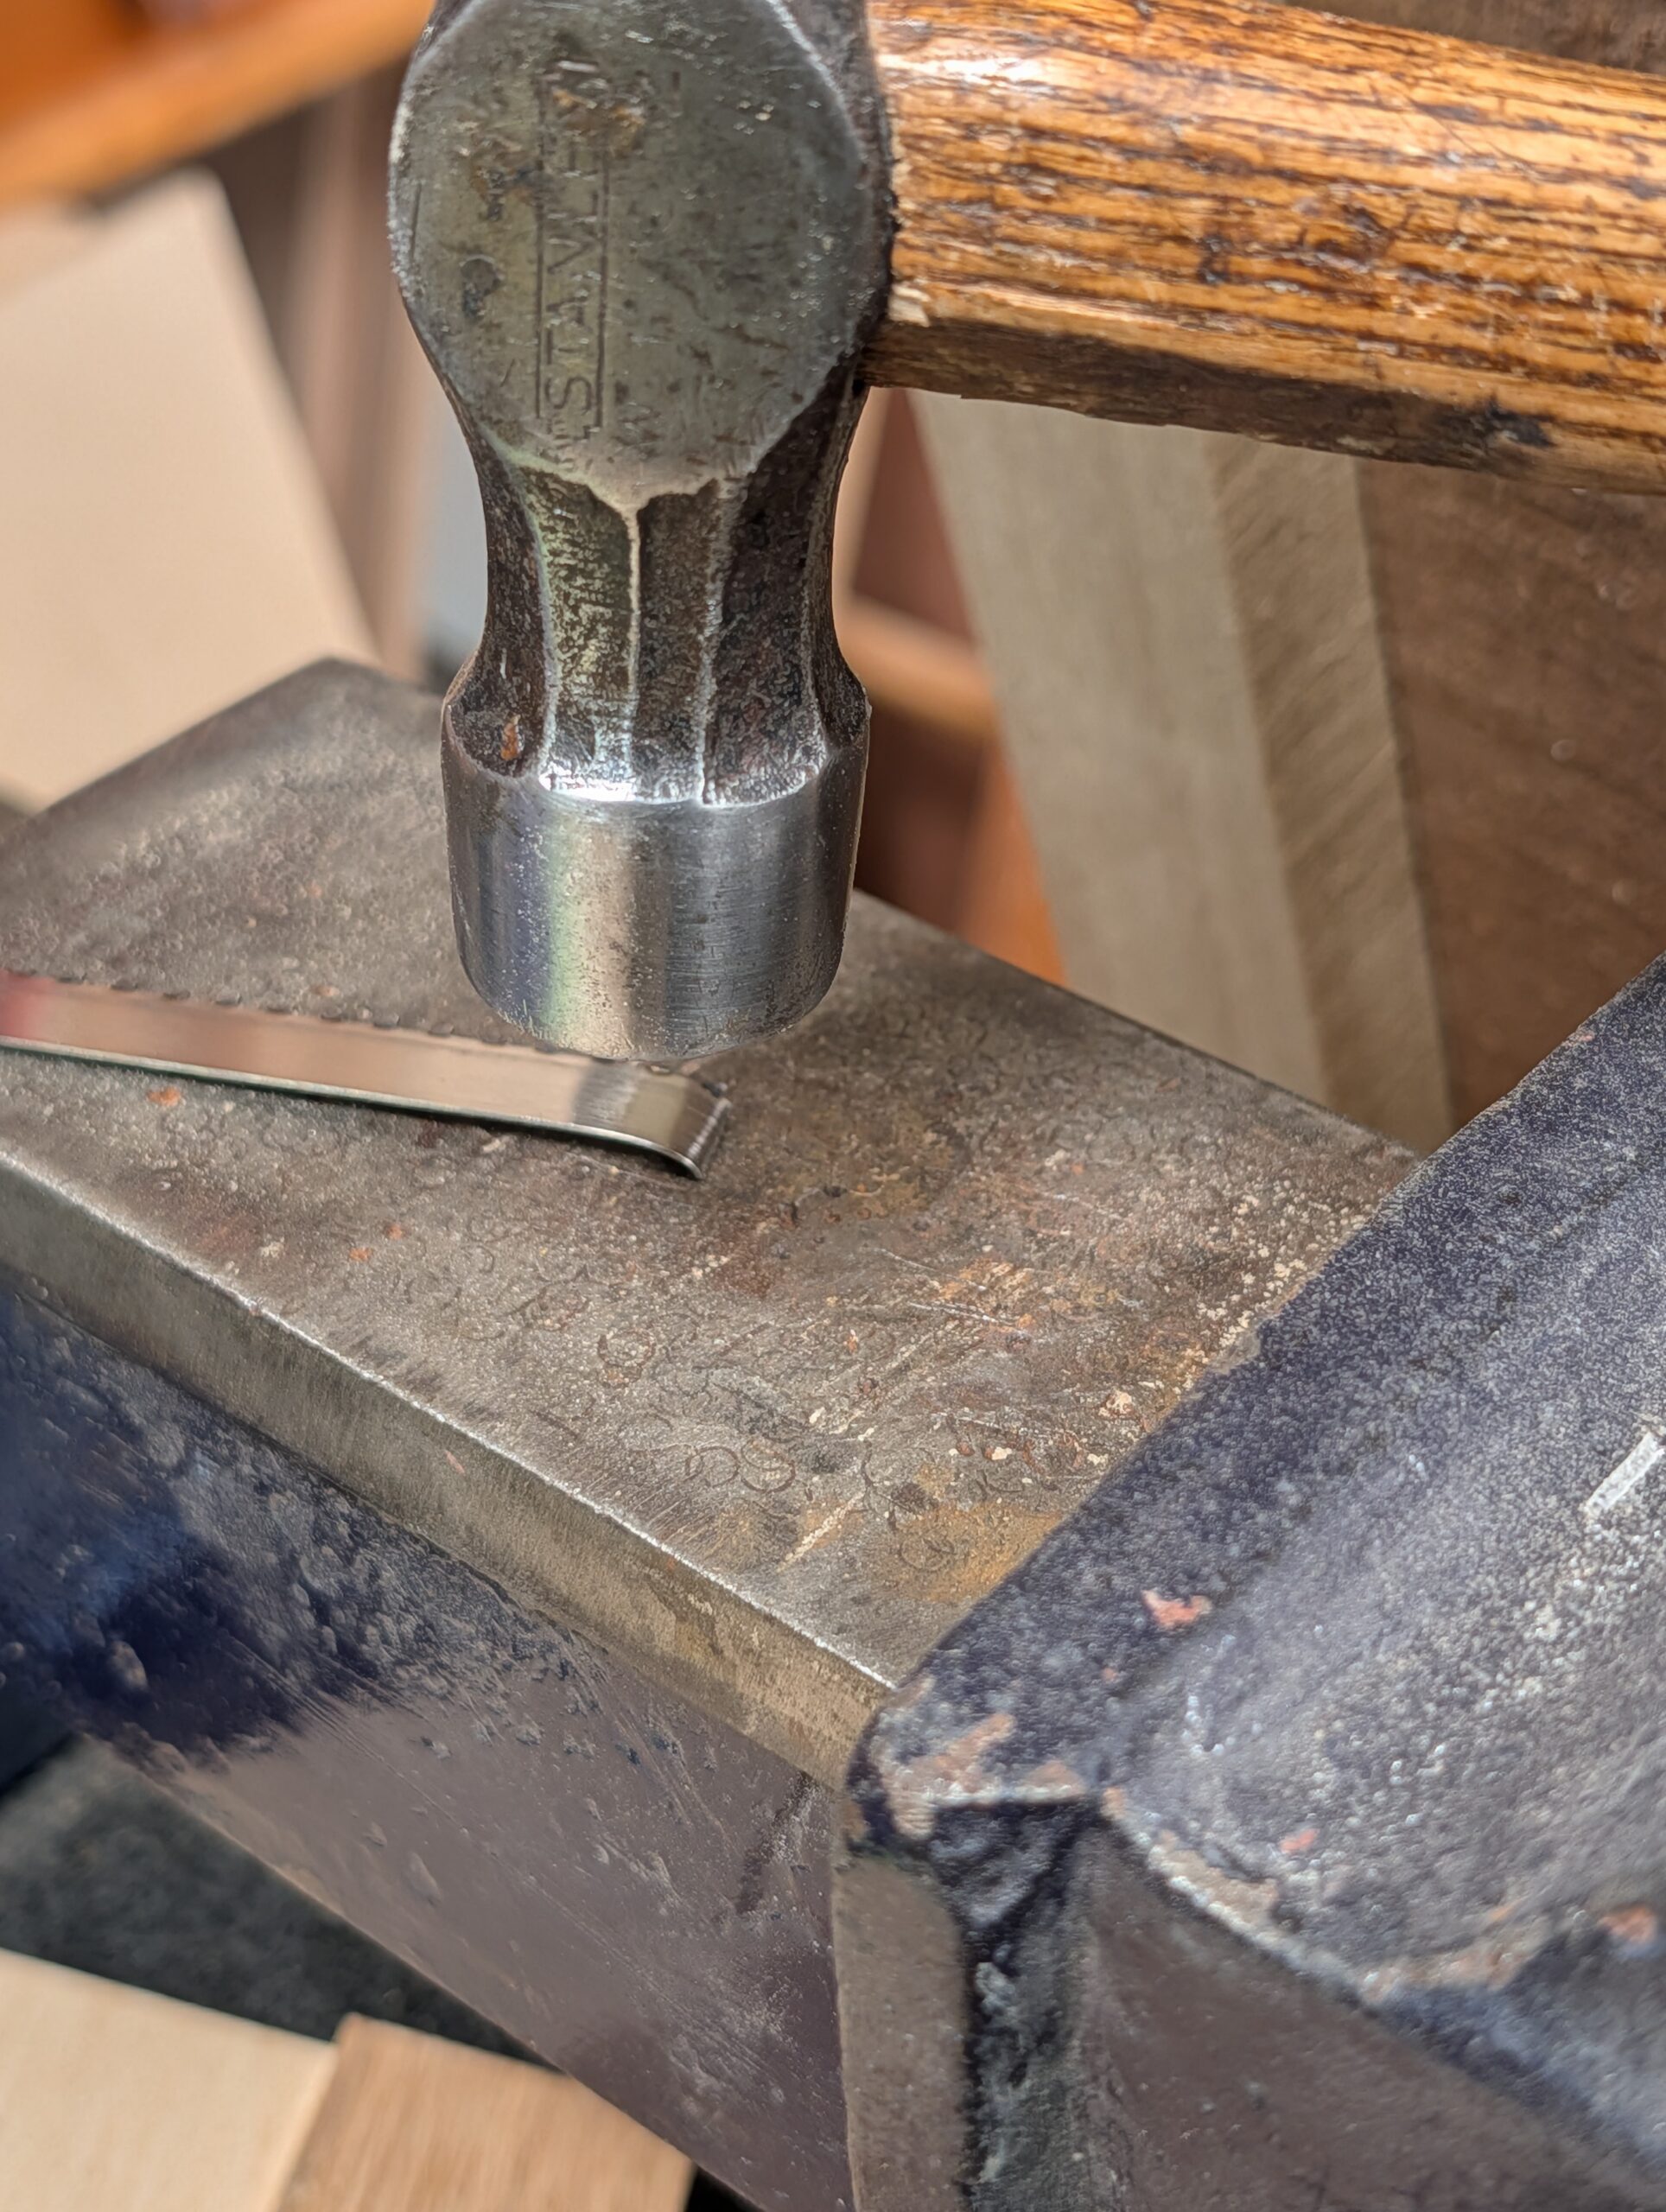
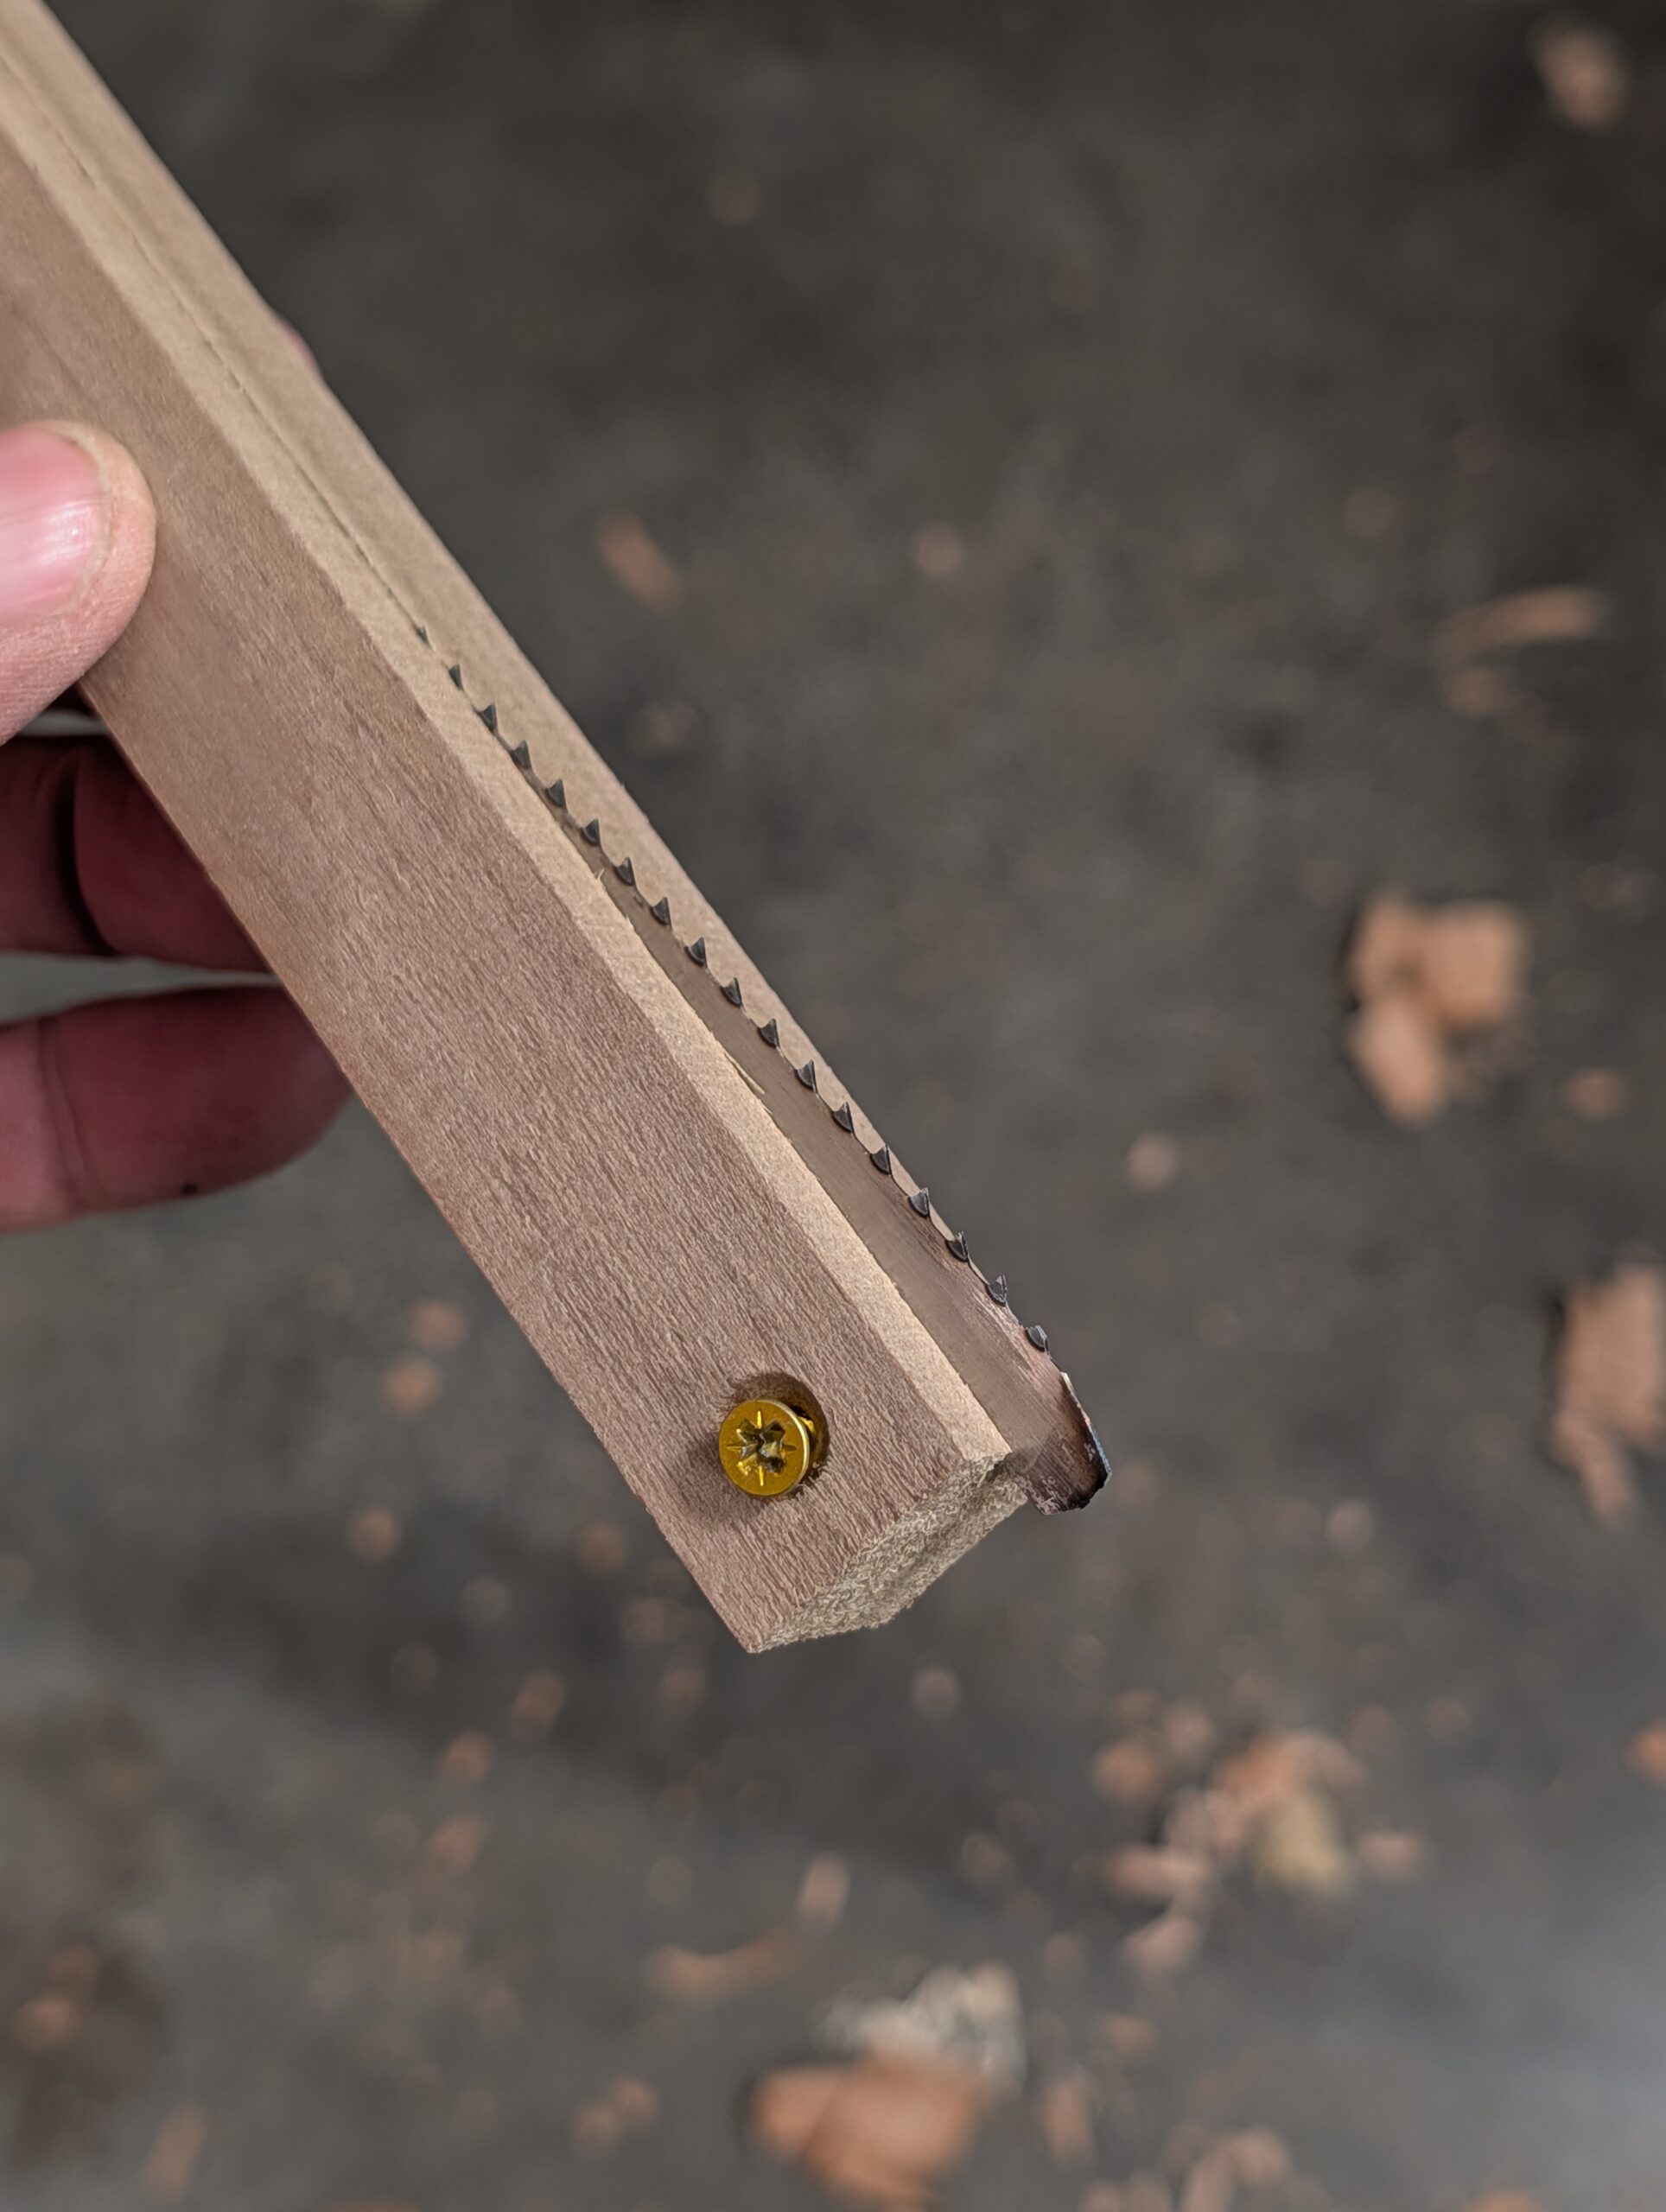
If the metal is bent at the snap point, it usually is, straighten with a hammer. Three to four inches is plenty long enough. Screw or glue it between the two pieces of wood as shown. I used superglue and accelerator, but screws work well too.
My blade is half inch. Set the blade either parallel or sloping from zero to the final depth of 1/16" as discussed above. This is good enough for what we want but for some work you may need to go to a deeper setting.
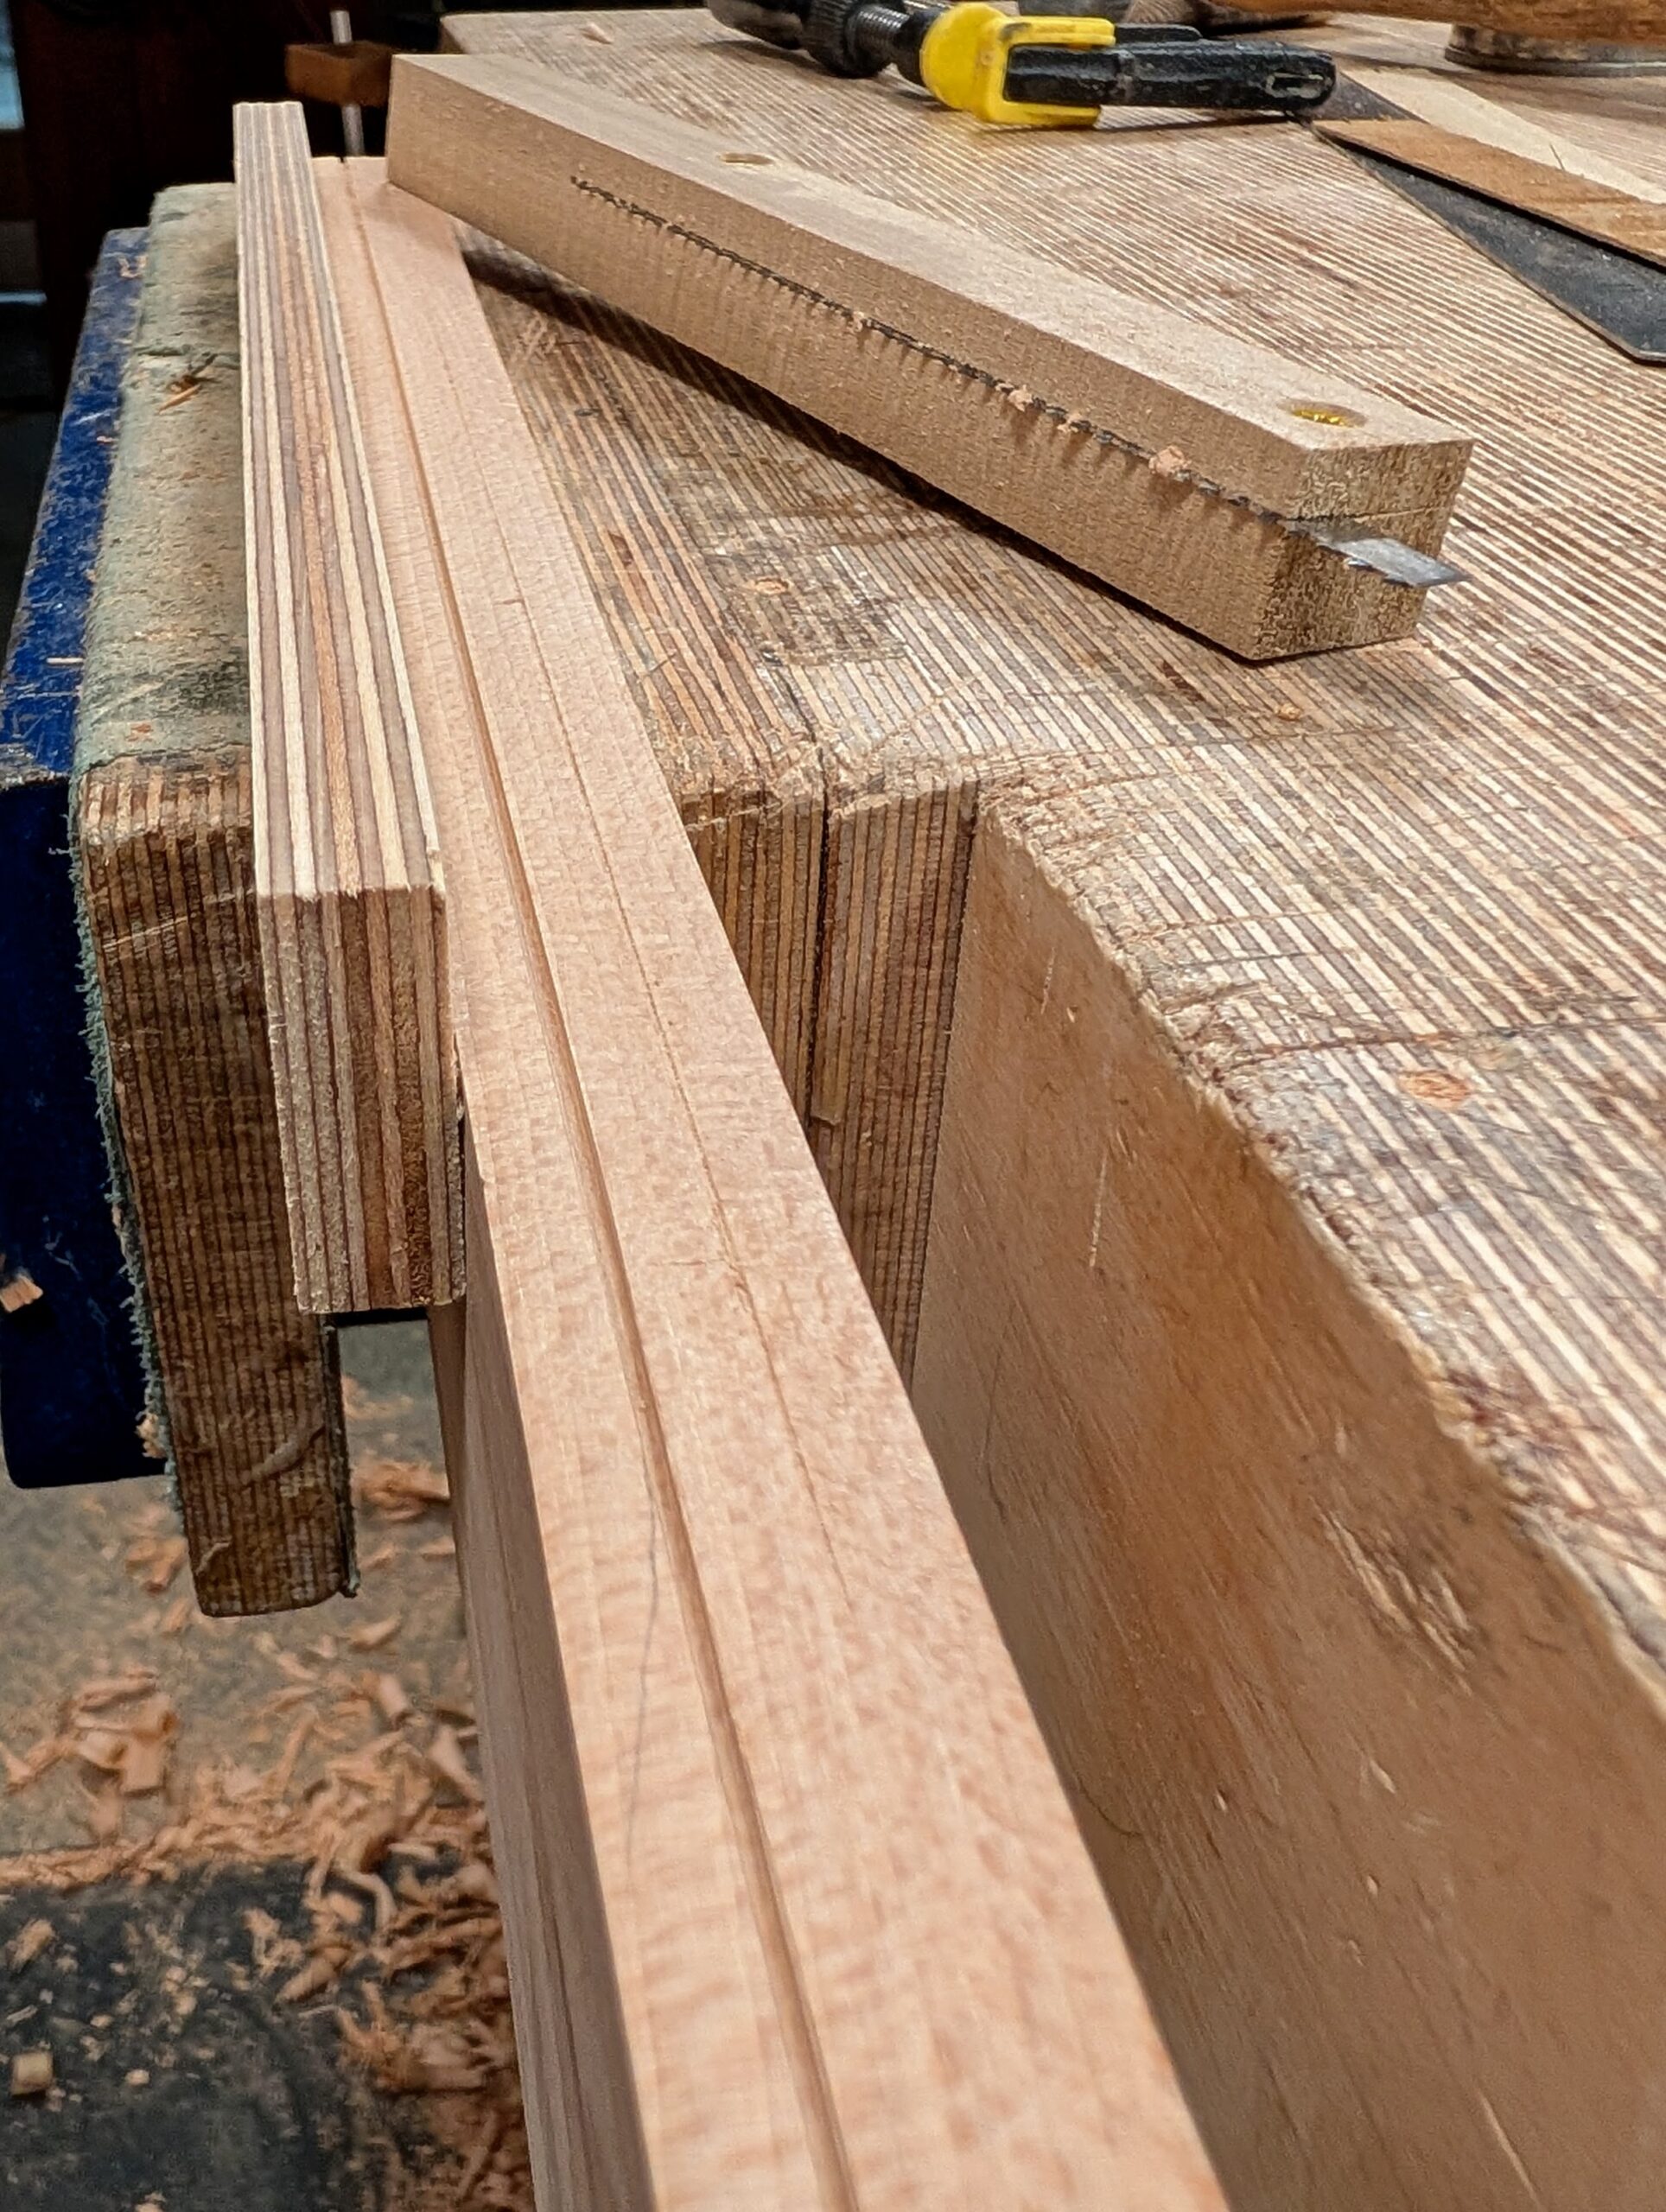
Now clamp a loose fence guide in the vise with the workpiece, press the new tool against the fence and push in a short-stroked sawing action. I mention this alternative so that you can keep the tenon saw free for use.
Using the New Tools and Guides
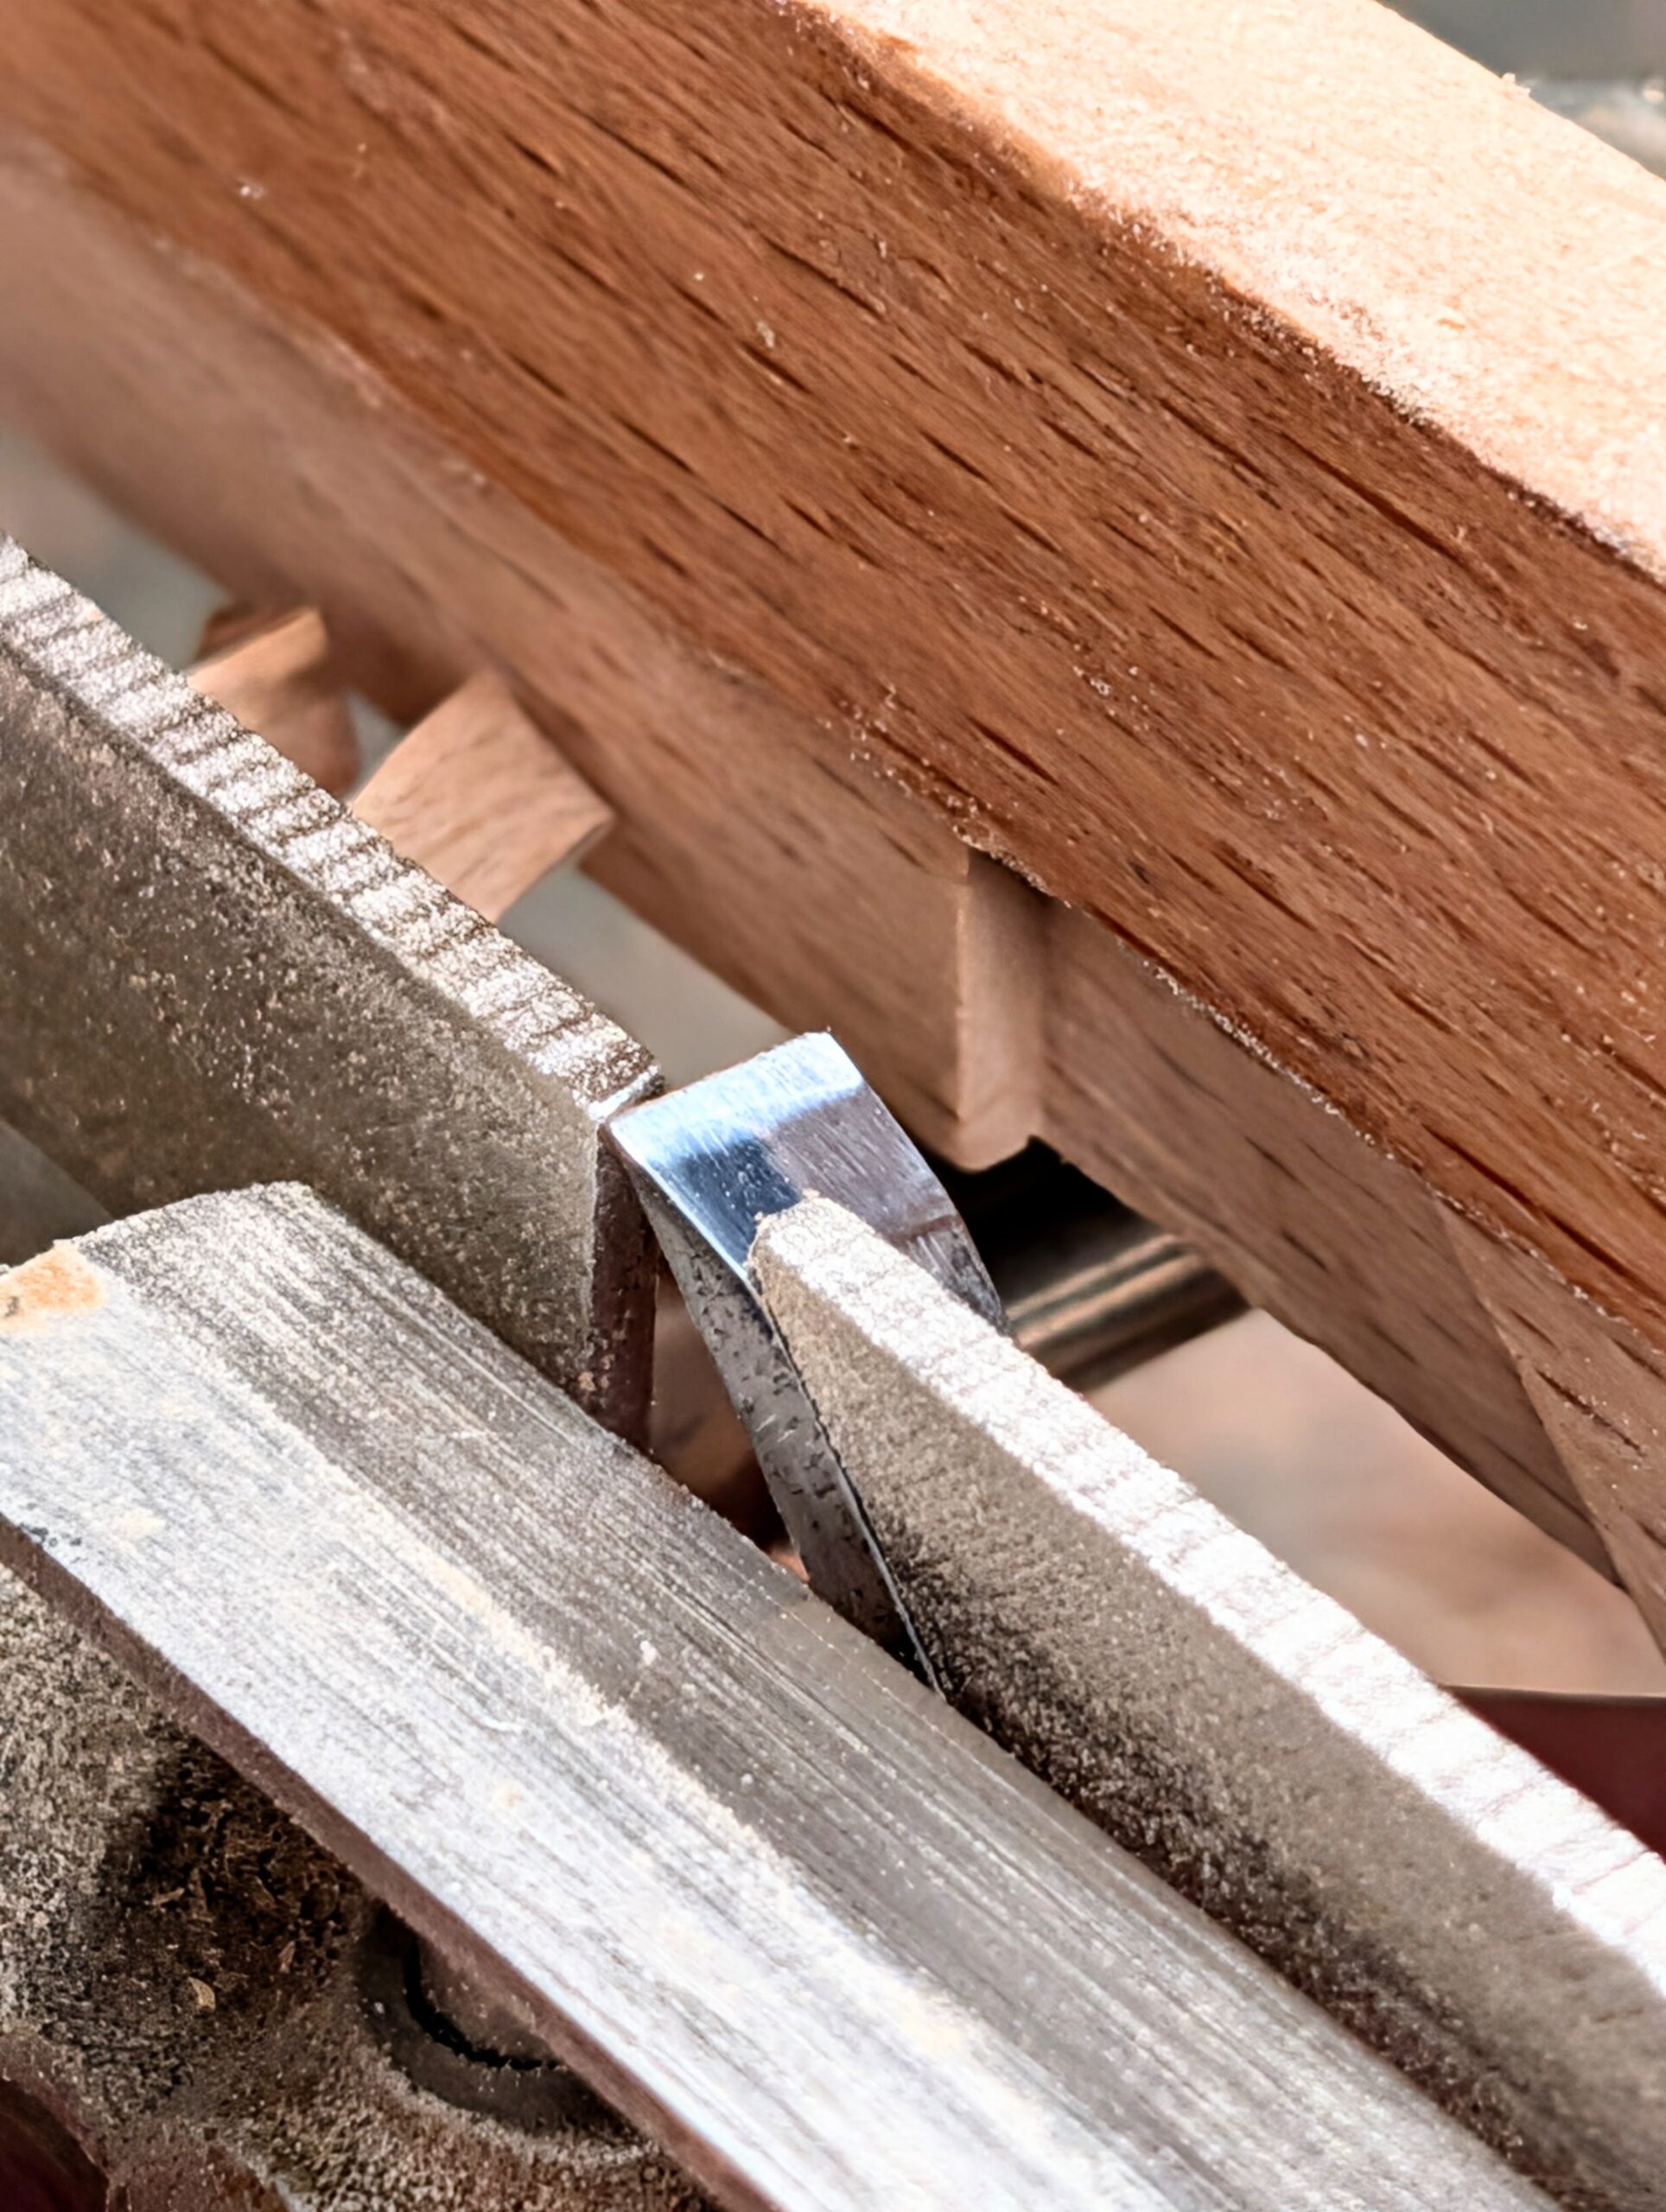
I'll skip the mortise gauge and knife, as that is obvious. Let's move on to the saw in the holder. You can use a clamp or two or screws to secure either the tenon saw or bandsaw blade in place. Clamps tend to be heavy, but they are convenient if you just have a couple to do. Start at the point furthest away from you and work backwards gradually with each subsequent stroke. As the guide bottoms out, look for that last clear stroke that tells you you've arrived. Turn the workpiece around end for end and do the same to the other side. You are now ready to plough with the plough plane.
I have another guide to knock you out too. One you've never seen anywhere.
Comments ()