Making a Splay-legged Stool––Weaving the Seat: Part II
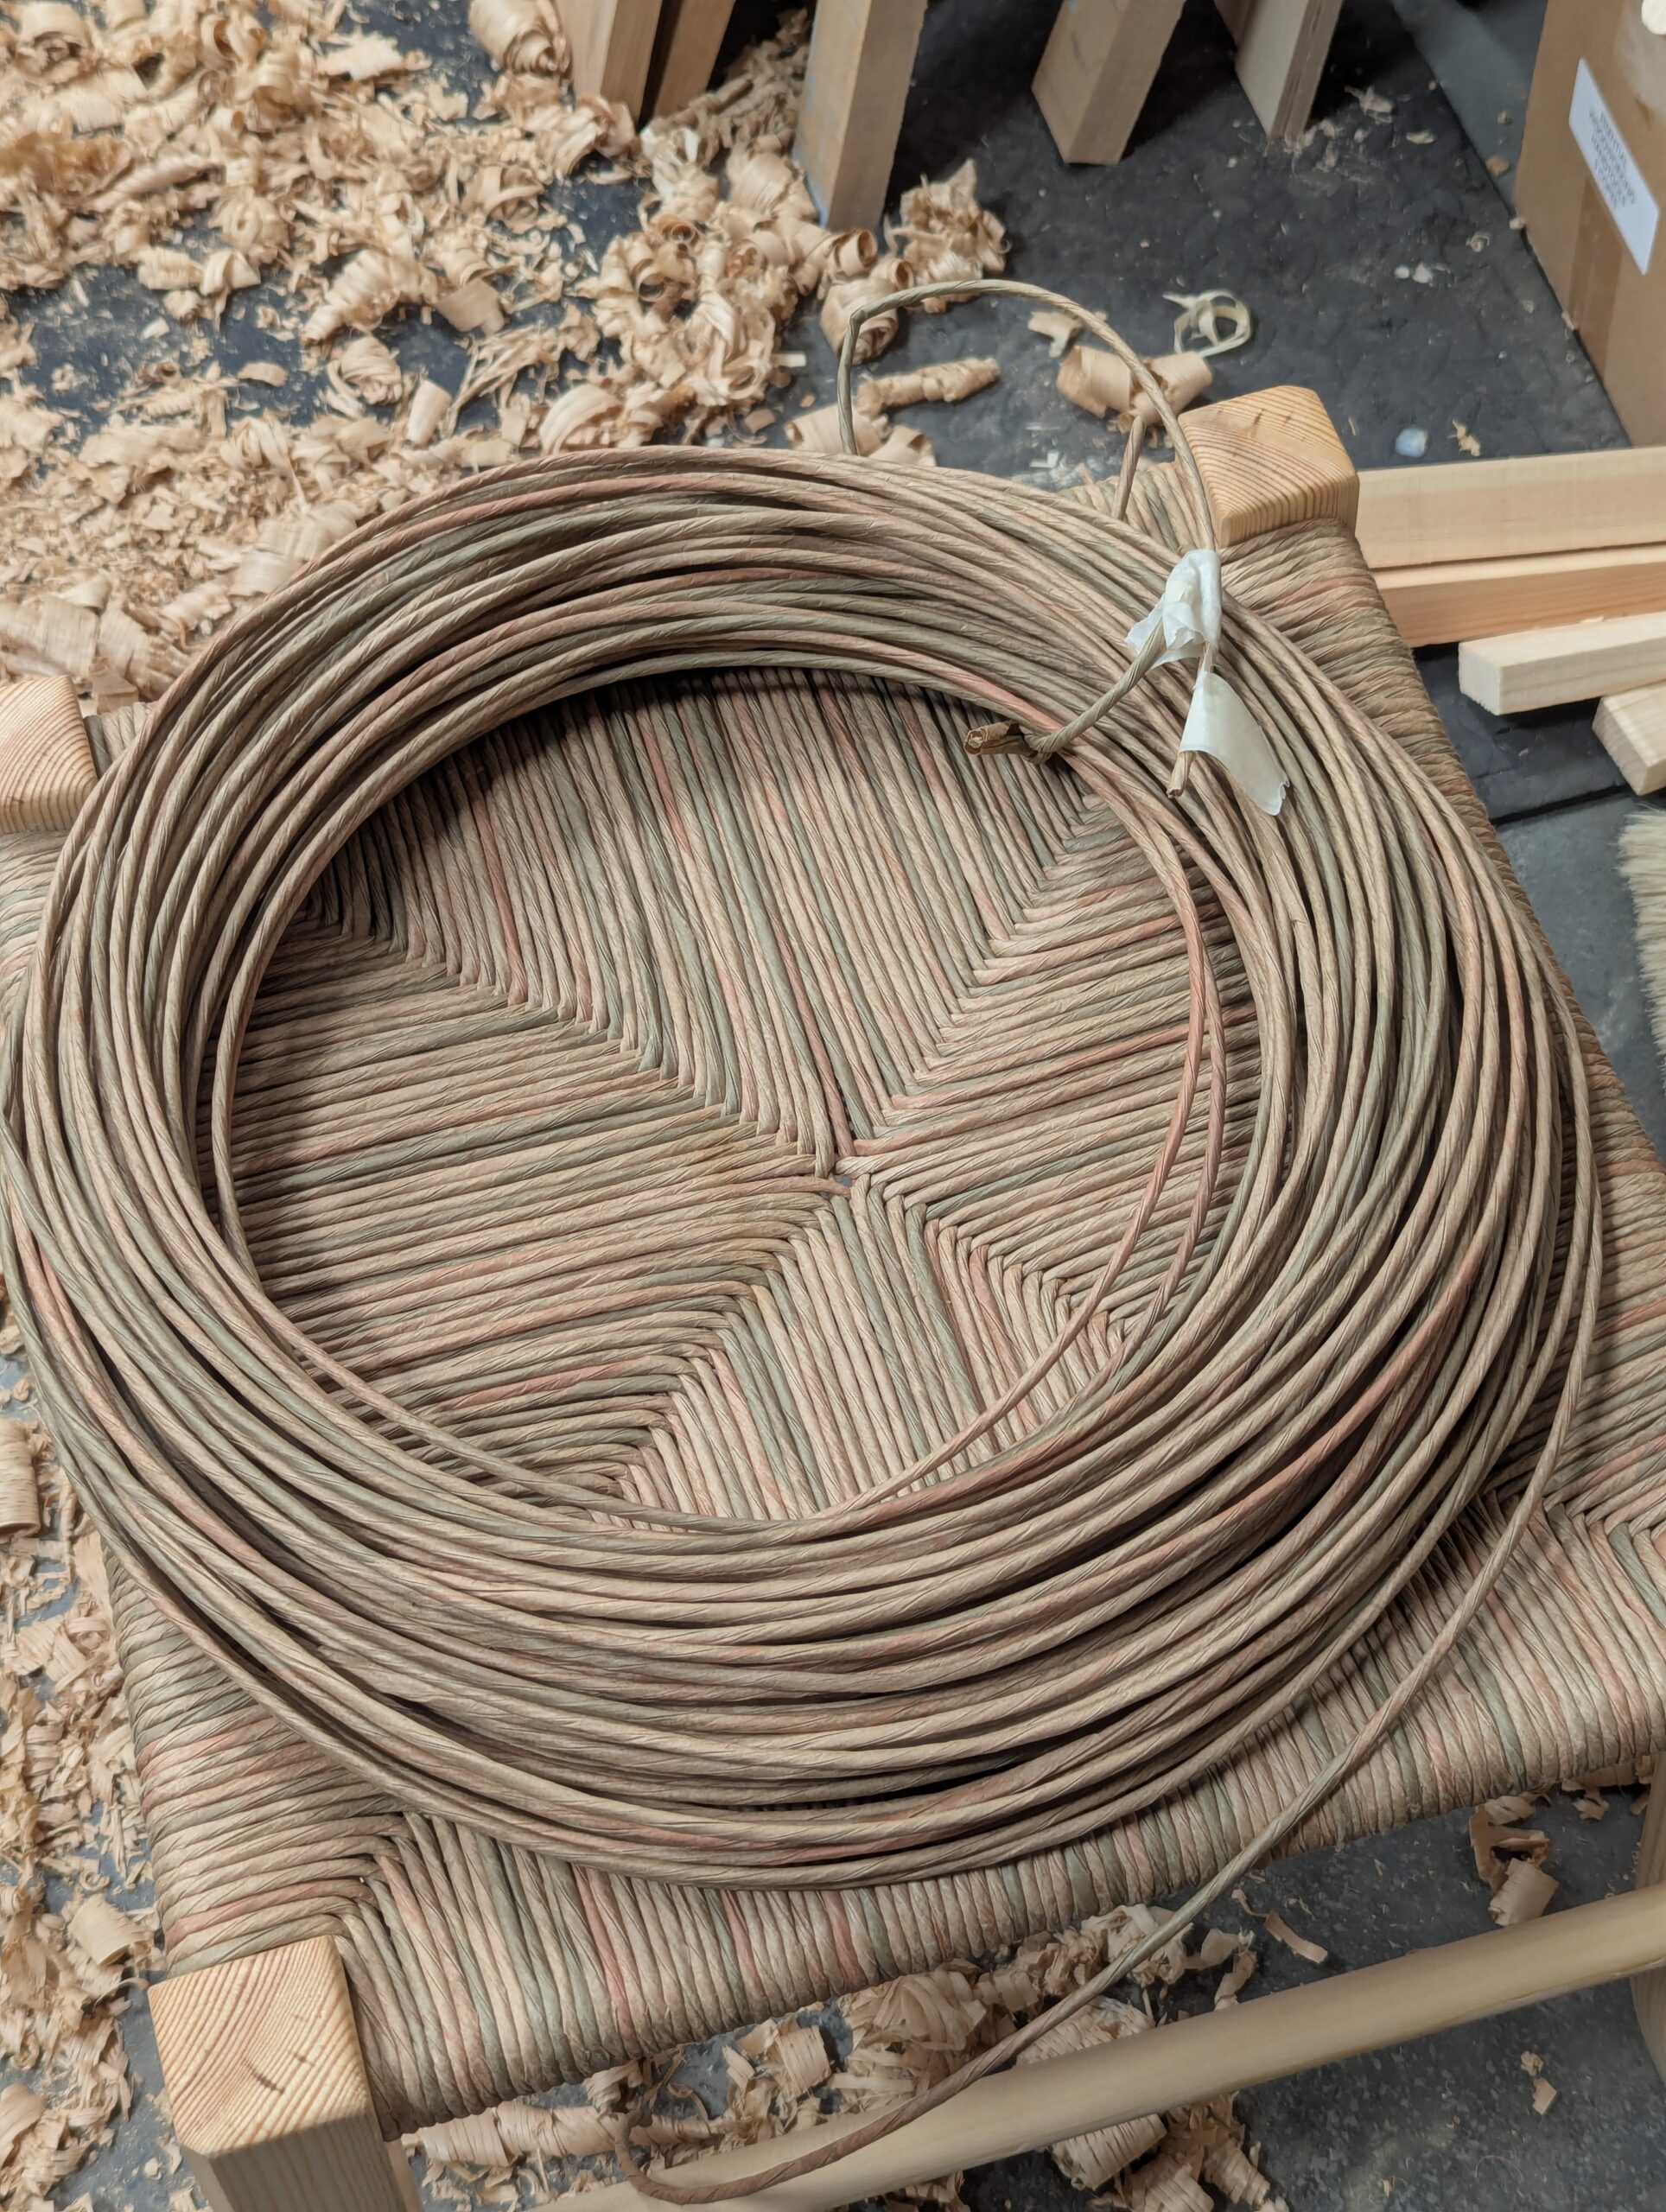
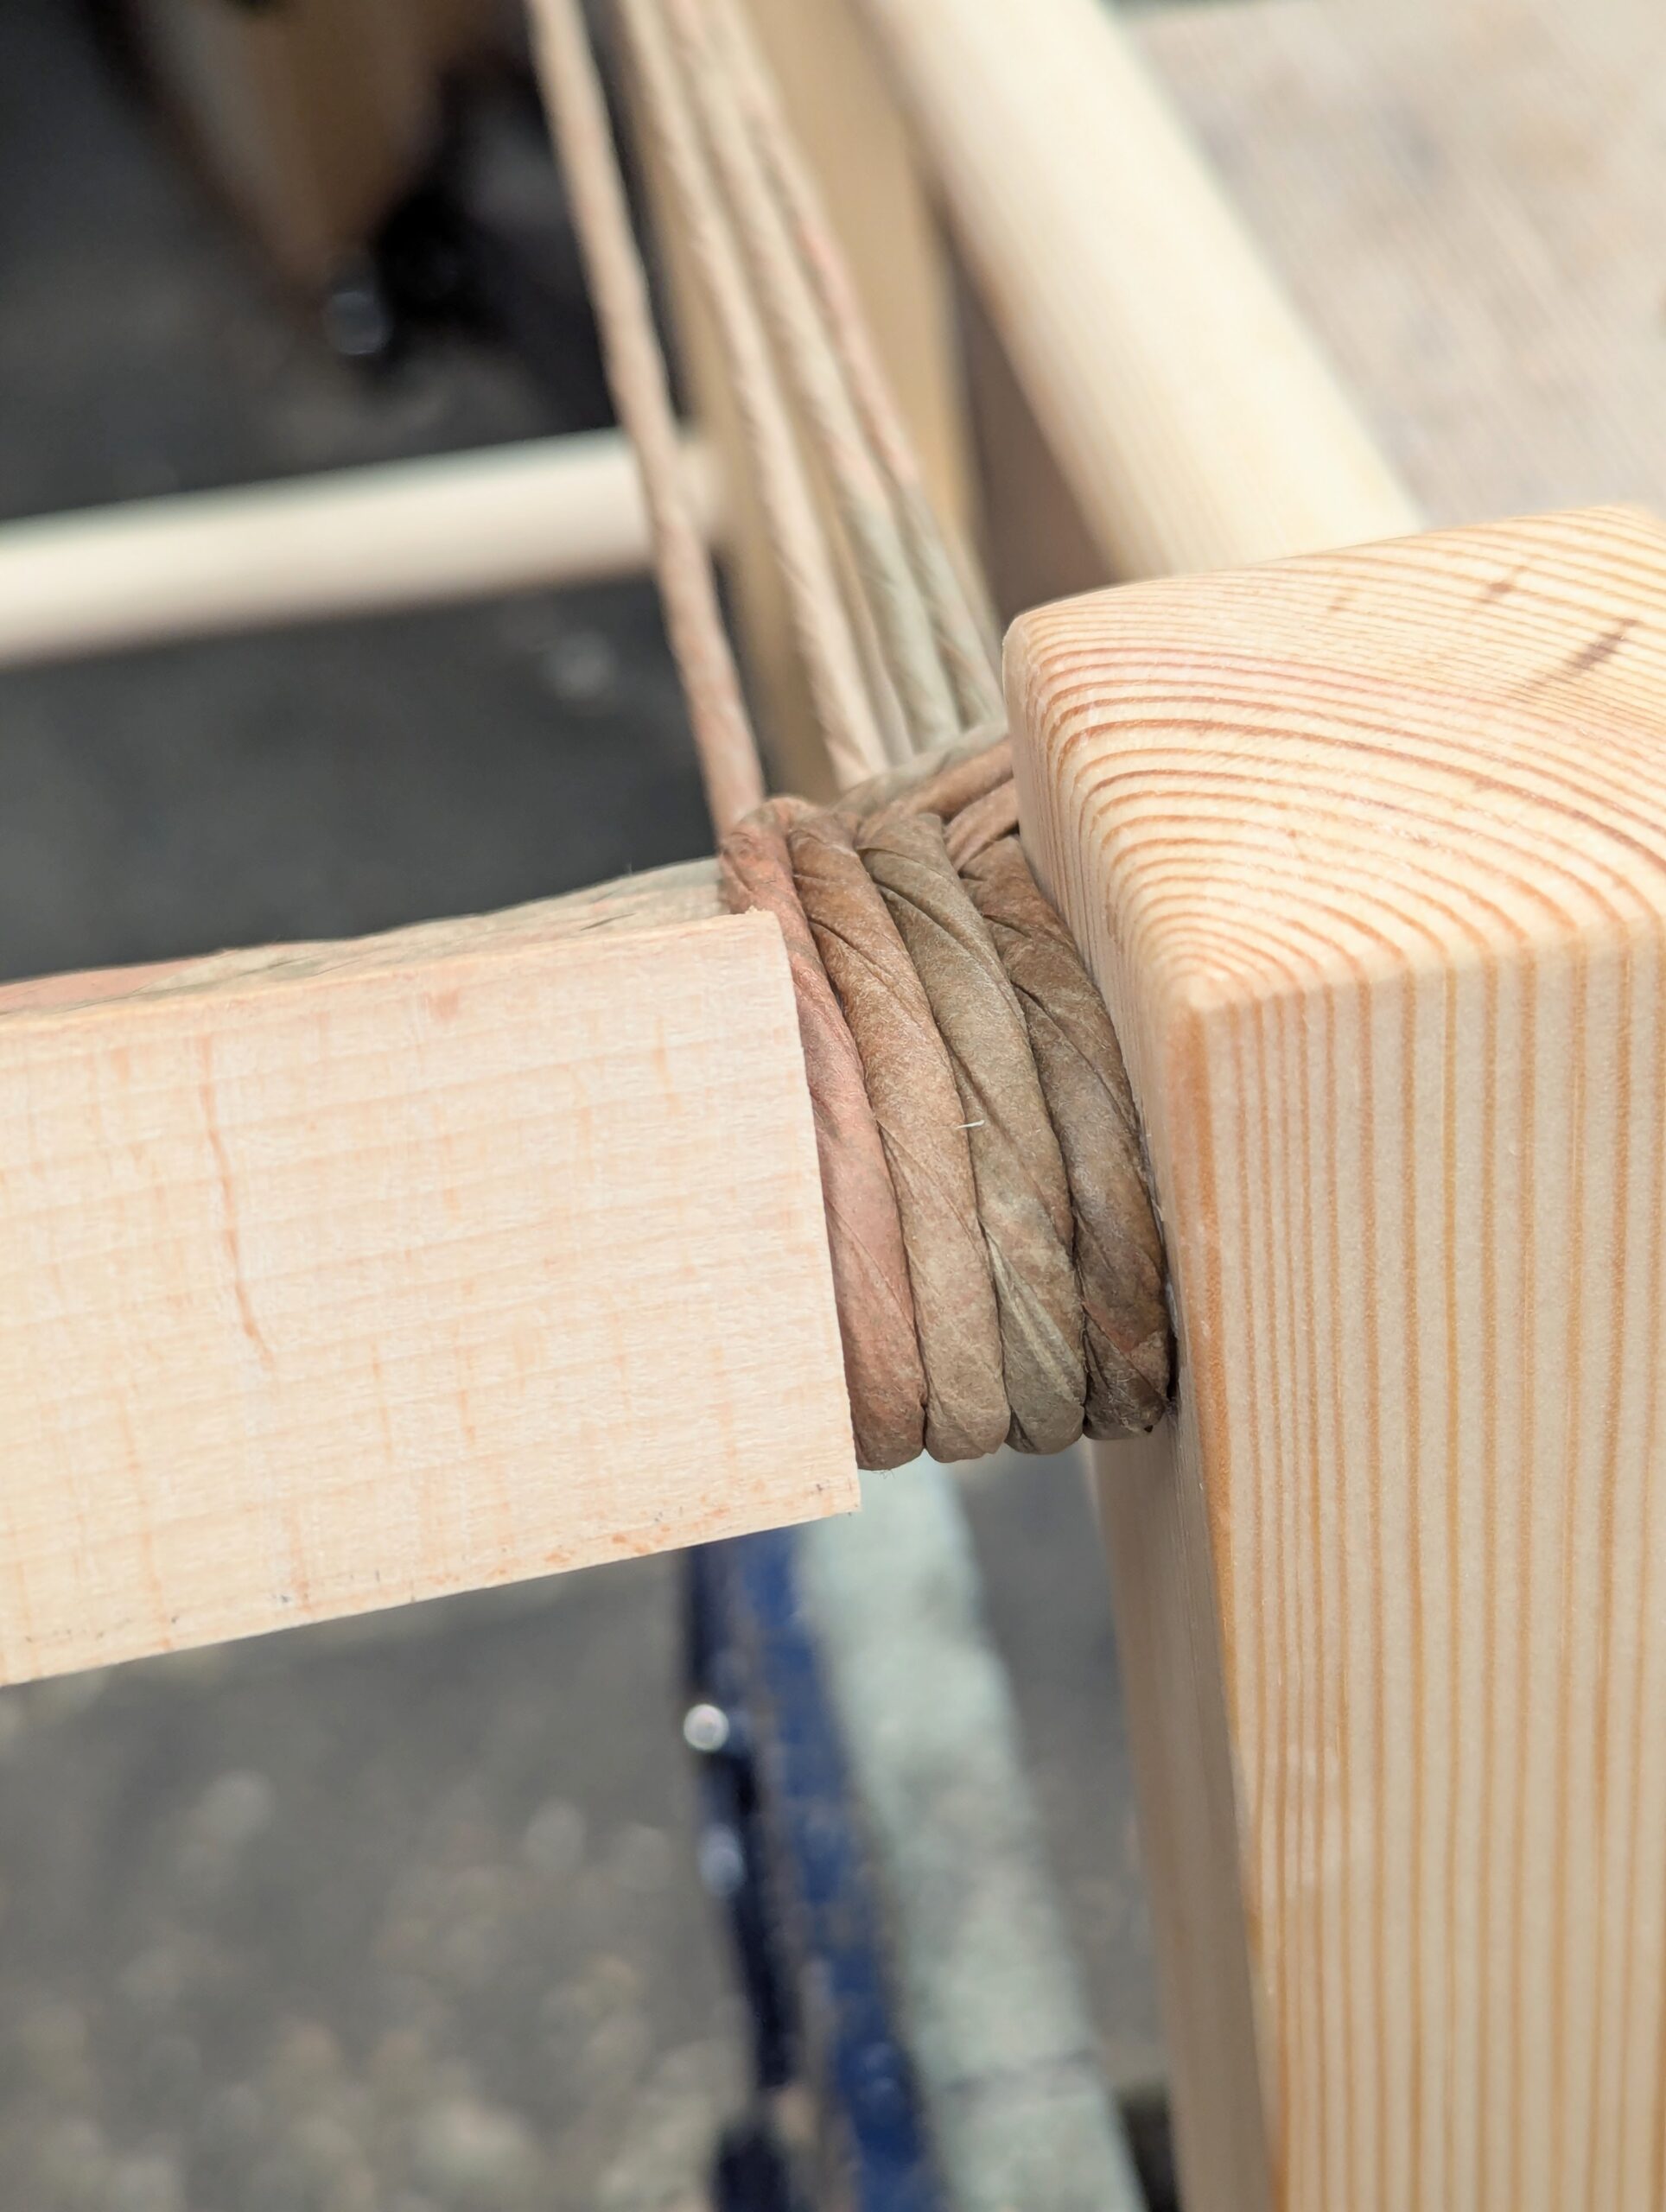
The material I chose is called Danish cord. It's made from three strands of brown paper; the first two are twisted together tightly and the third is a spiralled wrap. It's strong and durable and easier to weave than natural read. The outer is coated with a thin wax finish. You can further coat the Danish cord with shellac or hard wax oil. This darkens the appearance but adds extra protection.
I should preface this article with telling you I am not a seat weaver by craft, I'm a woodworker, but I found the pattern I am suing to be easy to do with the strong hands and arms I have developed as a woodworker working 98% of the time using only hand tool.
Some of my methods may well not be a seat weaver's, but they work well.
In my daily work, I am always standing and never, ever sitting. I wove one seat, a chair, sitting on an adjacent chair. I found it caused backache, something I never have had in 60 years of woodworking. Once I locked one leg in the vise, I found it very comfortable and much easier to work. Subsequent chairs and stools were done the same way.
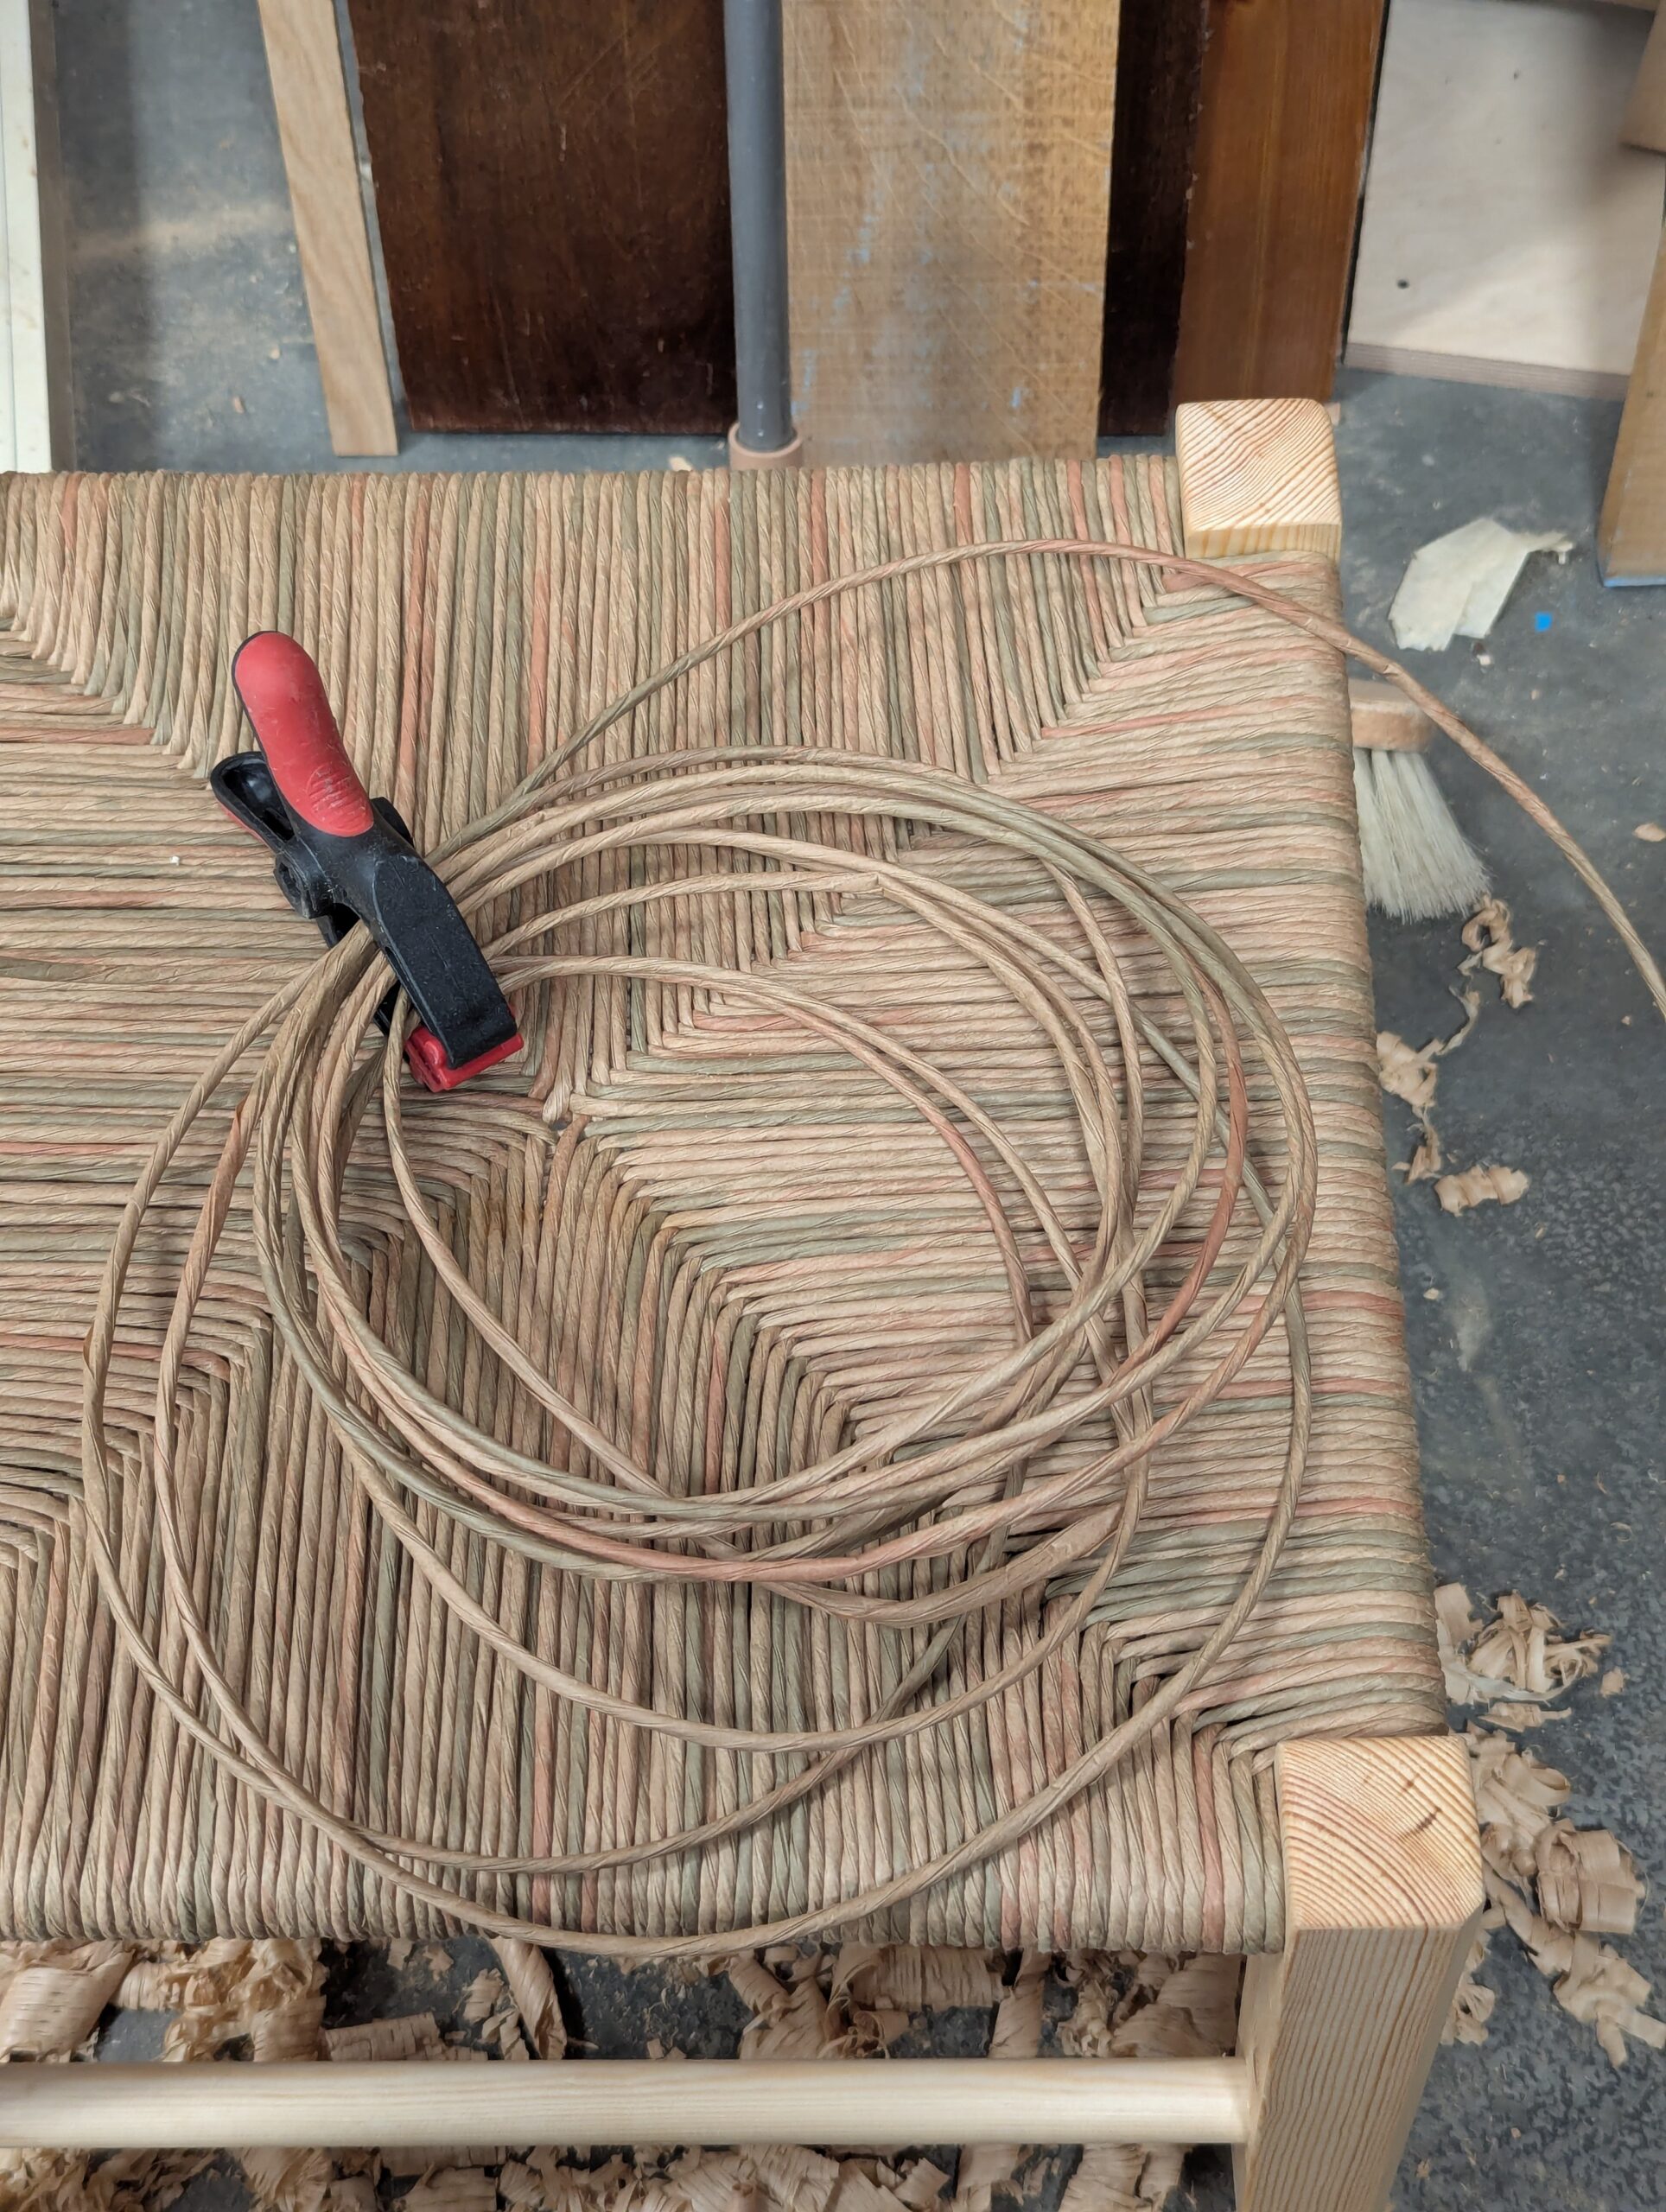
I peeled off a coil of 30 feet, extracting it from the main body of cord as a hank in a smaller coil, taking care to allow the 'rope' to keep its twist and disallow any untwisting as I went. This length of coil will allow three or so circuits in the seat. Adding more coil is simply a question of tying a reef (square, USA) knot as needed and tucking it beneath the weaving as you go.
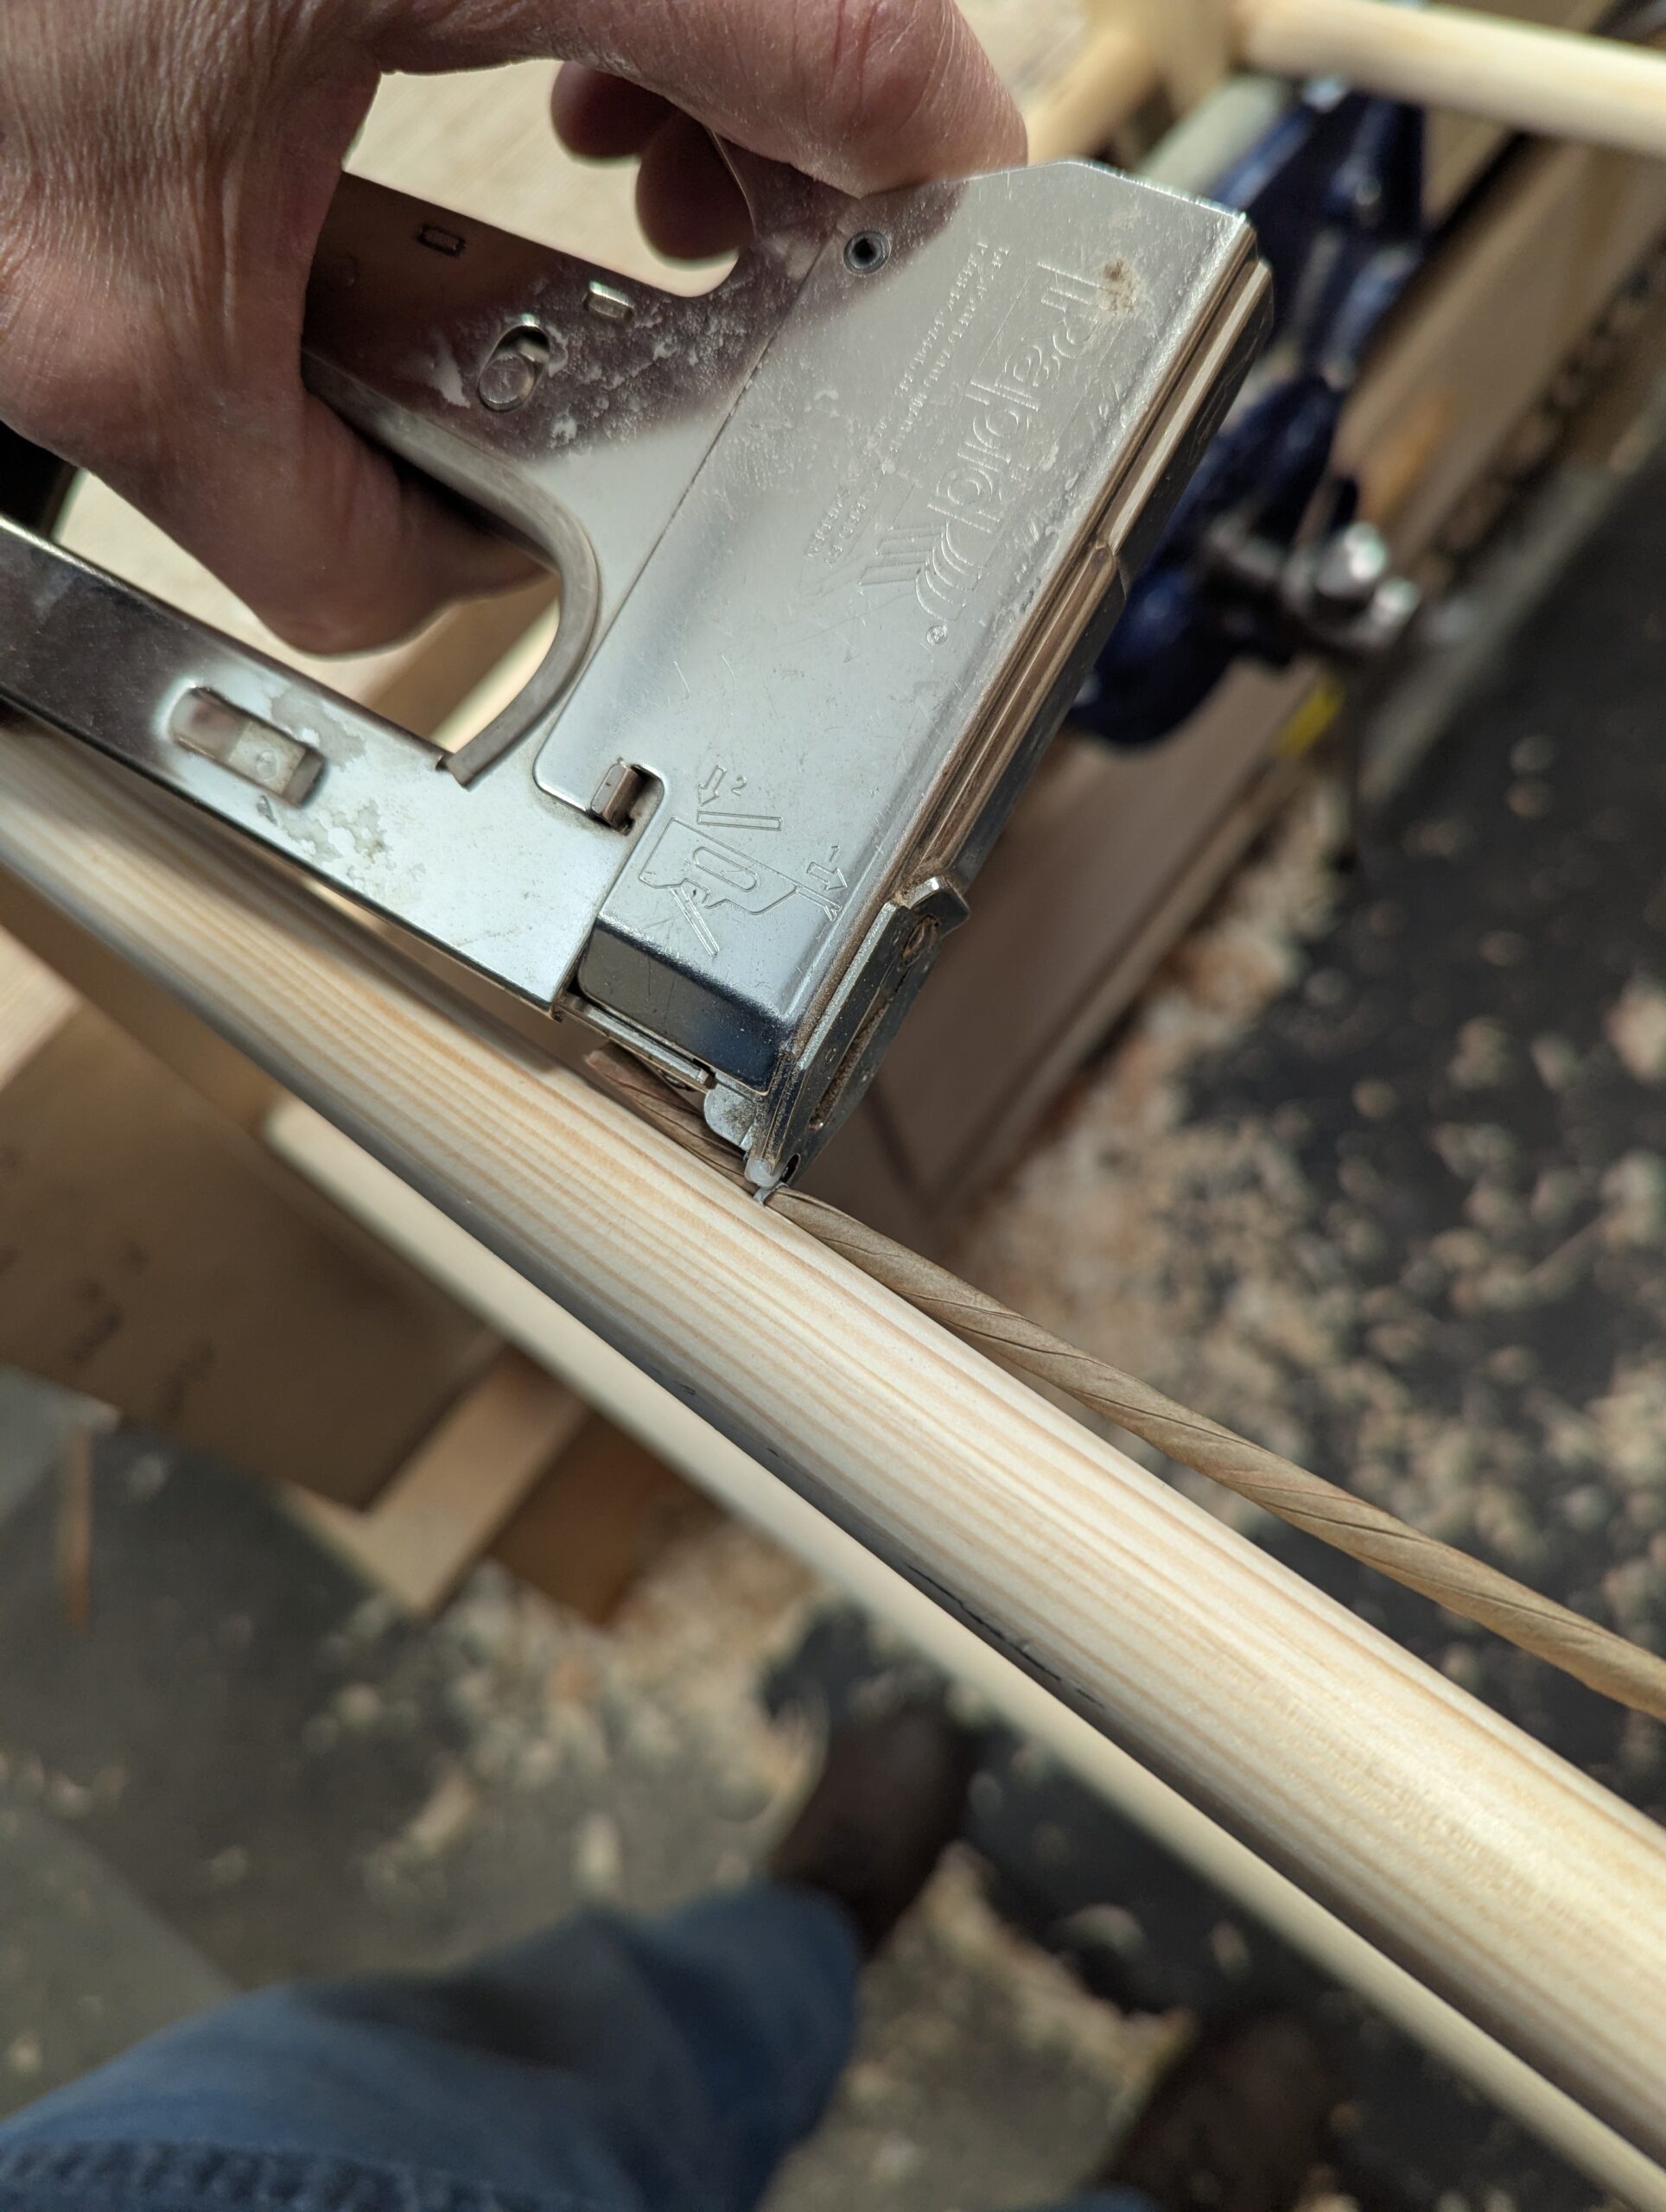
I own a cable stapler and this works well, but you can cant a regular stapler at an angle and this works well too. Alternatively, you can nail the cord with wide headed carpet tacks.
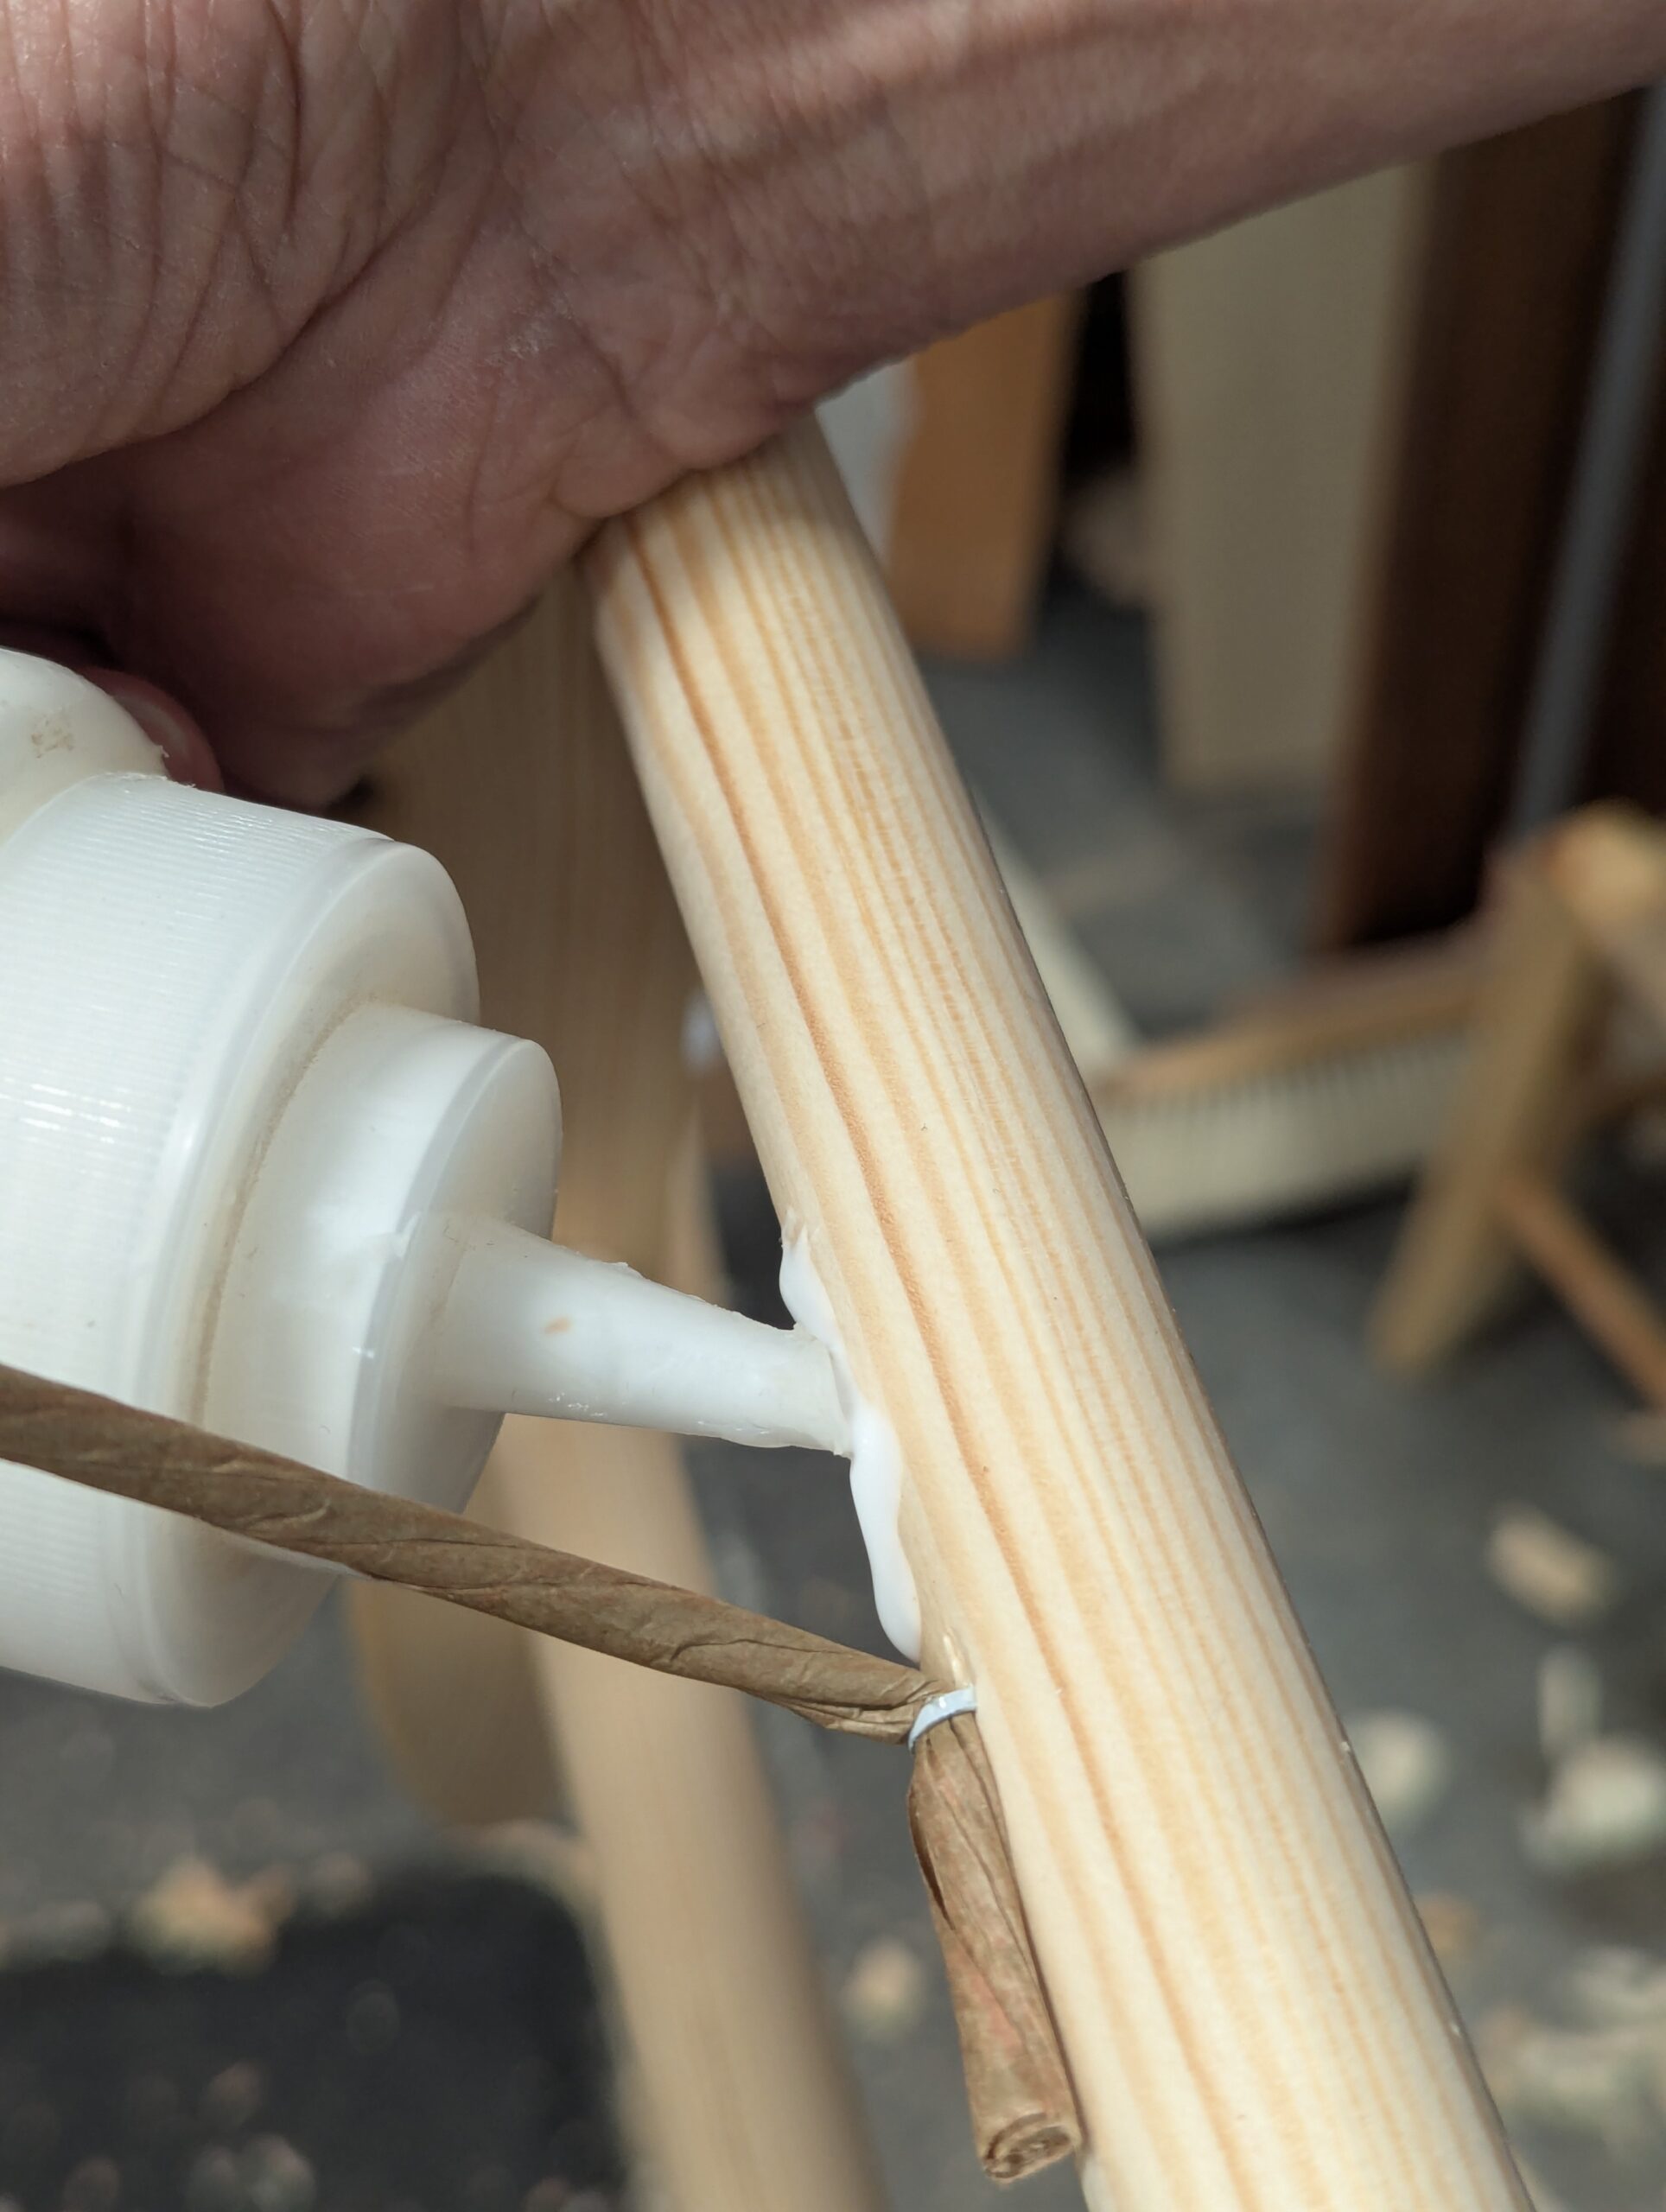
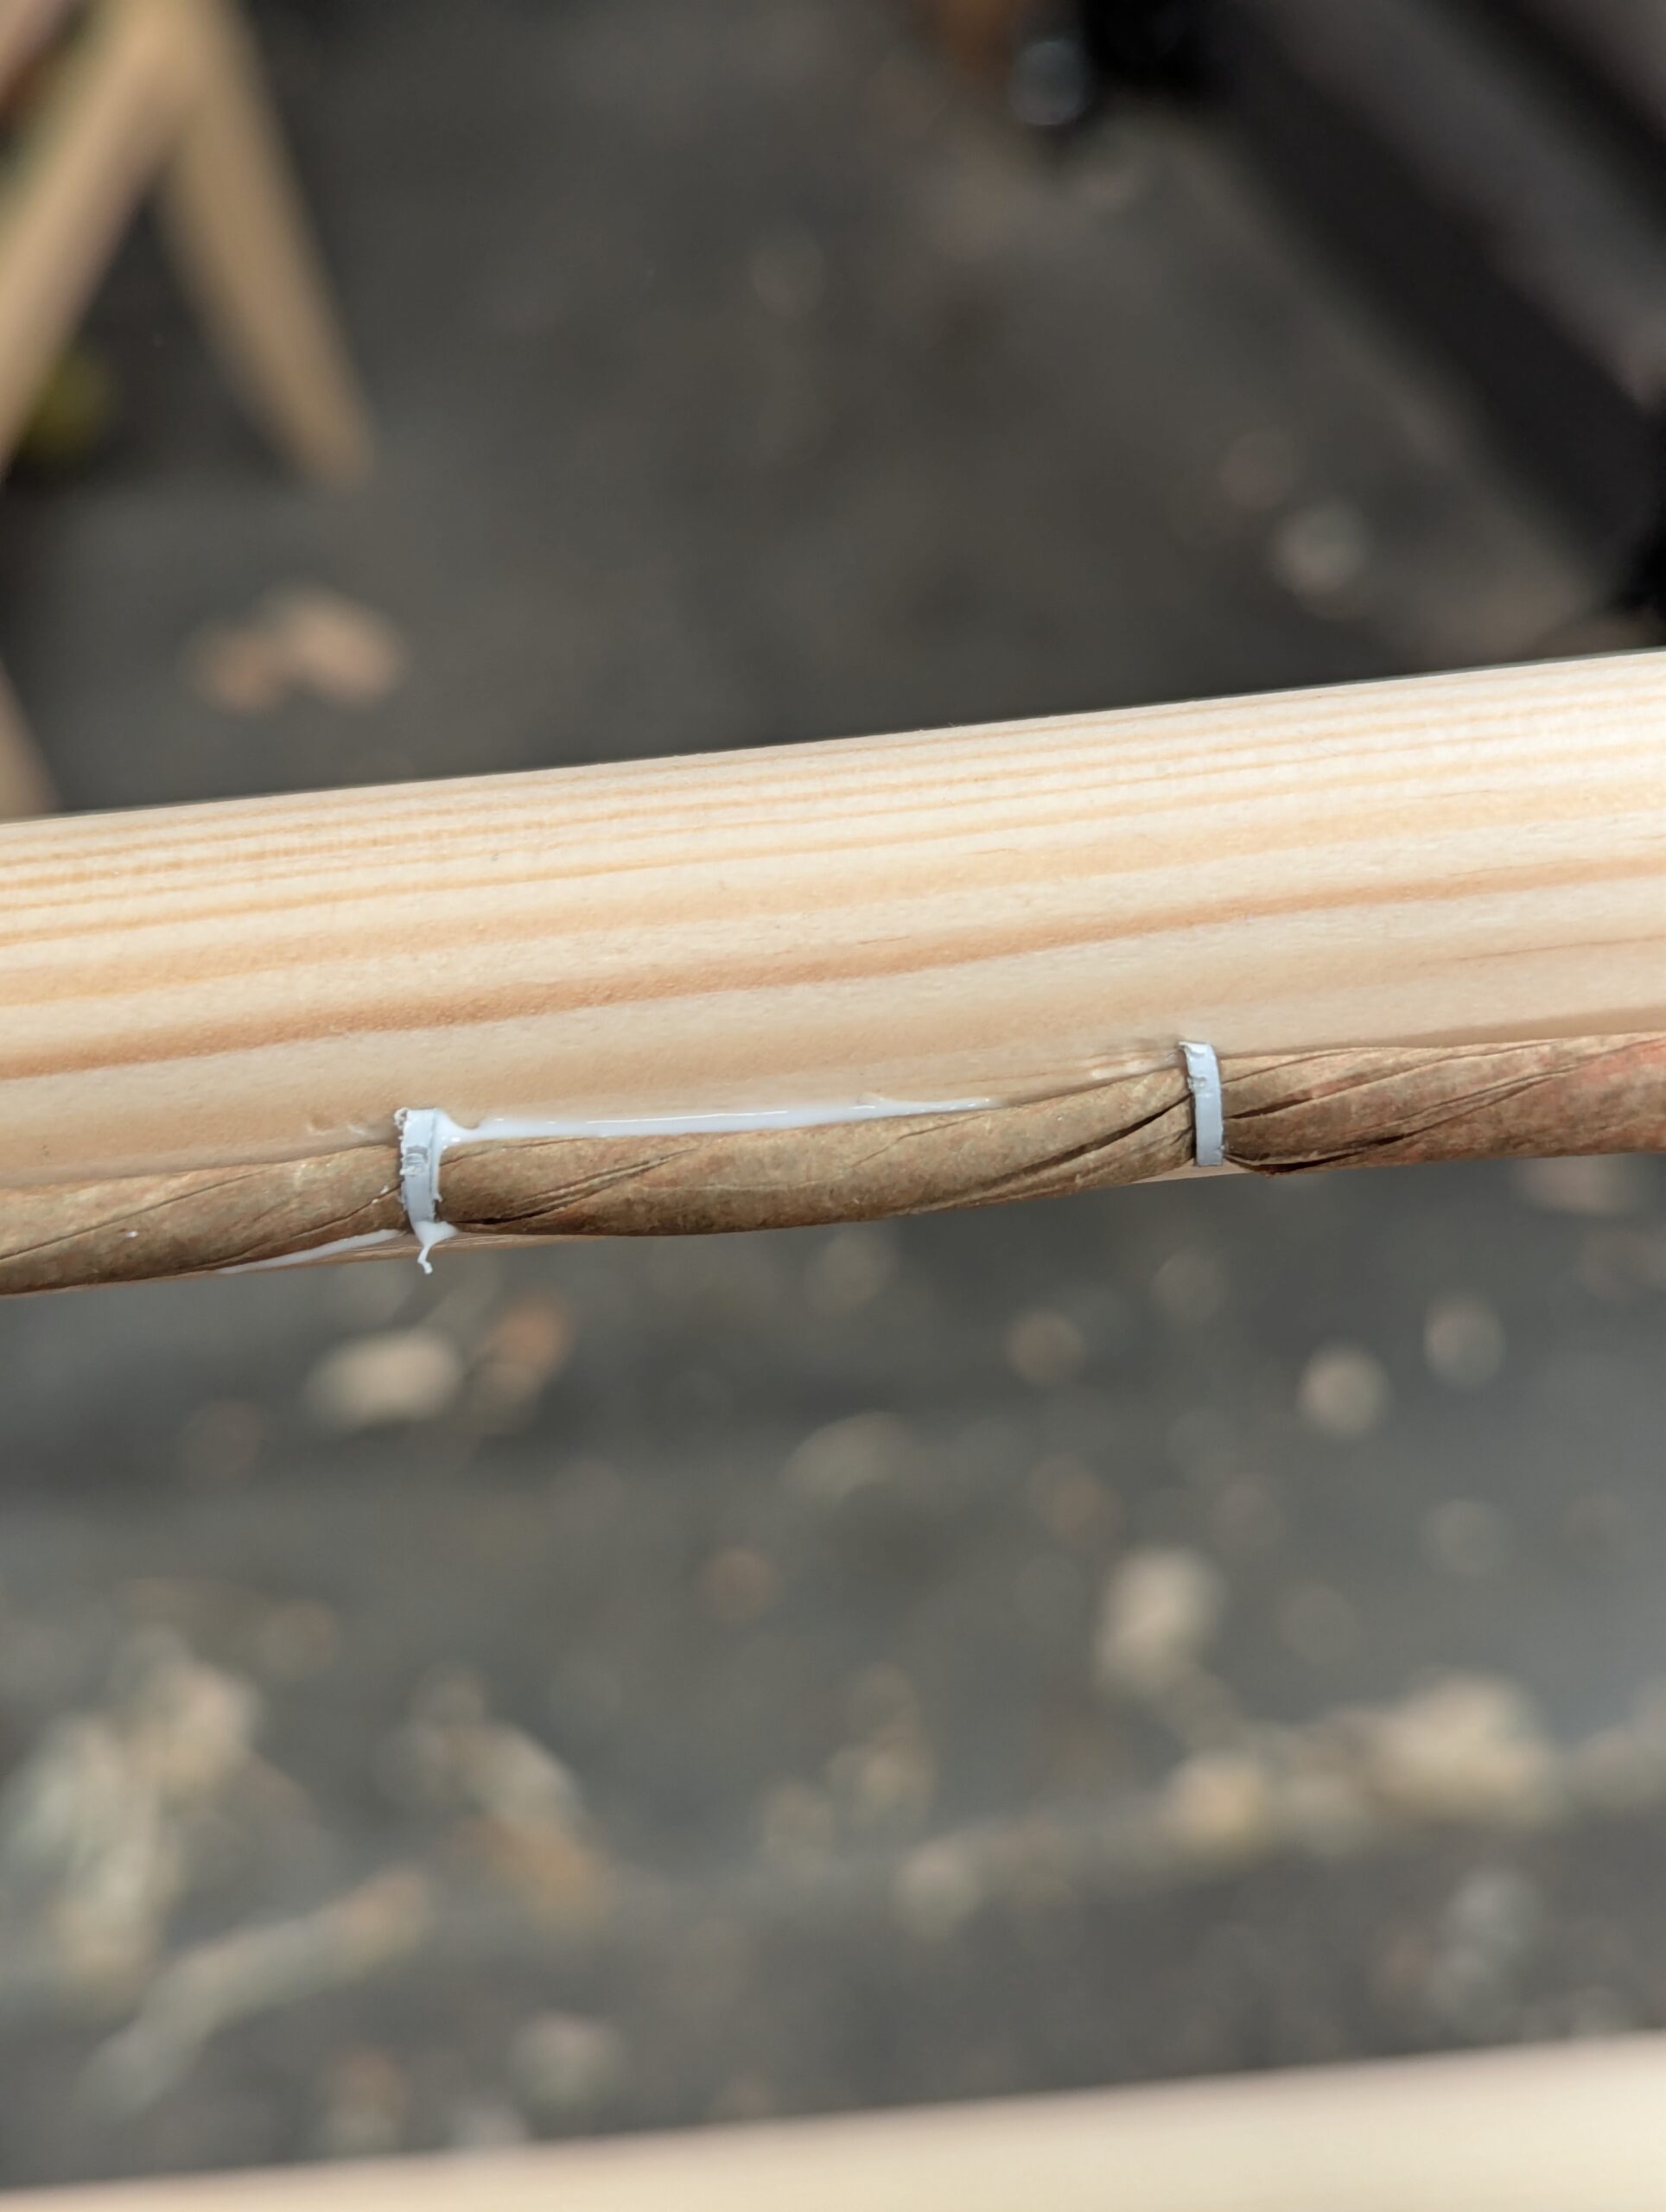
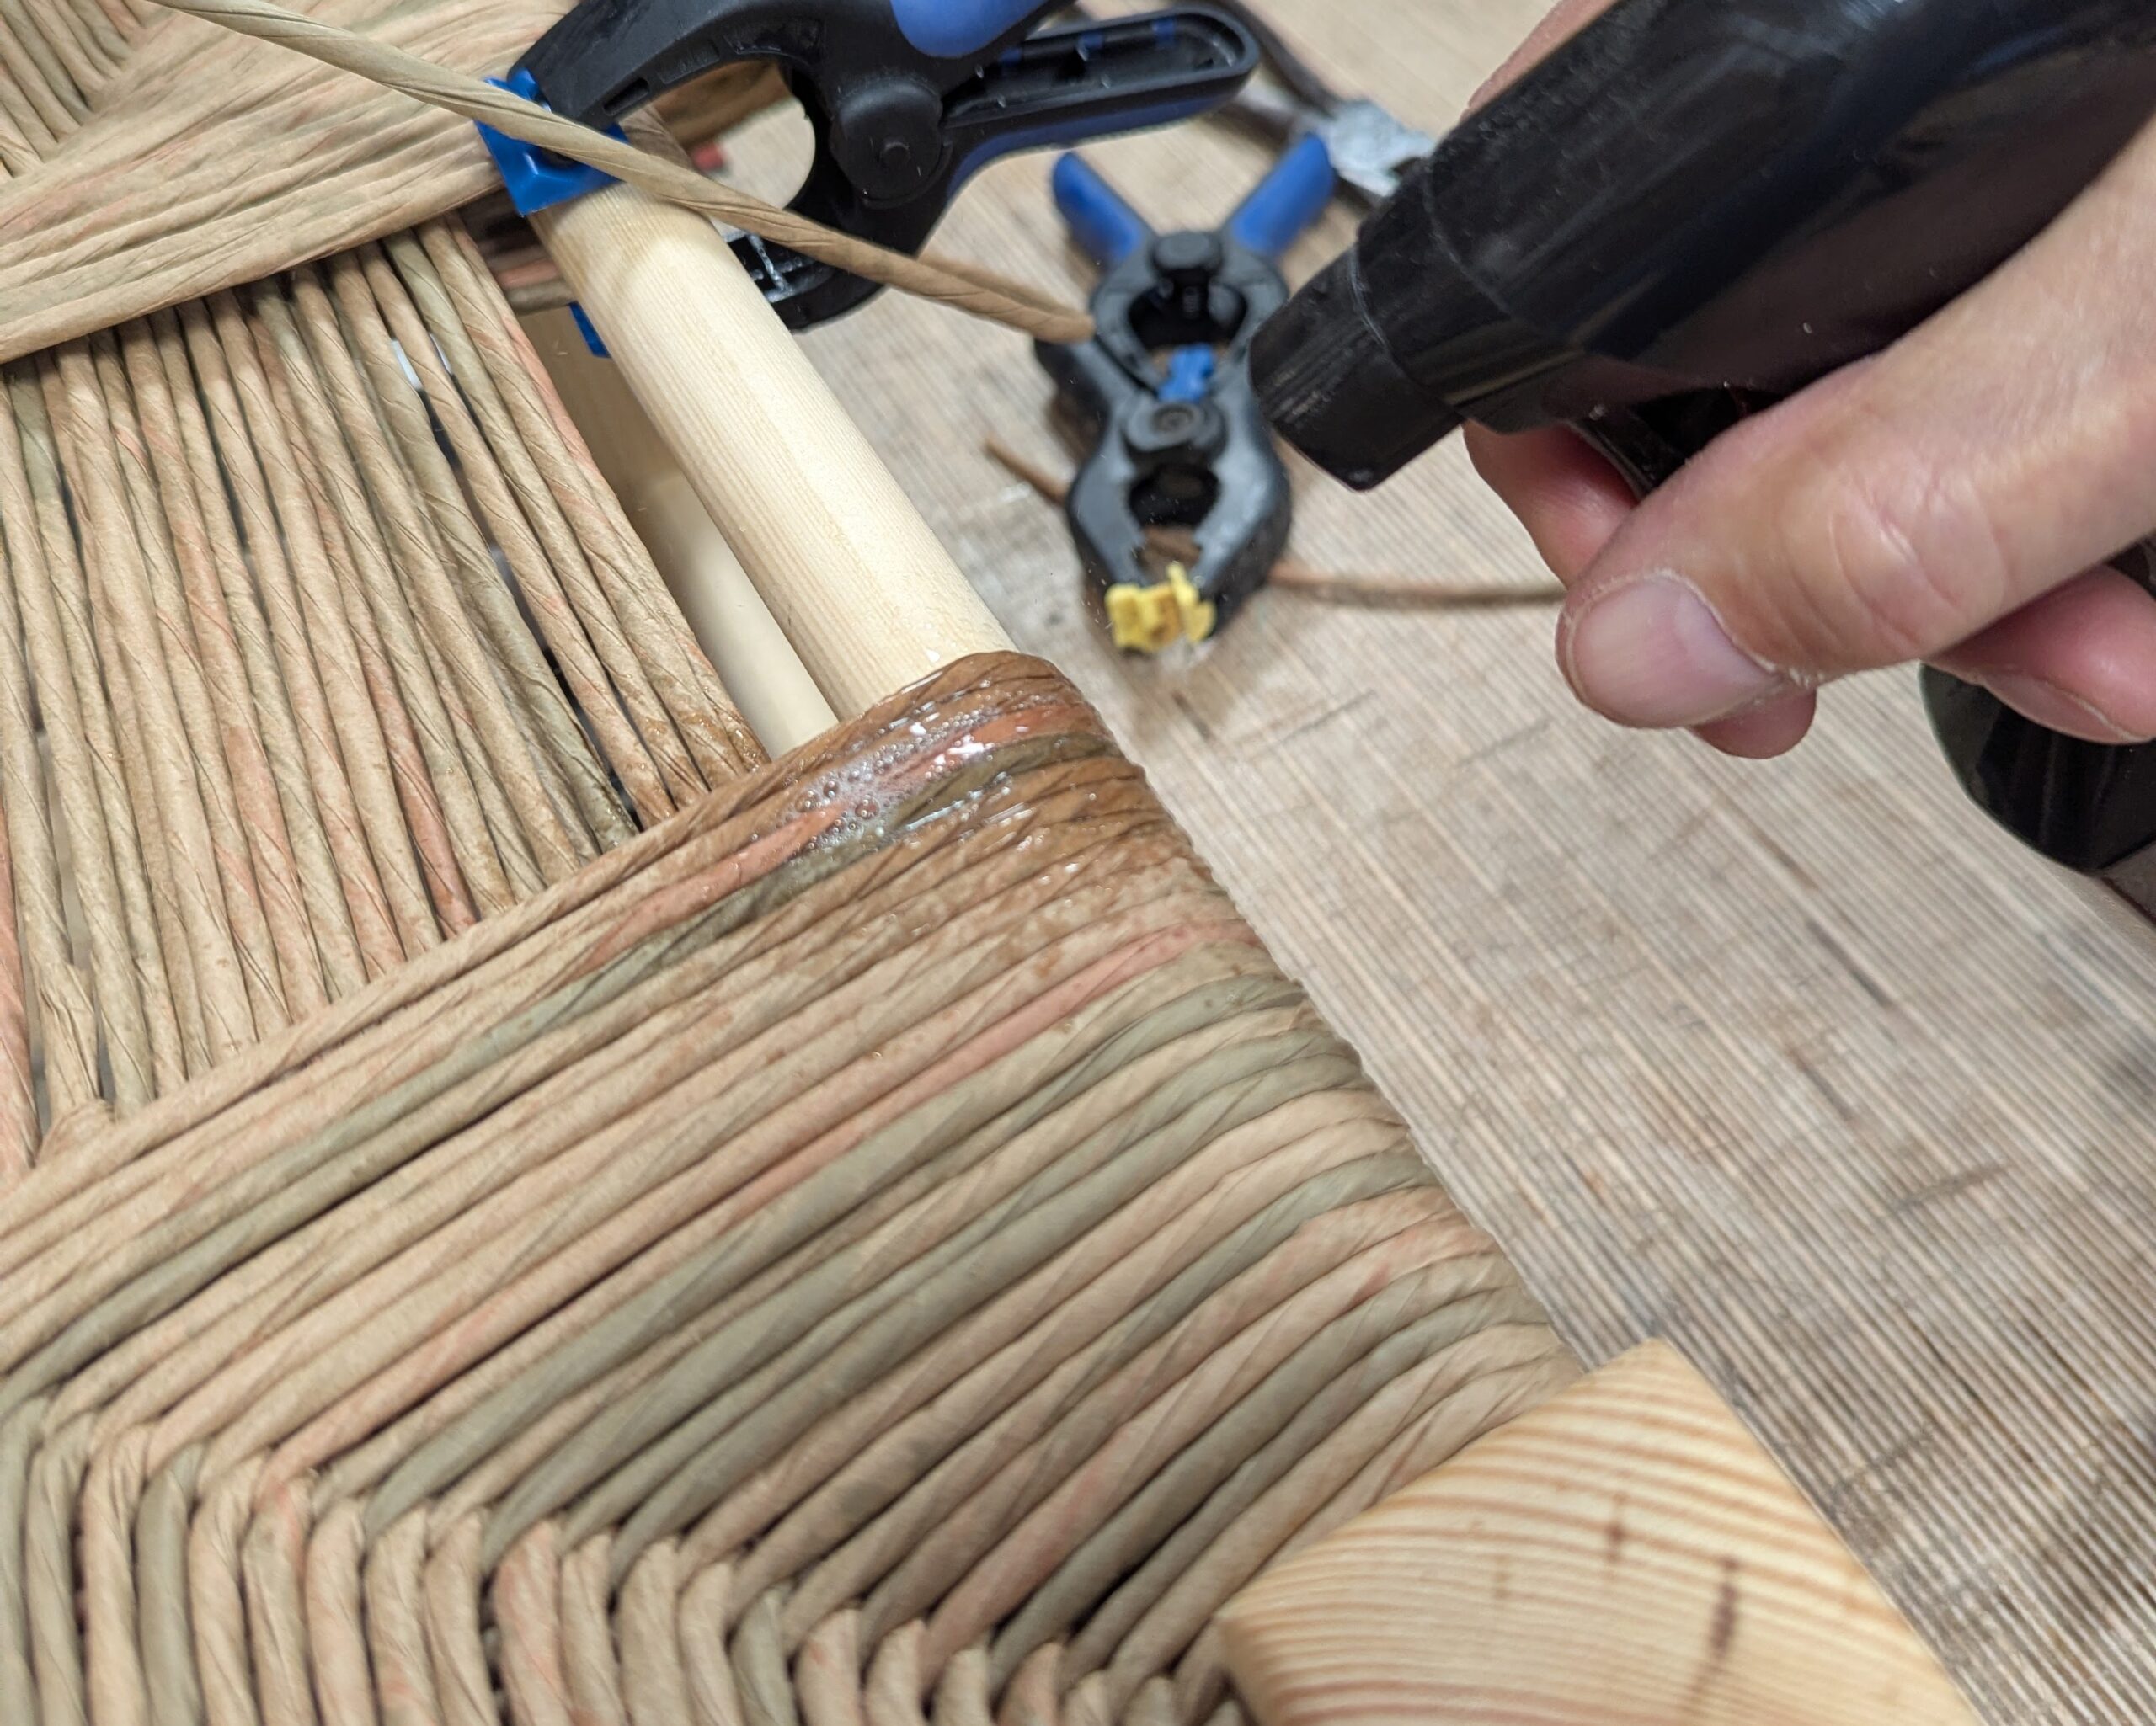
After stapling with one staple first, I added a bead of glue along the inside of the top rail as shown and stapled the cord a second time against the glue.
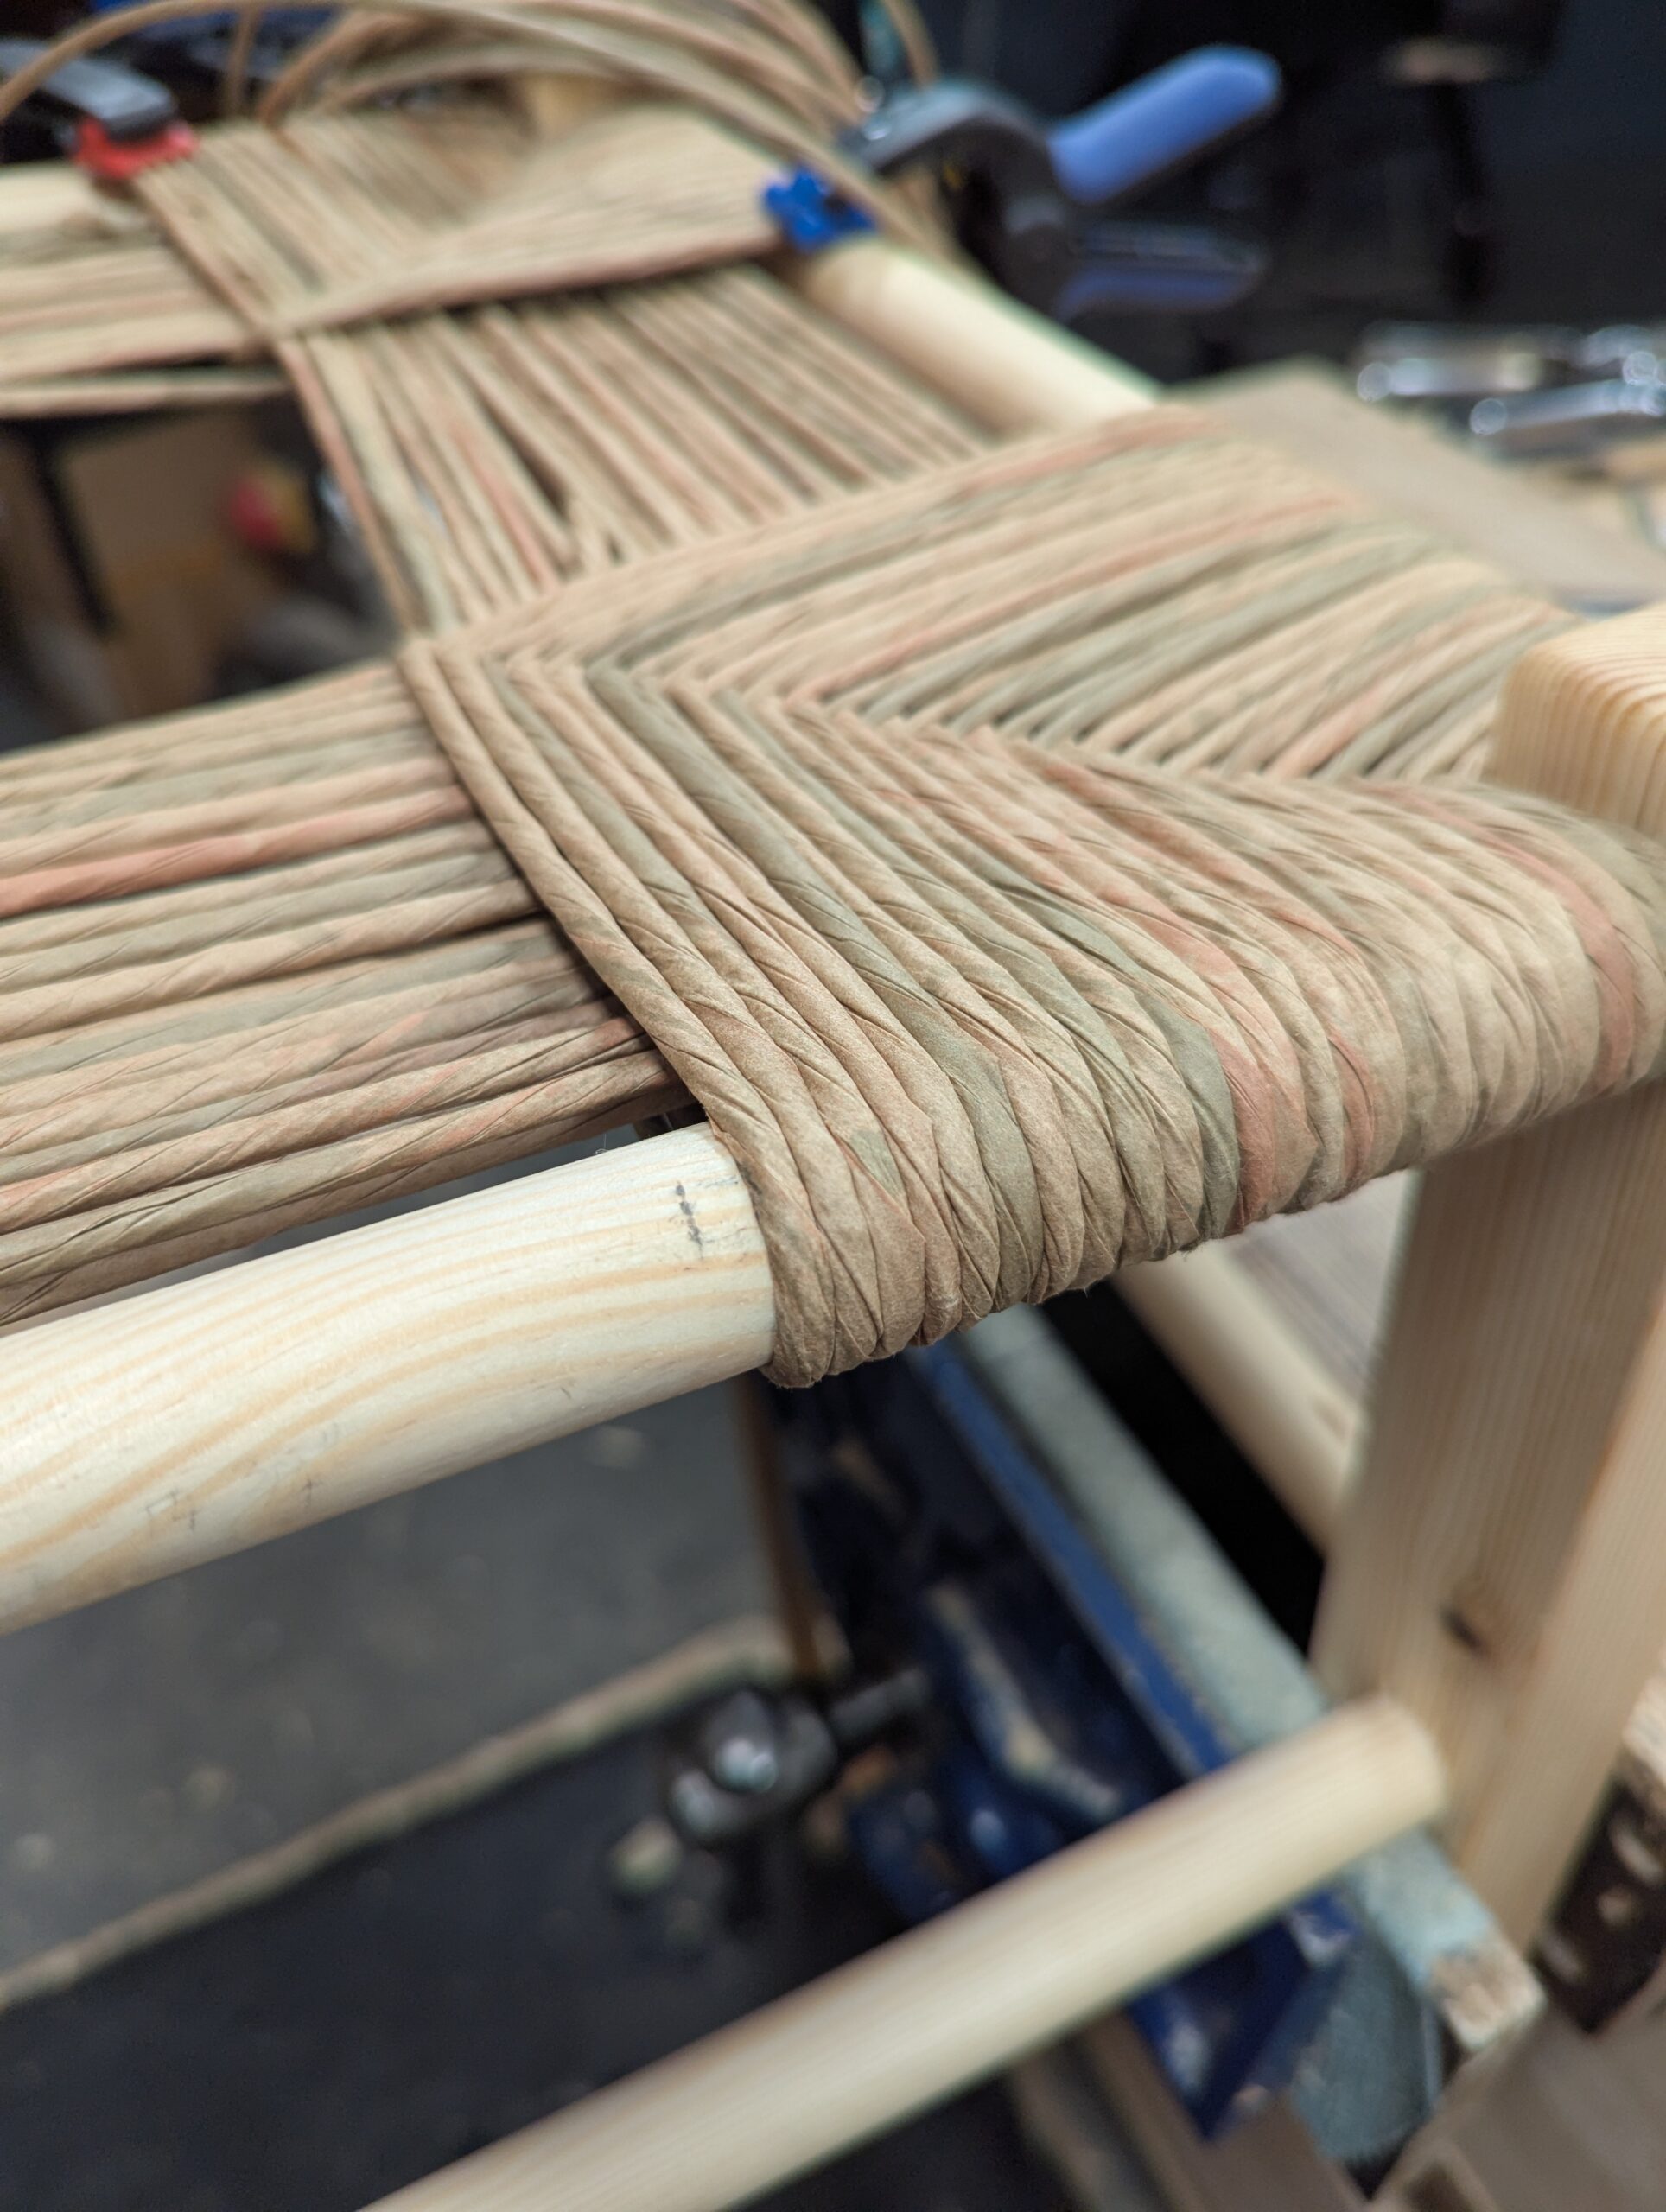
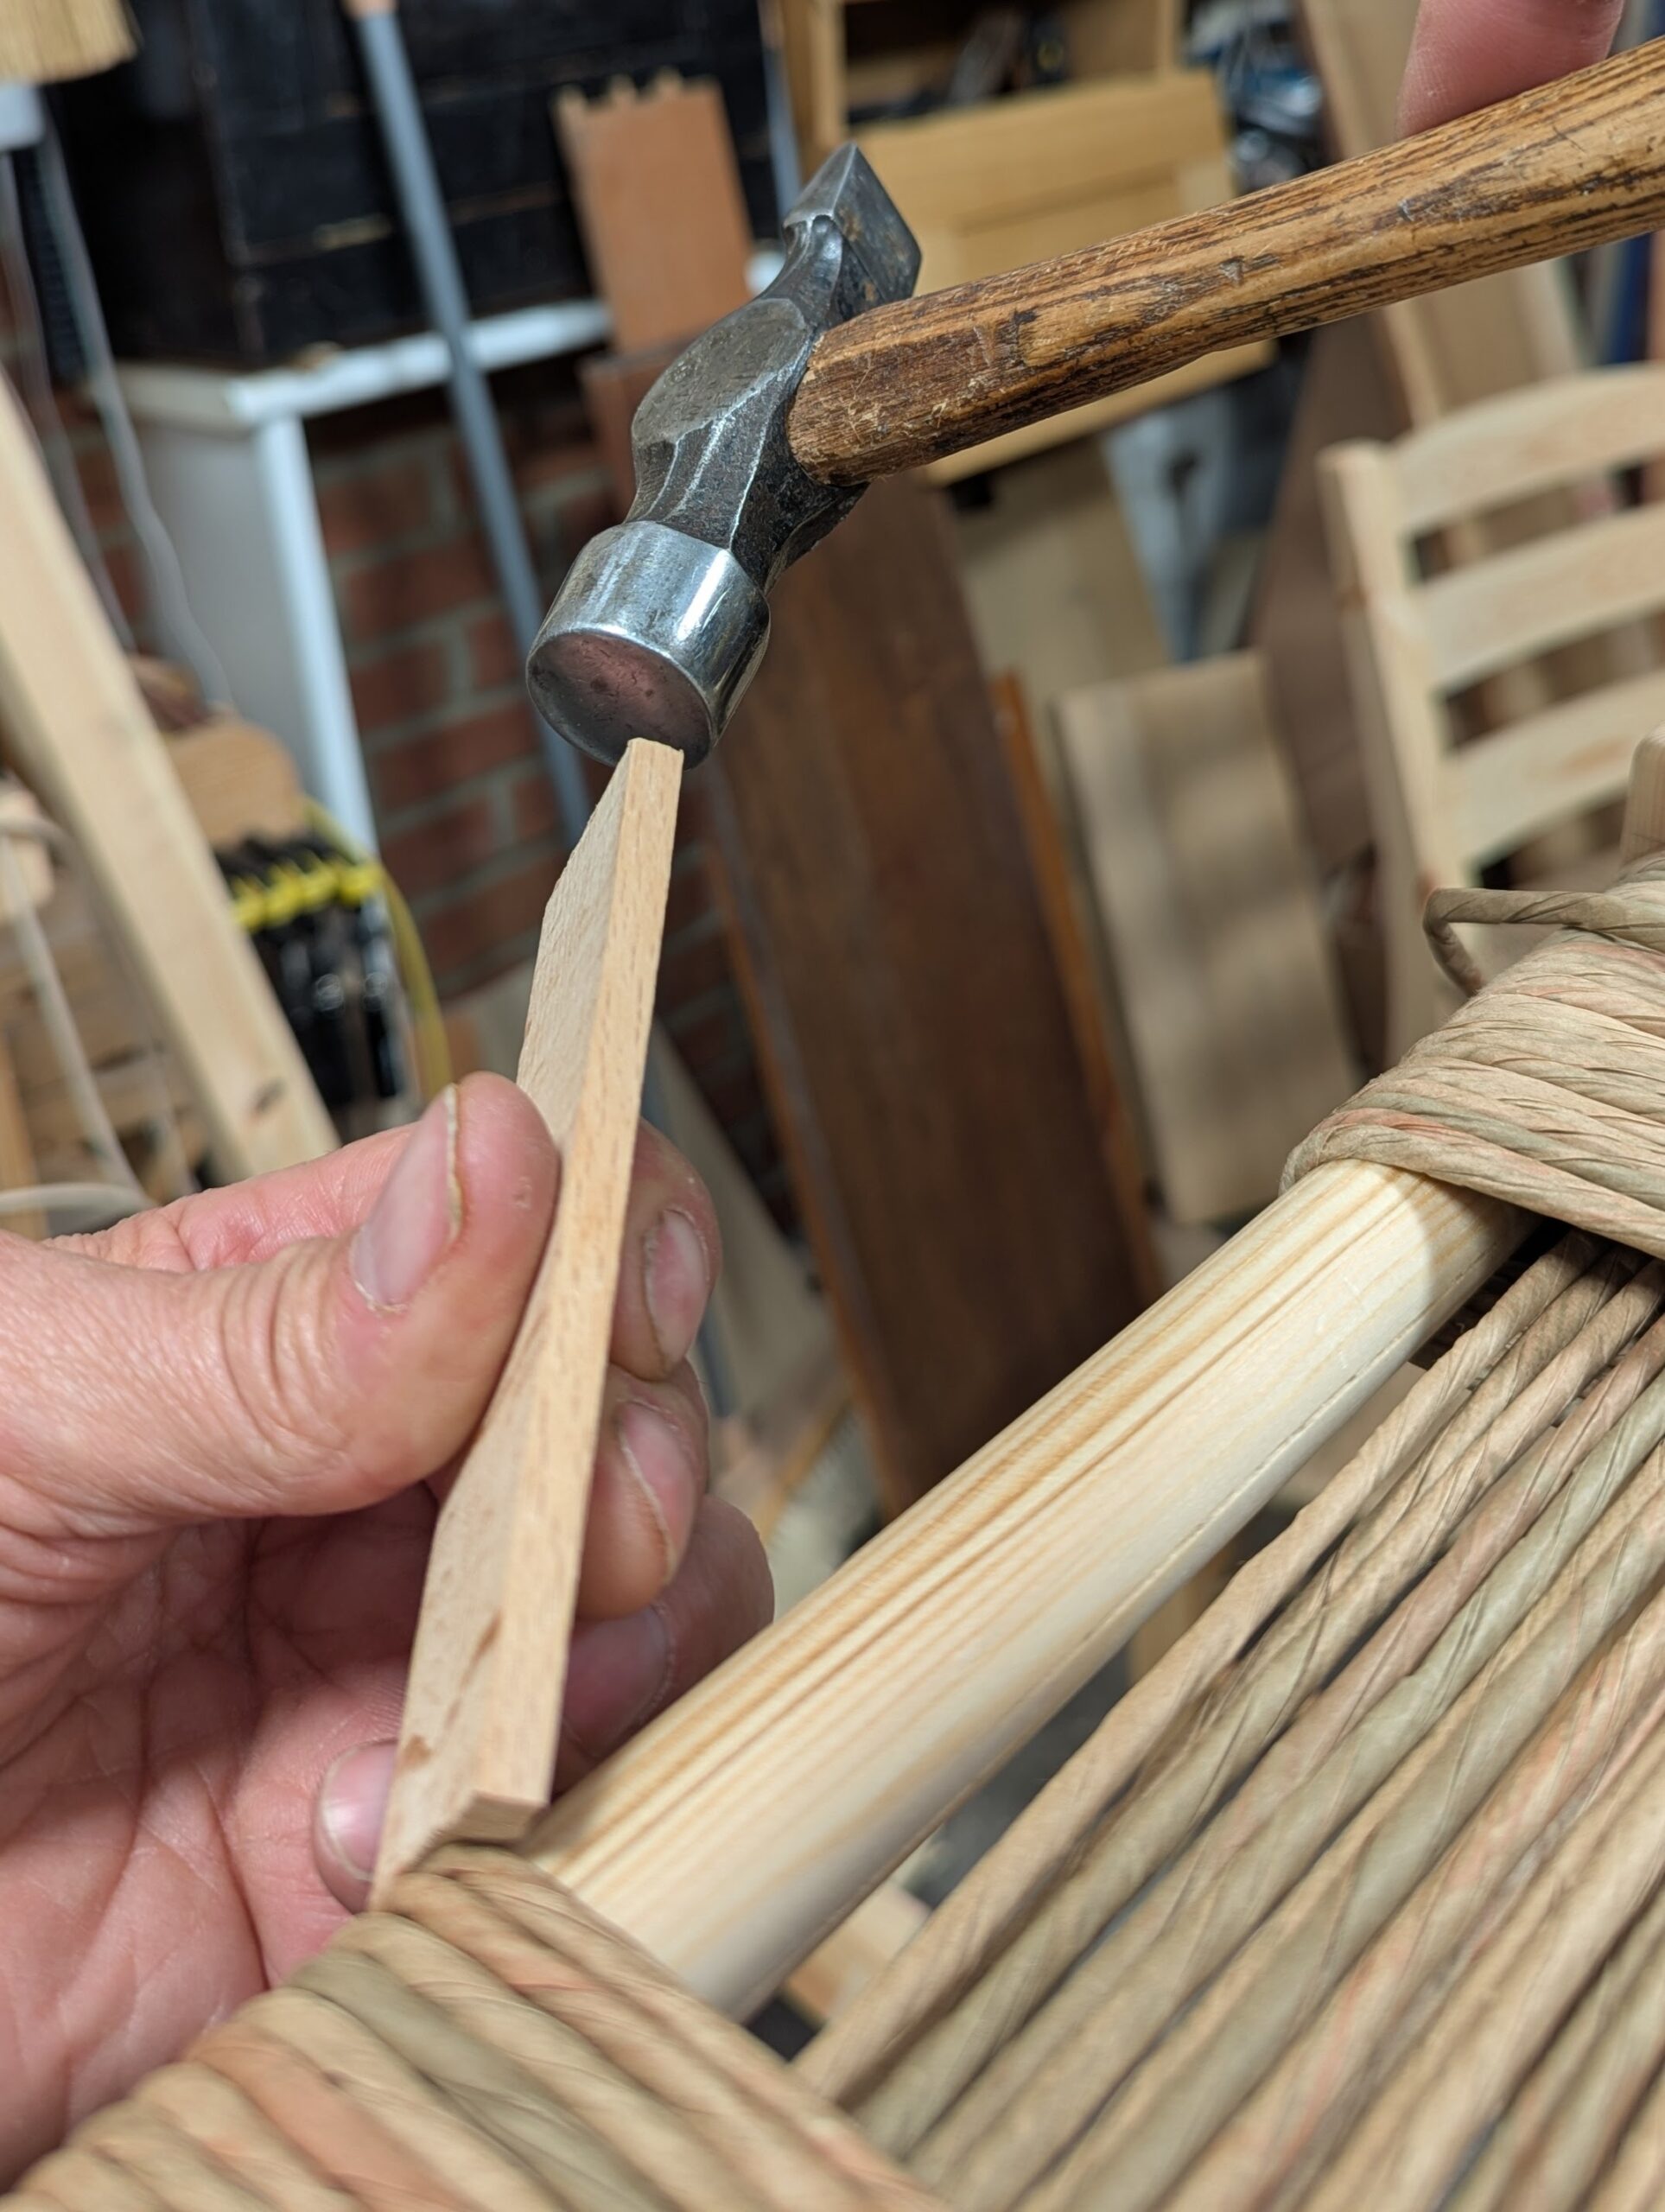
Now the weaving begins. All the way through, we follow the same pattern until the seat is woven. Intermittently, we tighten the strands as we go, with a hammer and a stick of wood.
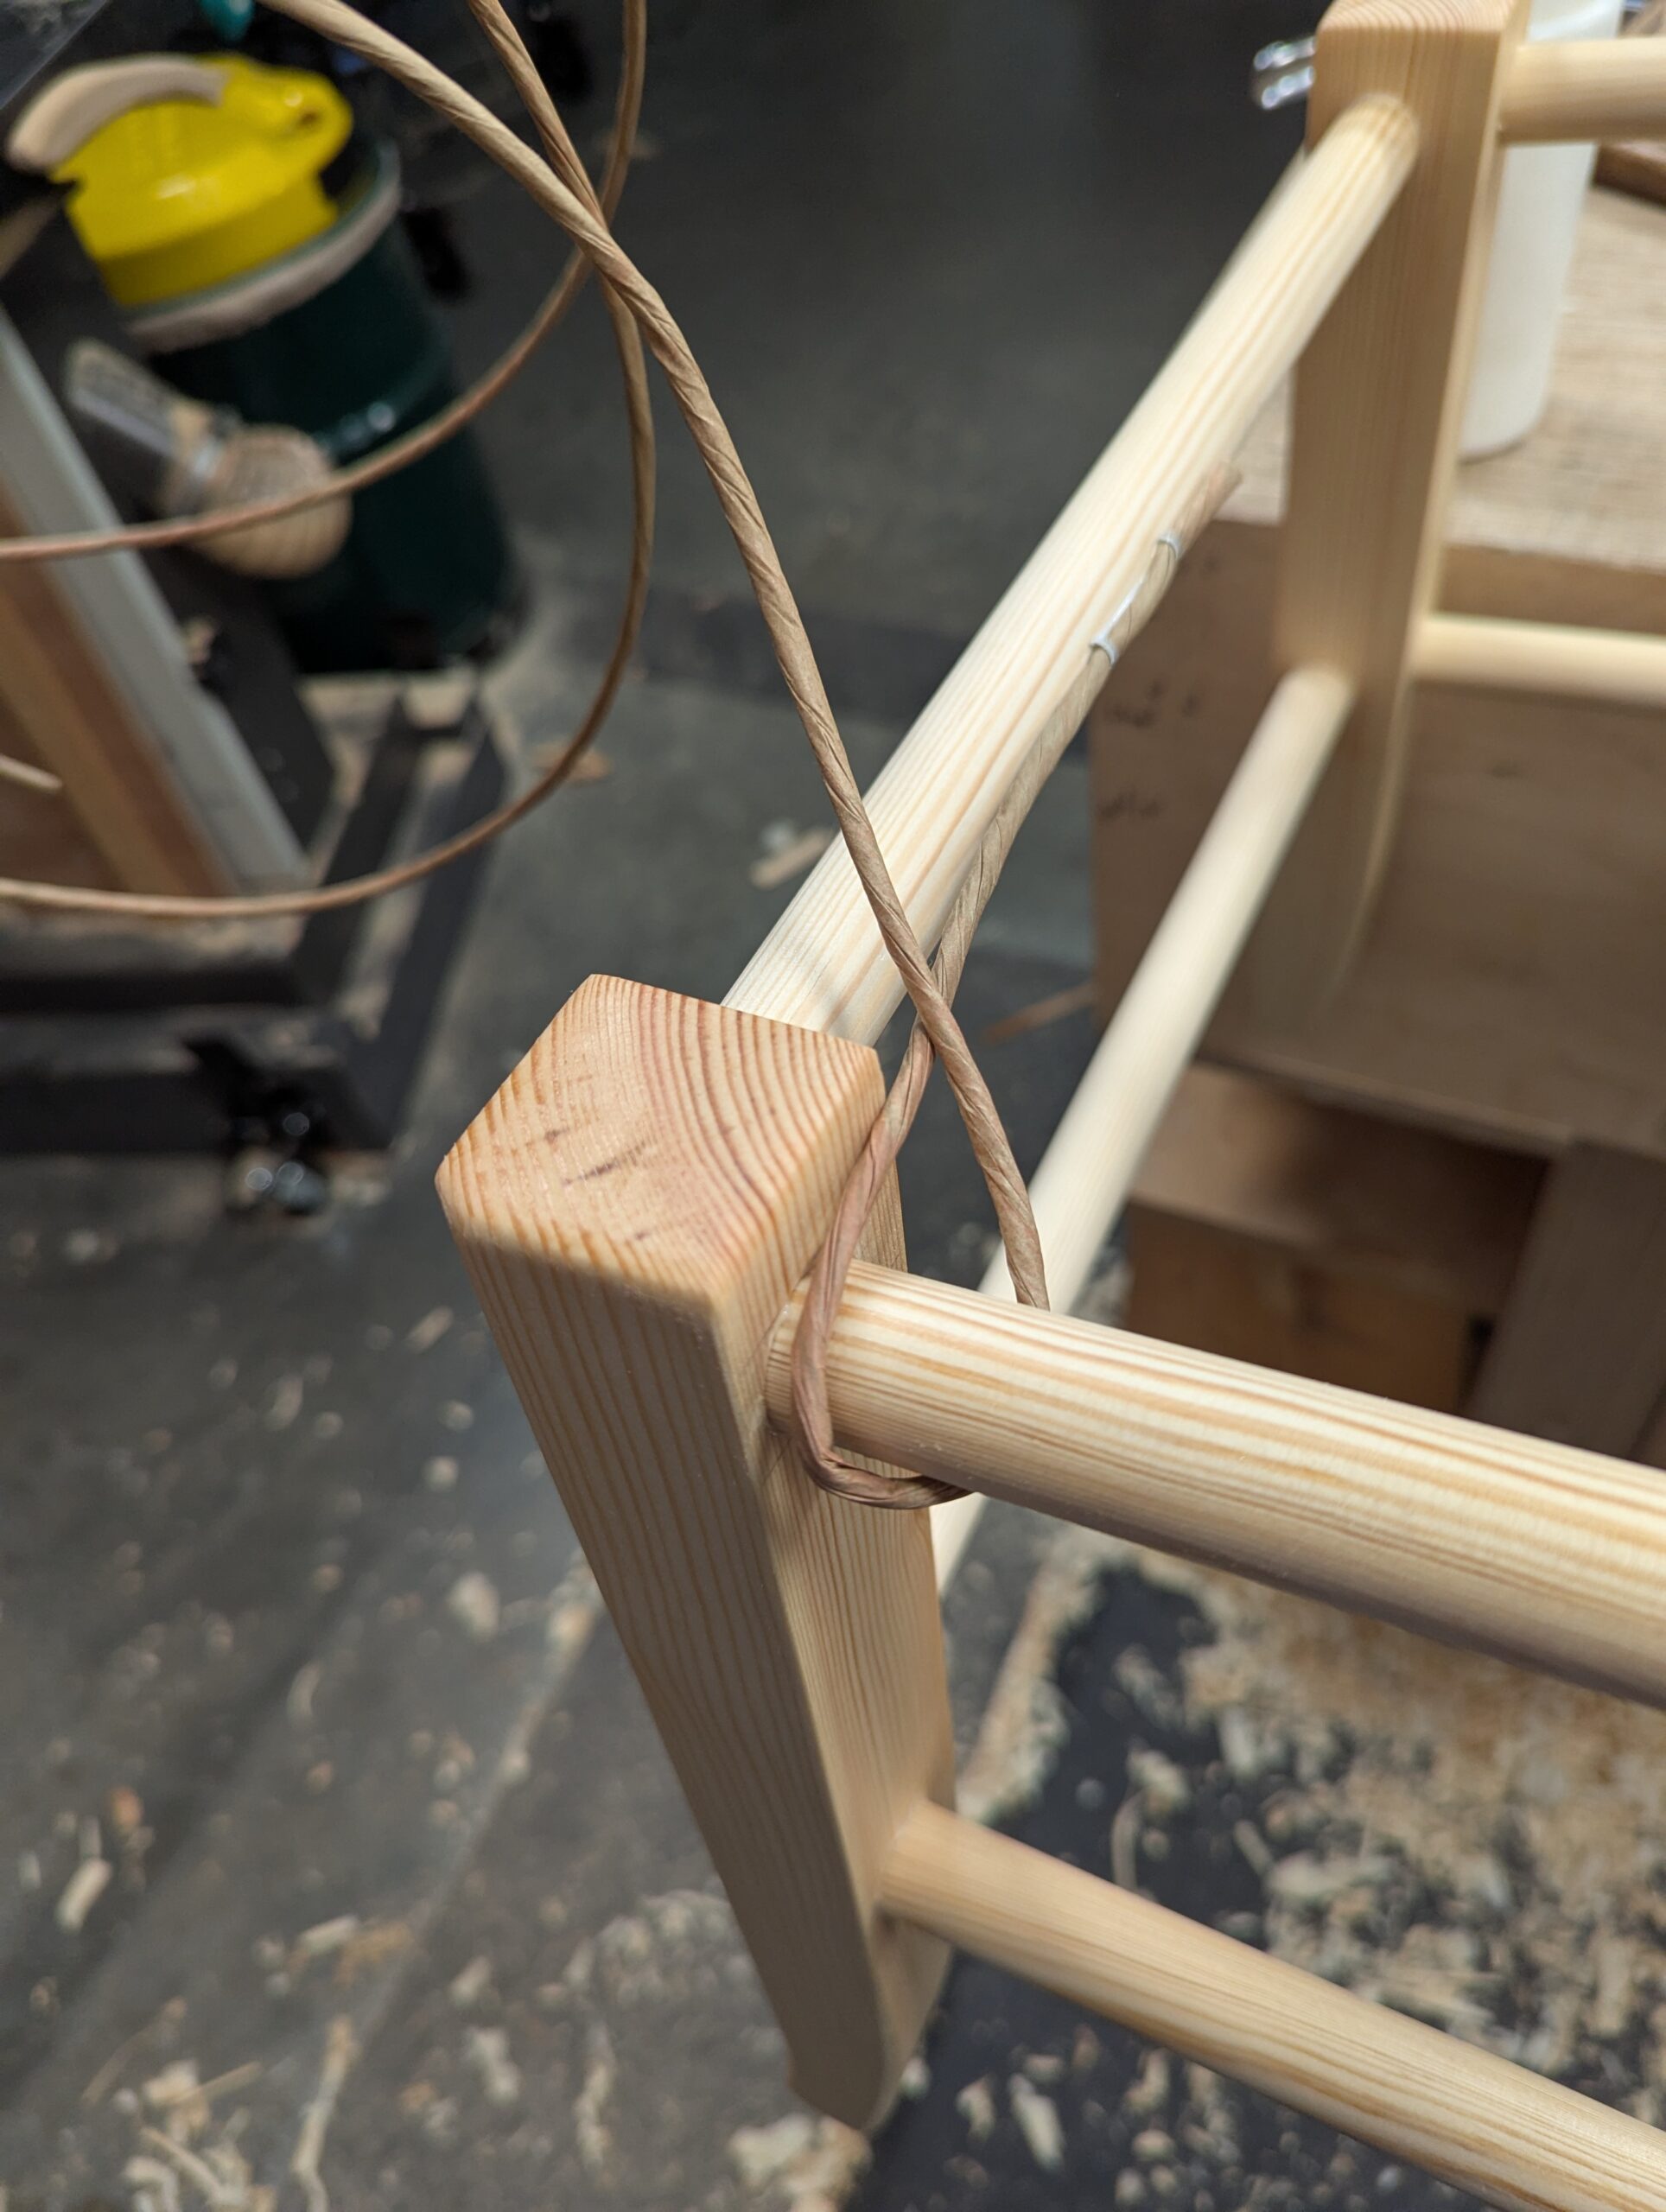
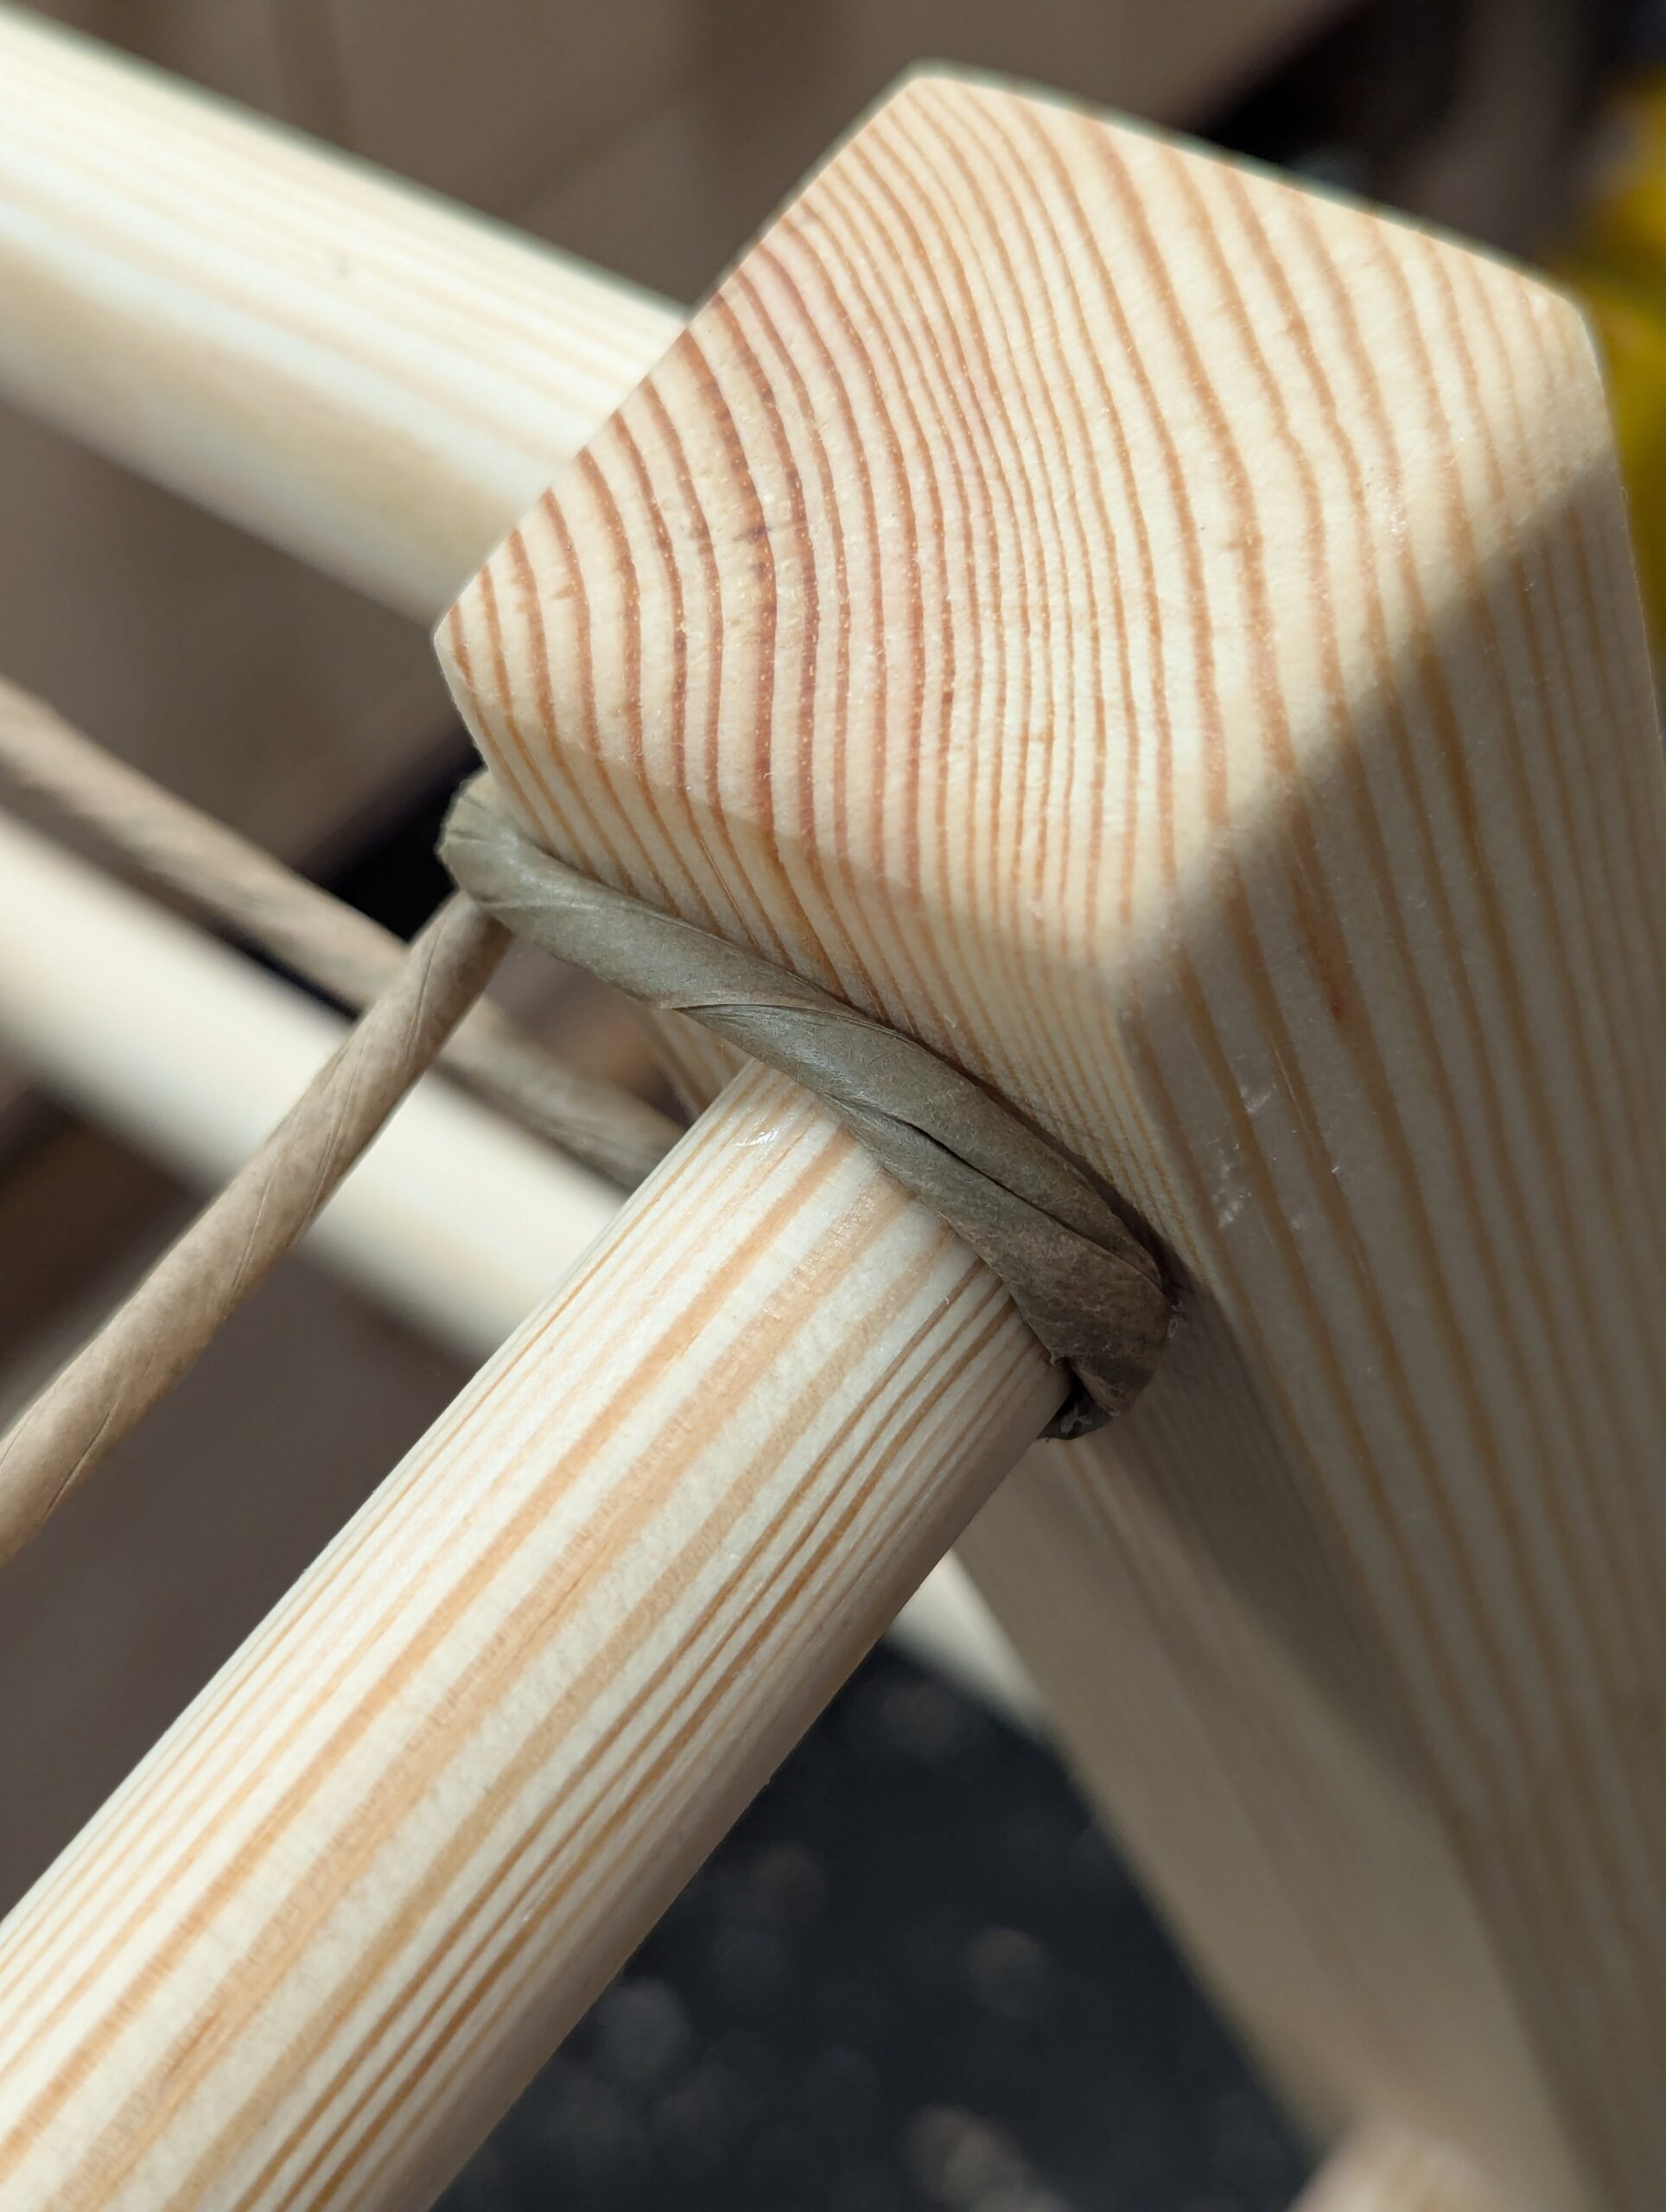
This first wrap repeats at each corner. You can pass the coil all the way around to enclose each leg corner, and then tighten the corners as you get to them. Use spring clamps to secure the strand as you go; this frees your hands to keep going while keeping tension on the corner wraps.
You will learn to twist and turn to tighten the twist as you make these corner turns. This keeps the twist on the outside tight. The last part of the coil bottom right is now rising to the opposite side rail to pass over the top, back under the rail and then forward around the leg to pass over the front rail and coil, back under and on up to and over the back rail where you will pull it tight and consider using a spring clip to hold it temporarily. . .
. . .and around the back leg, over the top of the rail and back under and on to the opposite rail, over the top, back under, around the leg and over the top of the back rail.
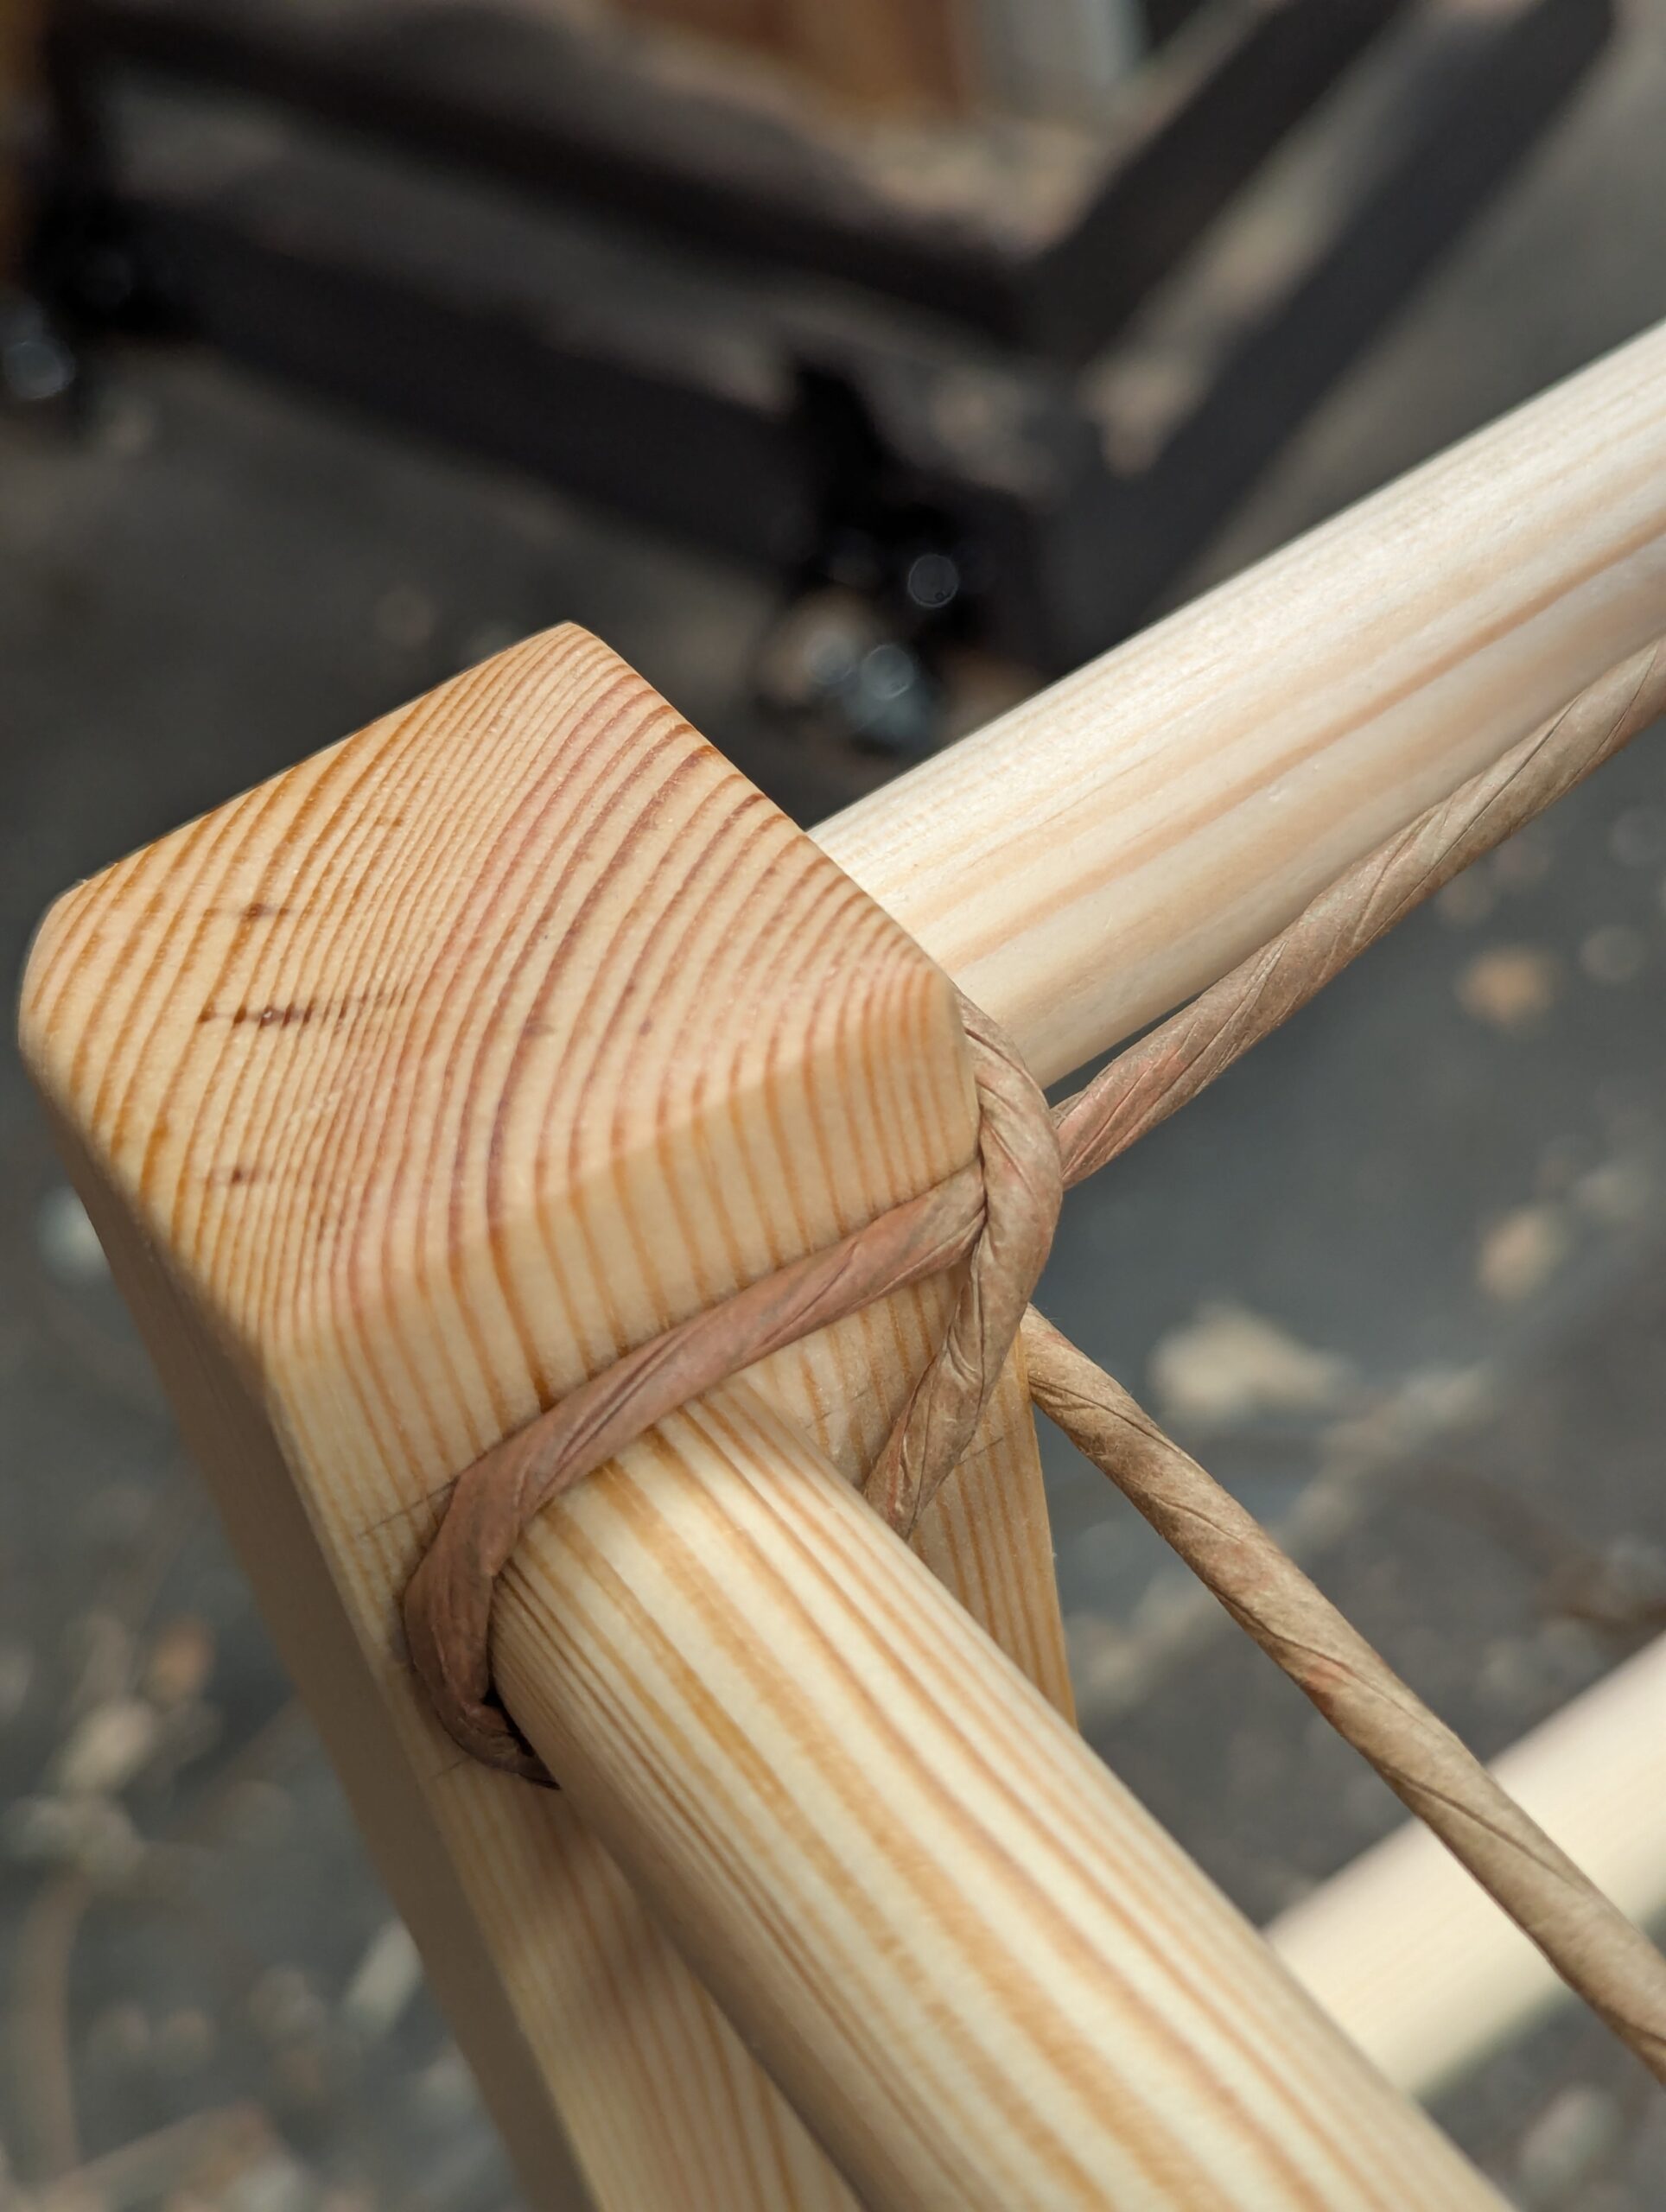
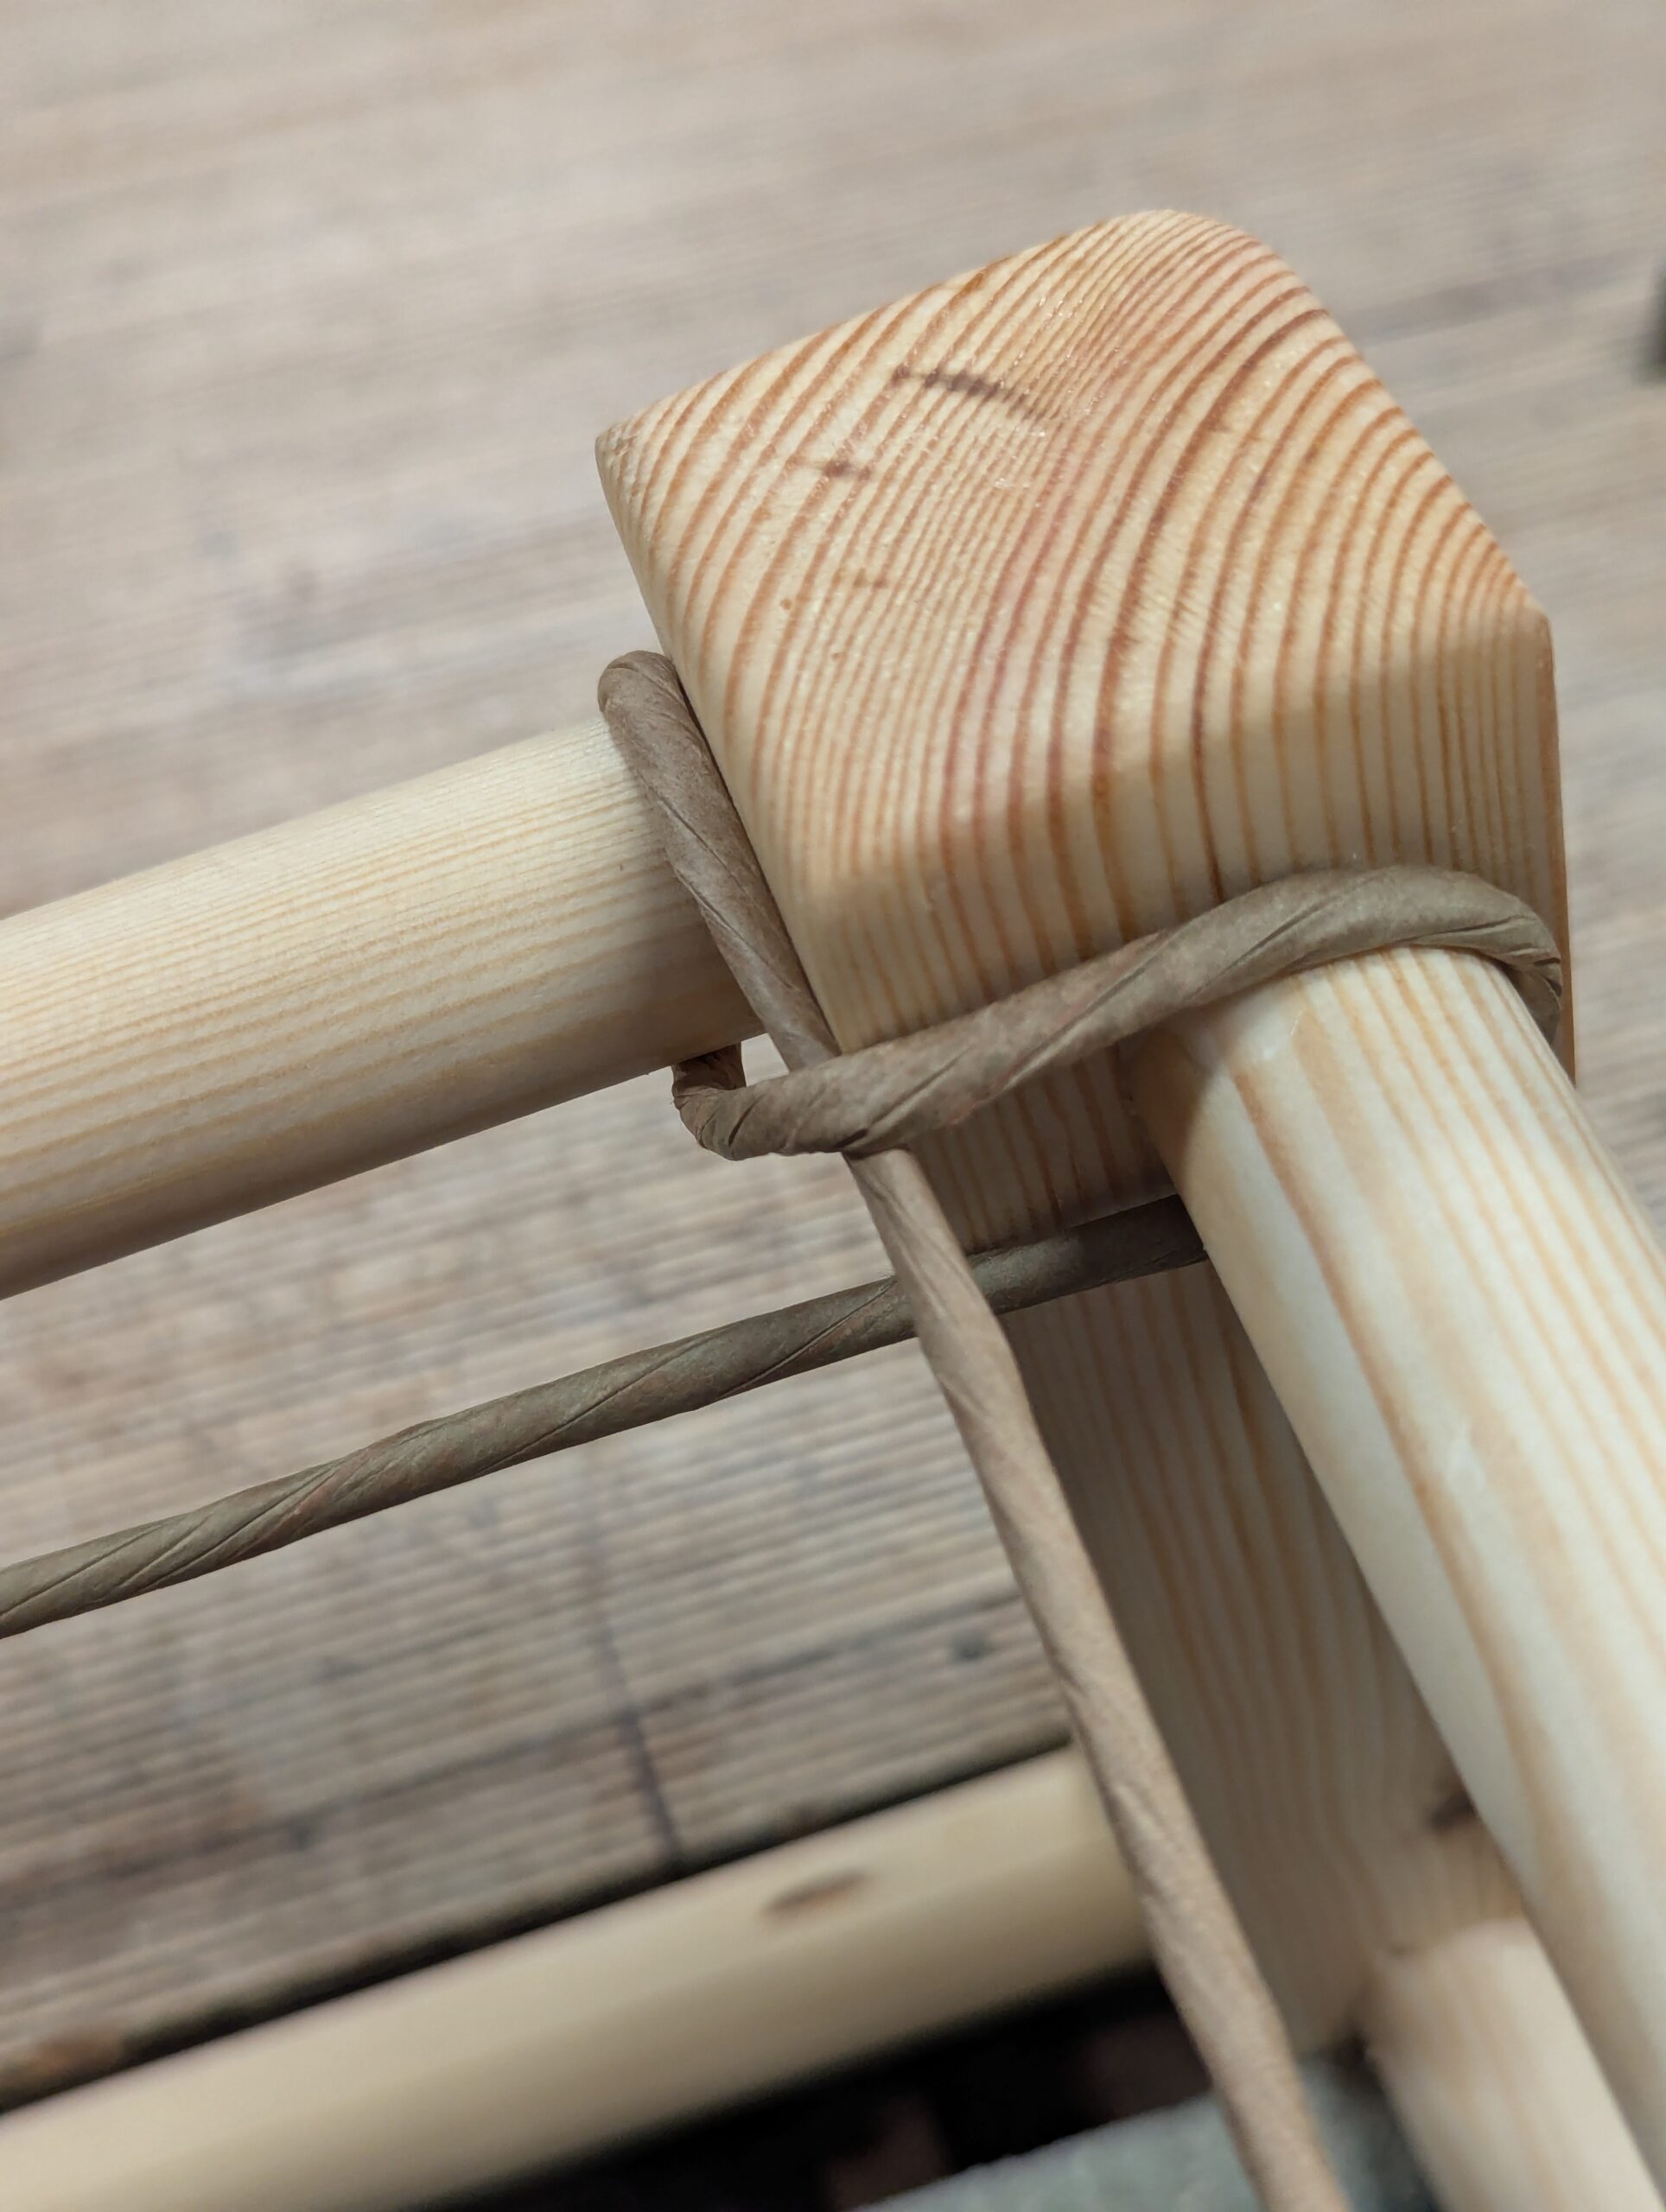
And this brings us to the second wrap that butts up against the first and starts the exact repeat of what we just did. This time we have the previous cord to pass our return cord under the first and pull up as we round the corners.
The second leg wrap after the initial anchor point wrap butts tight up against it, pulls the lower cord up and then wraps around the rail at top to pass underneath and across to the topside of the opposite rail.
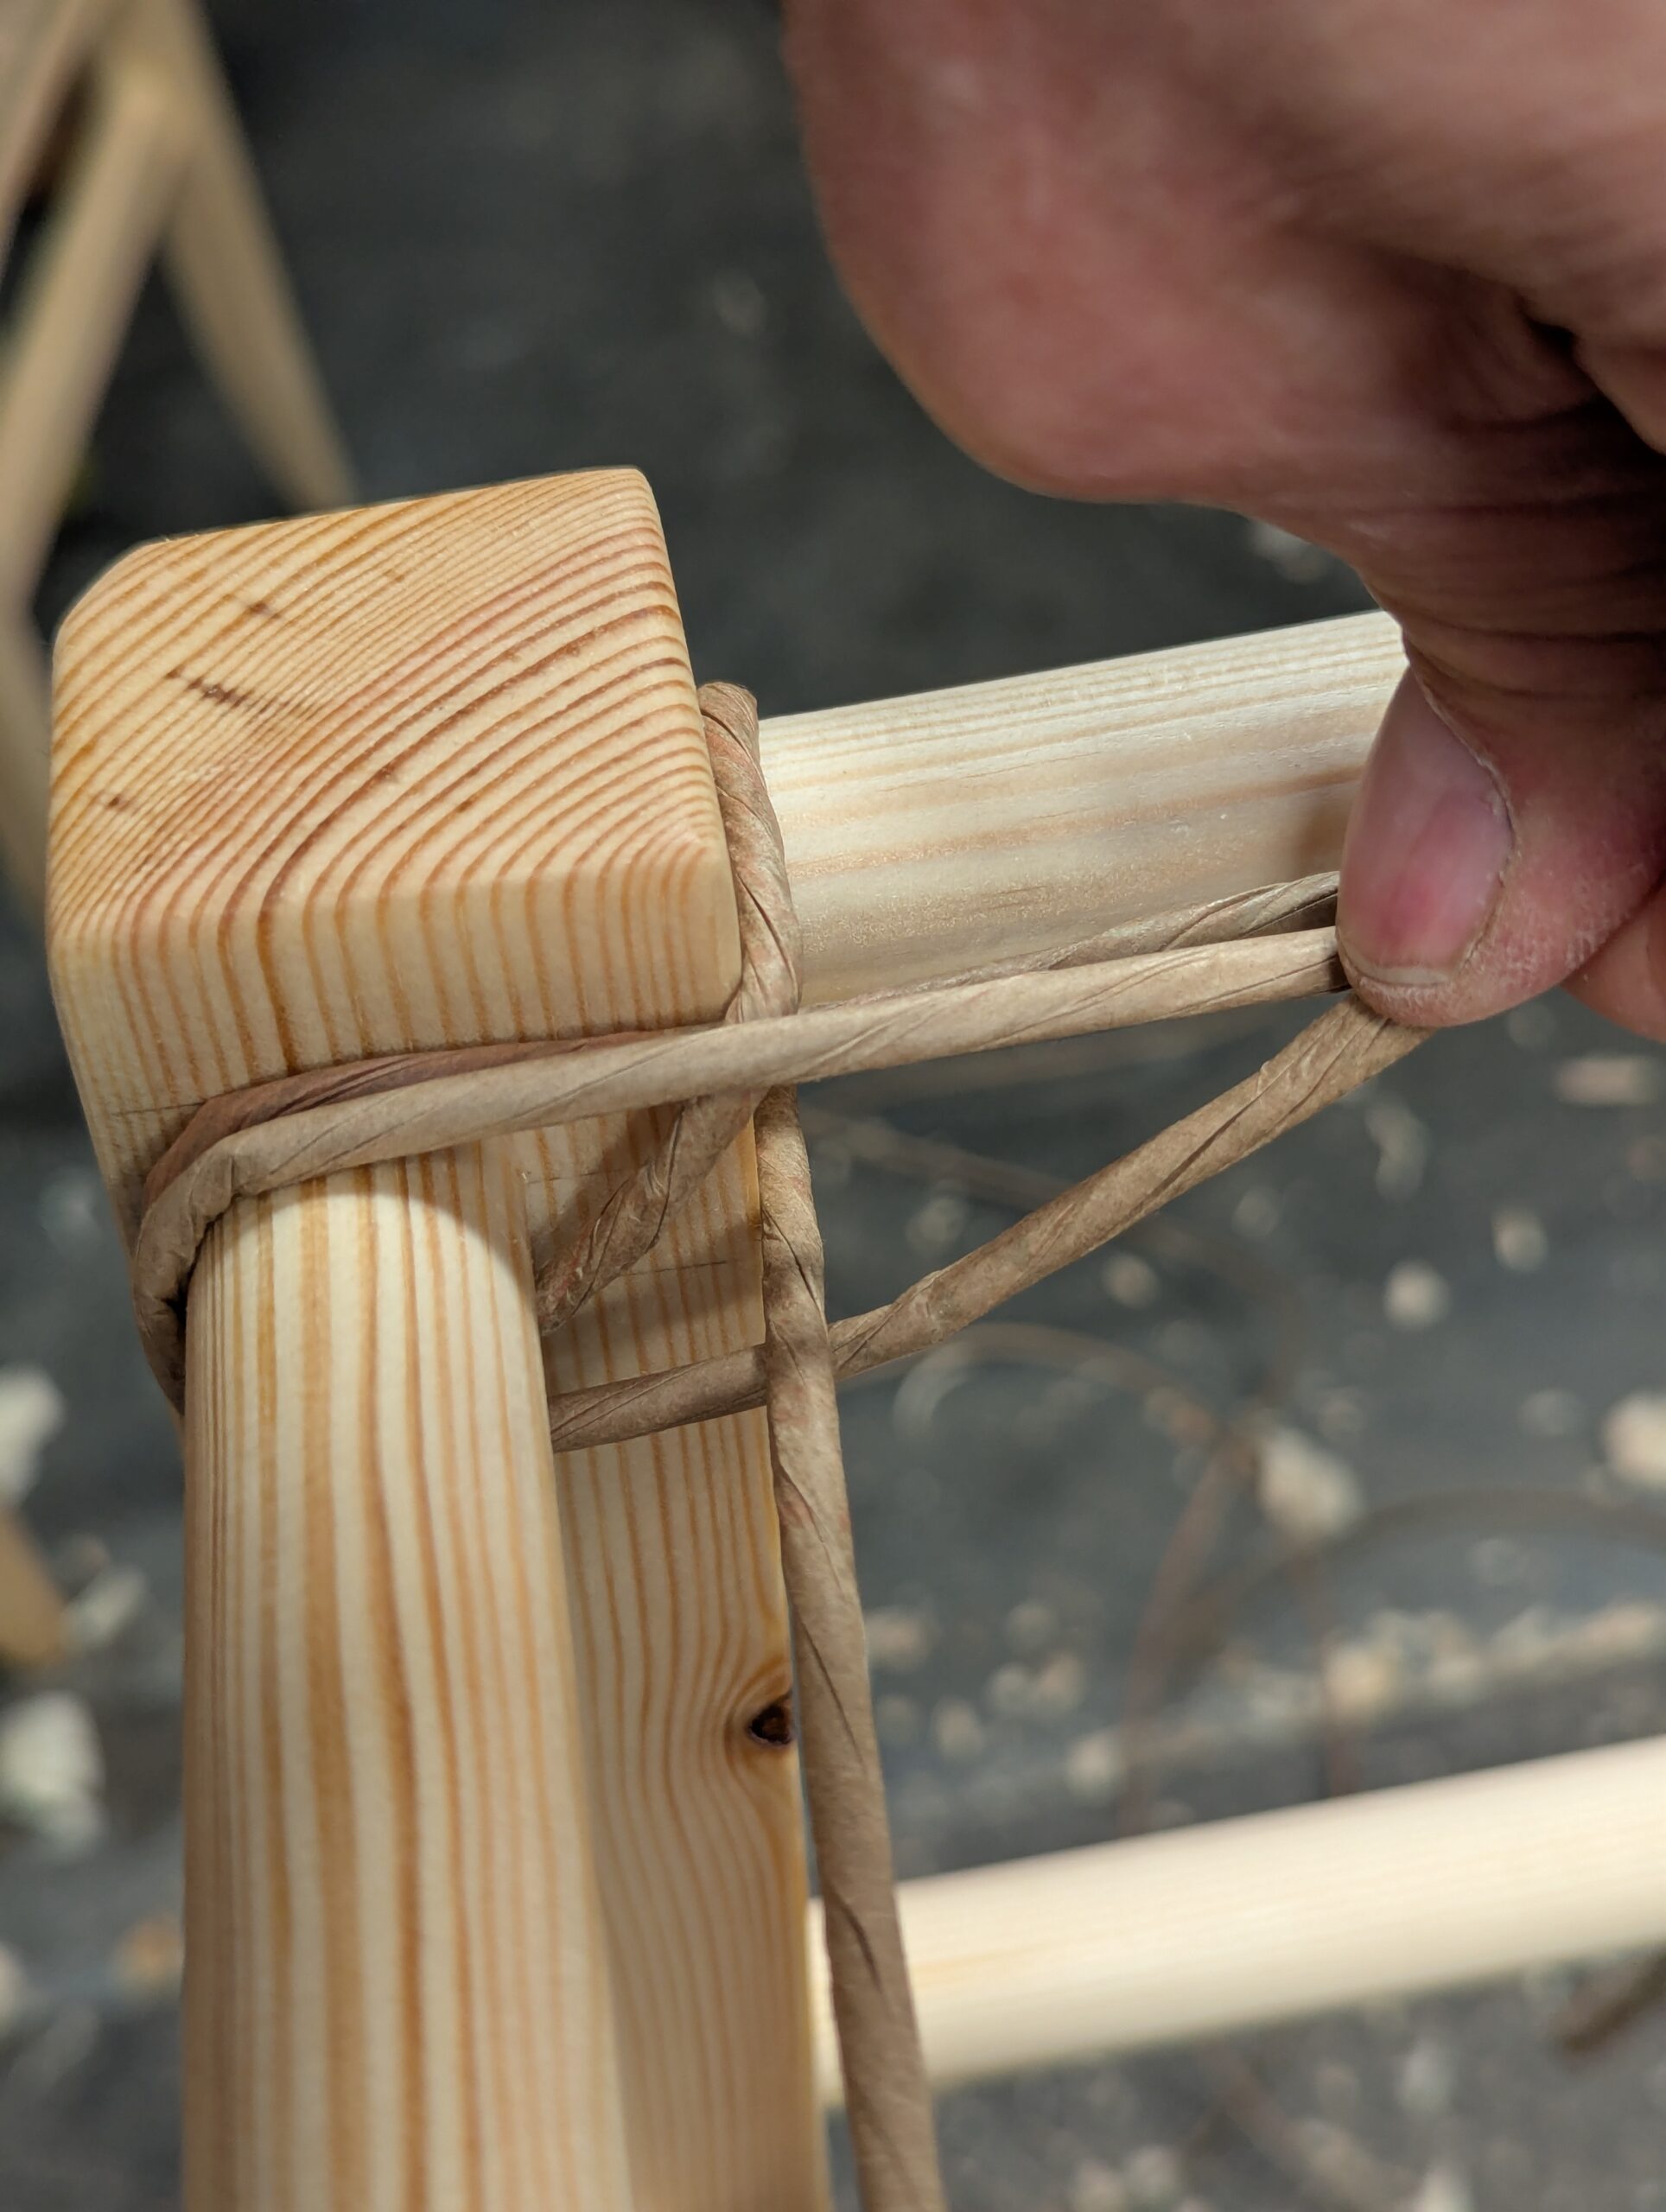
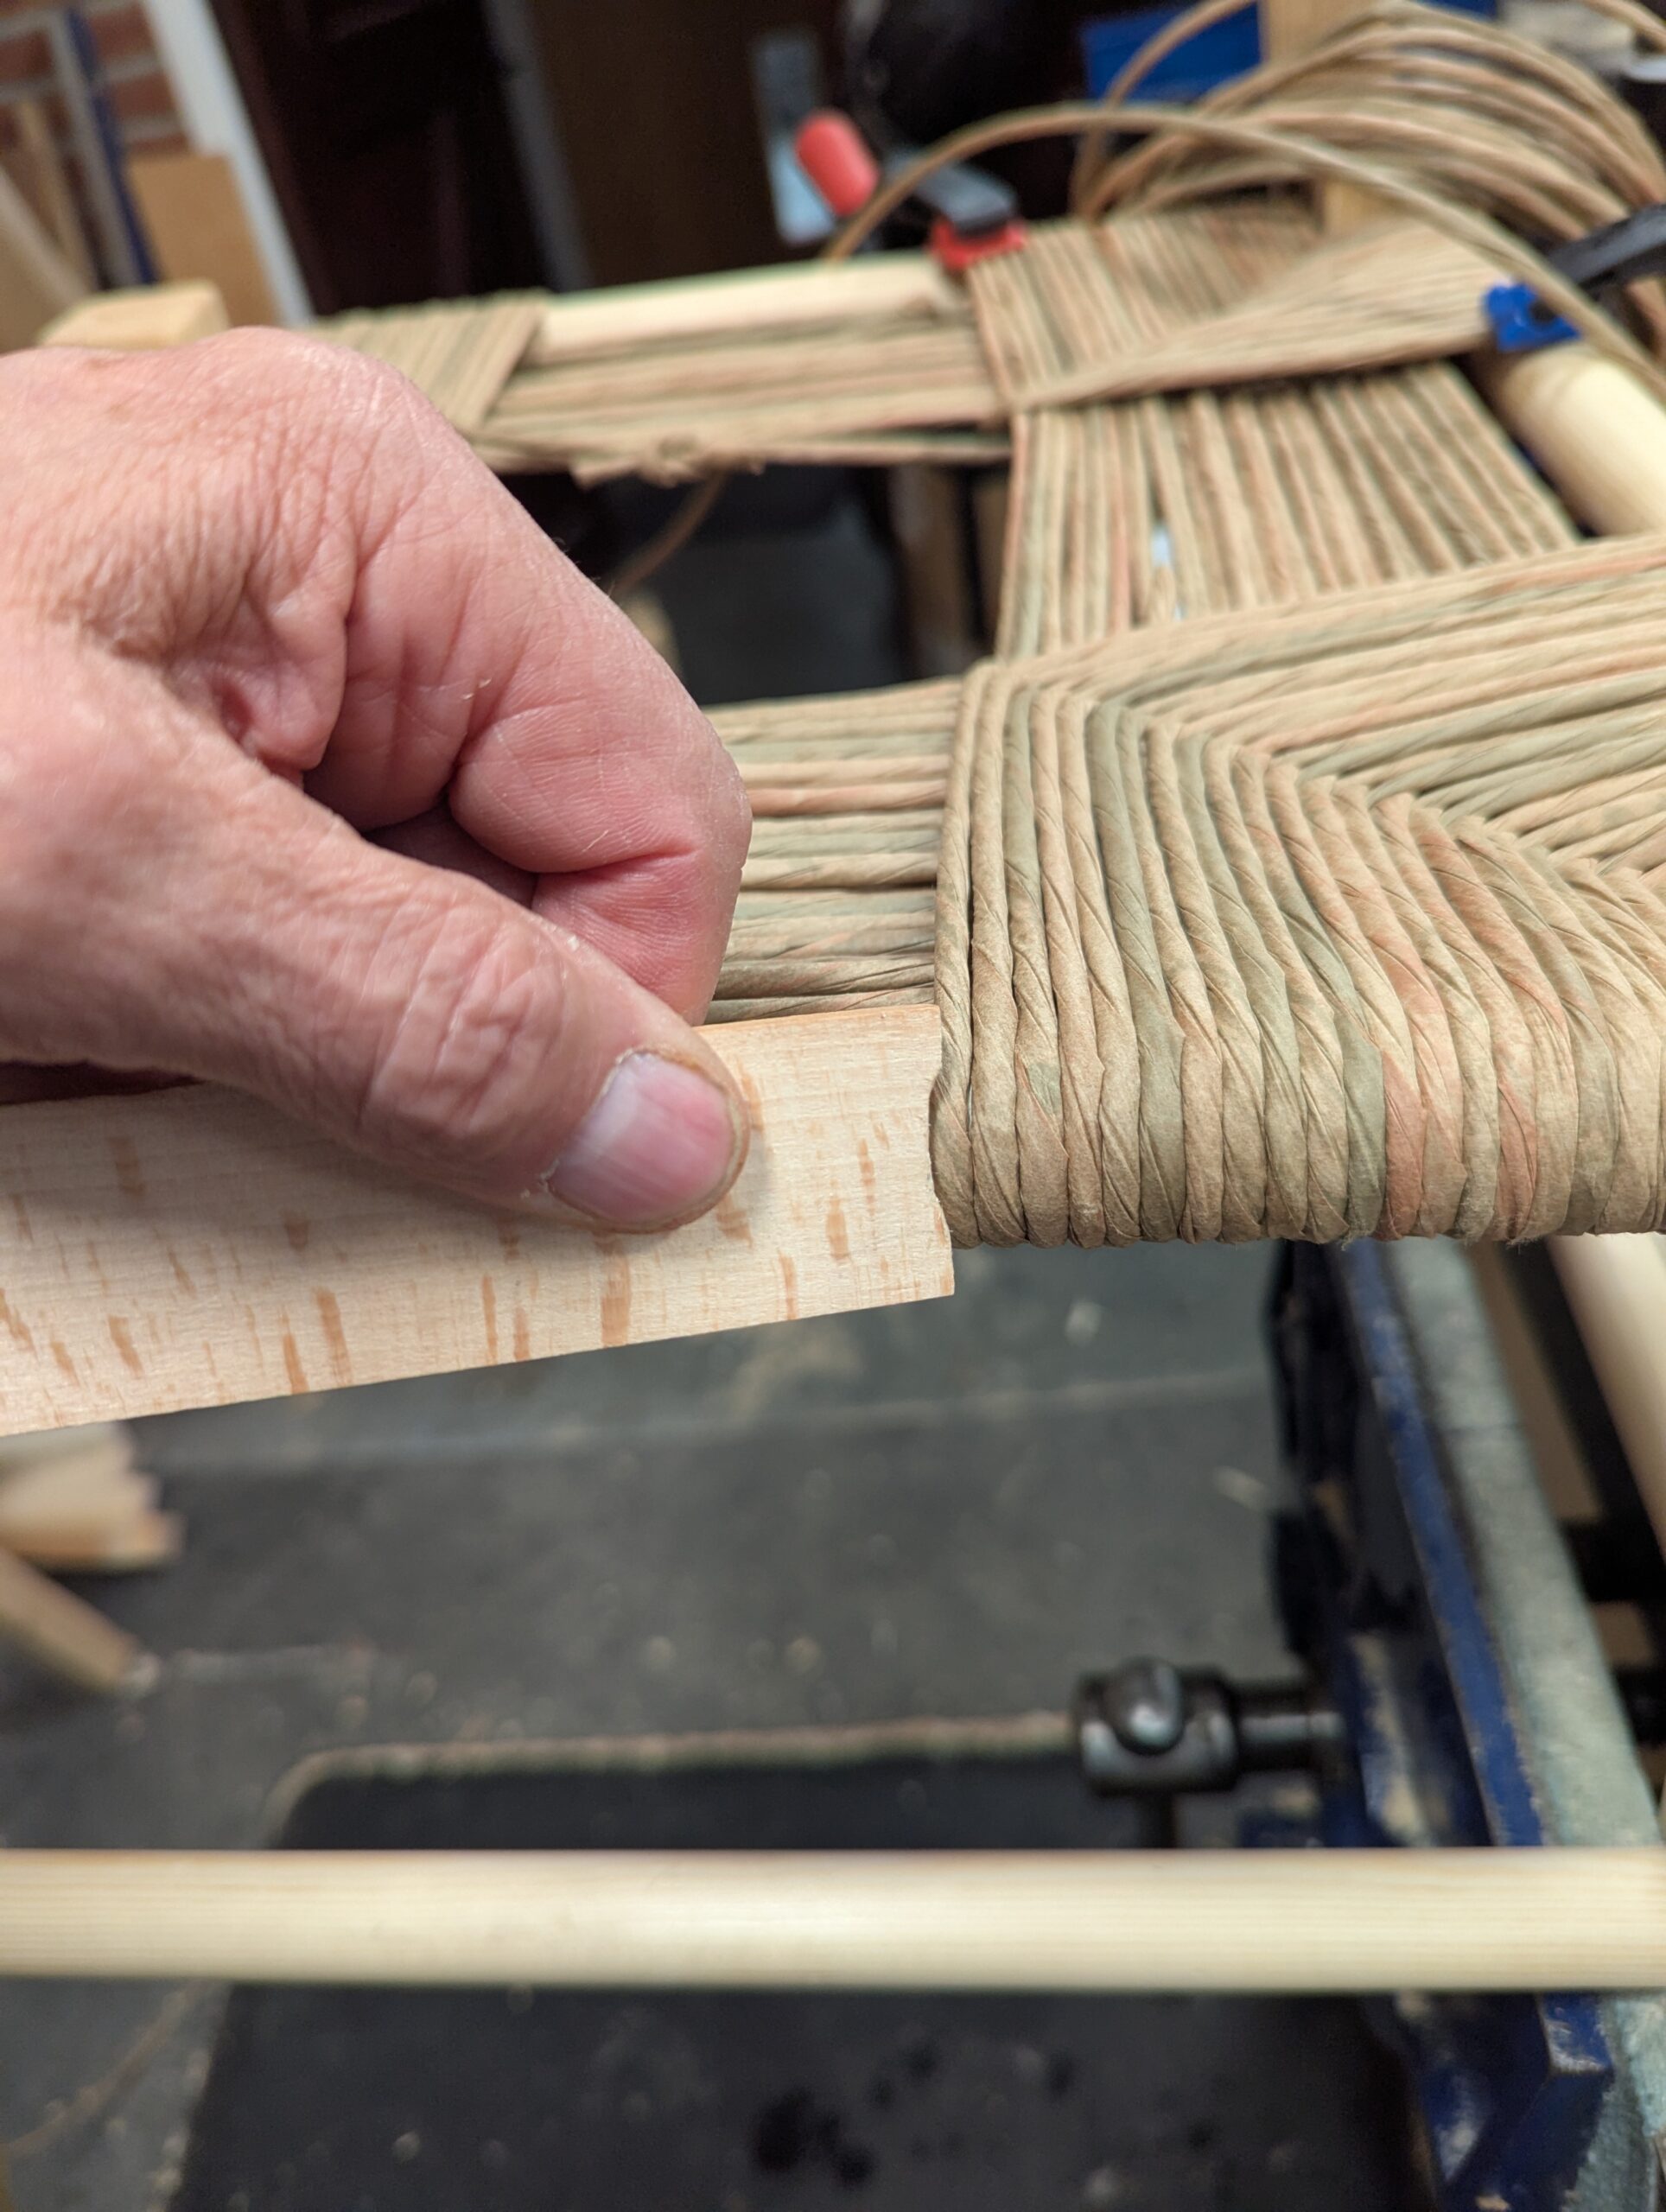
As the wraps build, they will need nudging over with a block of wood and a few hammer taps.
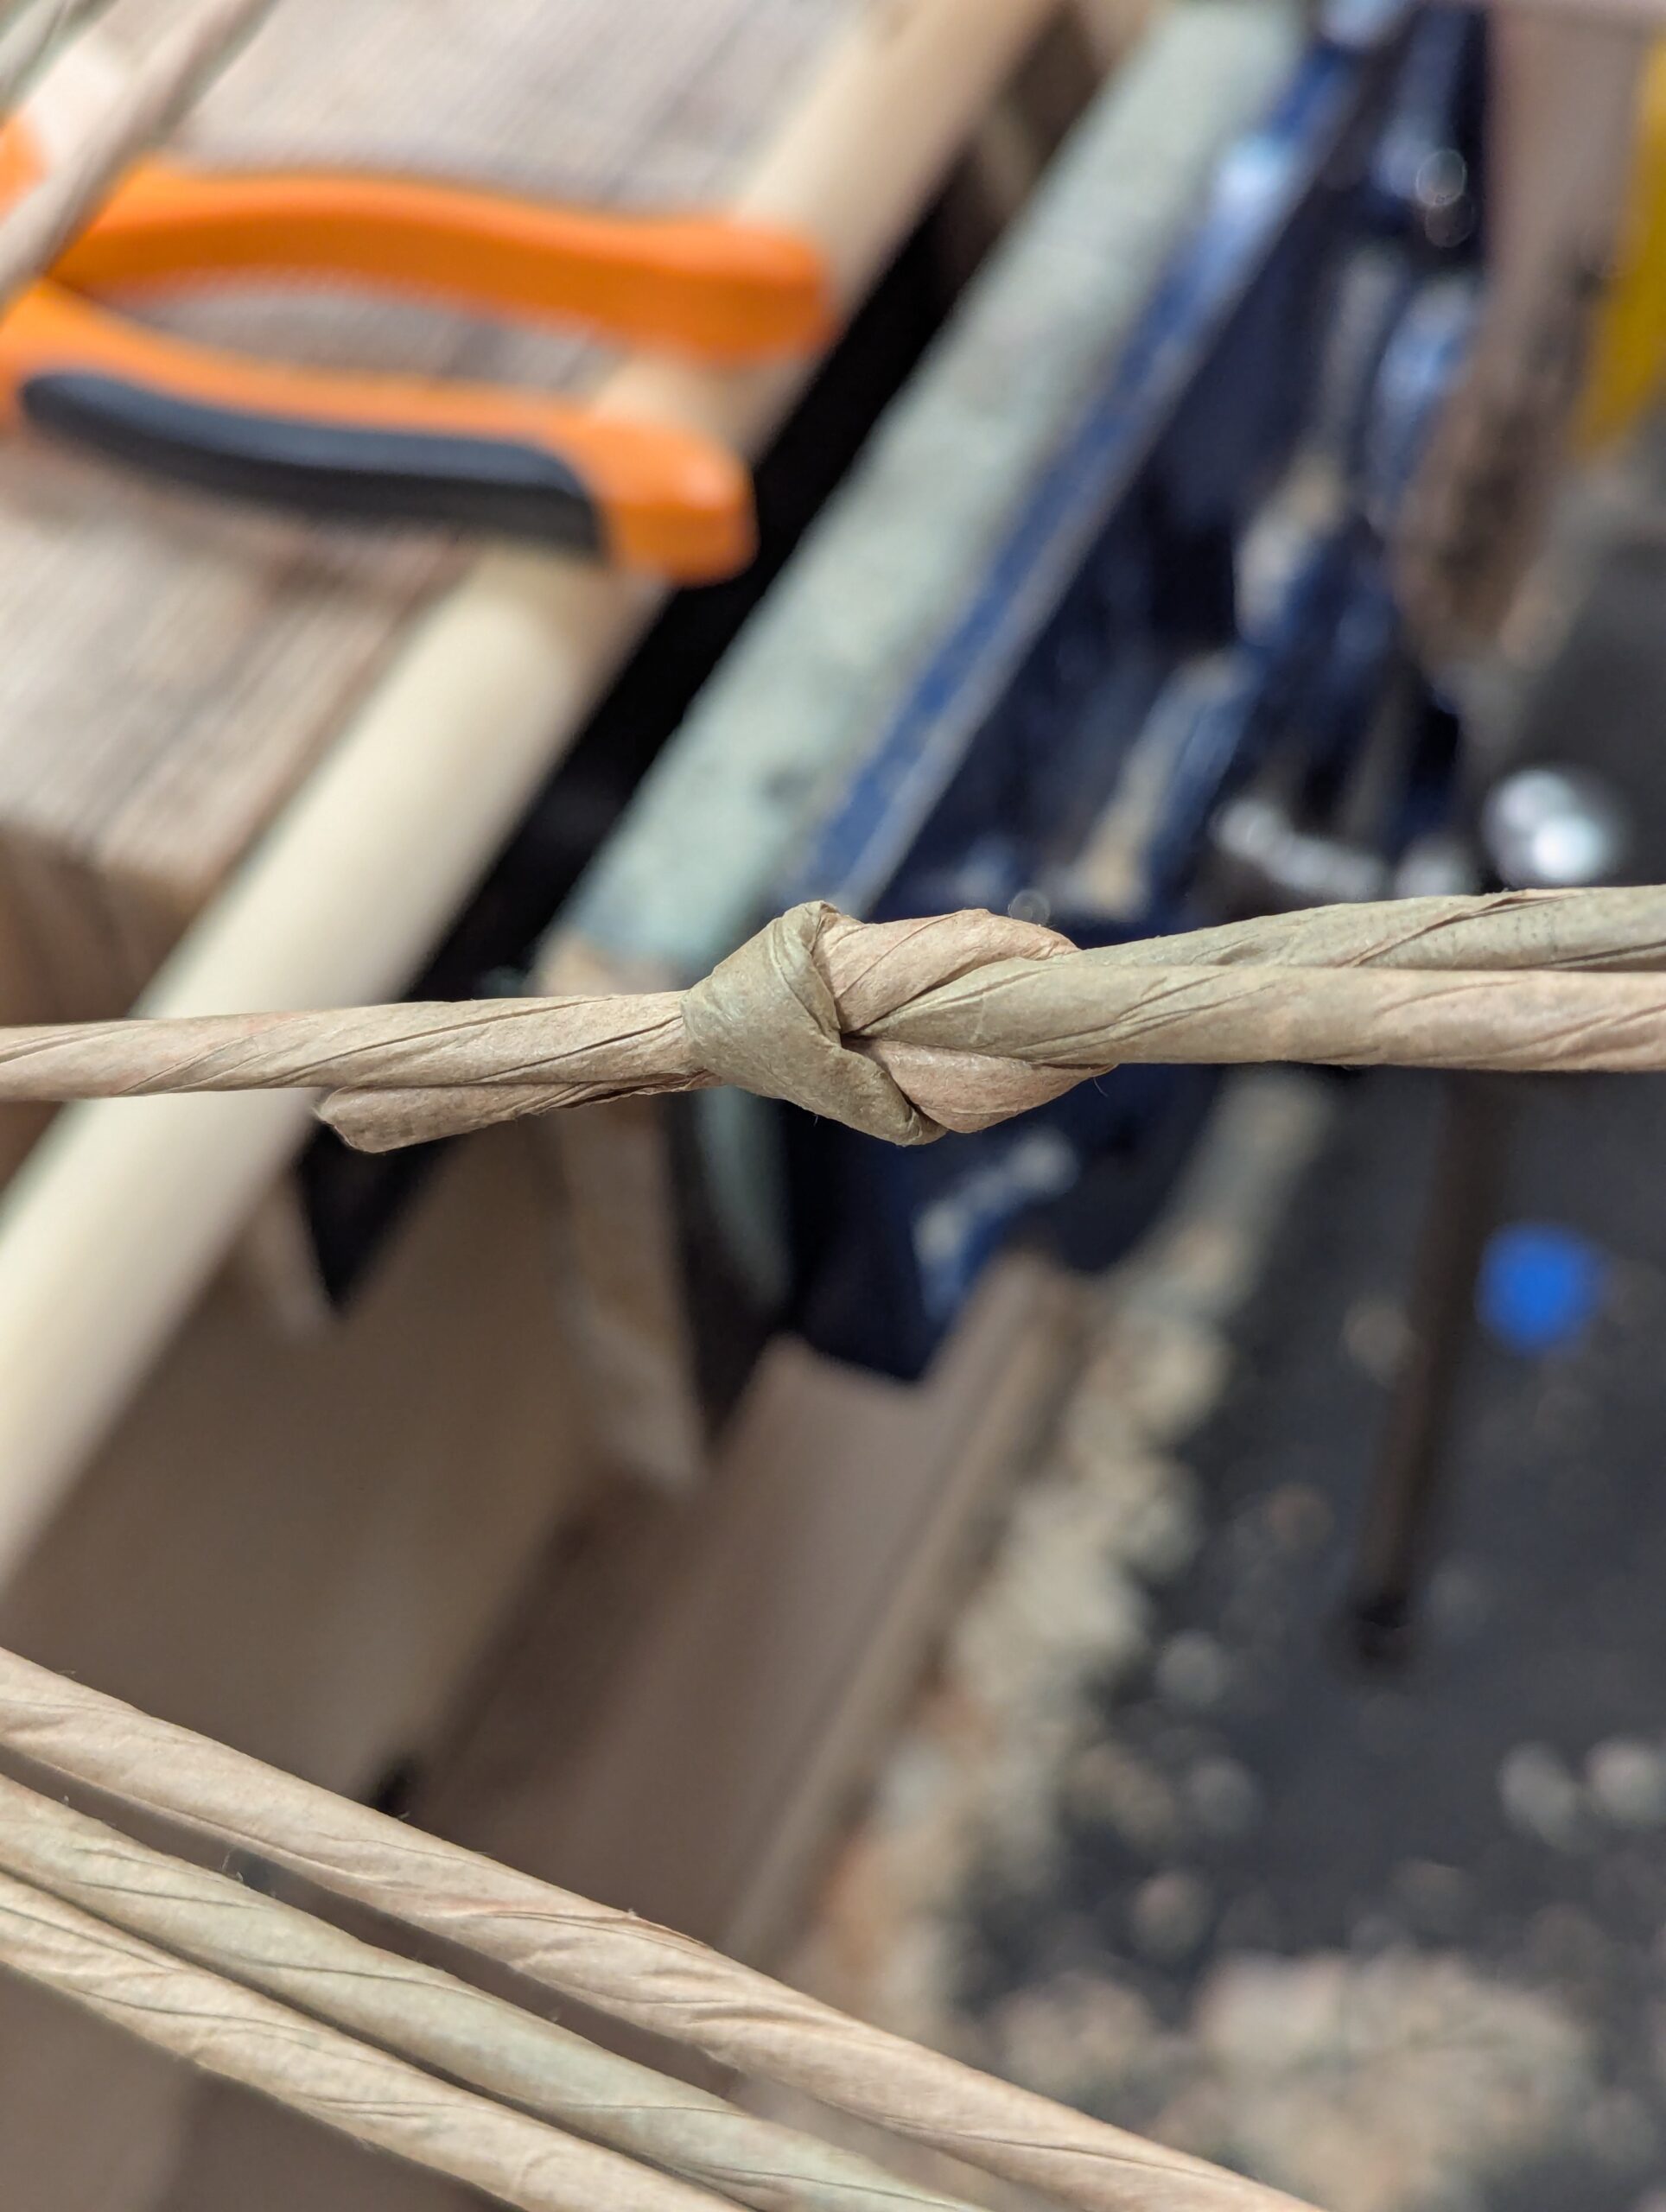
A reef not works neatly for connecting additional lengths of the cord. In the US it's called a square knot.
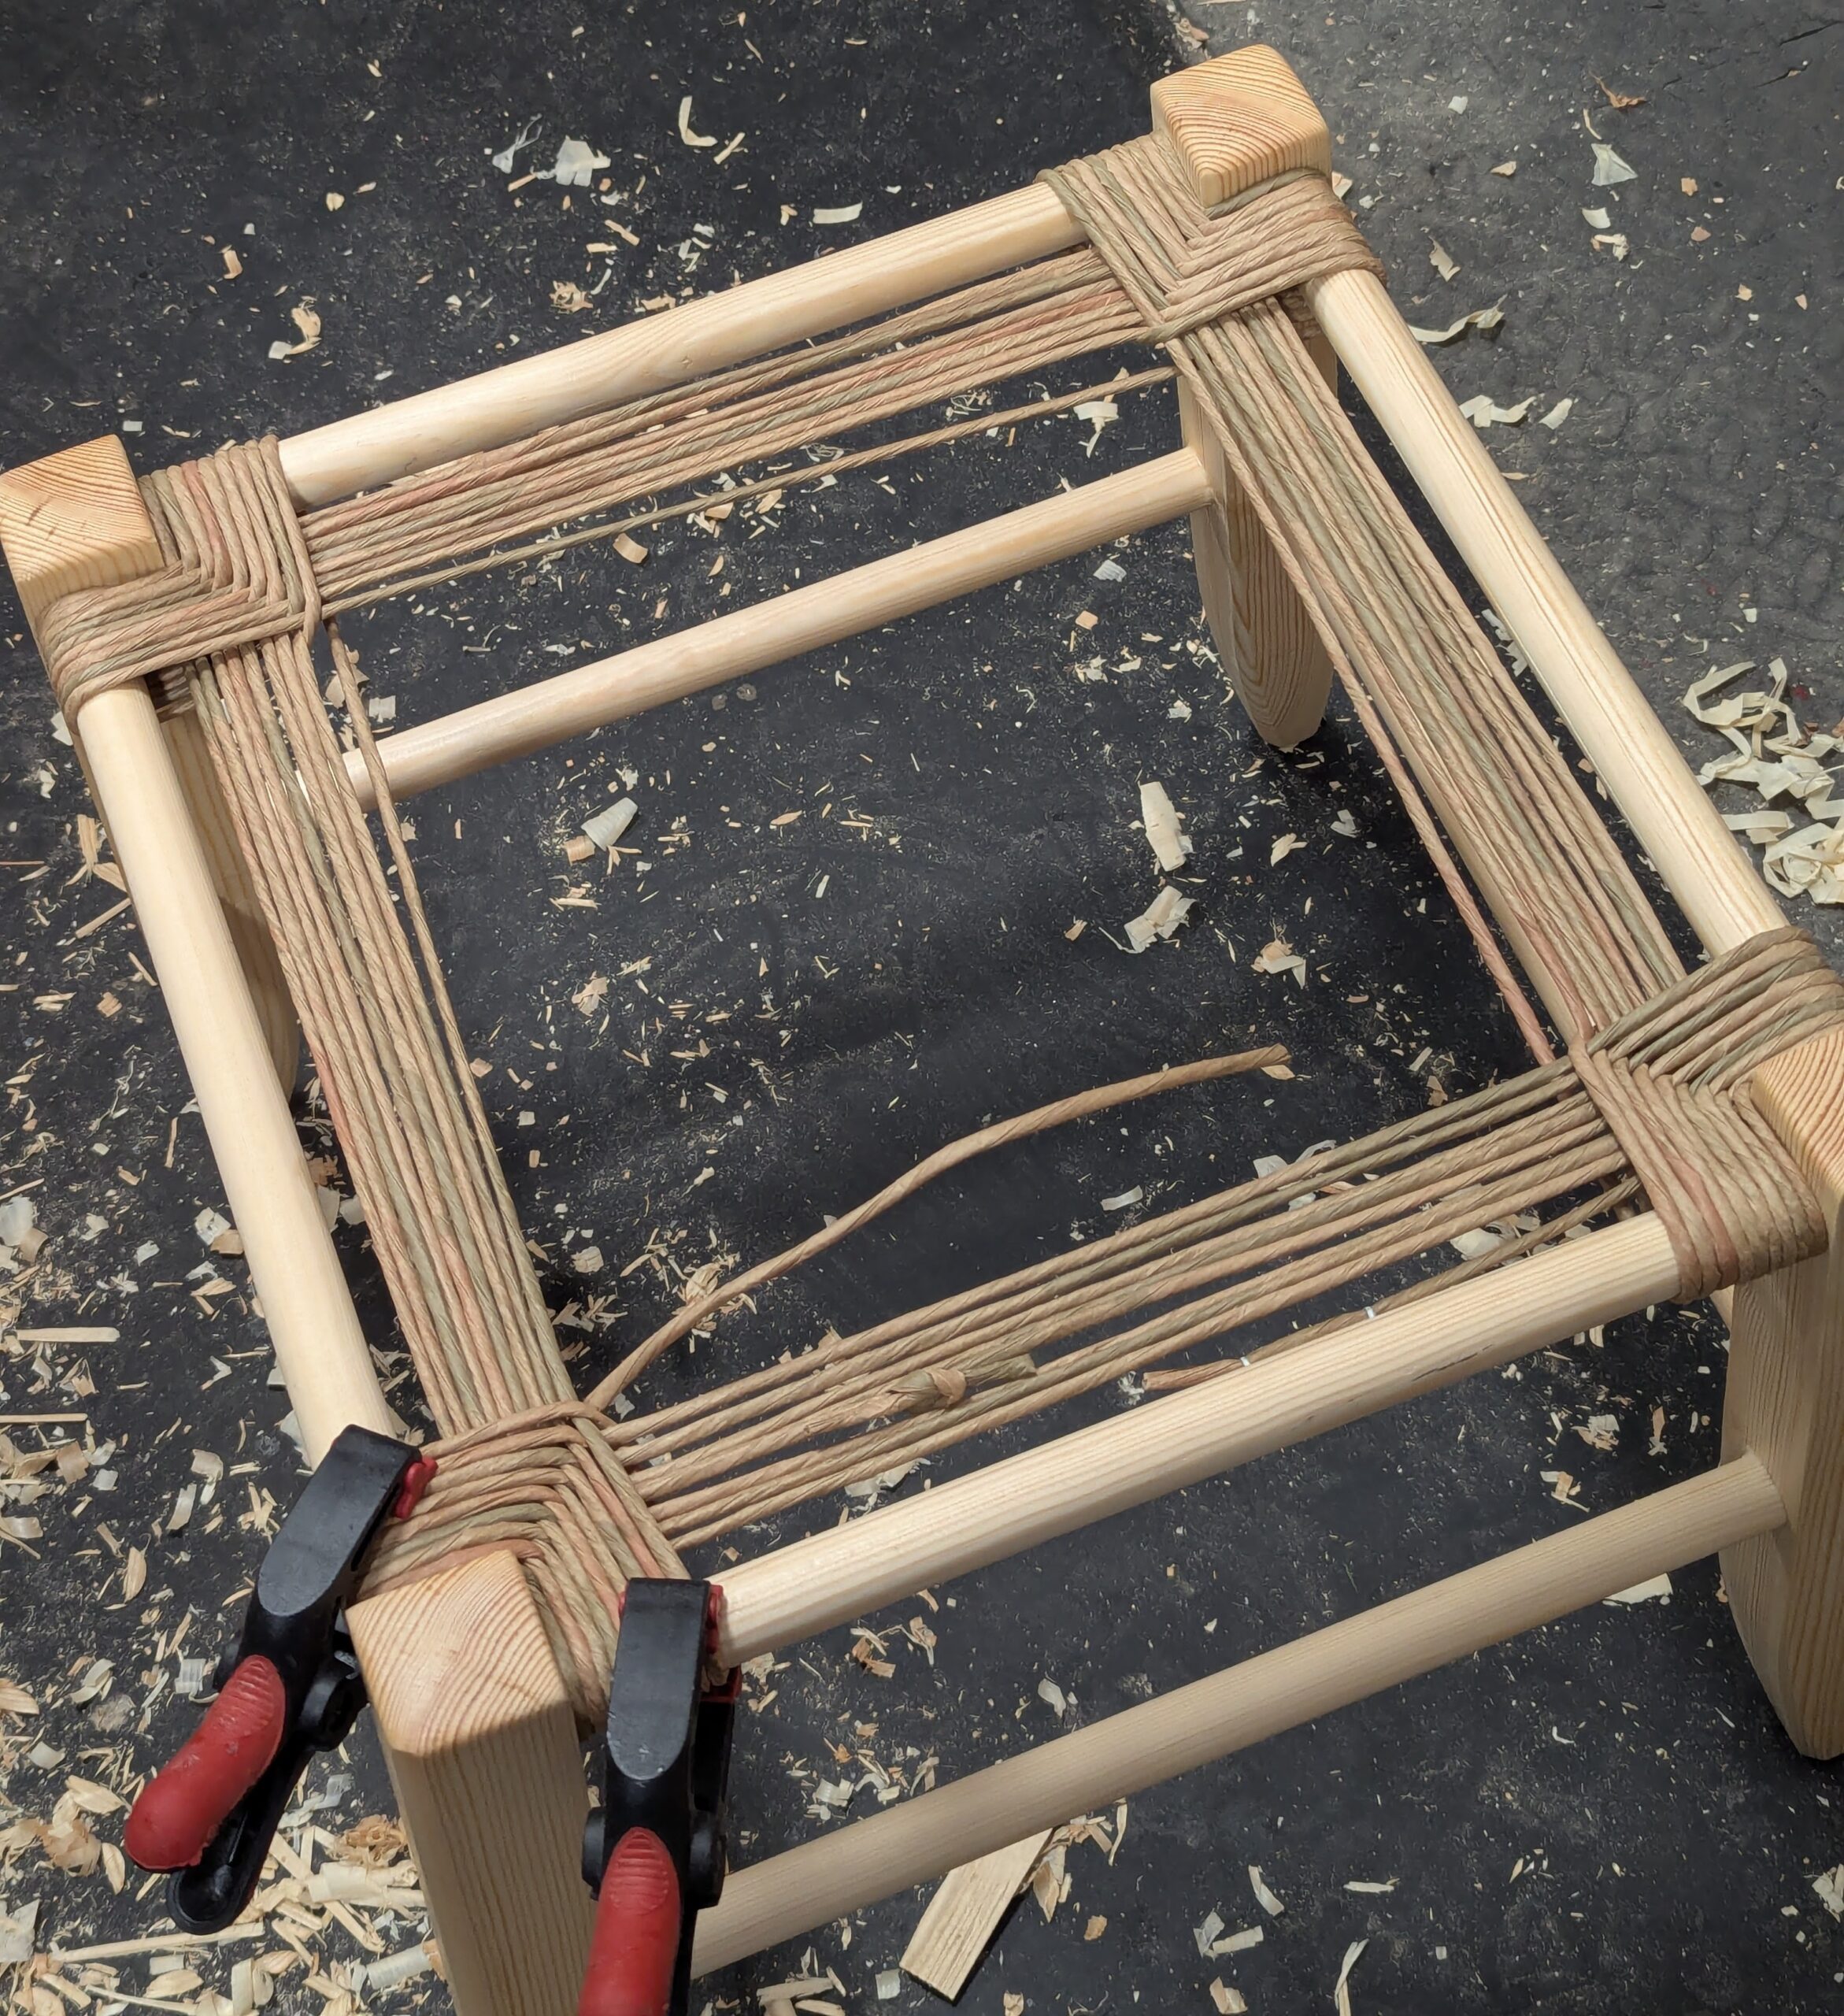
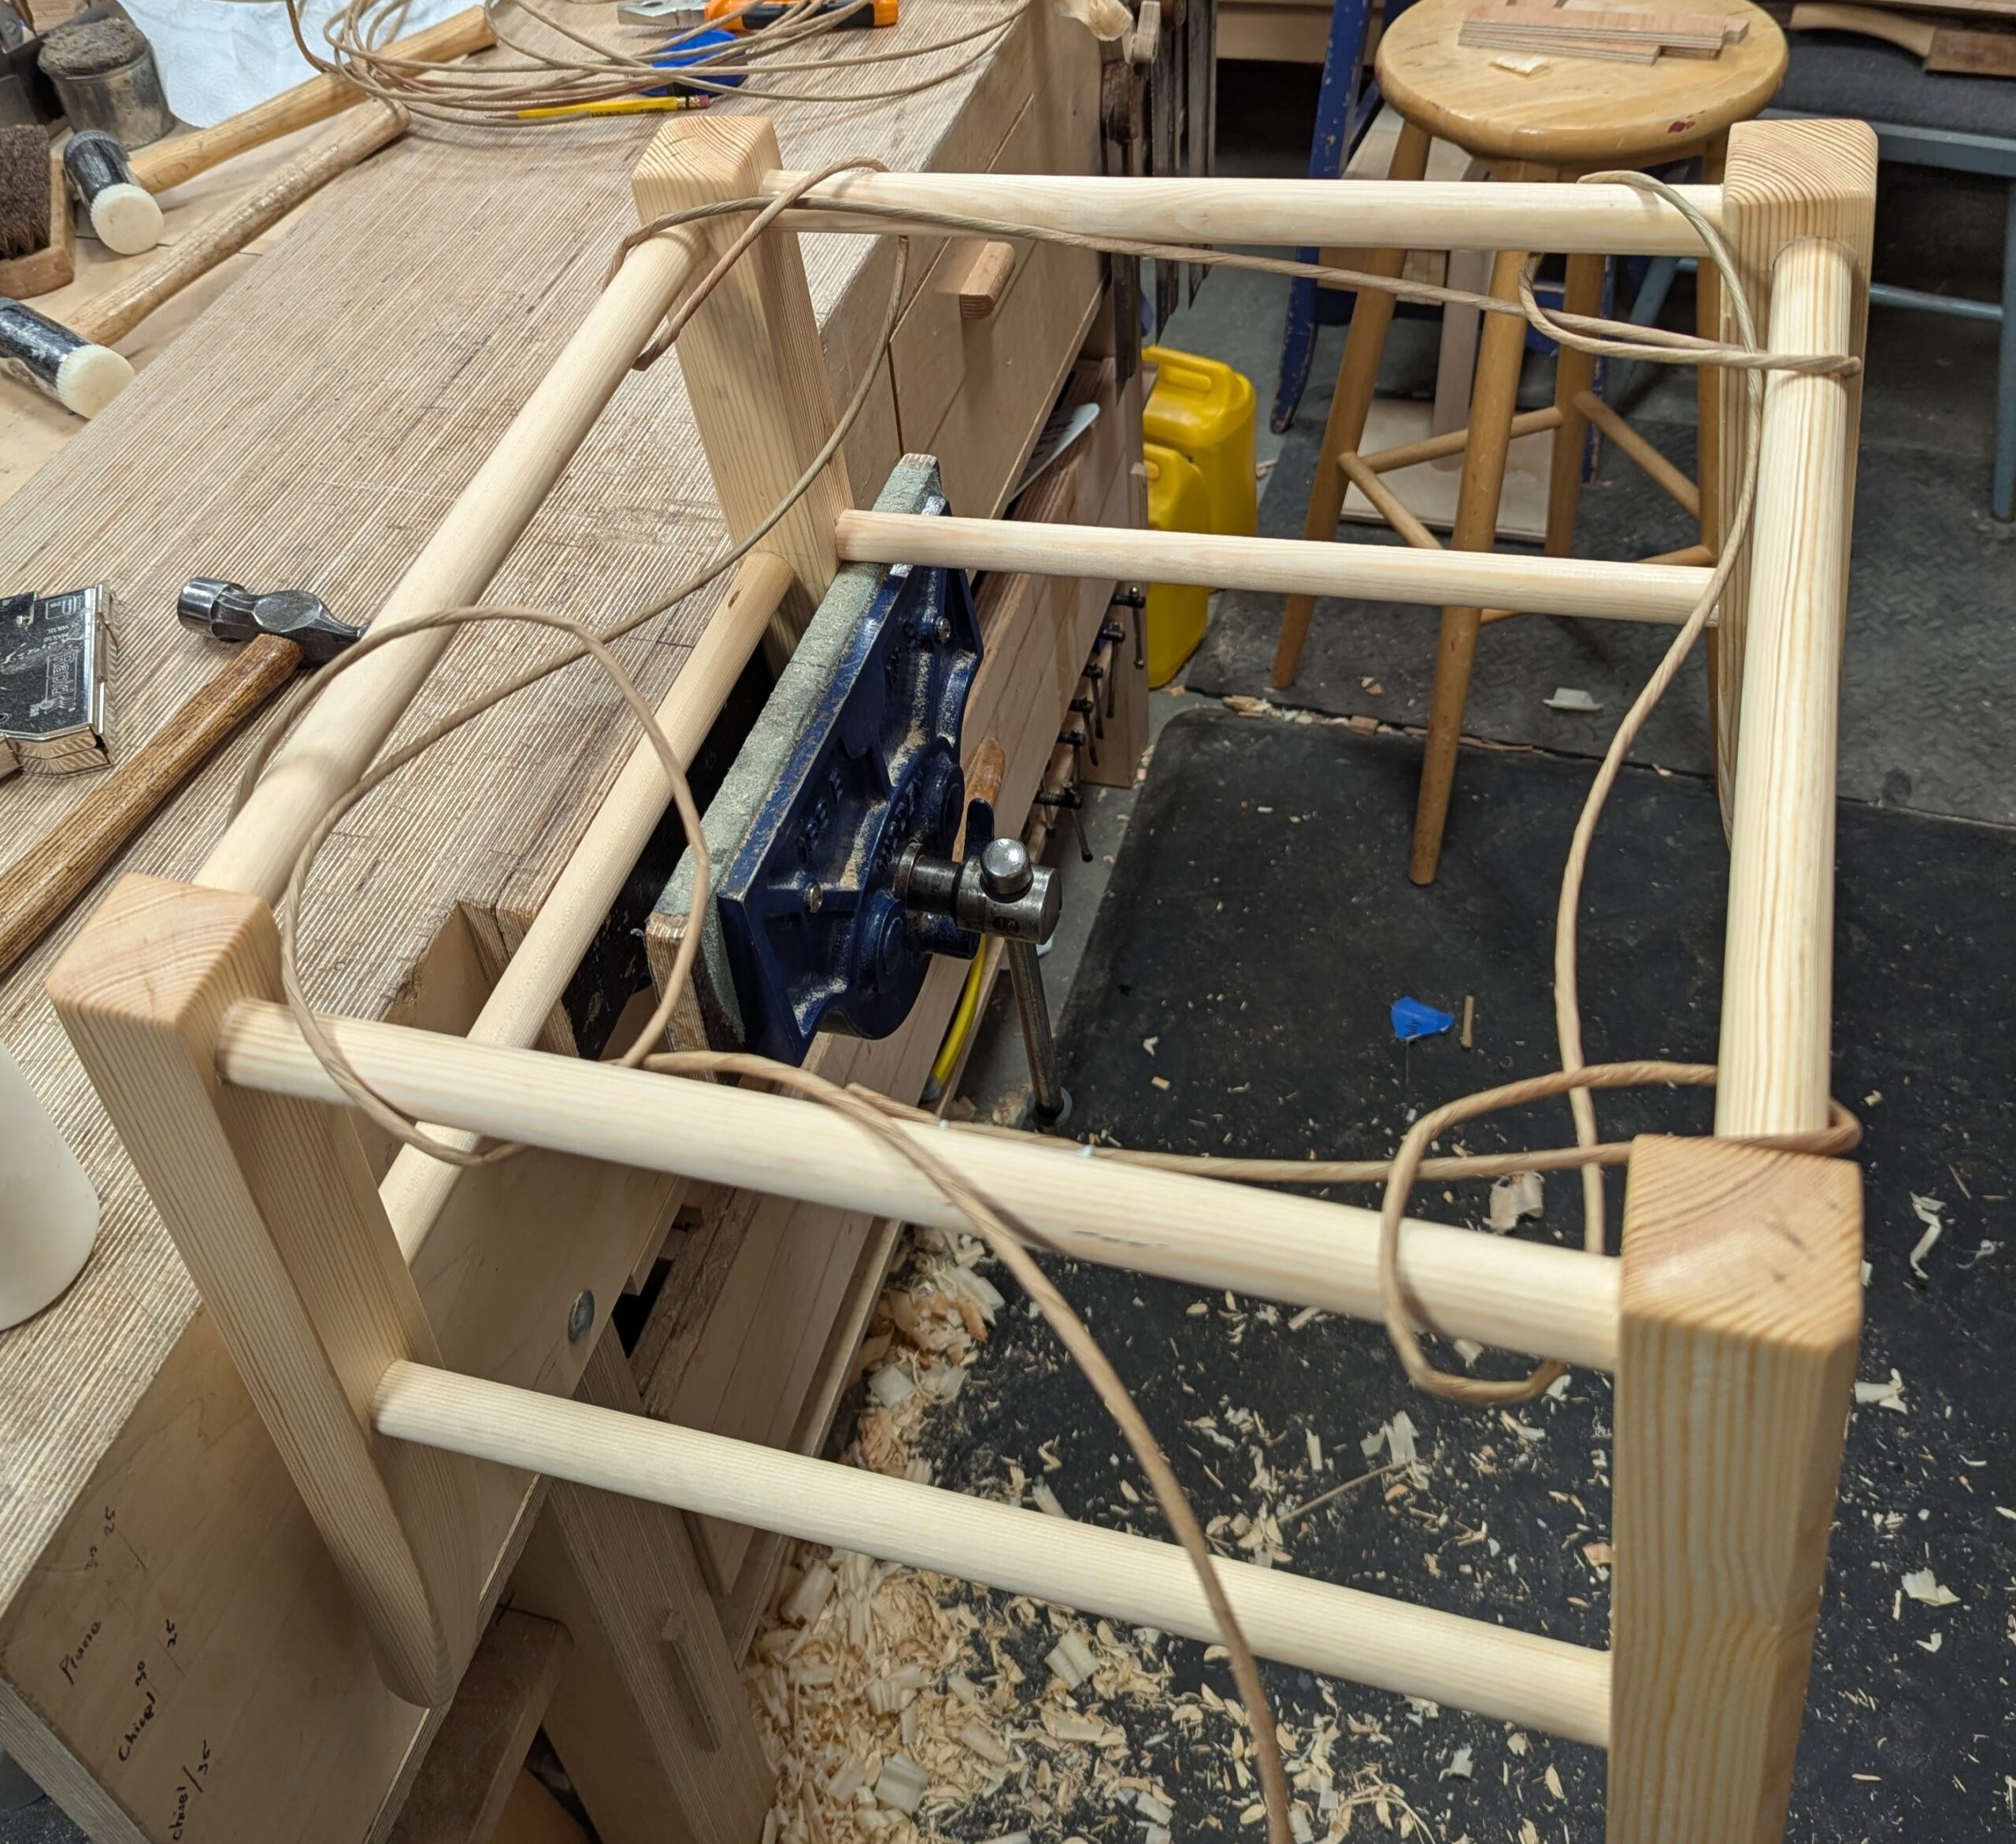
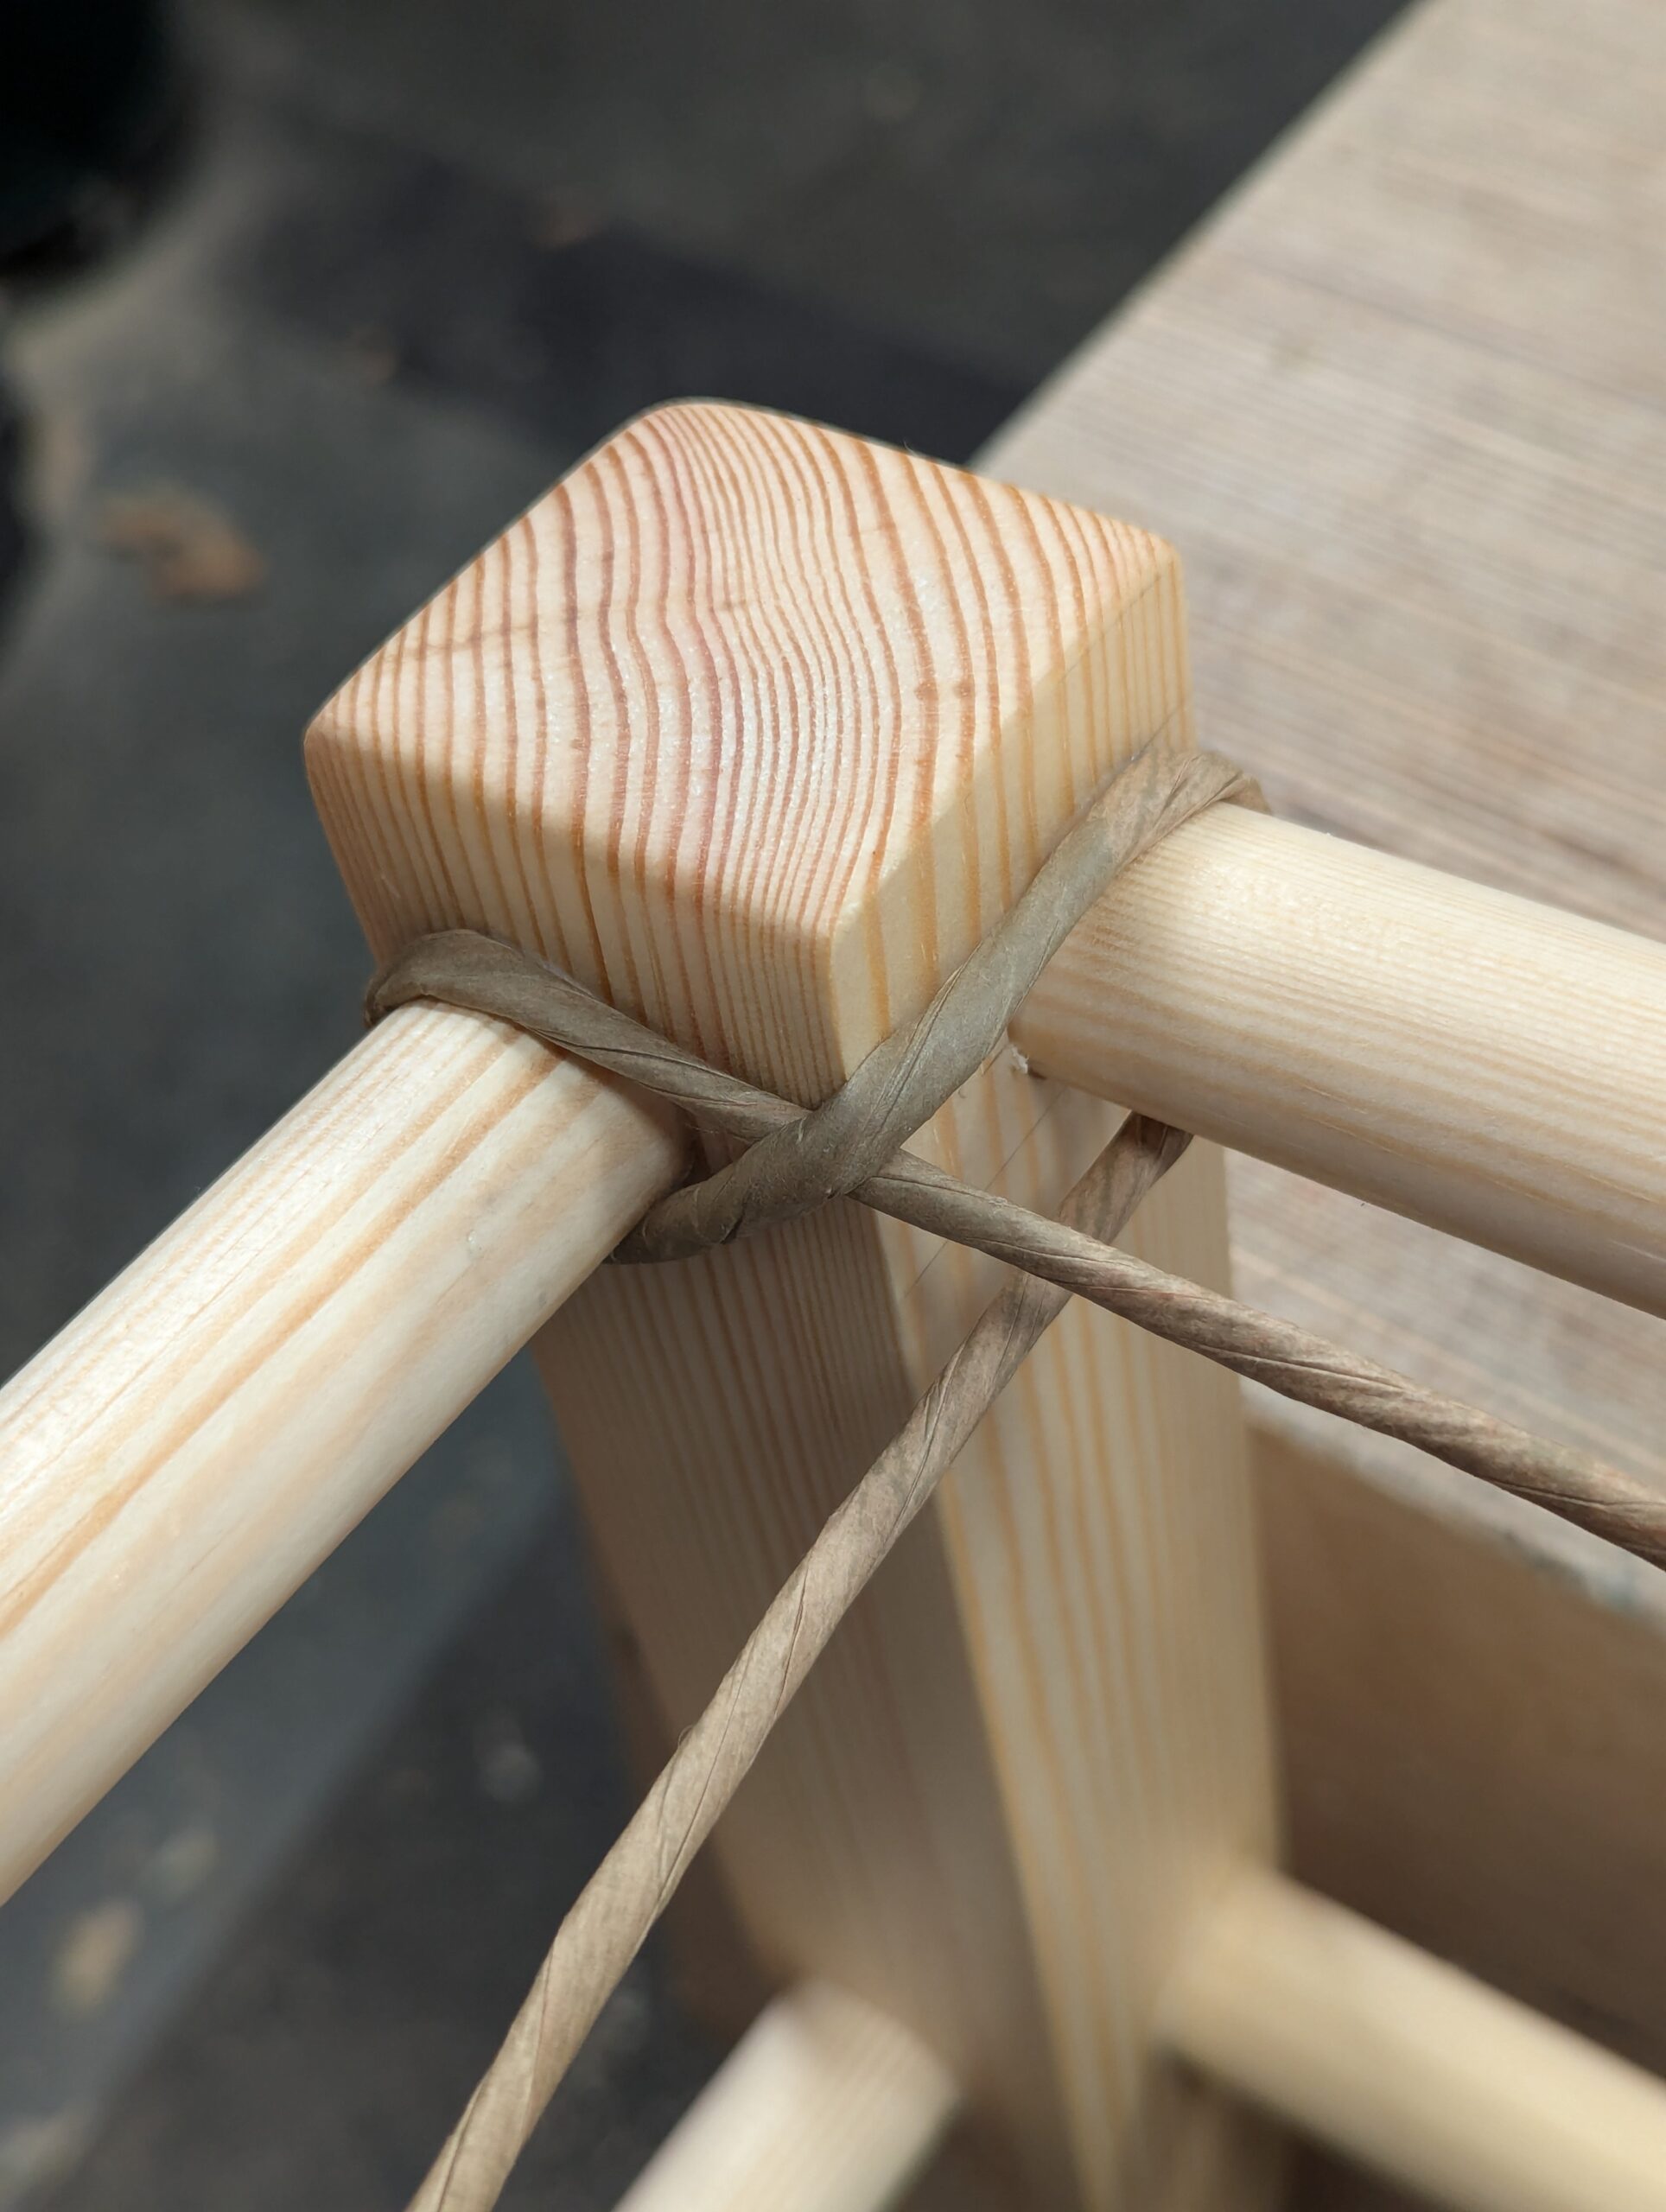
There is a uniformity to the work, as the wraps simply repeat with each circuit. Spring clips work well to retain tension and free up the hands for weaving and pulling the cord tightly.
Aim always for squareness to the rails, as the natural tendency of the wraps is to get ever wider on the rails. If this starts to happen, you must correct it, otherwise the centre section will have a large gap and lose its neat alignment.
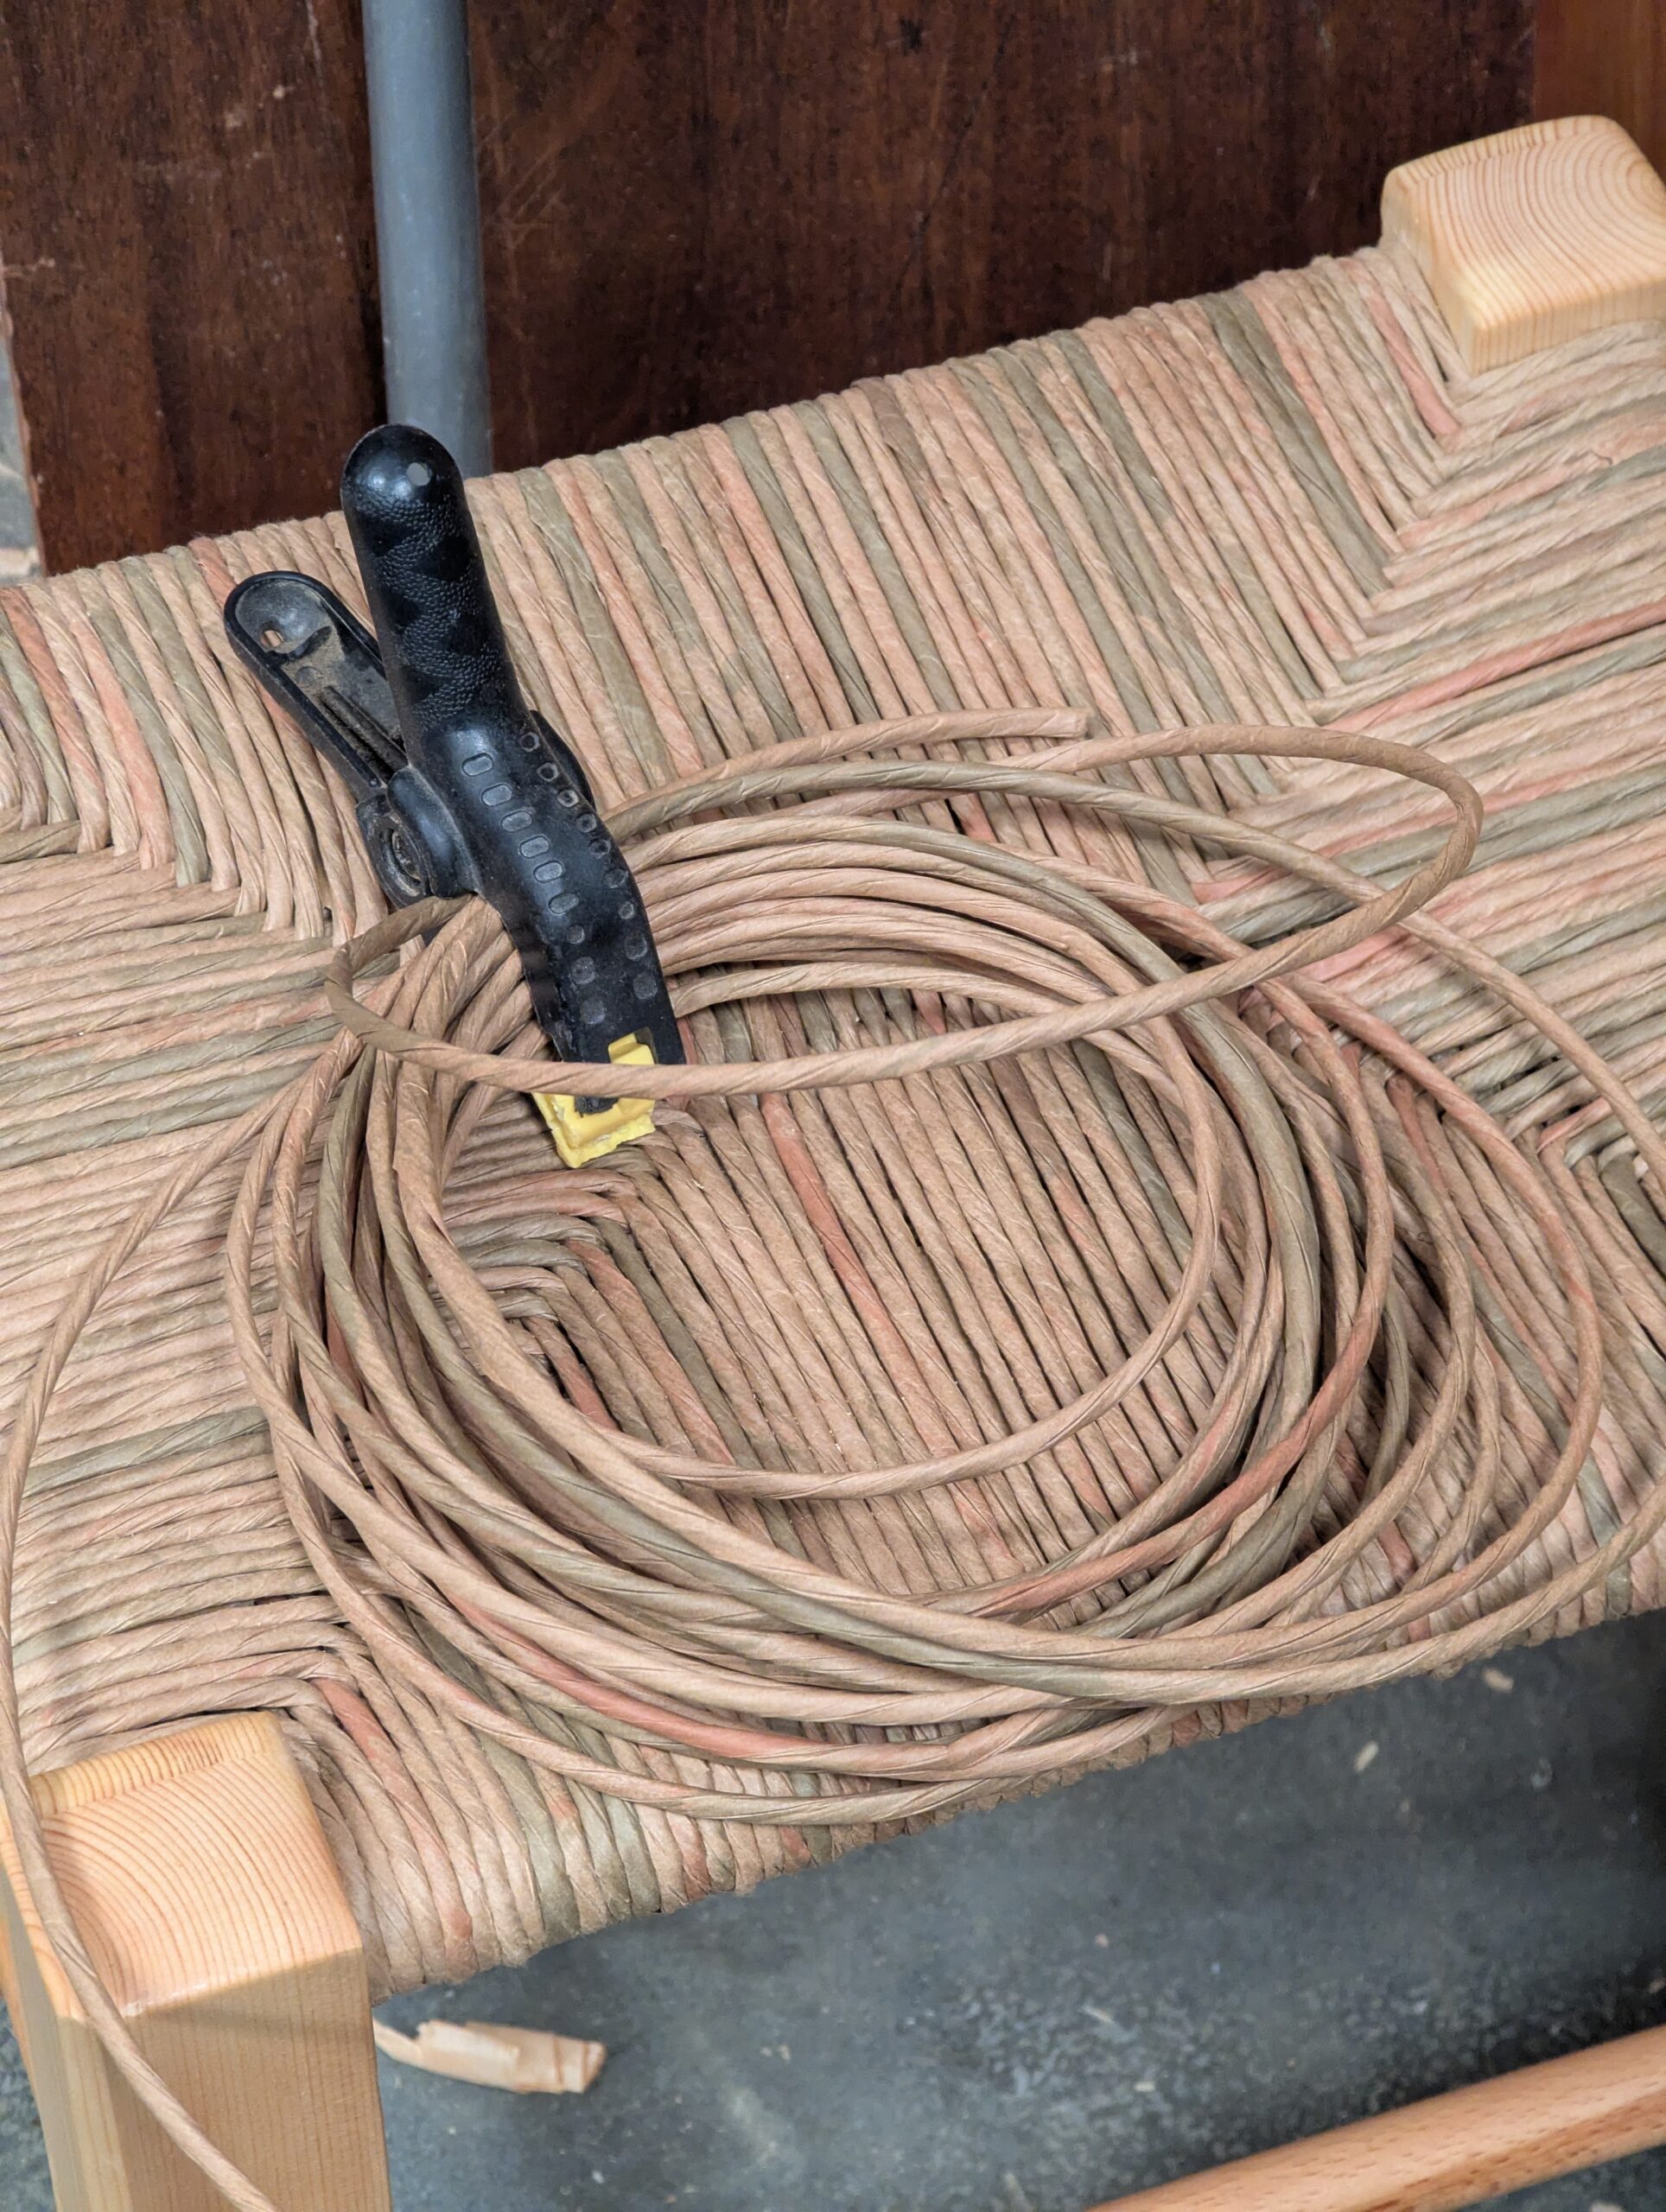
A section of cord is best shortened; otherwise the coil gets too much to handle and can become untwisted. The lengths that worked best for me were about thirty feet per smaller coil as above.
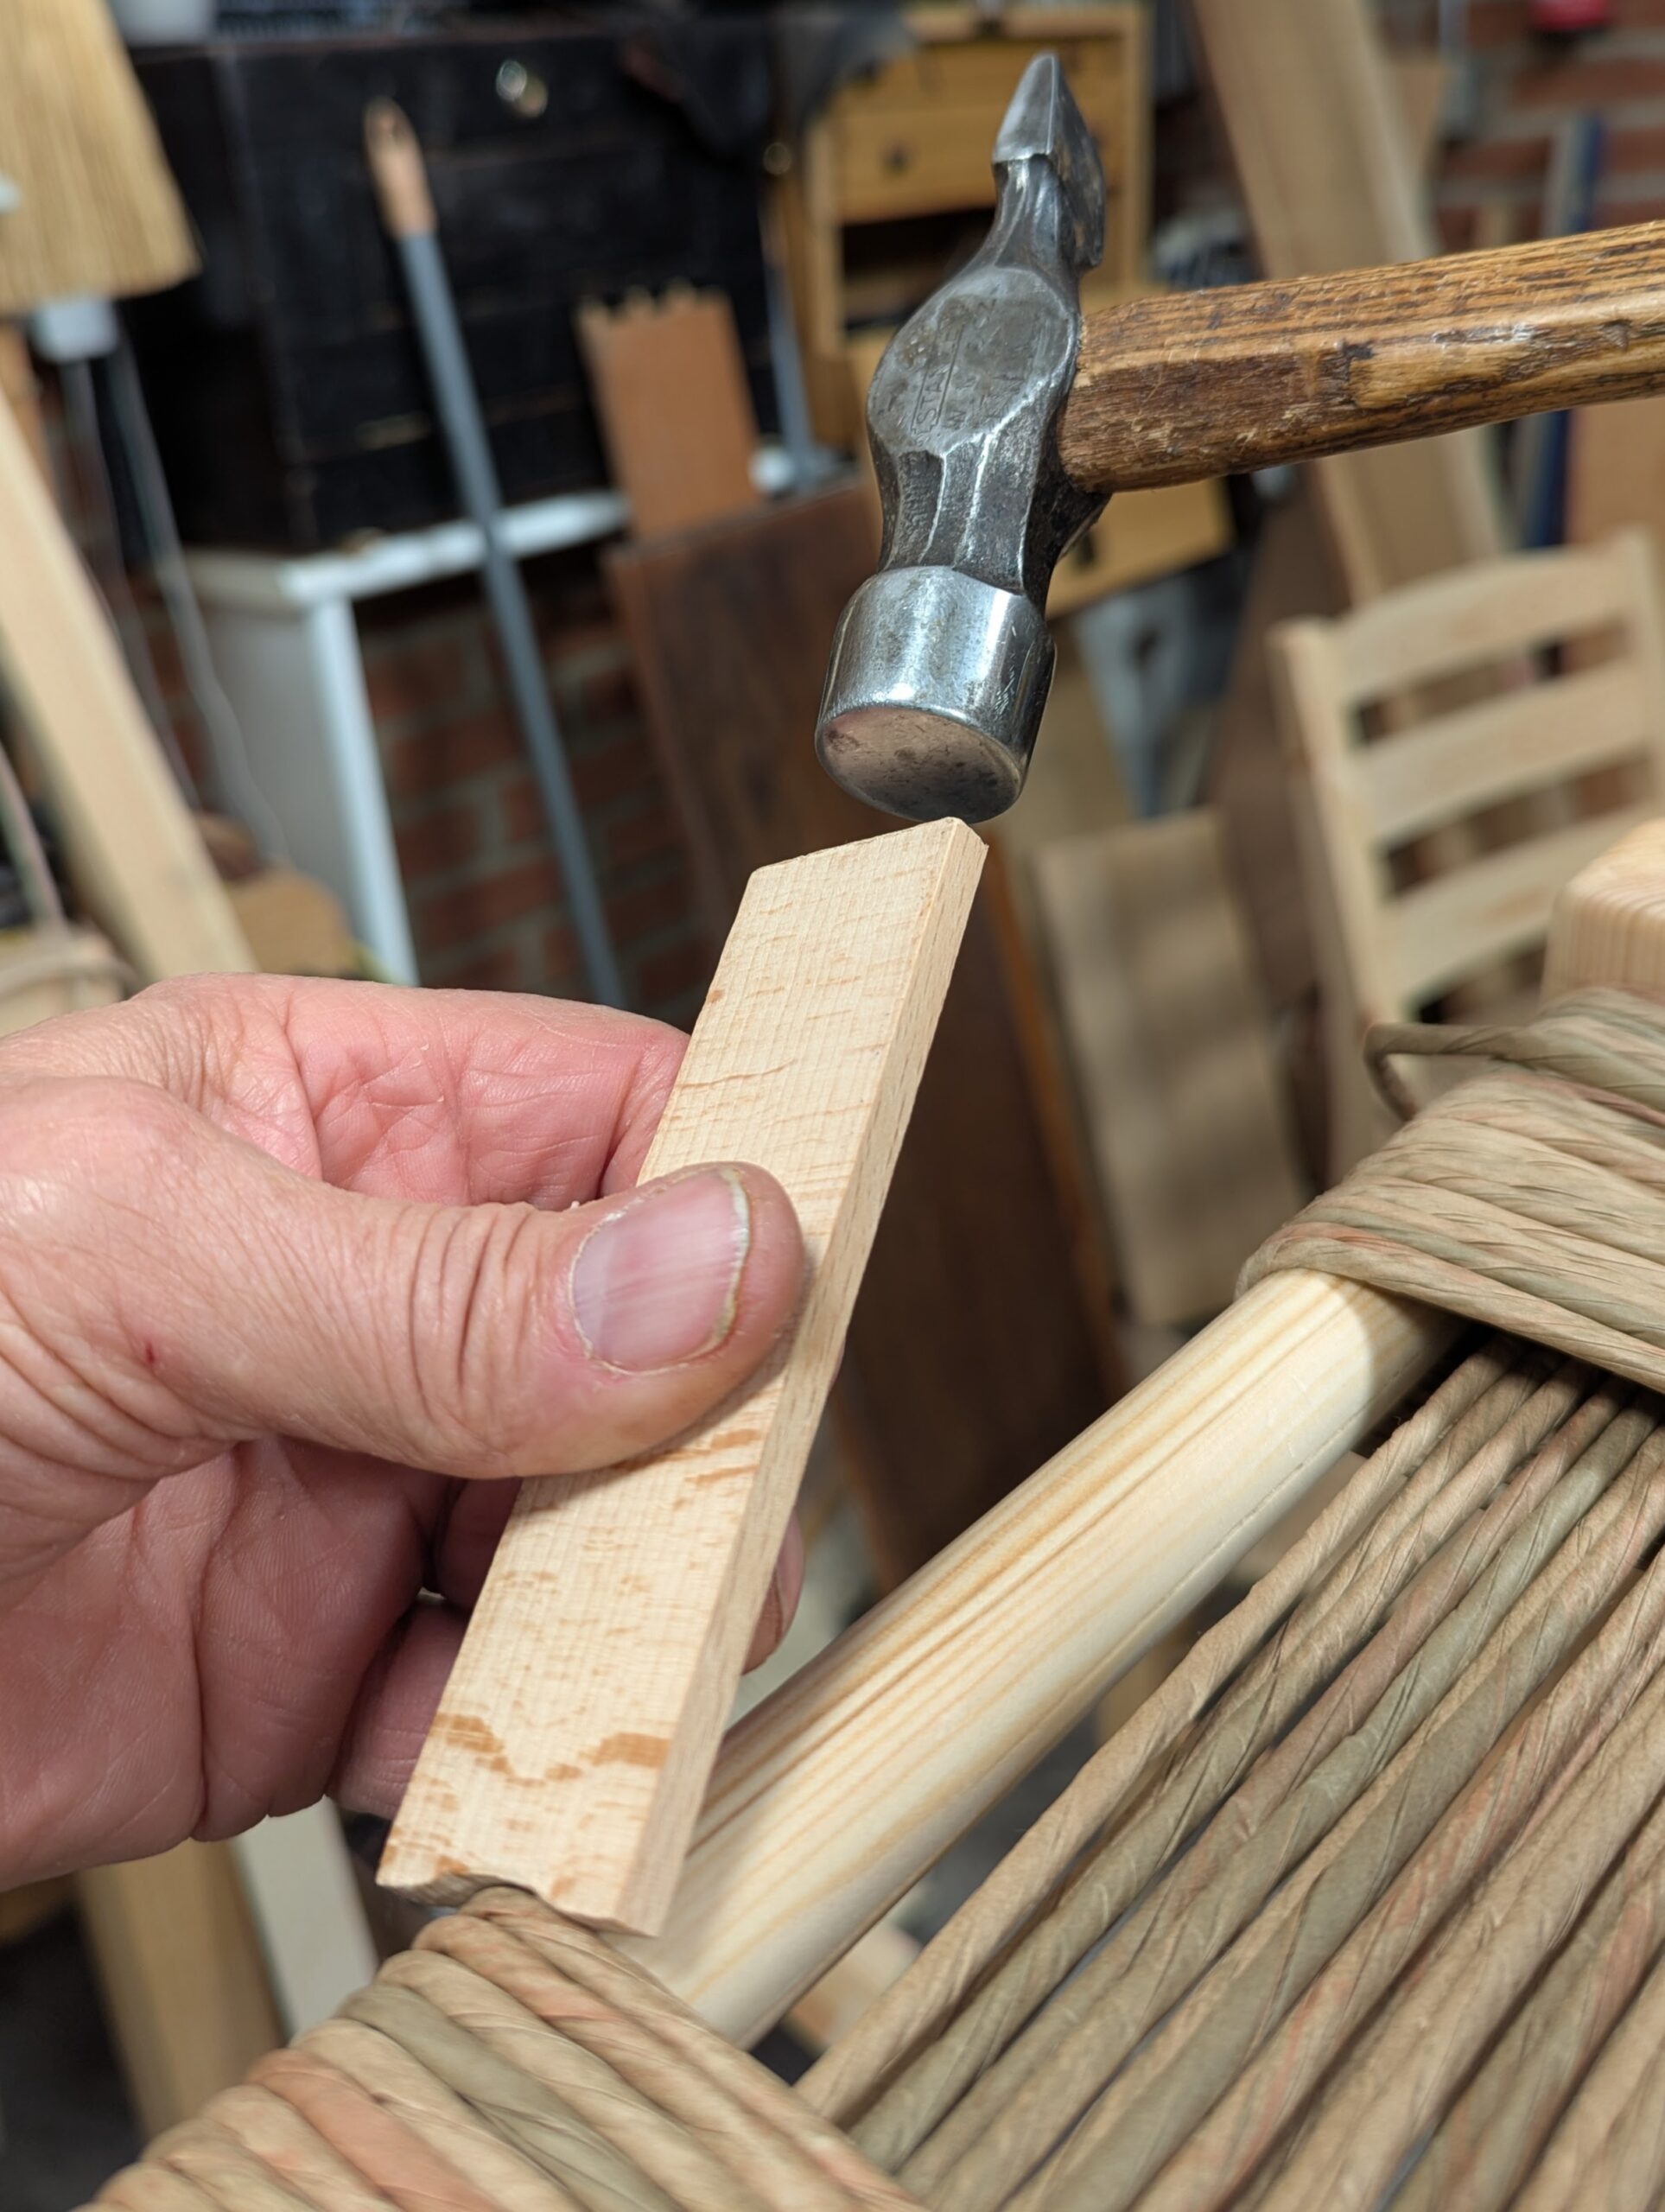
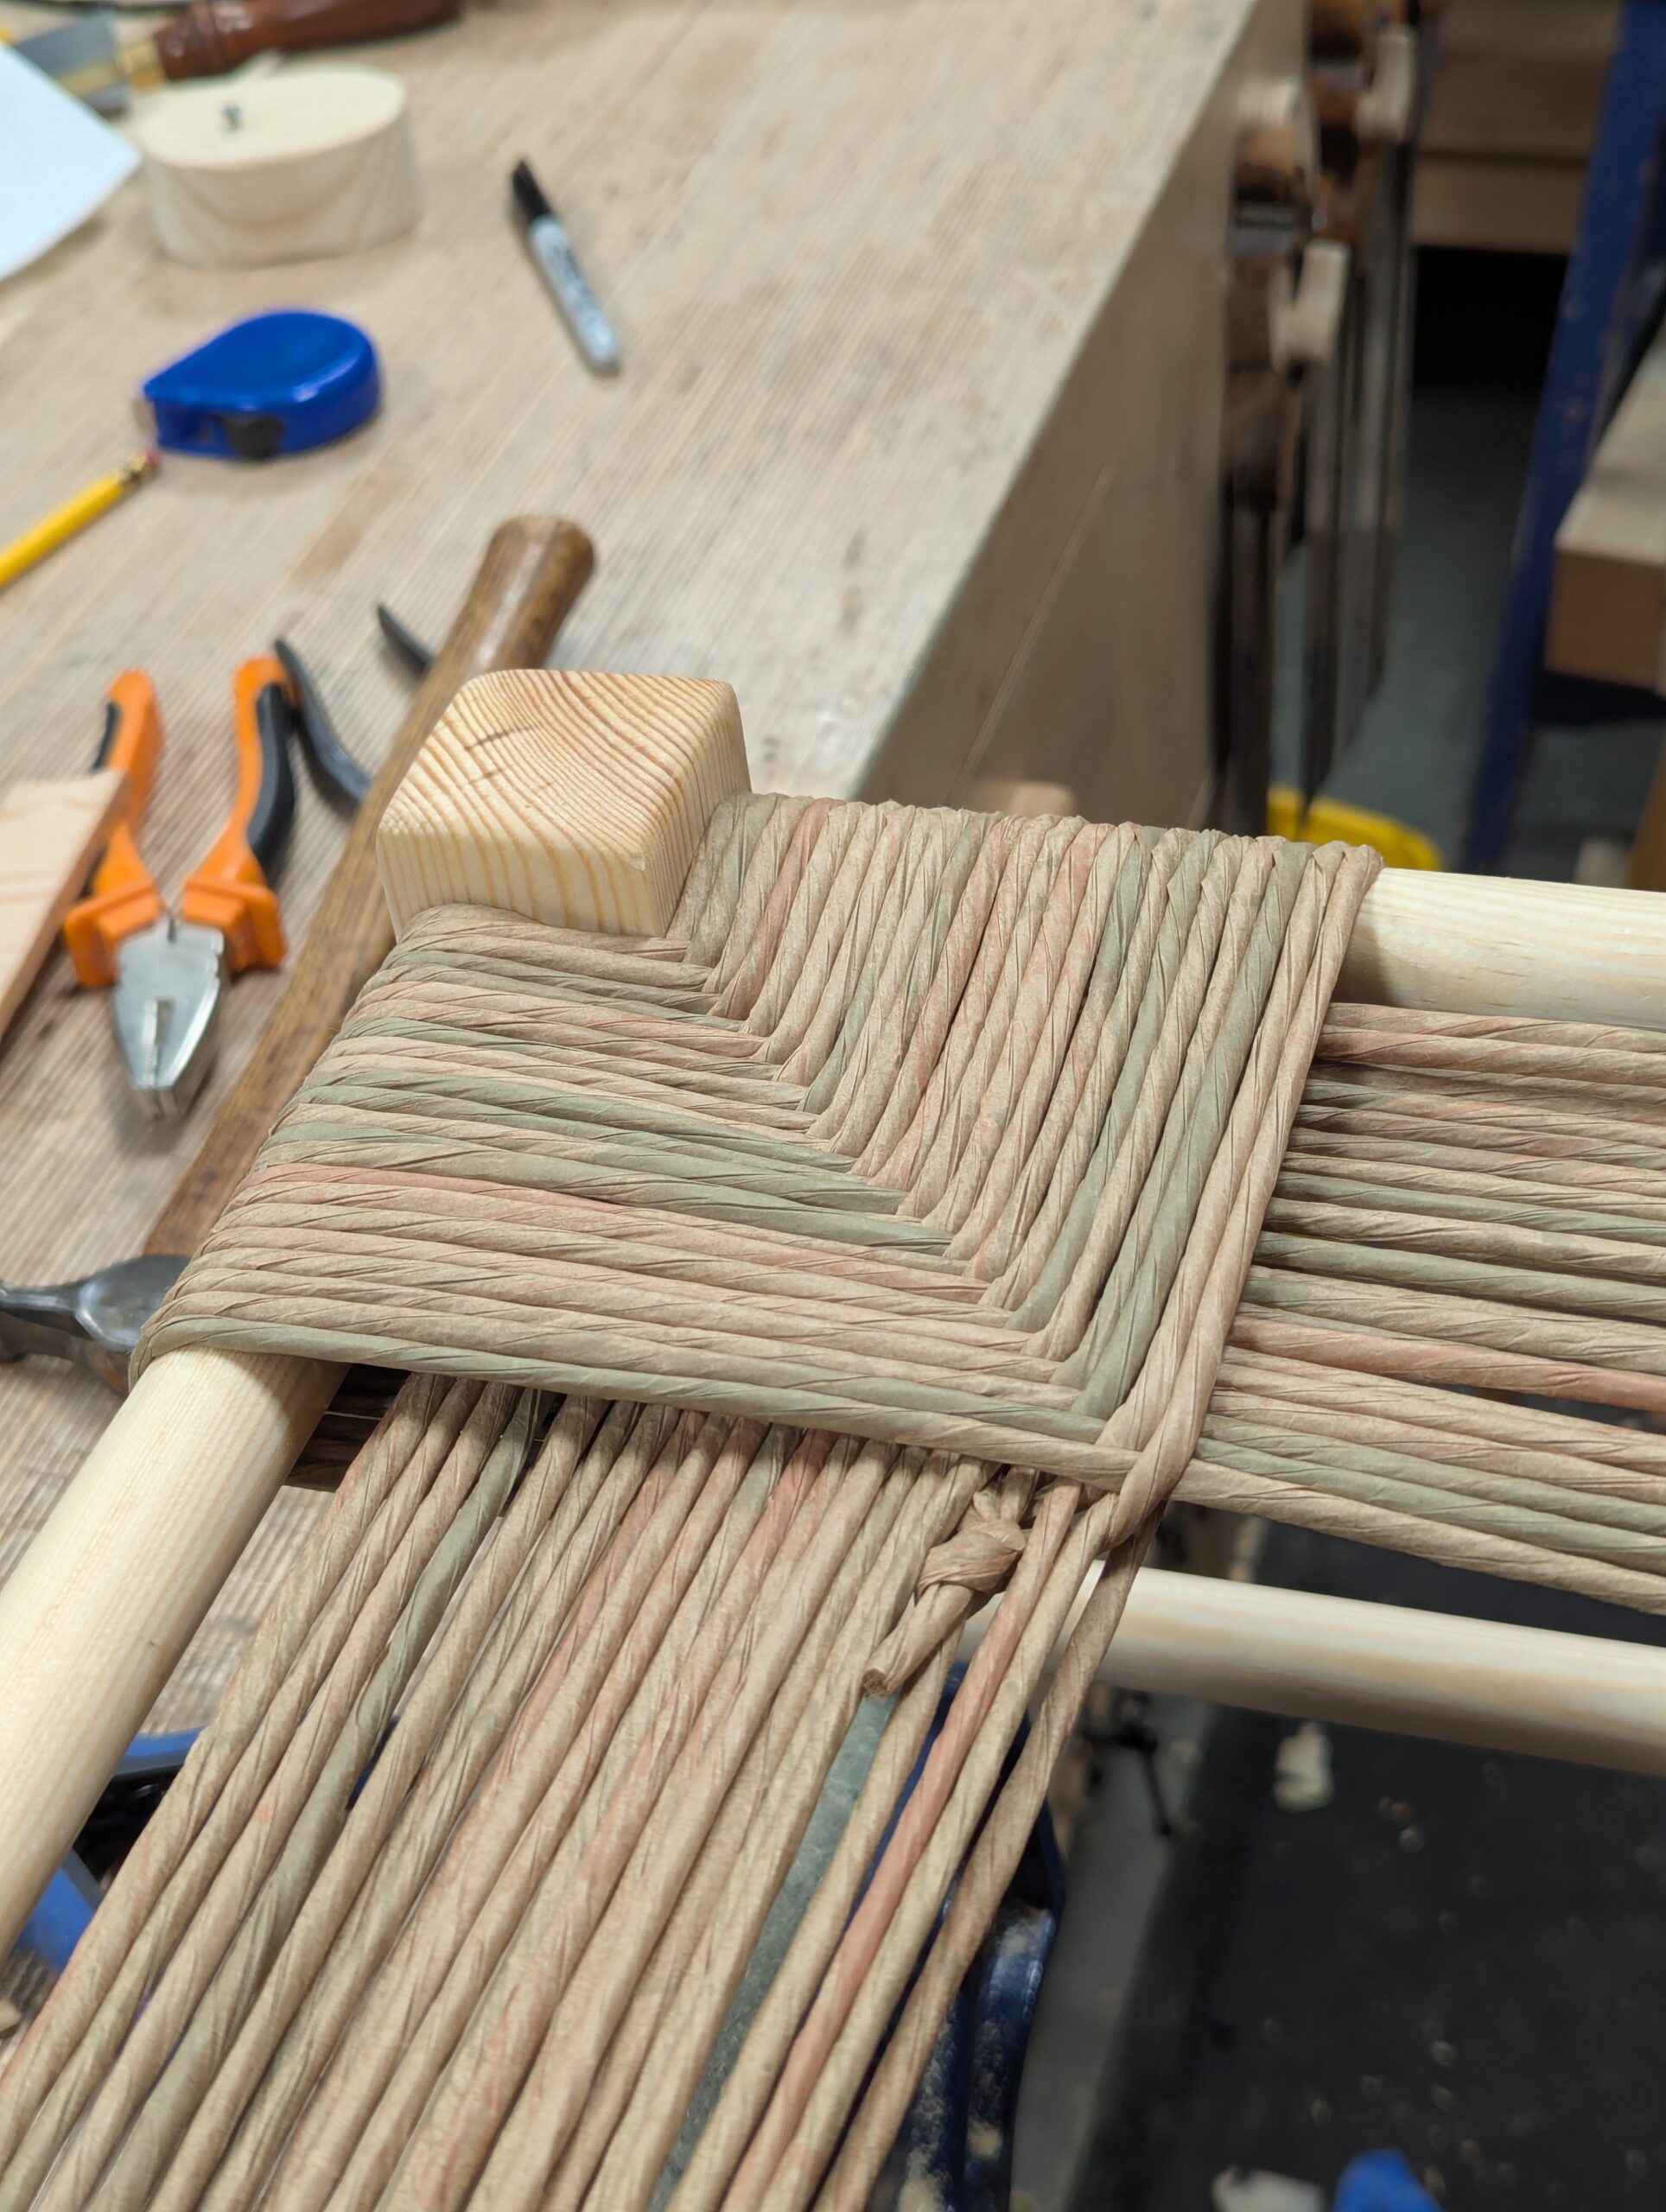
On round rails like this, I used a coping saw to saw a hollow at the end of the tapping stick. This helped to keep the stick centre on the rail as I worked around the rail.
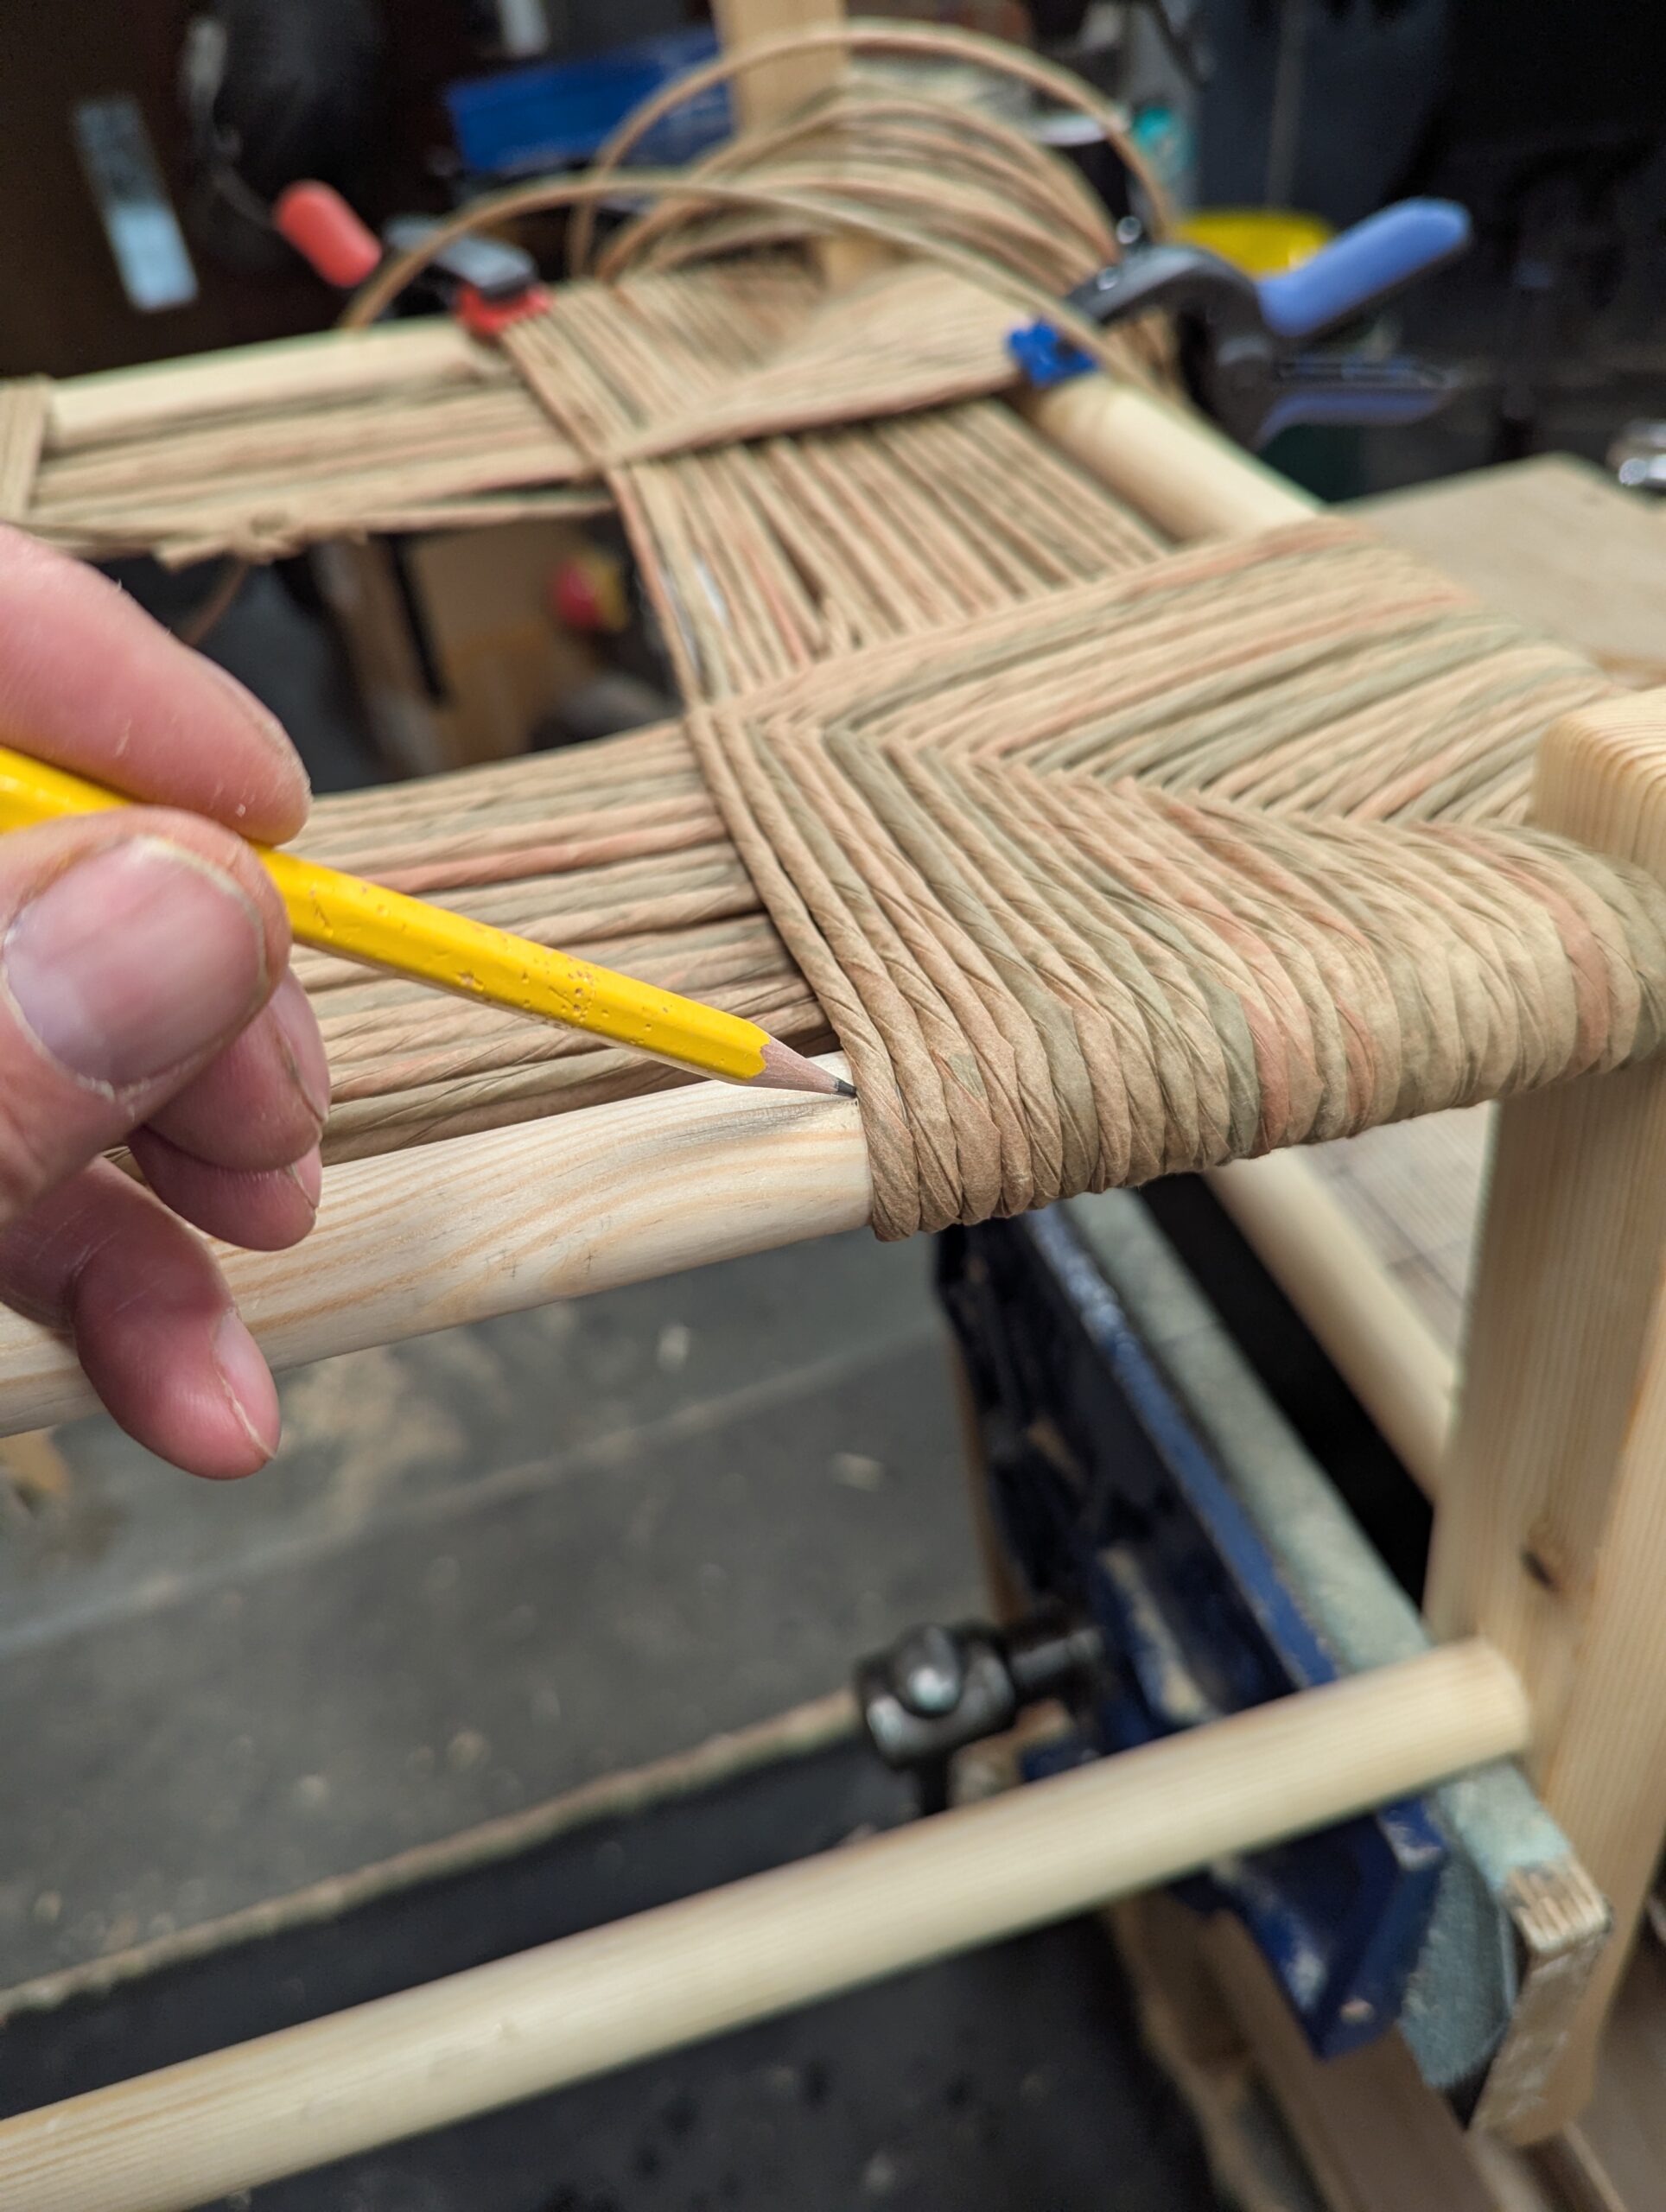
A pencil mark before tapping the wraps helps to see how much the wraps move over.
The wraps need to be tight up against one another.
After the tapping, you can see I gained a quarter of an inch . . .
. . . if that's not quite enough, surprise, surprise! All is not lost if the cord isn't moving quite enough into square. A spray bottle with water sprayed periodically as you weave, only a light amount, then dried off with a cloth, allows the cord to consolidate and tighten up. Not too much, just a single spray and leave it for a minute before driving the cord into itself.
It's going to surprise you how much gain comes after spraying.
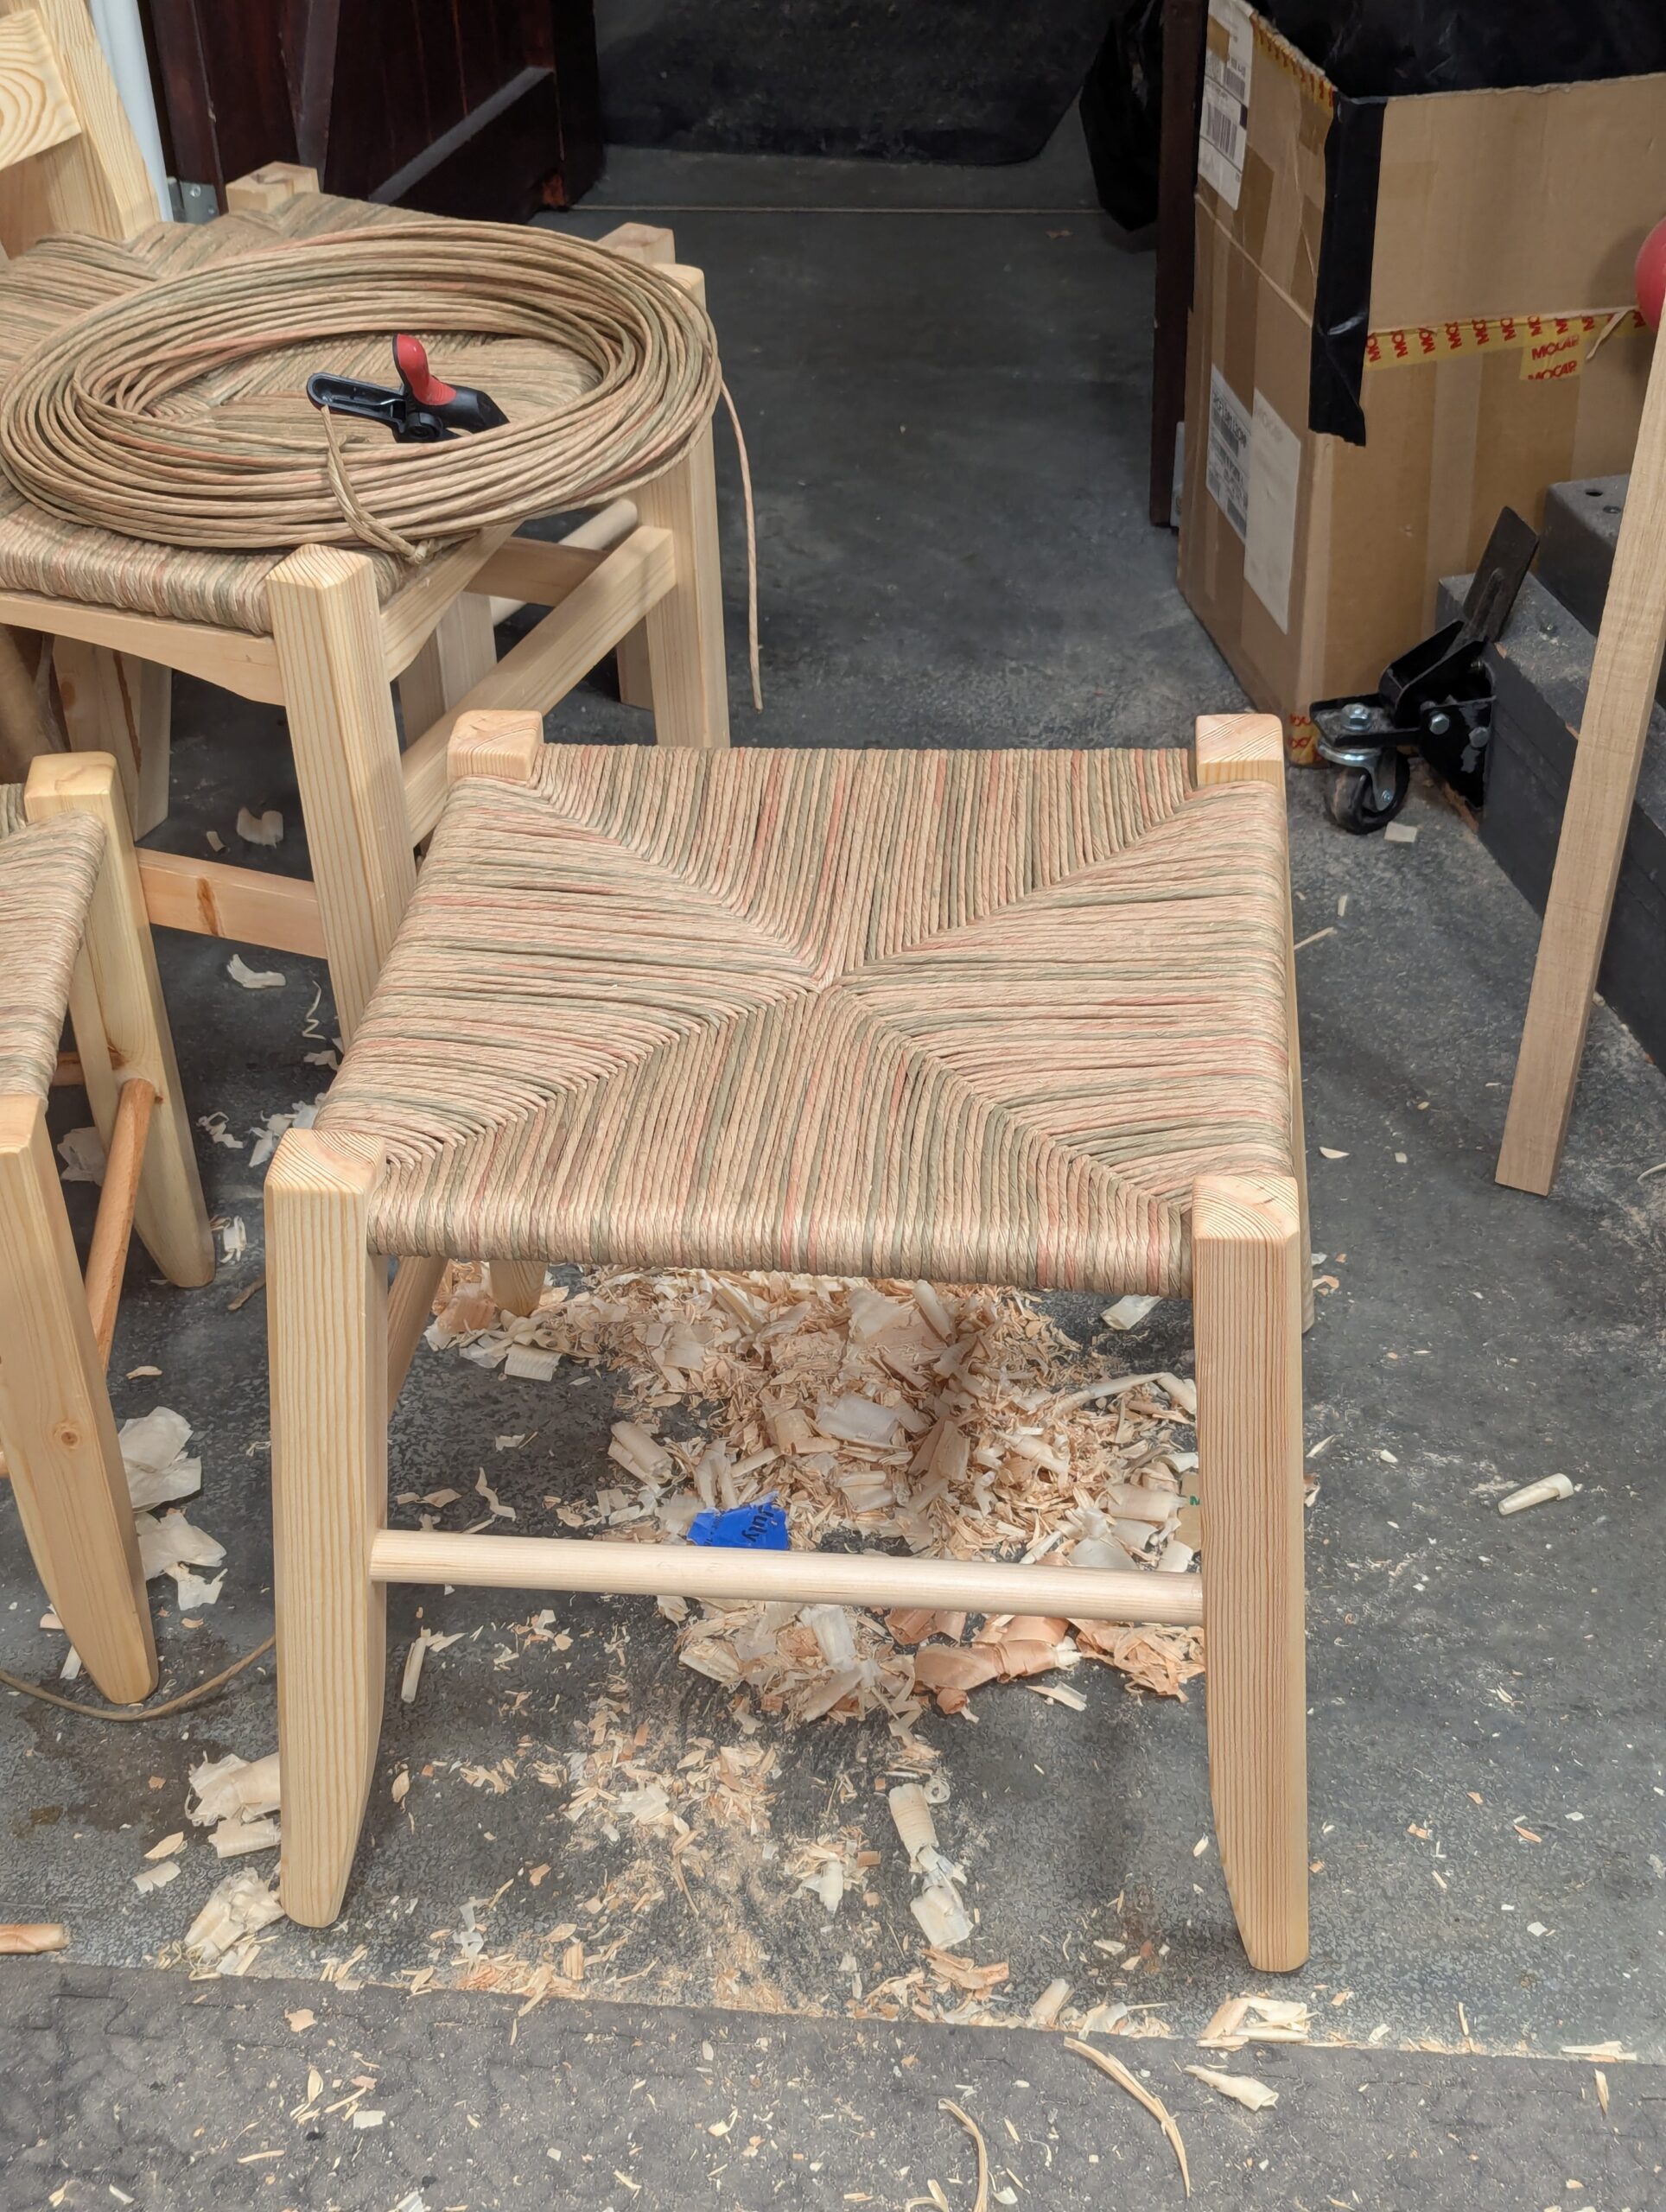
The finished stool looks like this. The final step is to tie off the final strand you just poked through in the dead centre of the four mitres.
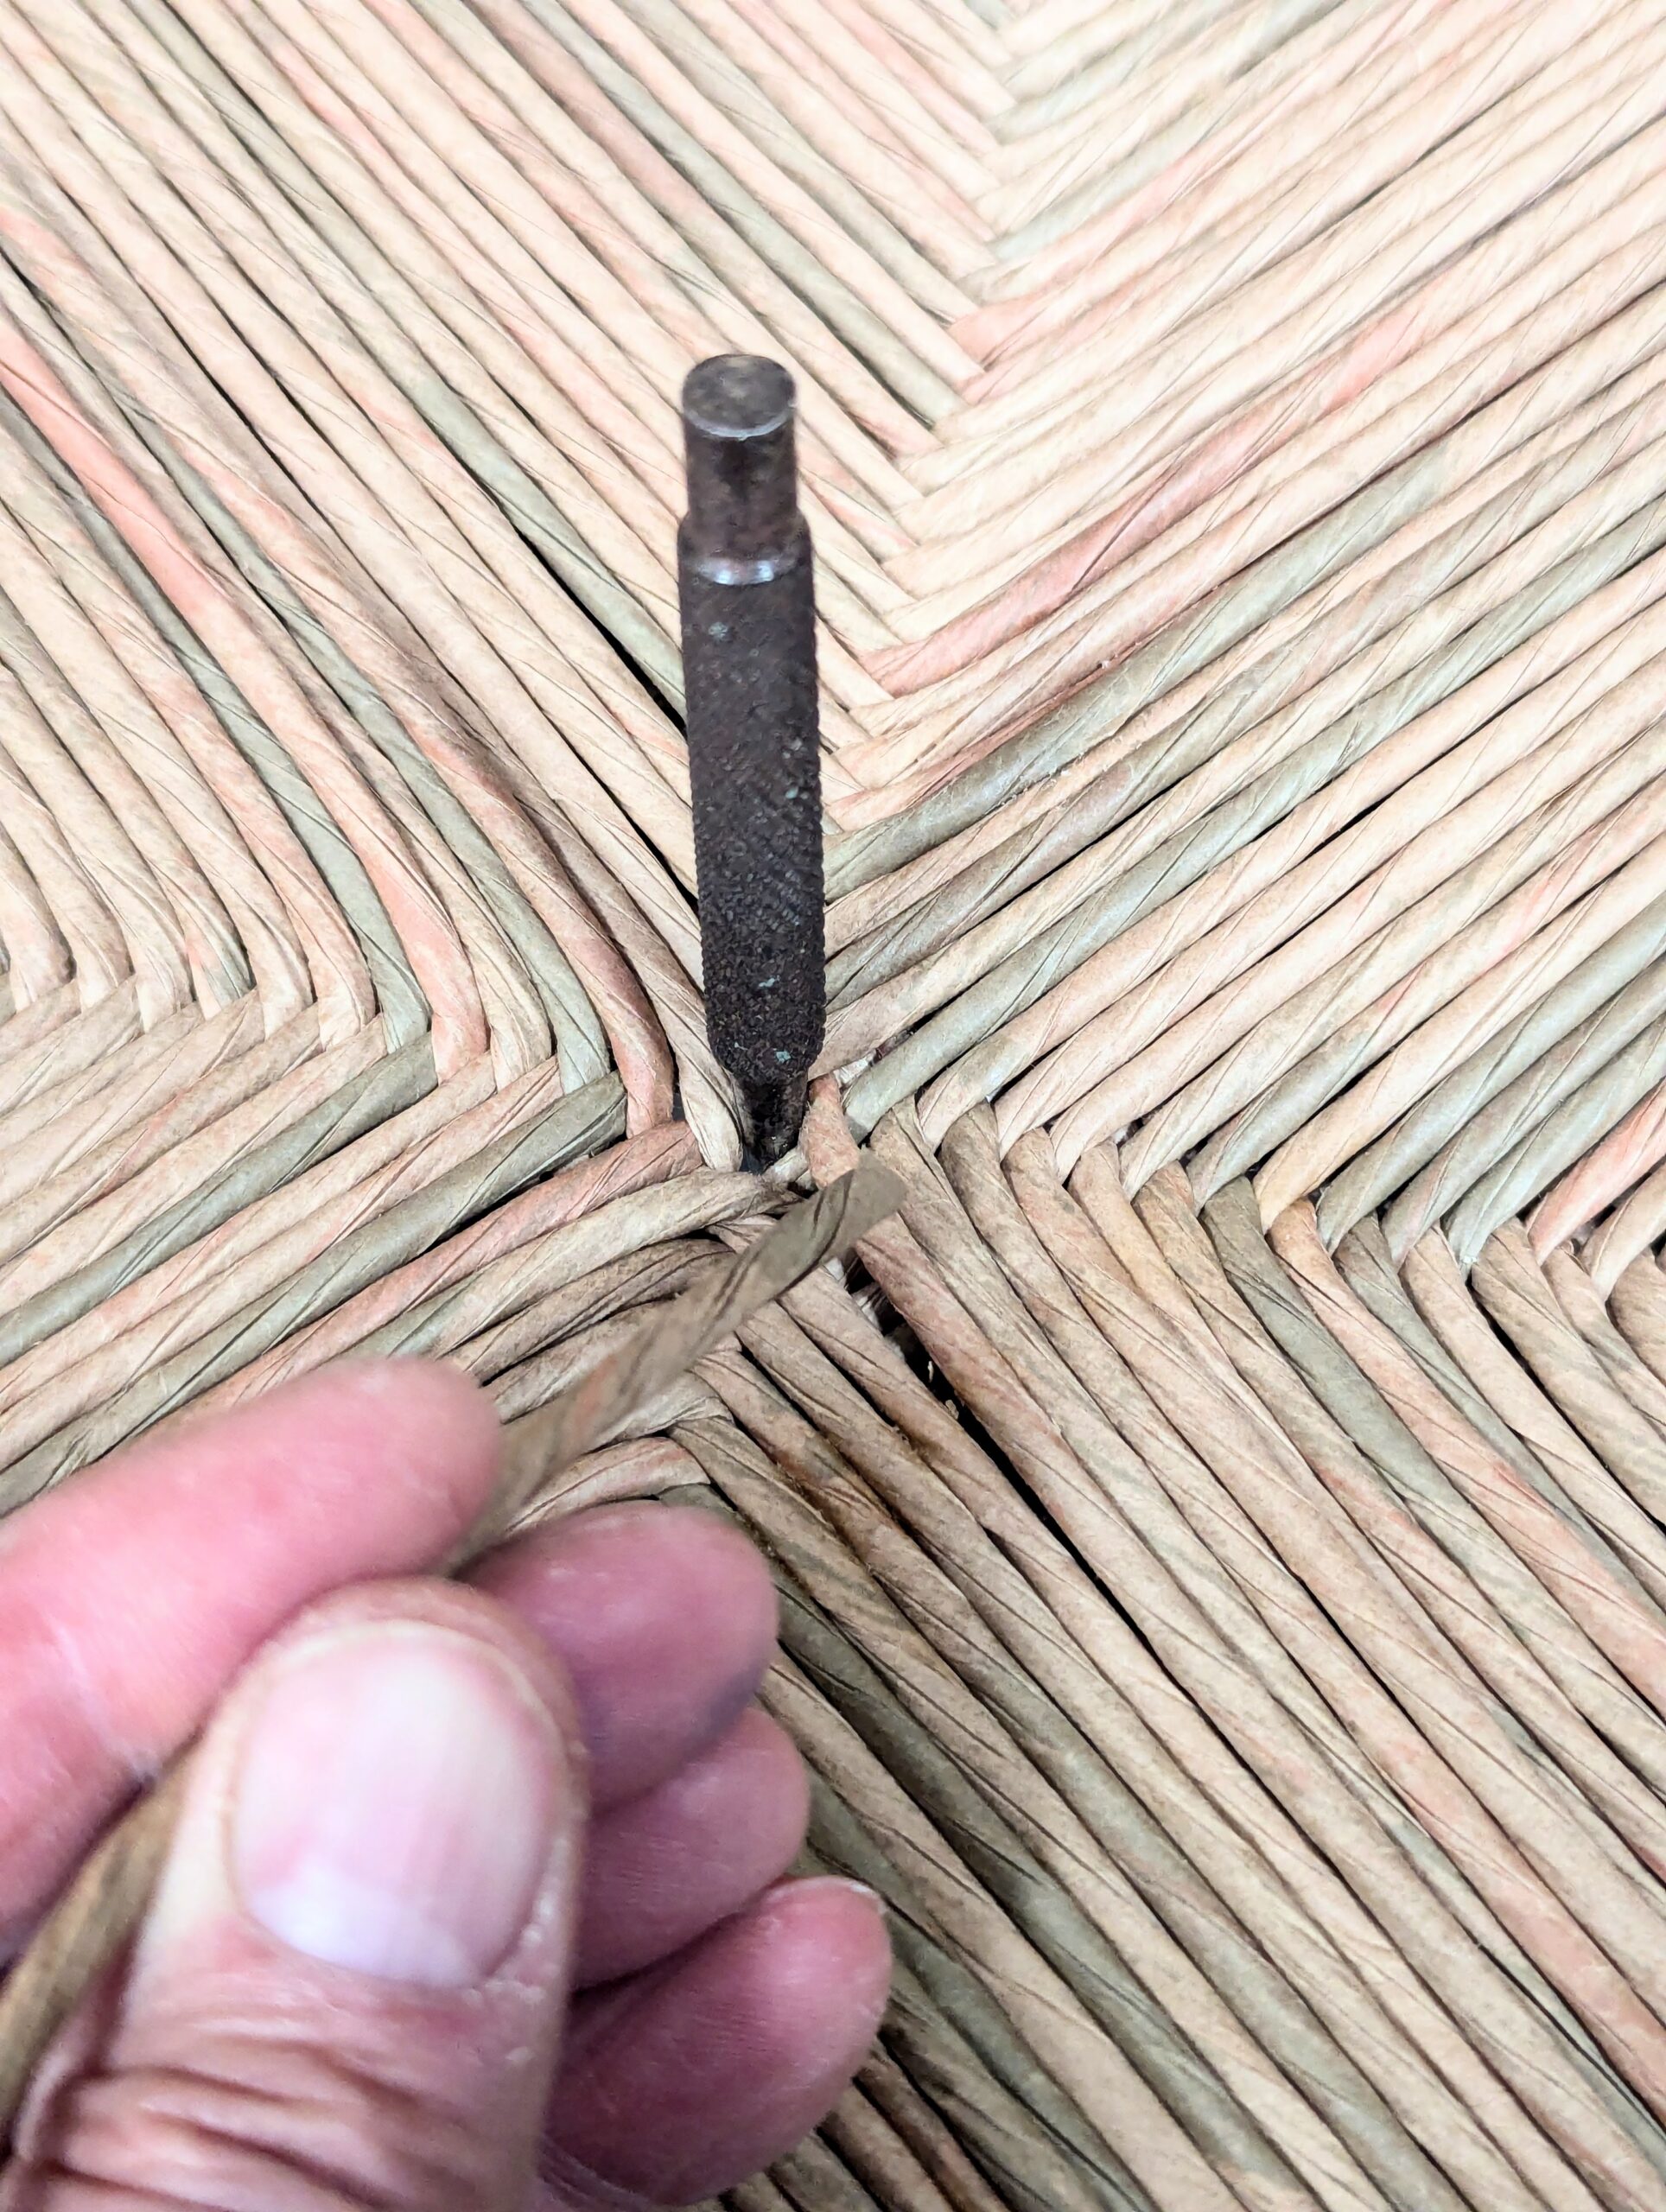
You can use a pointed stick or a nail set to open the strands sufficient to get the core through.
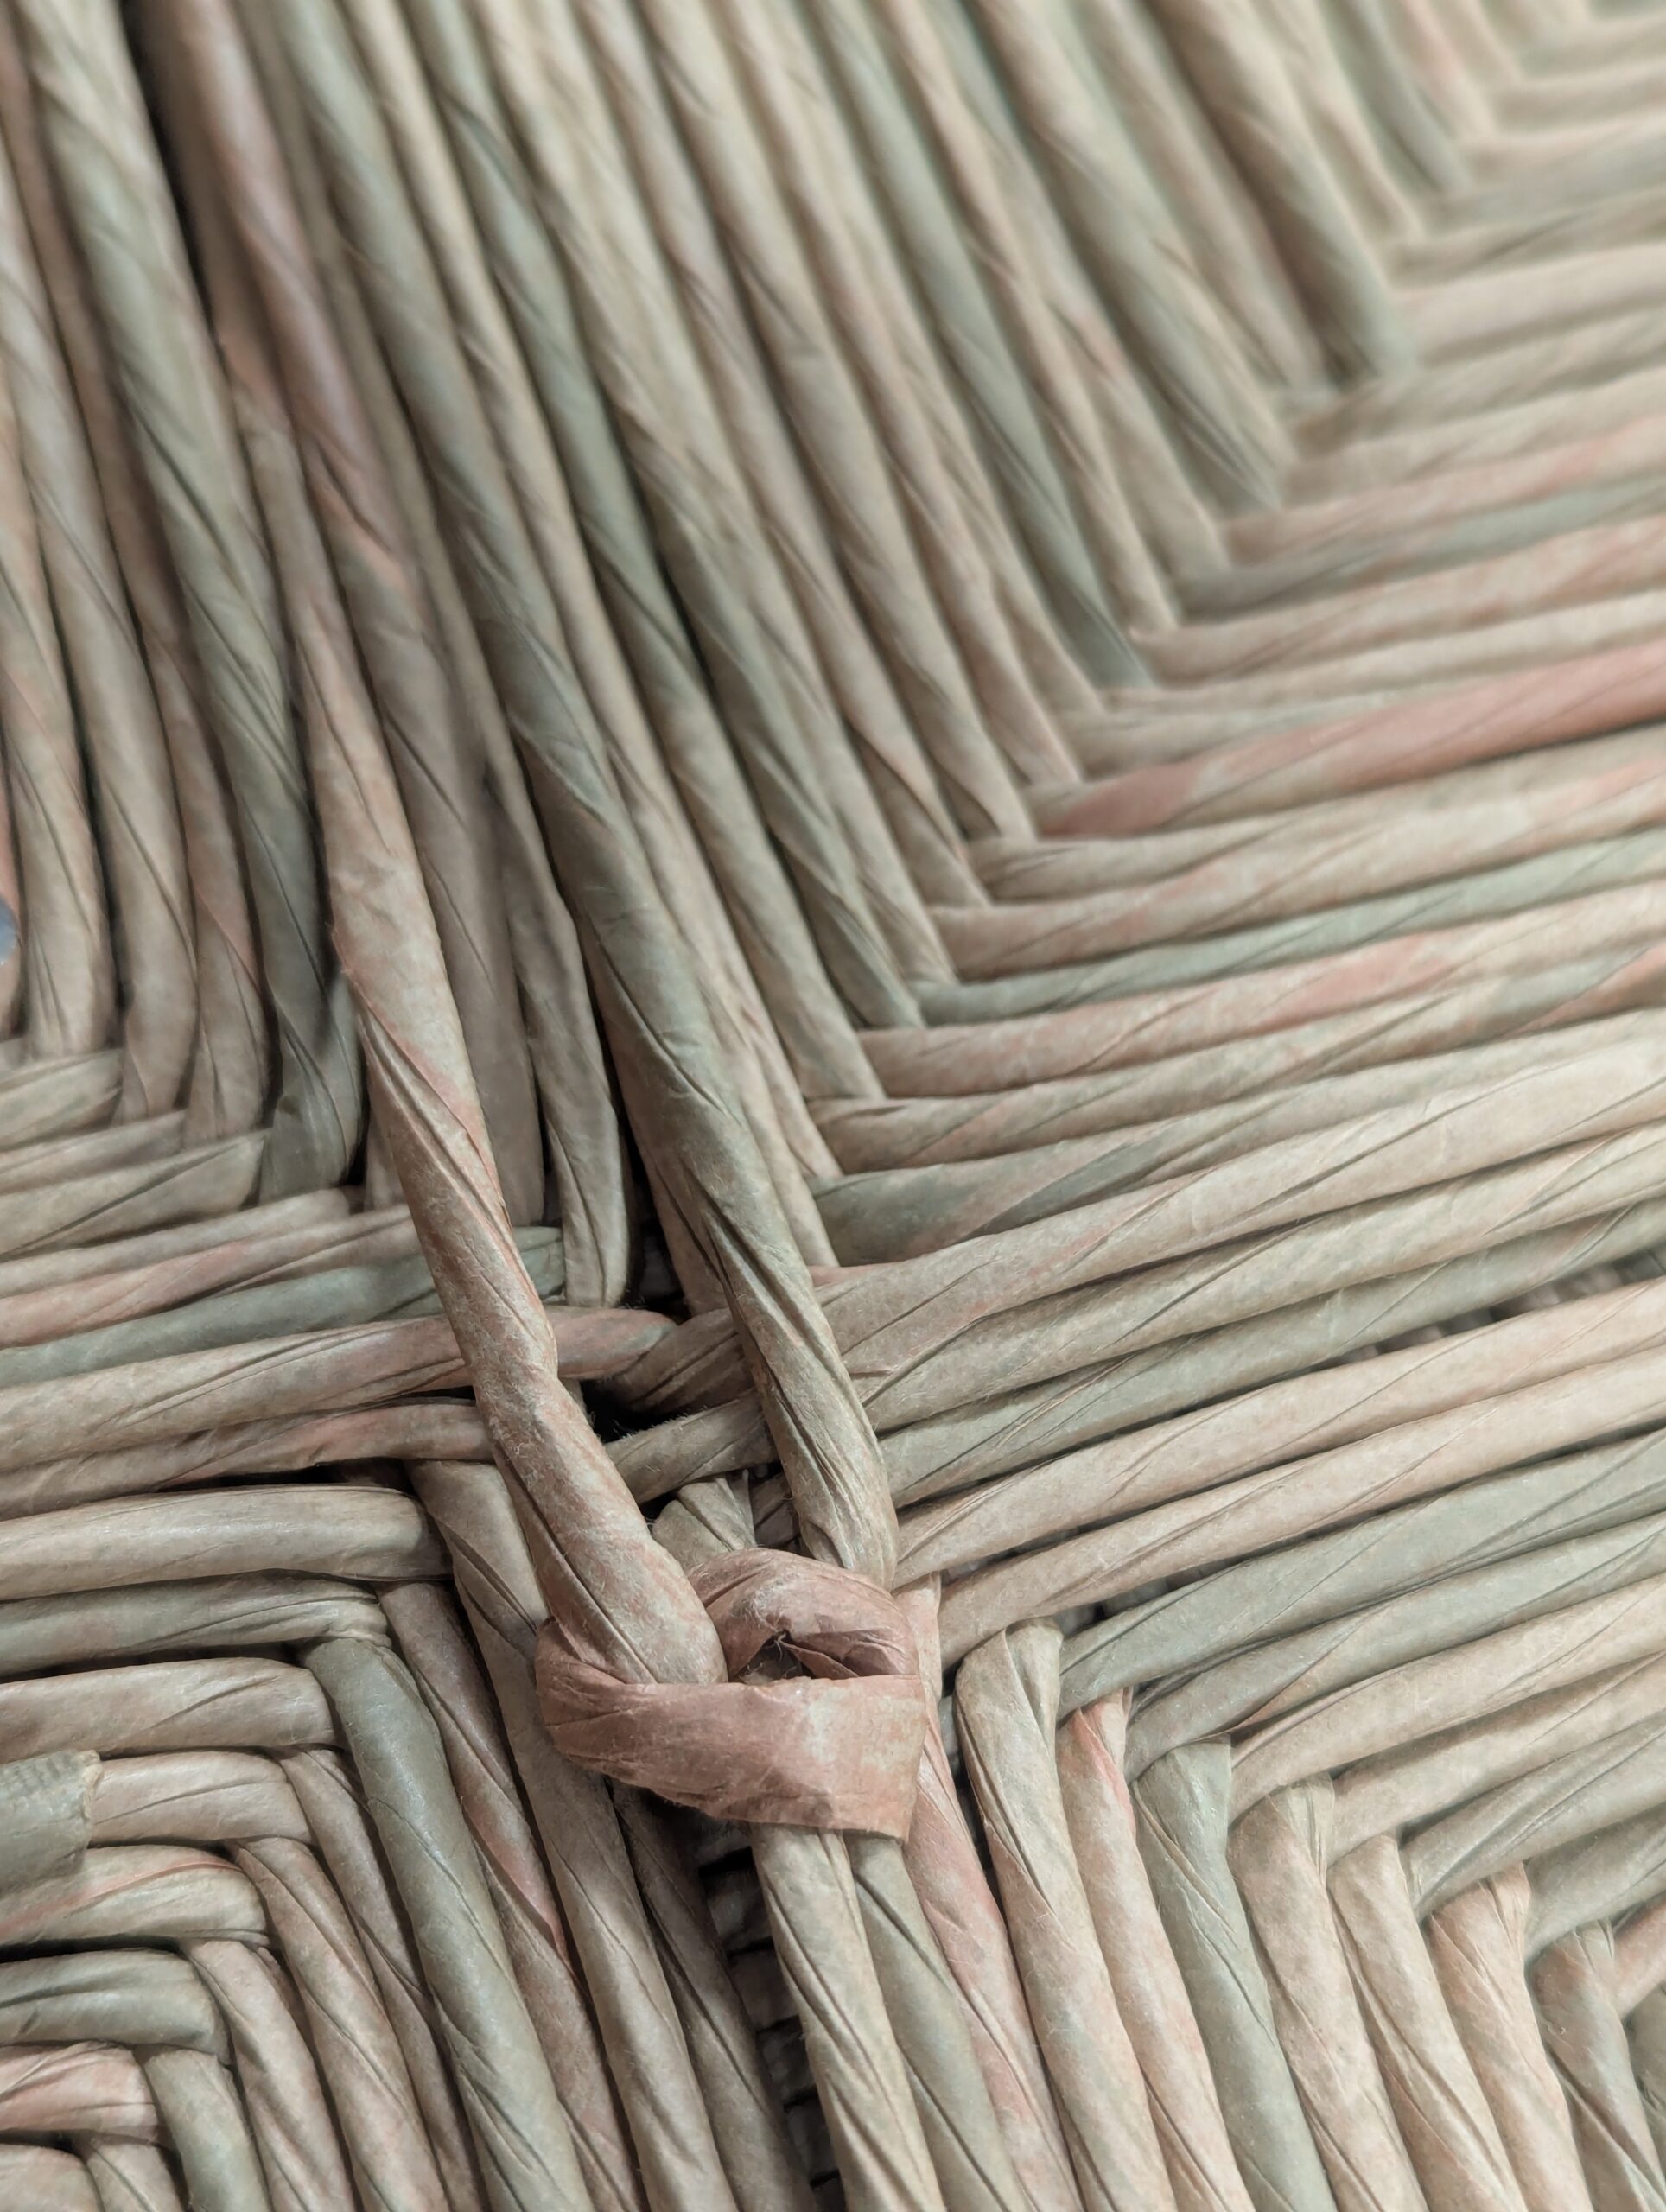
The final tie off is a half hitch knot followed by a second and pulling them close to and tight.
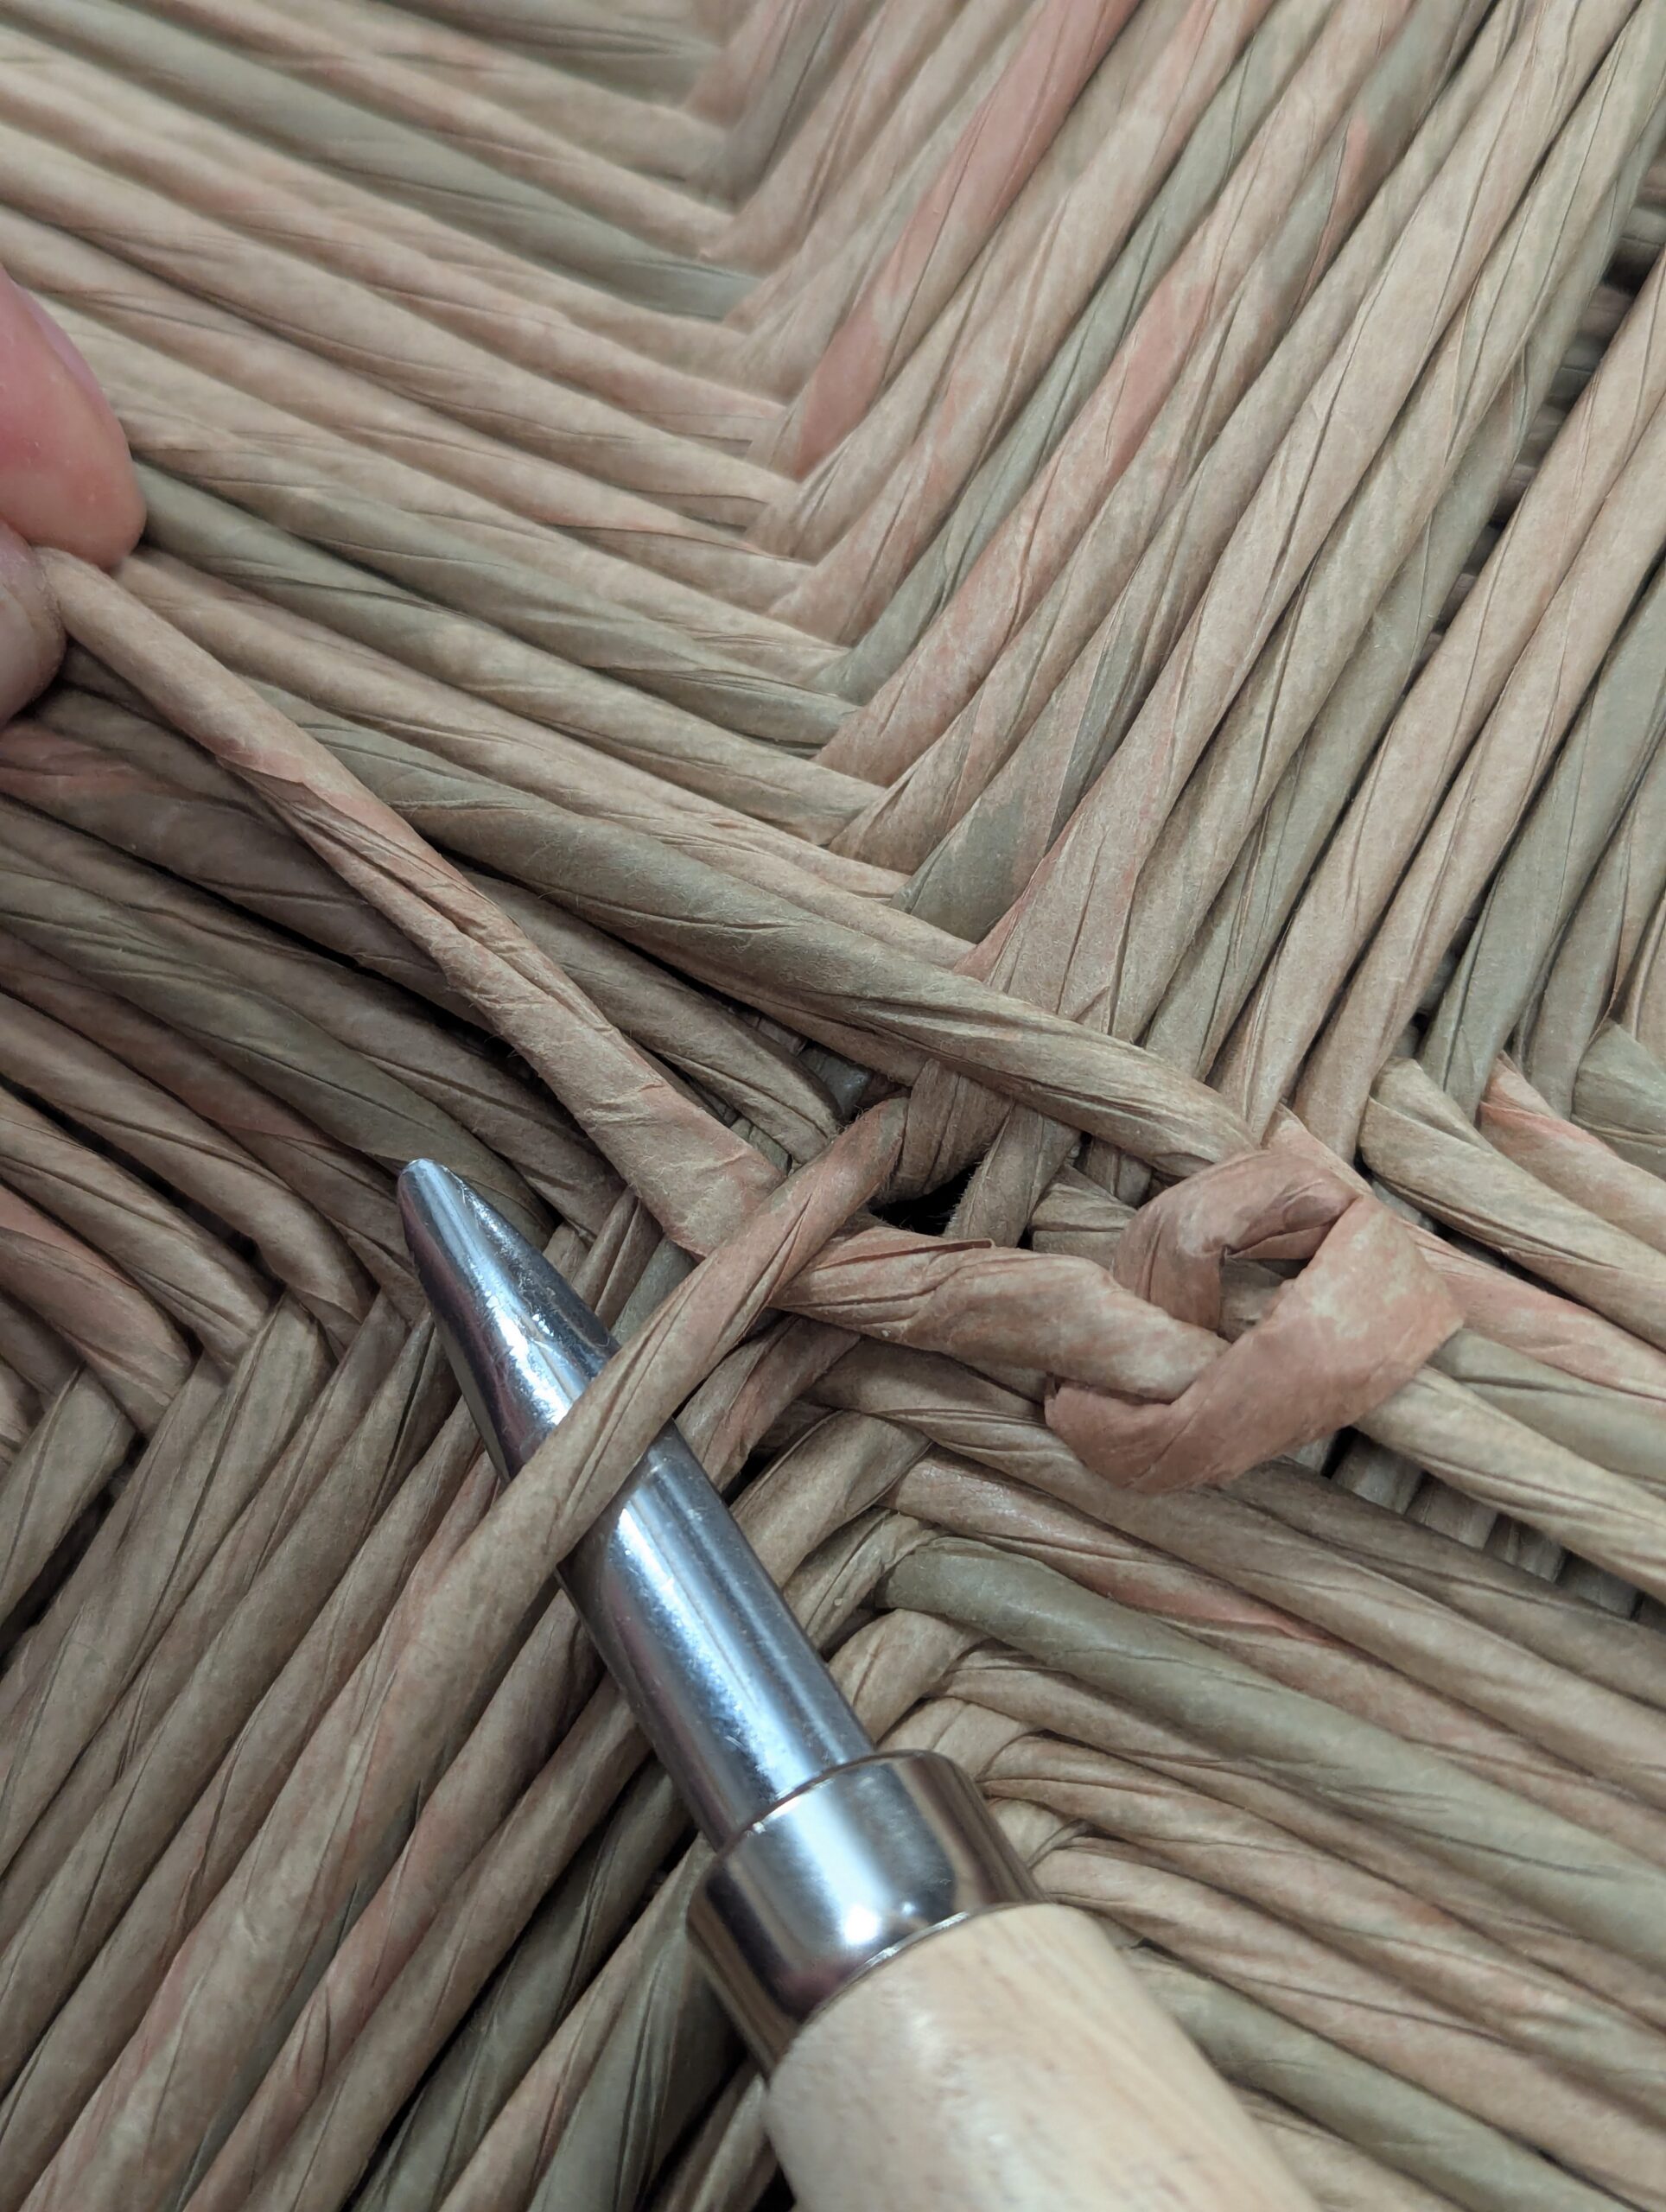
With the last half hitch made, tuck it tightly under a nearby strand by lifting the strand and passing it through and then tugging it tight.
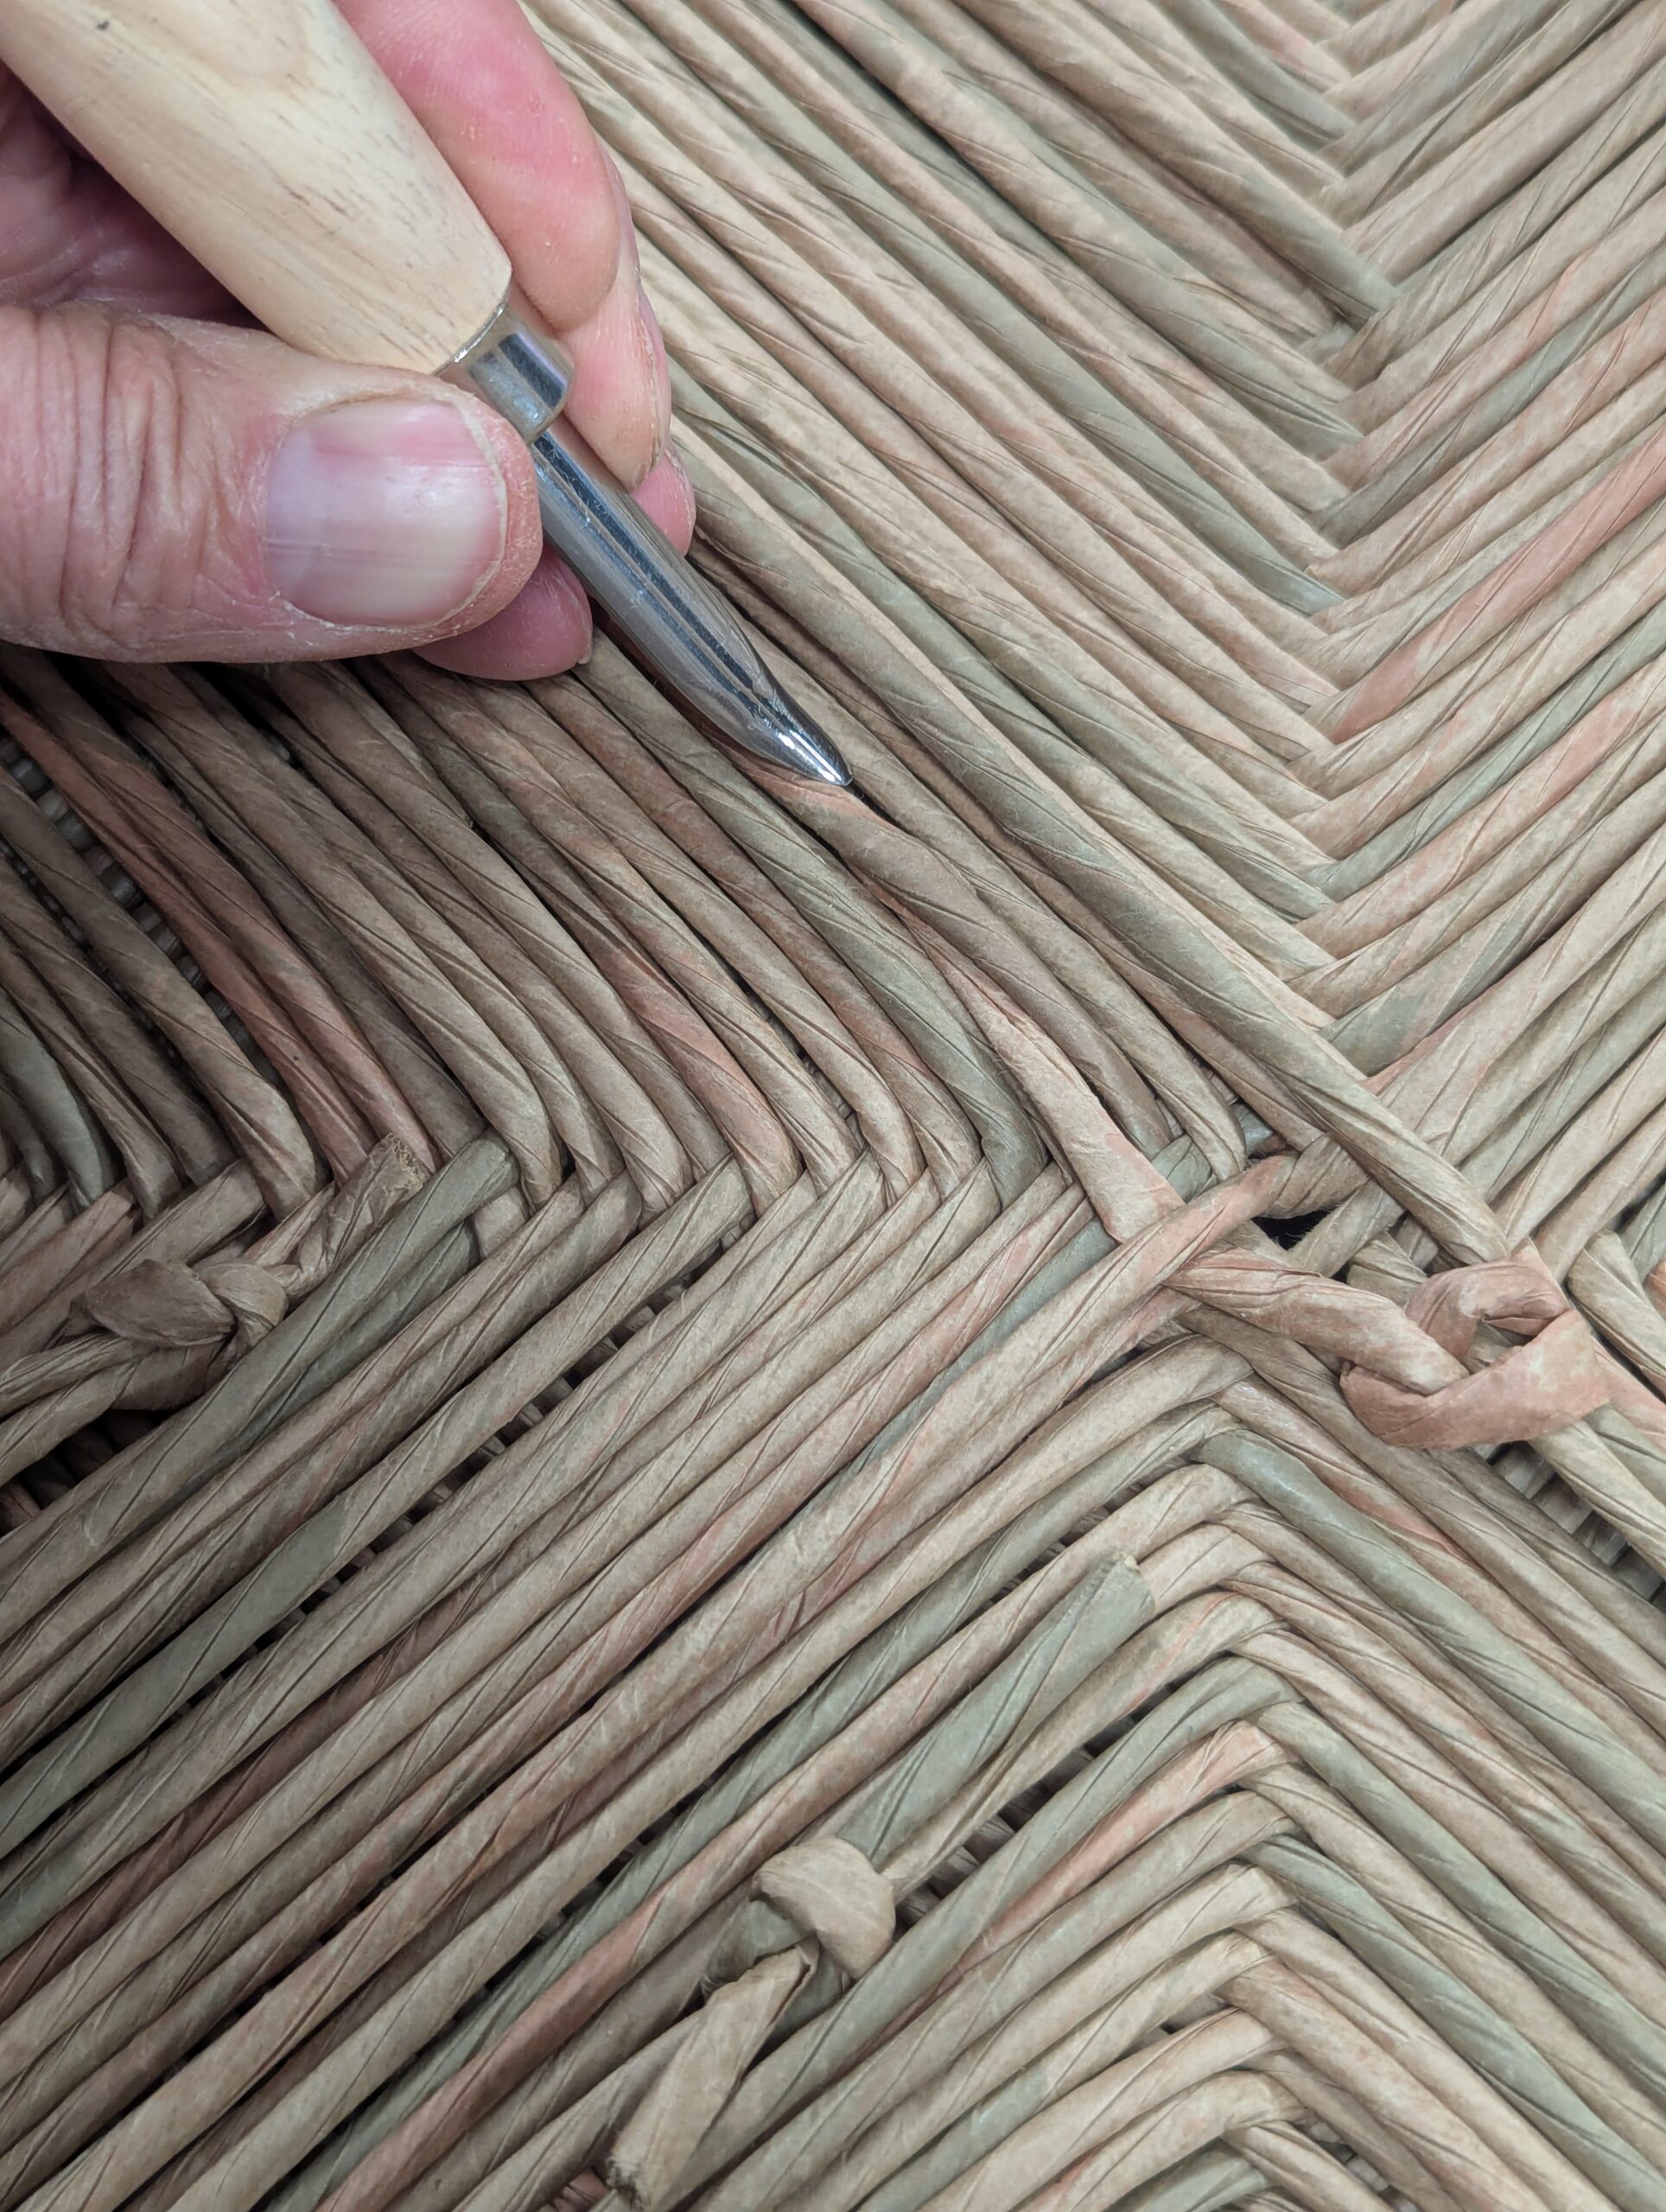
Tuck in the final part of the tail end of that last strand for neatness.
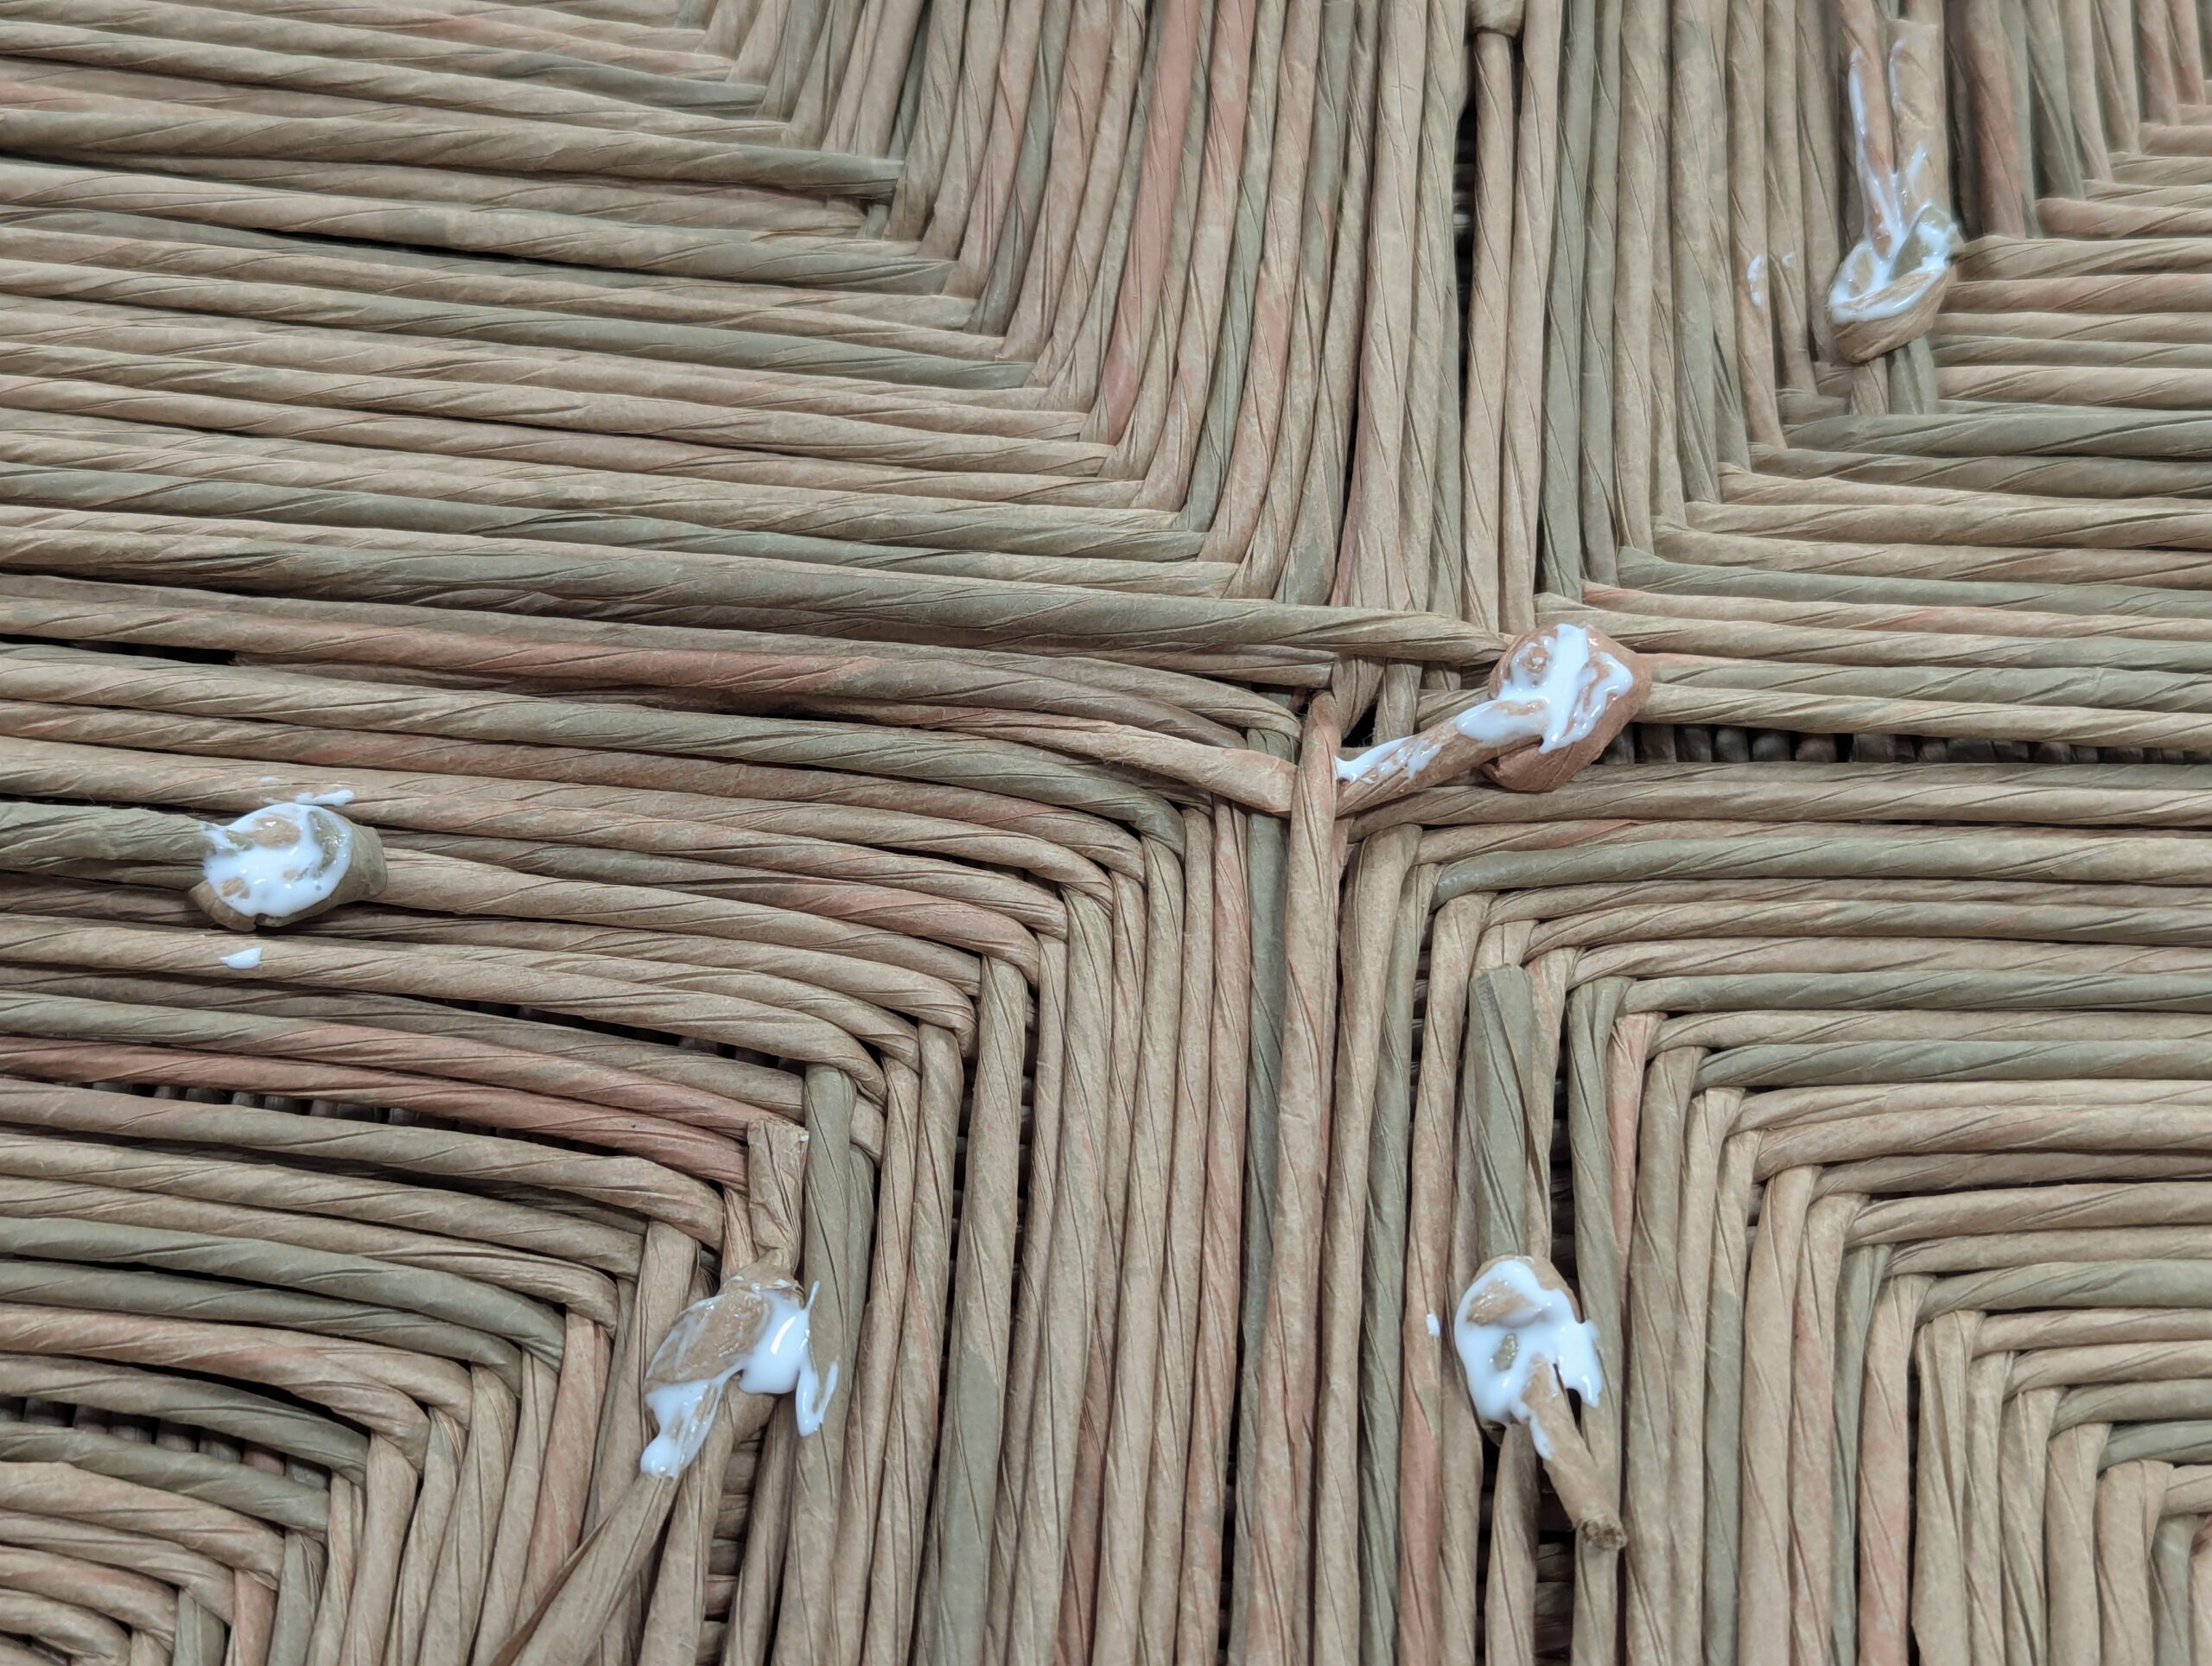
As added security to the reef knots, to prevent them from undoing in the coming years, you can rub in some PVA glue to the knots before you tuck them away within the two levels, top and underside. When the glue dries, it is barely discernible.
Comments ()