Designing a Design
The only thing two days might have in common with one another is the unpredictability of them. We plan one thing, and then something happens that turns what we hoped to accomplish completely on its head. It's life. A road works, temporary traffic lights and a redirection sends us a different, much longer way.
Today I am struck by others who parallel one another as icons of design by designing something more distinctive in art form than practical in use. Their designs look evocative, clean-lined, shapely elegant and, well, eye-drawingly praiseworthy. We'll all remember the first pallet wood coffee tables suspended on four corners on breeze (cinder block USA) block with a plate, float-glass top from back in the 1980s. This slam in the face of Ercol or Hepplewhite, Chippendale traditionalism was a bit like the 1960s Hippie Movement, when student-types rejected suburban middle-class values to pursue an alternative life as yet undefined.
The pallet was distinctively different and unusual then, and is still just as ugly when placed in the wrong setting today. And it's as much about the setting as it is about anything else. I think we all look to be different and that's been around since the 1960s, but we also look for cohesion and not necessarily harmony, but then we want something that, by an arrangement of parts, brings things to a complementary agreement with a closeness where all things are working well together with one another.
For the main part, my current work is less about creative artivism and mostly about practicalism. It's what families need to sit at and work from, and then those new to woodworking need to develop their skills. I need chairs and tables that fit people, suit working life for working families around a home, and look attractively purposeful. Beyond that, and equally important, is a chair a family can make working alongside one another. My work through the decade has been to say woodworking should be for everyone, regardless of past paradigms in thinking. Especially is this so for those seeking to establish the skills of hand work.
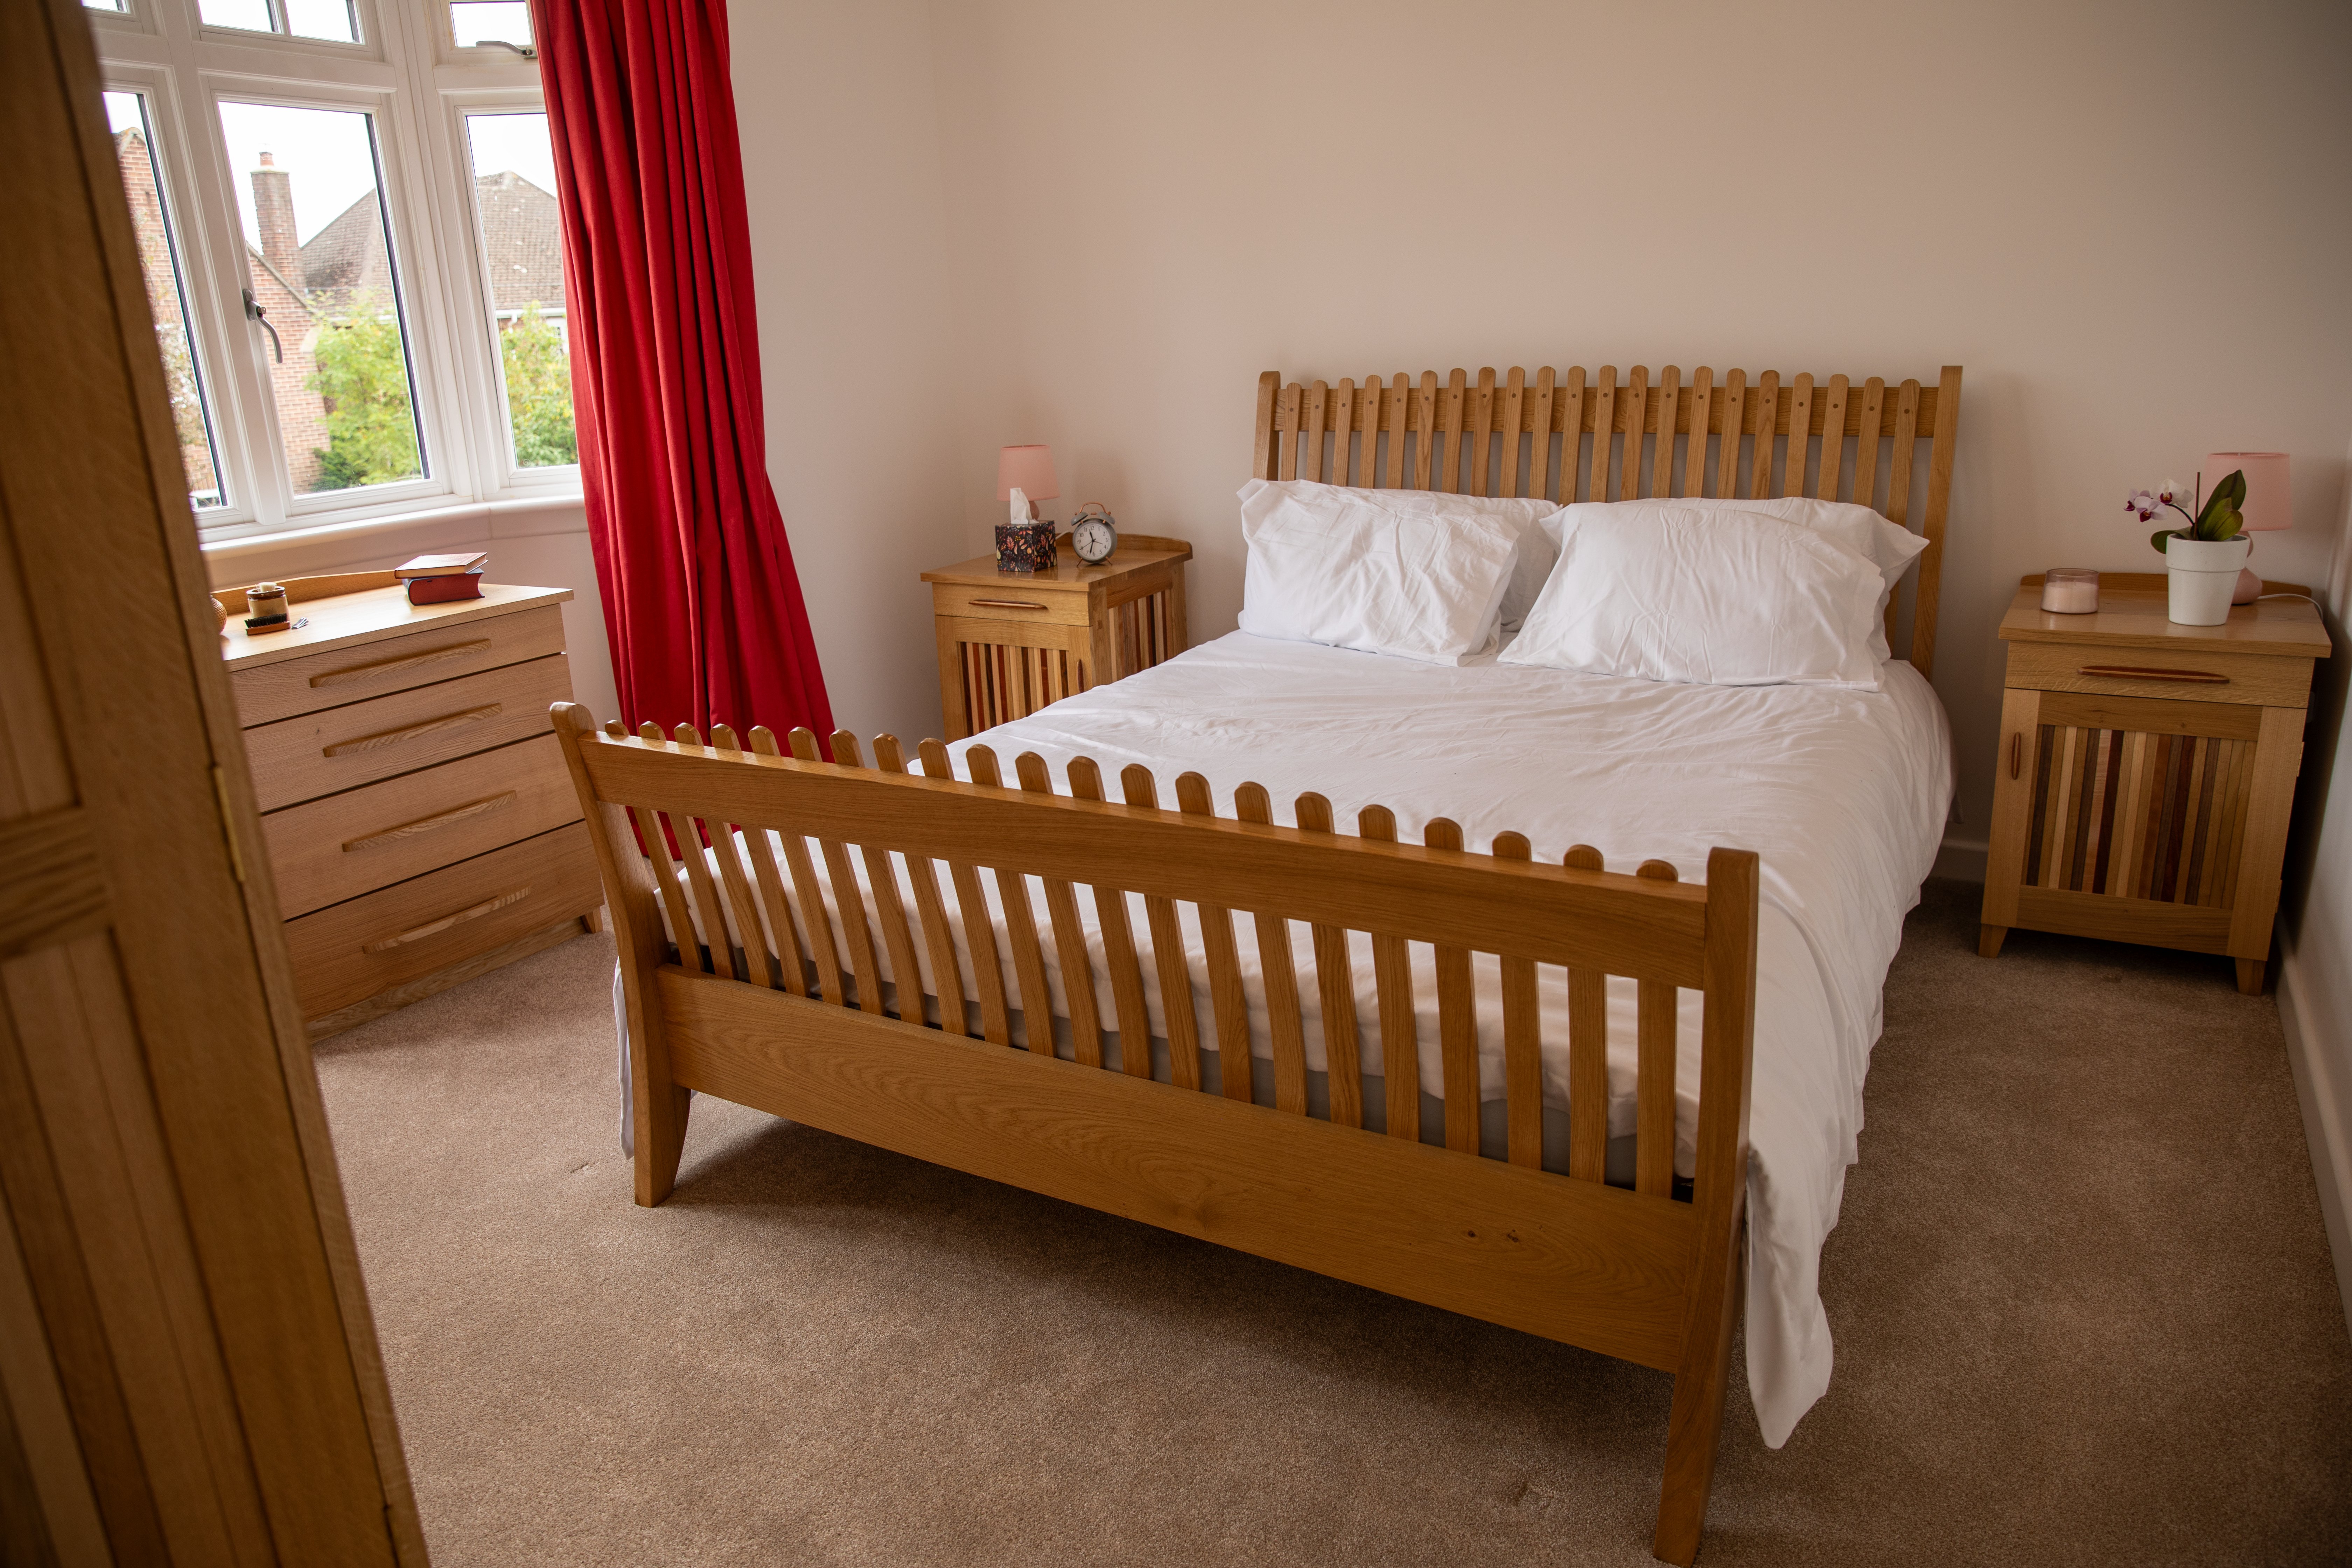
The sloped back on my curved kingsize headboard gives prodigious levels of comfort using a single pillow when sitting up in bed to read. It was much more work than a symmetrical vertical version, but a wow for both comfort and looks.
In many designs, there are givens we usually don't mess with or defy or would never change for truly practical reasons. If or when we do, we often create discomfort somewhere along the line. But there are exceptions to the rule. 18" is a very standard height for a dining chair seat from the floor, be that home or café.
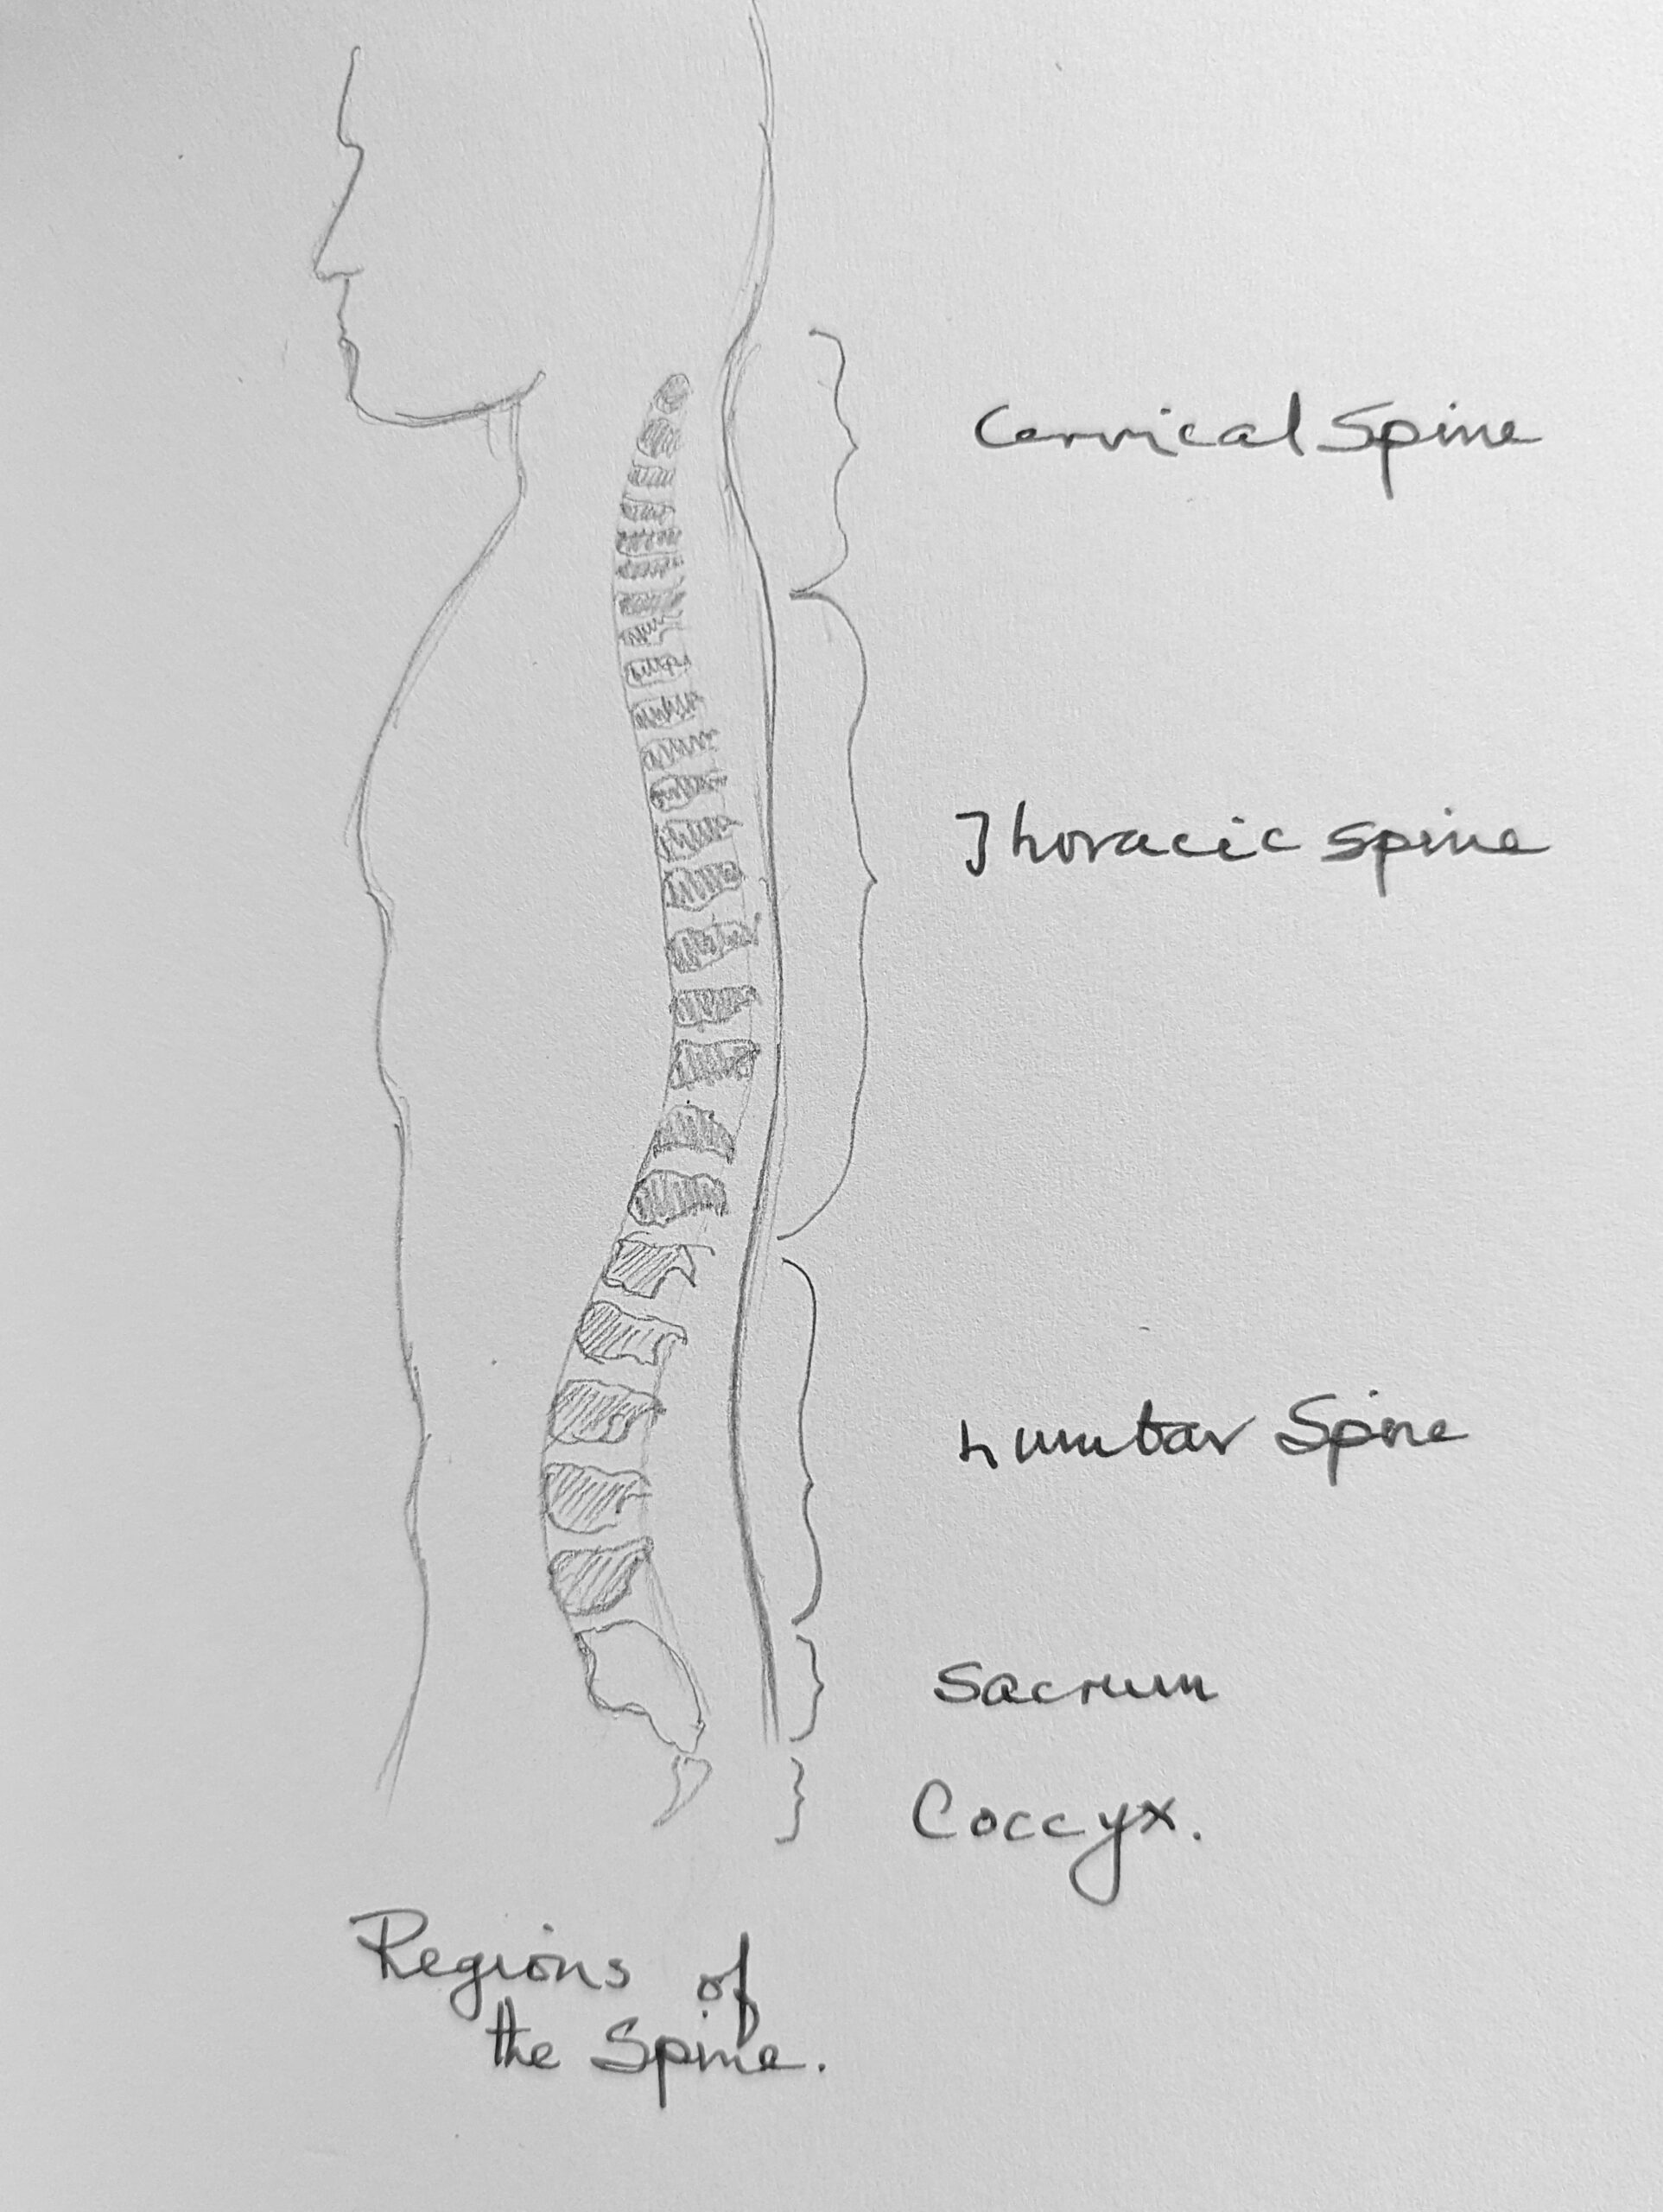
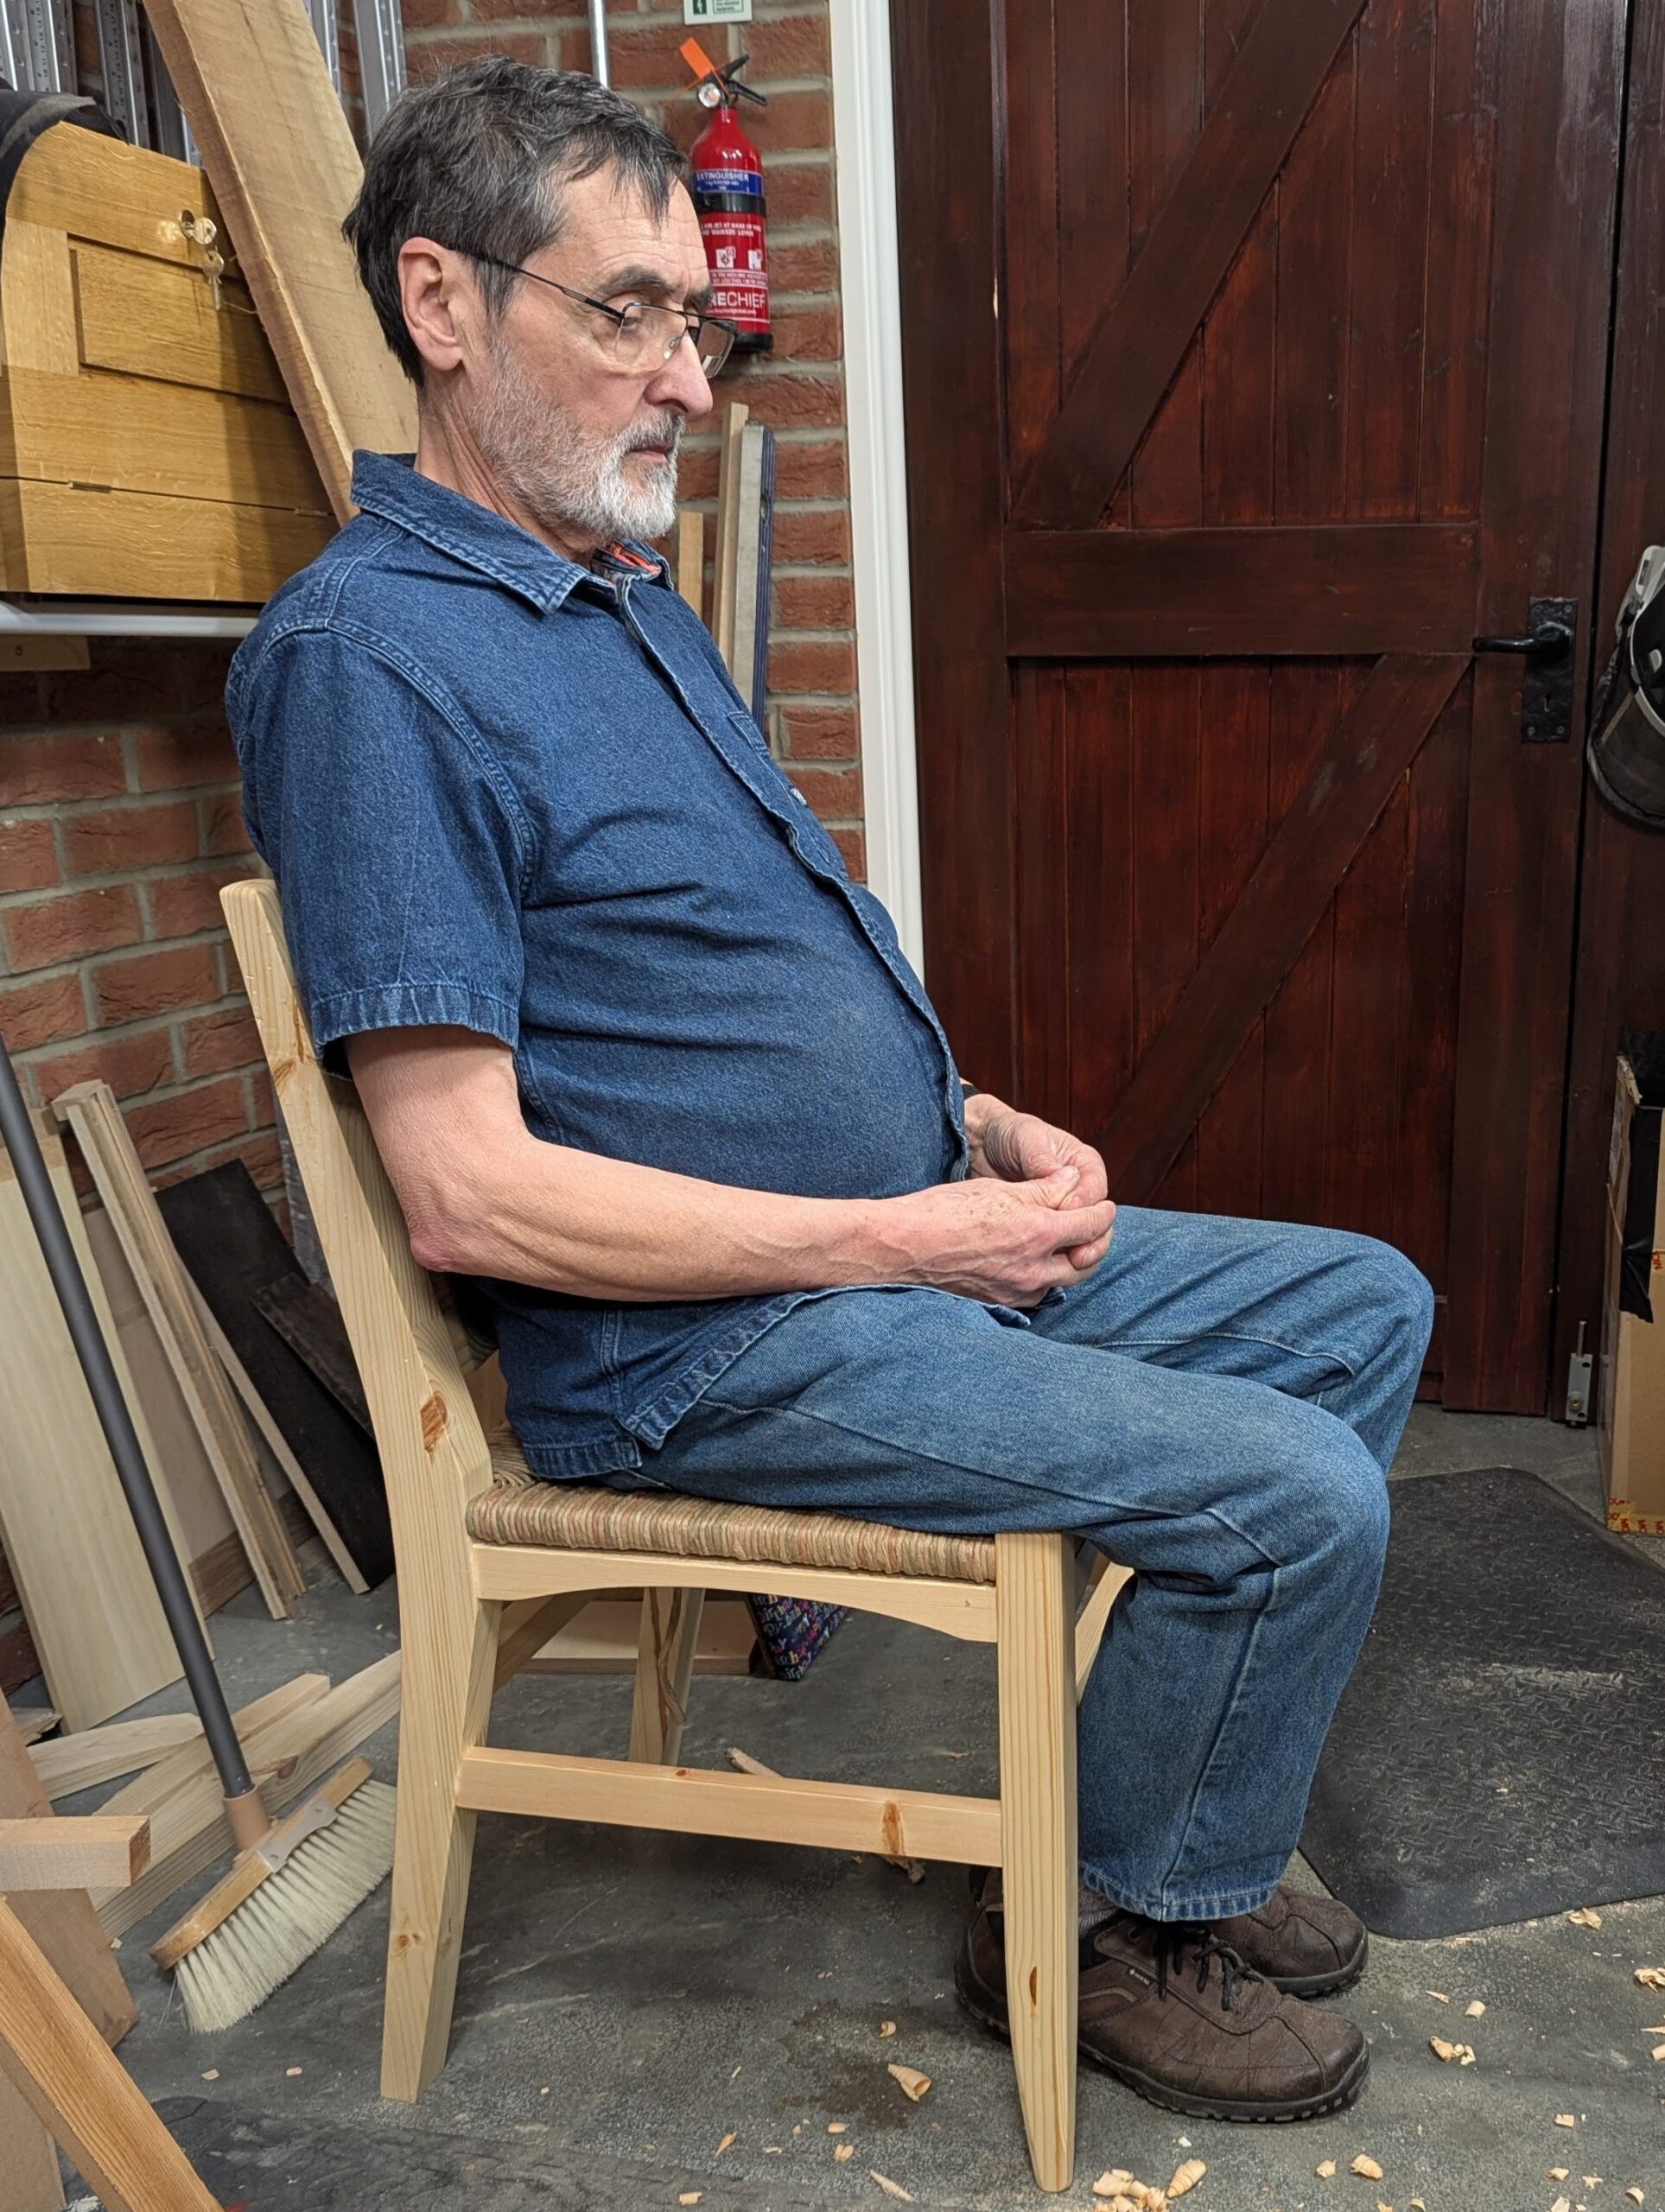
The depth of the seat front to back support is critical for accommodating good back support from the inside ligaments of the knee to the base of the spine. If the lower back, the lumbar, fails to touch the seat back then that can be uncomfortable, but so too the back of the legs hitting the front edge of the seat. The lumbar section of the spine, the five of the lower spine, protects the spinal cord through discs that act to counter shock during any and all activity in the day to day. This is the strongest part of the movable spine that supports most of your body's weight. Good support and exercise here keeps it limber and in good shape. A working chair encourages good posture and limits slouching. Combined with our woodworking at the bench, we should be in great shape with no back pain issues. In a lifetime of daily woodworking ten hours, many days, I have no back issues, even now, aged 75.
I've been working this new chair project, having just concluded a previous one, which was a stool for the dressing table. Design can be both simple and complex in a single piece, and it's up to me how to approach things, how to decide what will be the most beneficial with regard to teaching and training. I developed some techniques for this one that you will, as frequently happens with my working to teach, have never seen elsewhere. I develop things intentionally because we won't grow in our craft without creating challenges along the way, and so I often decide to work elements into my pieces for both the challenges and the joy of working something distinctive and different into them.
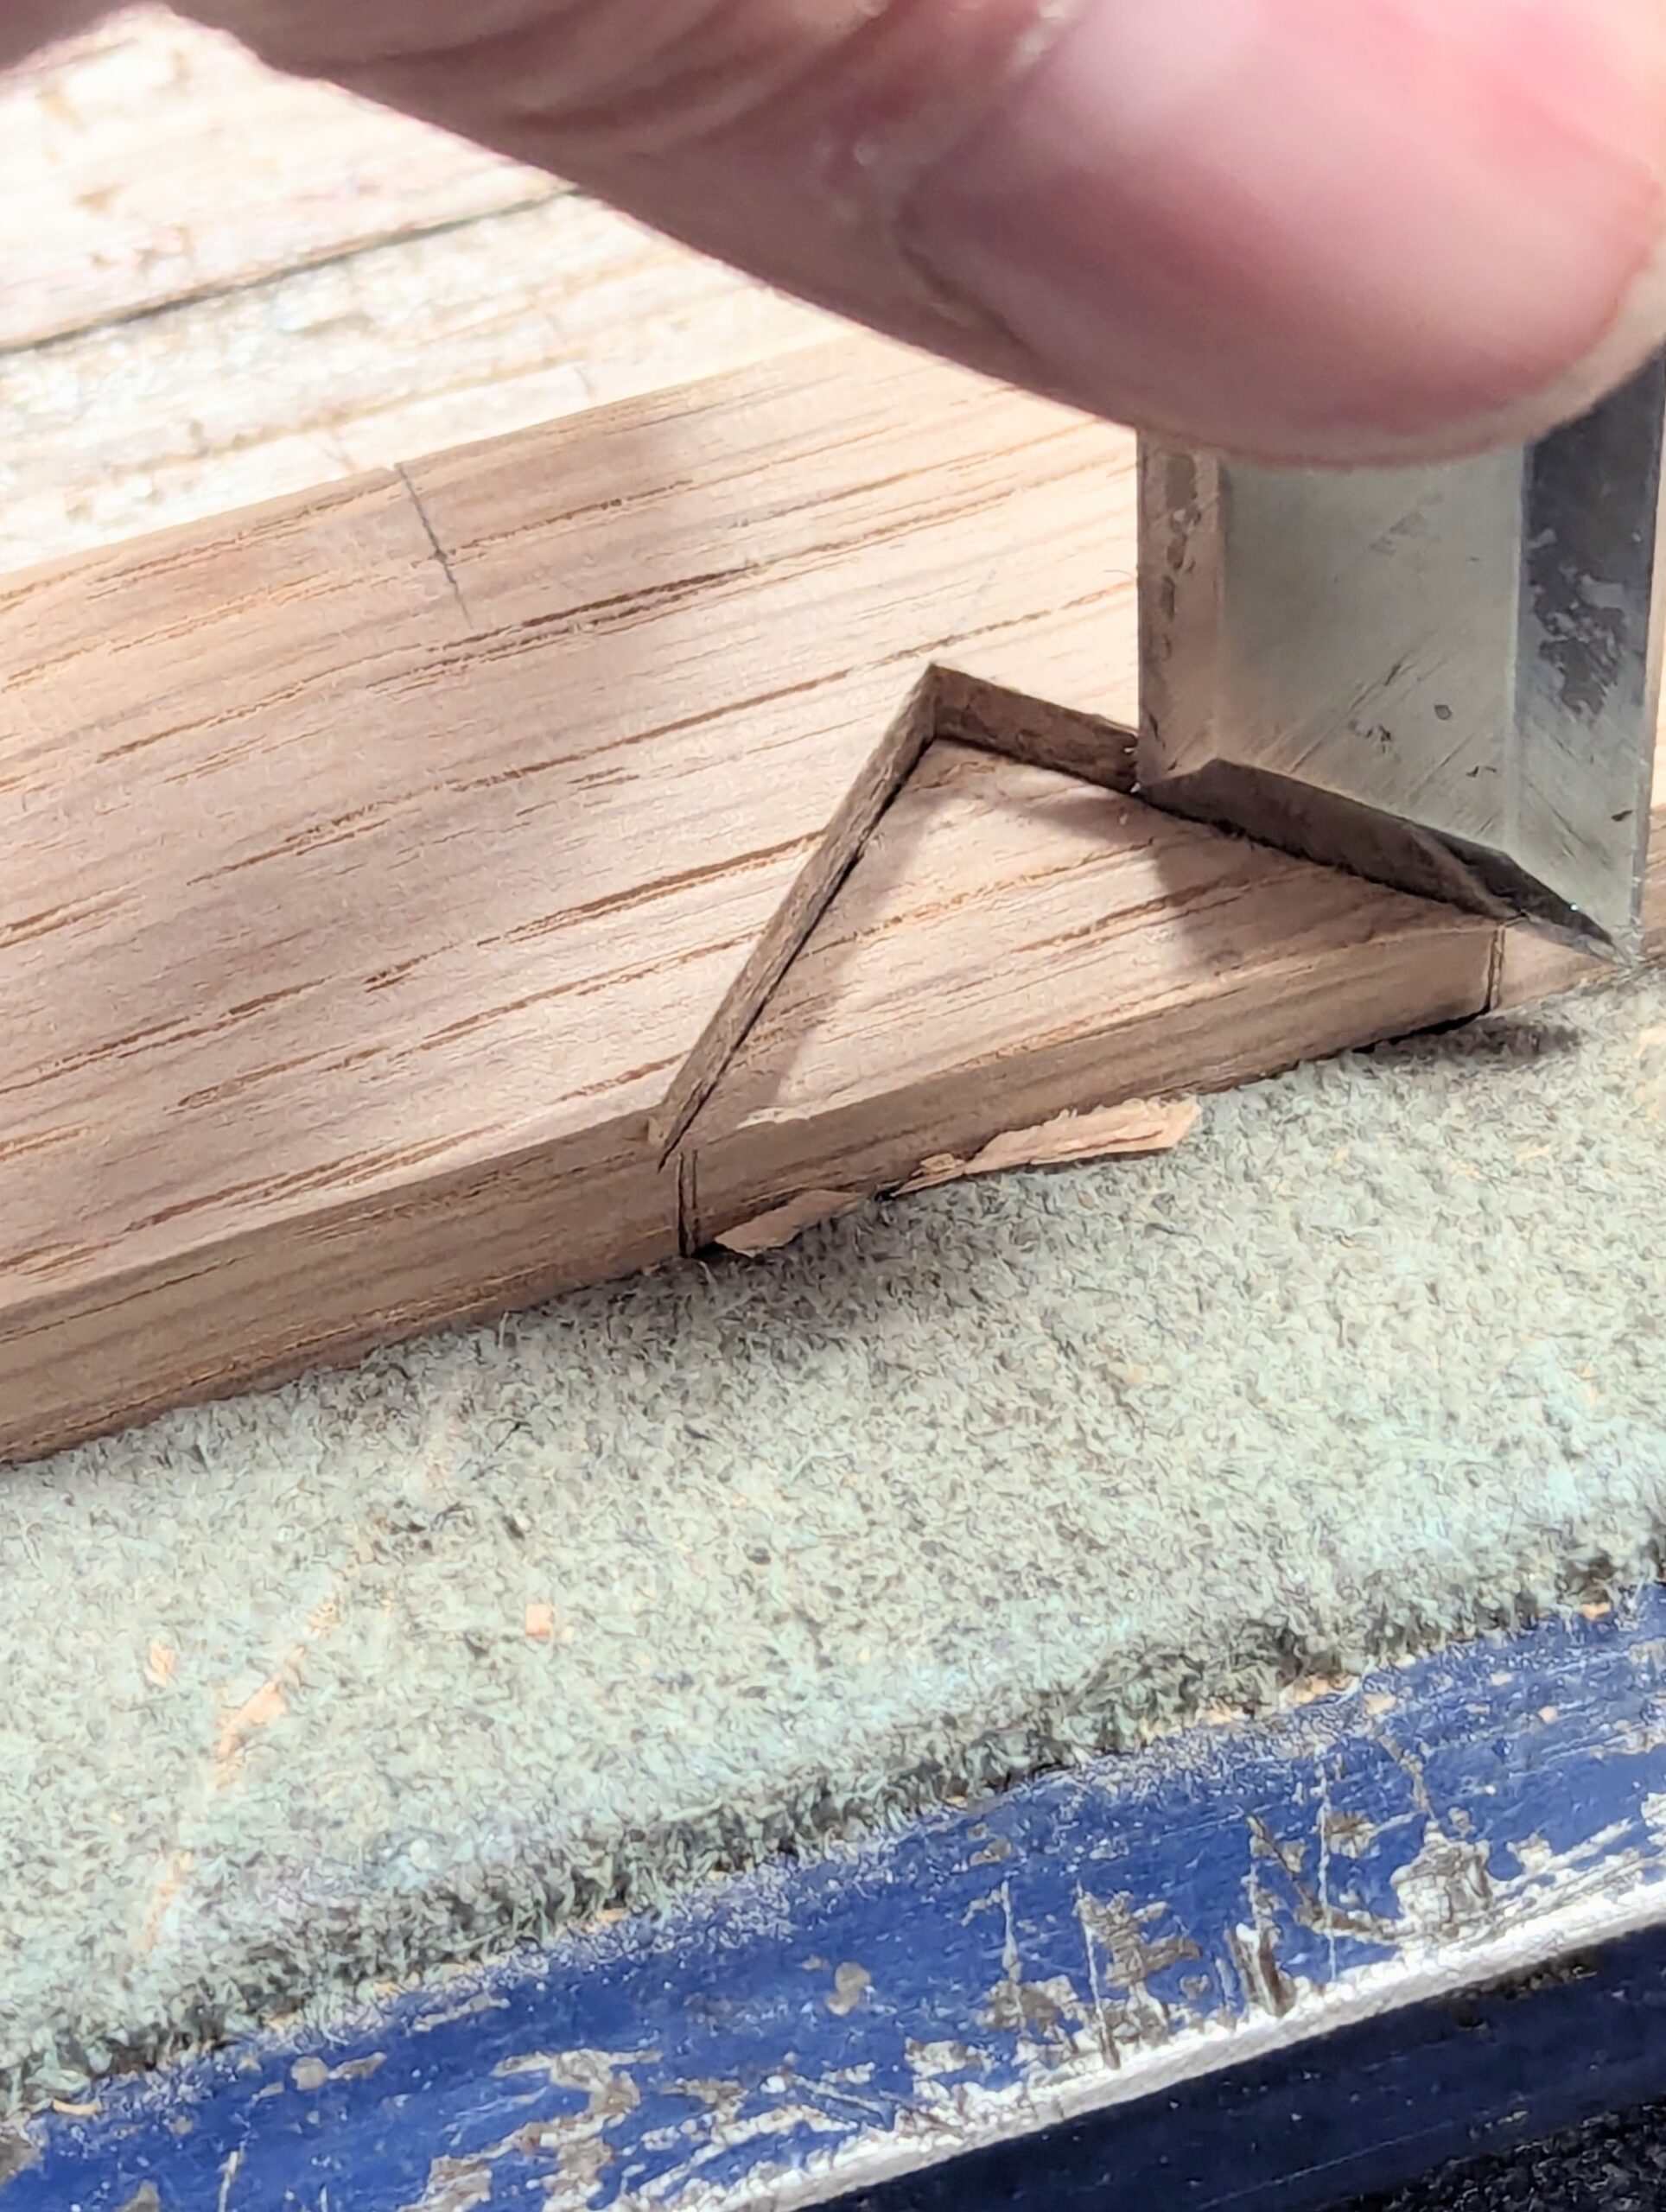
The awkward mirror joints to the corners in my last dressing table project, the unusual dovetailed housing dado dividing the compartments of the lift-up bins, established a gold standard for hand tool accuracy. At the same time, I retained the simple lines I strive for that counter the obsessive trend that's happened for decades in the overuse of moulding created by power routers. Some consider hand tools to be too slow and uneconomical, but for many tasks they are often faster than machine methods while at the same time offering different and greater rewards.
My chair evolved over a couple of days by a trial and error approach, yes, but chair making over a number of decades leaves you with practical experiences to gain from. I've increased my knowledge and expertise in the making of all things wooden, but concepts of design for aesthetic appeal and for teaching others can change in a heartbeat. When I came to put this prototype together, I simply placed numbers and angles on a notebook page of paper working from the best and practical I have kept for convenience in my head; for that reason, the design seemed to readily fall into place as I made it. Conventional joinery goes with the work in my case. I'm not interested in the frenzy for fast-paced biscuits, dowels and dominoes that's taken place through the decades to distance people from establishing true hand skills that, once mastered and established, change the whole way of thinking. I did try a couple of them early on in my woodworking life as a designer-maker, but they left me with a hollow feeling and held nothing for me––and never have. No alternative has yet proven itself equal to the task. The traditional M&T joints meet all of my expectations throughout my work. Interestingly: did you know that worldwide, the mortise and tenon joint is the most common of all joints. Nothing comes close.
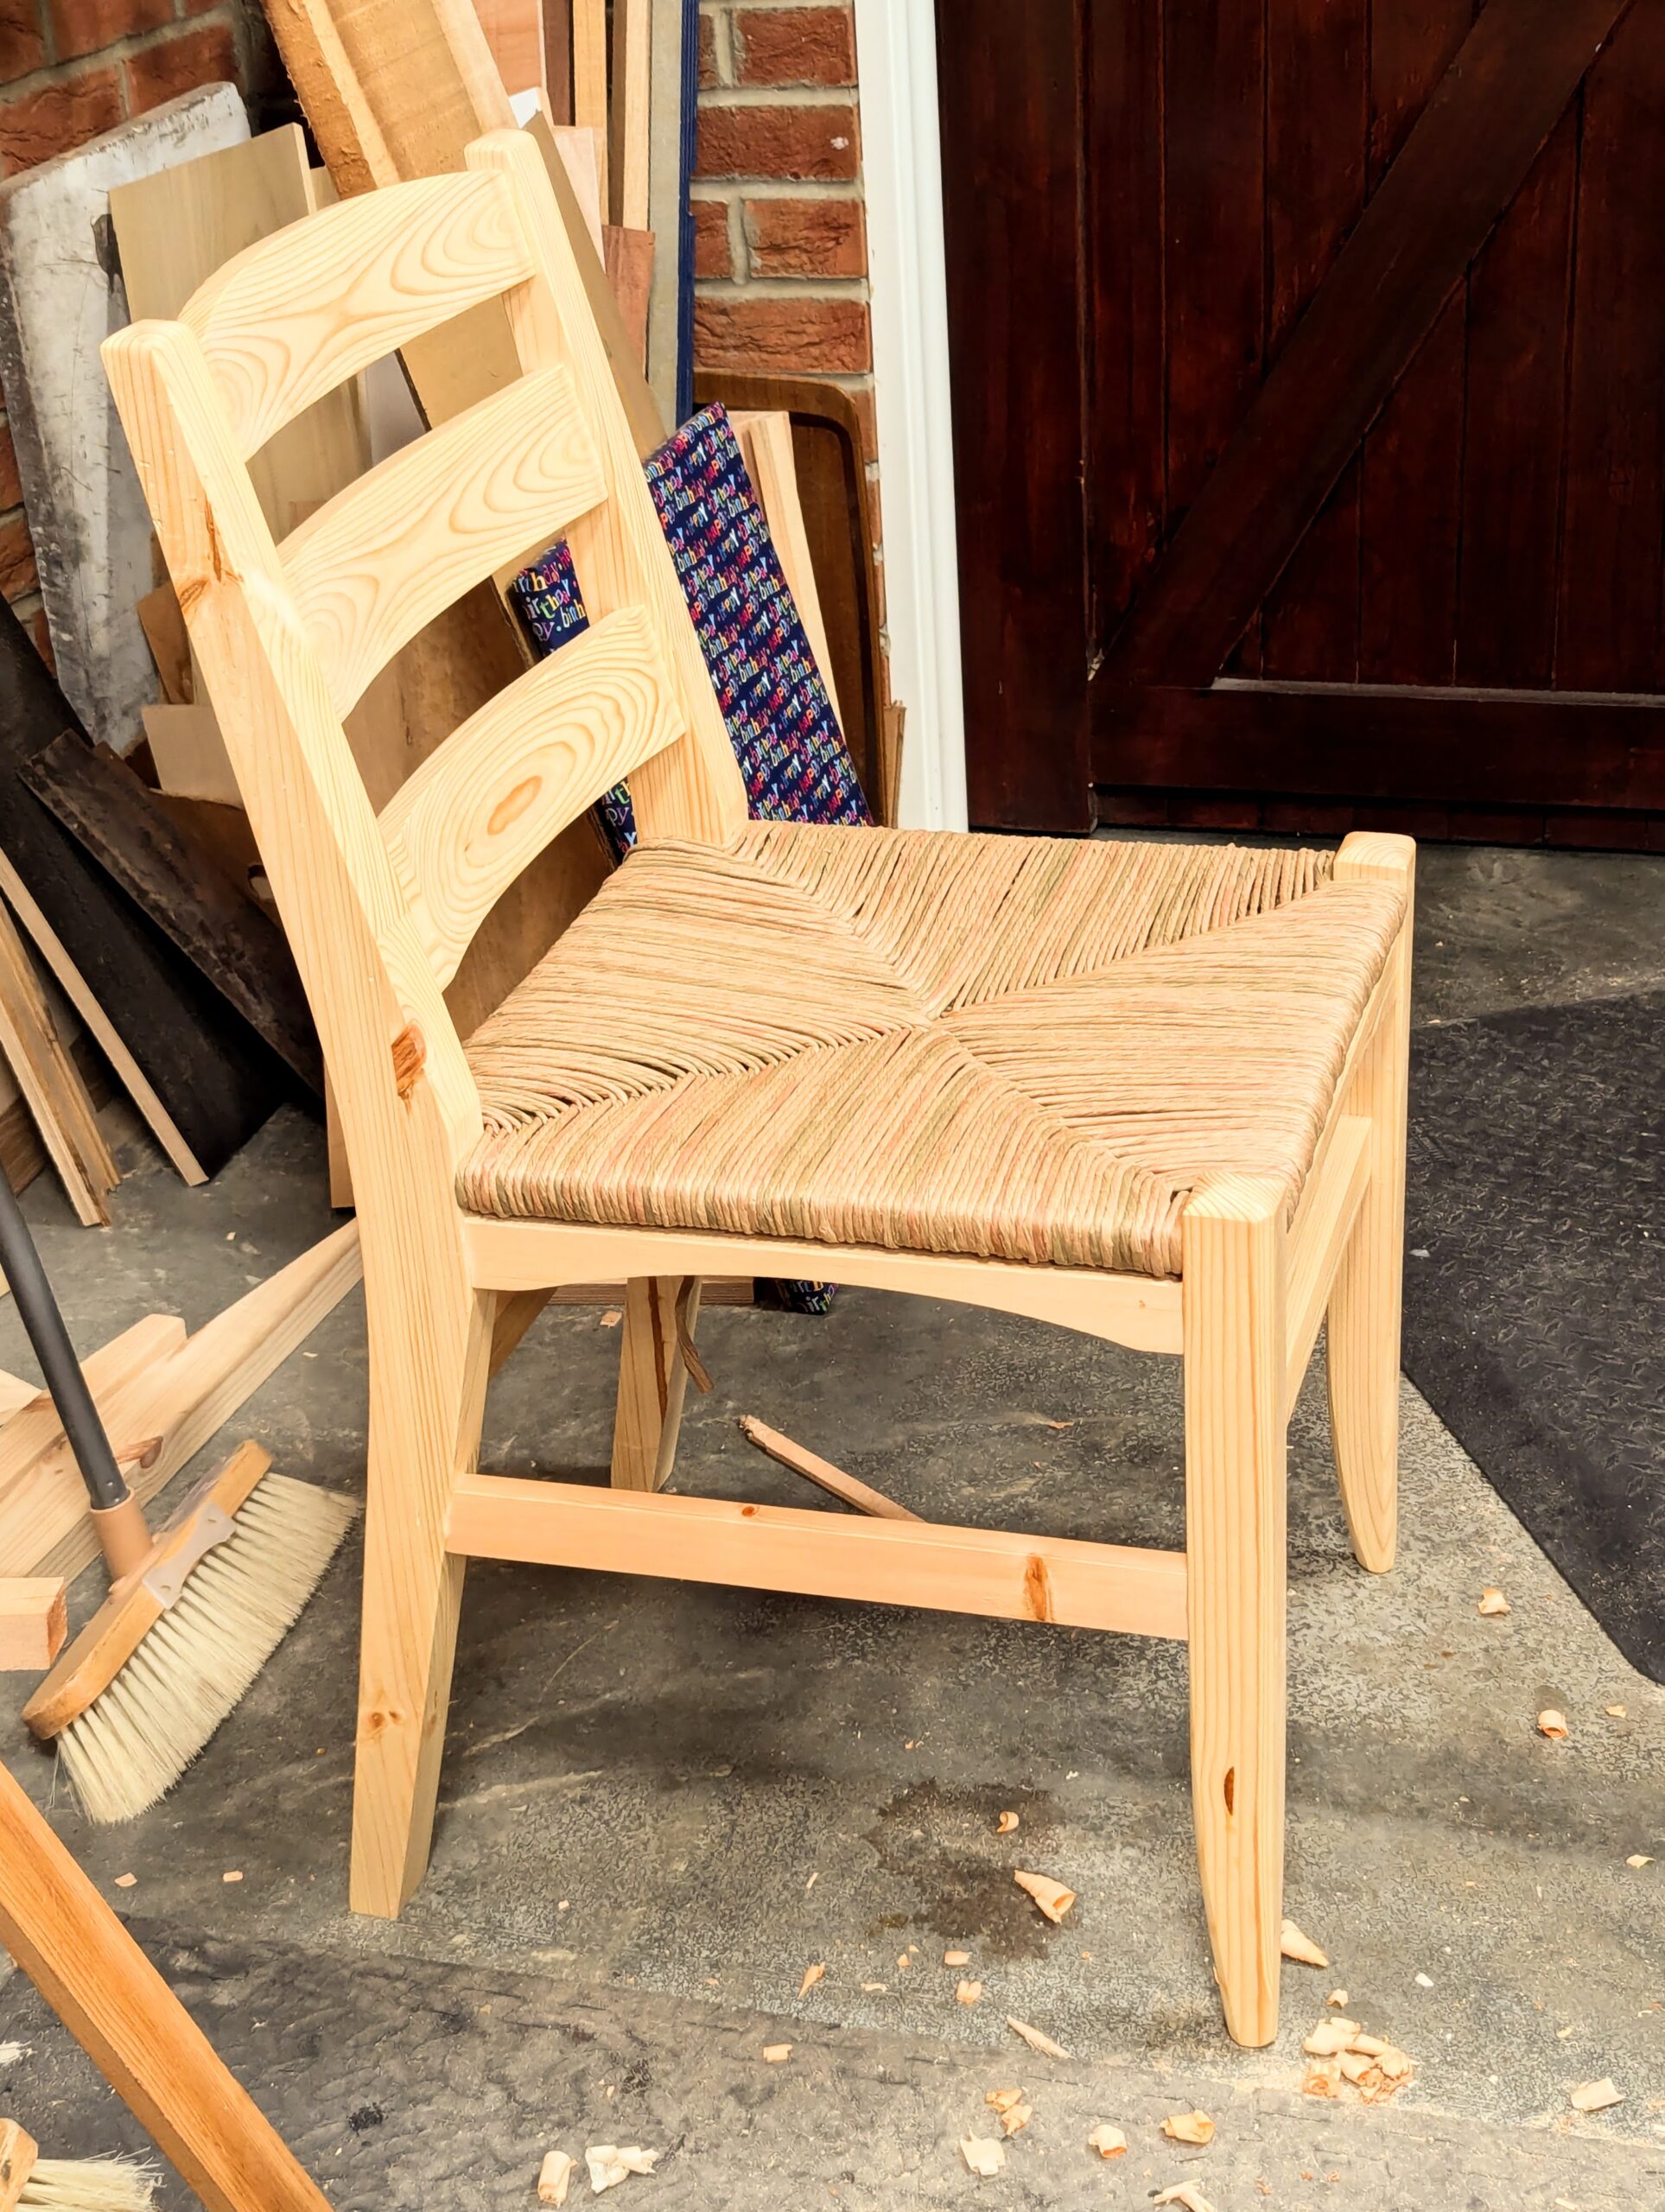
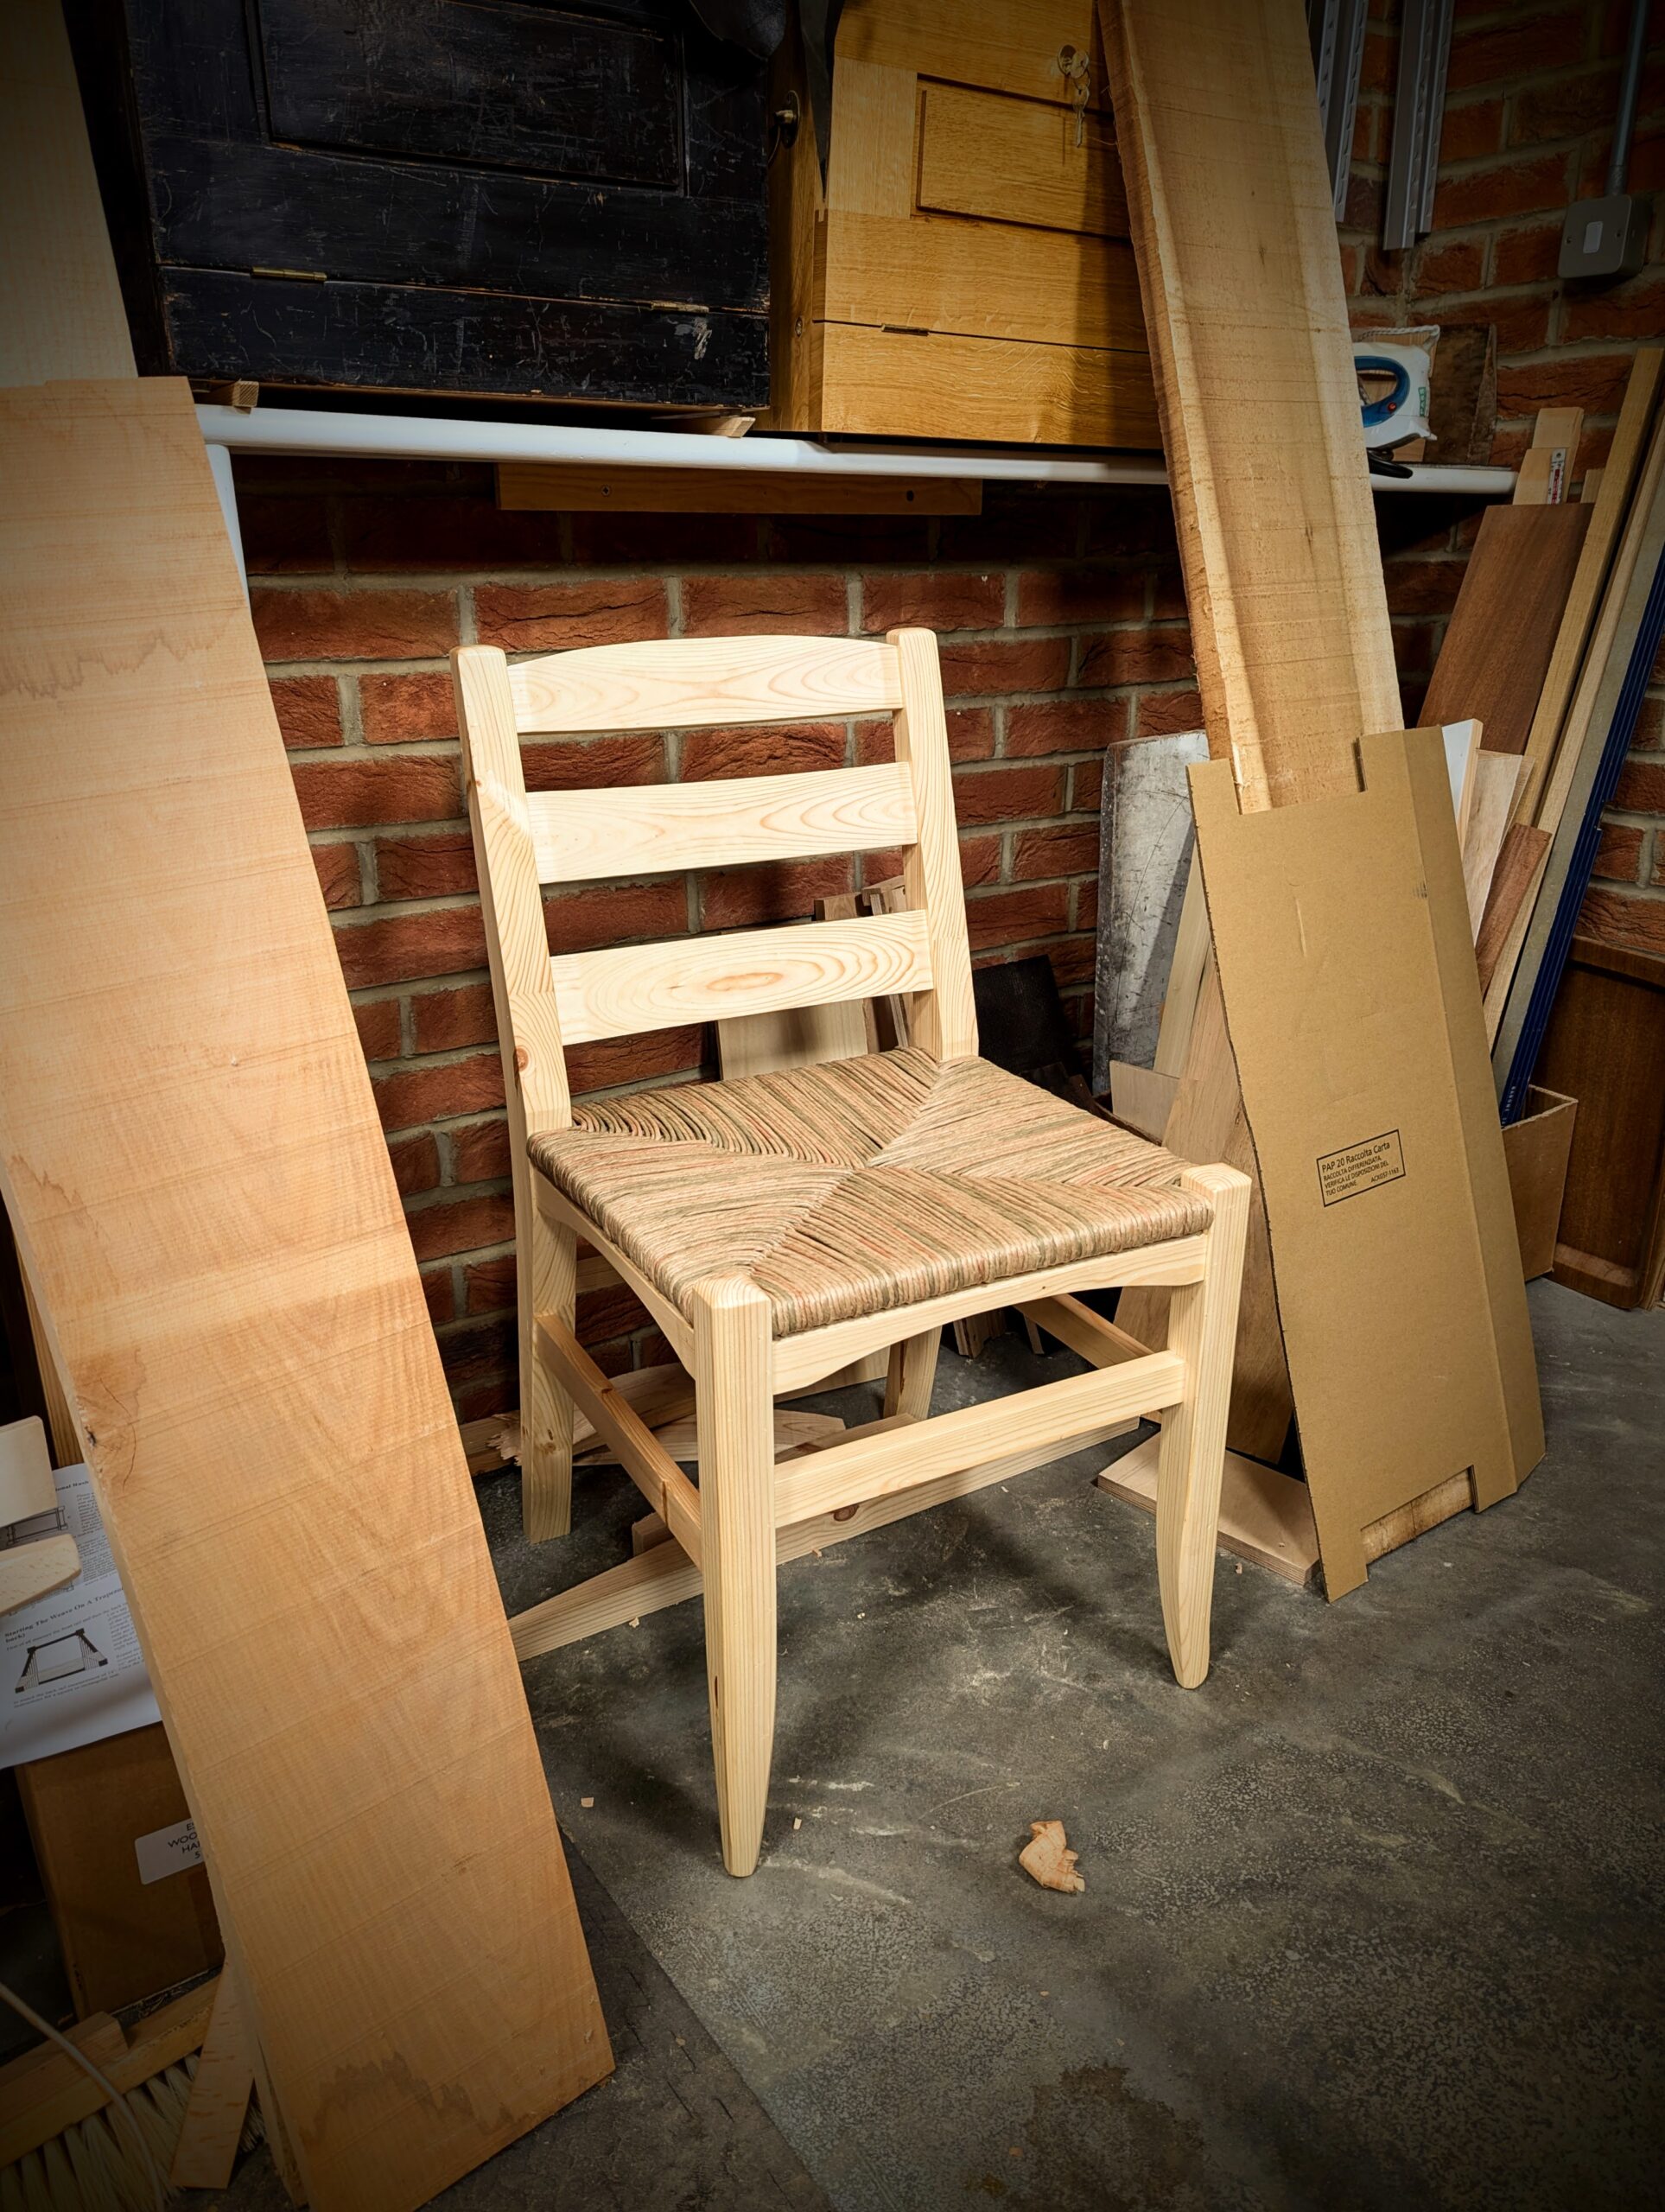
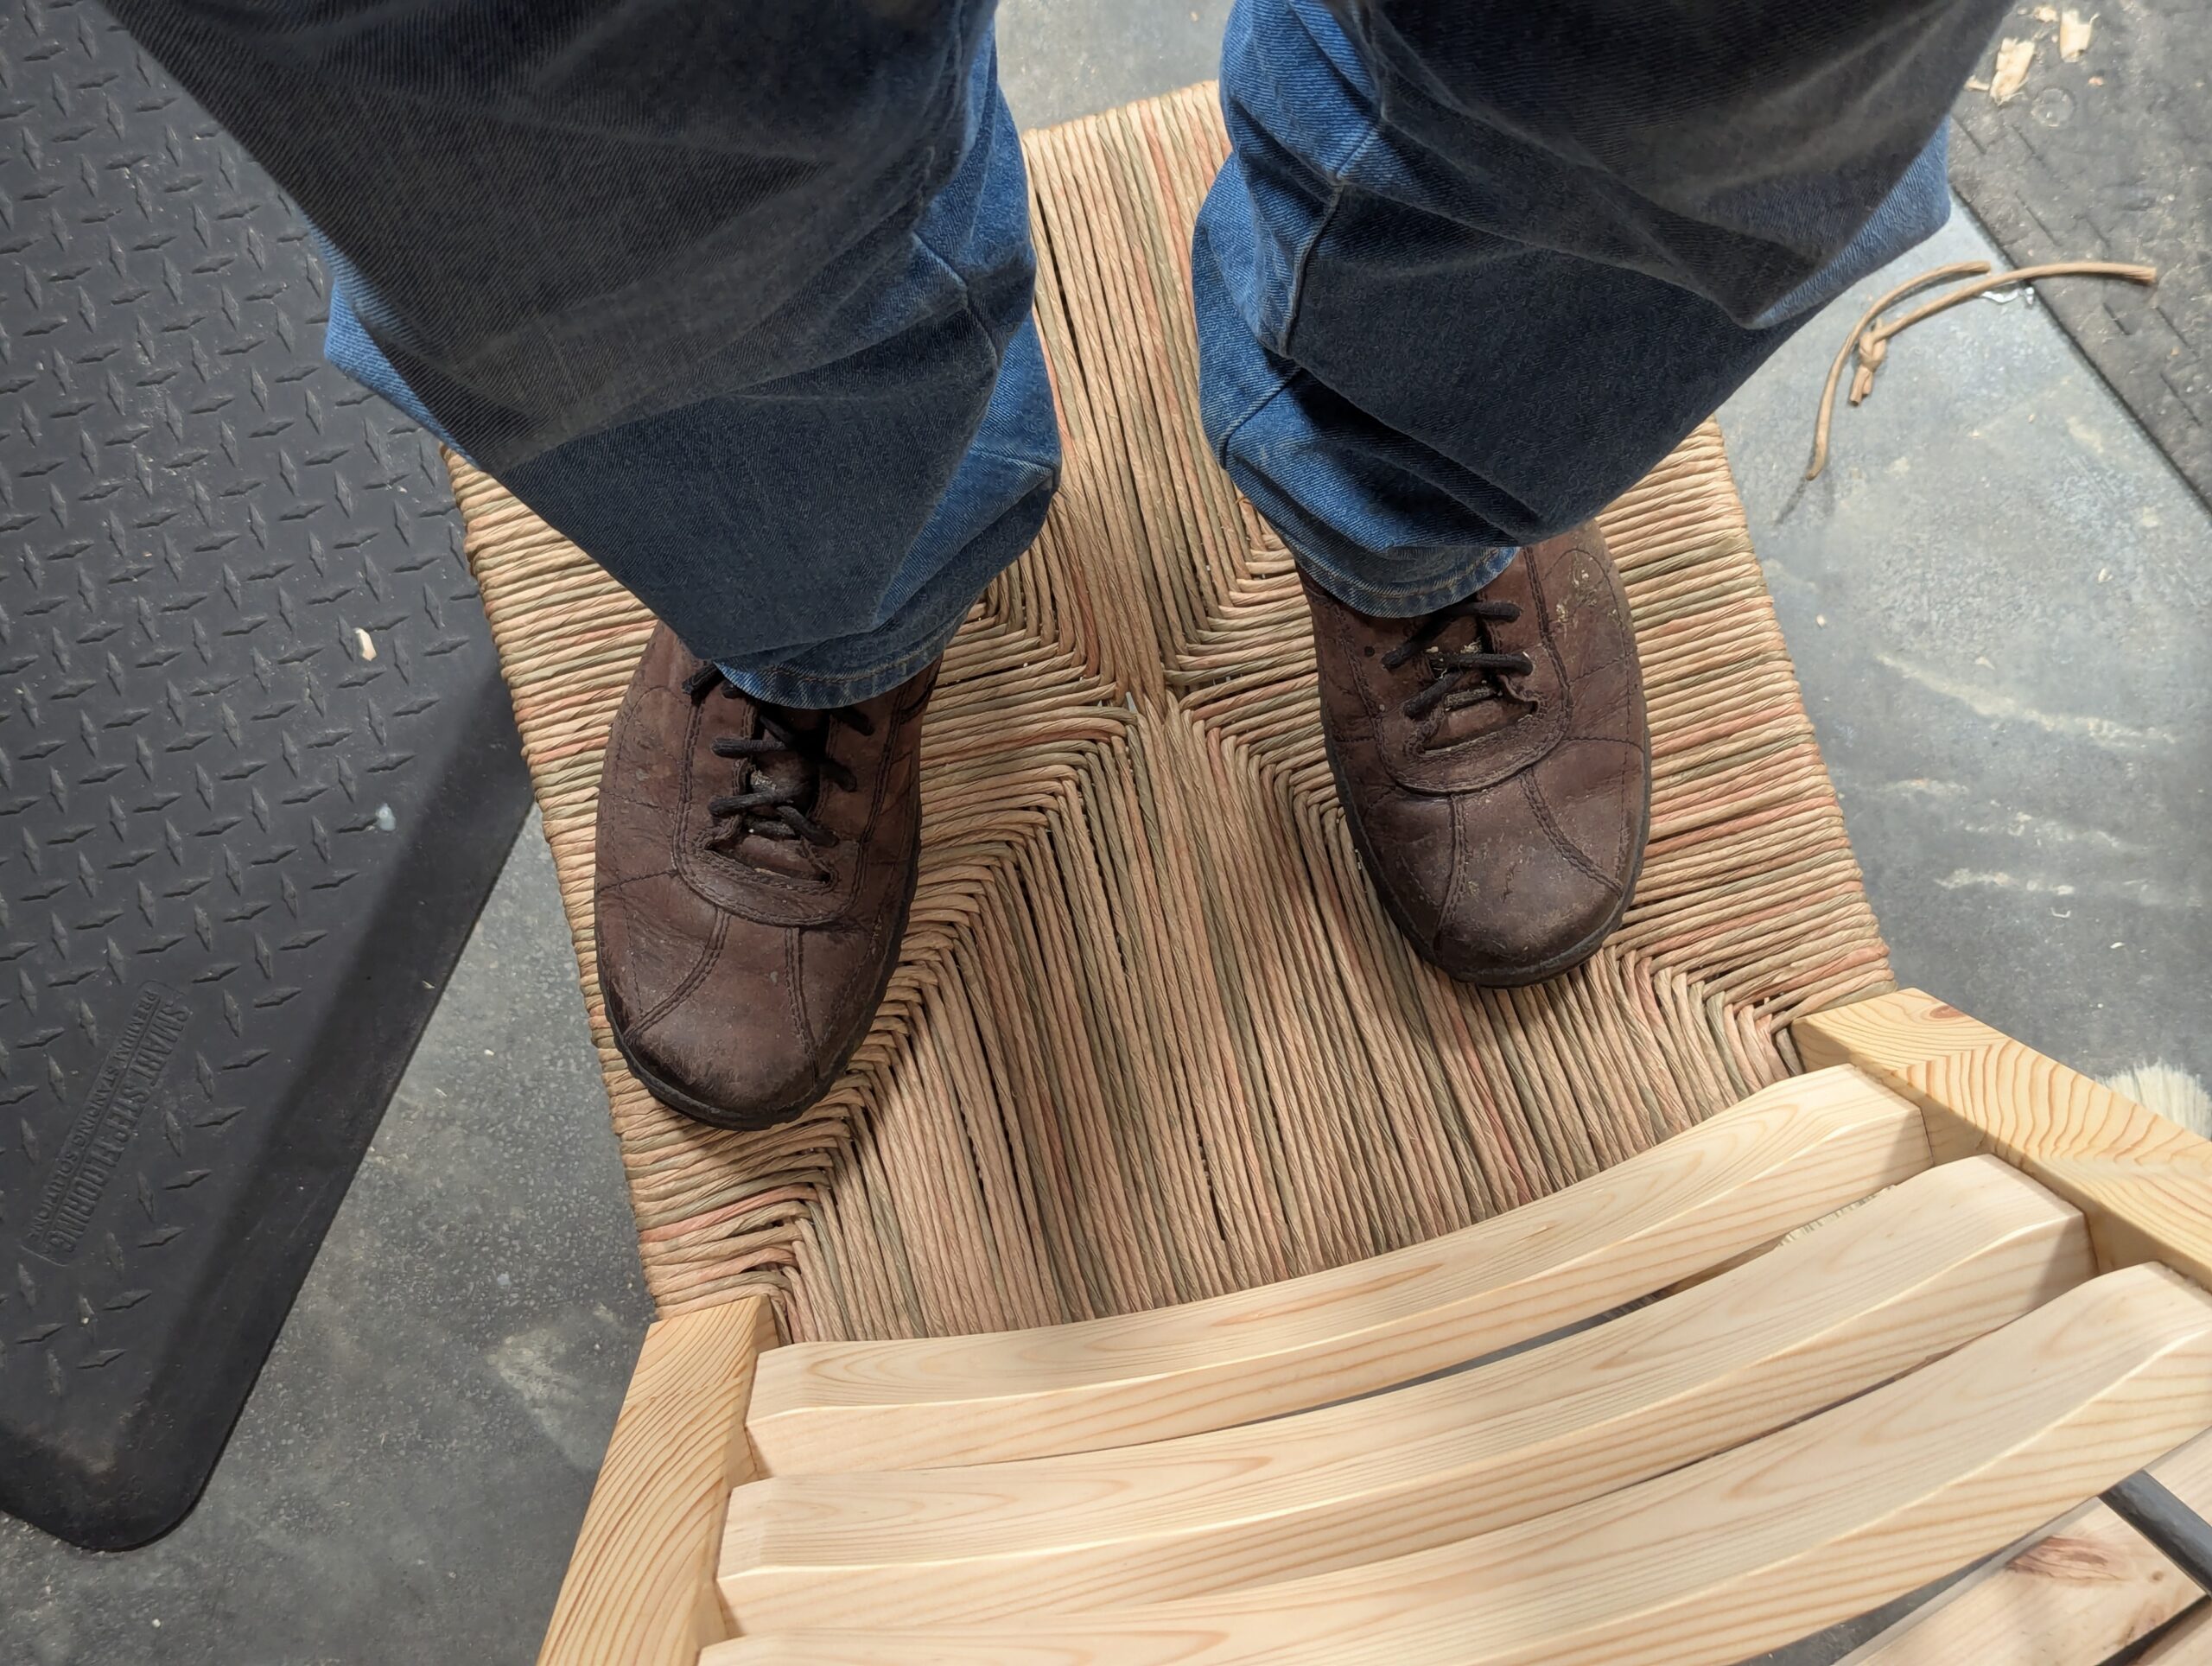
I worked my prototype in European redwood because of its stability but also because of its weight-to-strength ratio. It's not really an inexpensive wood these days, but it is one of the most readily available here in GB. And even this iteration is saleable. Using proper joinery for integrity and strength, you can lift this chair over your head single-handedly. And yet, as I did here, you can stand on it knowing that it will take that concentrated centre point of dead weight.
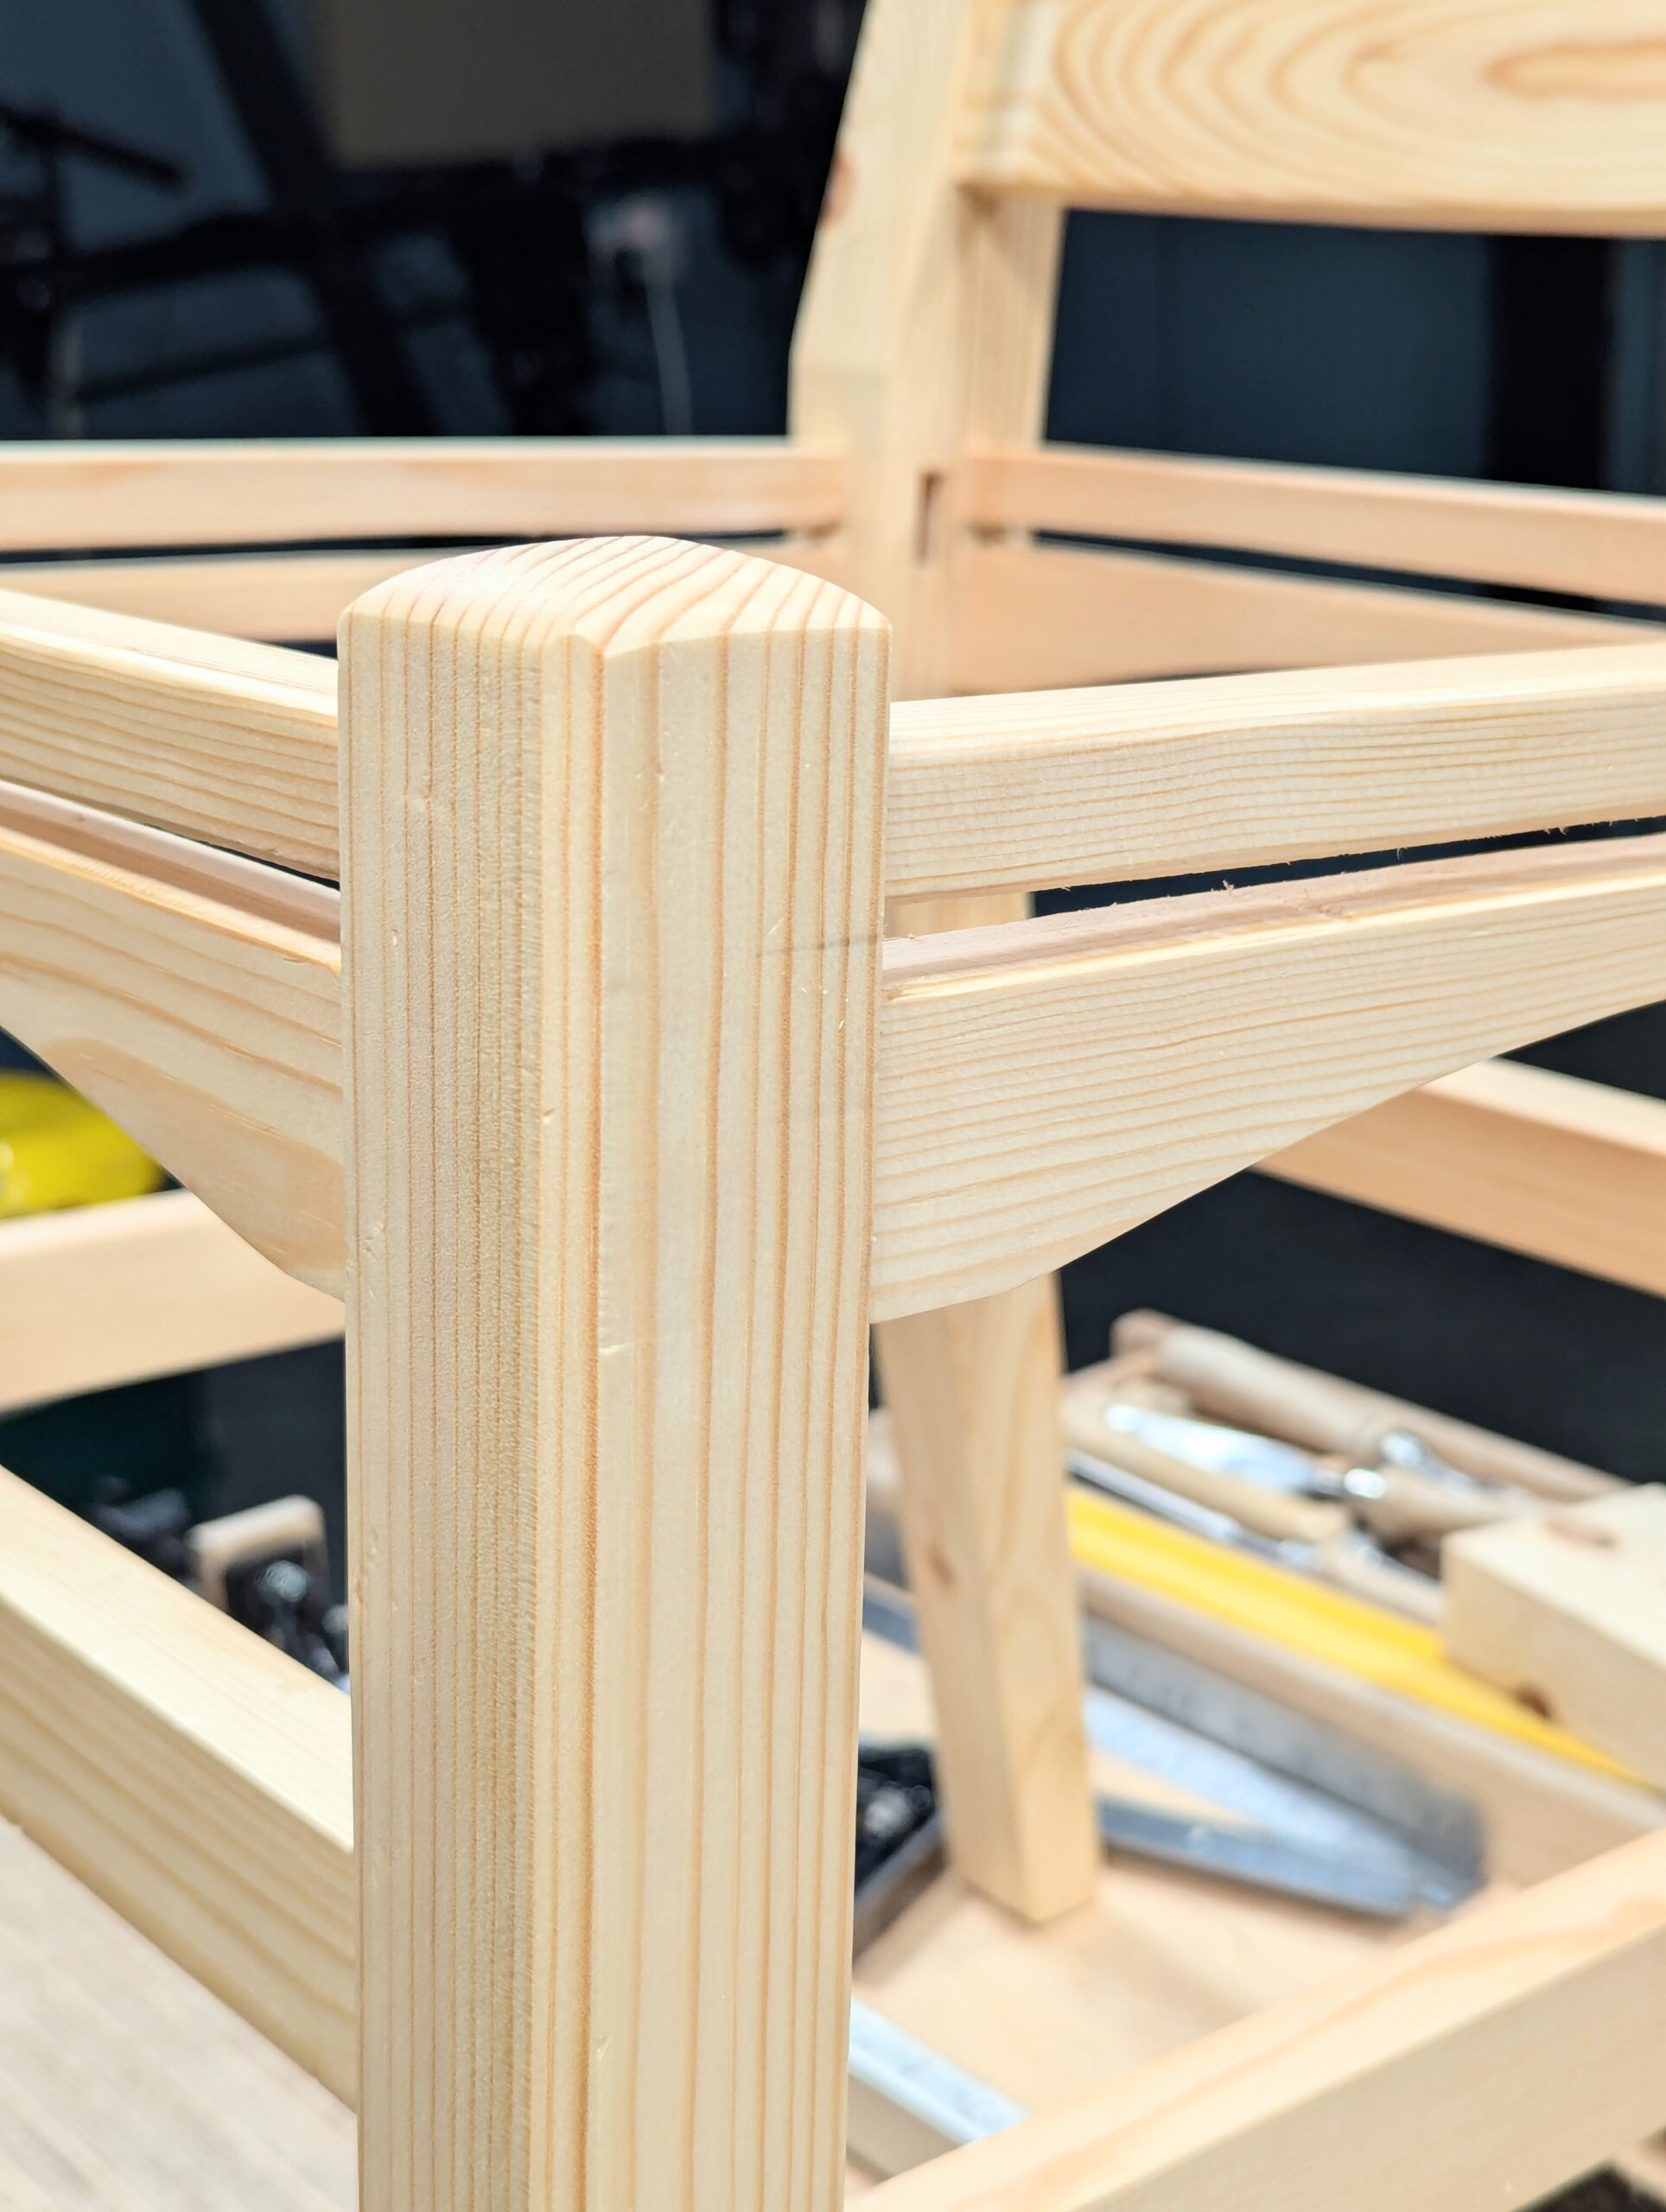
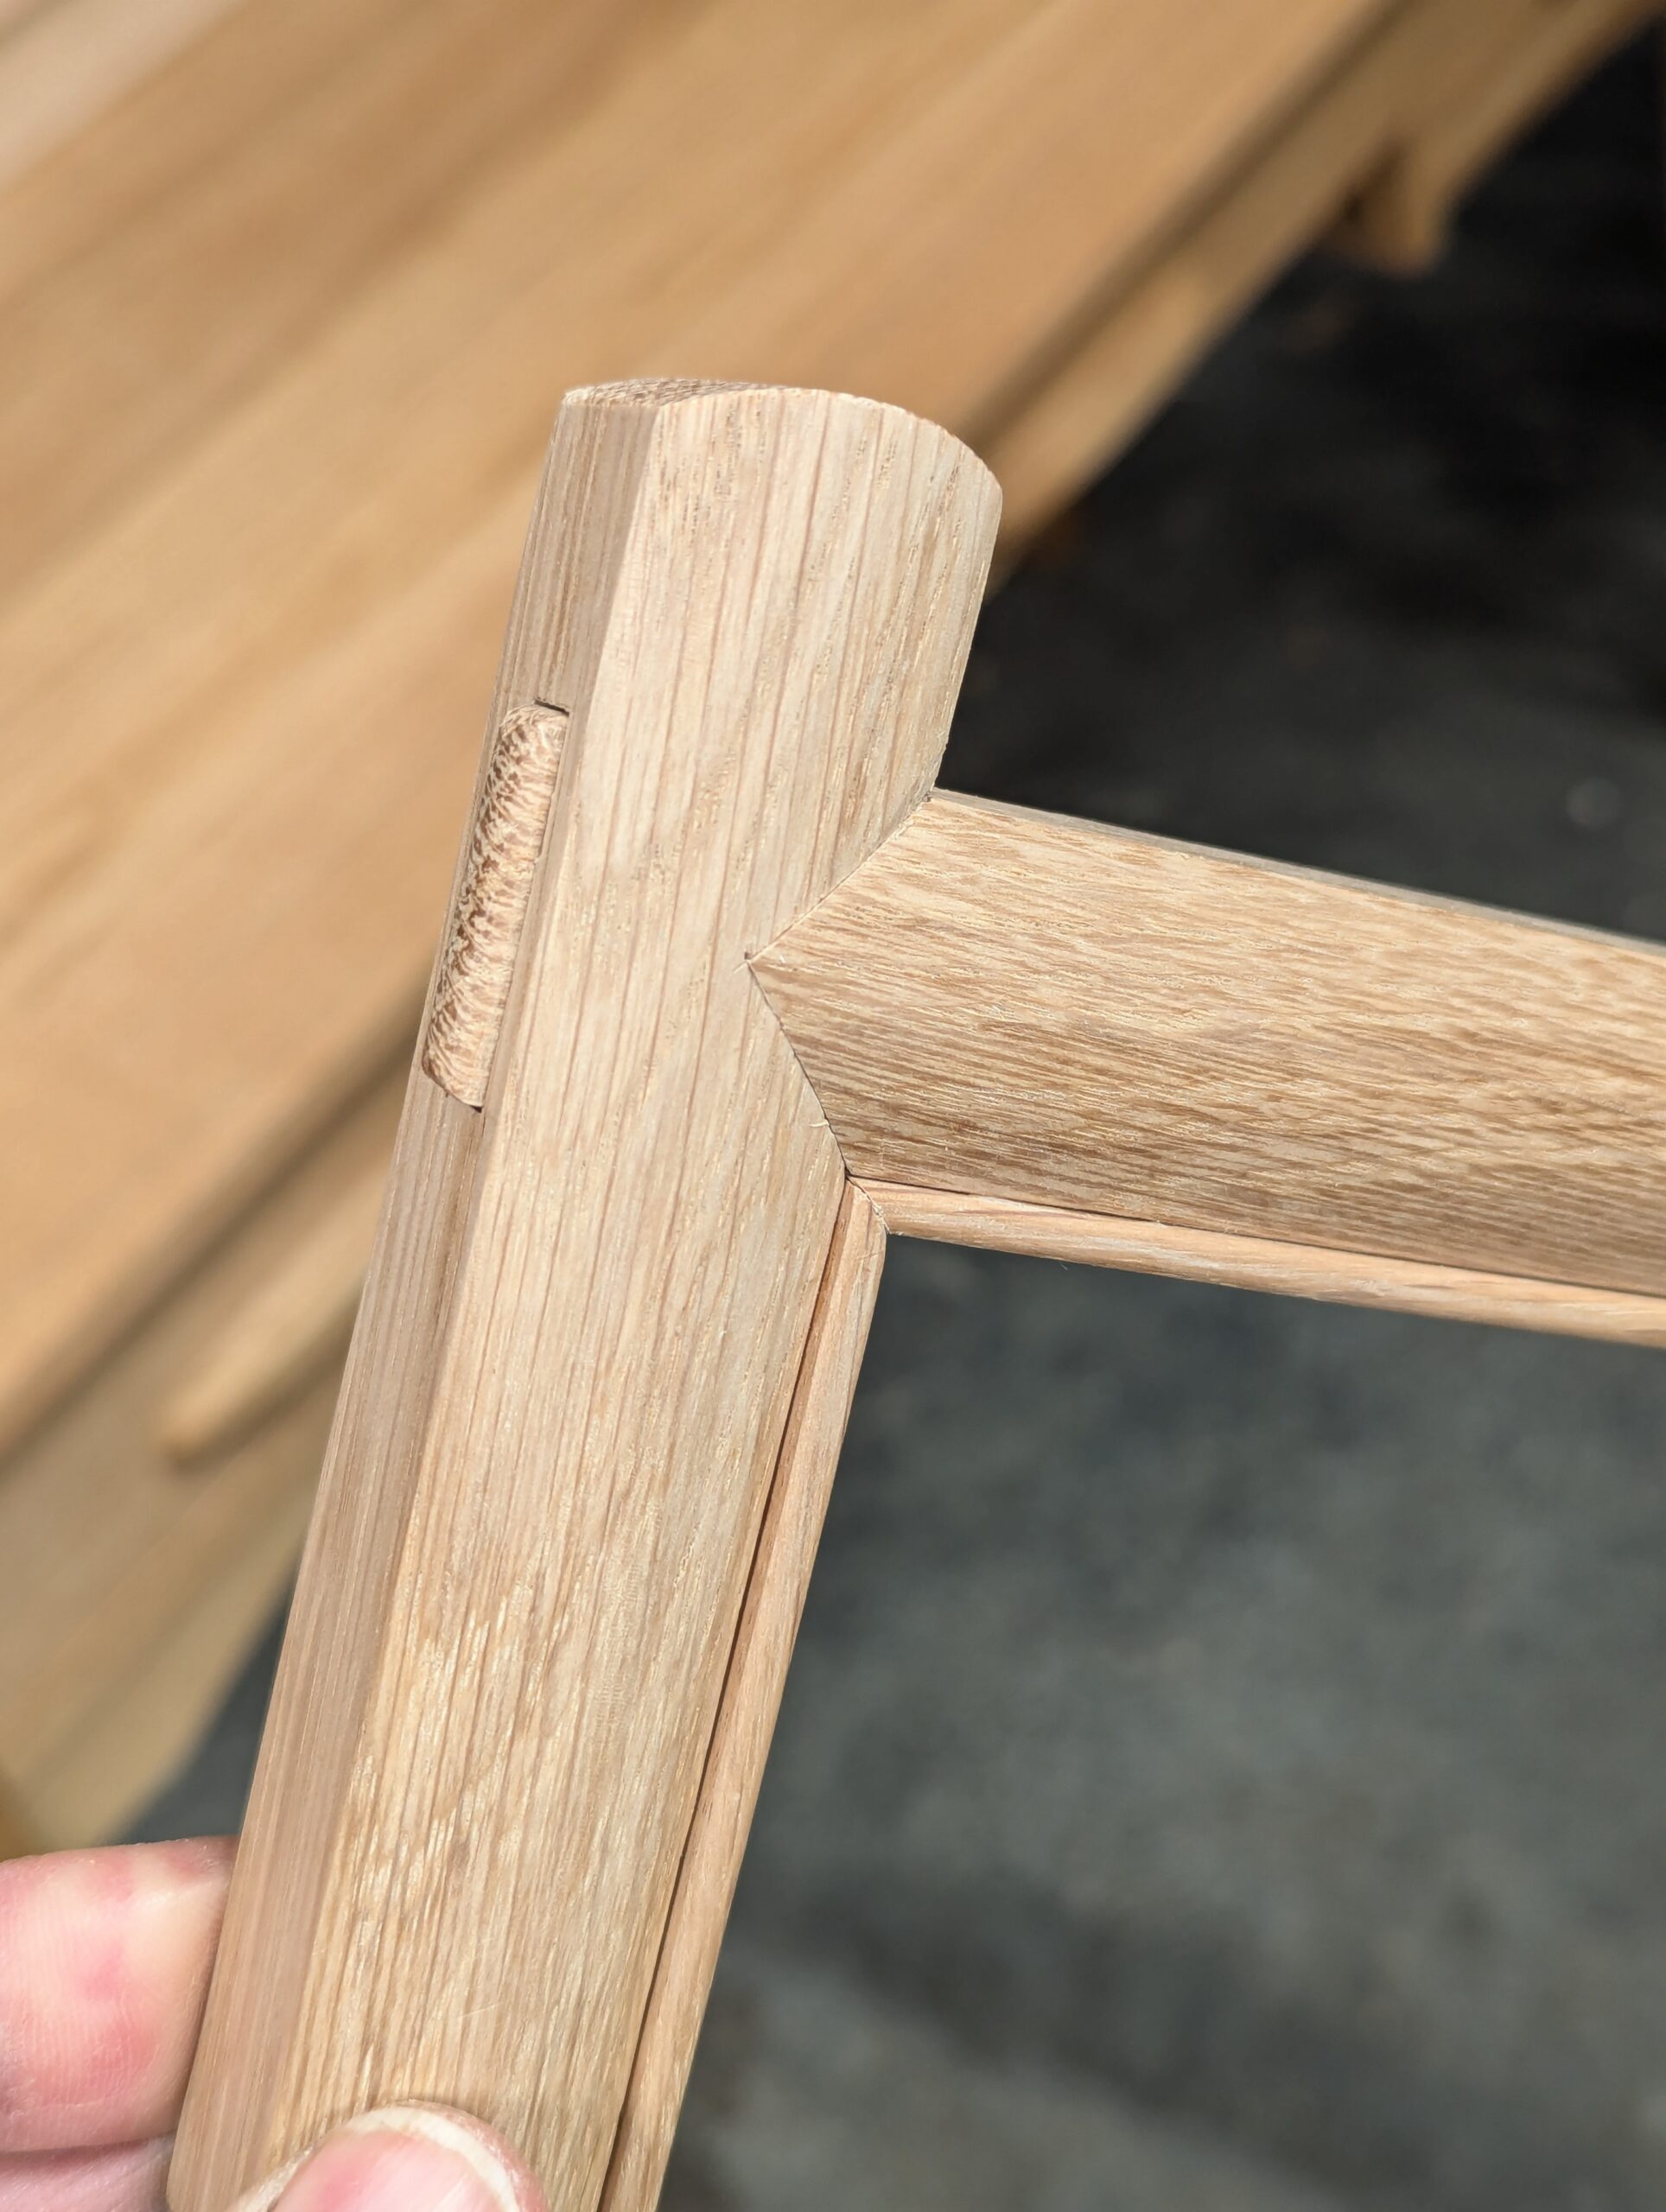
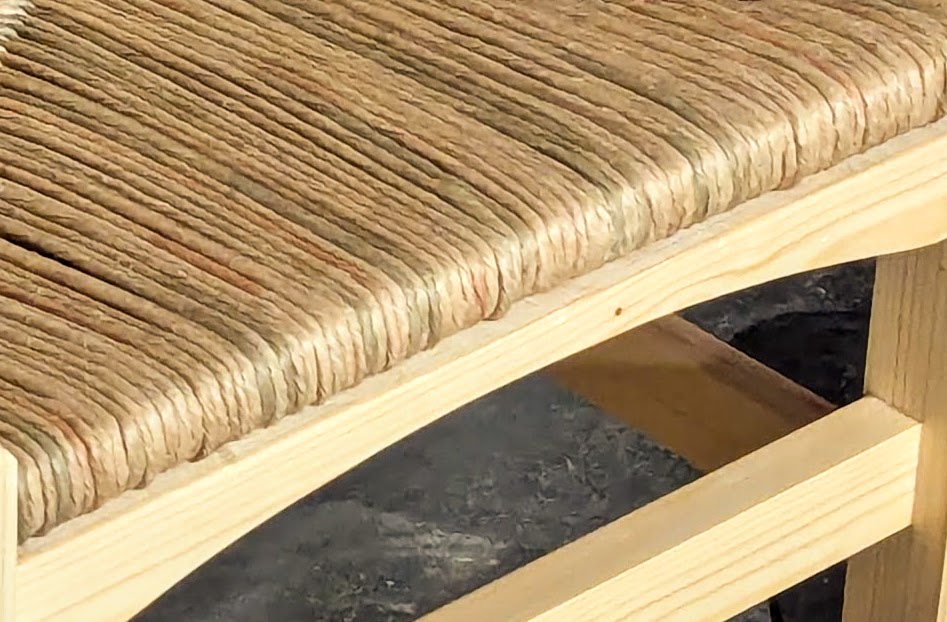
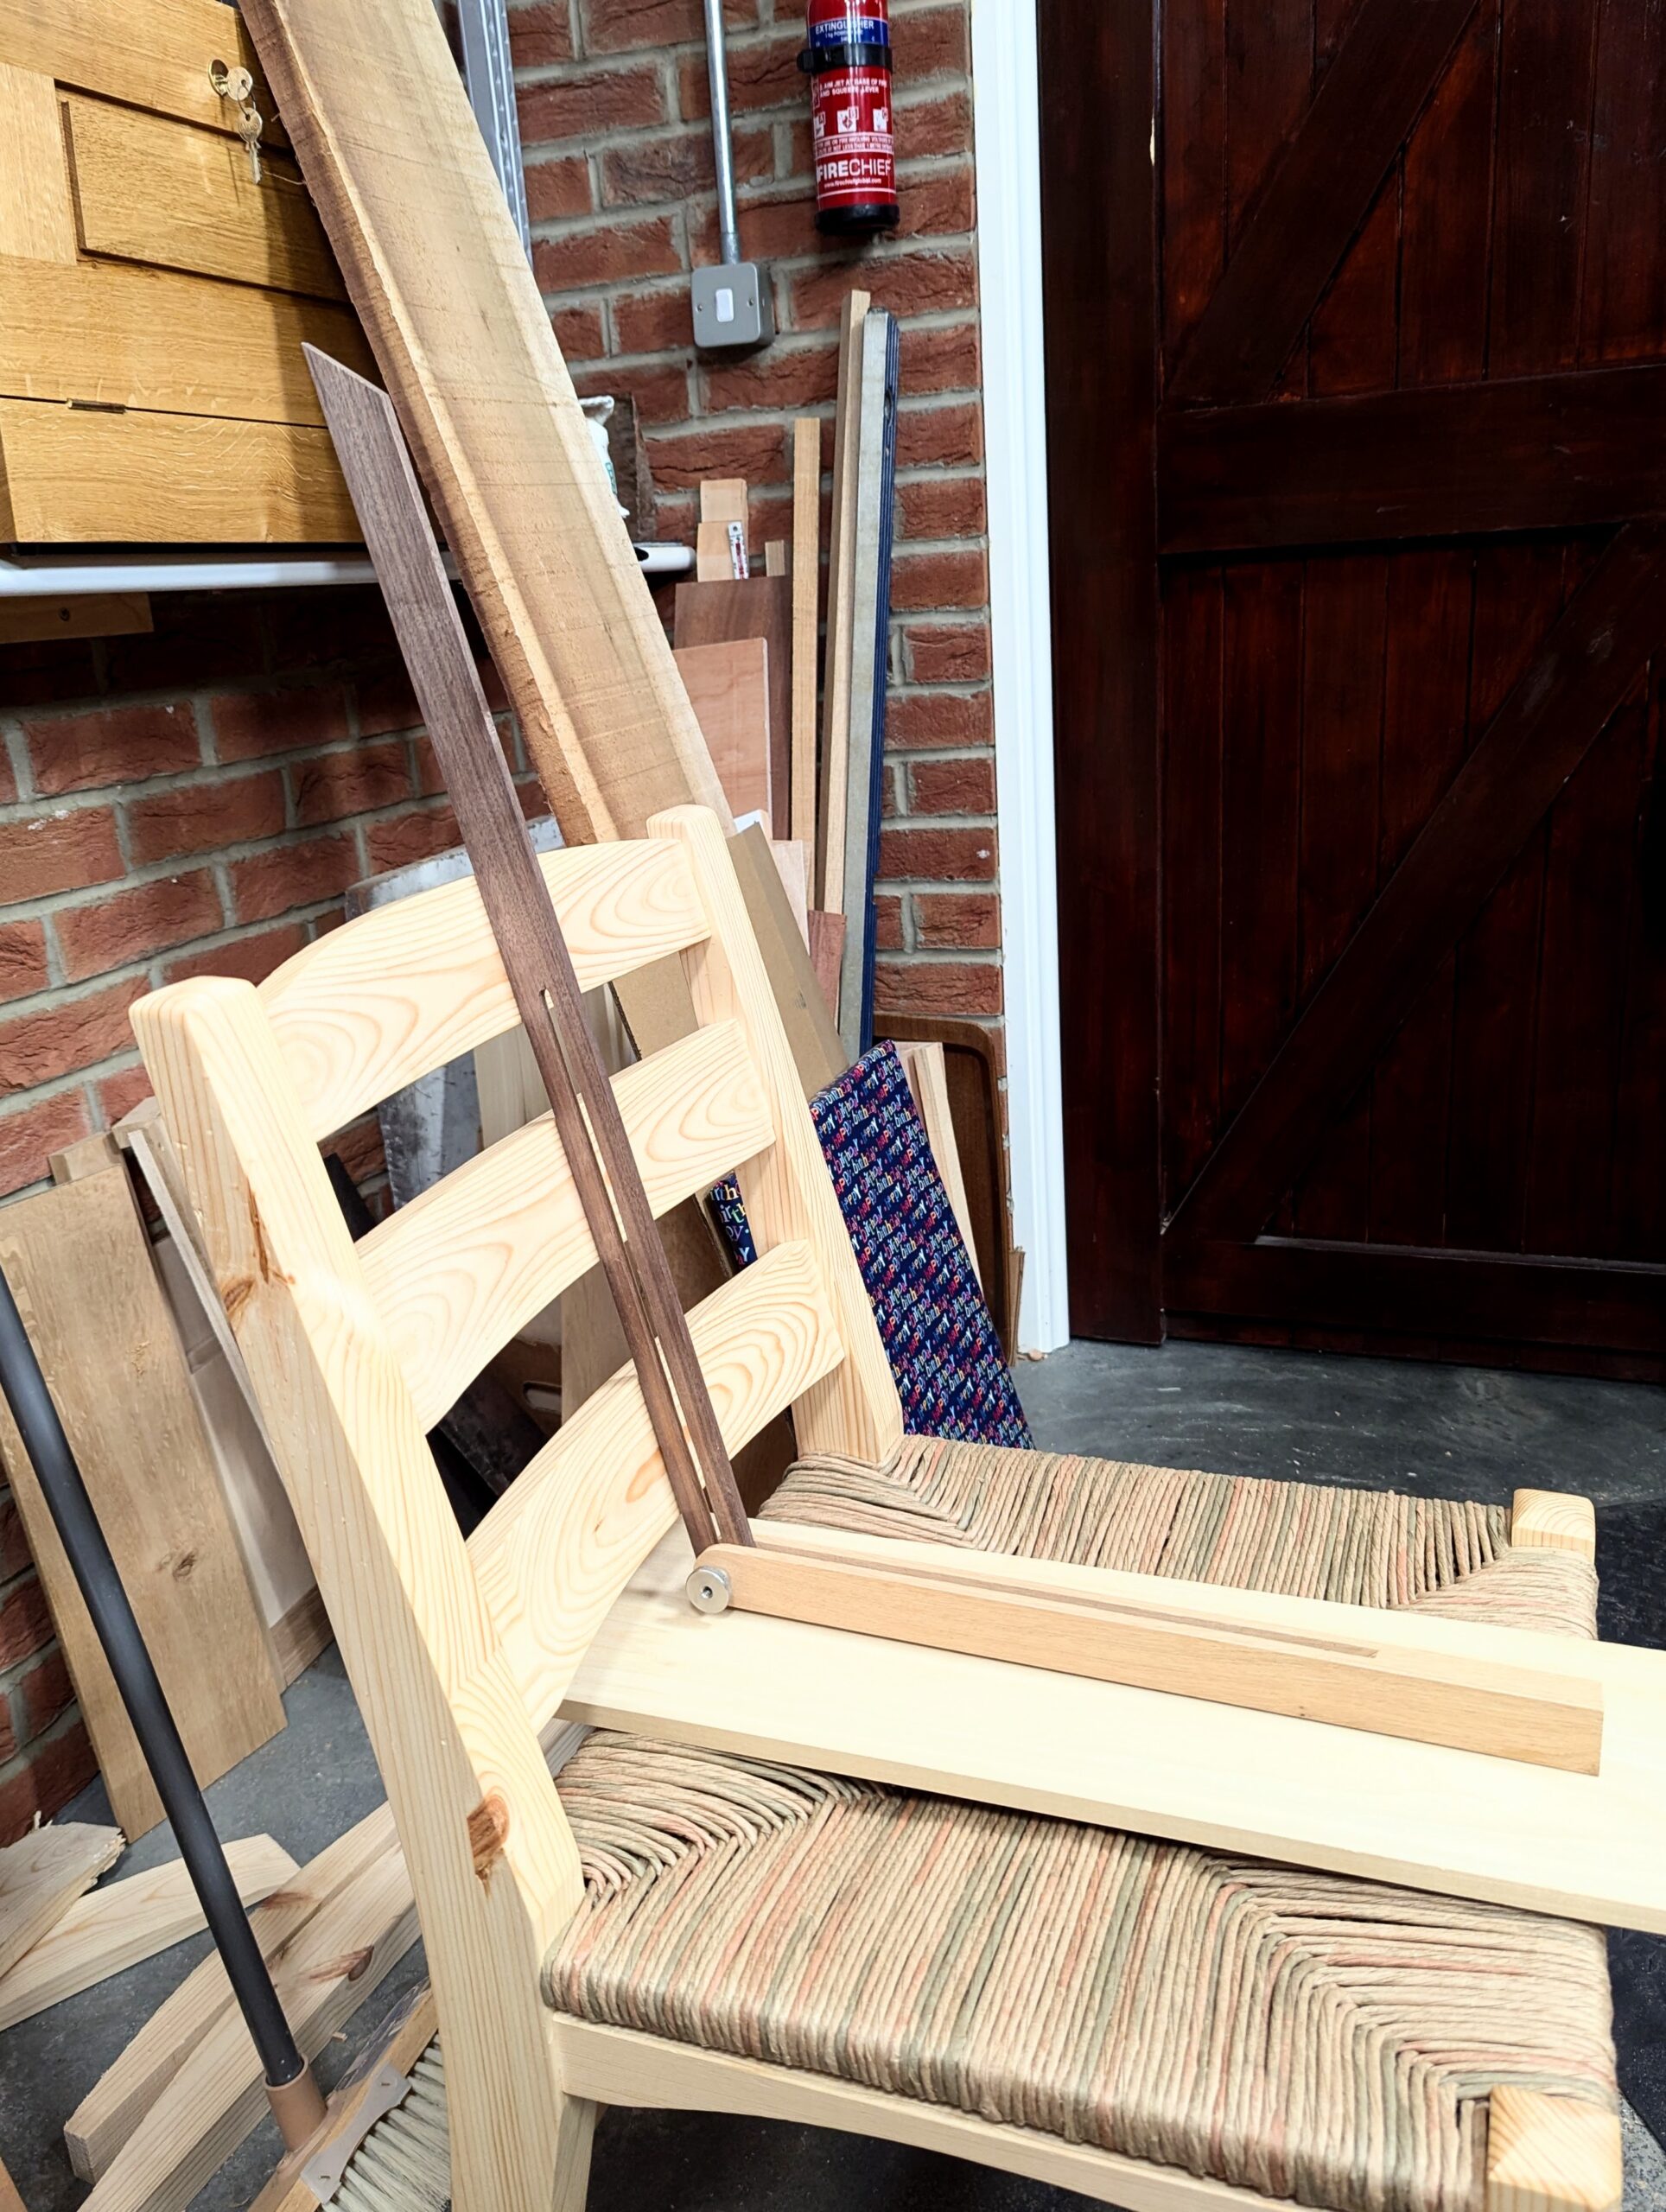
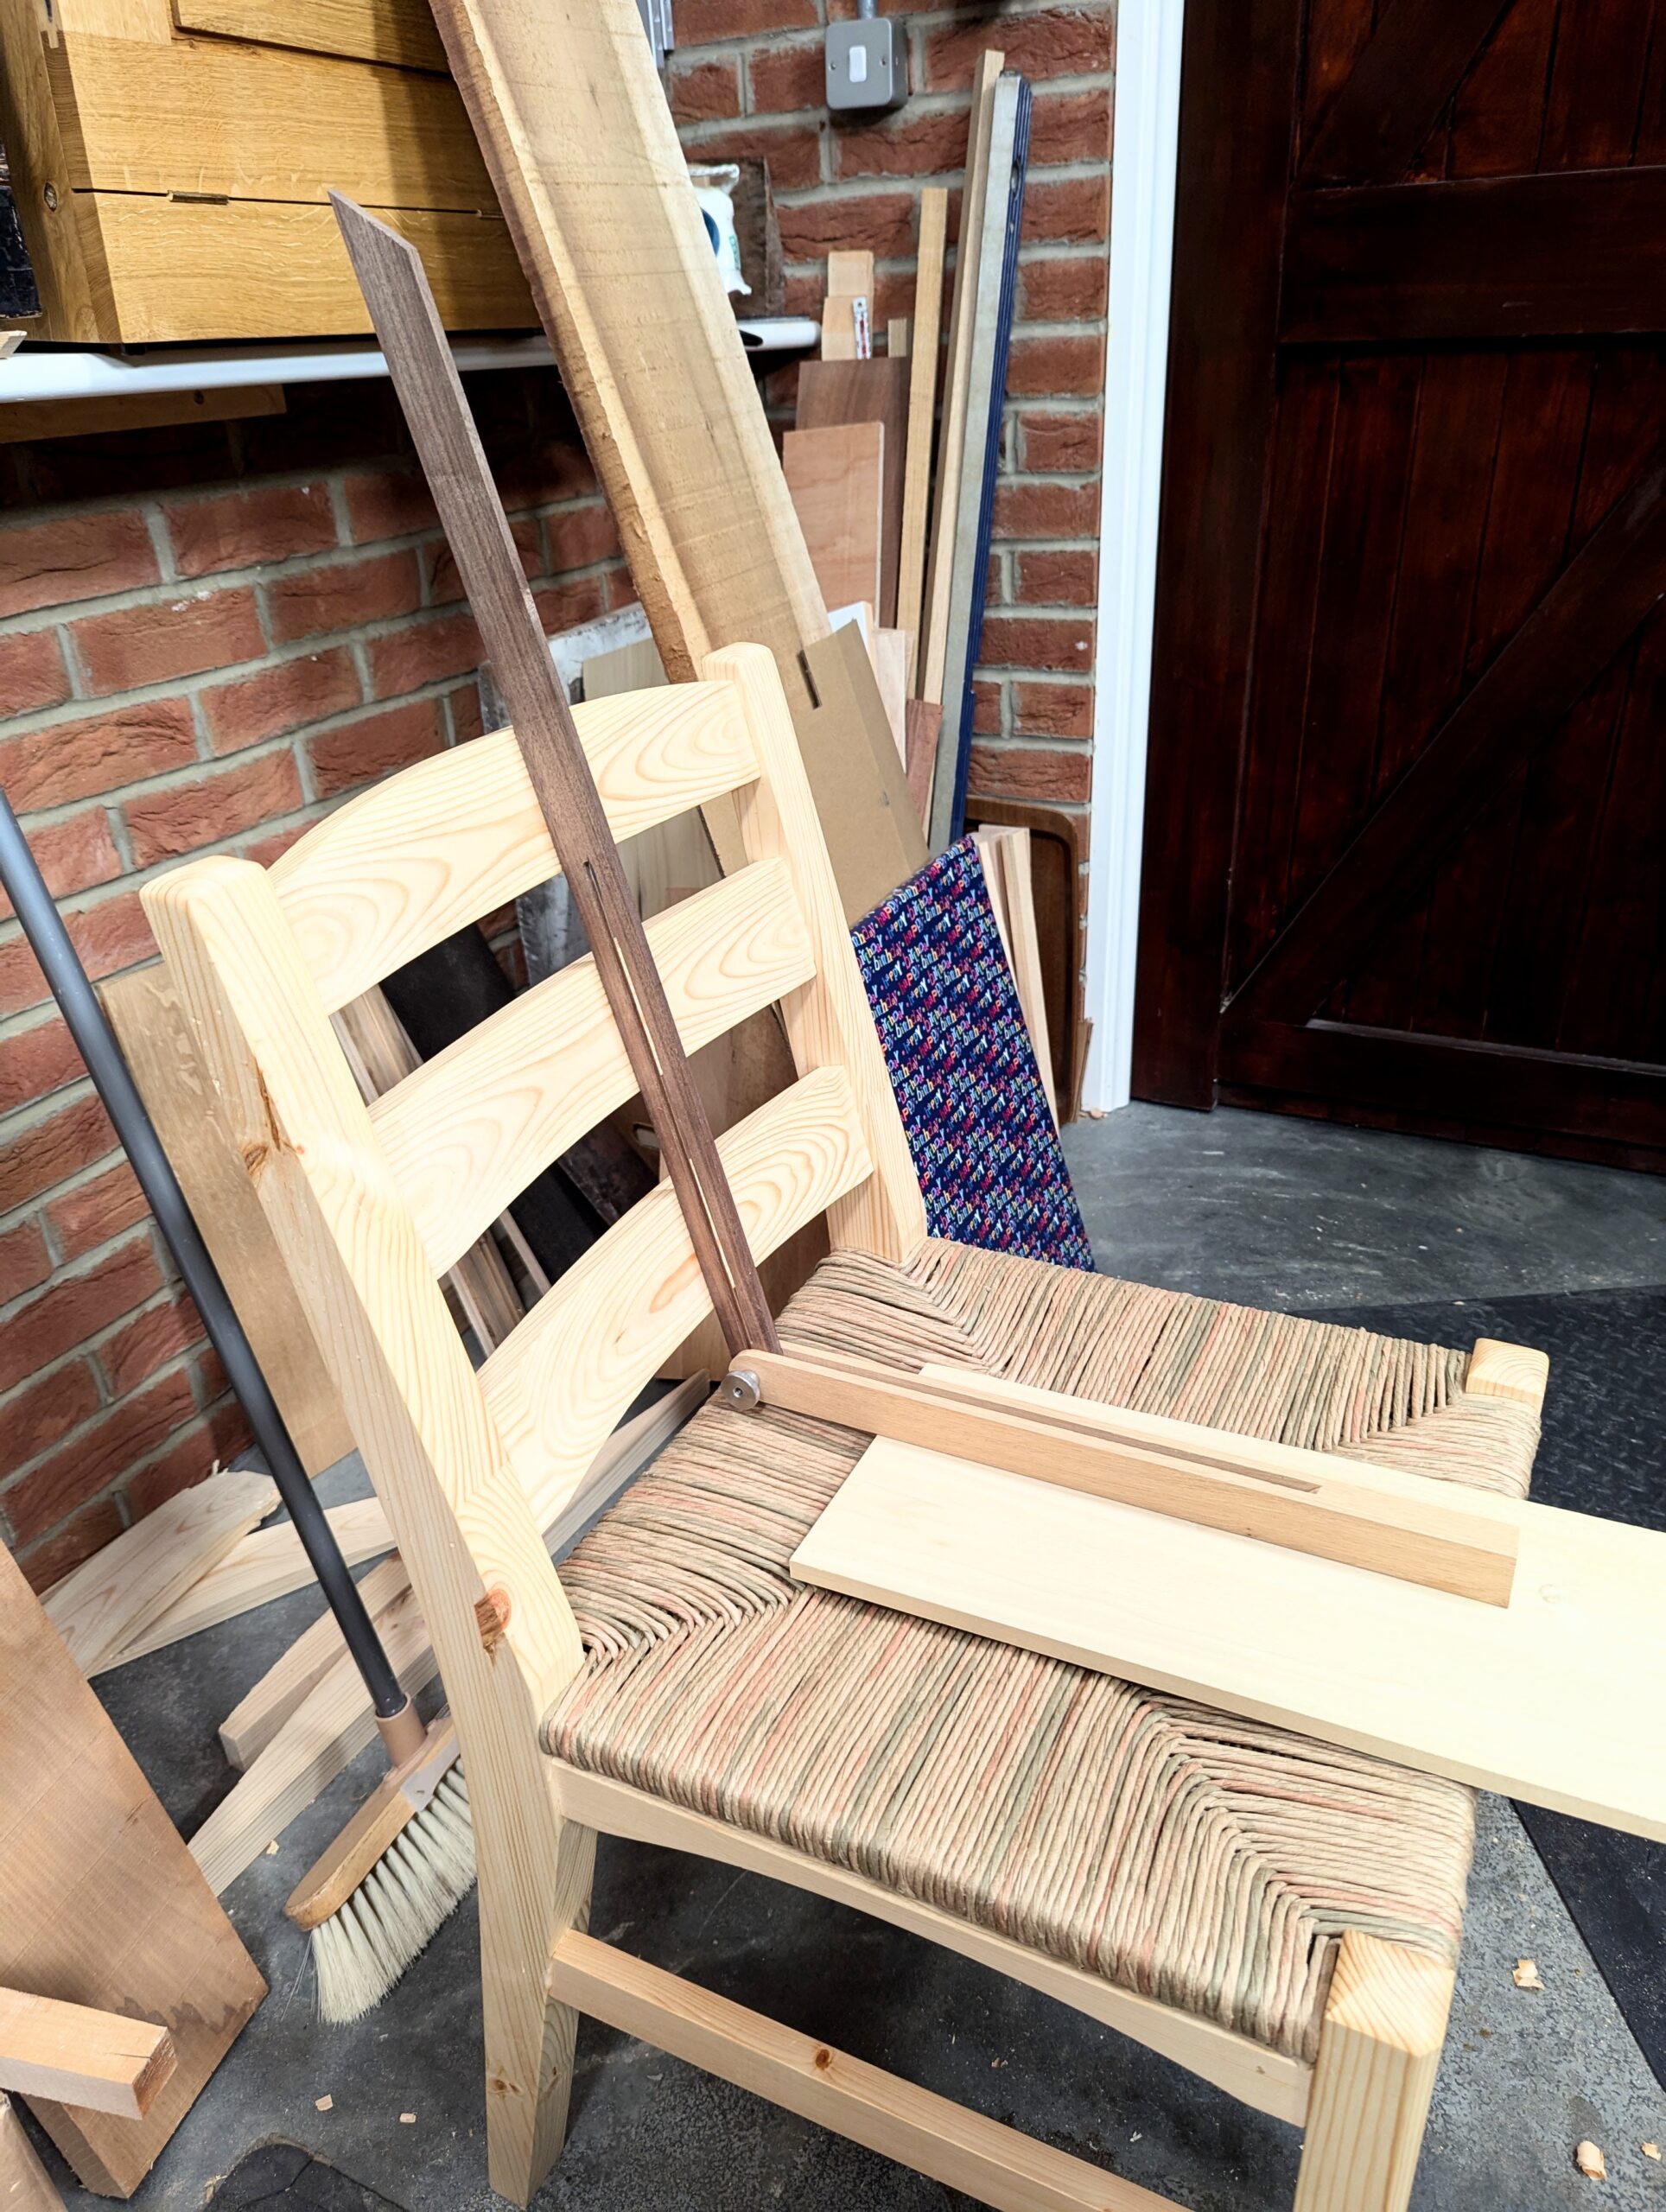
The first thing to notice is that there are no angled side rails that narrow the chair from wide at the front and narrower at the back. This simplifies the design make altogether, especially when it comes to the joinery. The two lower side rails allow me to kick the lower aspect of the back legs back, which reduces the risk of back tipping if or when people tip back on the chairs. It can even prevent this bad habit. The tops of the front legs are domed and not too high. Sitting on chairs where these project too much can be uncomfortable. Mine are 5/8" past the top rail, but then we have the reed, which is around 1/4". The domed top starts pretty much at the height of the reed, so anyone swivelling sideways to get up will not feel anything of the leg tops as they do so.

The split rails around the seat are quite the different part to my design––I like the complementary association between the contrasting combination. The under-arching accents the rails, reduces weight, keeps the strength of a wide-shouldered tenon and allows for a nice wrap of the reed. The negative side of my design, and there is but one, is having to feed the reed wrap of vertical 'soldiers' through the narrow slit. I knew the problem before the design, but a design should never be governed by ease of manufacture. That's the other world I left behind.
I wanted this instead of a full band width with no contrast. Of course, it added a difficulty because of not being able to pass a substantial coil of material over and through the rail via the large opening inside the chair seat area in the common way. This increases the reed weaving time, making it substantially longer. But I got the unusual look I was looking for. Features like this make a design yours. It's uncopied, and you own it as a feature. By the time a design is finished, you may have three or four such components that make the work more distinctively yours.
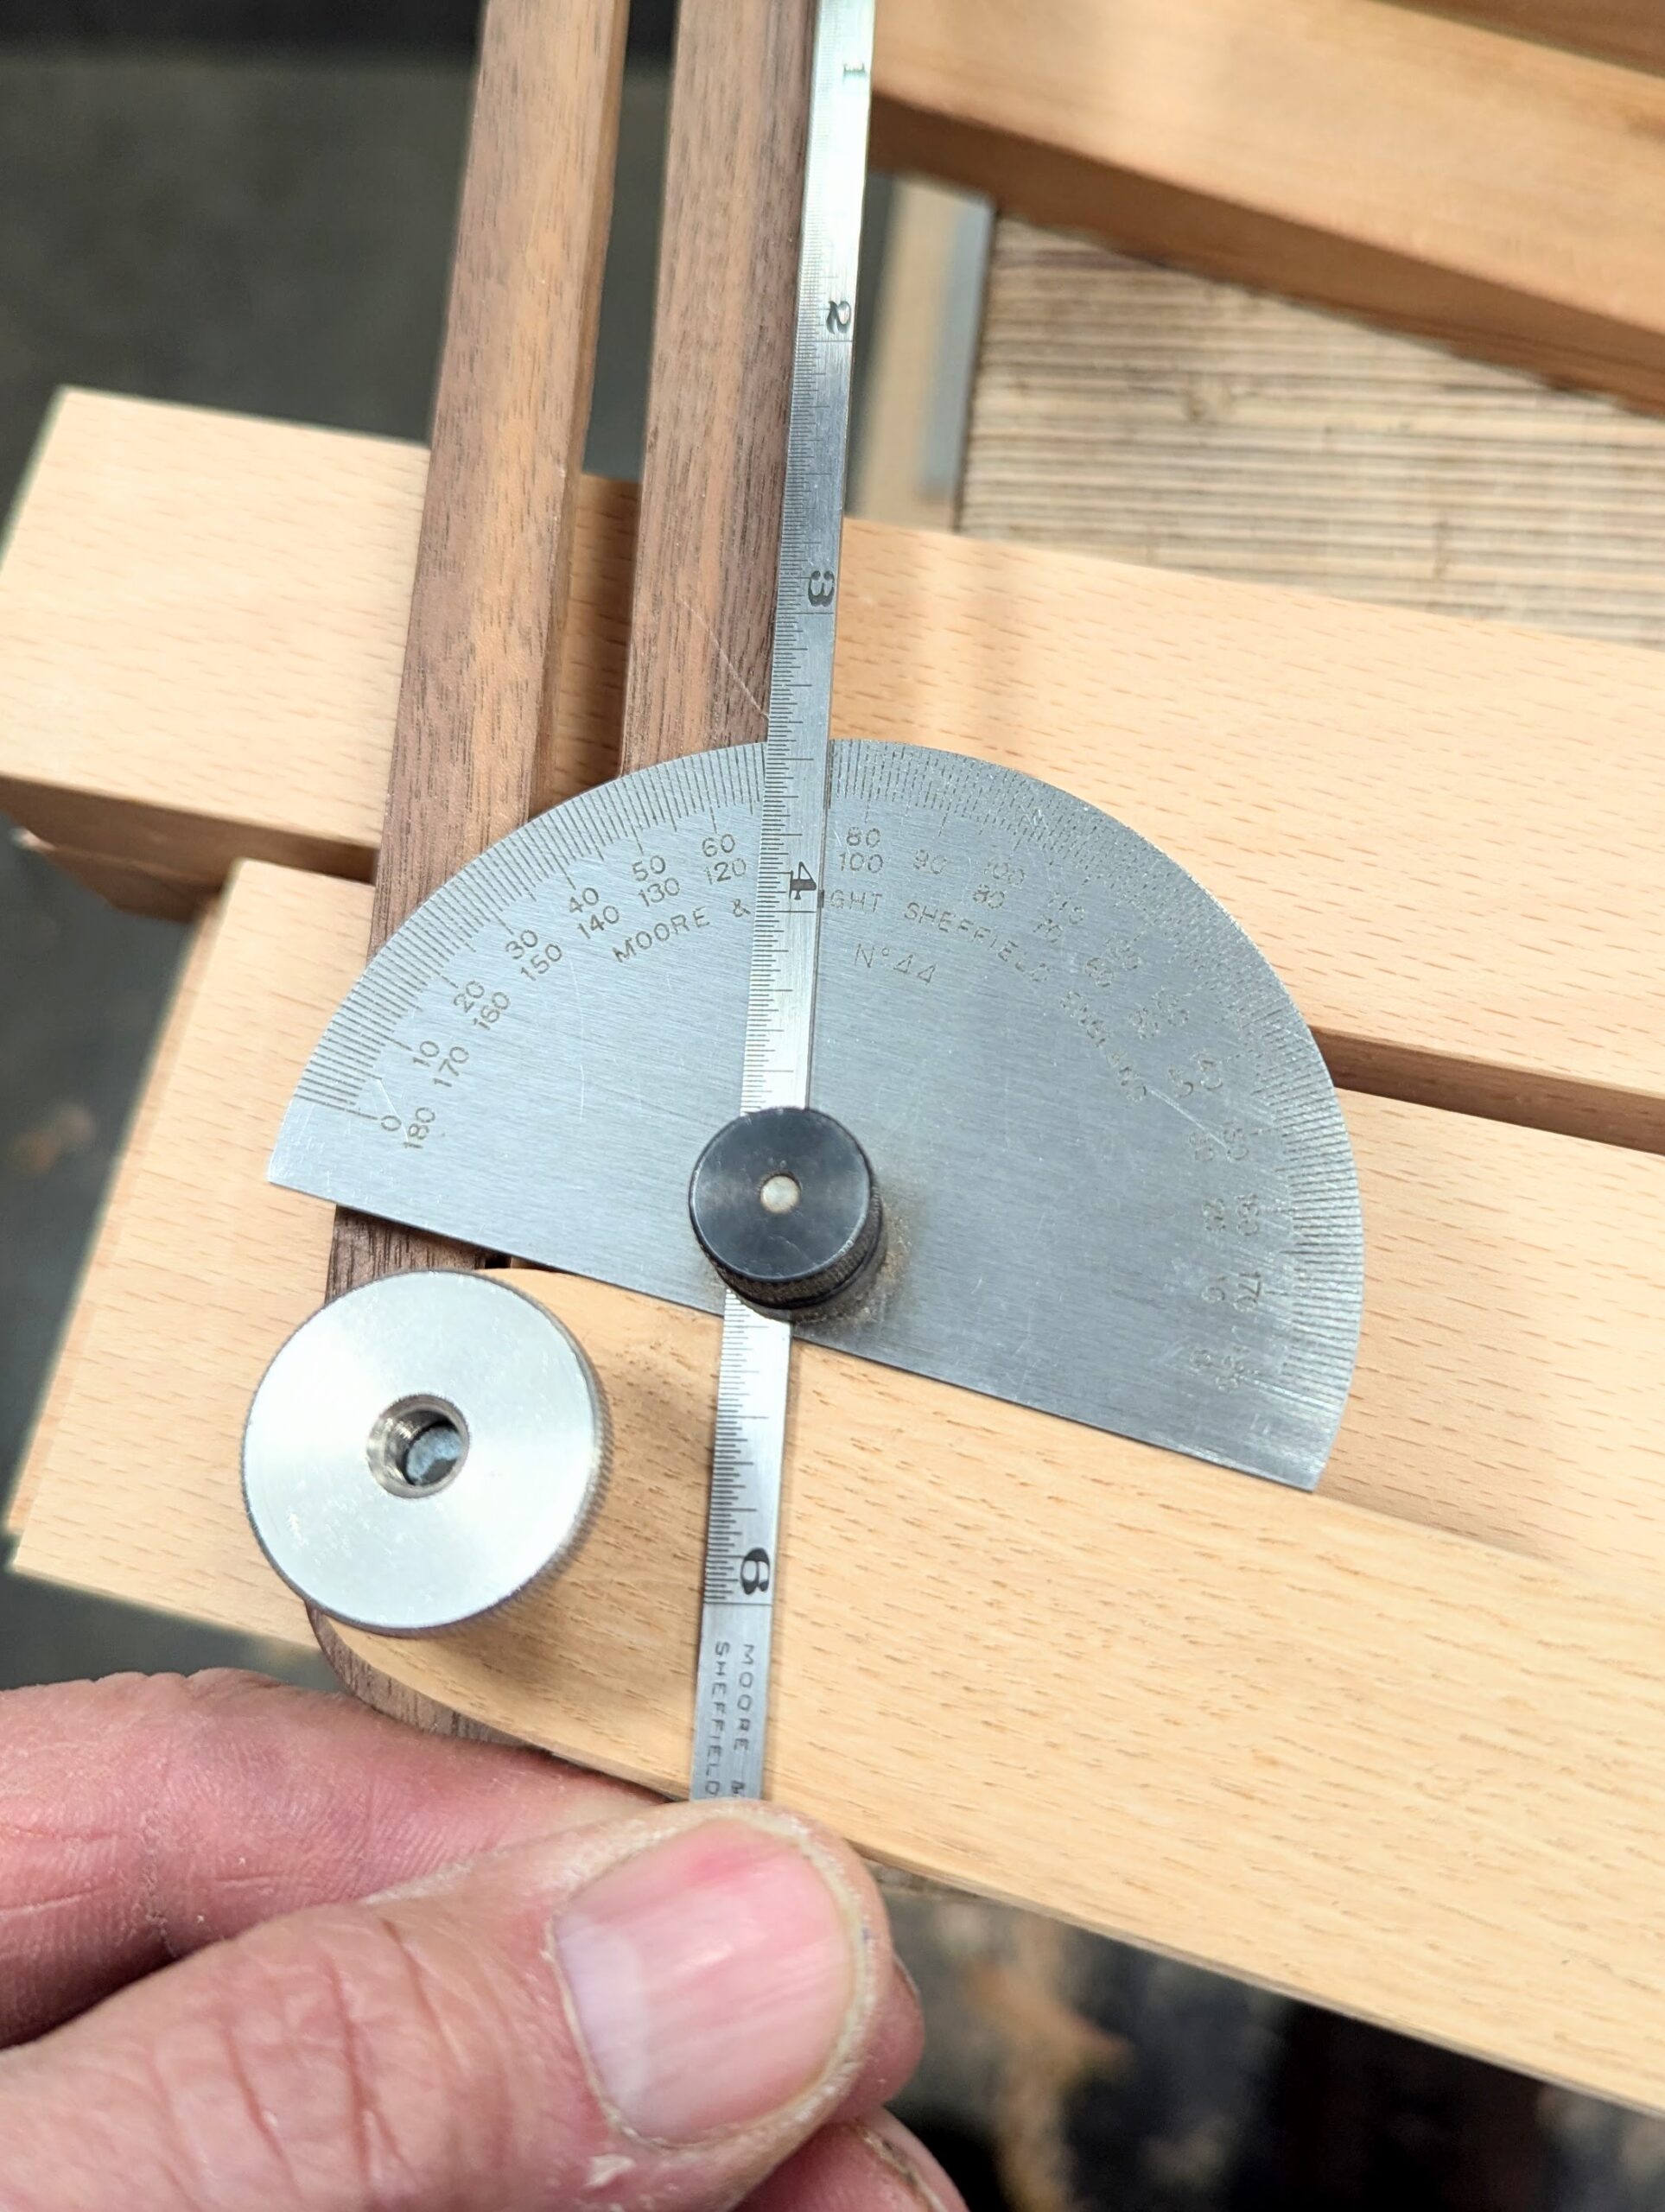
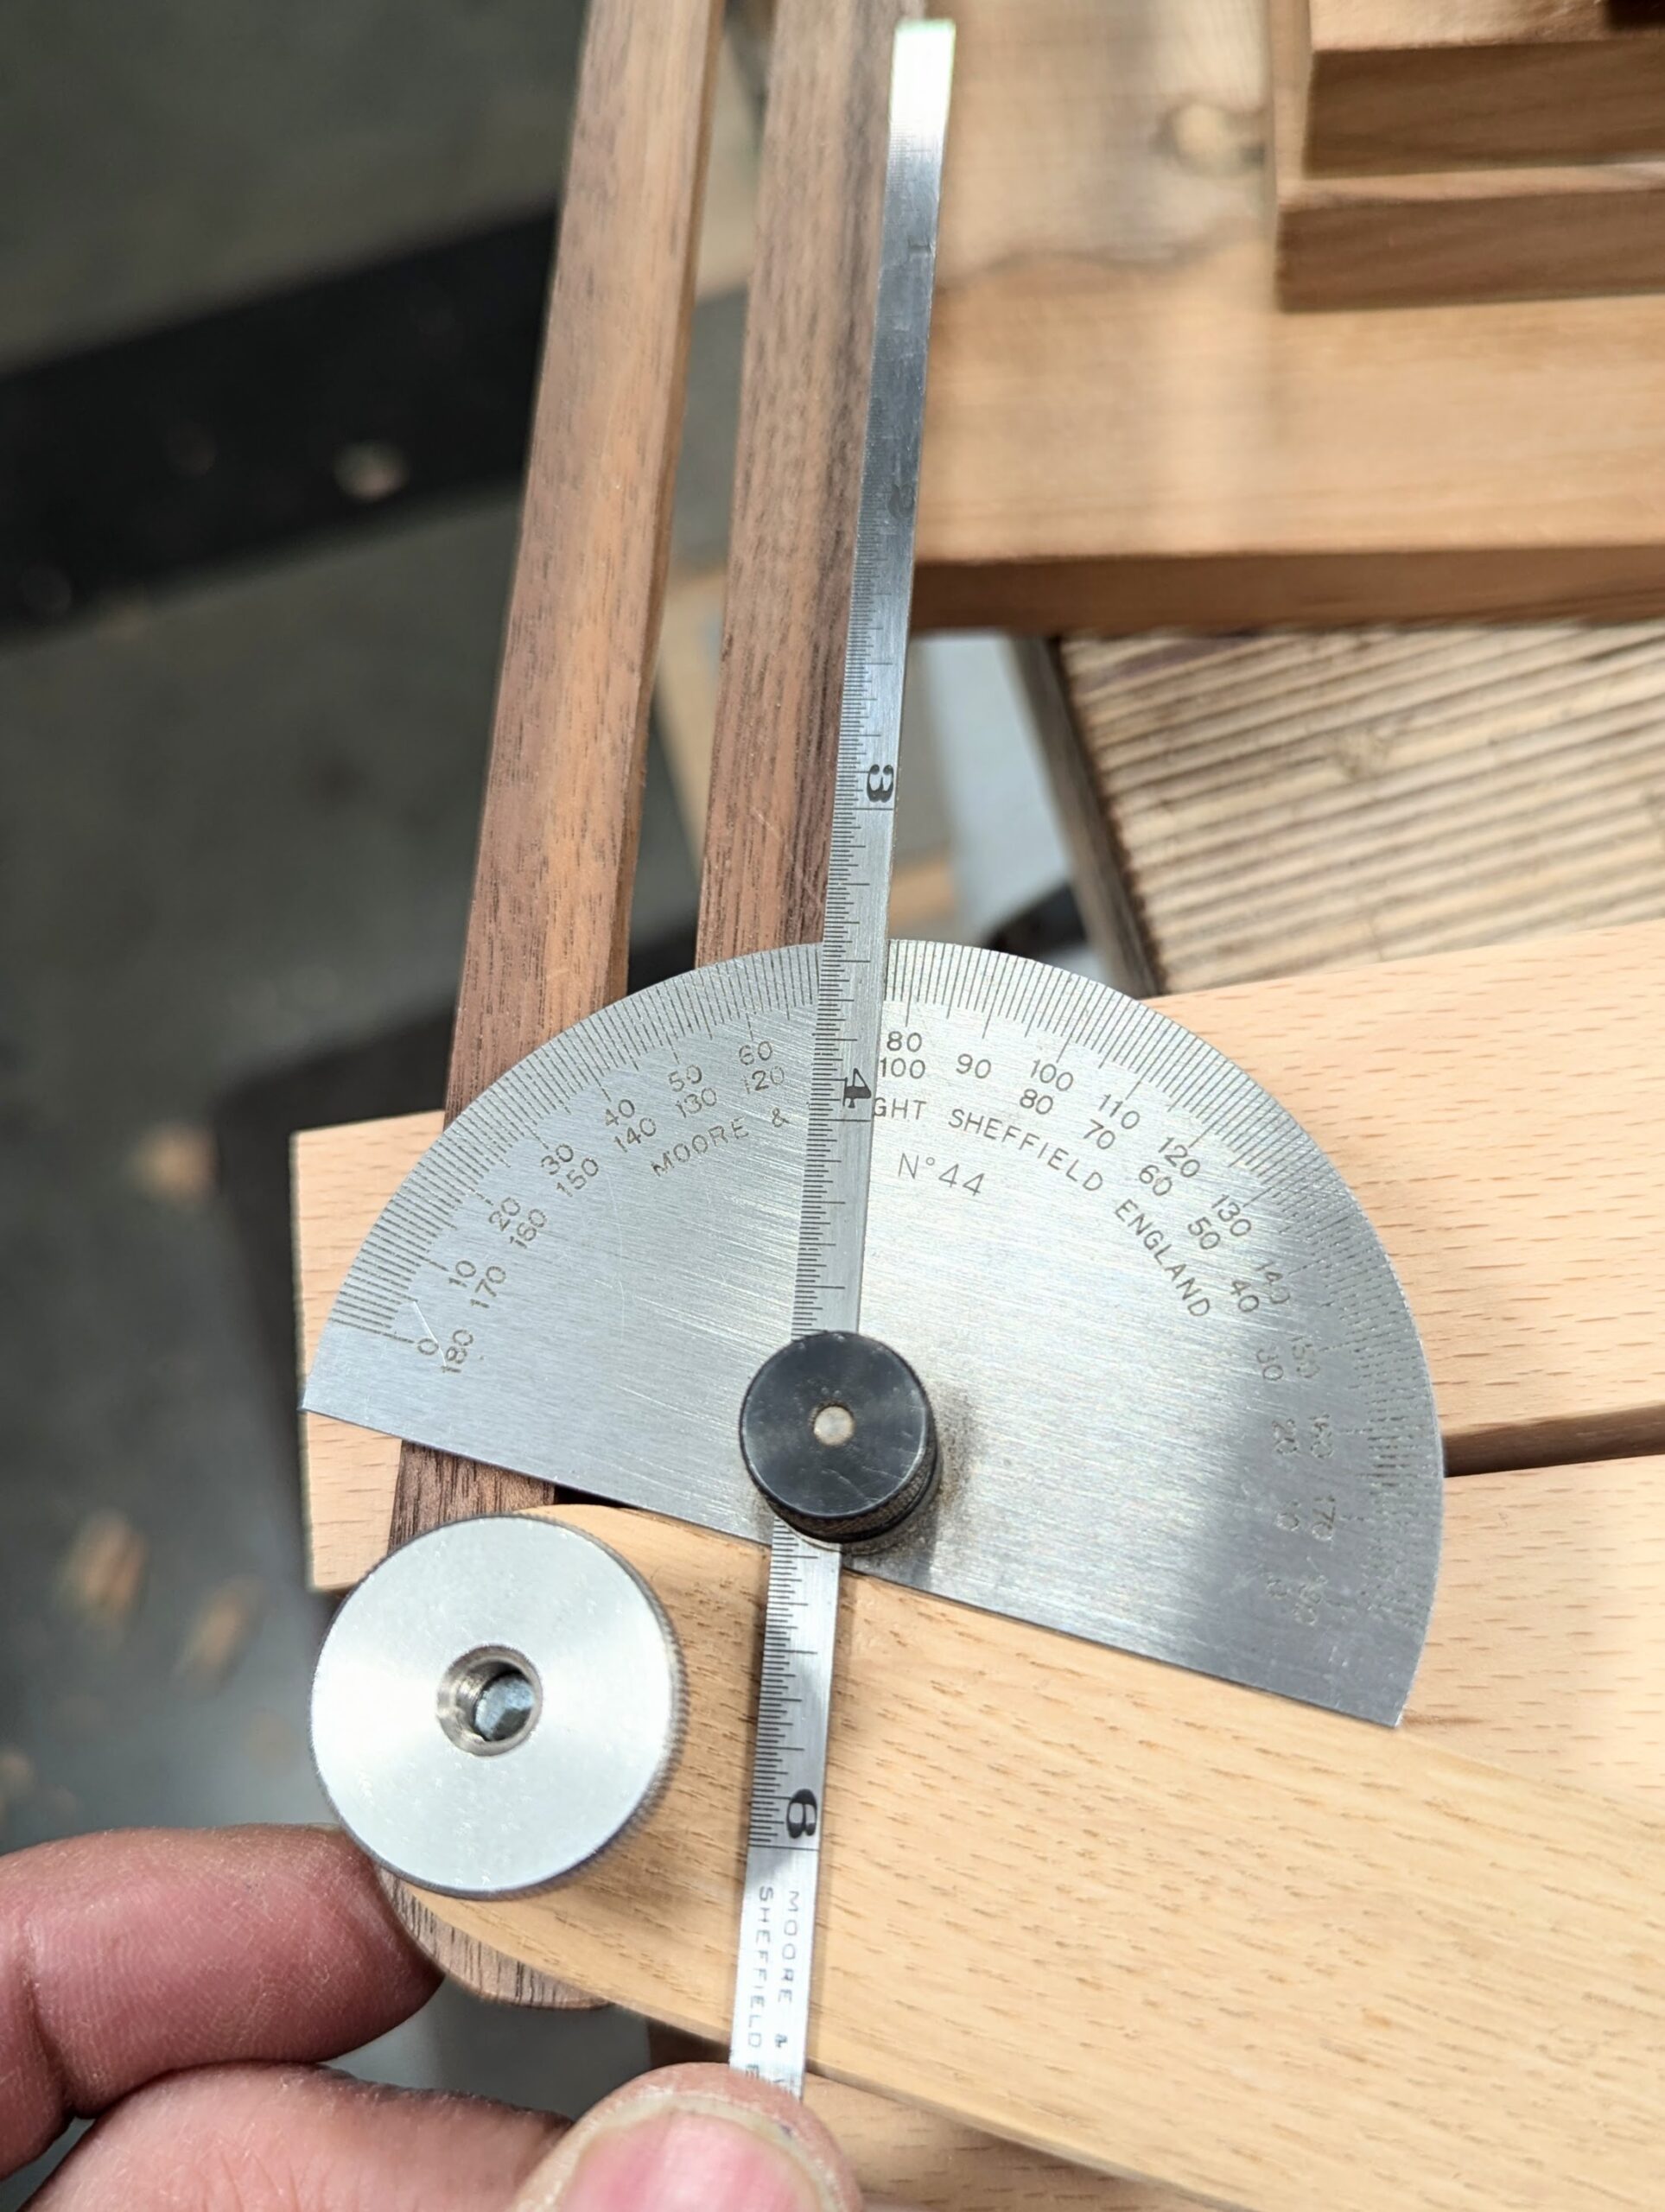
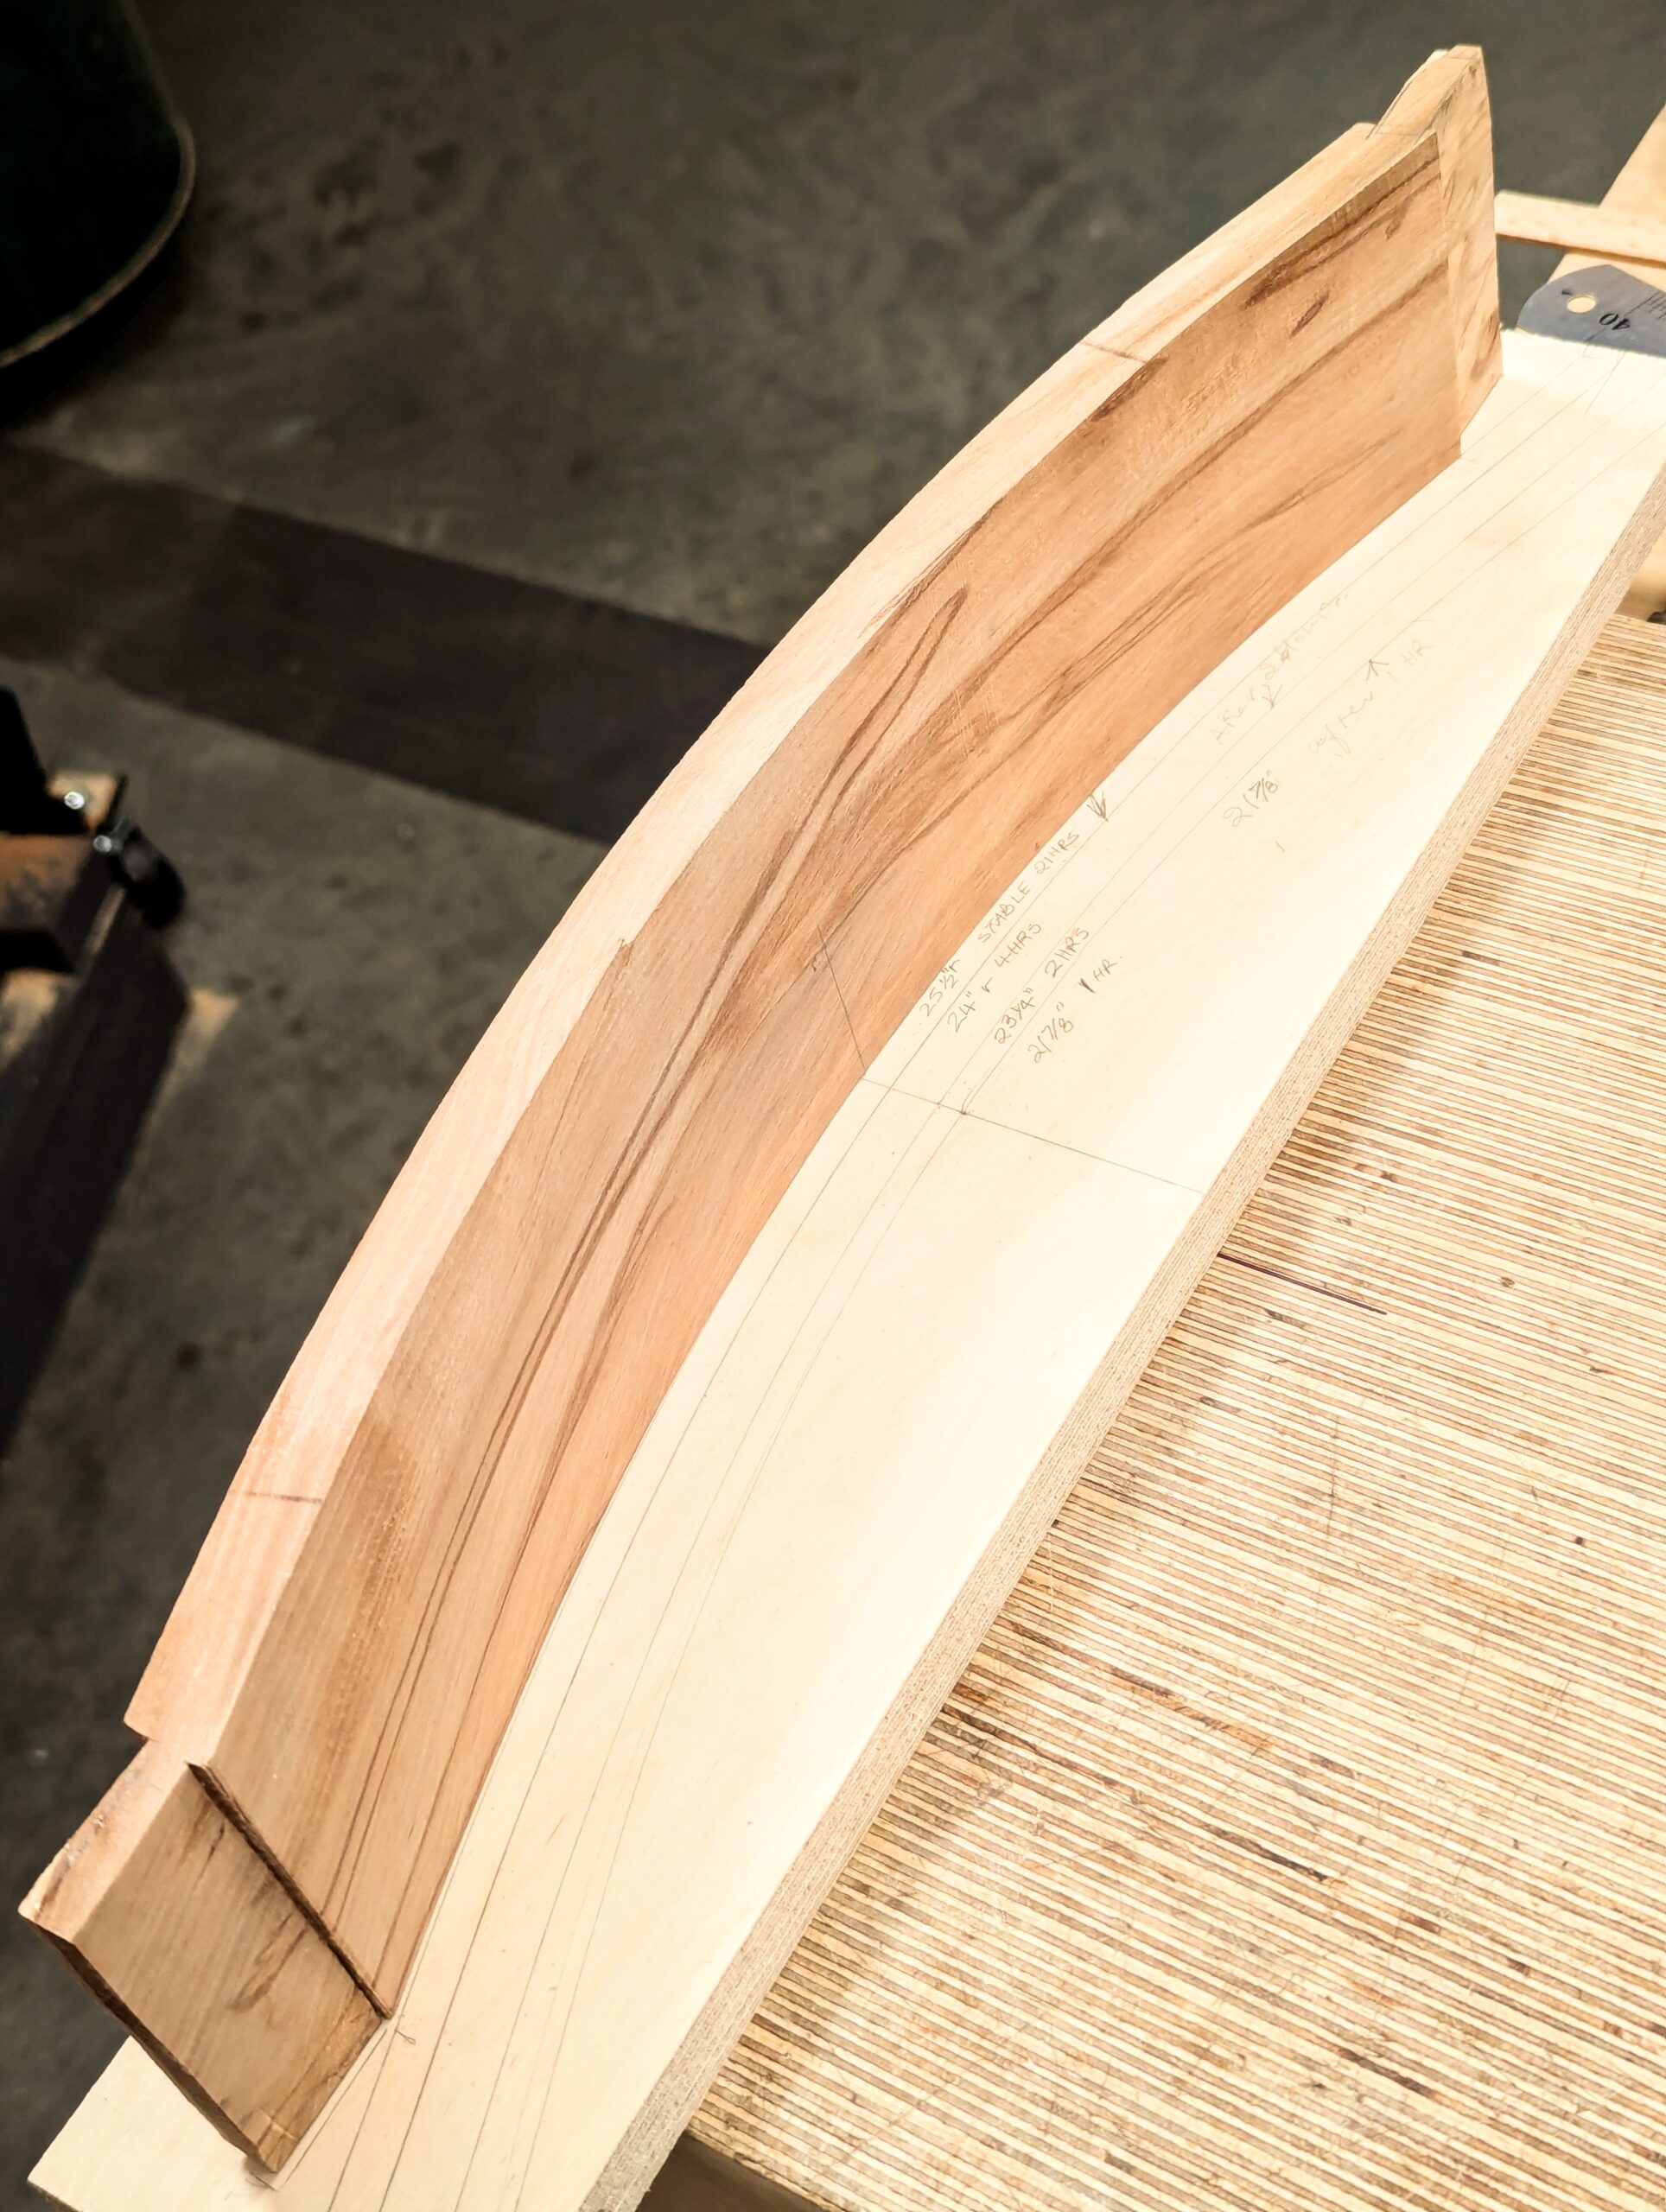
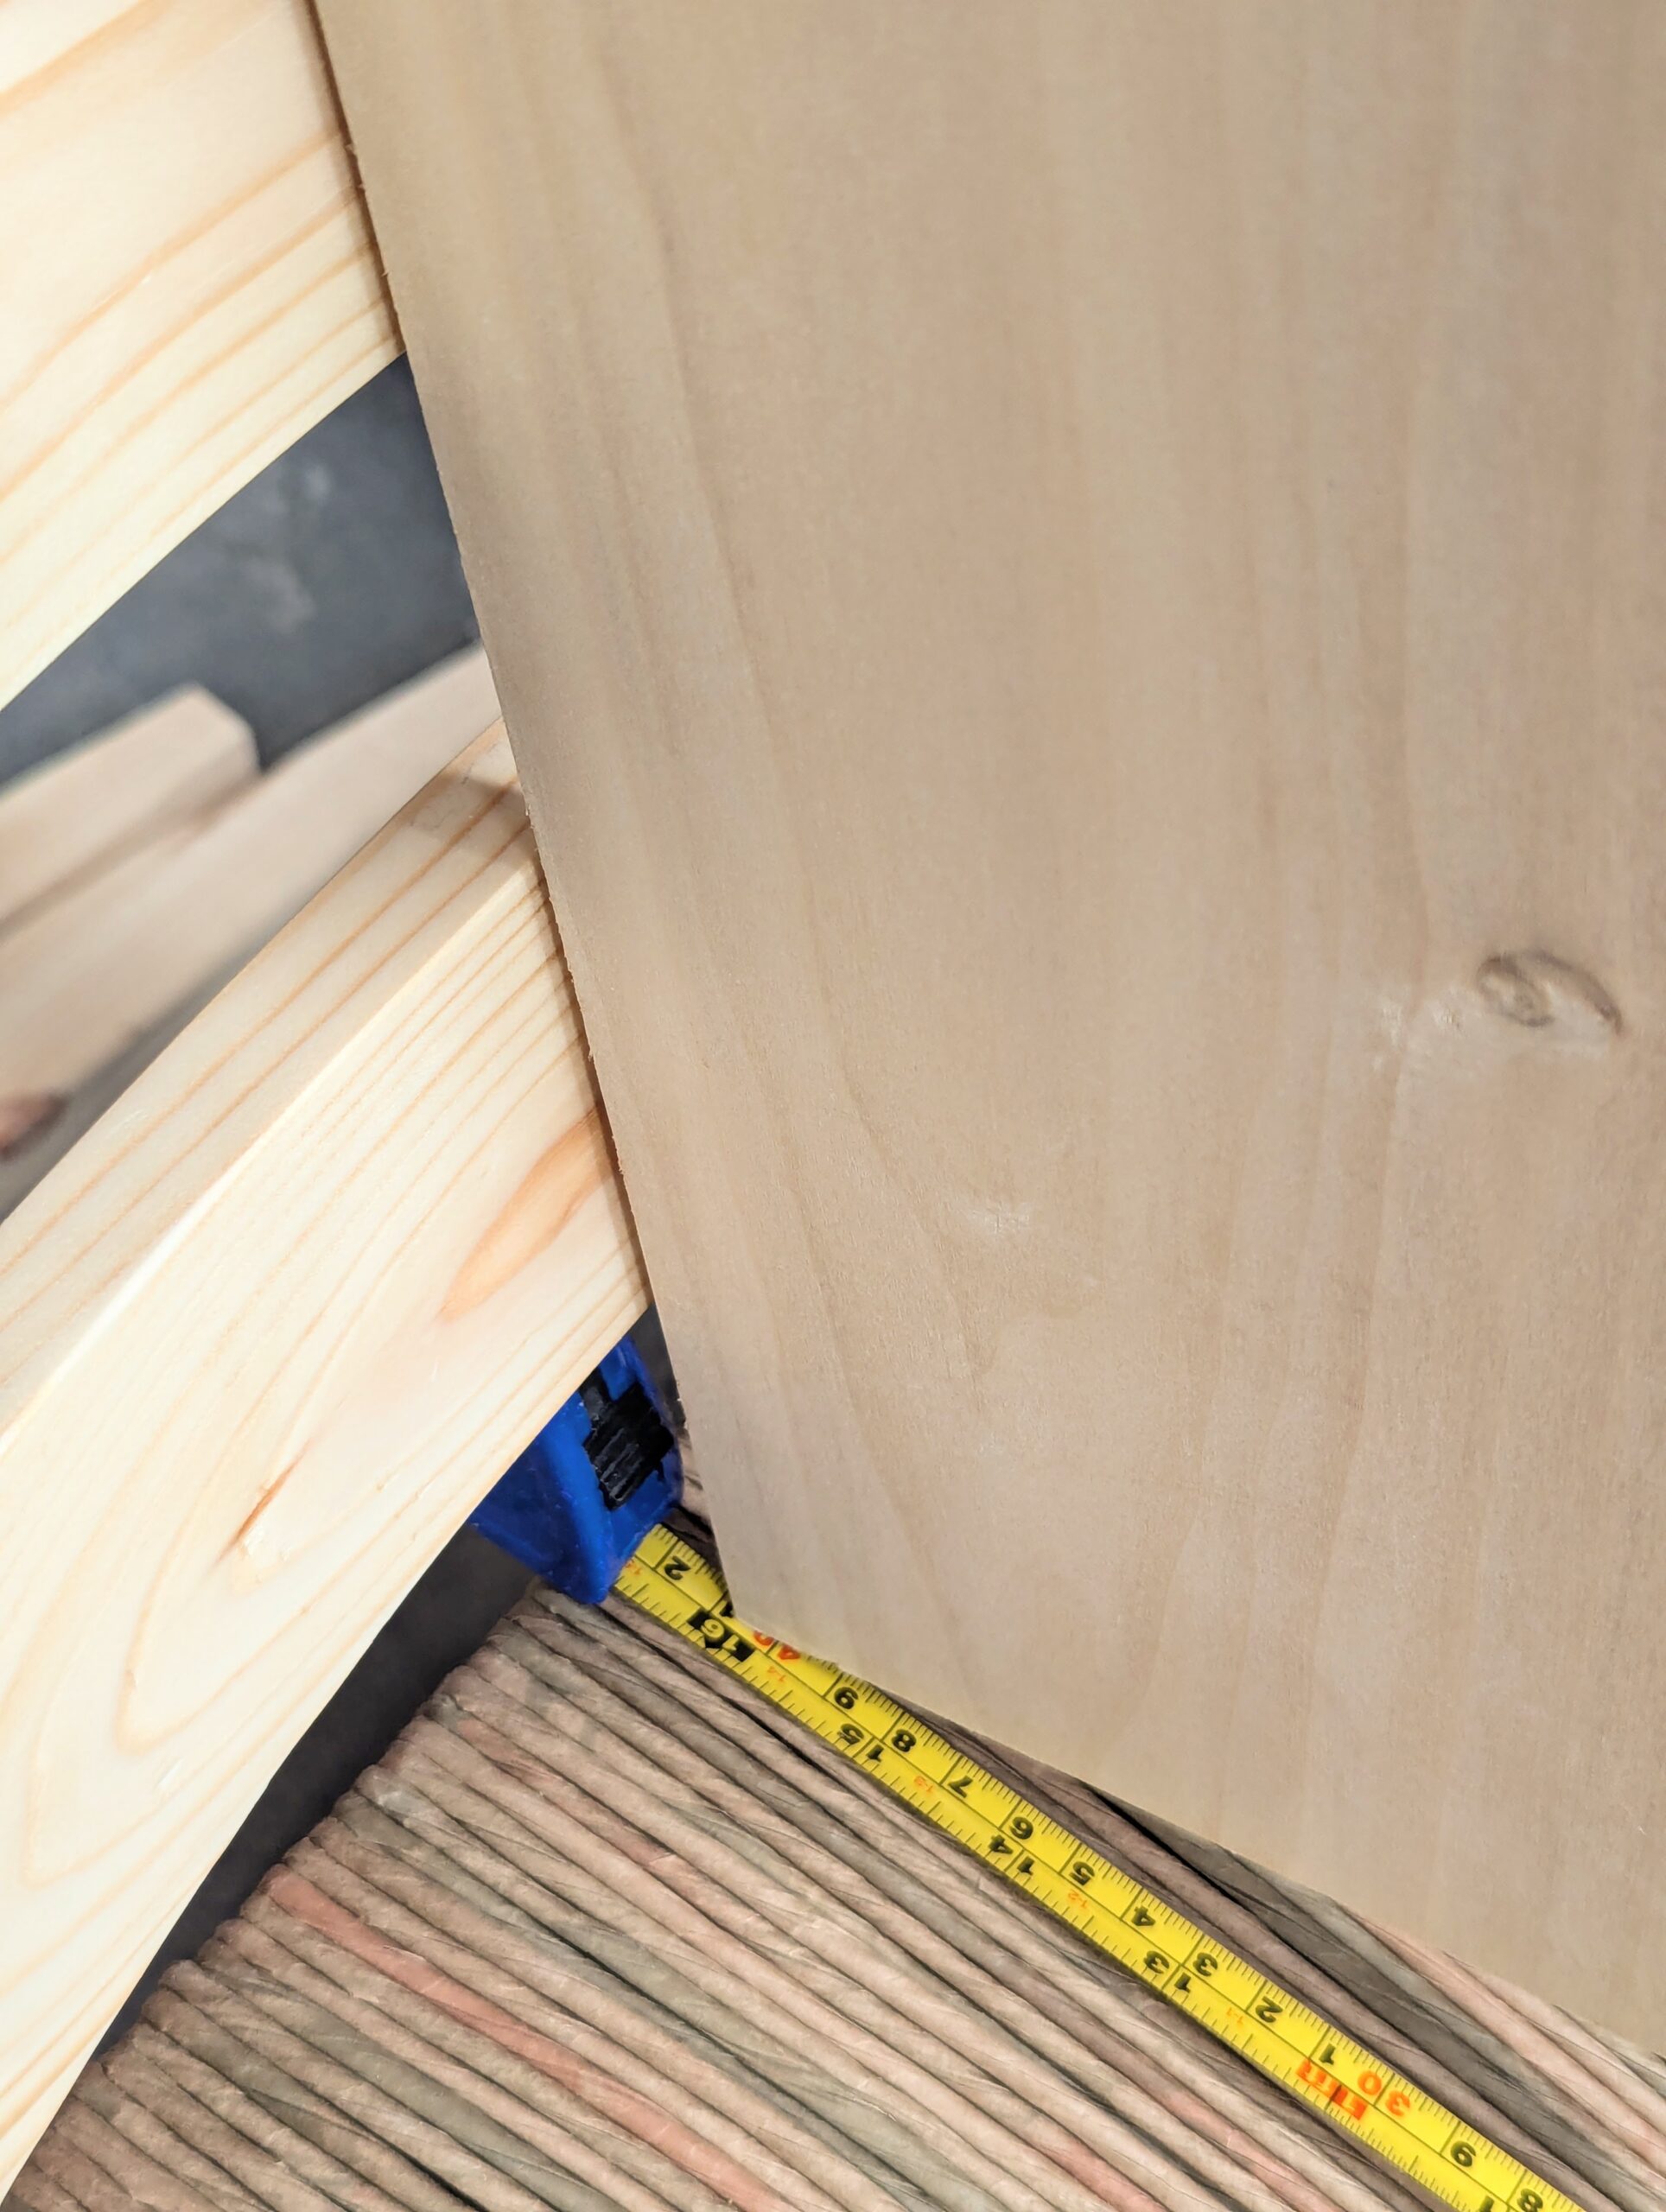
There will be two back rakes (shown above) effectively. There is the angle from front to back which in this case is 15º, and then there will be the 'buttock dip', that's where the hollow of the seat centre is lower or is lowered by the user and so this needs calculating by additional factors. Using a board all the way front to back is rigid and gave me the 15º from level, but then when you sit in a chair, your buttocks will be nearer to the centre of the seat depending on your size, etc, sitting preference and so on. Factor into this the user's weight, and all of the calculations can go to pot. That said, we need to have something to work to and something to bring understanding; moving the board forward and offering my sliding bevel to the angle, there was a two-degree difference, giving me a 13º rake.
Thankfully, most of this information is pretty much standardised and there are manuals you can get hold of to identify practice or industry standards. I tend to go off my own instincts these days and, of course, being mister average male, work things out according to my own comfort, knowing that I can customise a seat to anyone if needed.
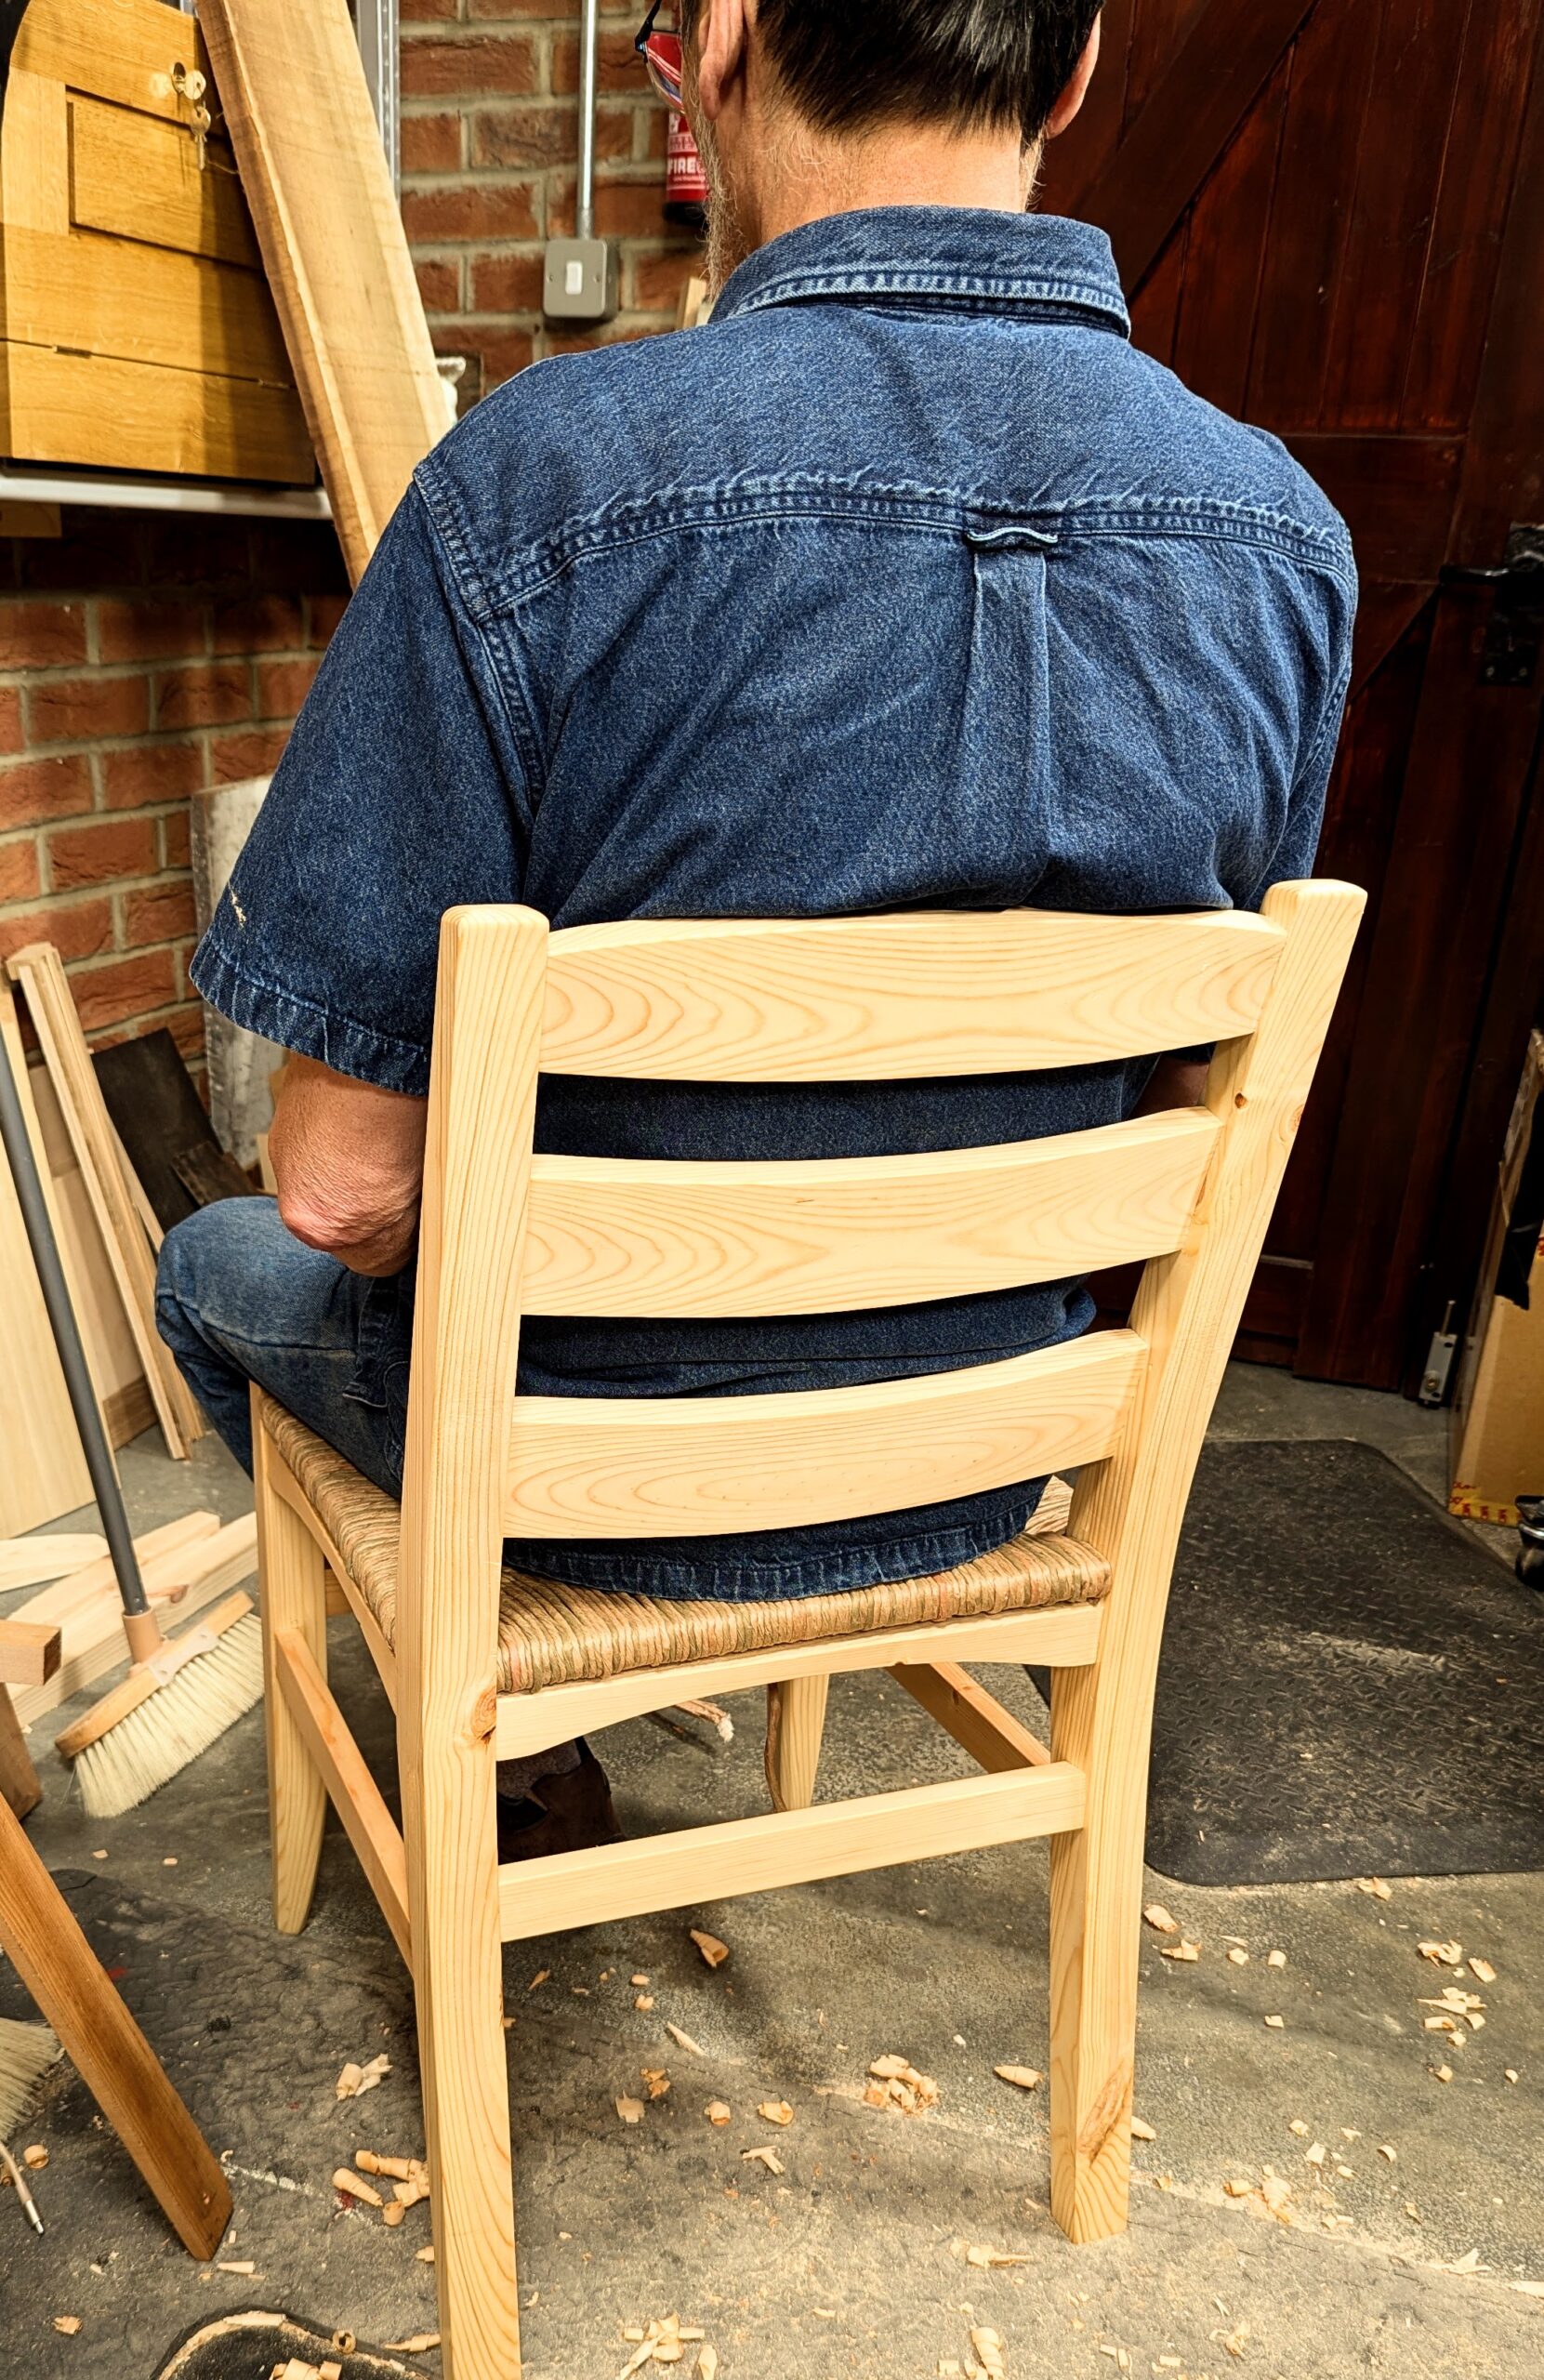
I feel that the back rake, hit the spot and gave good back support for a working chair. In this case, the chair works for dining too.
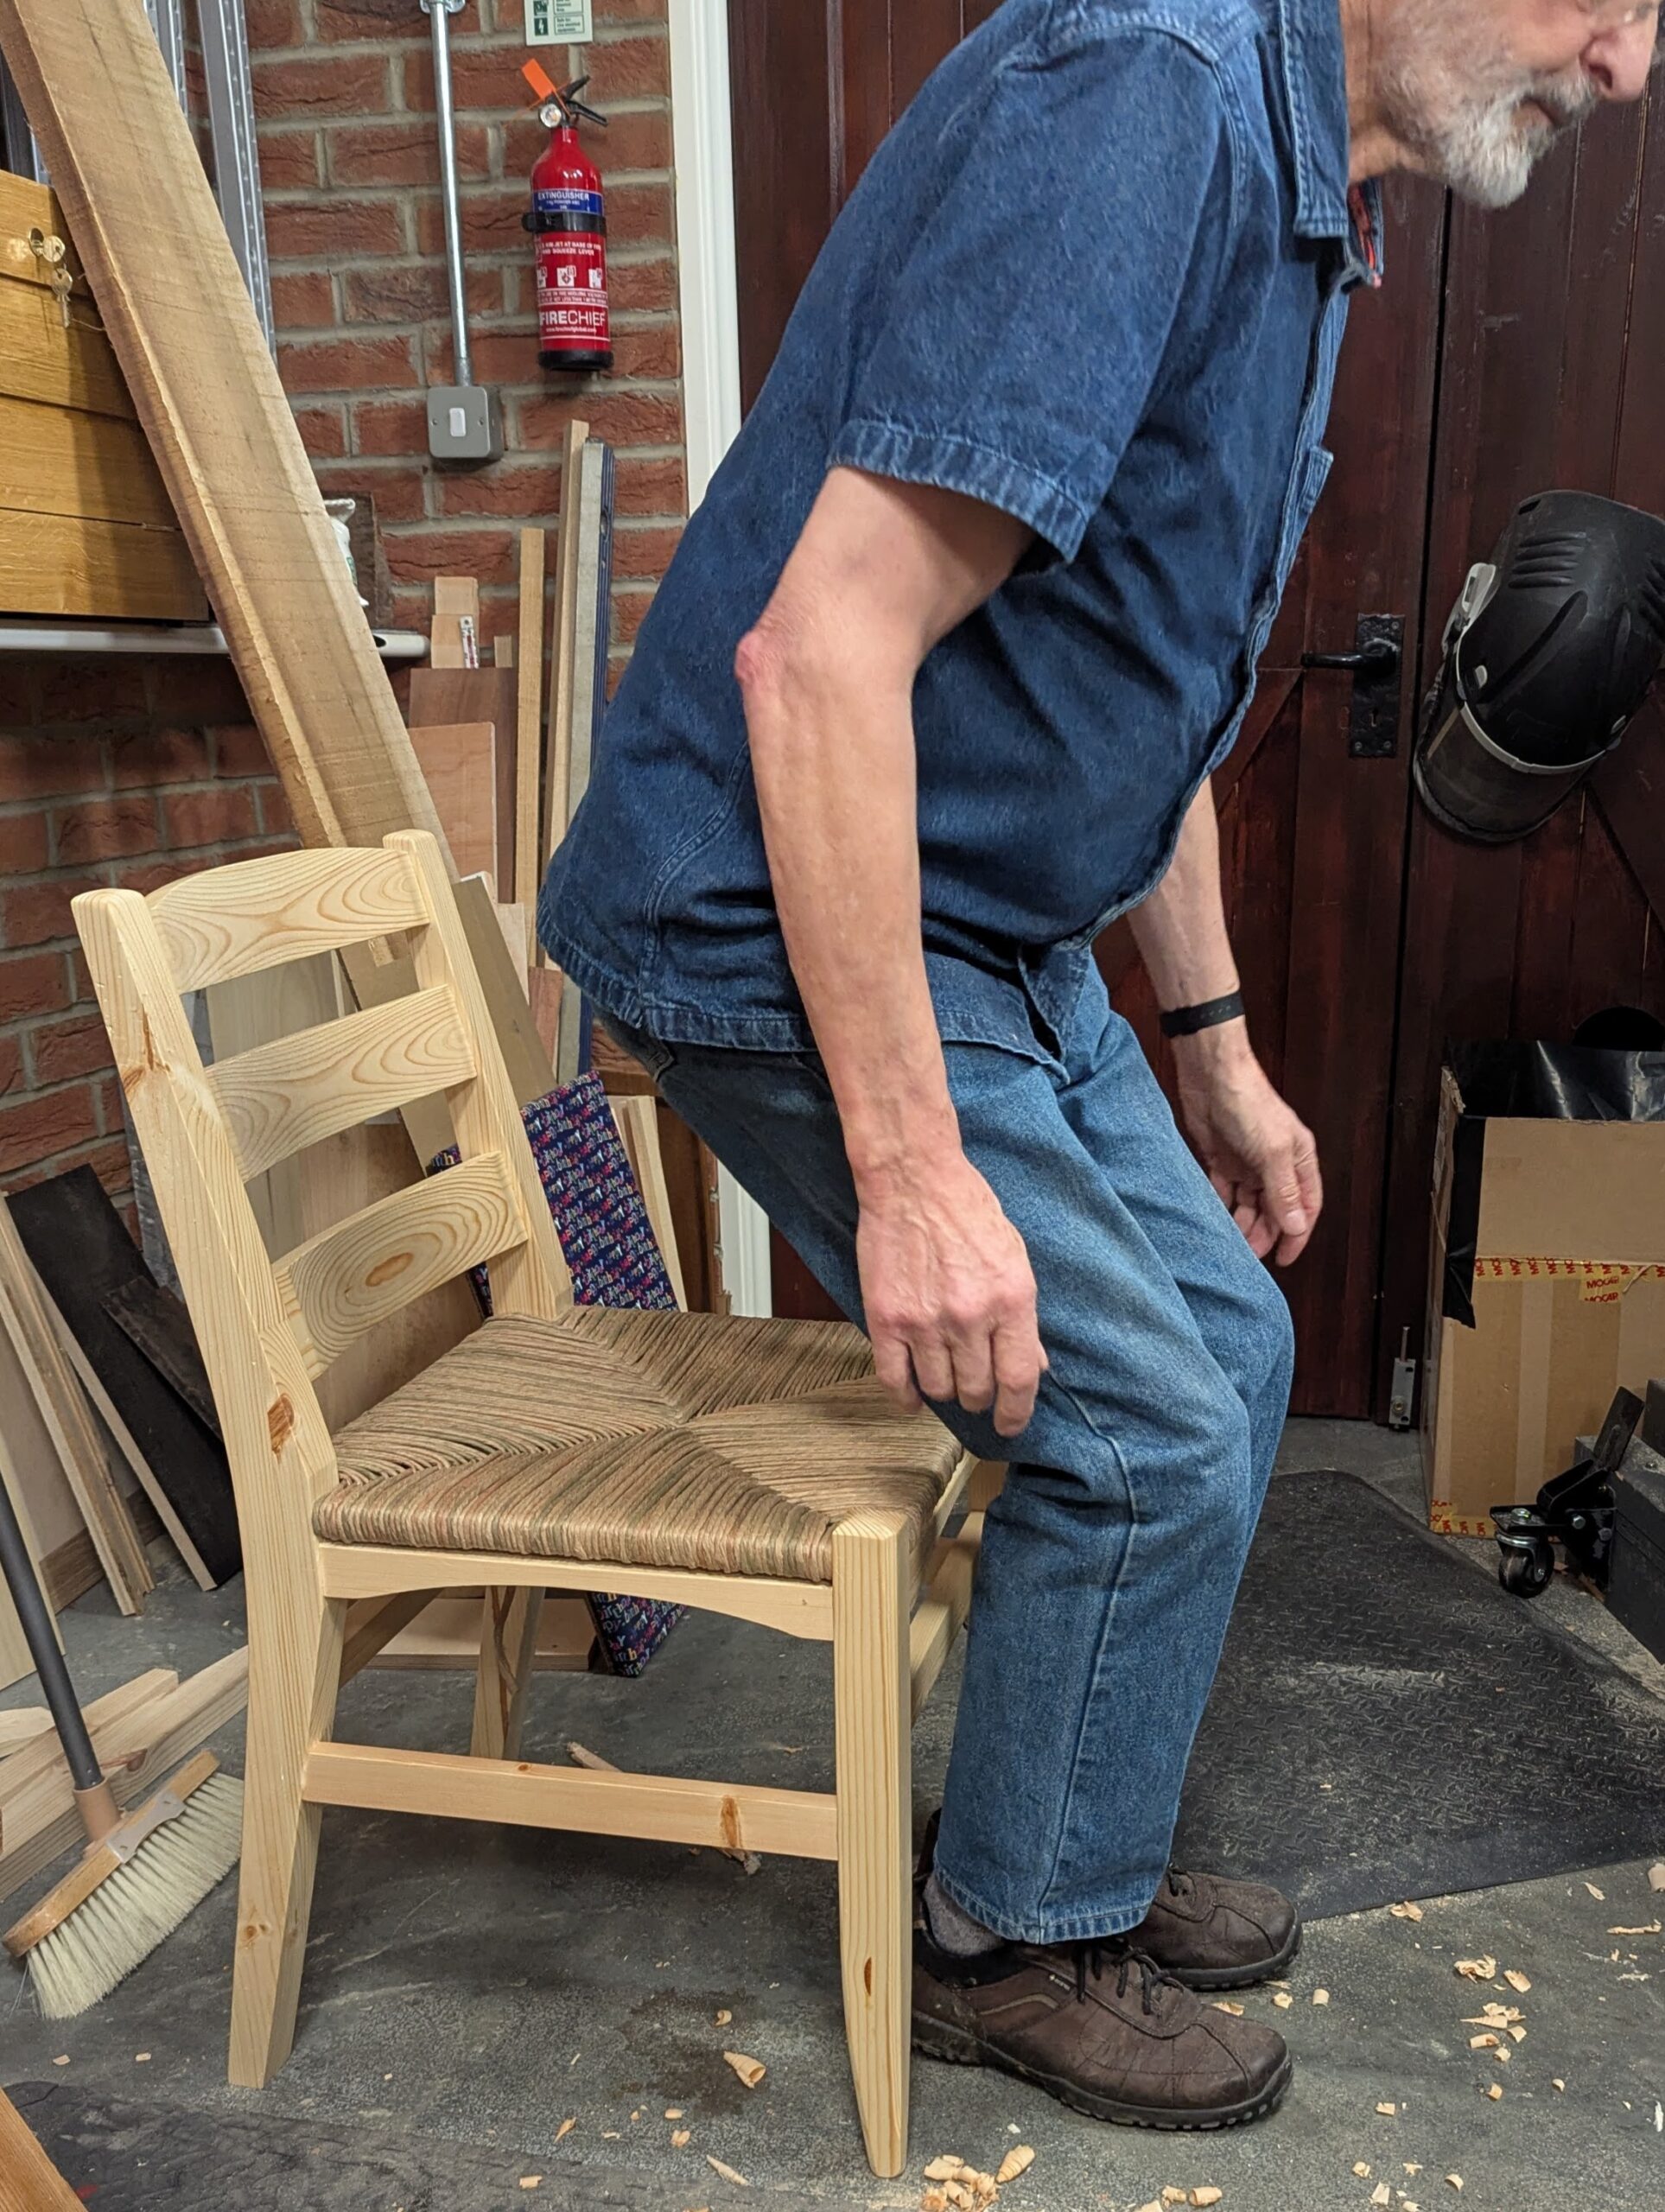
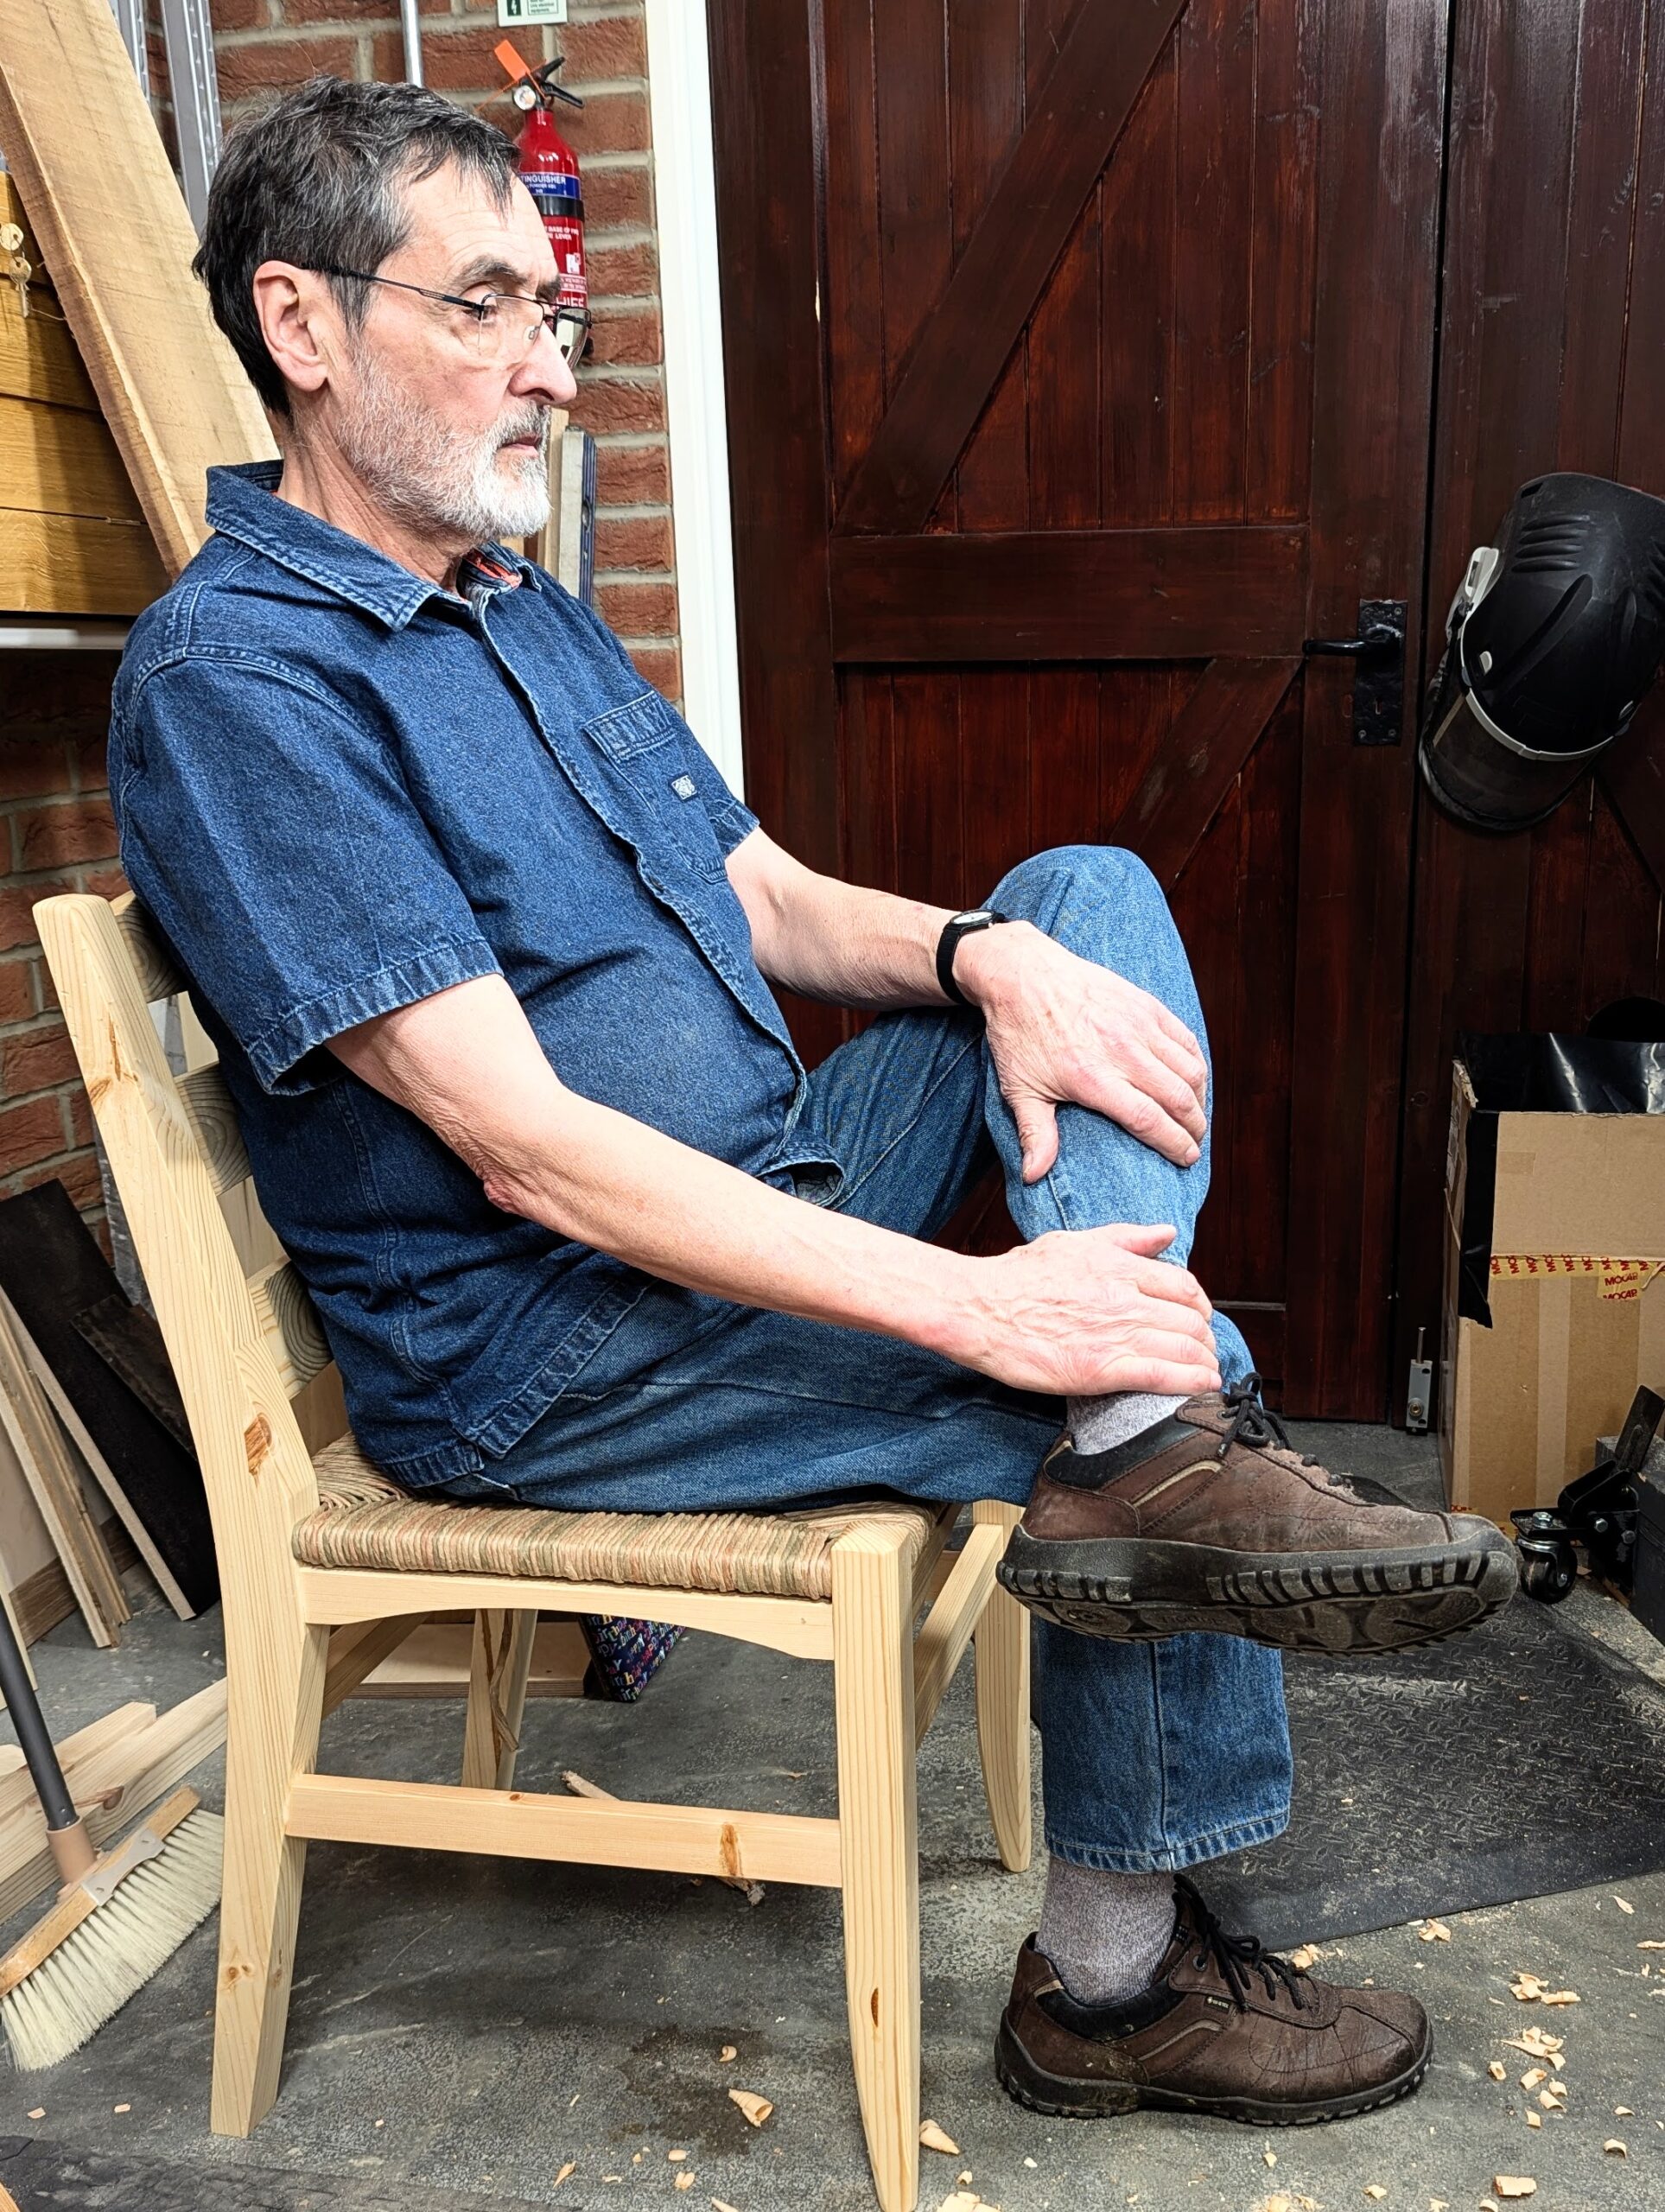
Do you tuck your legs under when you are working? Some do, some wholly bend from the knee and then straighten their ankles as well and some kinda bend here and there, just a bit. You might want to consider raising the lower front rail to an even higher level, even by a half inch, if so. Also, we tend to place our heels back to give ourselves a balance and a centre of gravity to pivot from when we rise from a chair. So much reasoning and so much to remember. Phew!
Lifting yourself up from the chair, shuffling around, etc, must all be considered.
It's never too late to change the pitch or rake of the back before you glue up because you can plane the mortised piece and add a degree or two to alter the pitch. That said, any change must be made before you cut shoulders to the lower rails as the distance and angle for the back tenons on this rail will be established after the top rail tenons are fitted to the front and back mortises.
The angles and depths are critical to a good and well-fitting chair, and that means comfort and stability for a sitting, working position. On this chair I can type, hand write, weave a basket or hold a baby on my knees to change the nappy (diaper USA) of a newborn. It's a working chair, but it will work for slouchers too. Additionally, it's a hard chair to tip backwards on because of the kickback angle to the lower aspect of the back chair legs. This planned for. Tipping back on a chair expresses a disrespectful attitude in anybody's book.
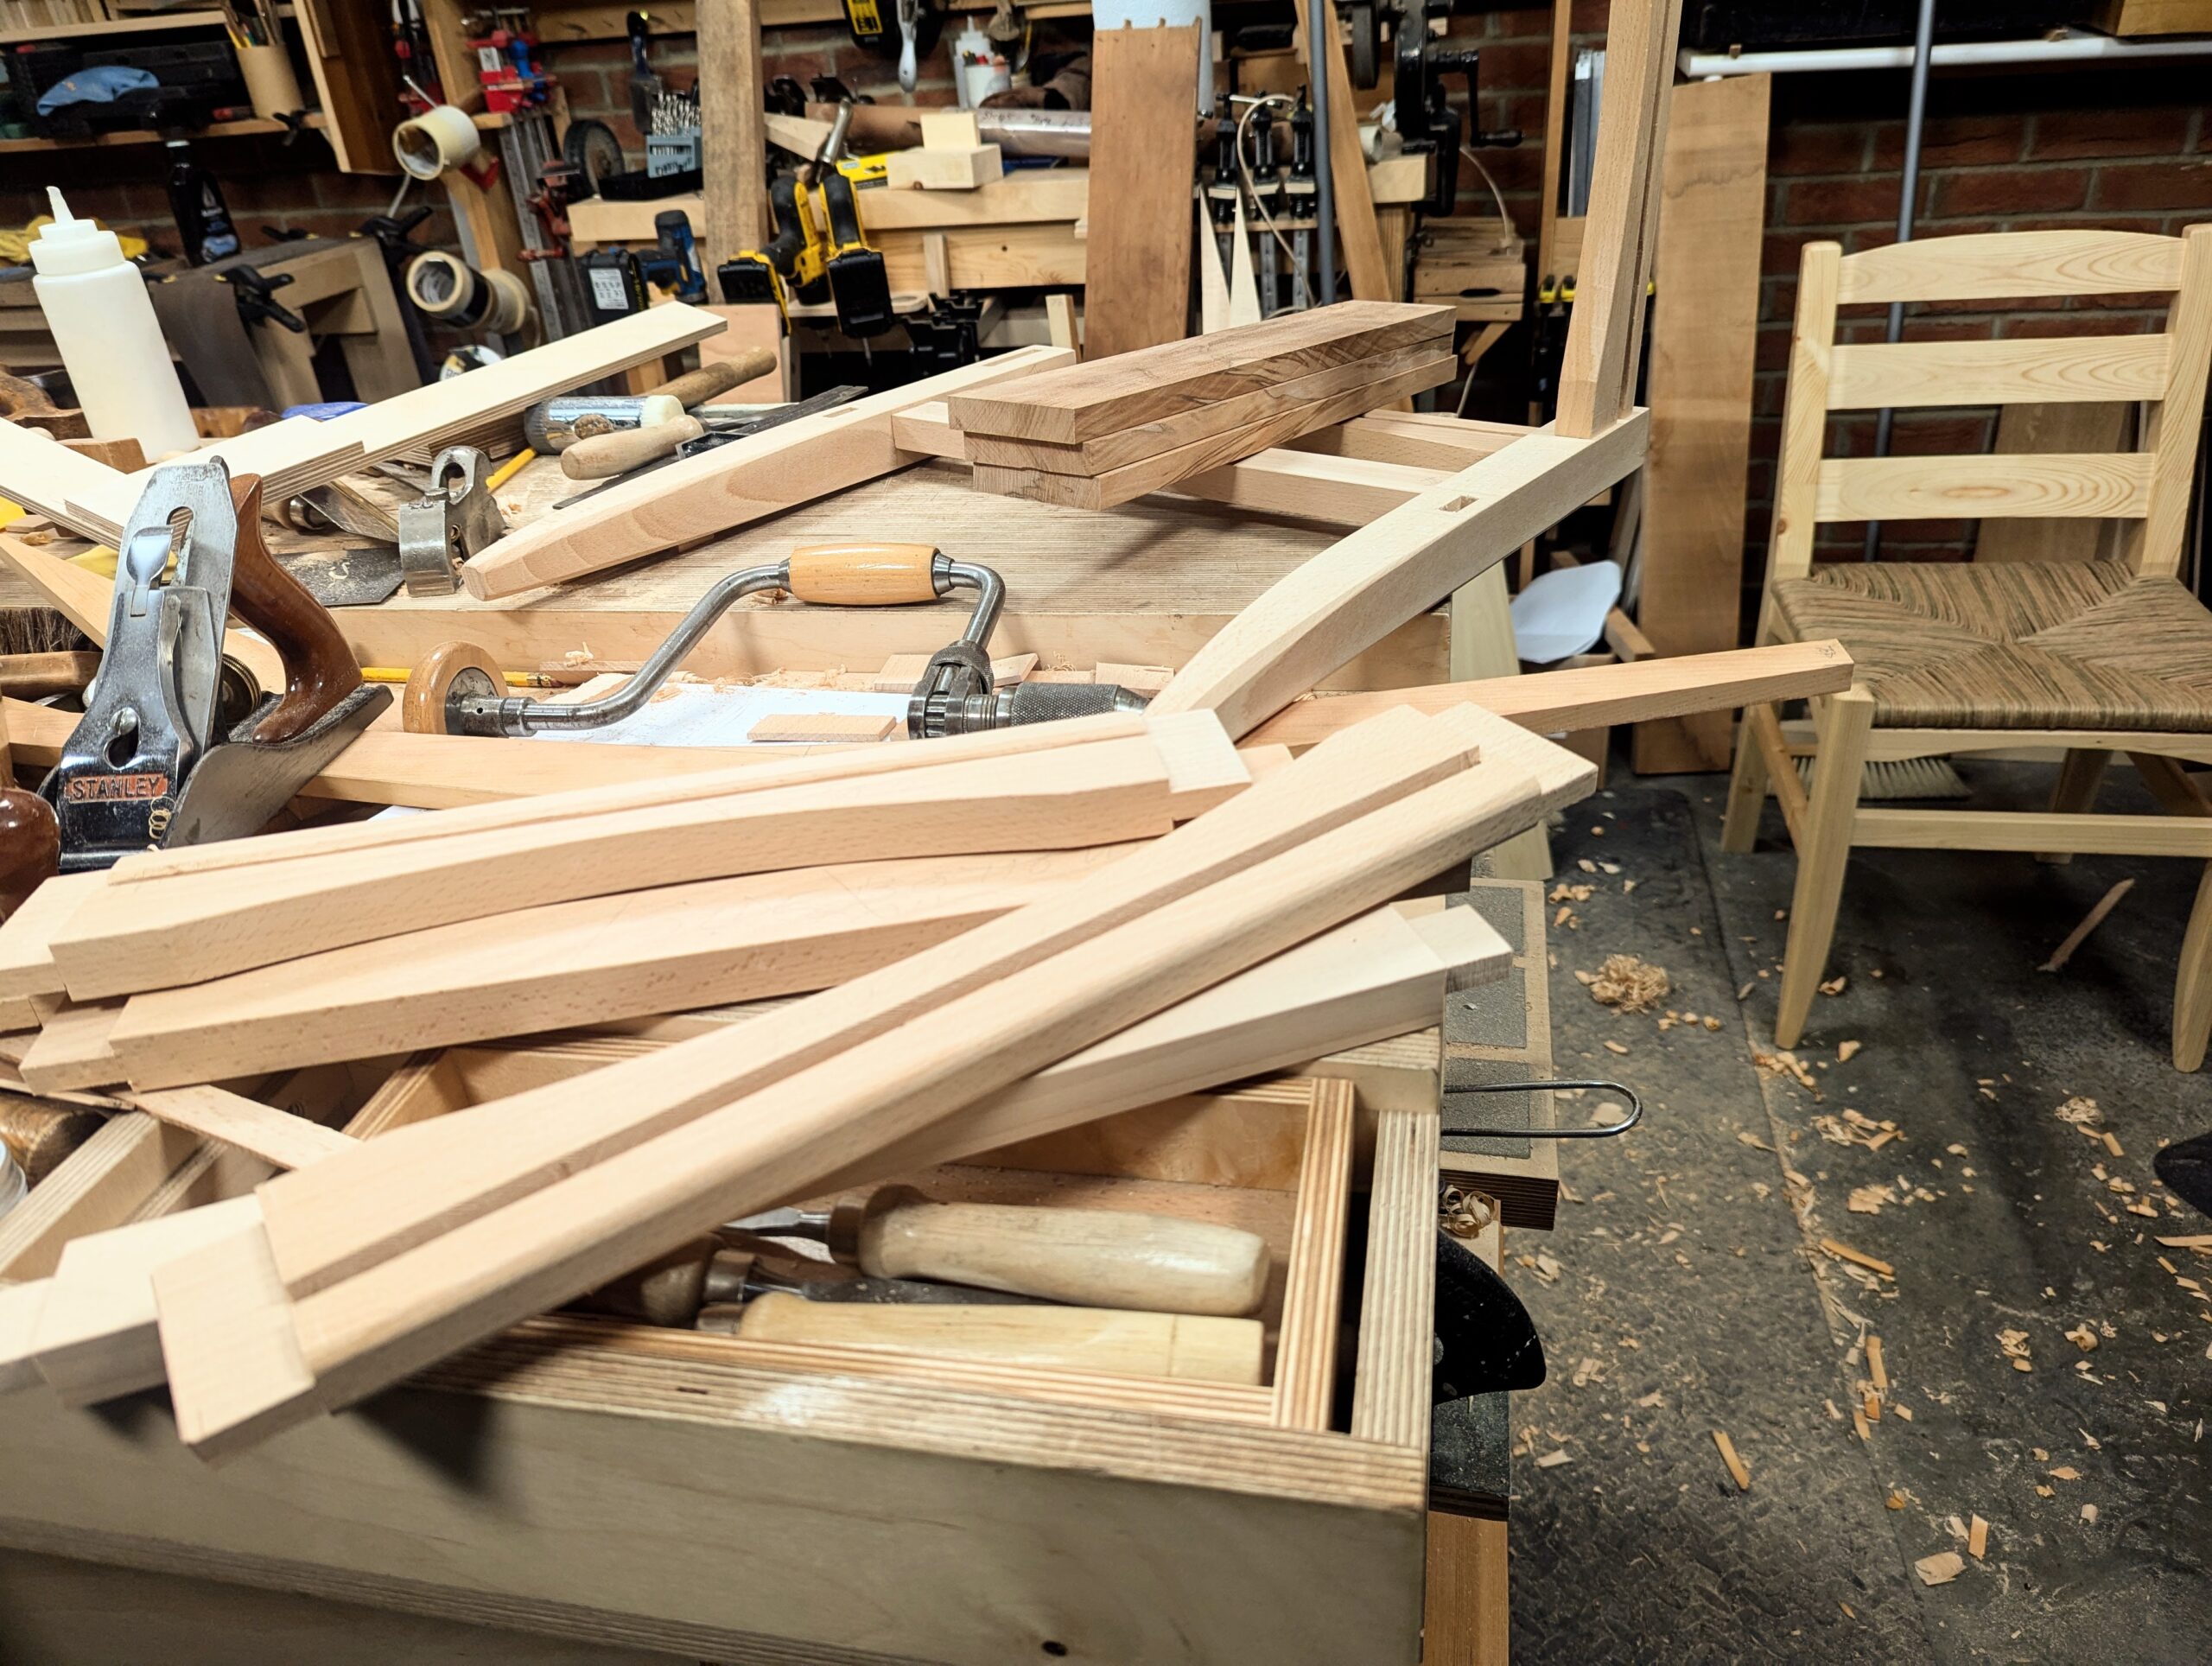
Beech is one of the most used woods for chair making production, and most café chairs come from beech here in the UK. I do think that it is one of my favourite chair woods . My final version is on its way and I feel good.
Comments ()