Making and Making Steps...
... The Hidden Gems of pure joy in creating your own hand-cut joinery can seem all the more lost in the modernity of today's methodology surrounding joint making and joinery, but when the hands cut and shape every part using the maker's energy, something changes forever in him and her. There is no going back––the freedom of high-demand extreme working holds within its private sphere rewards that can never be achieved any other way. It's almost two in the morning and I just finished the work you see in these pages. I will never write down what I have written here for any other entity. I write them, and I made the joint described throughout this article just for you so that hundreds of thousands of you will get it, own it and use it into your future. It's been my goal from the beginning. Writing for magazines in my early days were the merest of stepping stones....the dipping of my toe to convey me into the world of recording my feelings about my craft and other crafts too for the ensuing generations. Something never felt right listening to and working with the editors back then. You won't know this, but in the day, of the ten or so editors I got to know in all of the famous woodworking magazines on two continents, none of them knew much if anything much about woodworking. They provided platforms for machine manufacturers to sell their products. We got on okay, but I found it quite hard because, well, I think we lived in very different worlds.
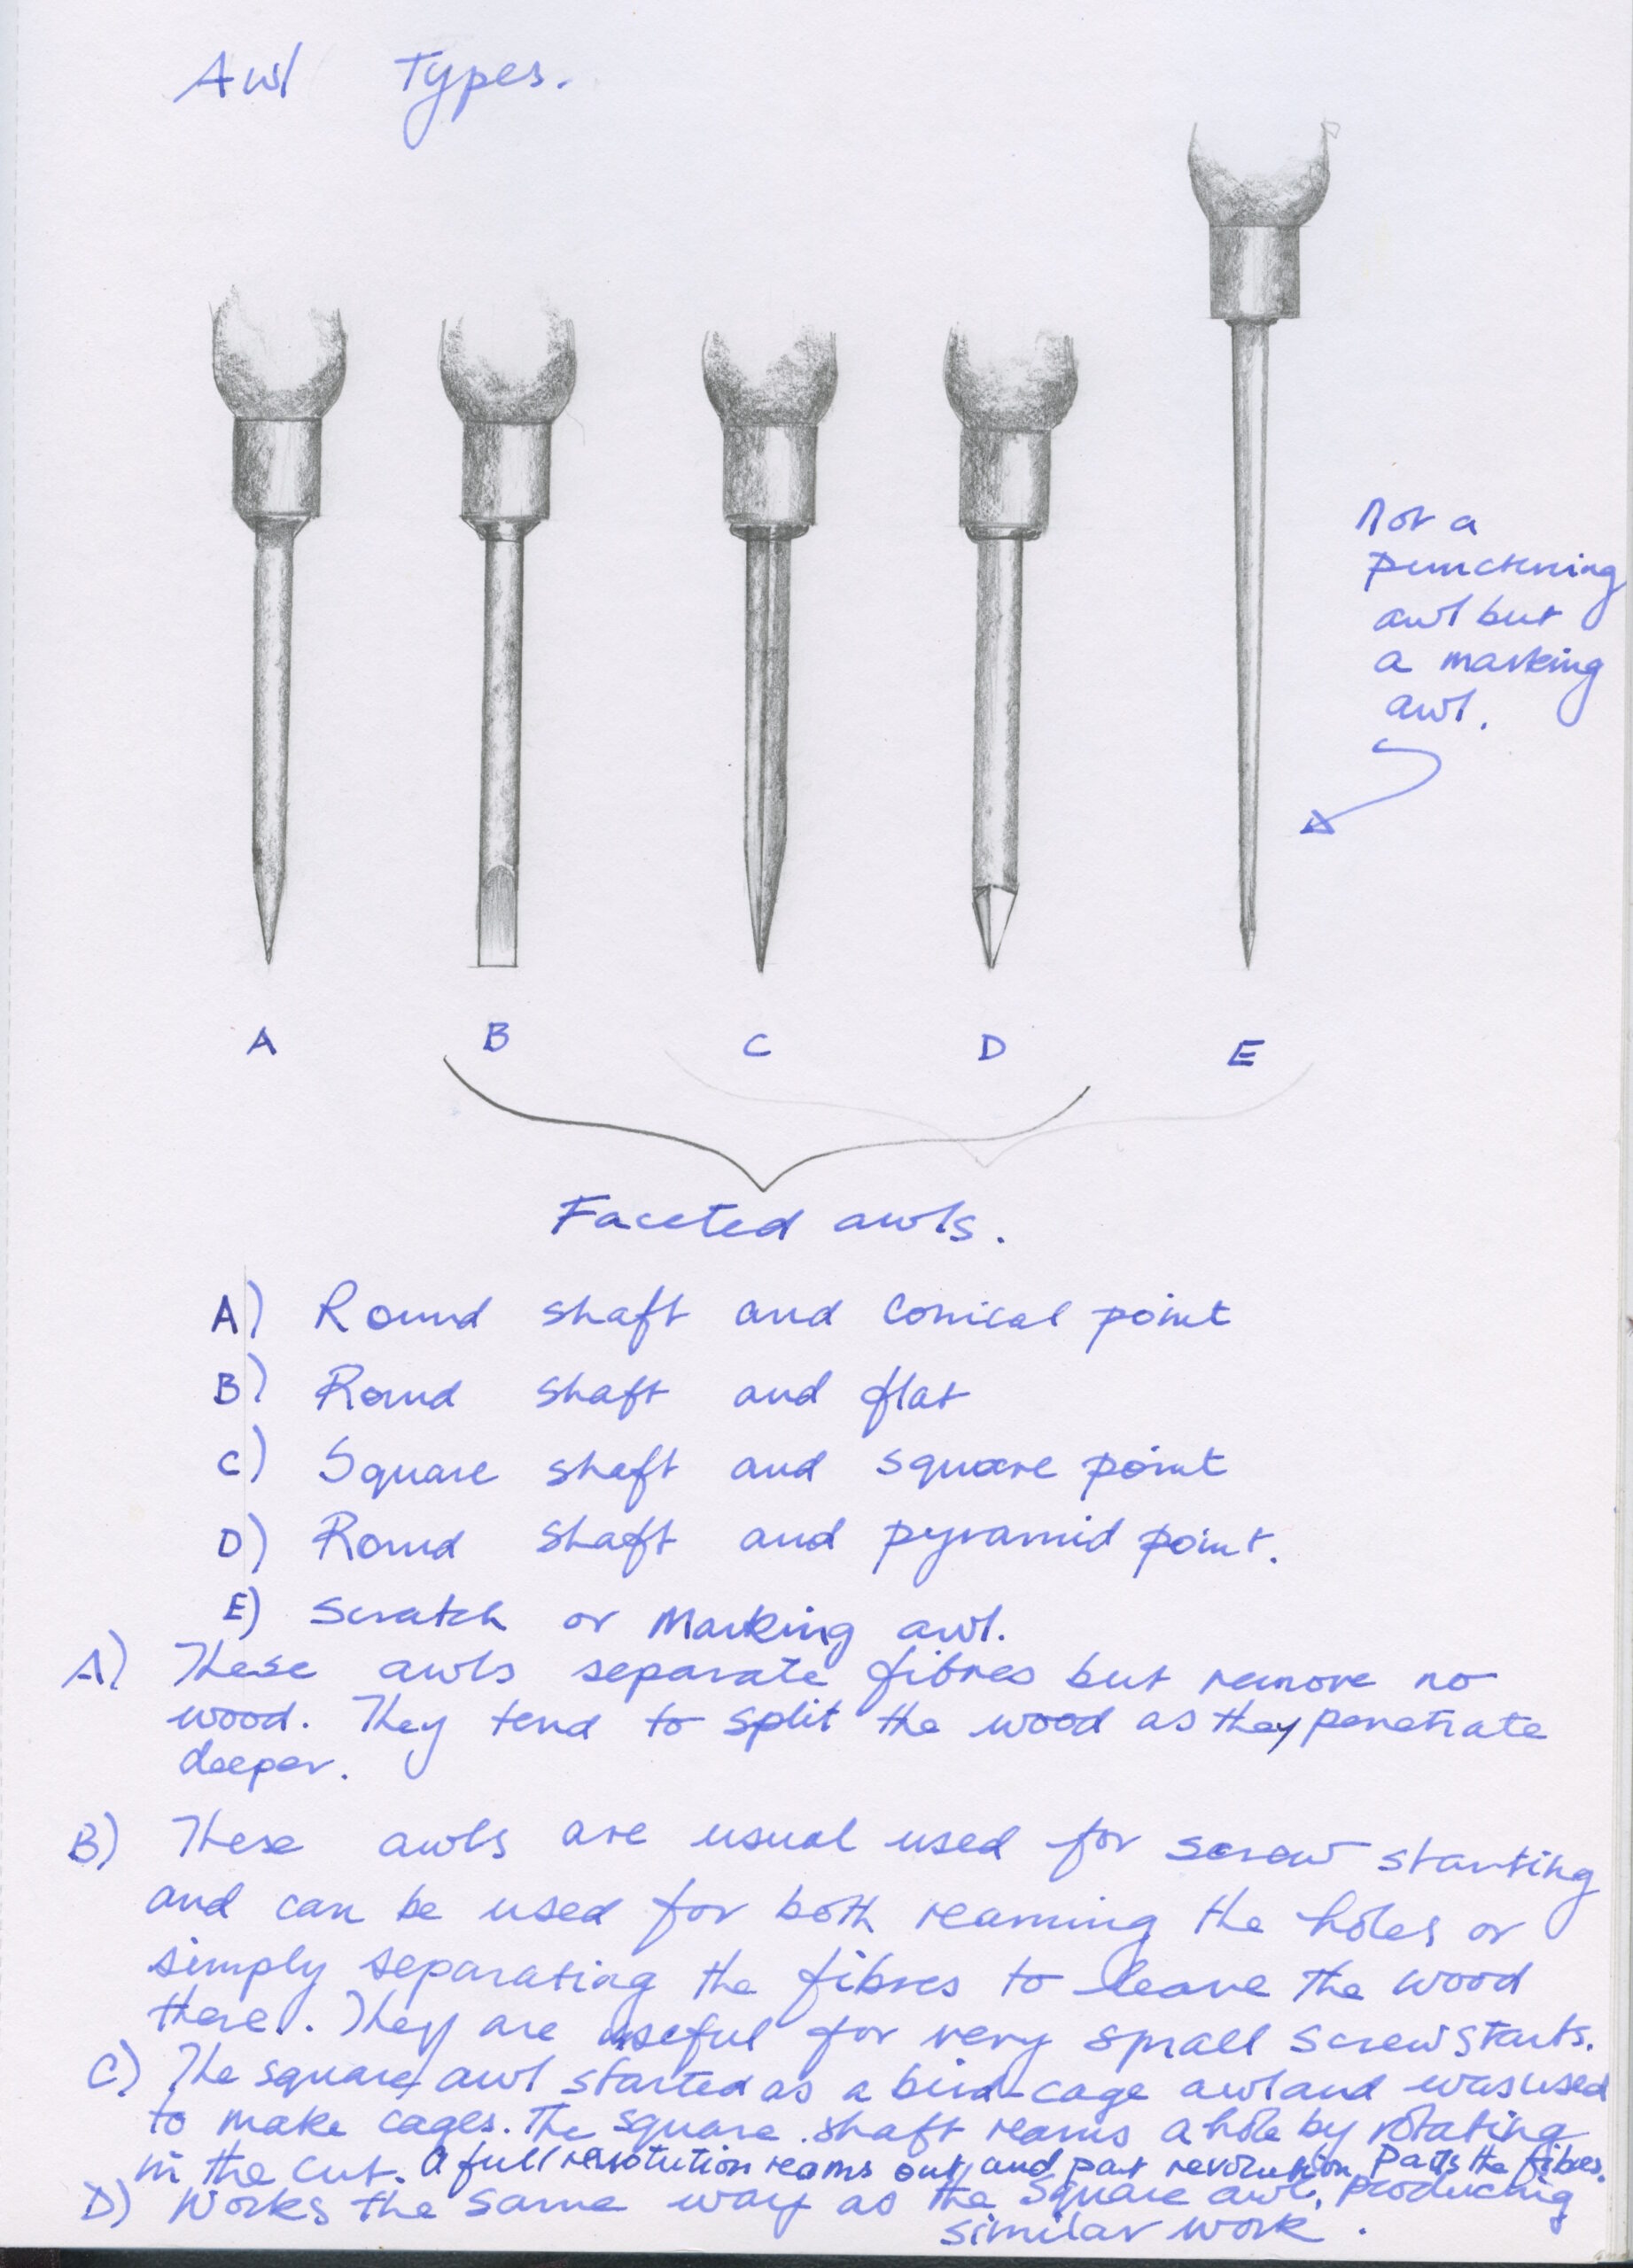
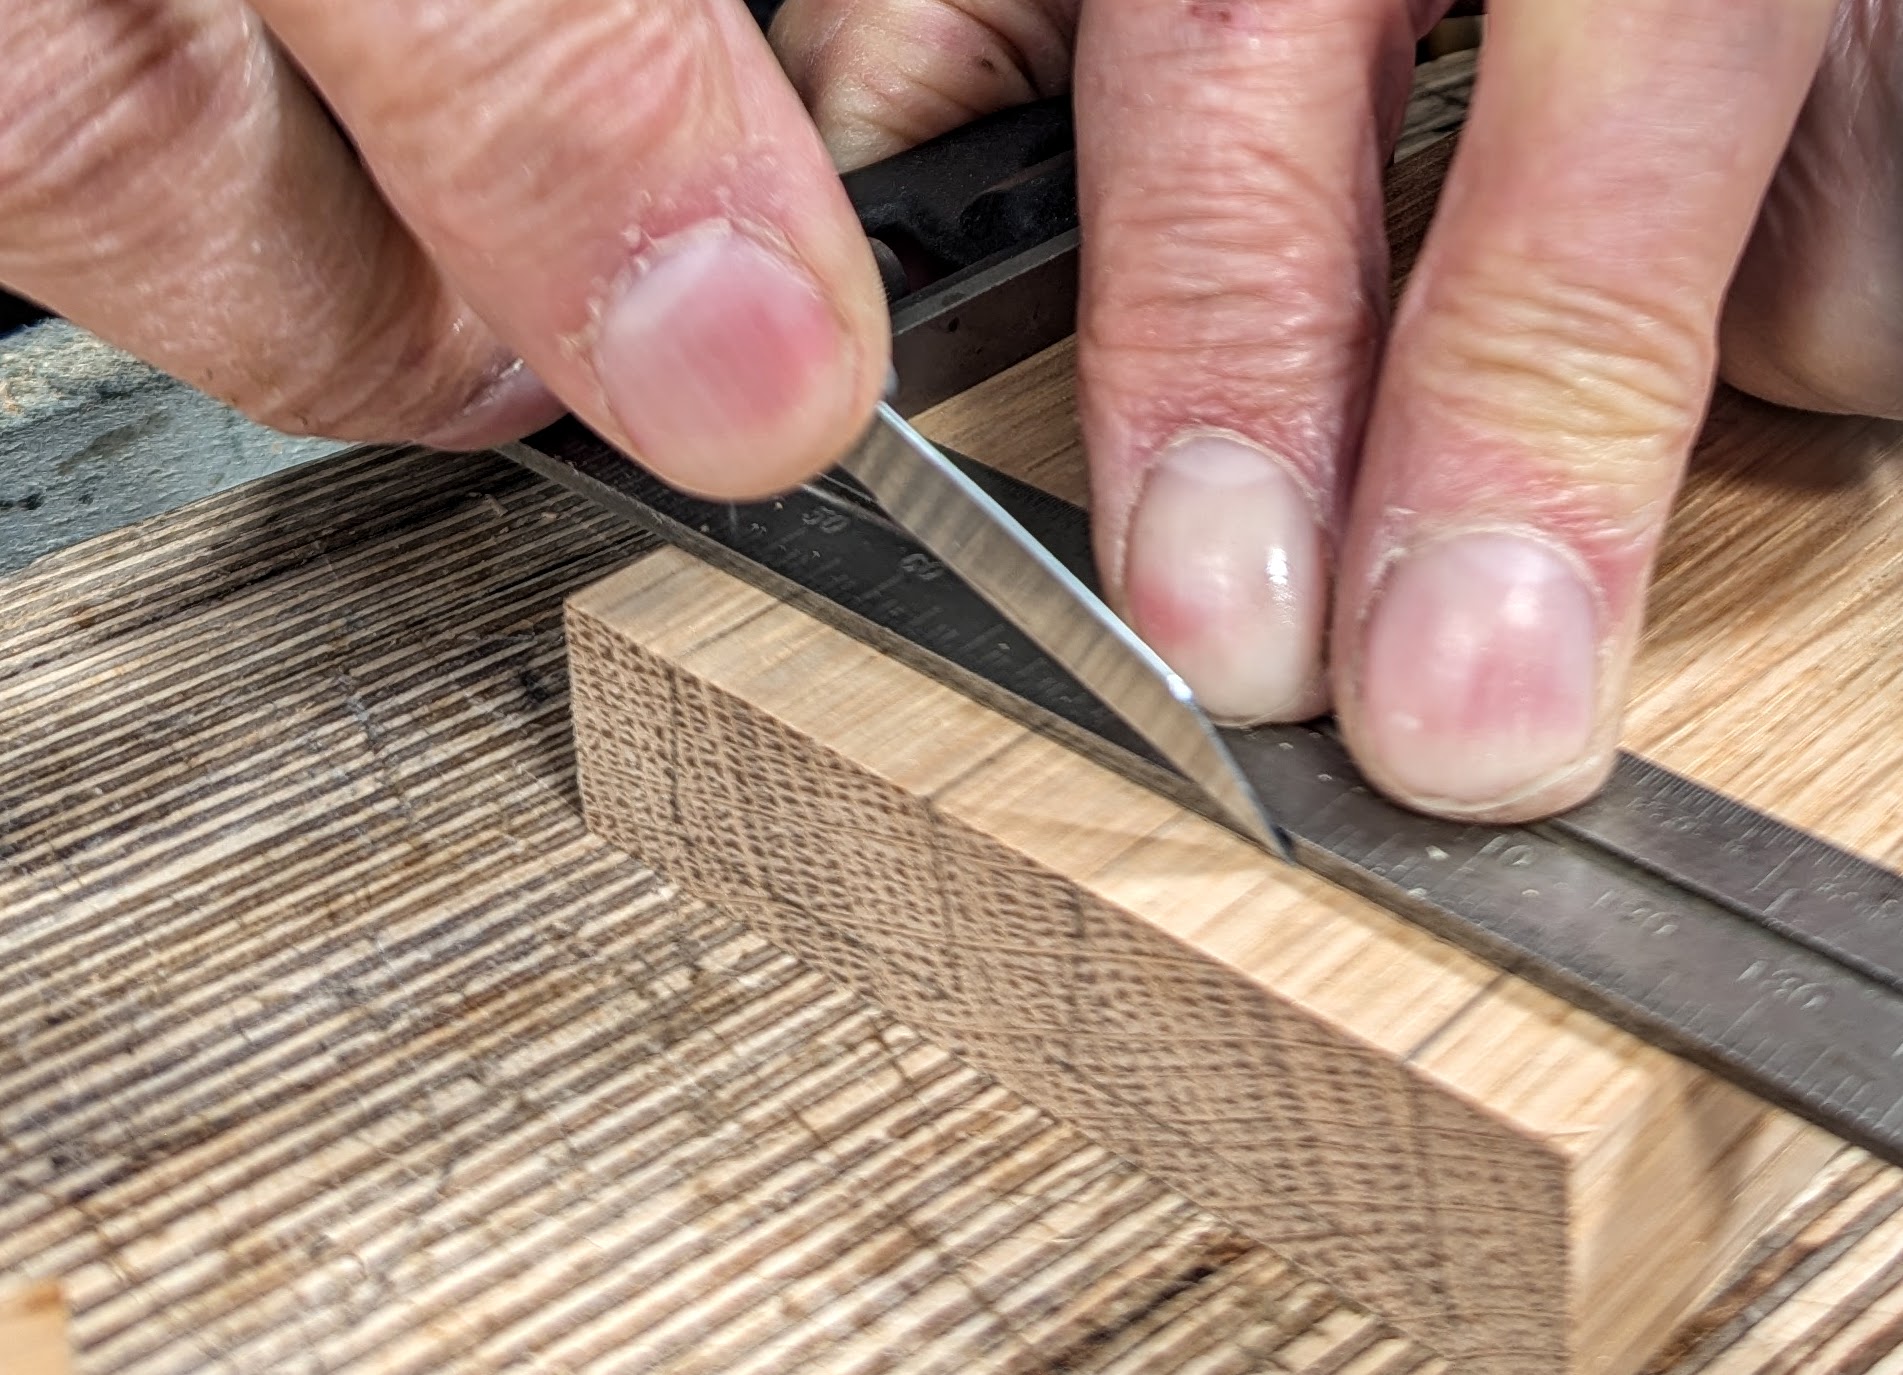
There are techniques we woodworkers develop that make it particularly 'ours'. I've two dozen of them that I take for granted and then someone will say, "Wow, I never saw that before!" Though often it is a technique or a method we use that flows naturally from our doing it for decades, it can and often is something that has been lost through the passage of time. And it could be a tool we use too. You, I'm guessing here, are most likely taking some things I've brought to your attention for granted now too. Take the square awl, for instance. Push a conical point into wood and see how the tiny split starts along the grain either side of the point as you apply pressure. Even if you rotate it as you press, the split gets bigger, and if you are near the end of a piece of wood then the wood just goes ahead and does its thing; it splits.
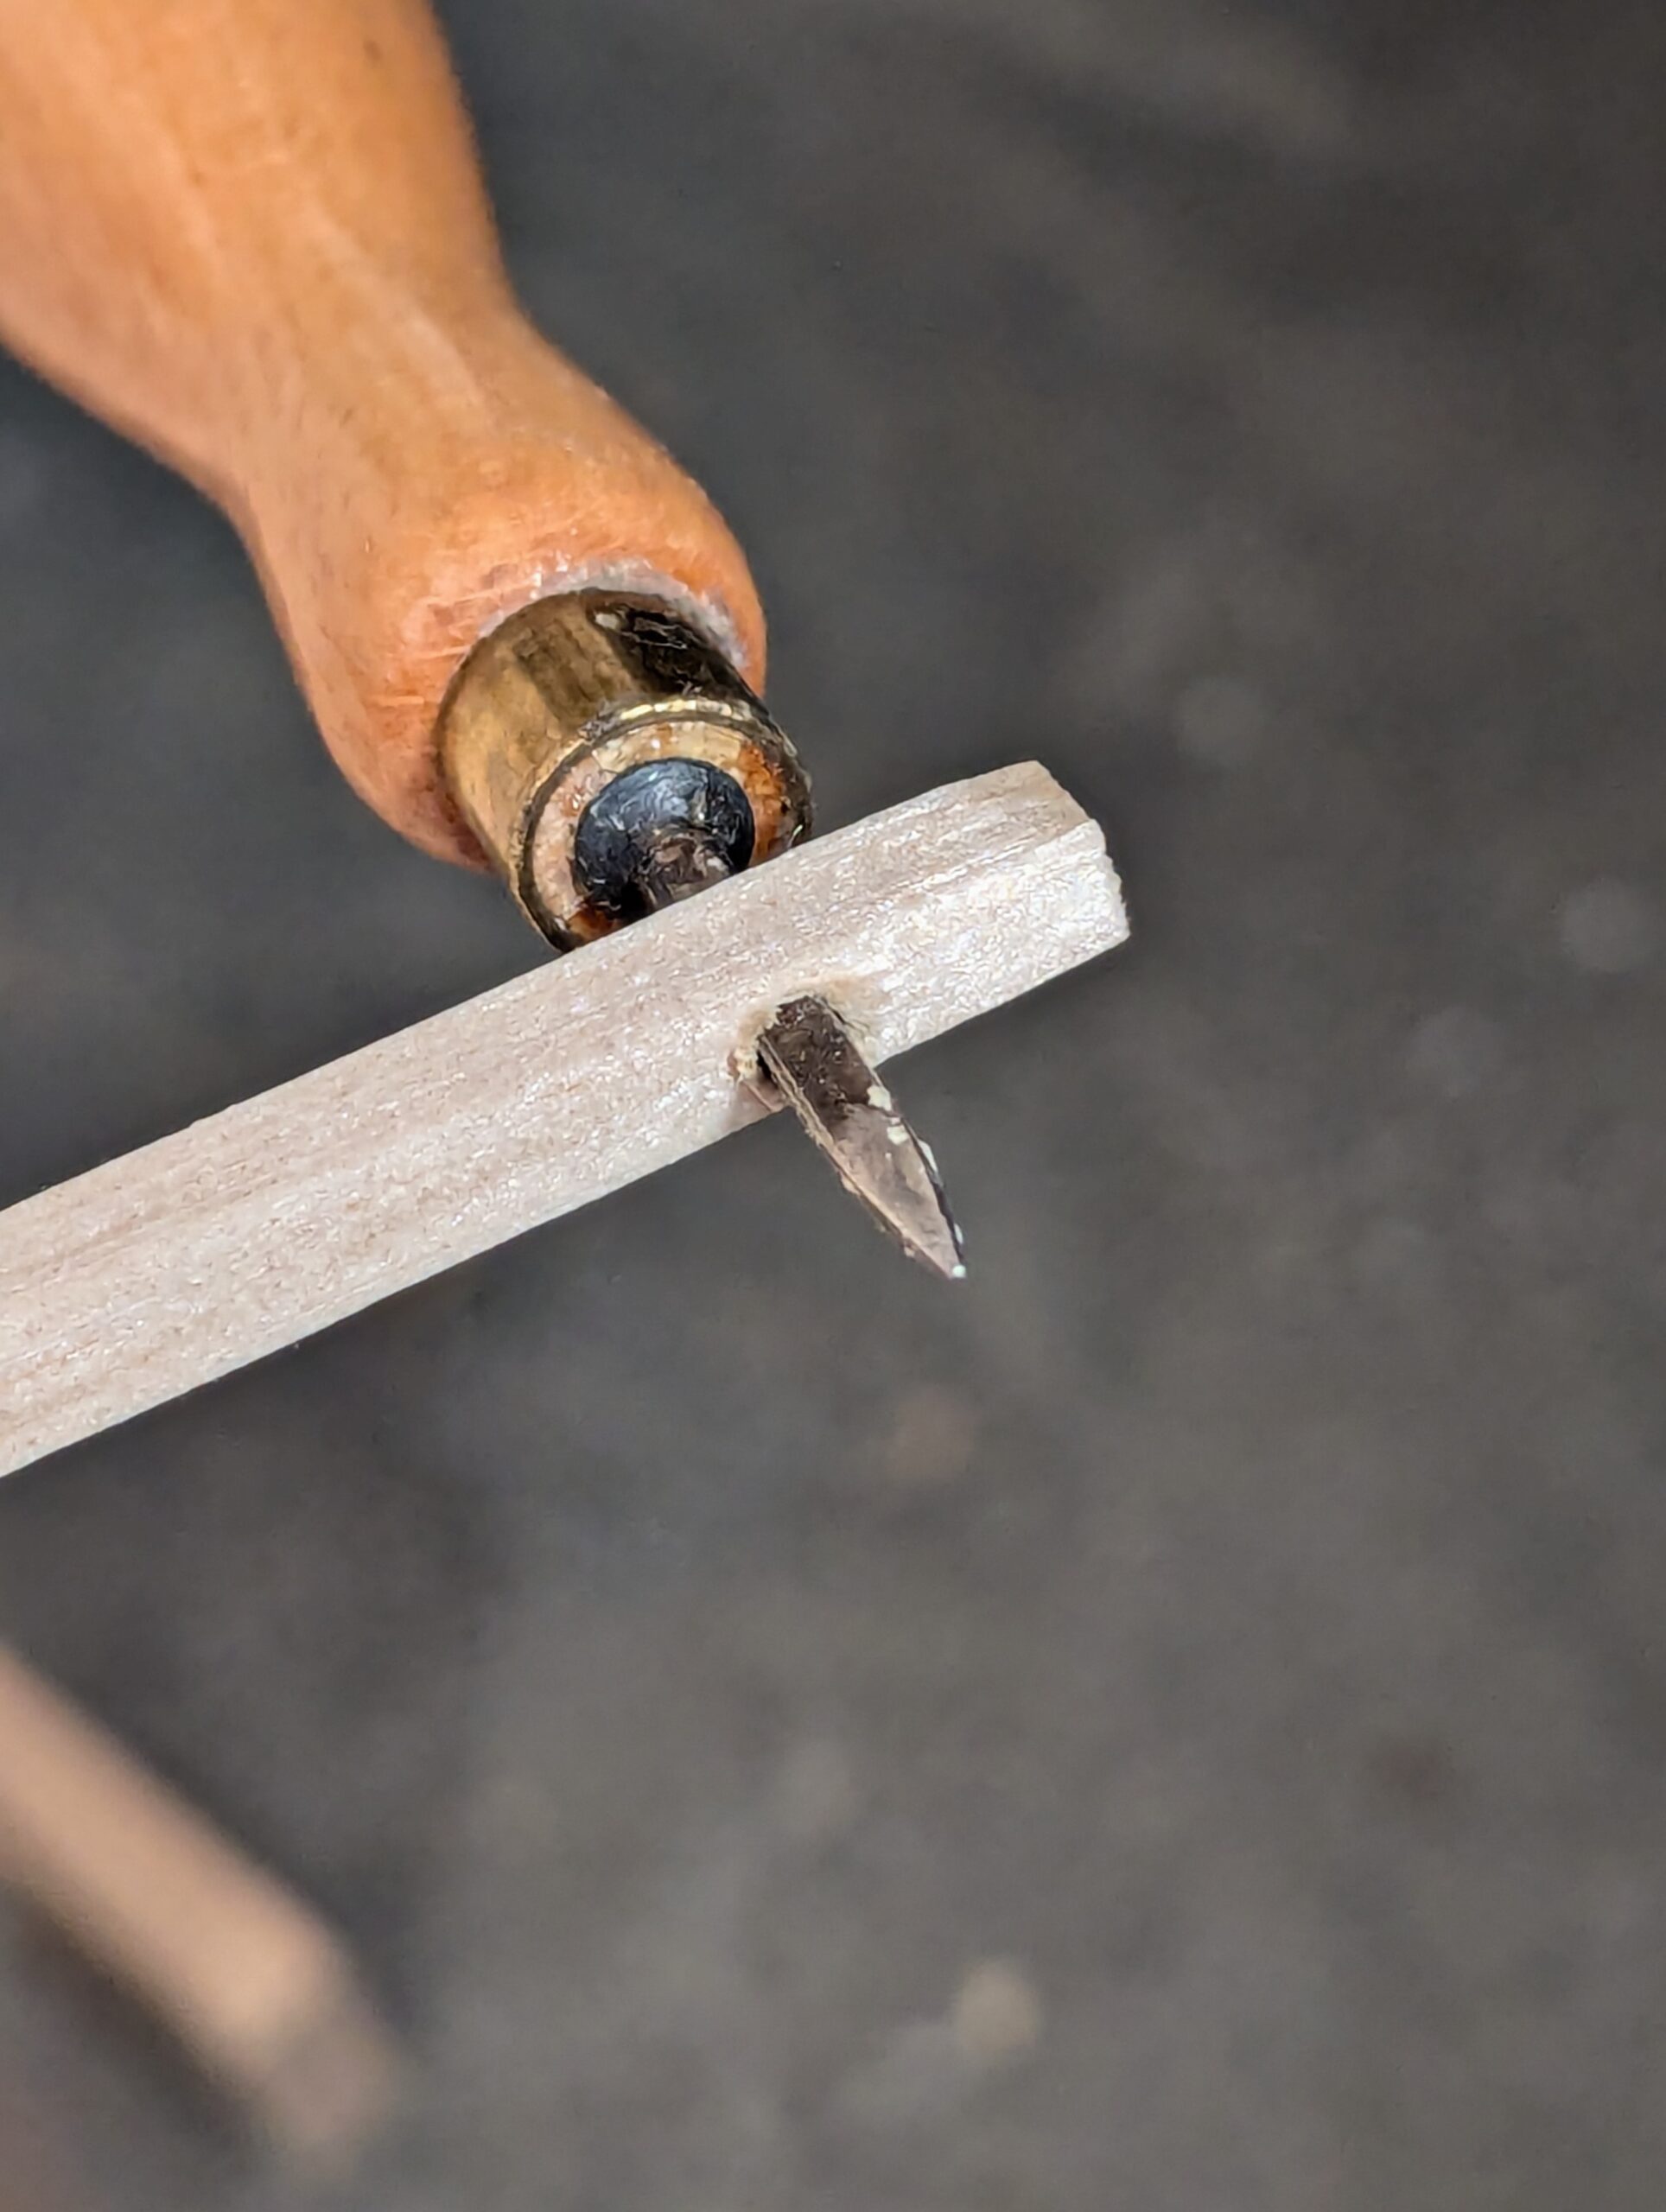
Use a square awl on the other hand, and it reams its passage into the wood by its angular corners and develops a clear hole. Stop for a tapered hole, or keep going for a roughly one-eighth-inch one. It's 300-year-old blacksmithed technology was developed to make bird cages for transporting birds like partridges and chicks to market and from place to place. I still use mine today. But it's a tool that 25 years ago had all but disappeared. But then I wrote this article, the internet came into being, and a tool was revived for daily use in our time.
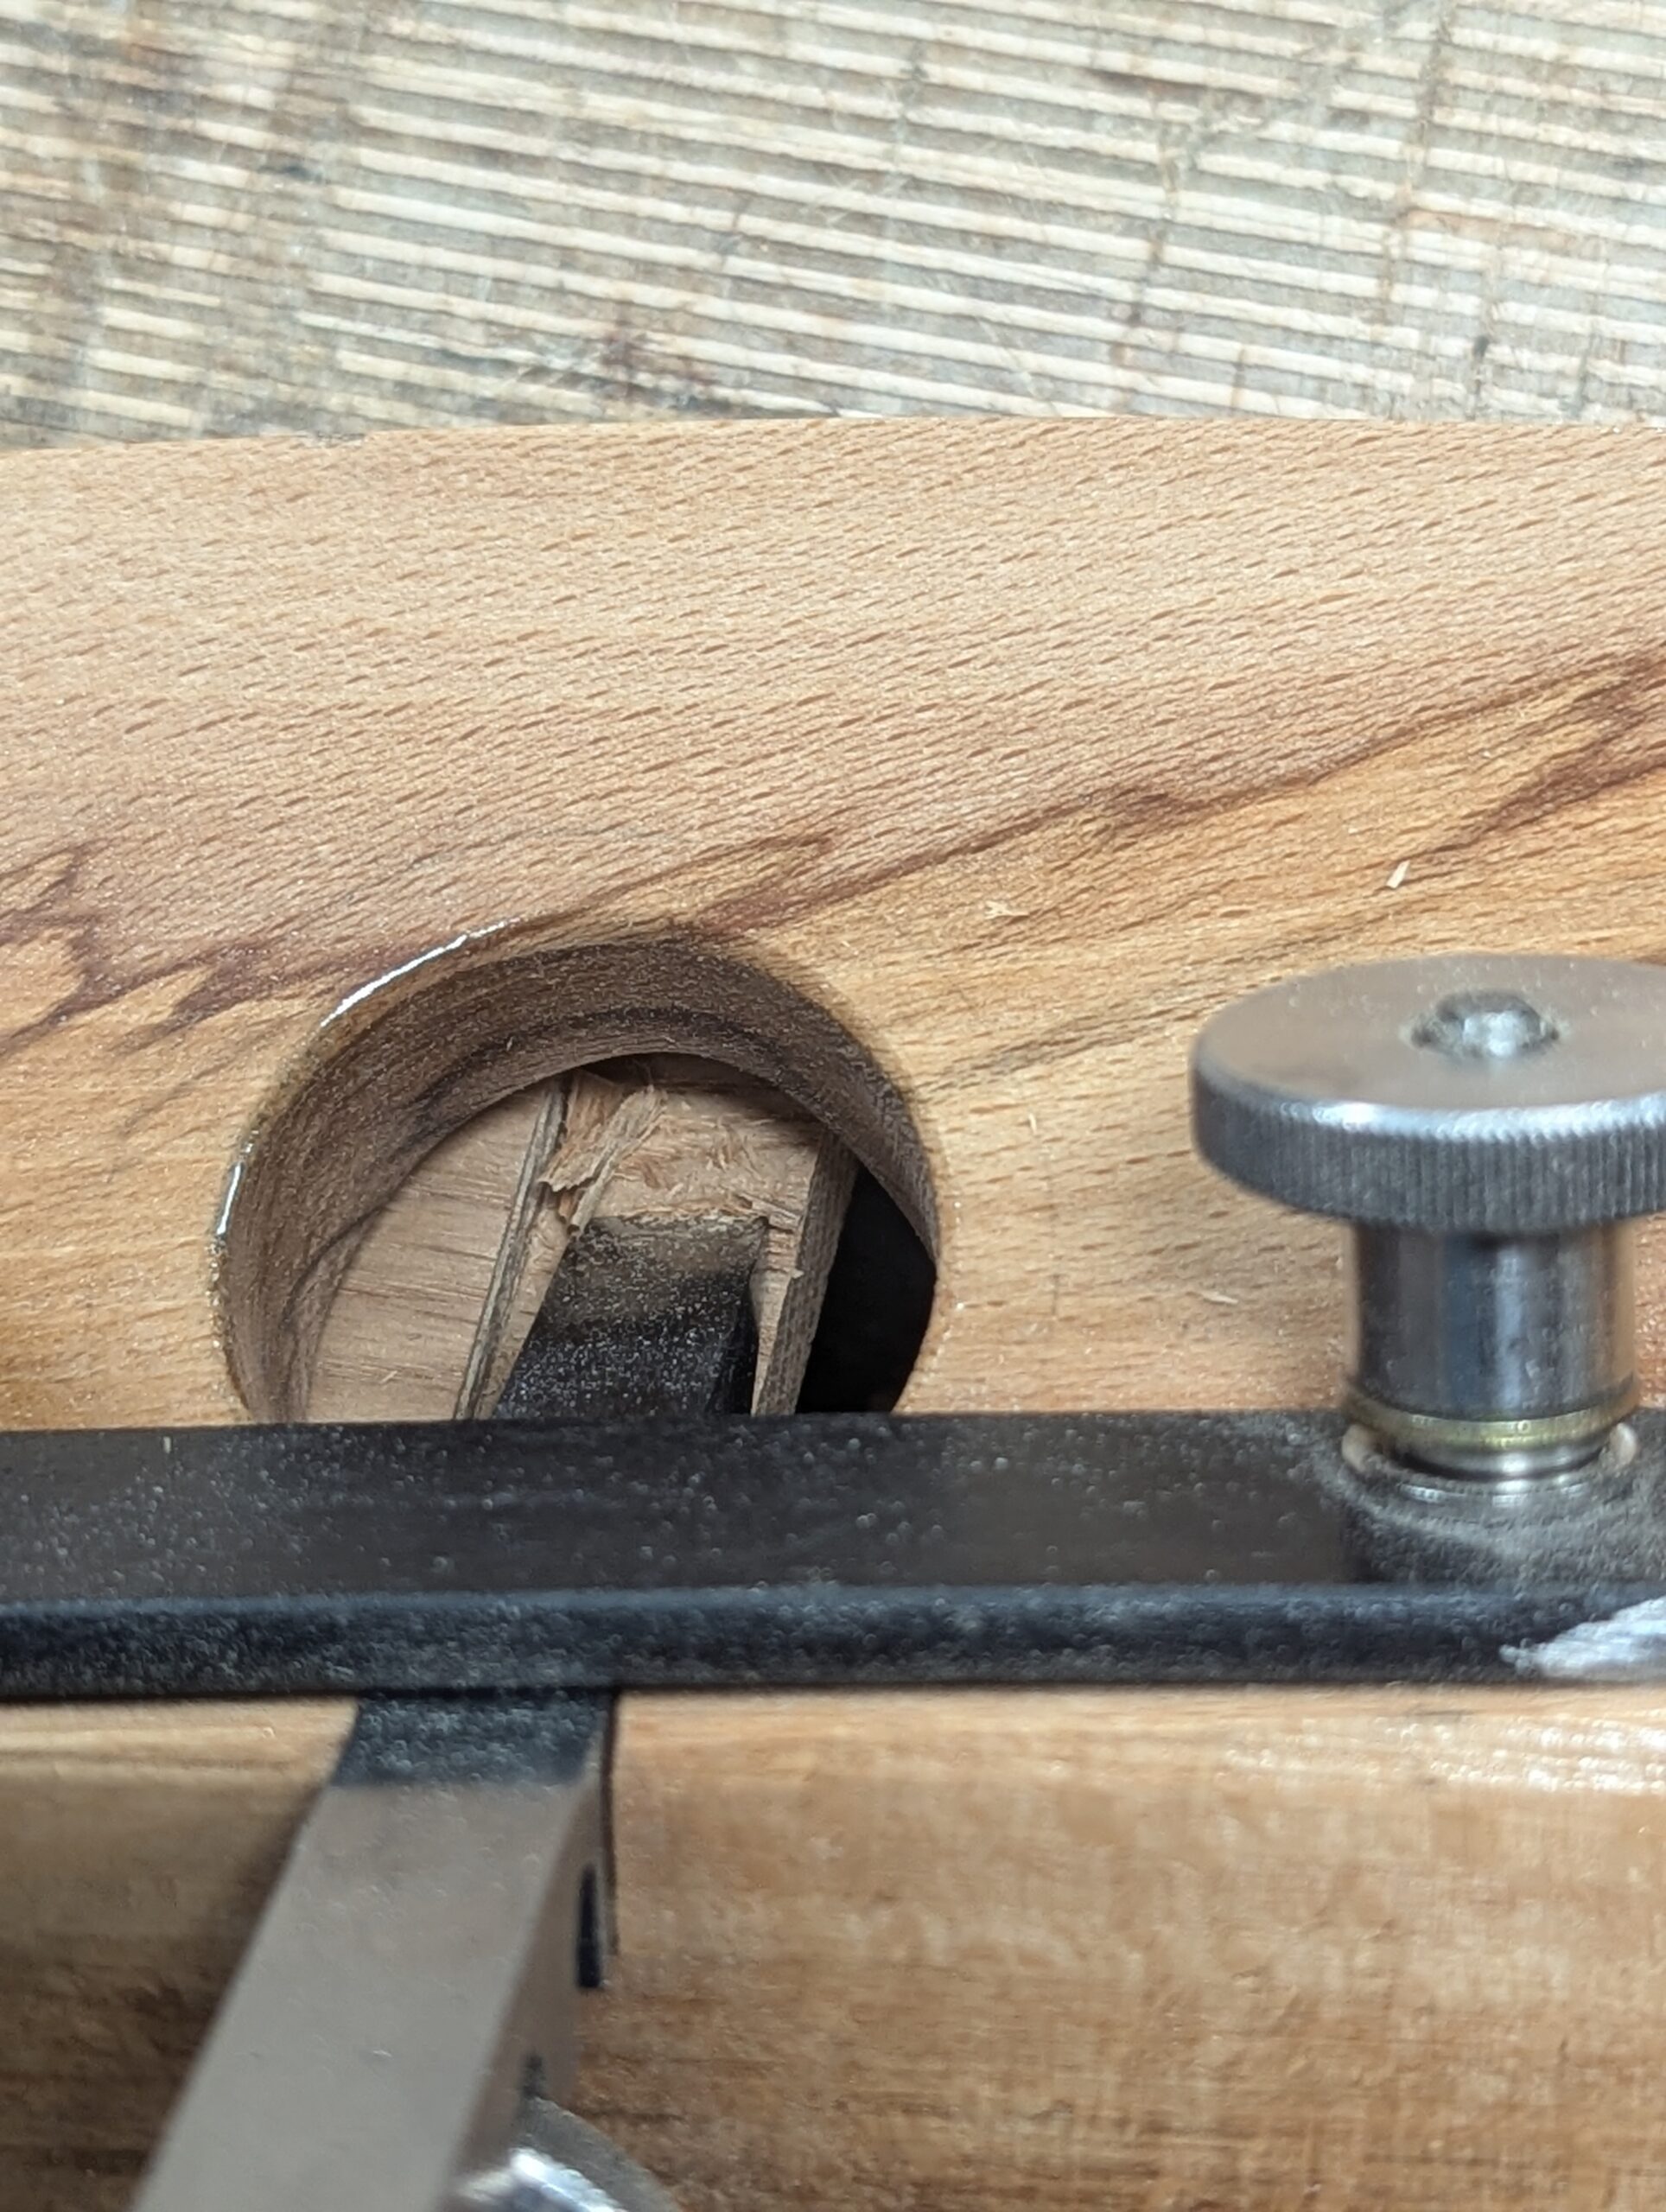
And then look at something like the Stanley or Record #71 hand router plane too. Only fifteen years ago, everyone looked at the tool and dismissed the hundred or so on eBay as being archaic, outdated and useless. So much so, they were selling boxed versions with three different sized unused cutting irons in near new condition for £10 -15 with free shipping thrown in. The same item now will go for £150 if you are lucky. Why? Well, I showed everyone what this virtuoso could really do when you refined it. Whoever saw someone refining the cheeks of tenons with a hand router plane before or using it as a marking gauge, creating a pristine knife-edge to cut with a chisel to?
The Record #043 and #044 once sold for under £10 boxed, until my videos proved that you could get supreme ploughed grooves in fifty strokes and fifty seconds by moving your arm back and forth, and that's in any wood. These tools were regarded as obsolete, my friends, and now they go for up to and over £100. This is the real power behind hand tool woodworking. Is that too much to pay for a plough or a router plane? Not altogether. These are after all lifetime tools. Even so, I still came in with the answer to the router plane inflationary prices to counter tool sellers splitting up tools to sell as parts because they could get £17 for a single router plane or plough plane cutter and other cannibalised parts when they could only get $50 for the set of ten or so. I designed a hand router plane with infinite adjustability within the tiny fractions of an inch we need to get a perfect surface, tenon thickness or recess.

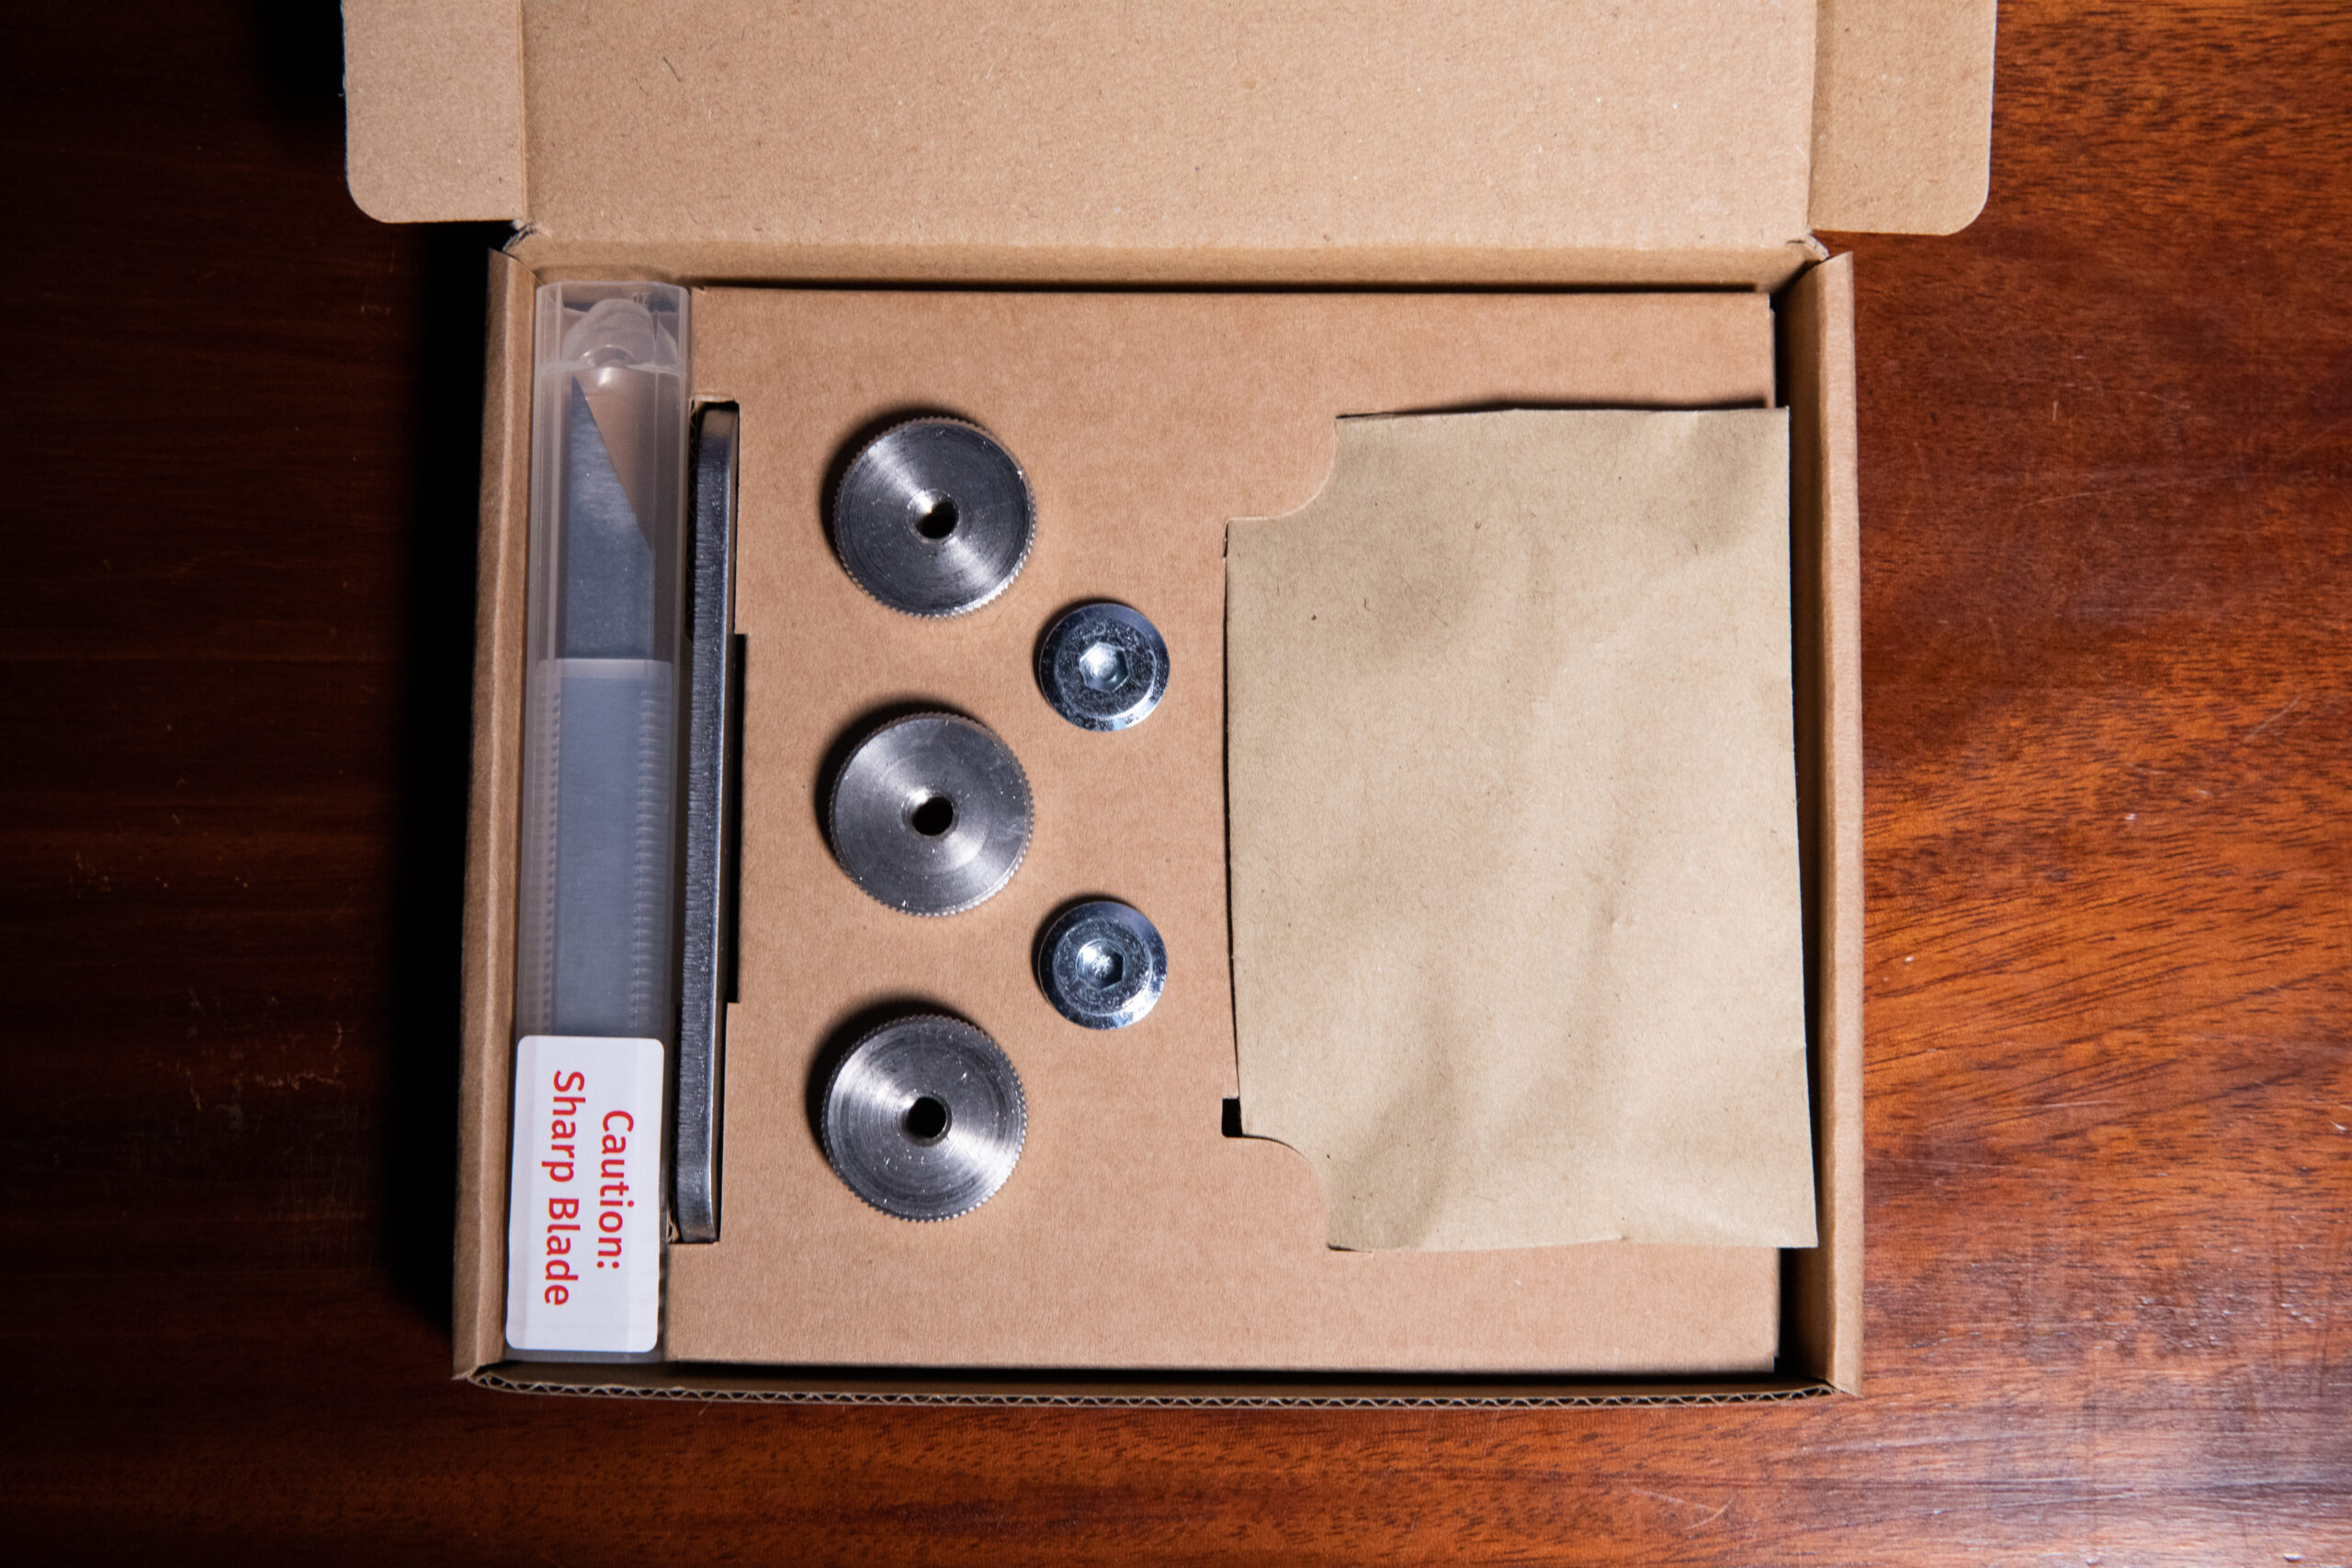
My kit came into being two years ago and the sales have really helped in support of the work we do. Currently, I am coming close on my autobiography. It covers so much of my life as a maker striving to make a living. I'm in the most difficult part of it right now, but I am thankful for keeping my personal journal for the last 25 years or so. There are details in there that I would surely have forgotten, so my editor is as excited as I am to pull all of this together.
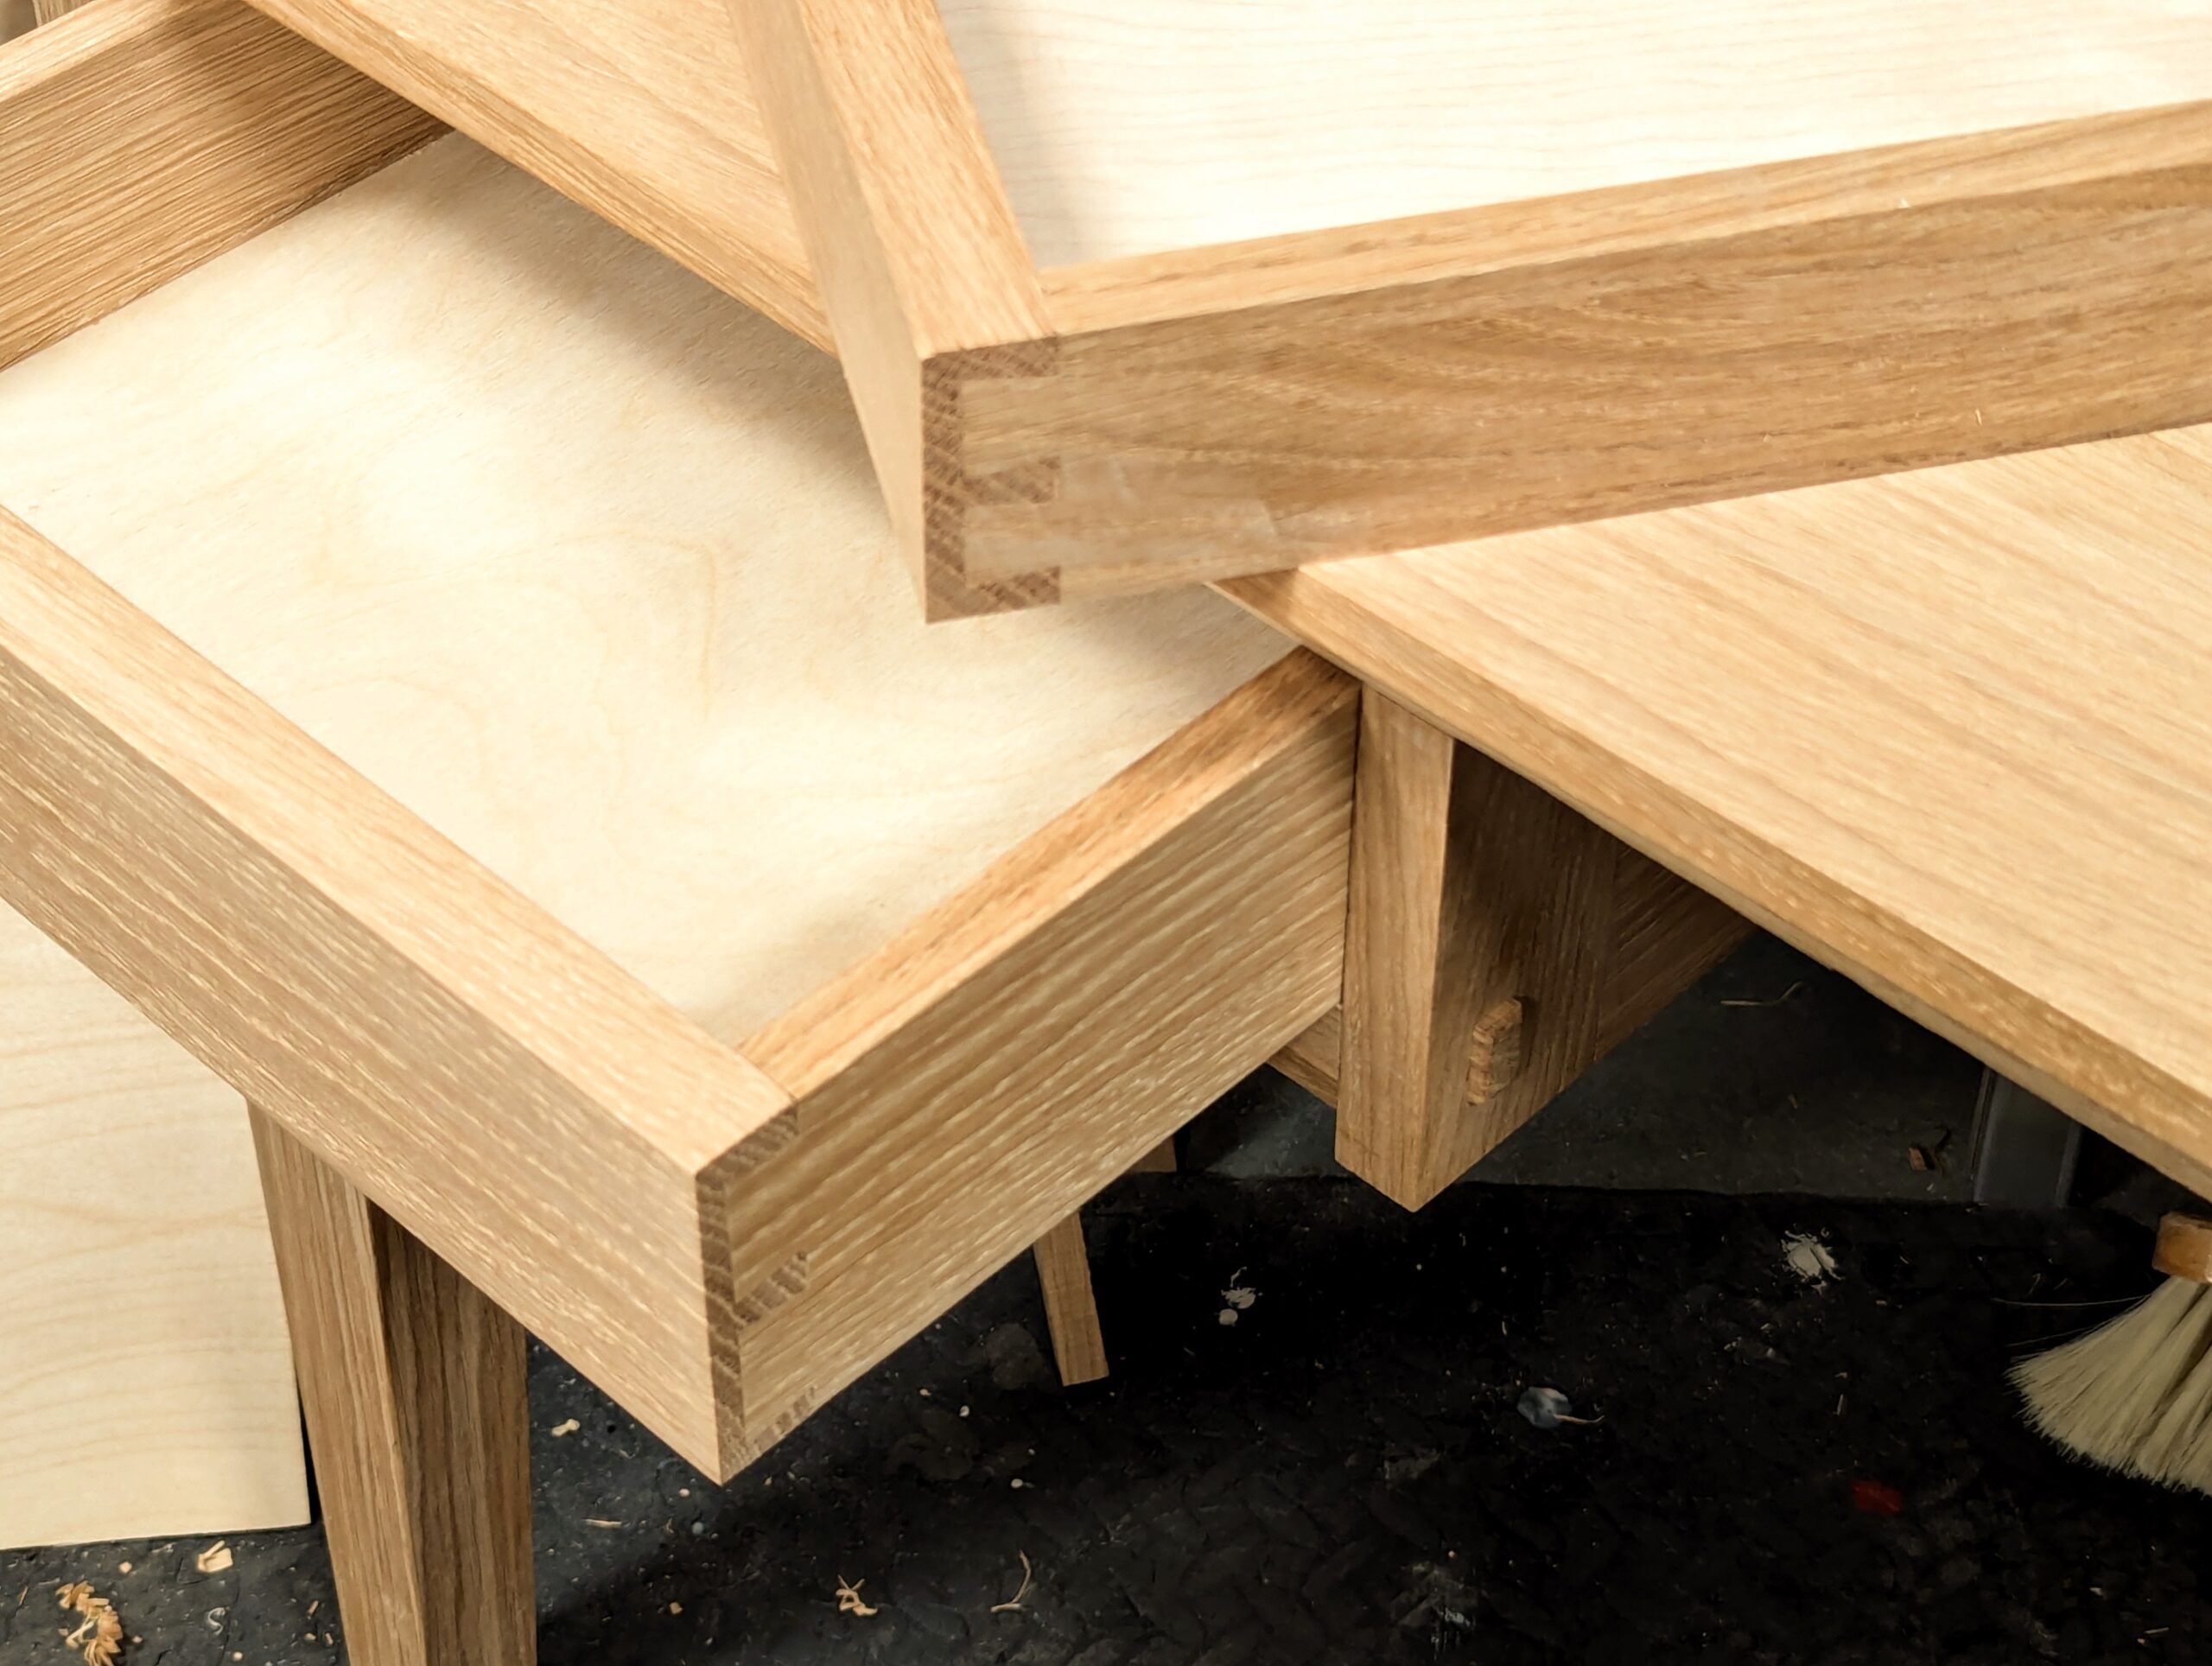
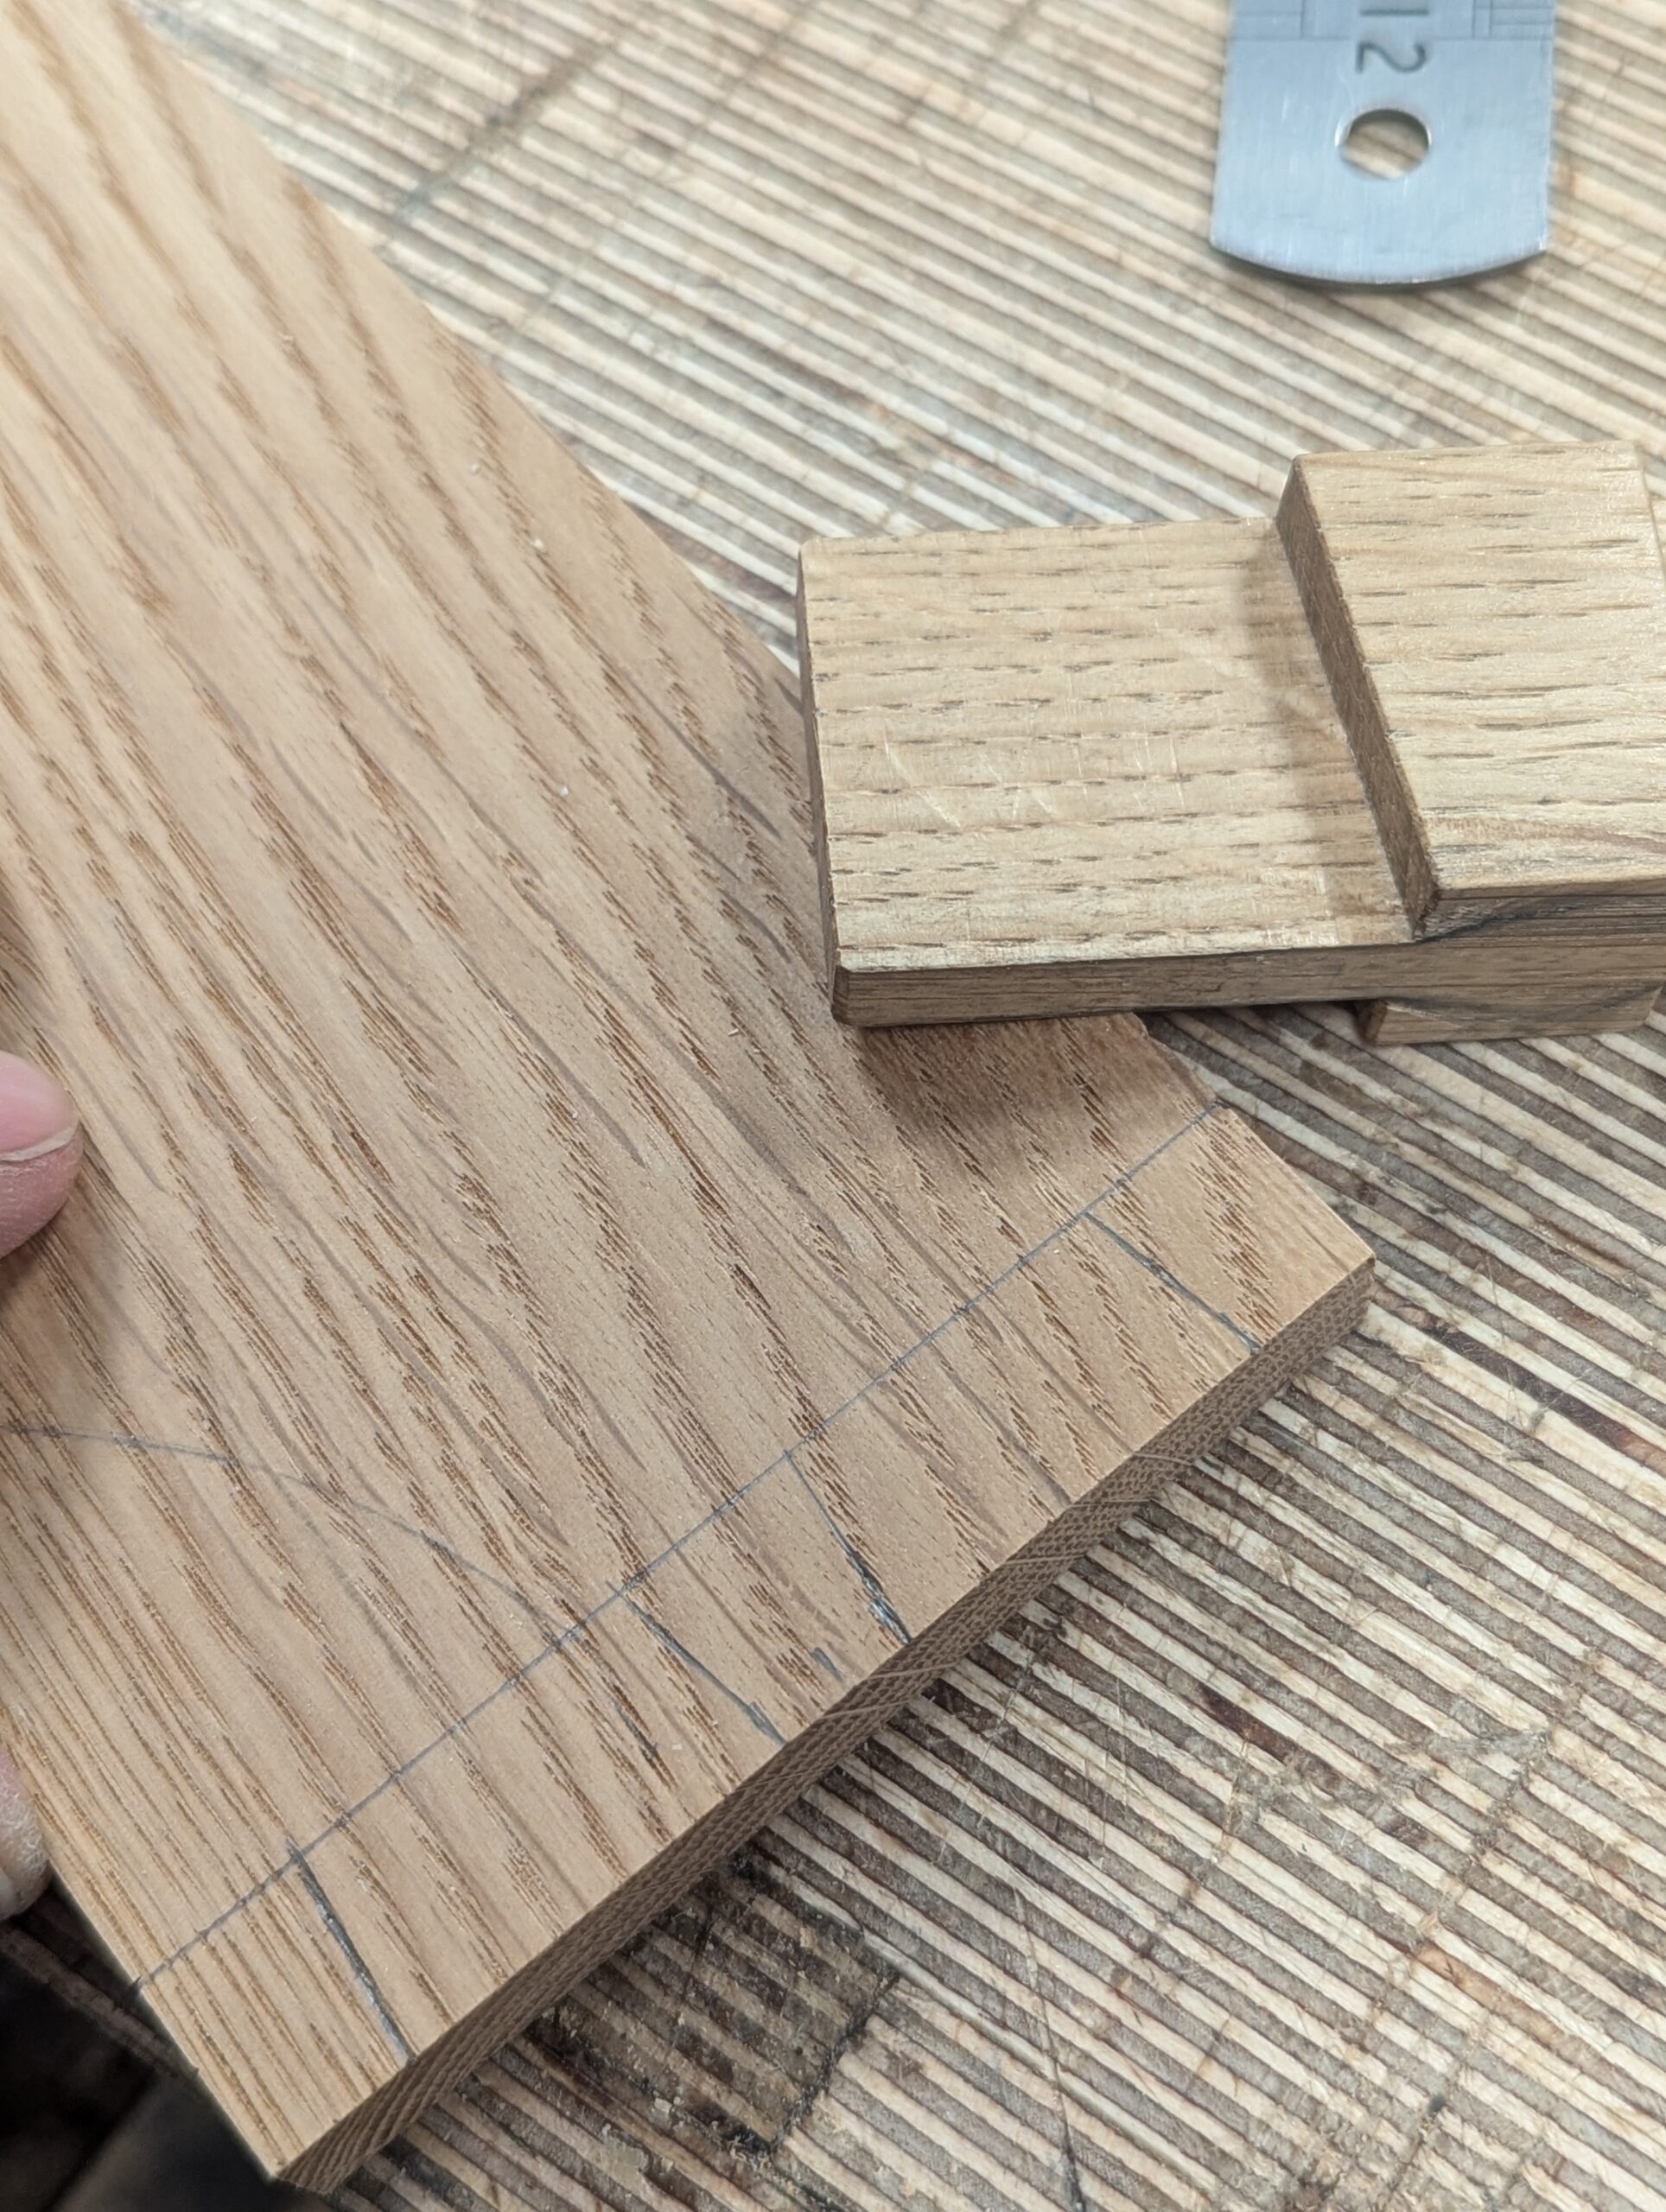
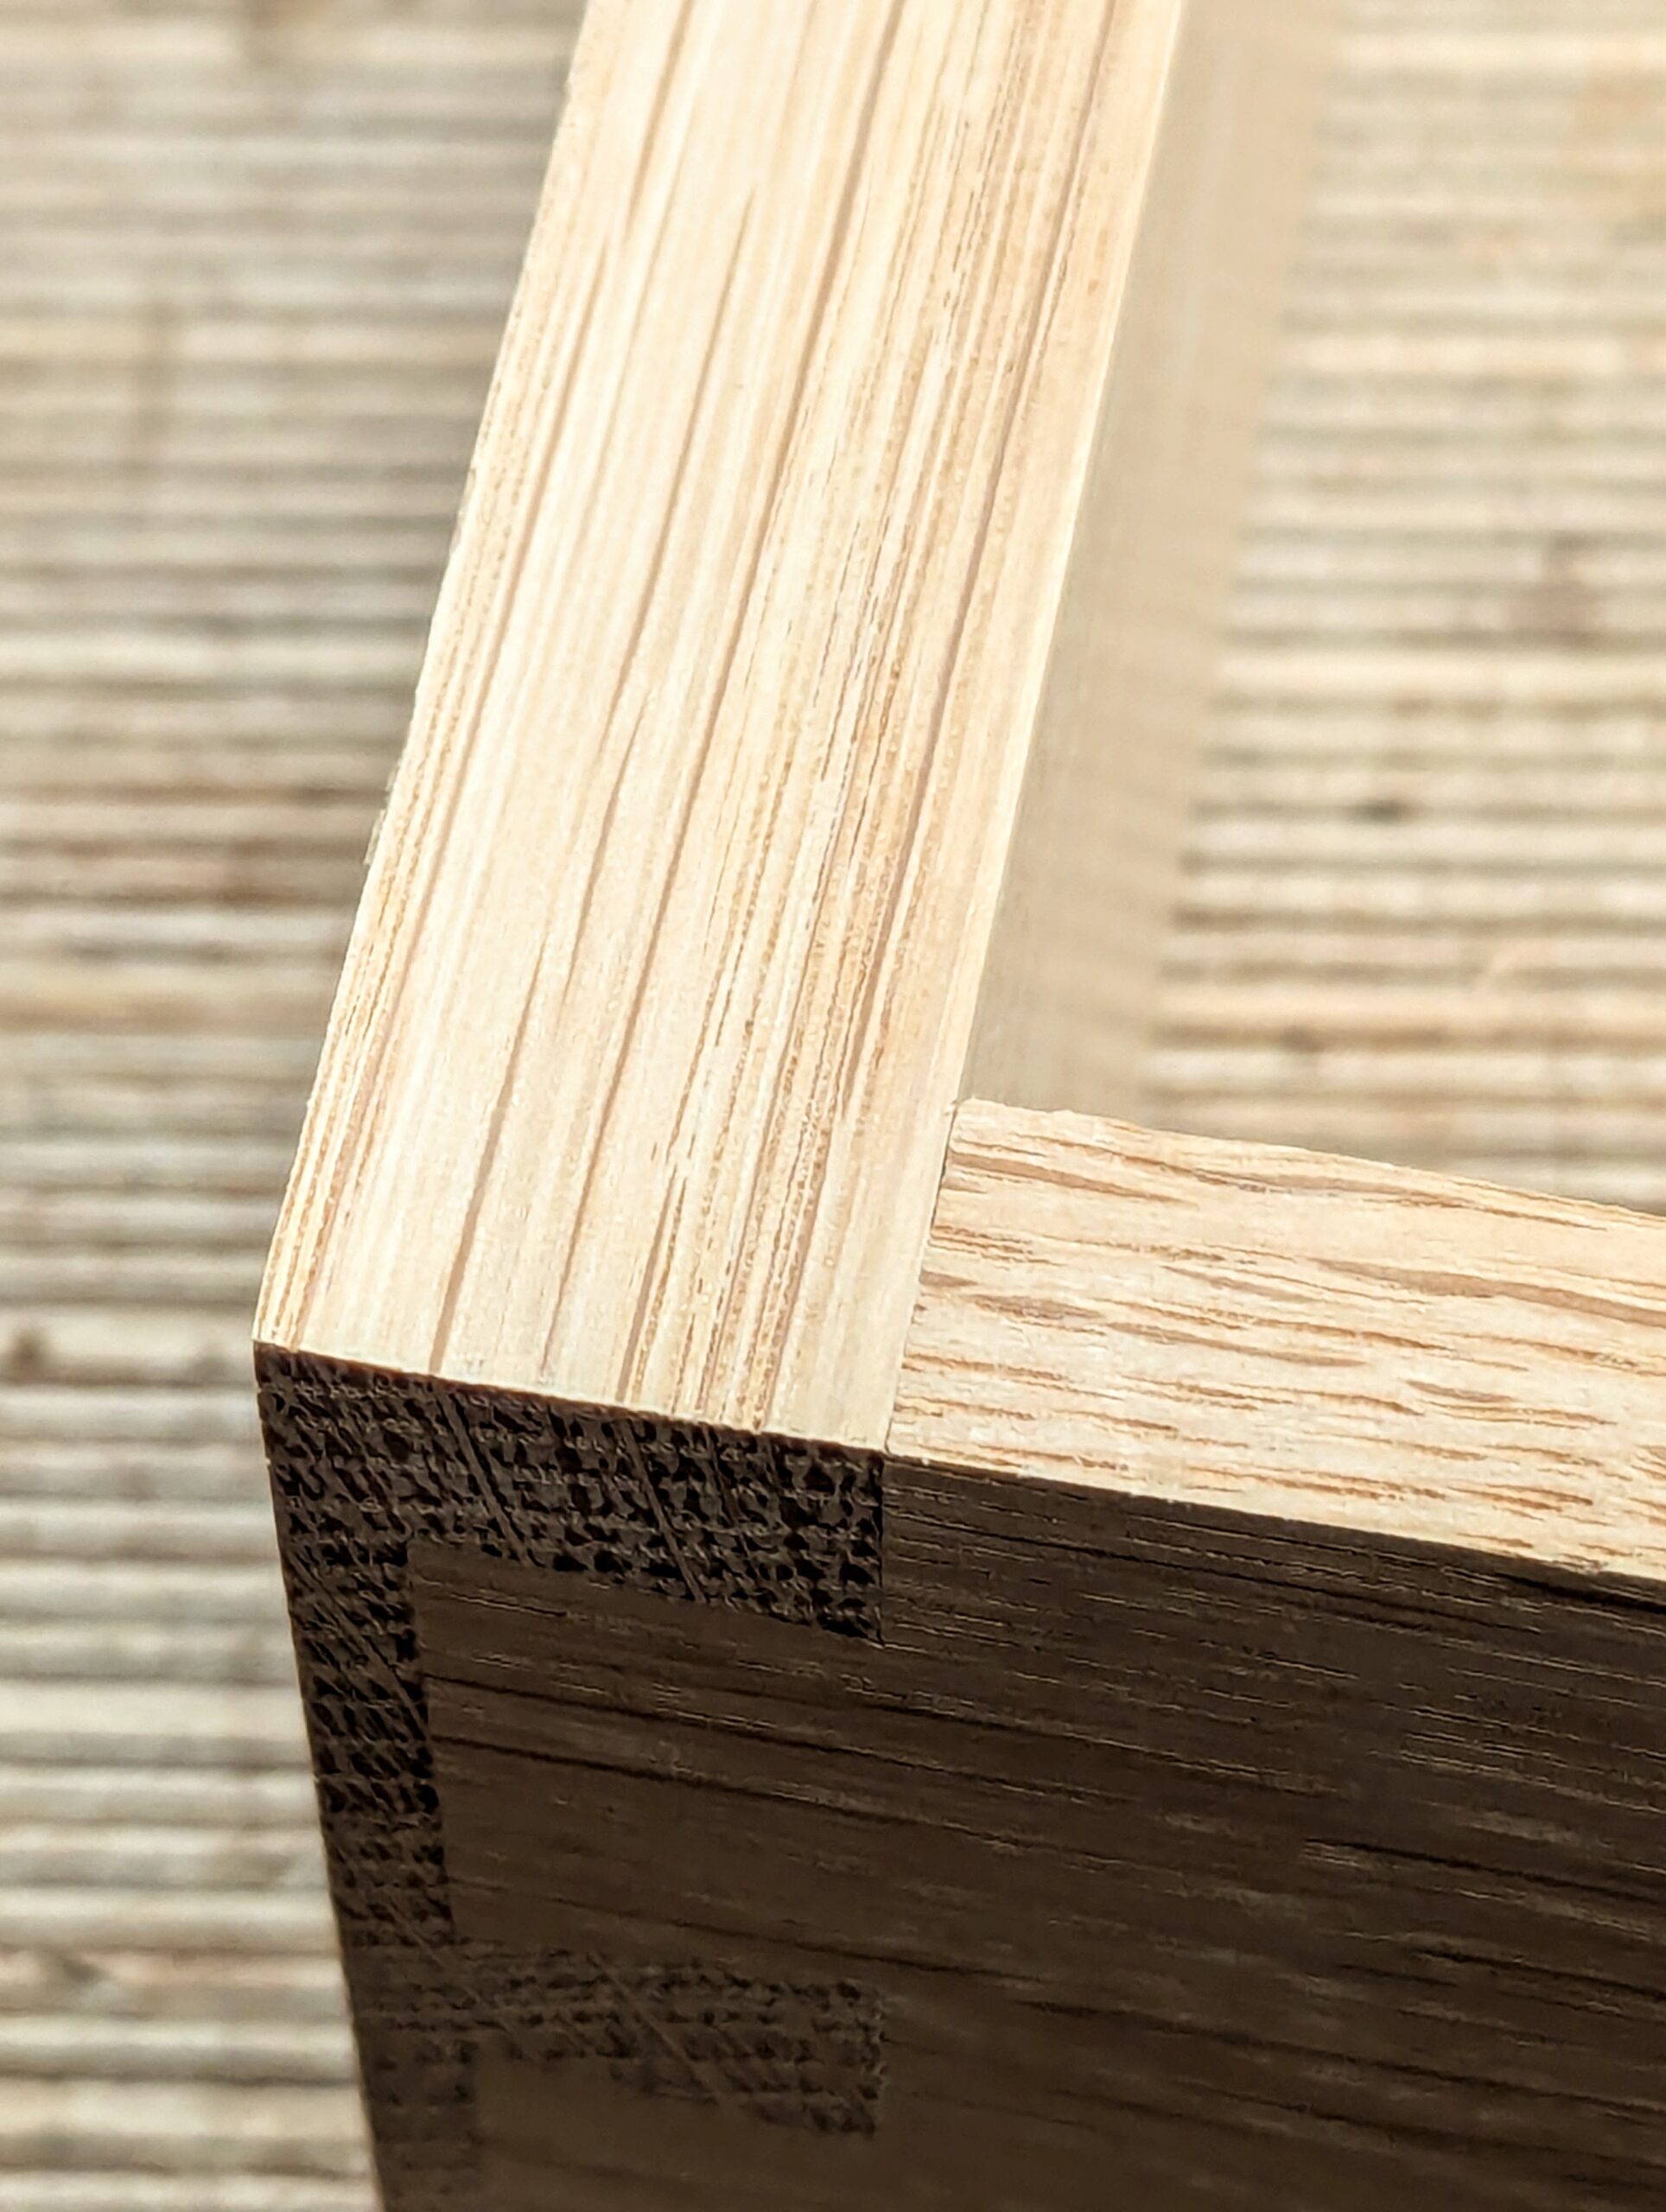
On then to the purpose of this particular blog. I wanted to record two parts to a project I am currently working on in the pieces I have been making this month. One is about my absolute preference to use a stepped dovetail joint, and the other is to combine my housing dados with the pull-power of adding a simple single dovetail. The outside of the stepped dovetail, my name for it now, is the dead-on, lock-set positioning of pulling it to the adjacent drawer or box part for marking out with knife or pencil. On the outside, these joints look, well, just ordinary, but they-re not at all. And once you make them, I am sure you will feel like me and not want to go back to the 'ordinary' again. And the neatest thing is this! Because we use our hand tools and have gradually developed the skills in various points of making, we can do it all in no more than 15 to 20 minutes apiece.
Below is where I end up 100% of the time after using my guide. The ends of all components needing square ends are always square both ways after half a dozen or so strokes.

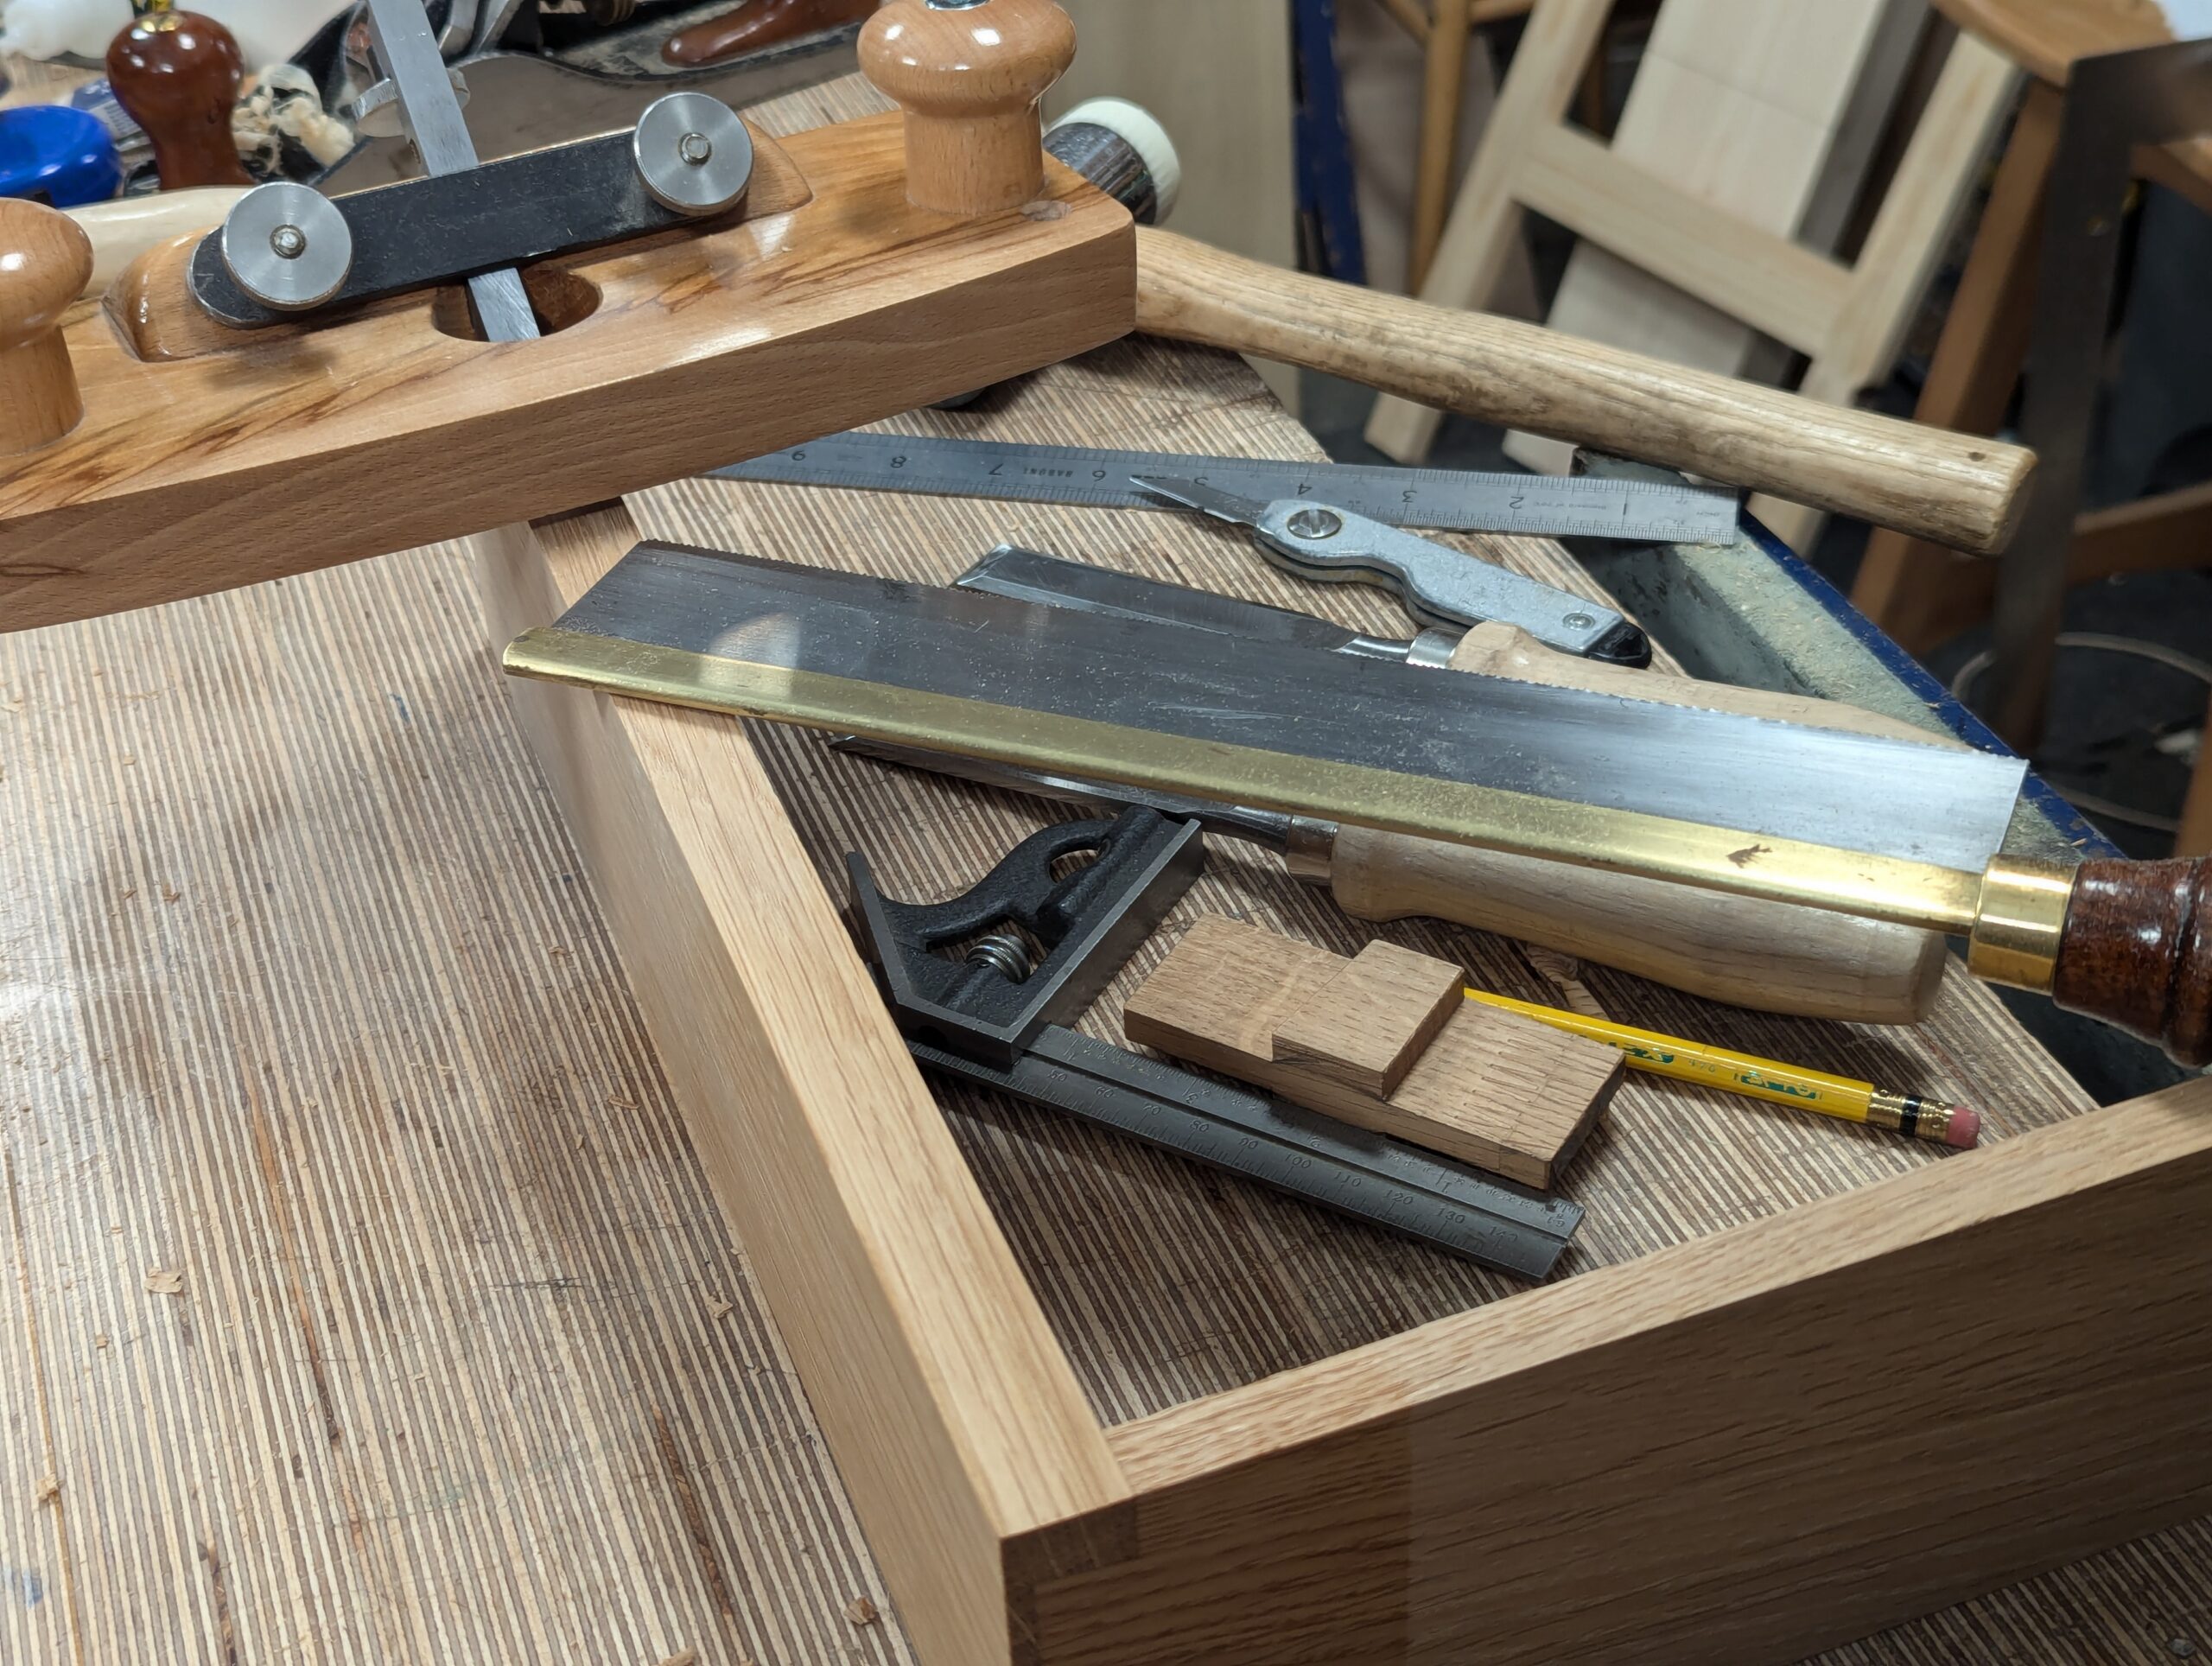
I absolutely love my vertical end planing guide for truing up the ends of wood for all kinds of parts because I can do any size I need to do. Those of you who come back at me and say, why not use a shooting board? Well, you can, of course. I do think that my y guide does do a much better job all around. It's very convenient, and it takes up no clearing of the bench top to use it. Need I say more? It takes ten minutes to make one from scraps, and rather than me answering questions about it, it will be much better for you to make one and see for yourself how you feel about it.
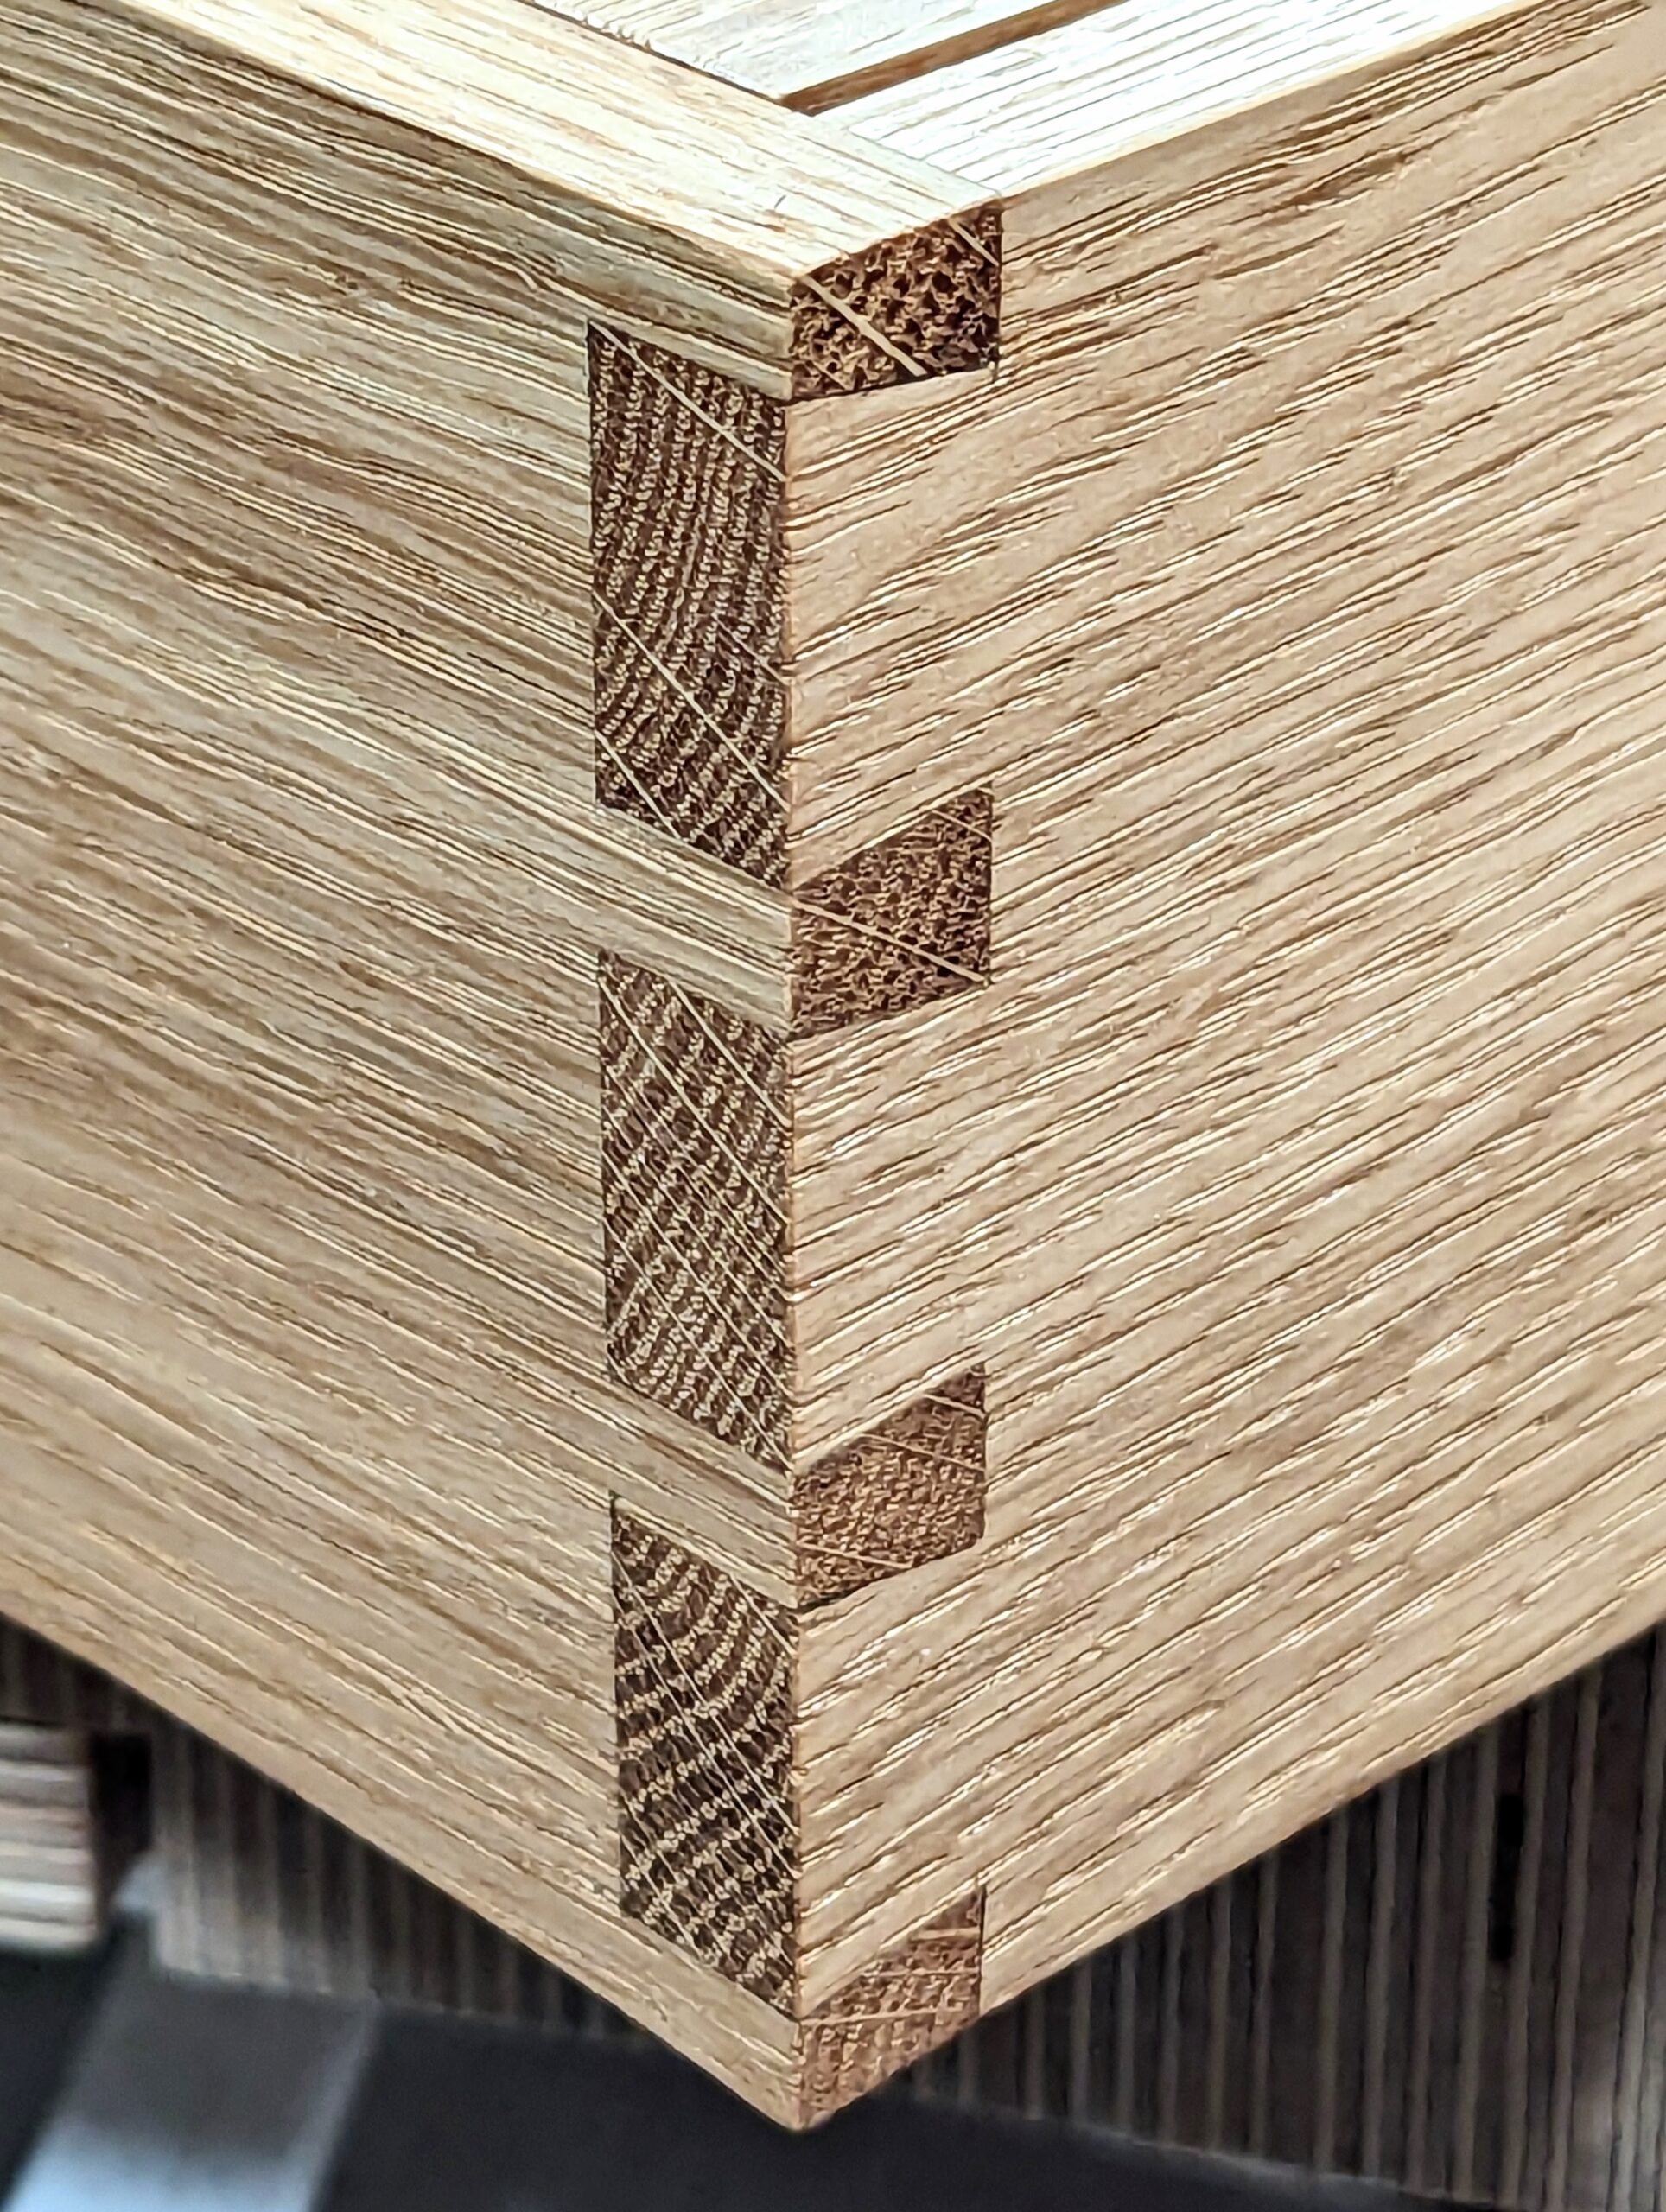
So here it is: How to make a stepped dovetail for whatever box construction you plan to make. Just as a drawer is a box, so too, boxes usually involve all of the drawer-making elements needed to make a variety of boxes. Adopt which ever part of this how-to you want for your future projects, but don't forget, the added 'step' will be compensated for in the higher levels of pretty much guaranteed accuracy, speed of construction and more.
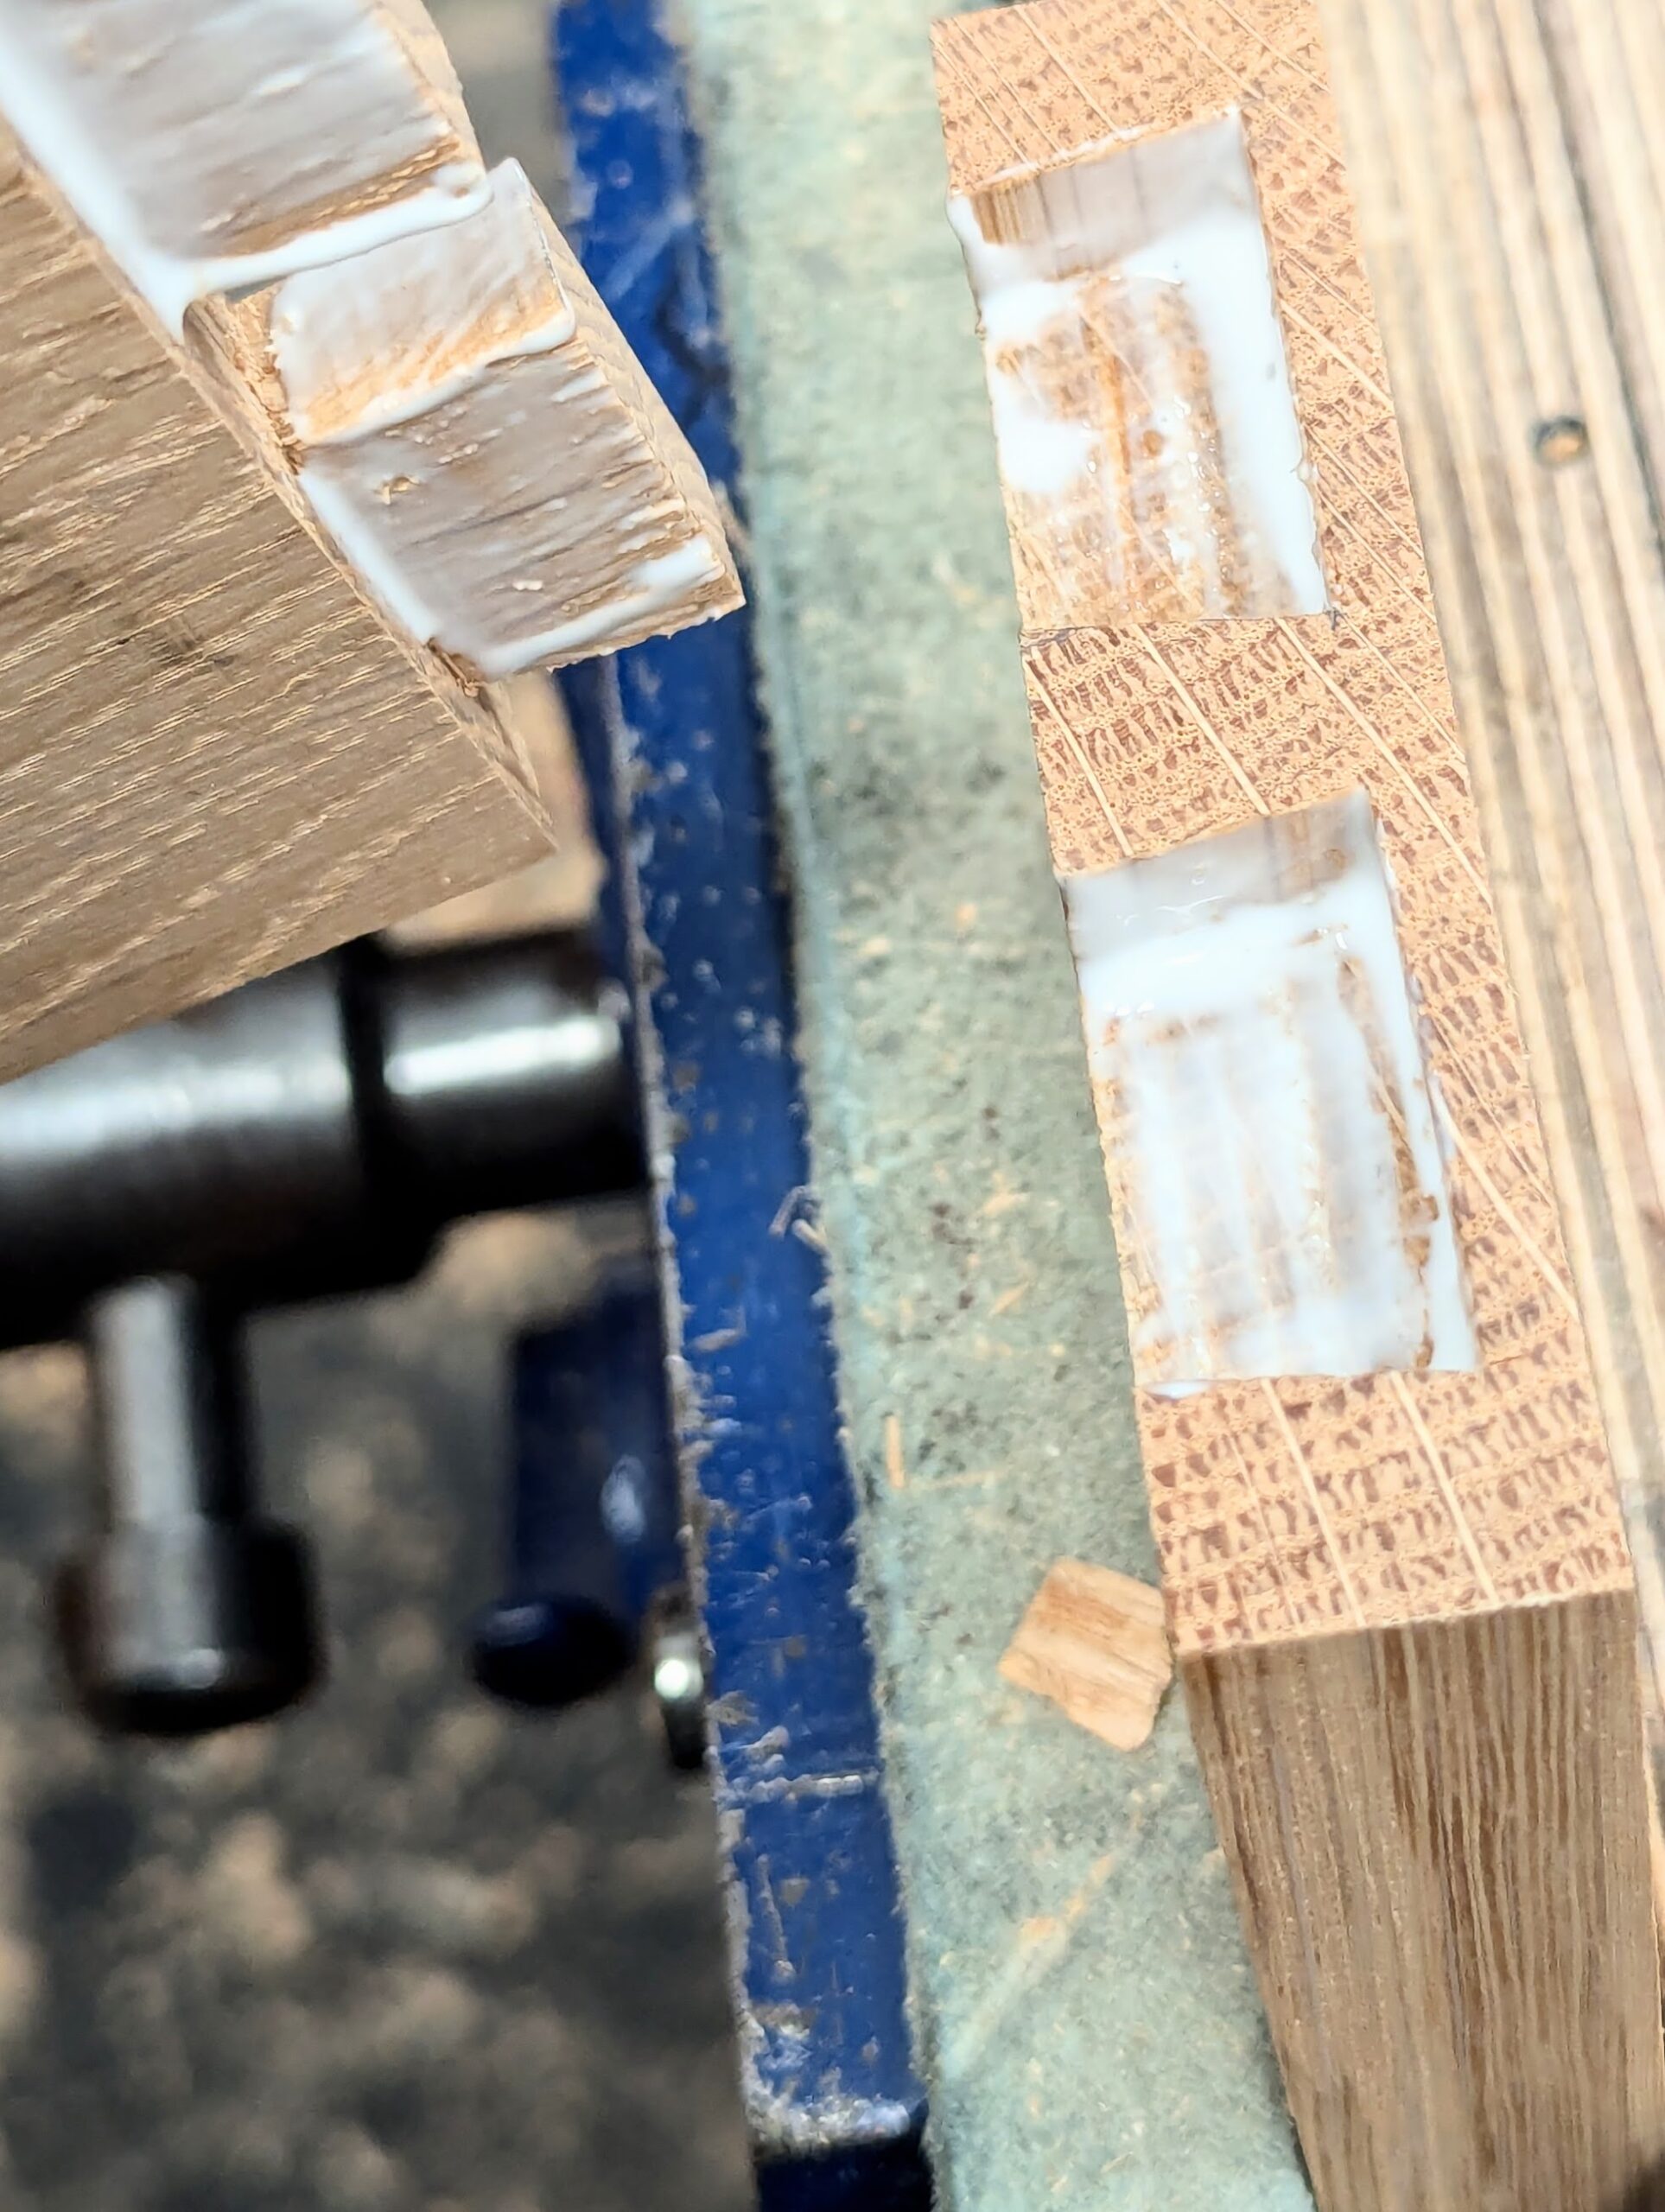
The depth of the rabbet or rebate is a matter of choice, but you don't need much to work as a stop––3-4mm is usually enough. I set my router plane to this depth and use it as my marking gauge. I chisel out the bulk of the waste and then come in with the same set router plane and skim off the final level for a plane-smooth finished level.
The length of the dovetails is also something of a matter of choice. I leave around 4-6mm of wood on the face if it is a half-lap dovetail, if a common or through-dovetail allow a .5mm excess to plane off when done.

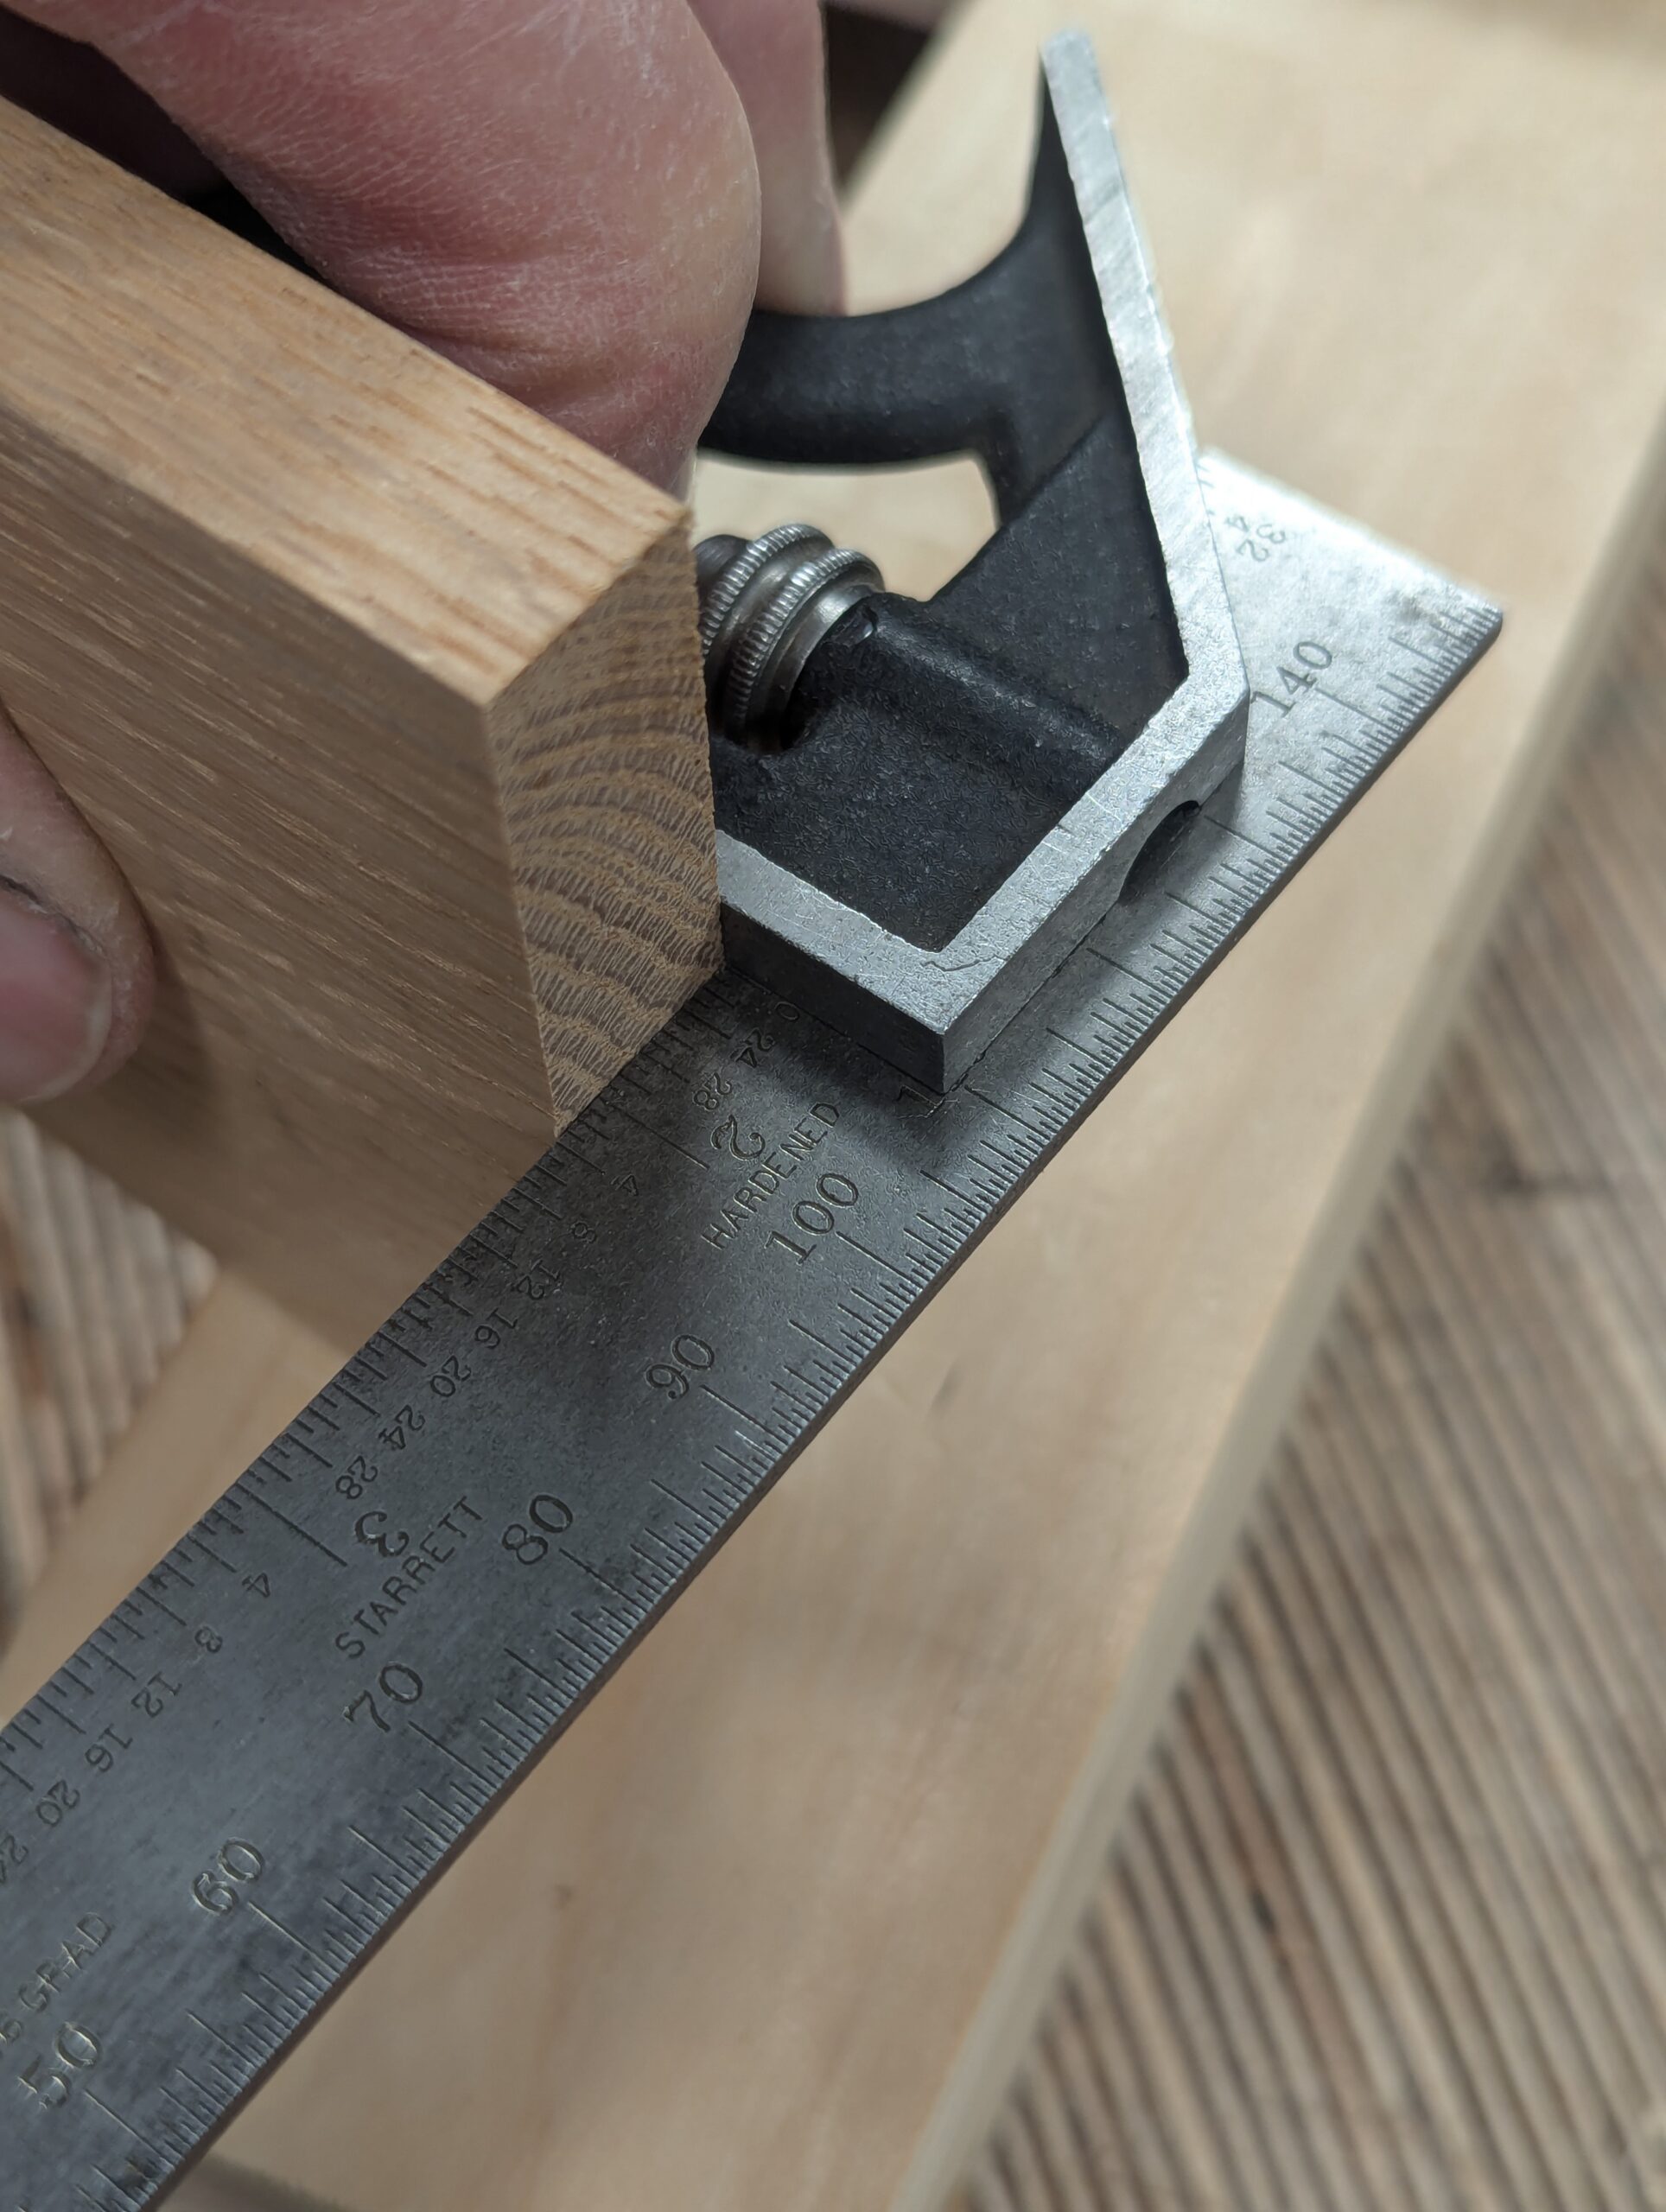
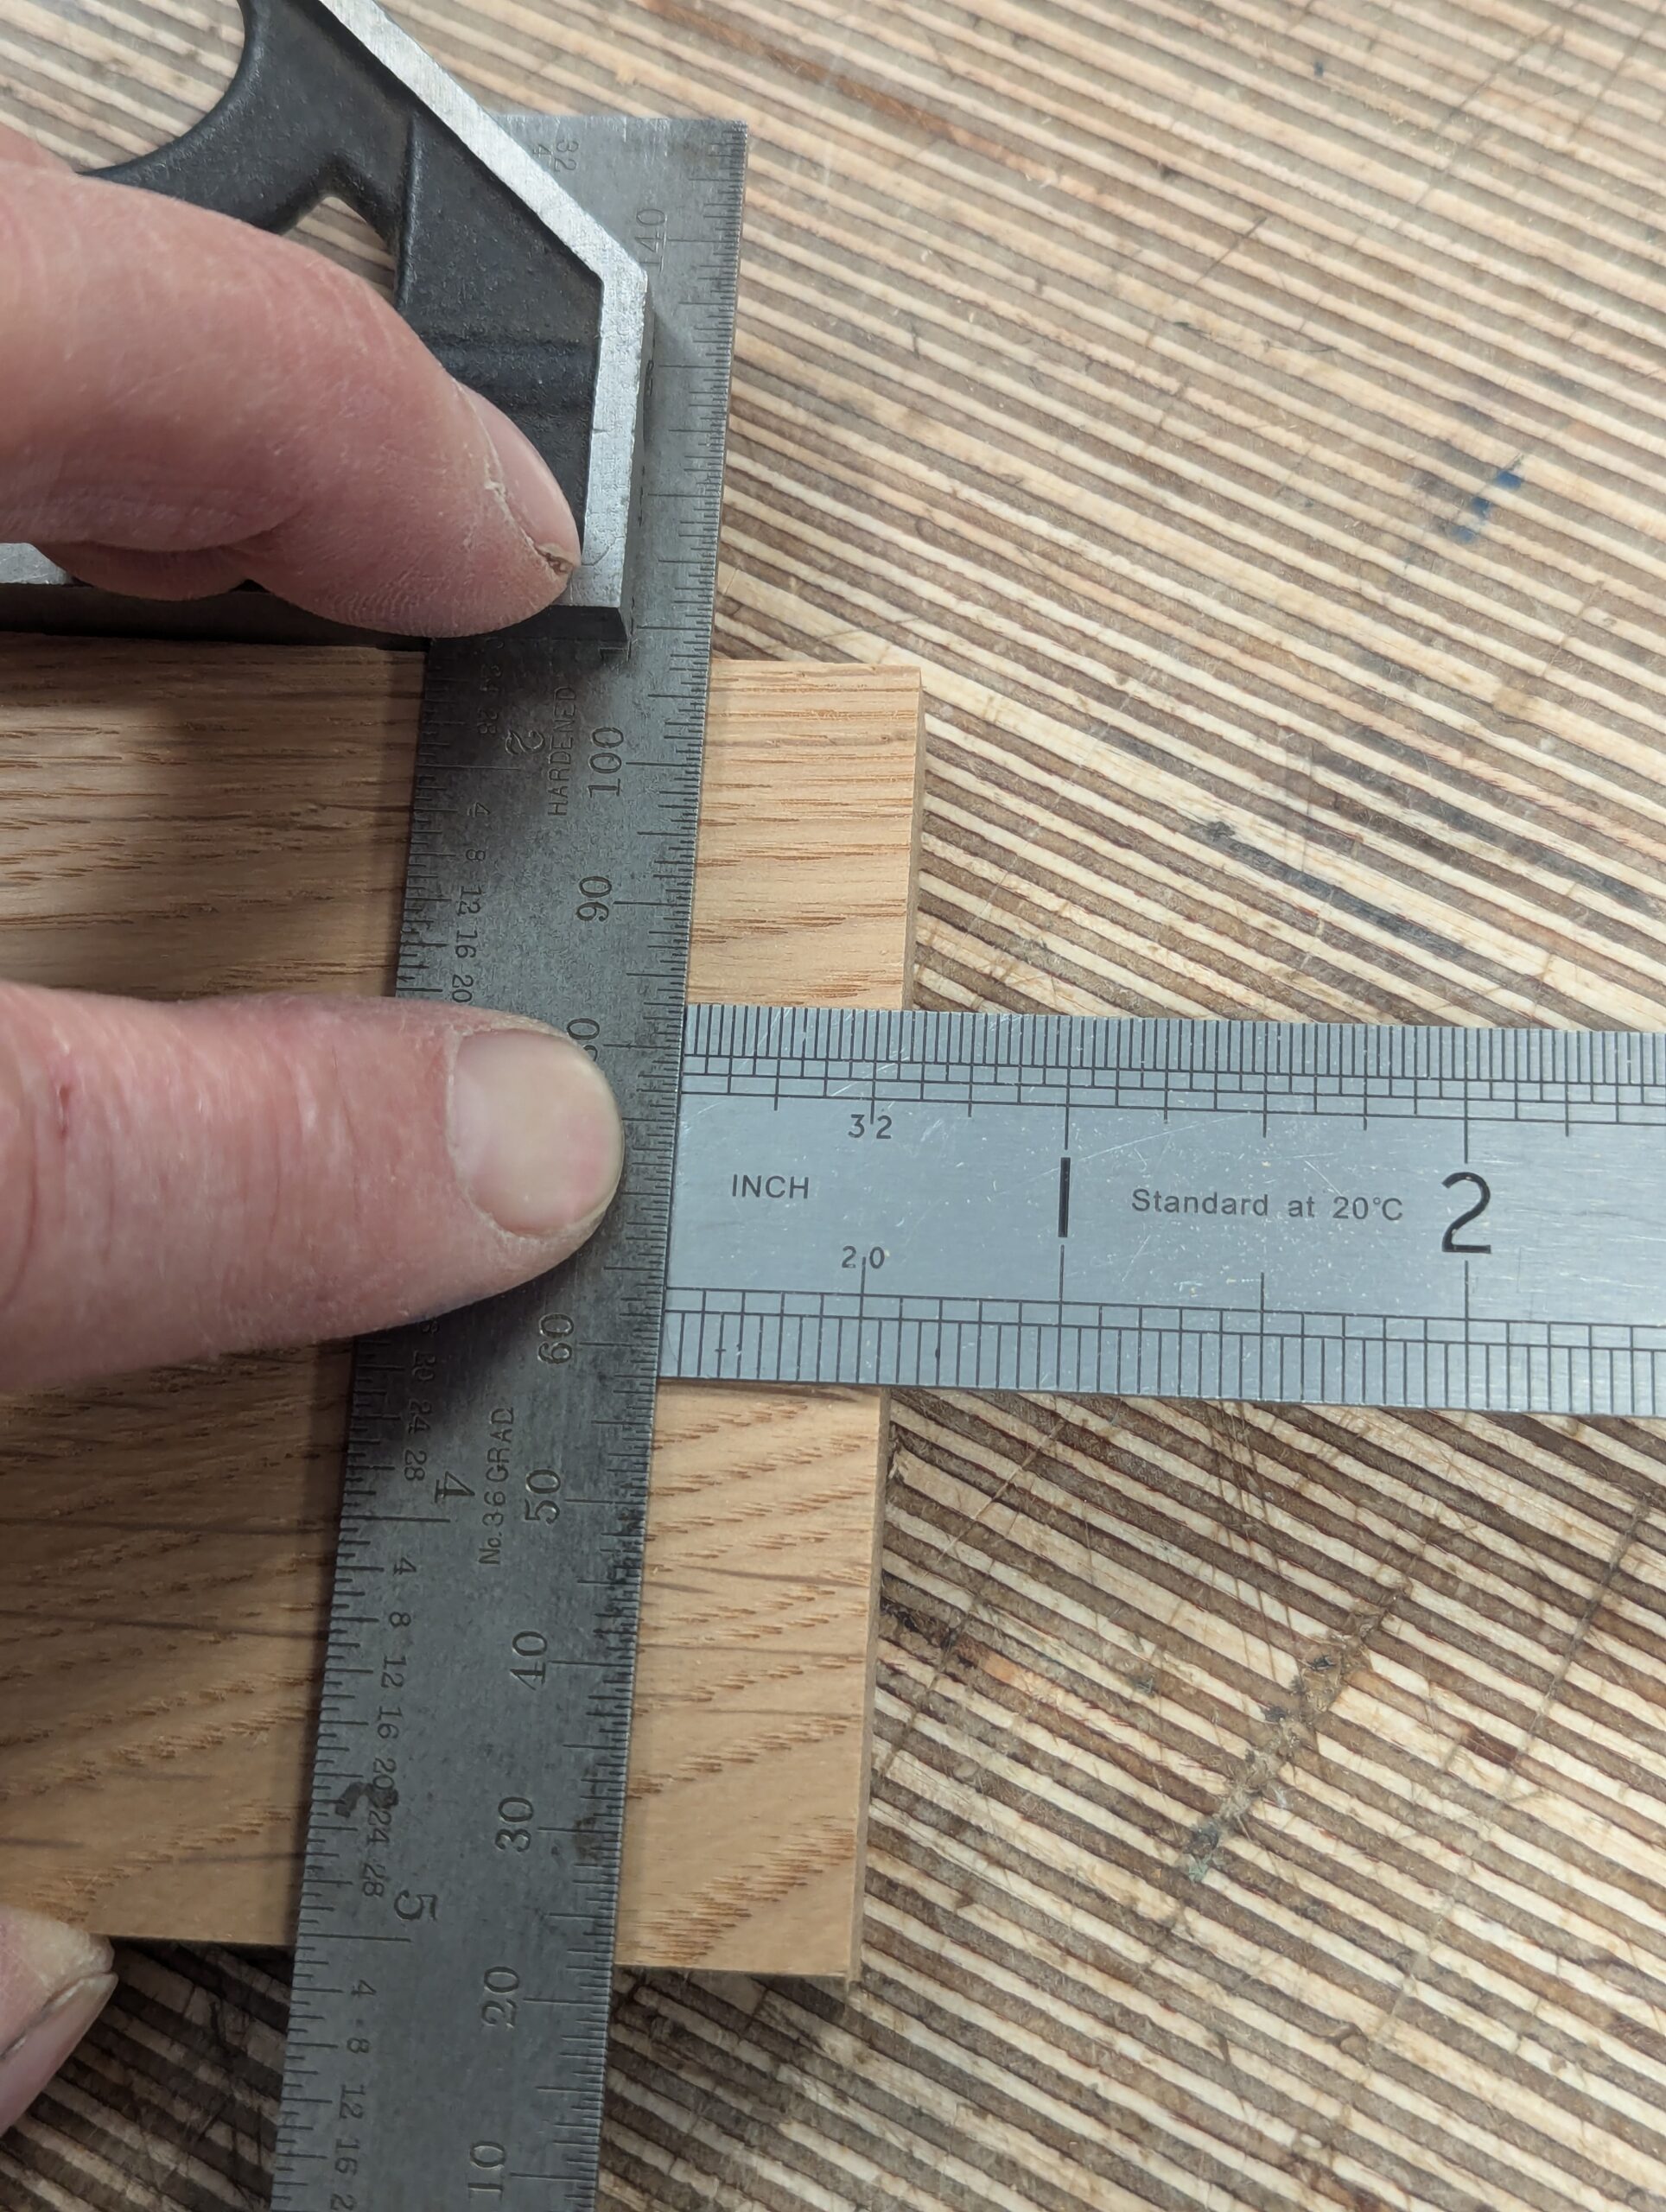
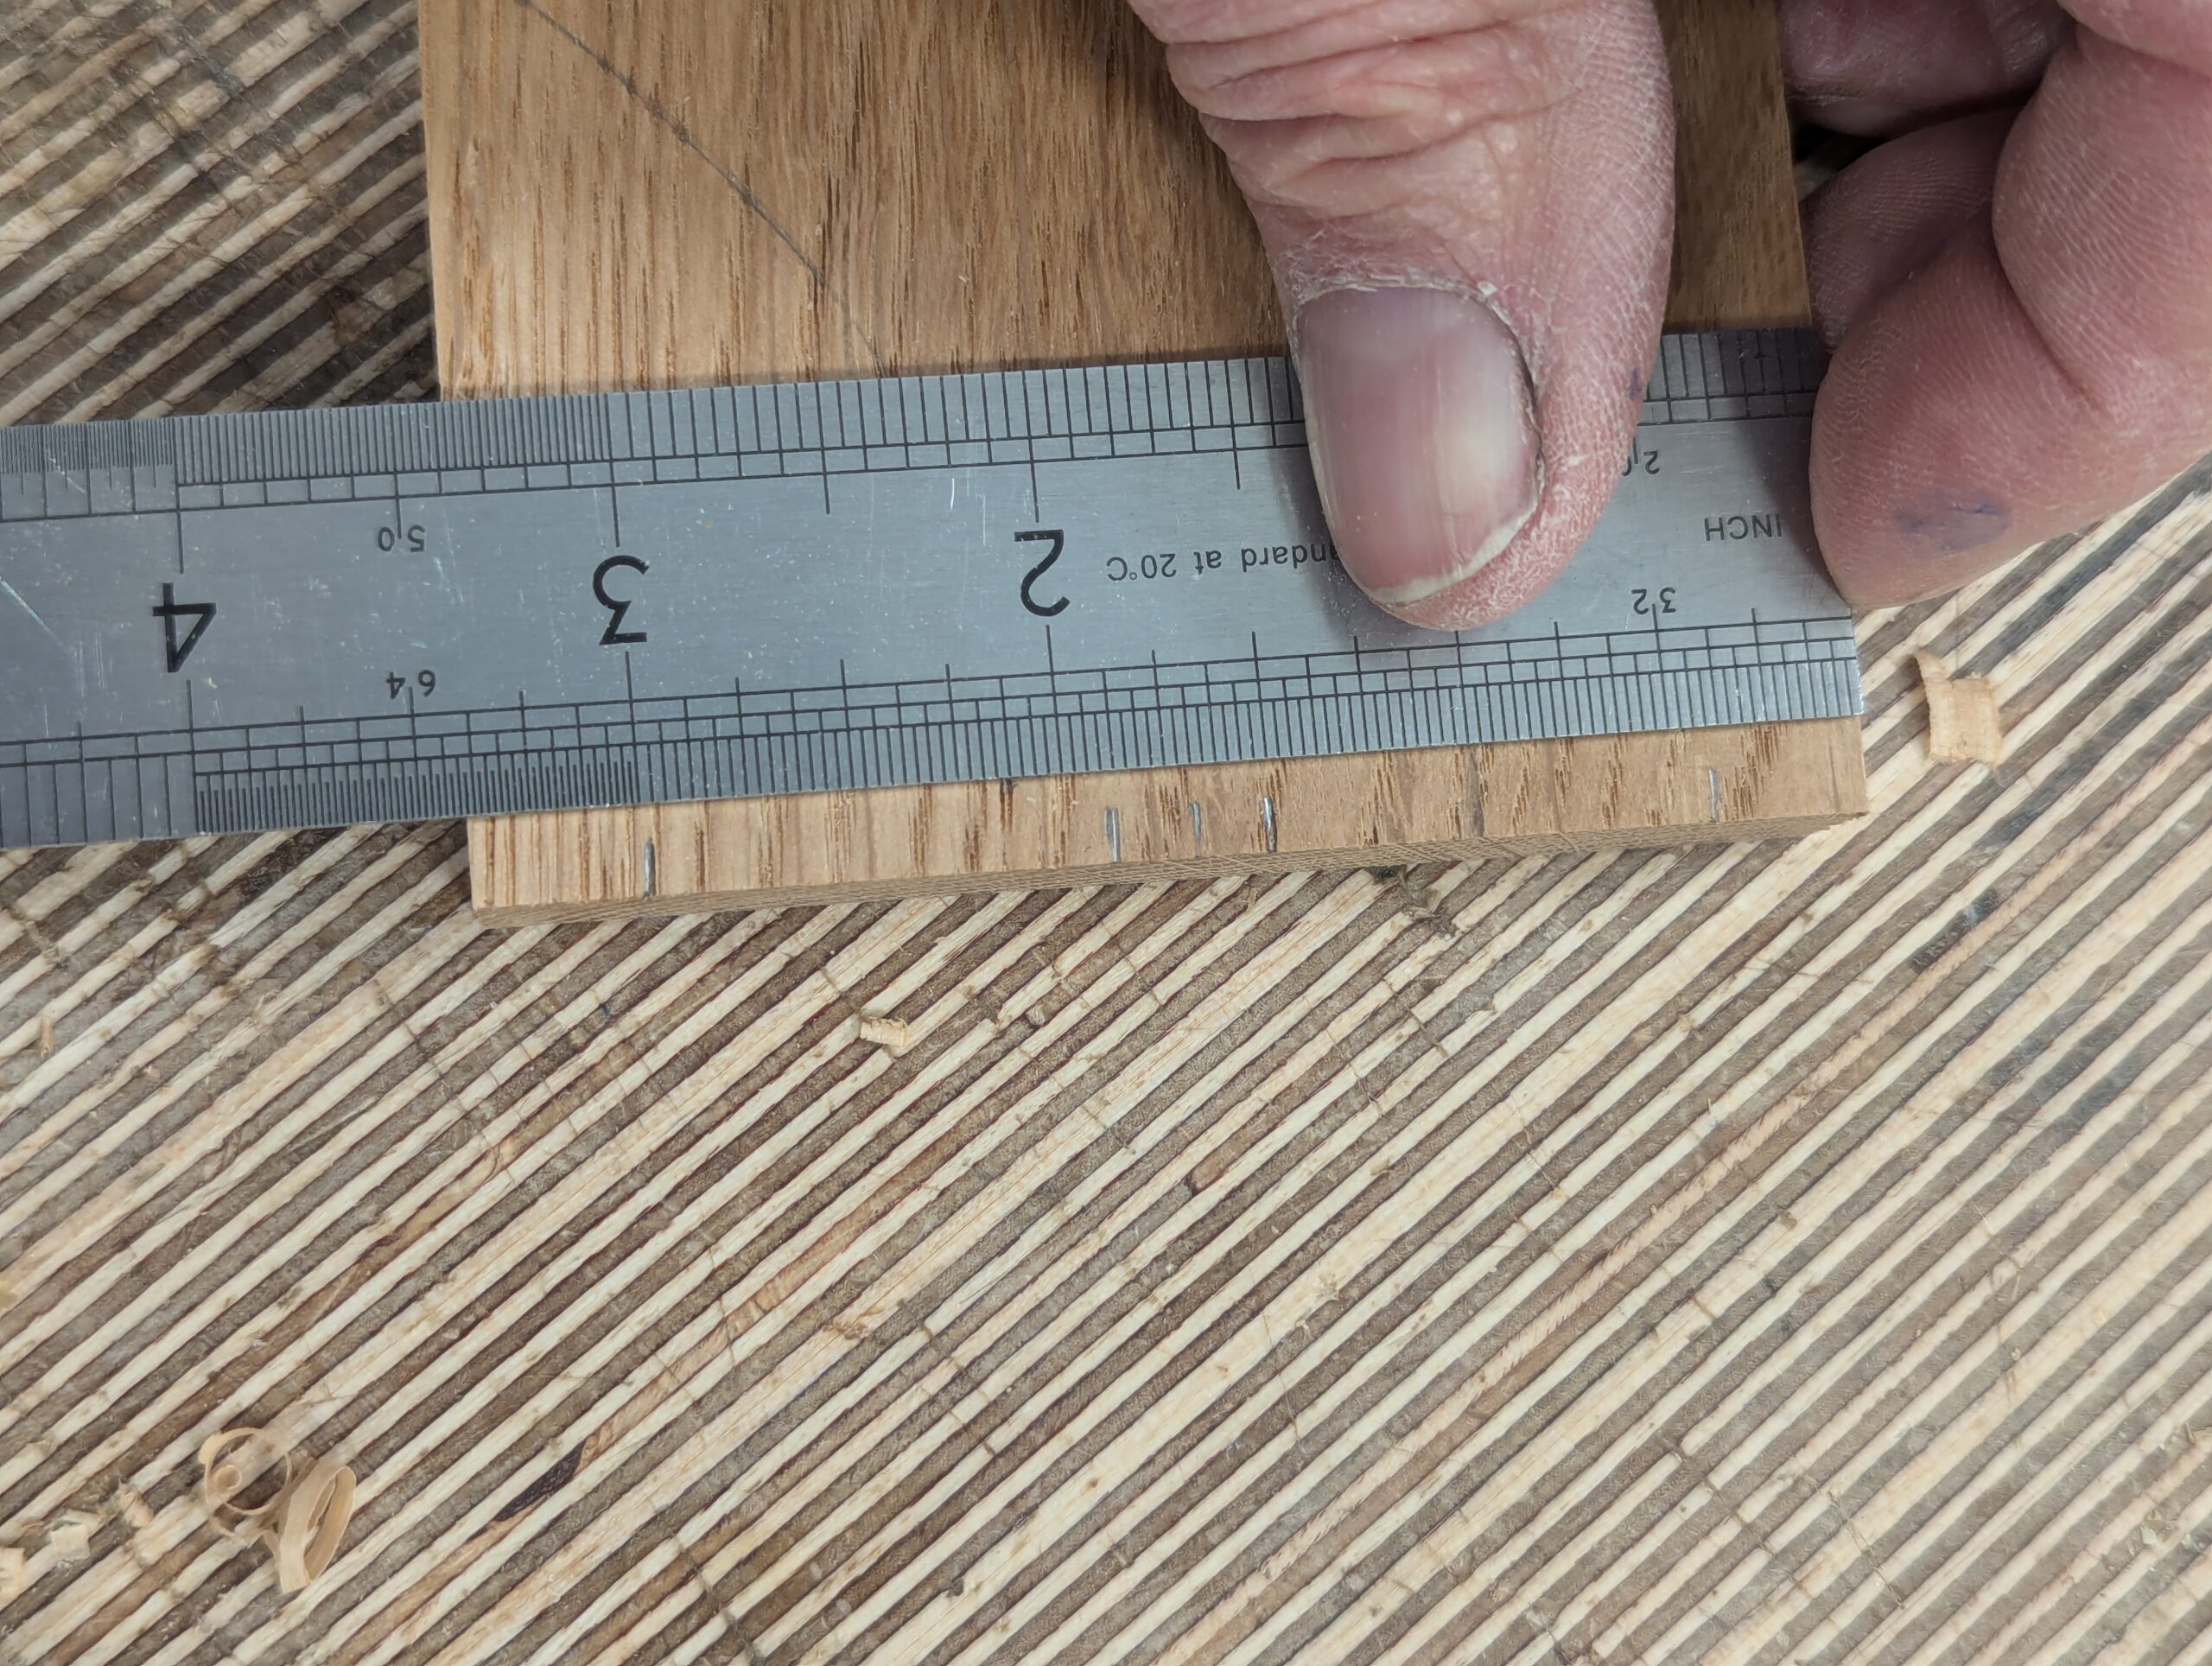
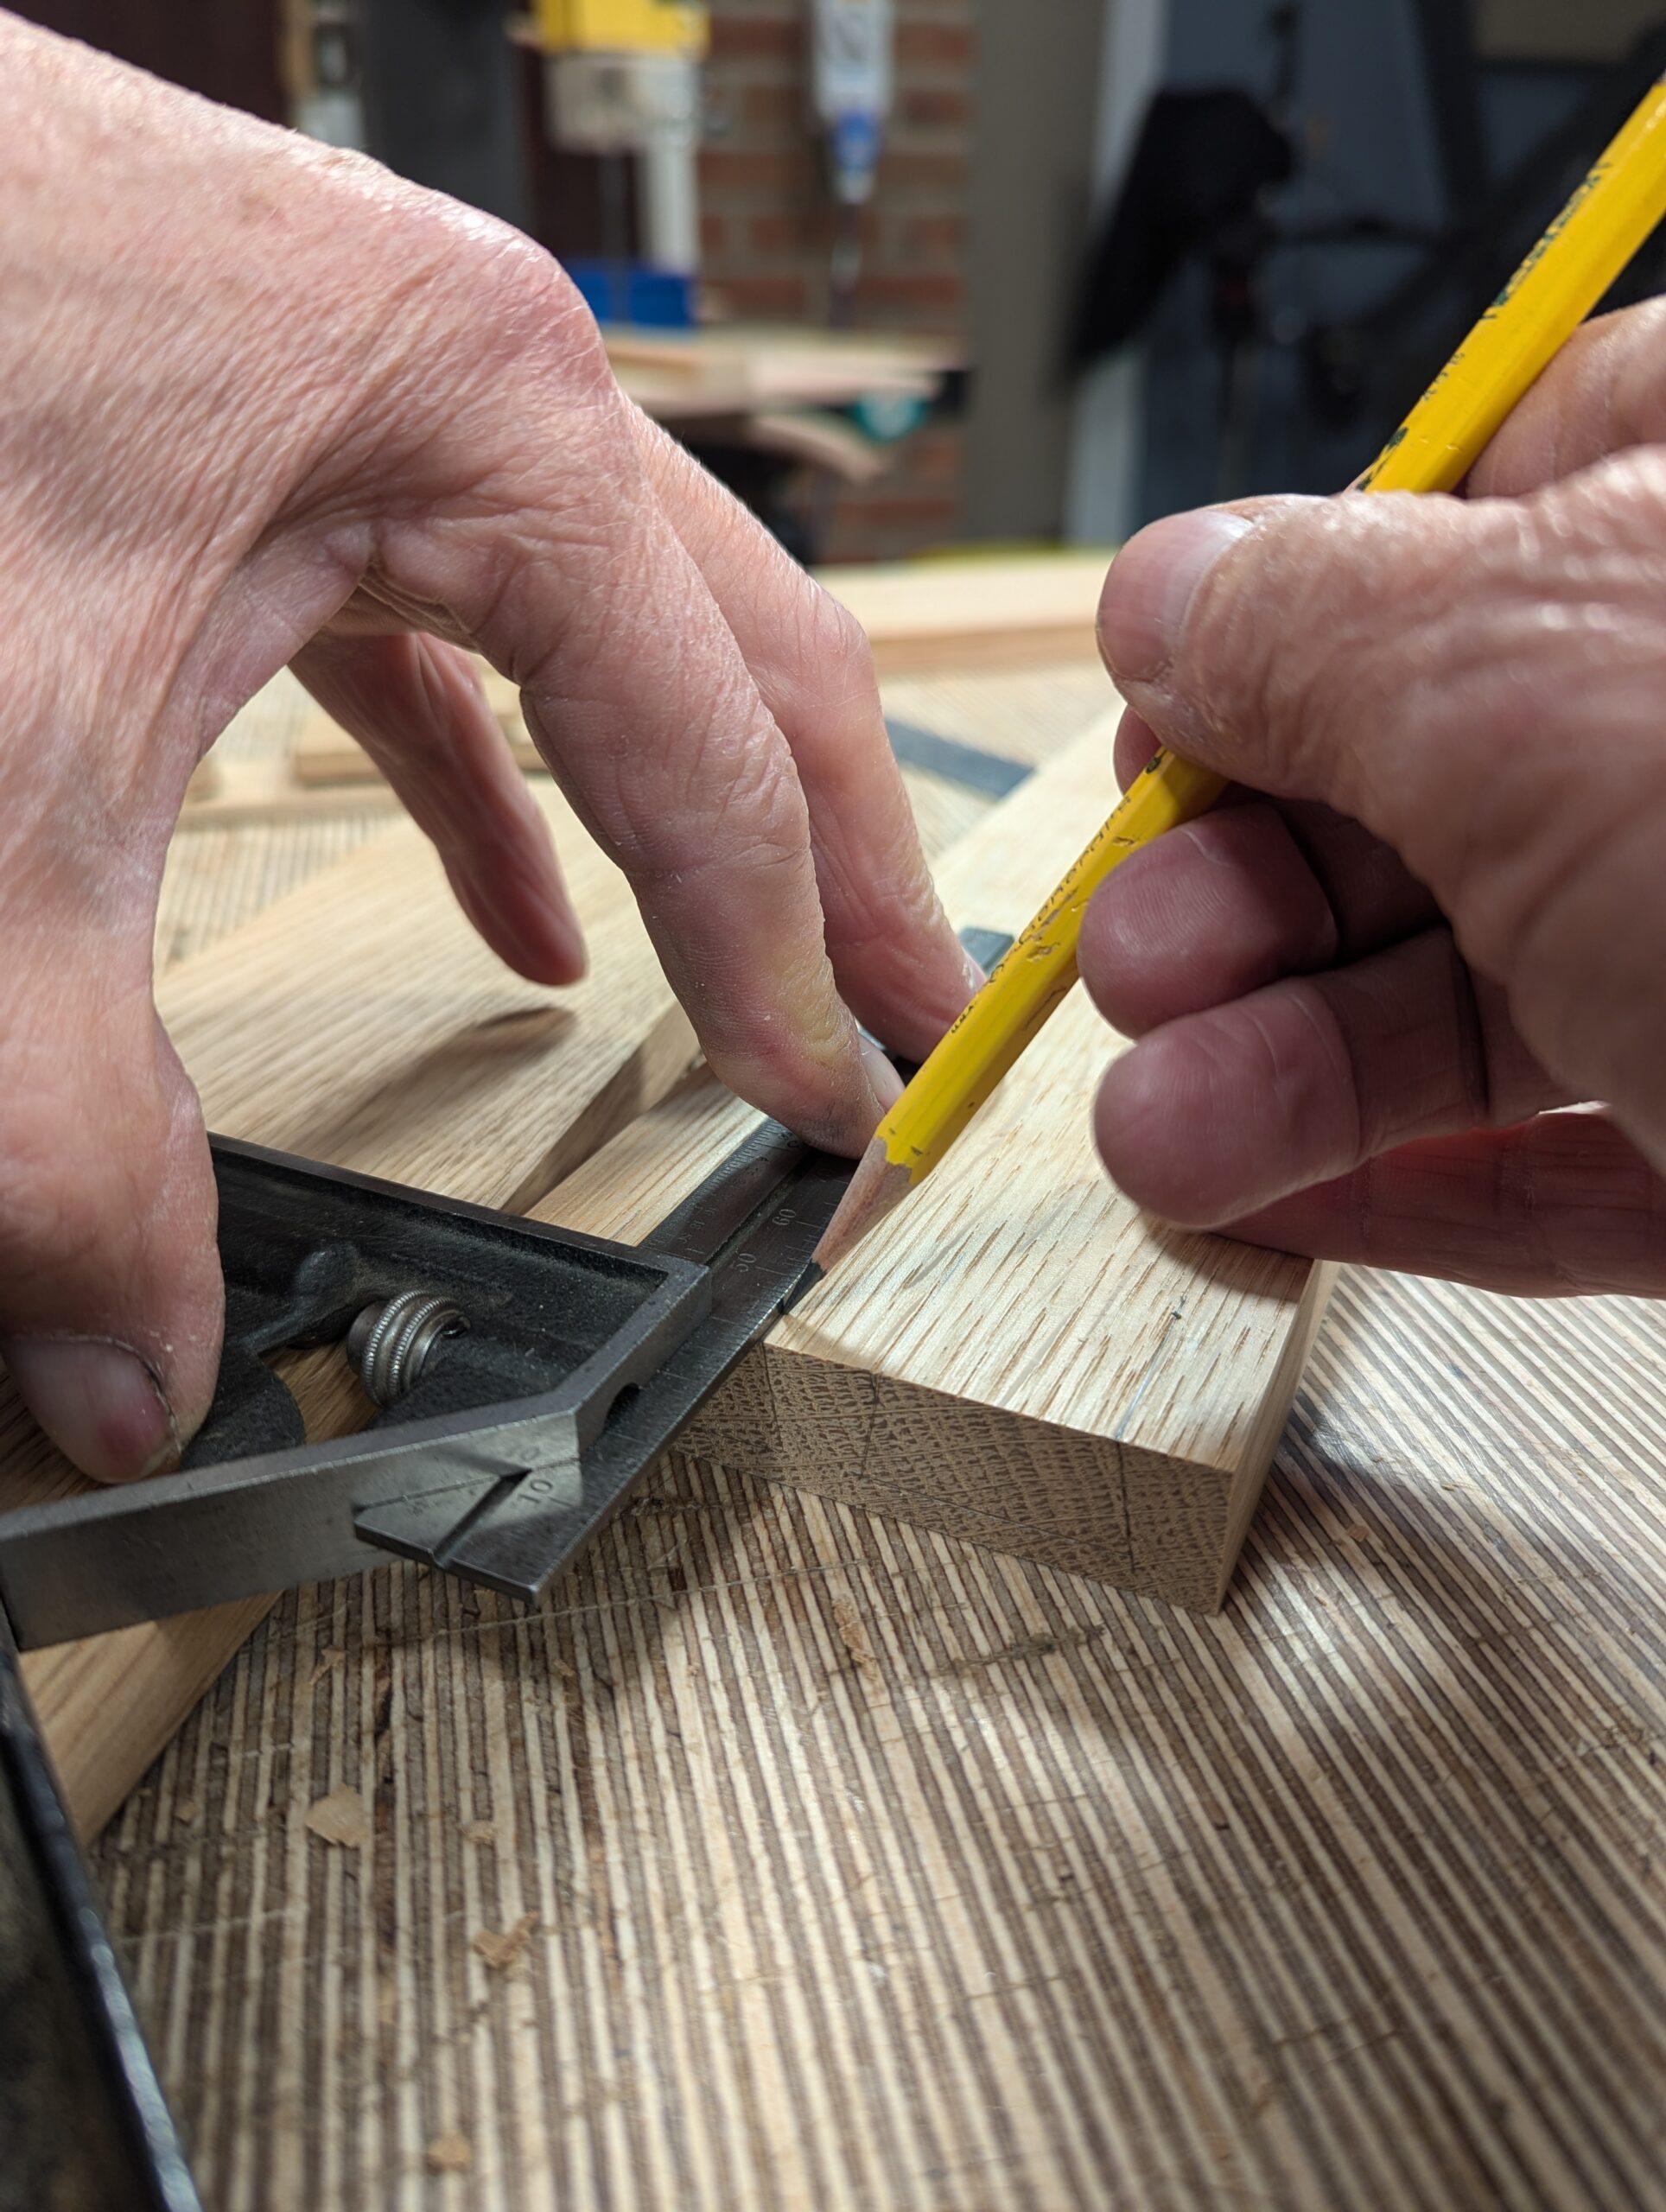
Establishing the dovetail length is a knifewall across the grain on the inside of the side pieces, but not on the outside just yet. On a 20mm thick drawer front, minus 6mm means my dovetails will be 14mm long. Having squared up the end grain in both directions, I simply measure from the end with the square and the ruler positioned so.
Square onto the outside edges with the knife also . . .

. . . but on the outside, visible face, use a pencil line to guide you as to where to stop with your saw cuts
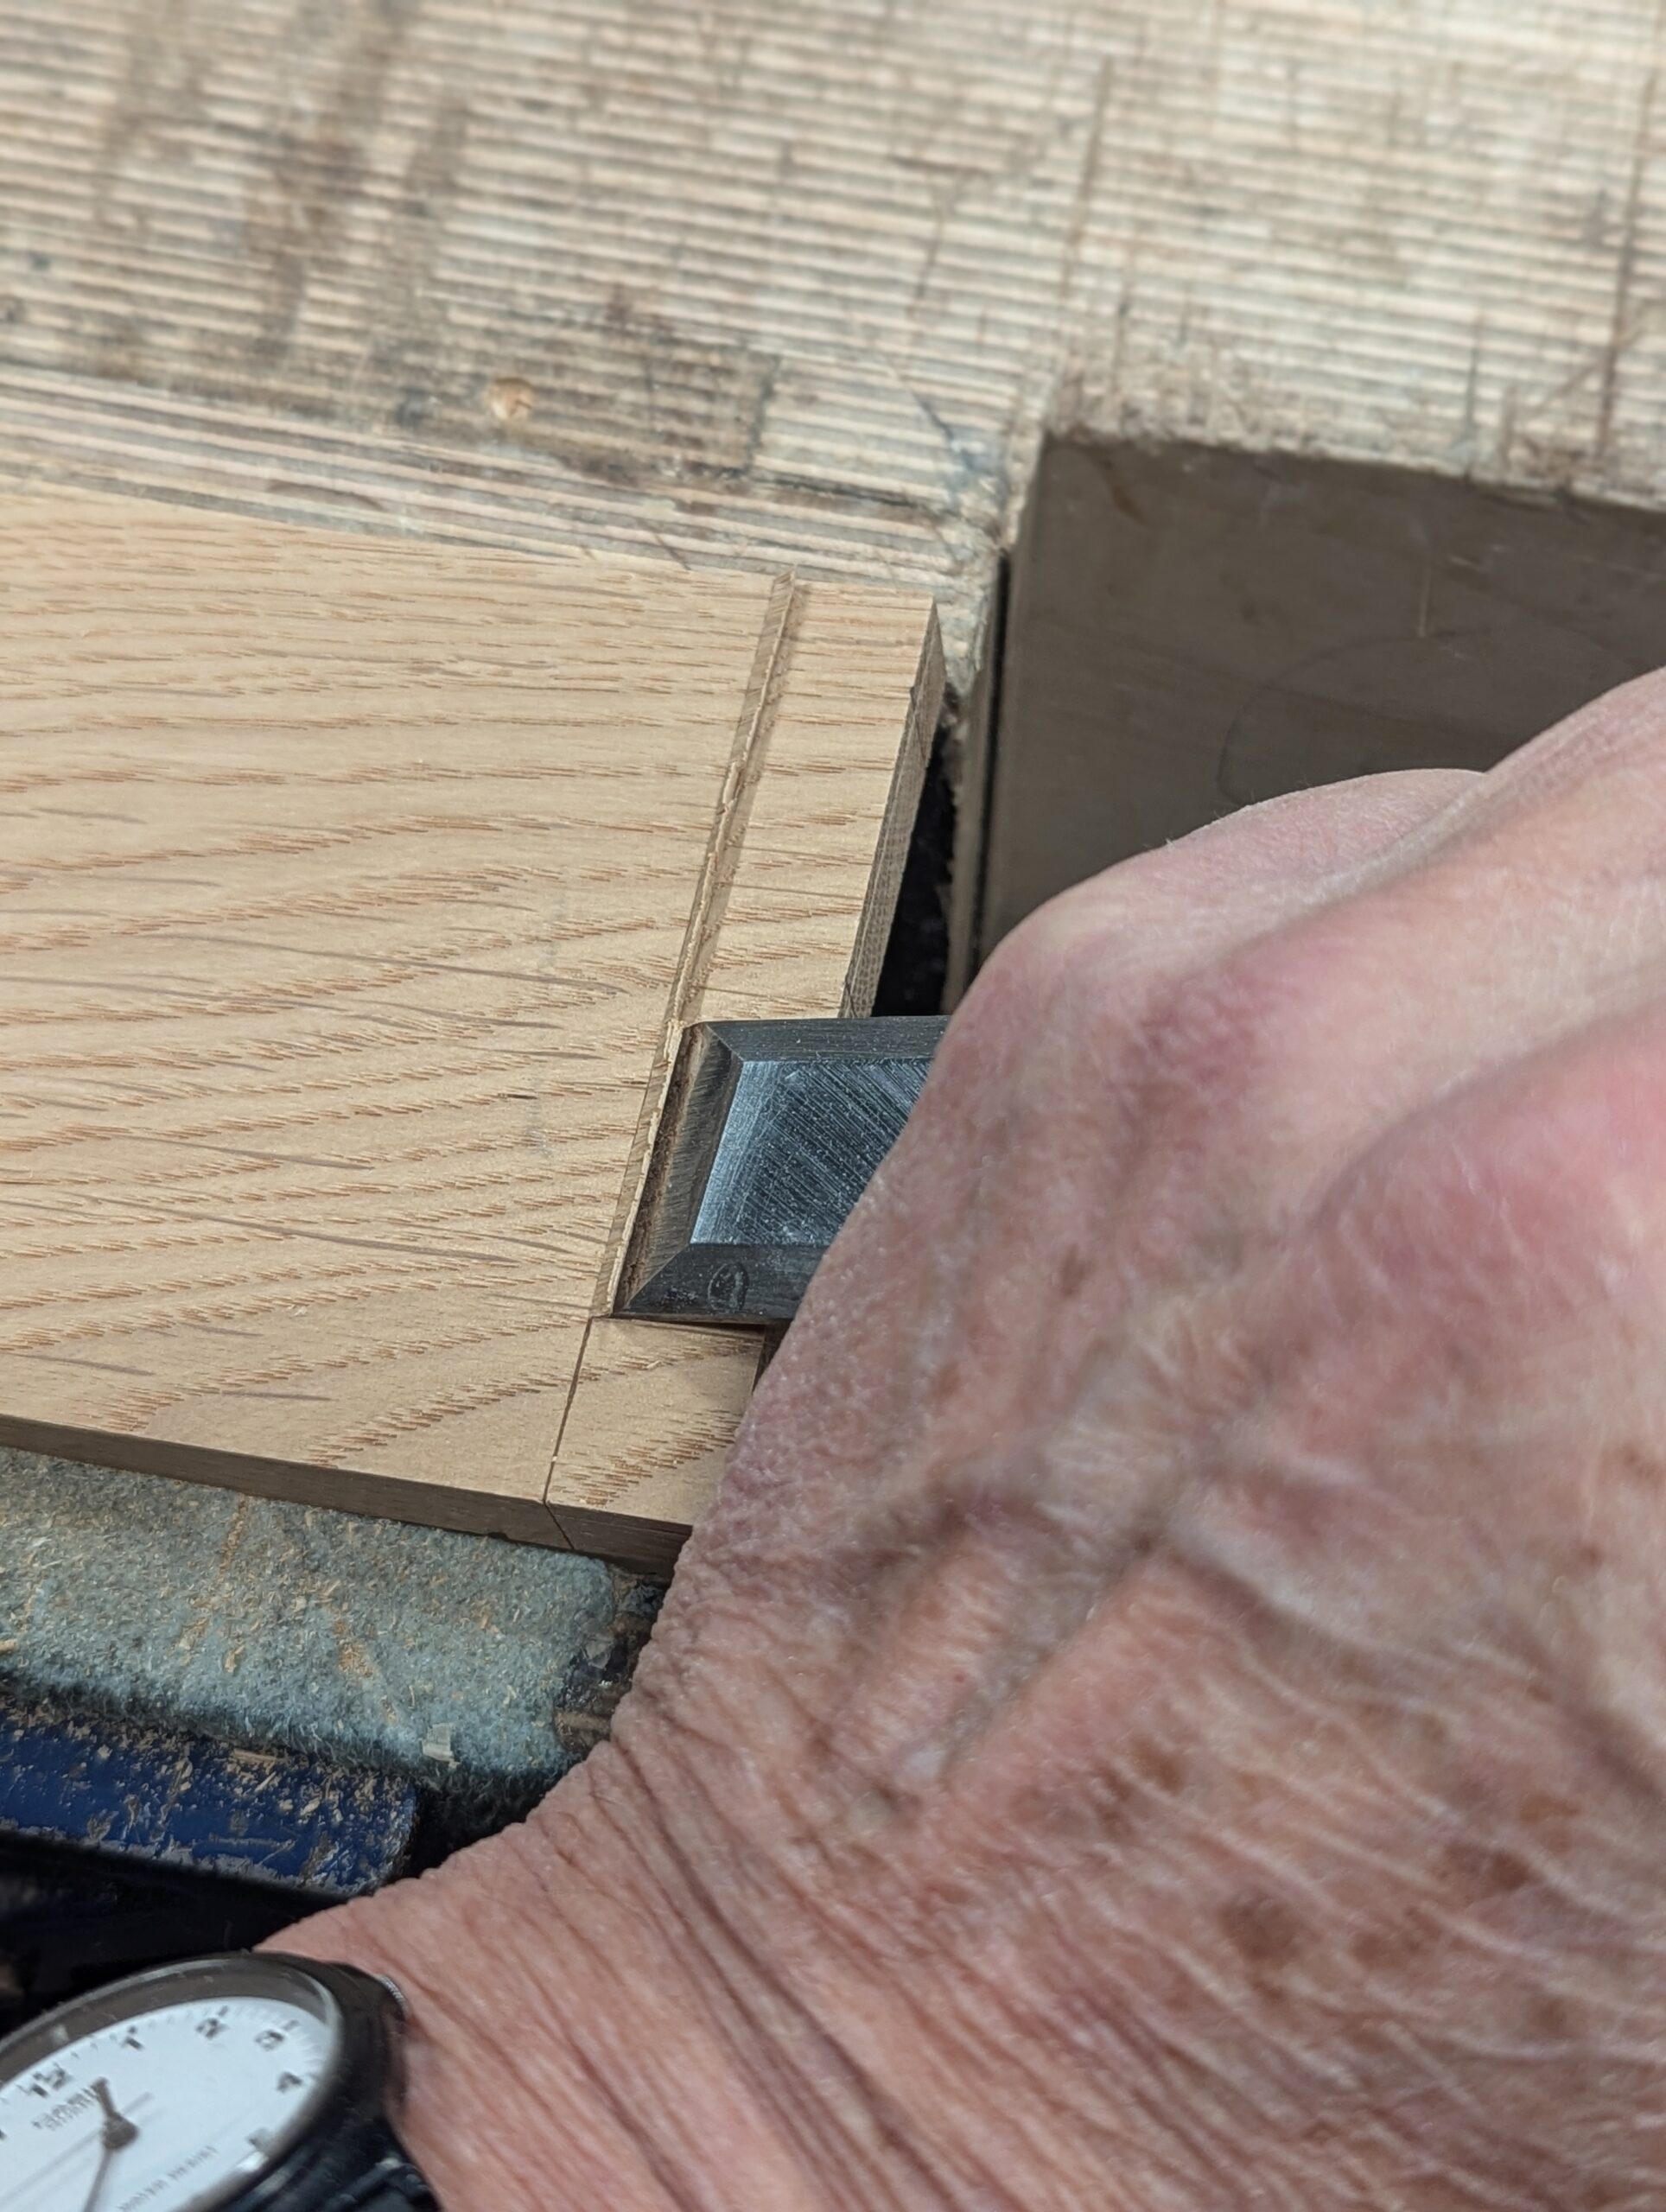

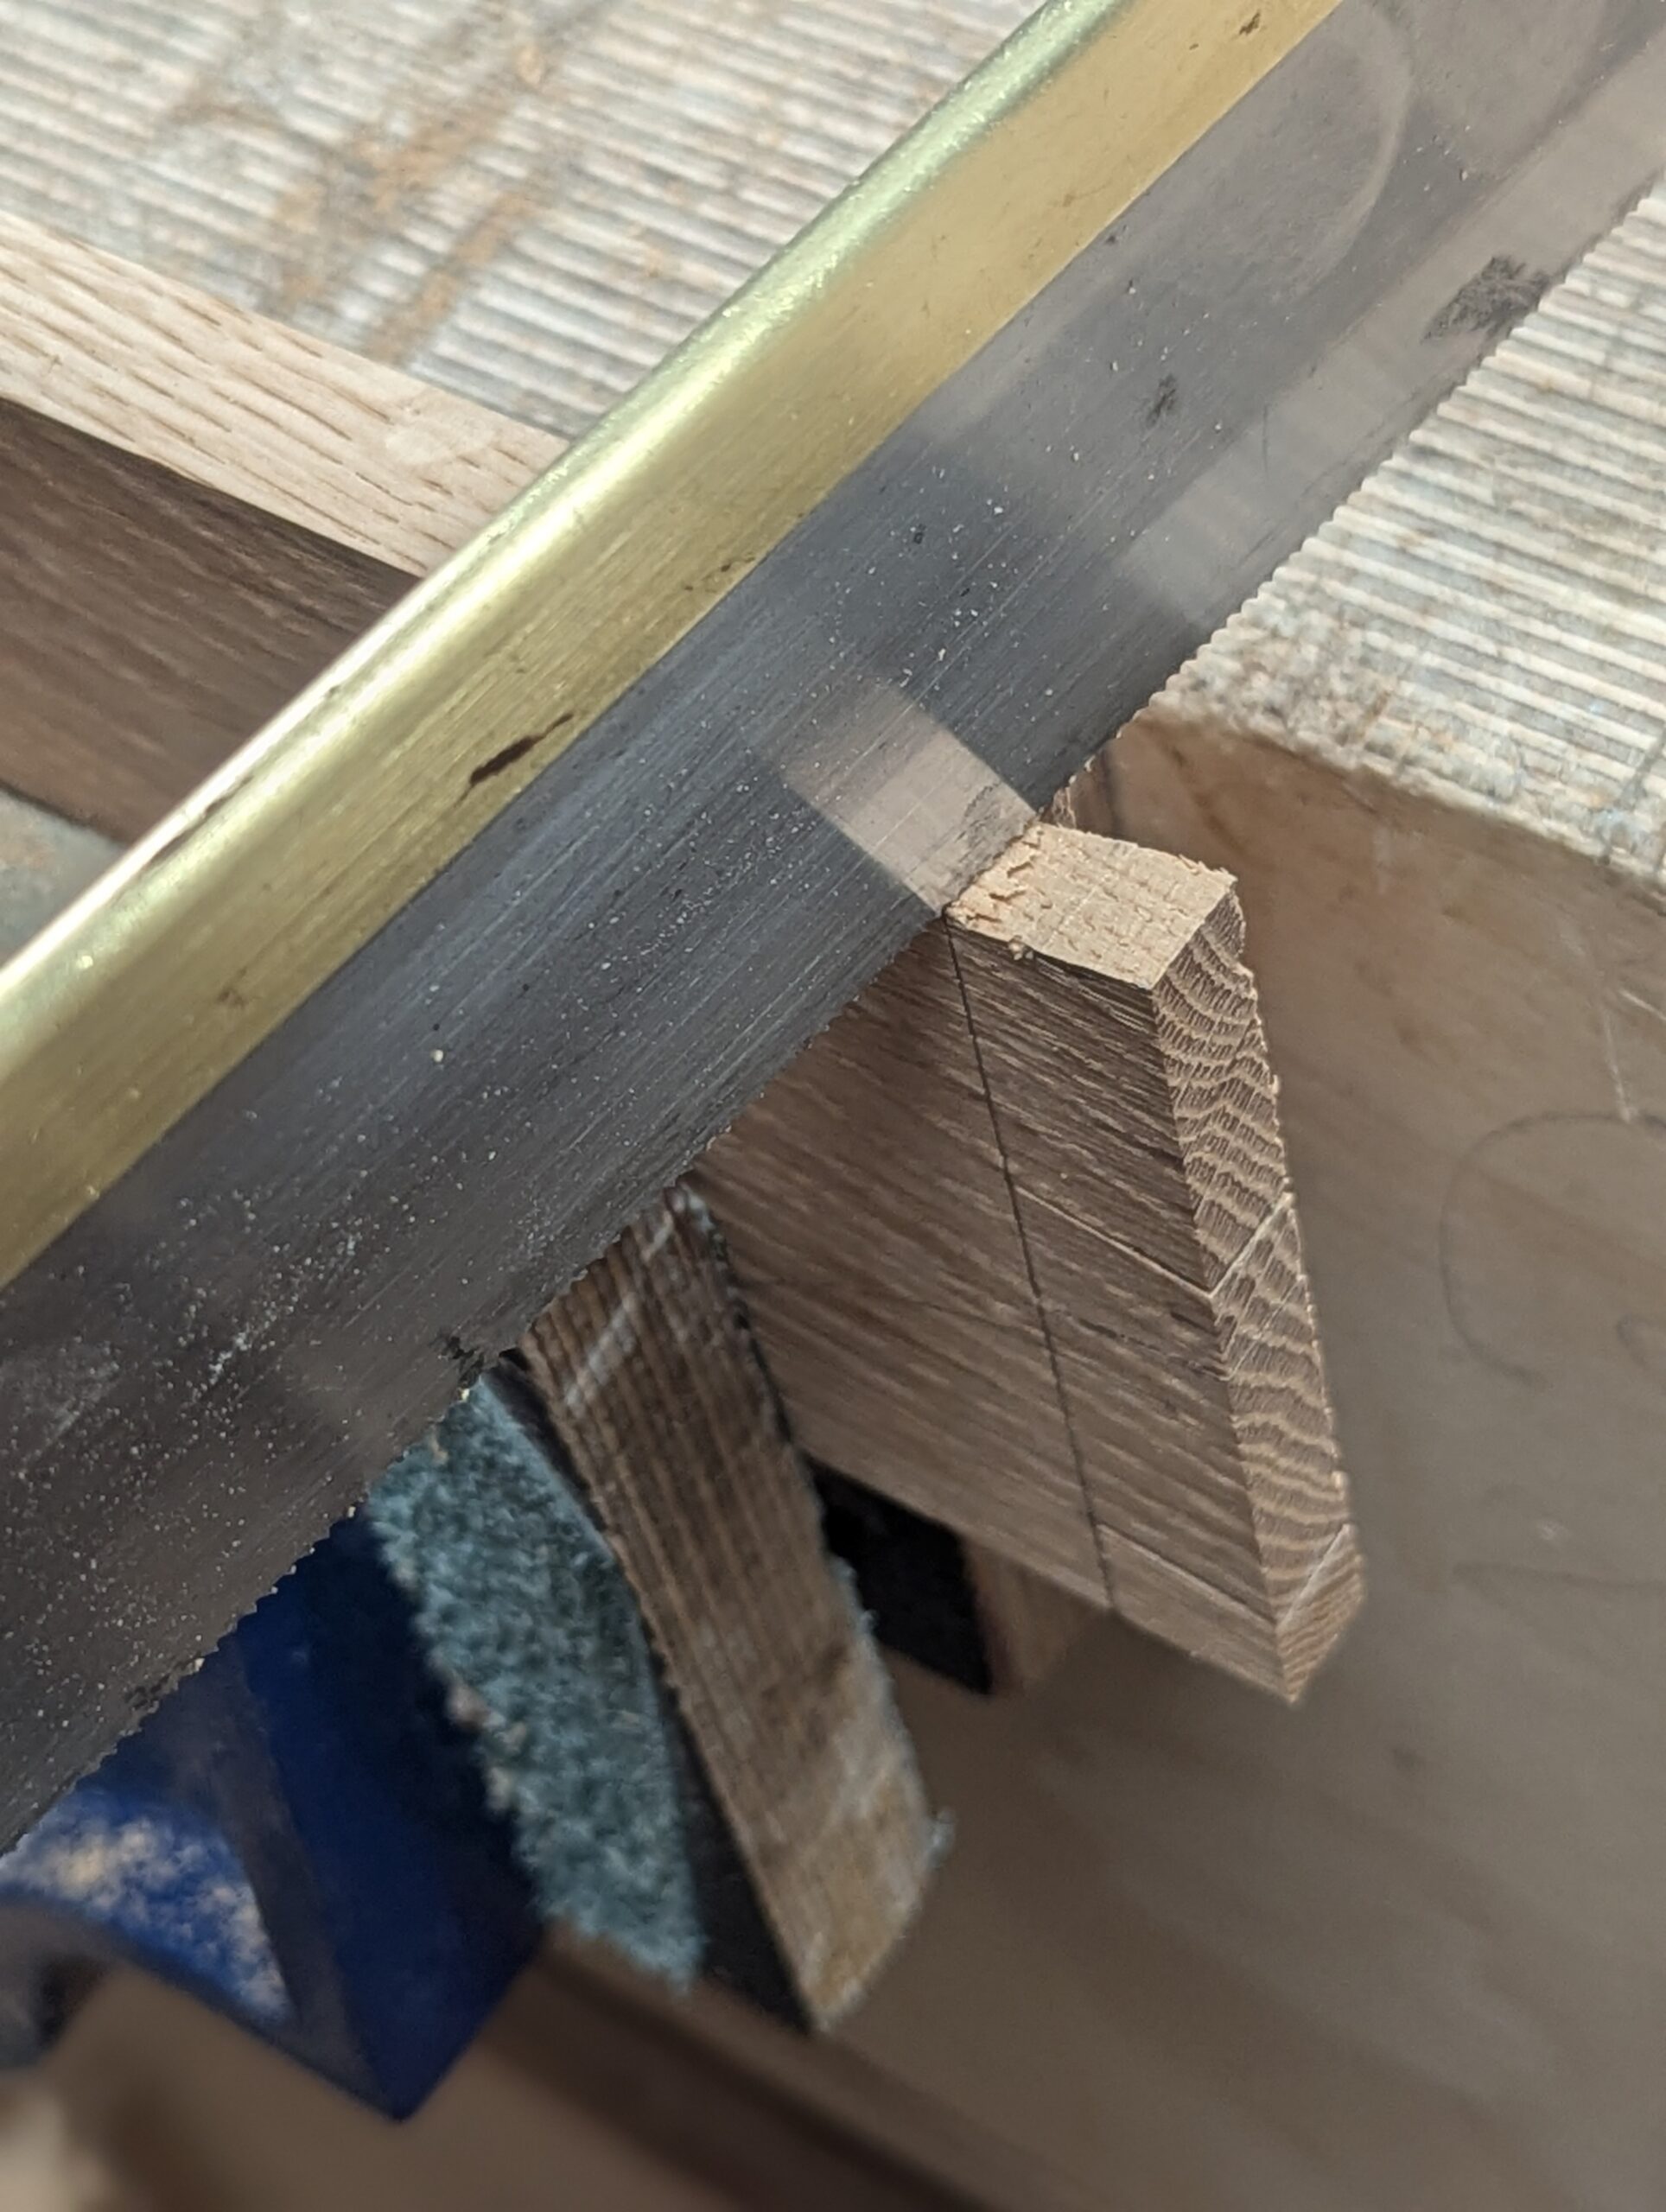
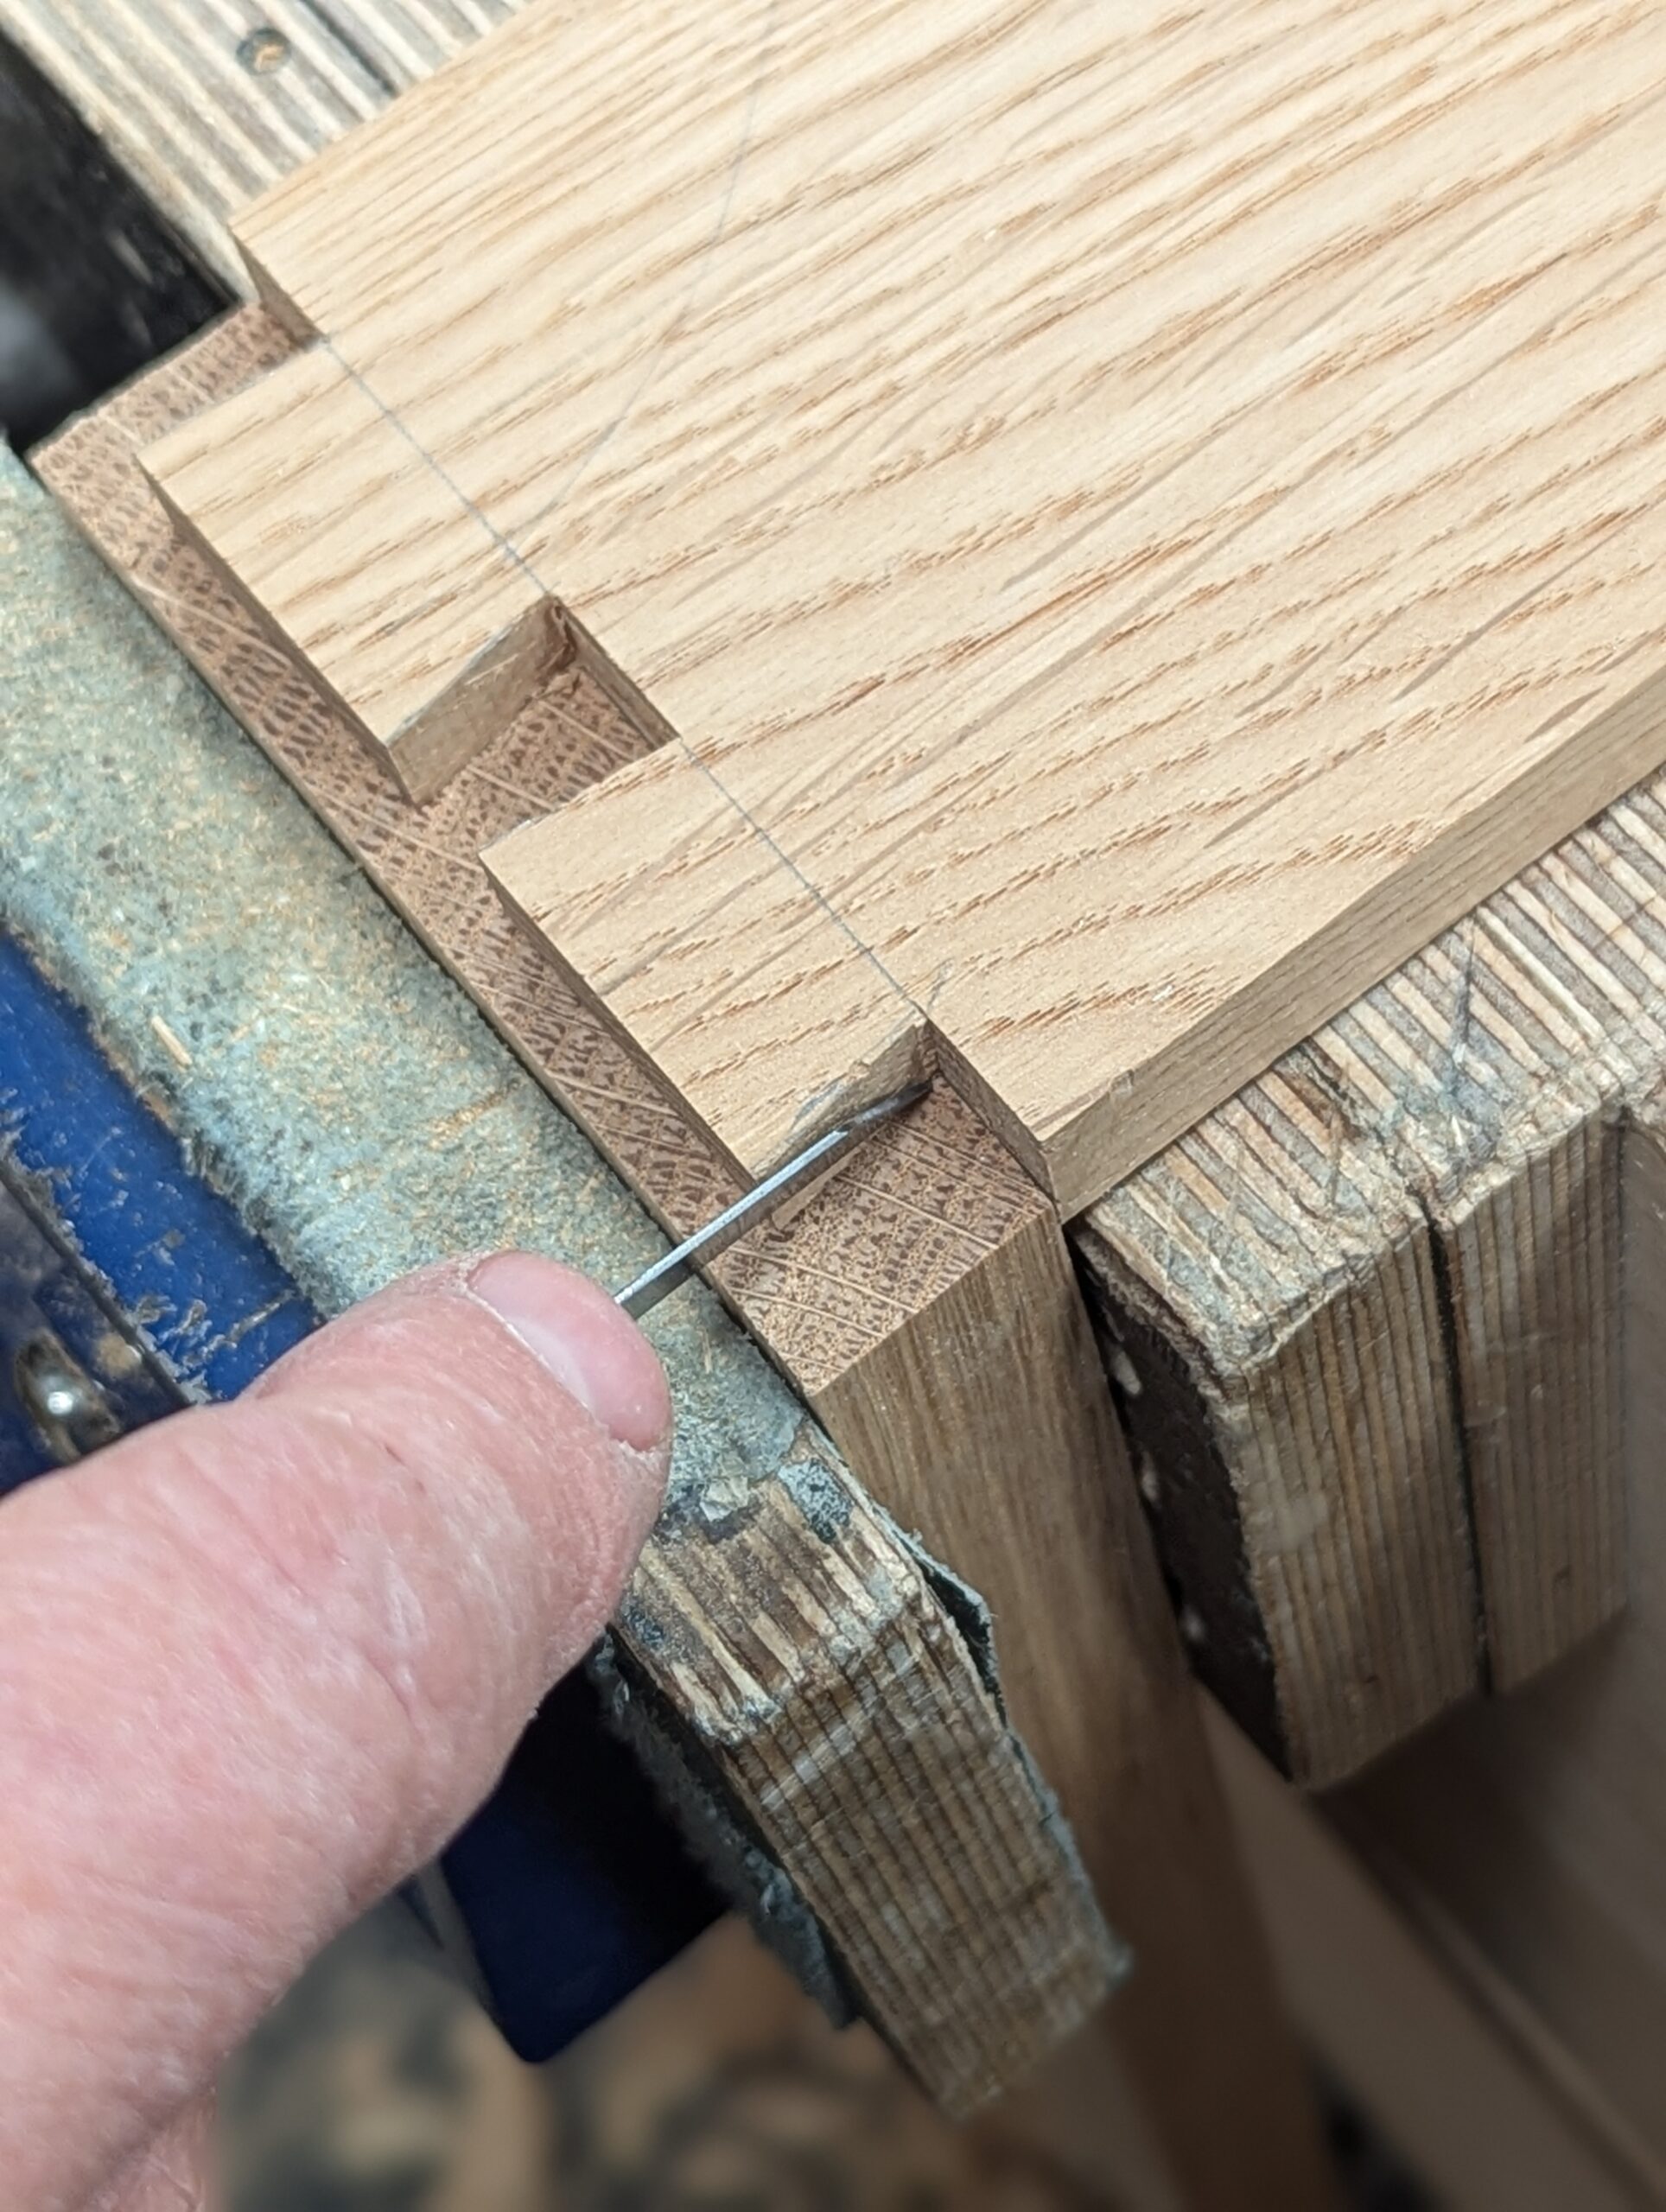
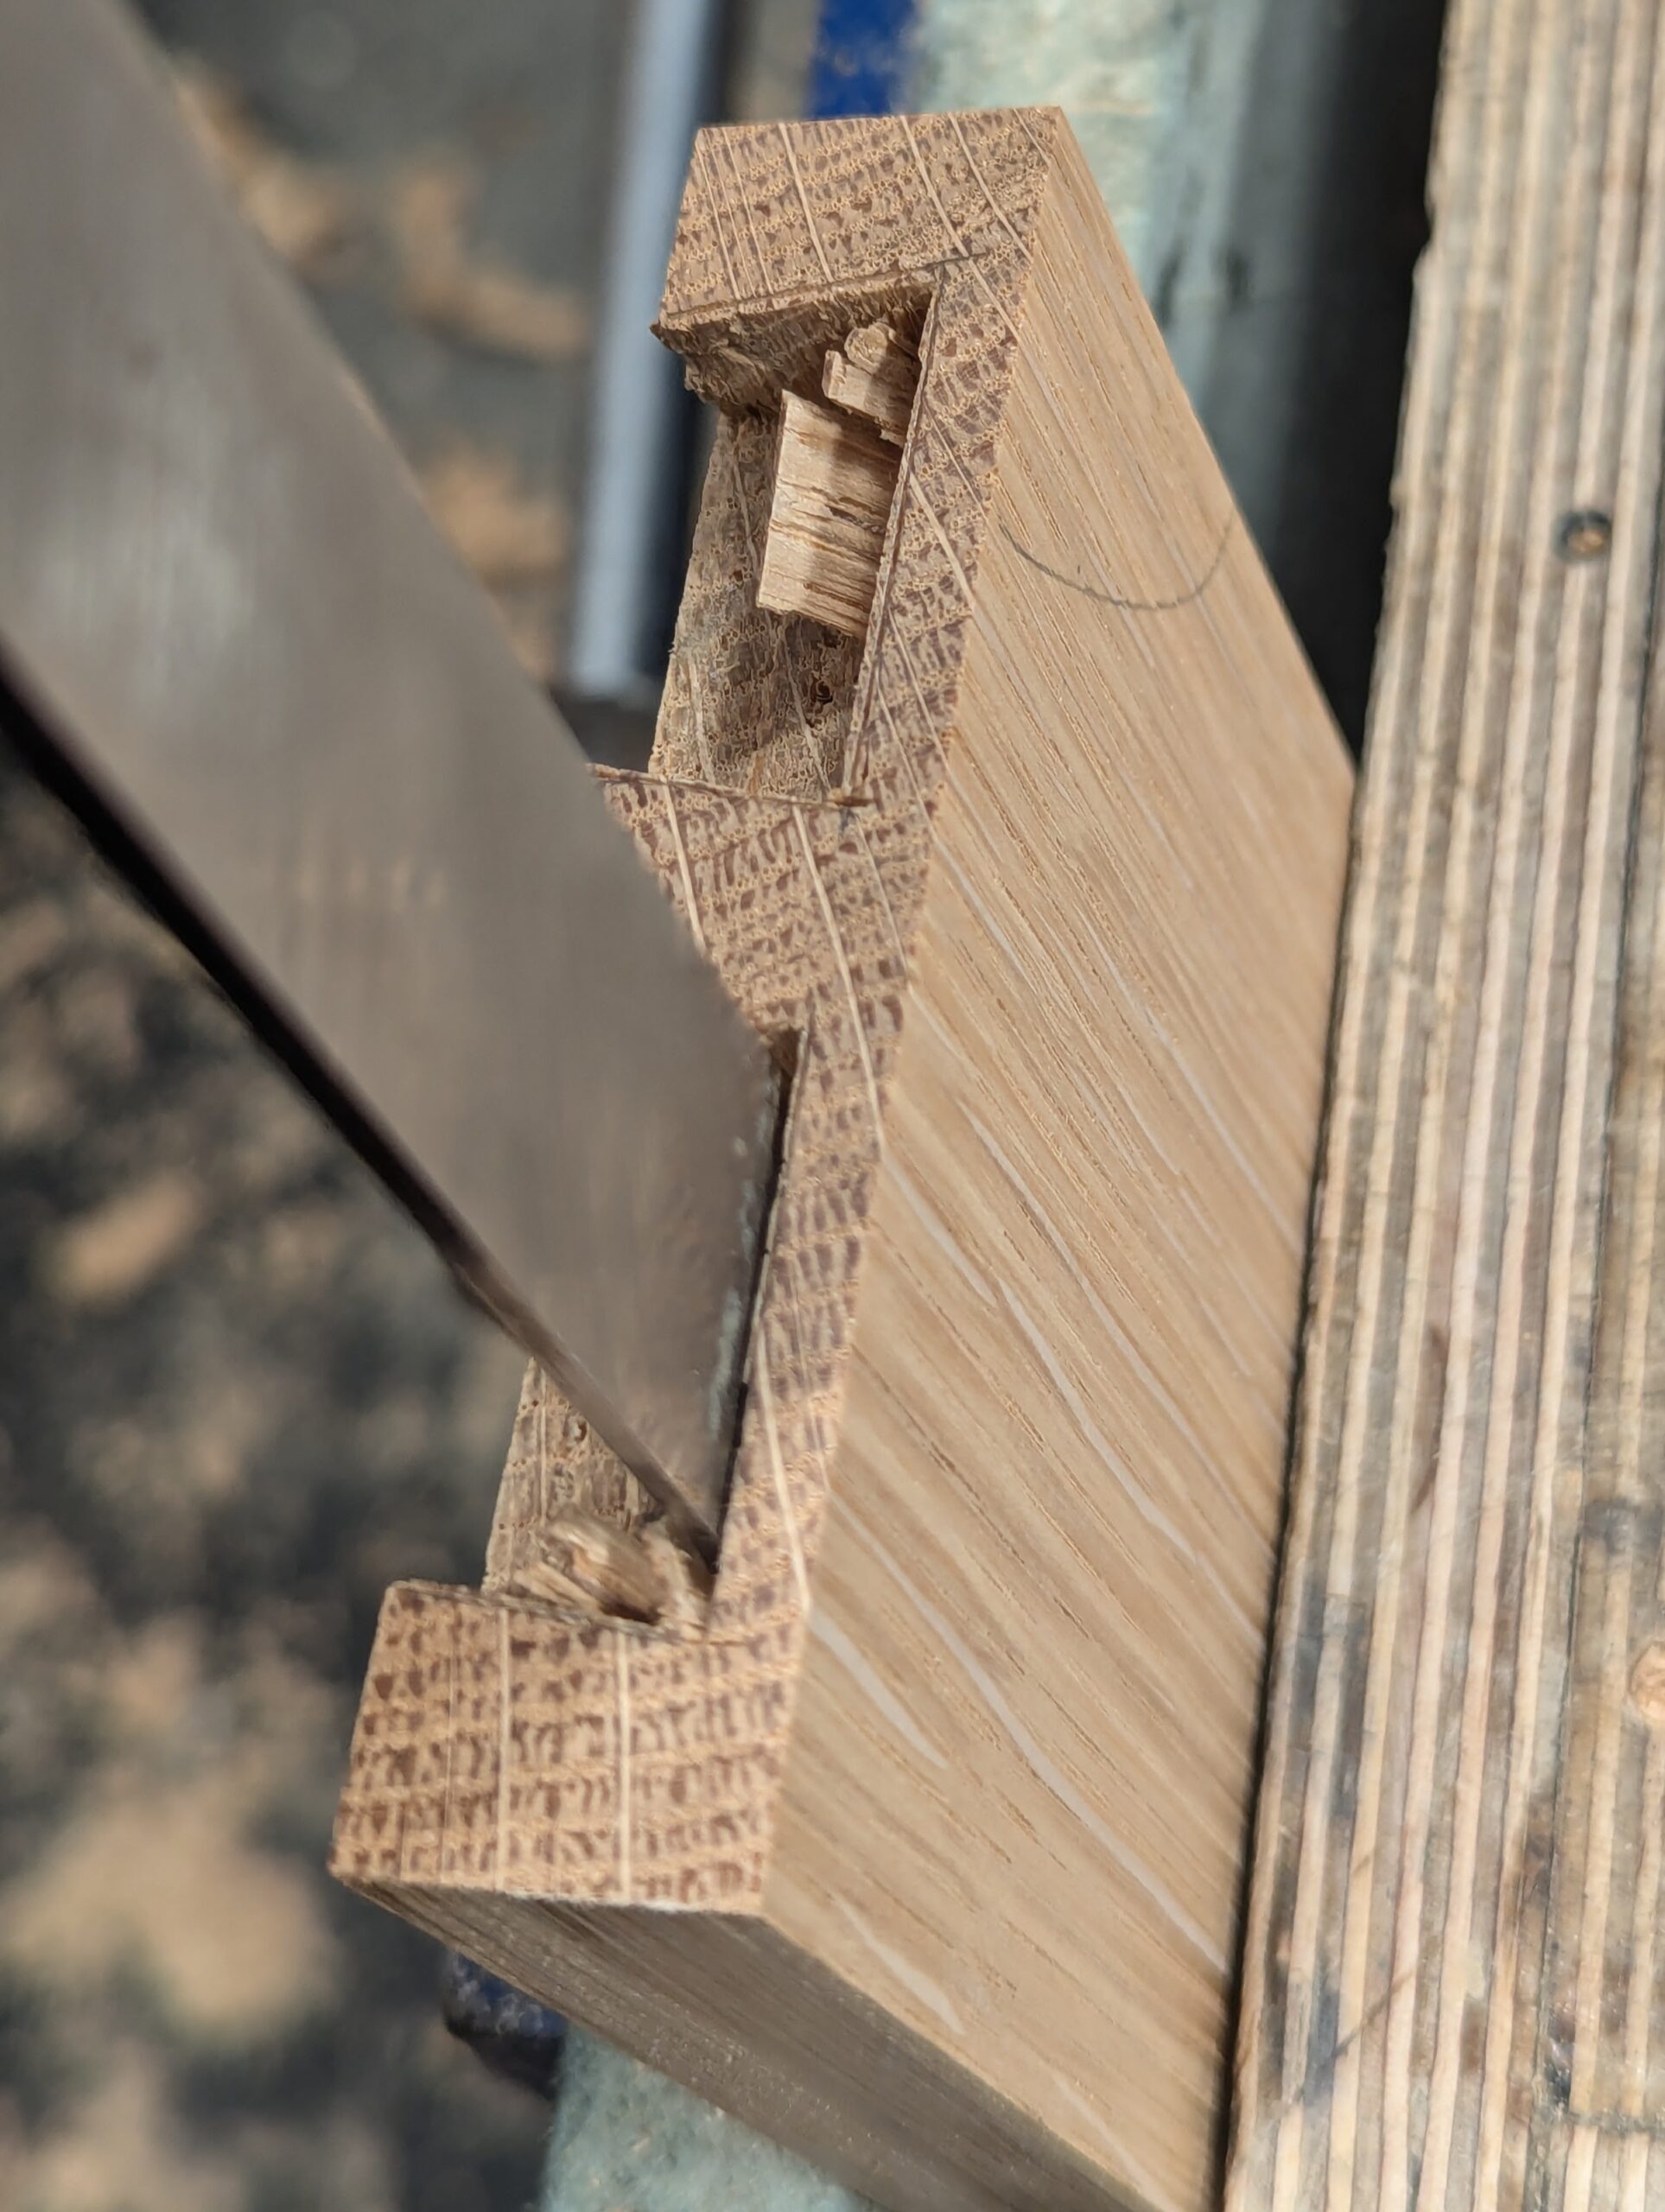
Chiselling into the knifewall at a low angle gives me a slight step down to set my saw into and against the knifewall.
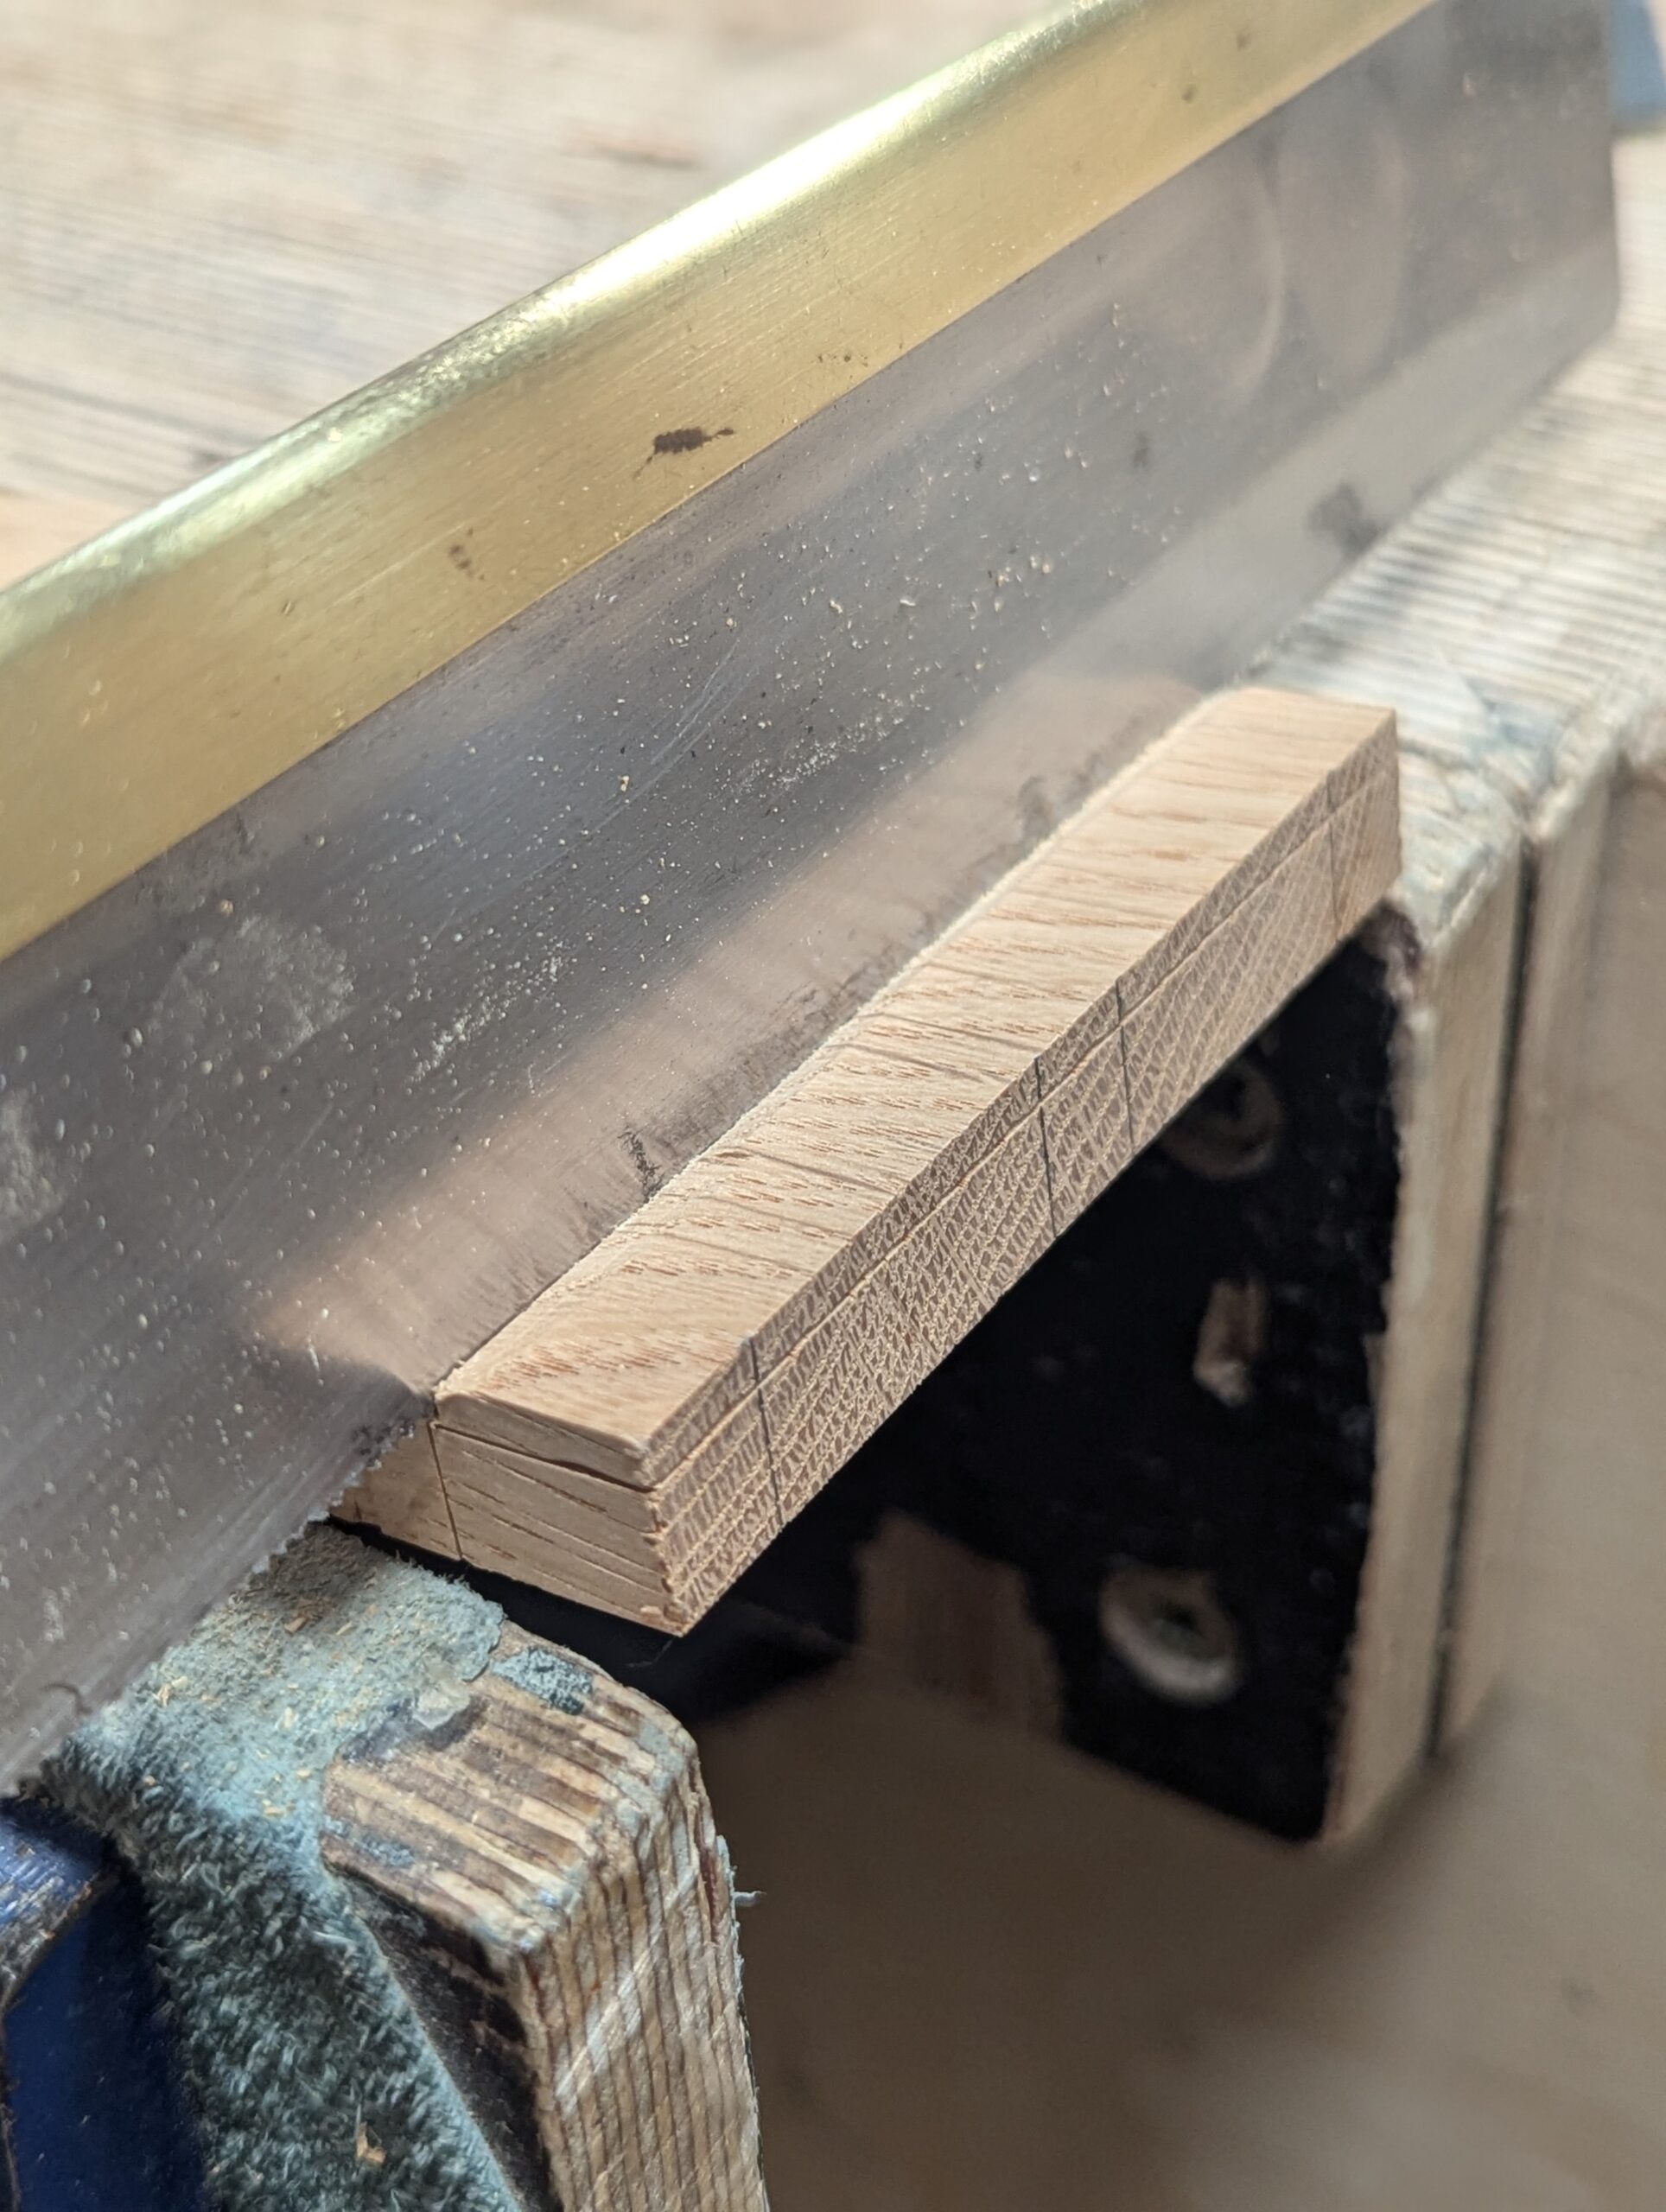
In saw down to the depth line, staying slightly above.
You can split cut the bulk of the waste or saw down to meet the previous cut. I split cut the bulk of the waste in two depth stages and . . .
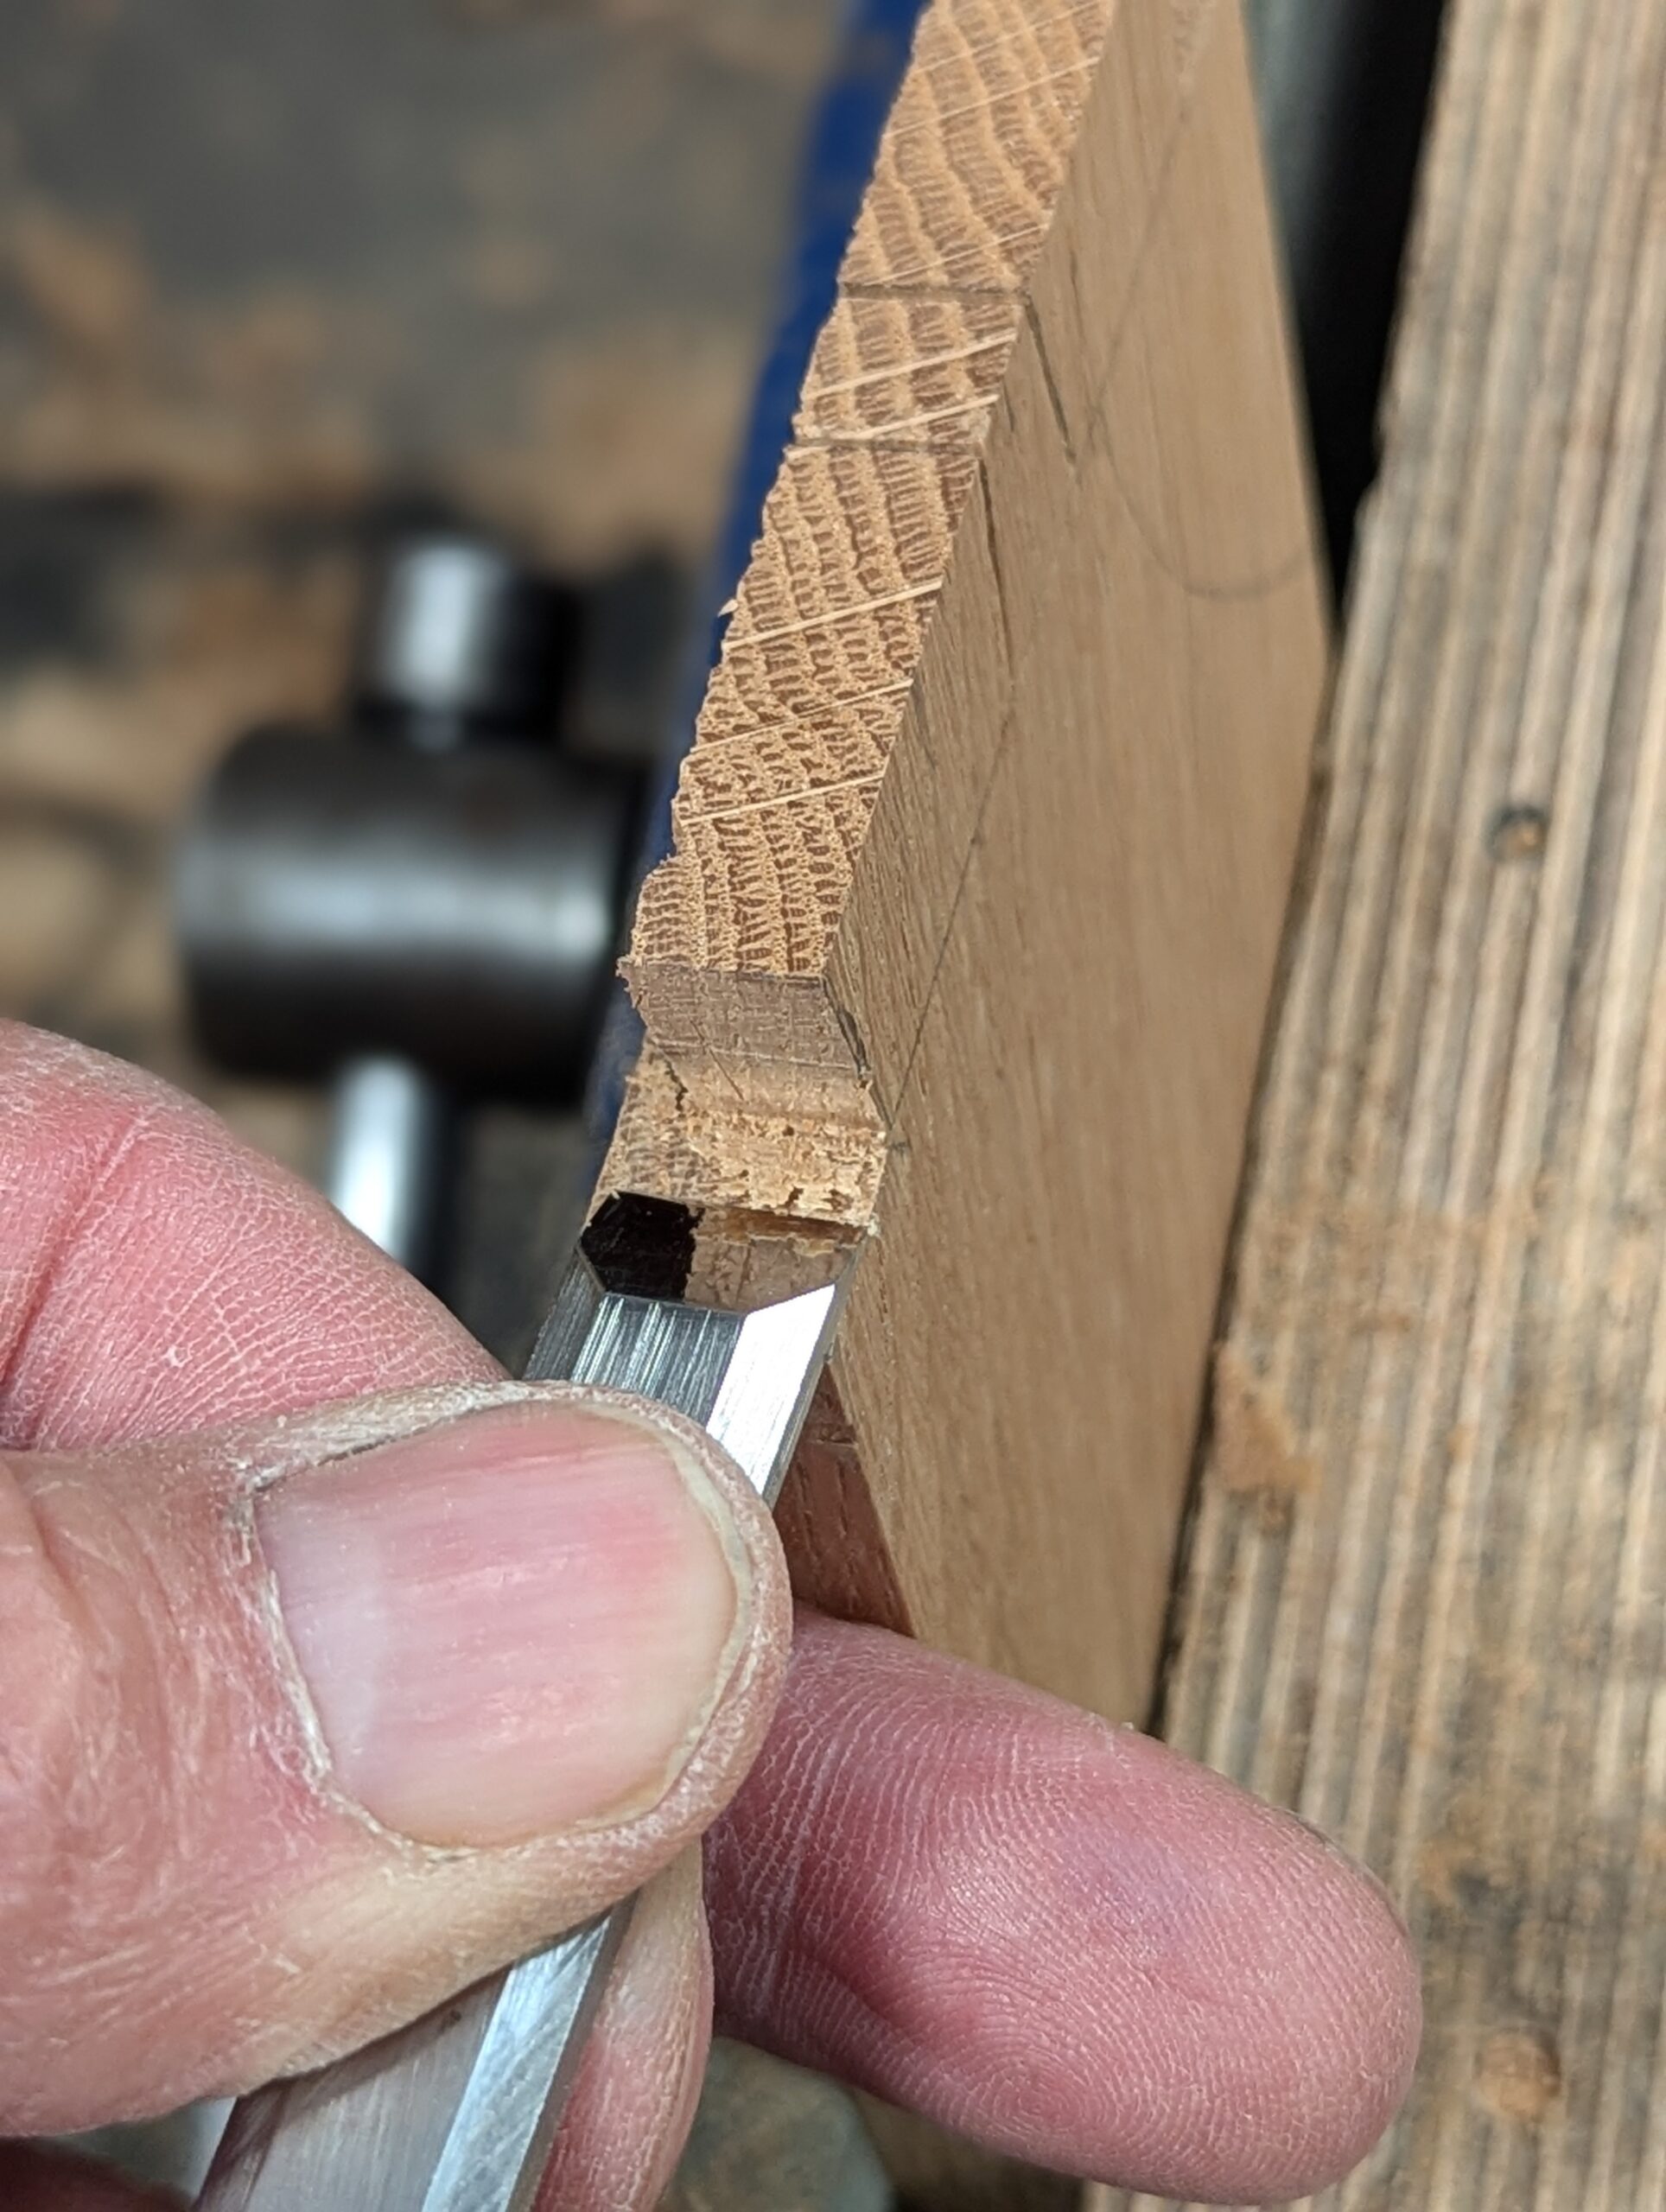
. . . Complete the refining cuts with the router plane.

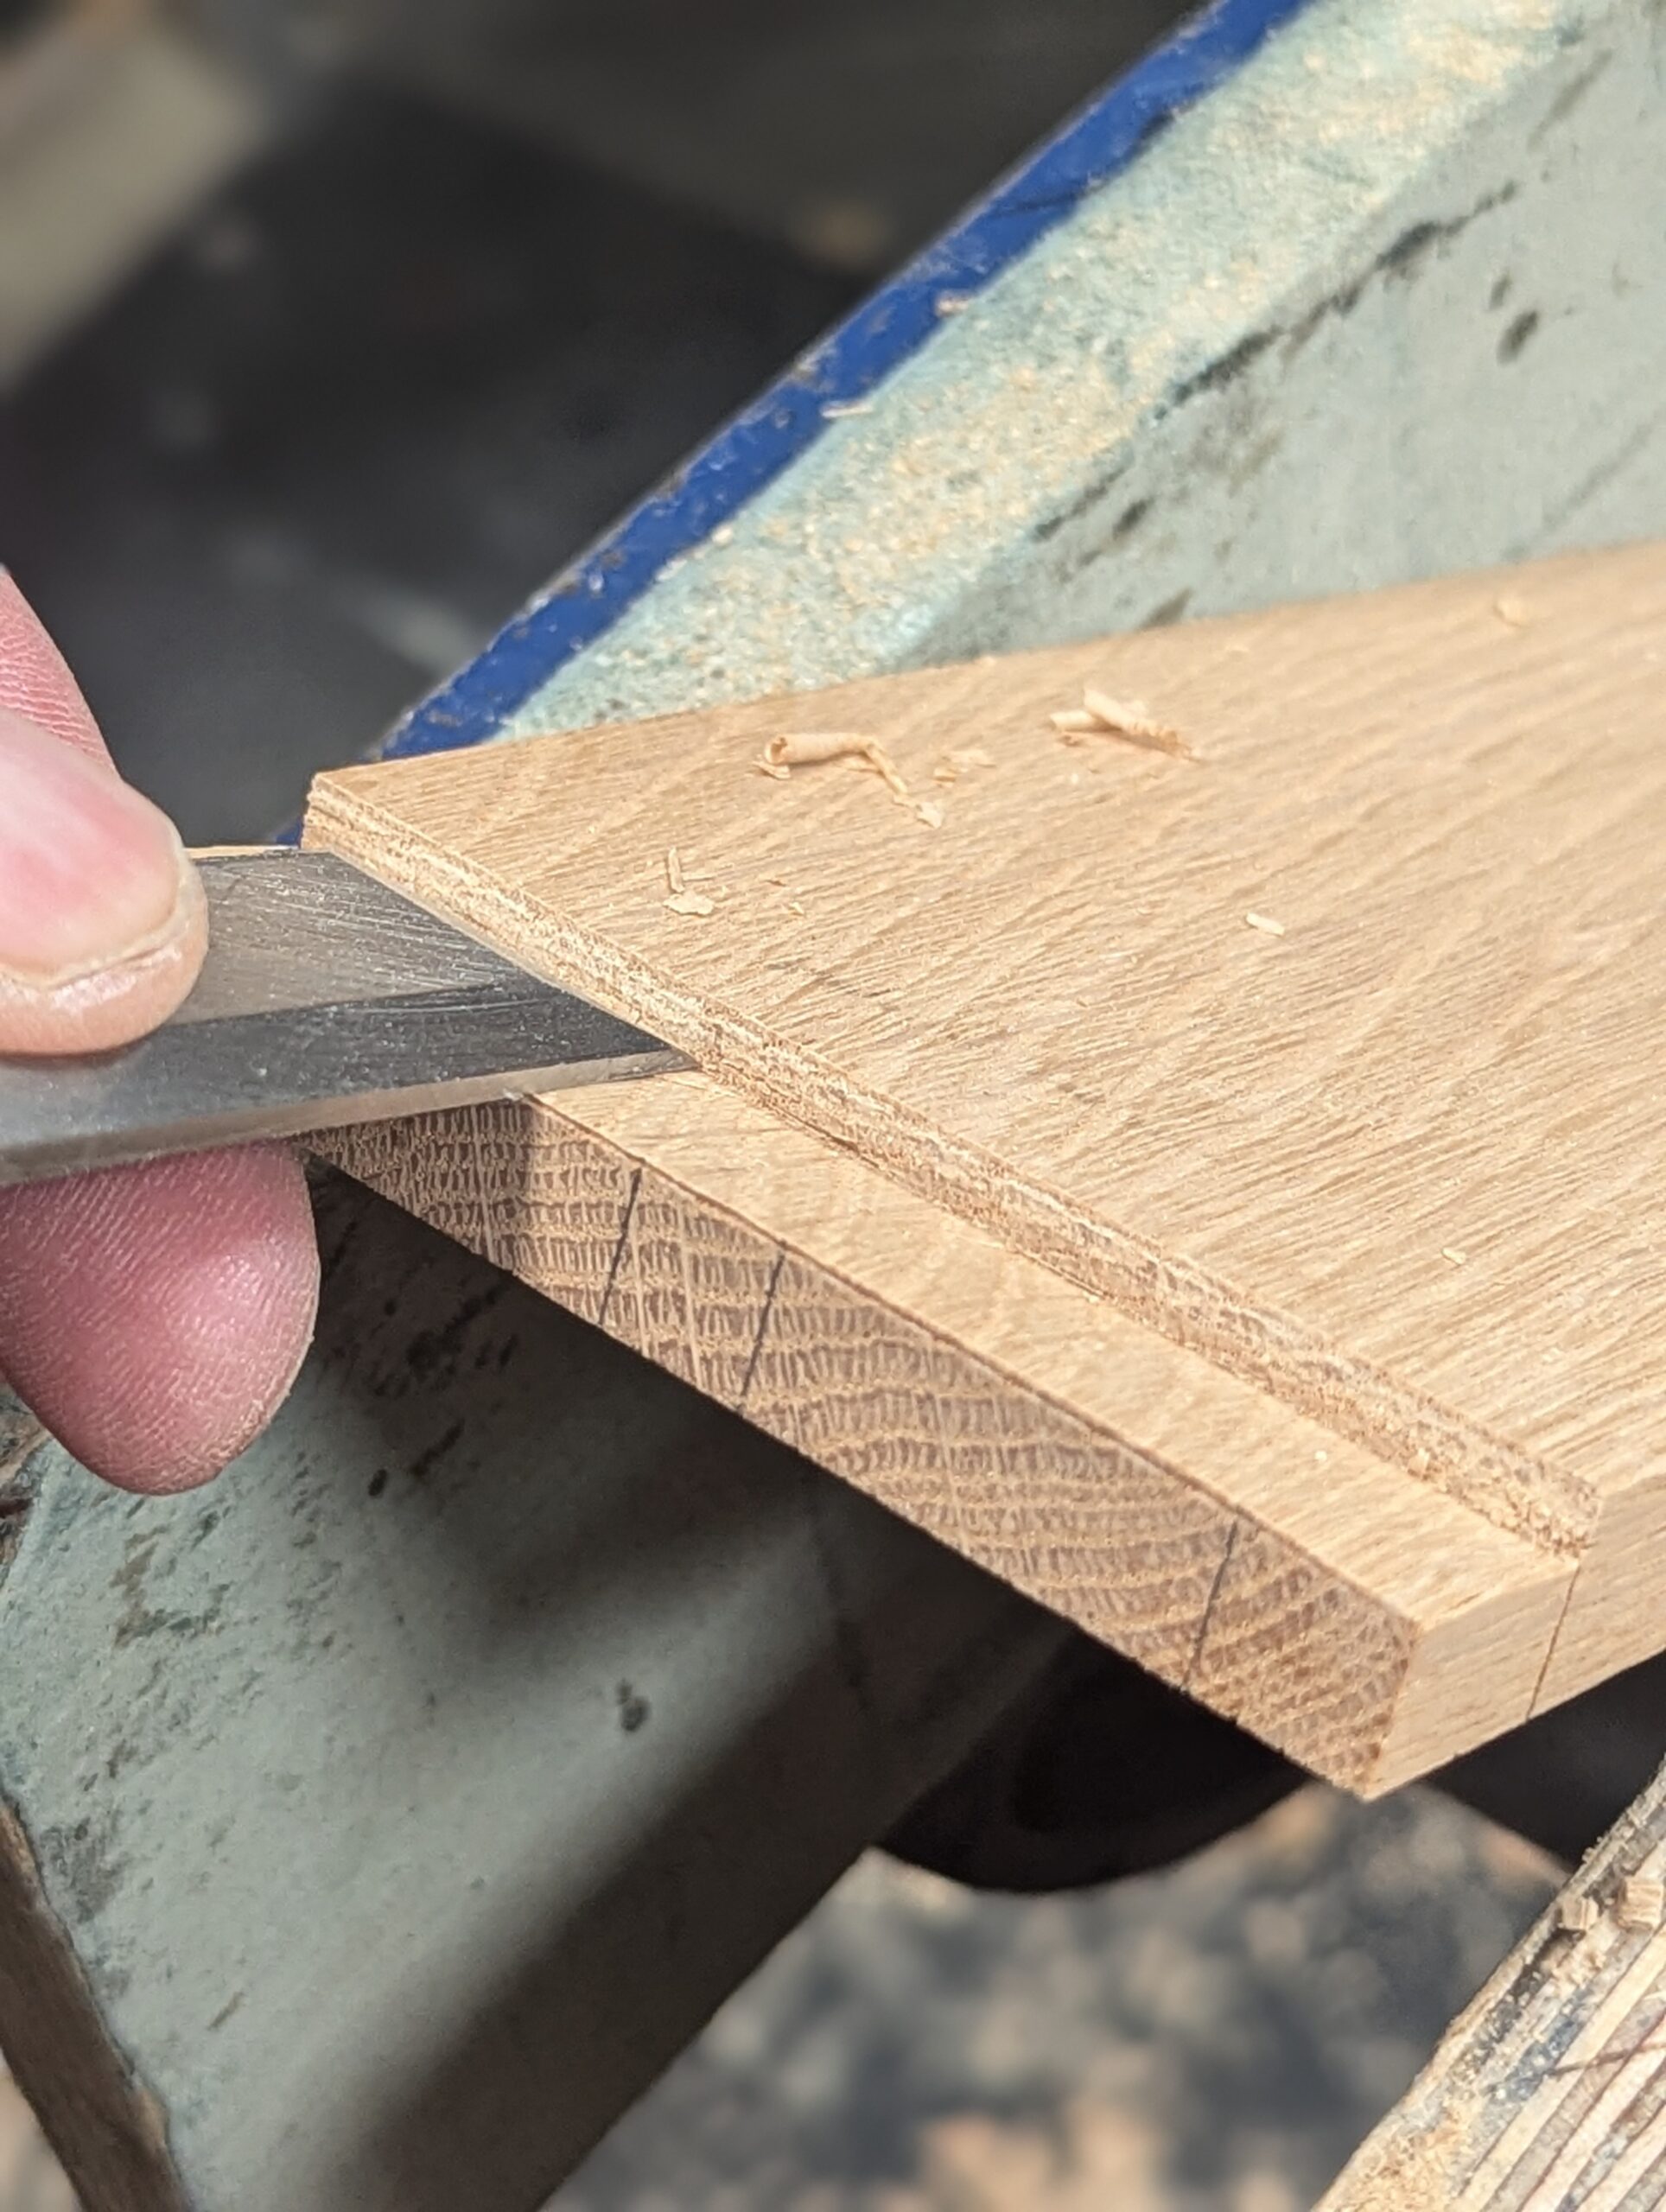
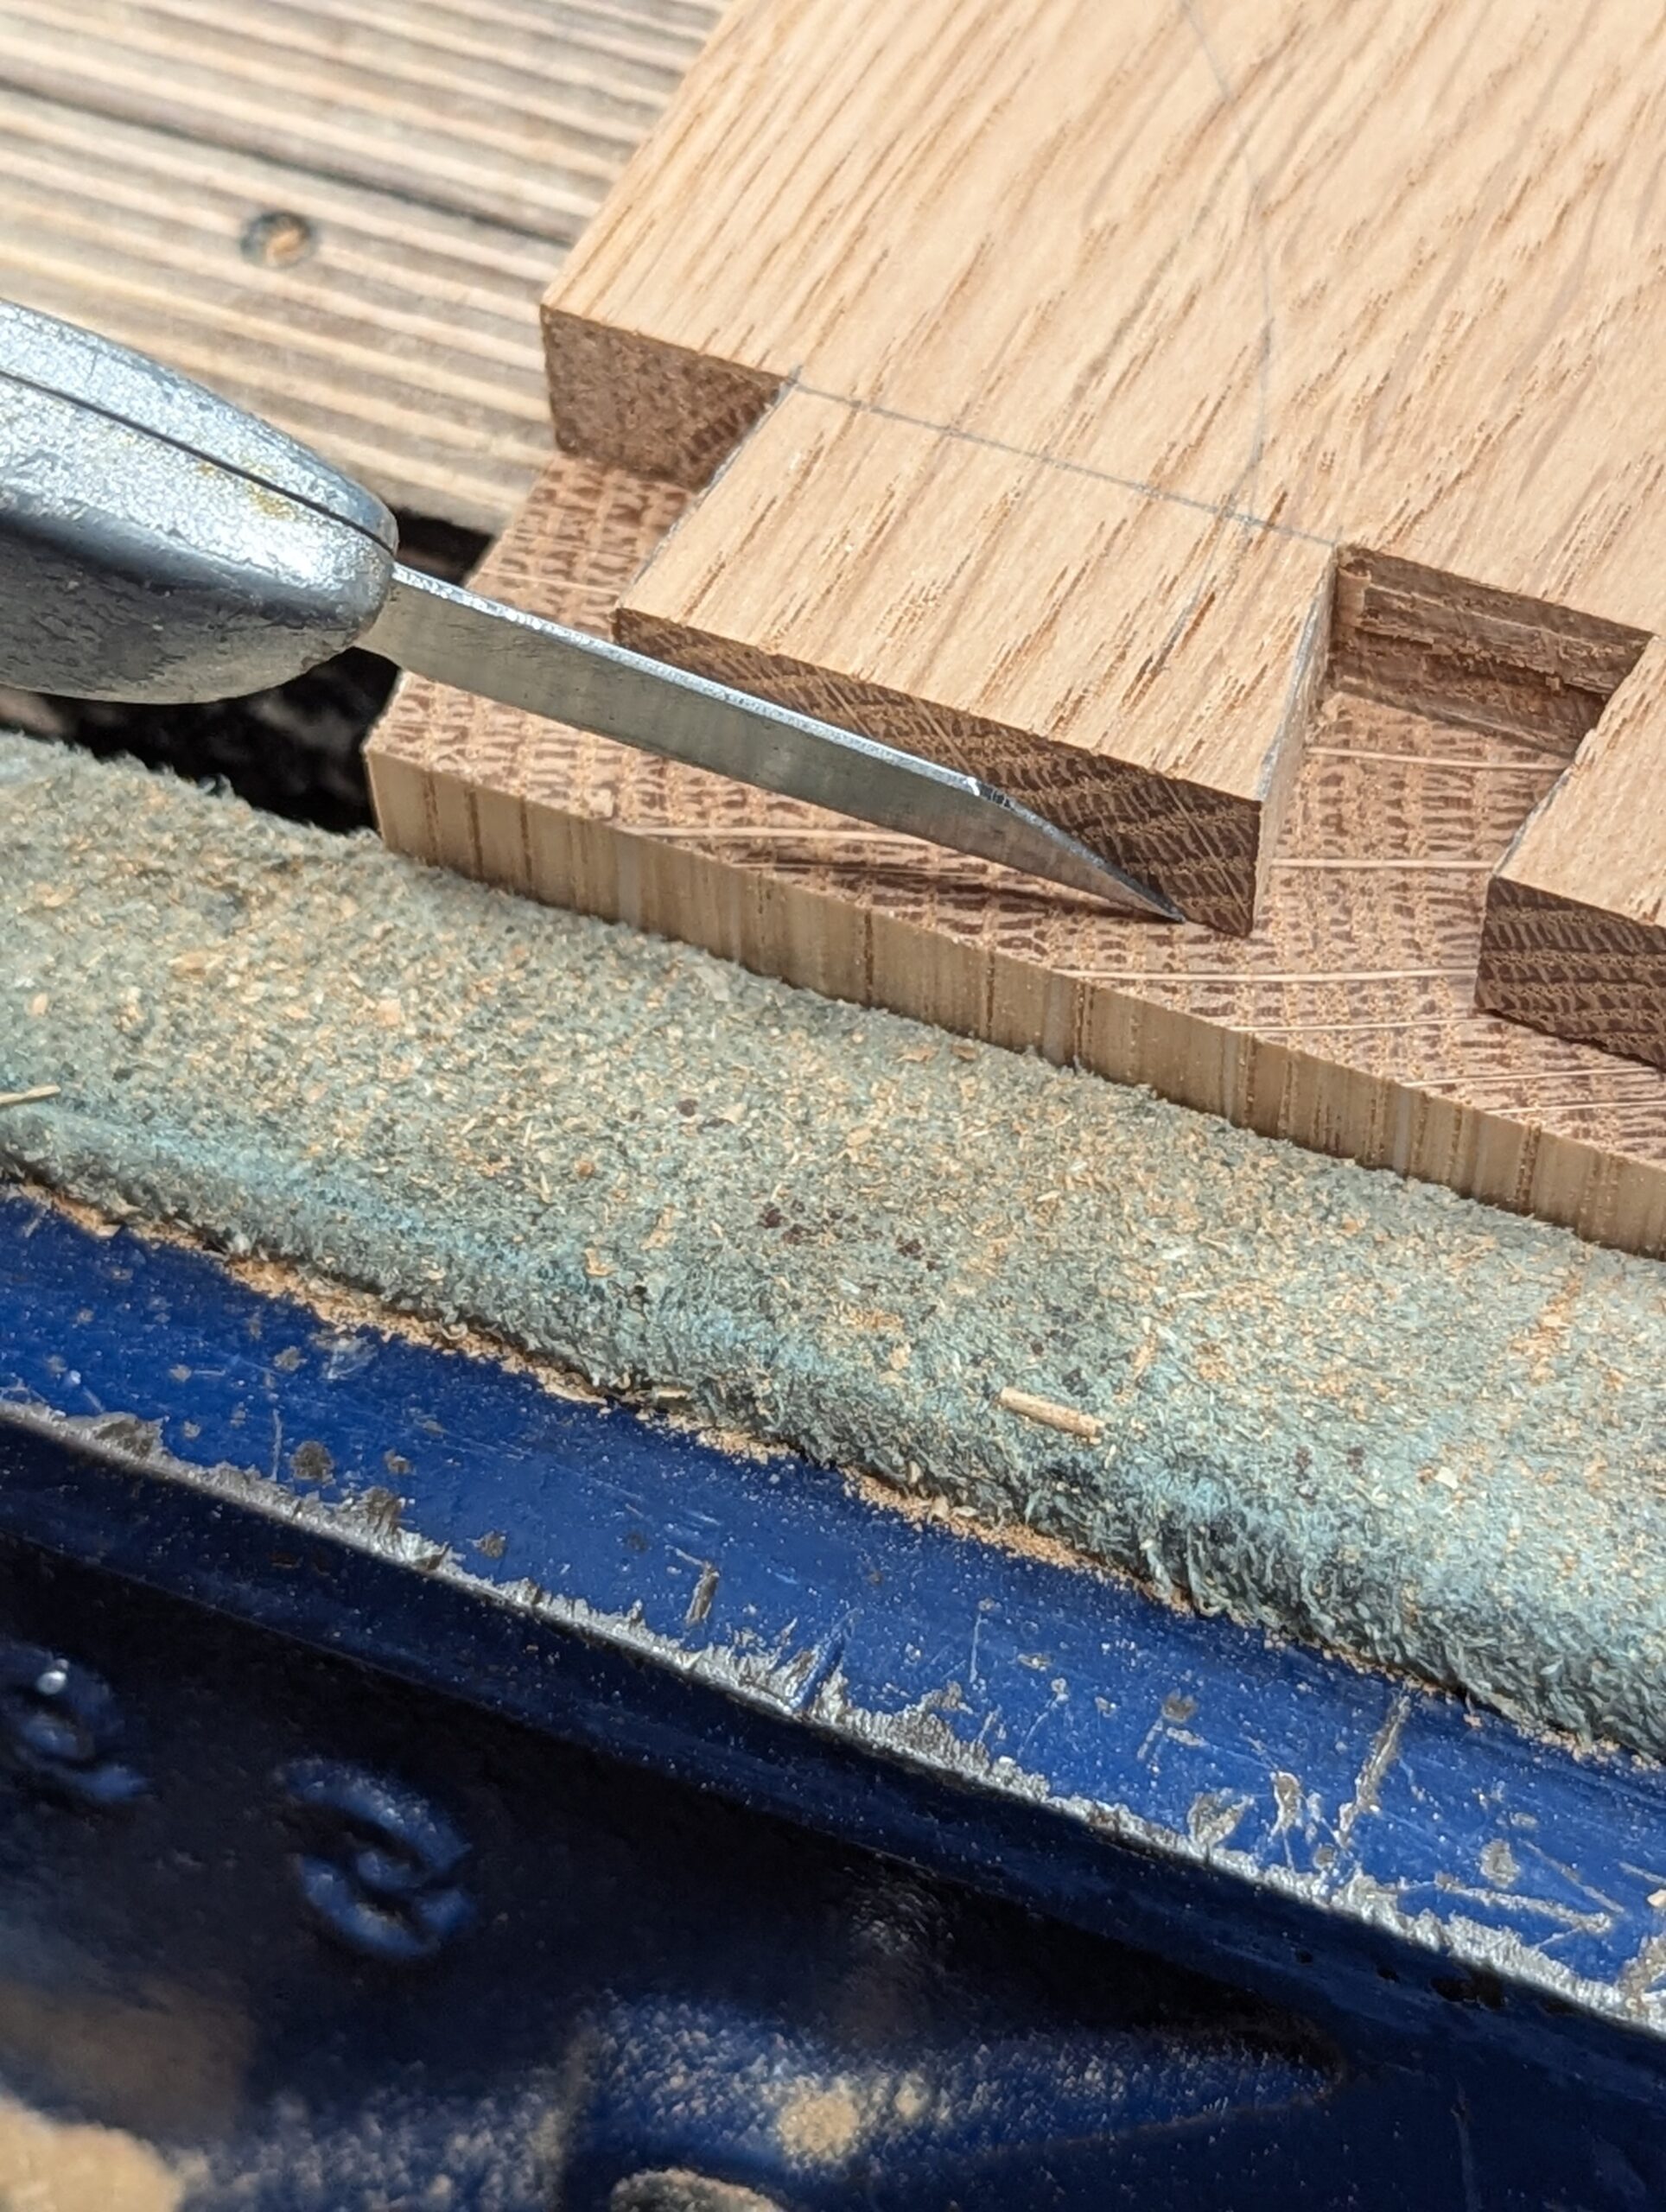
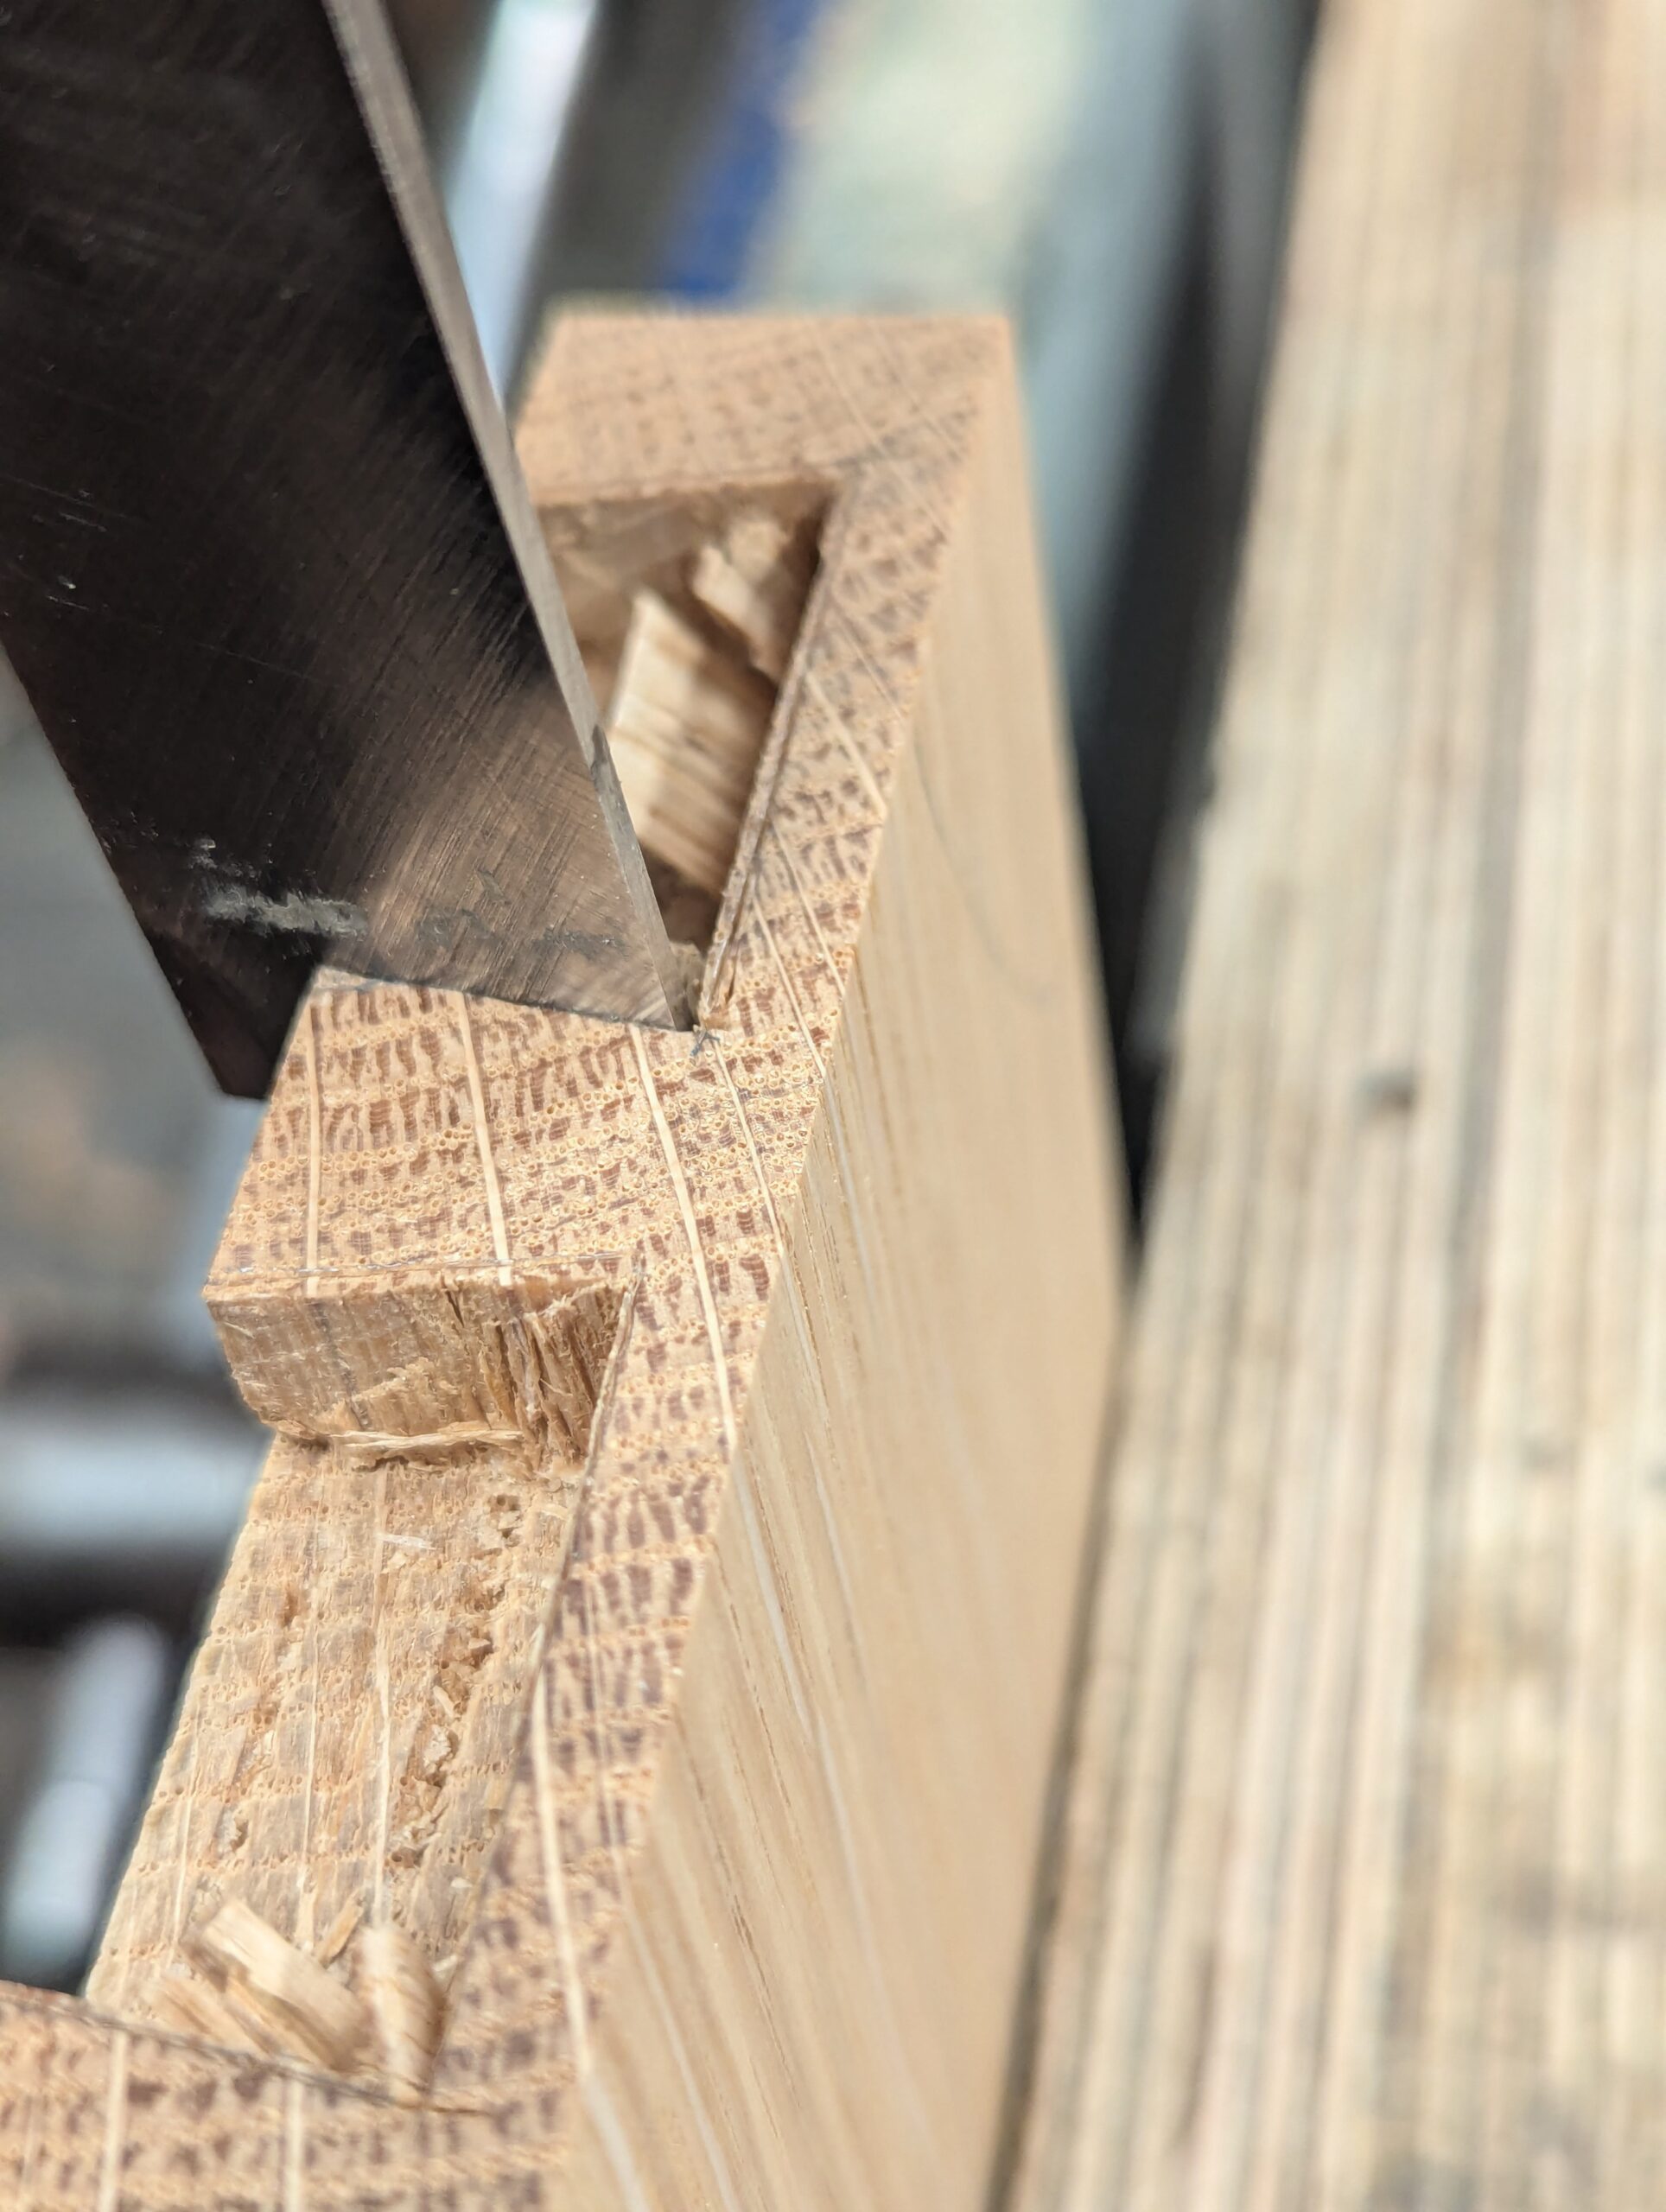
Use a paring cut to refine the end grain on the new shoulder.
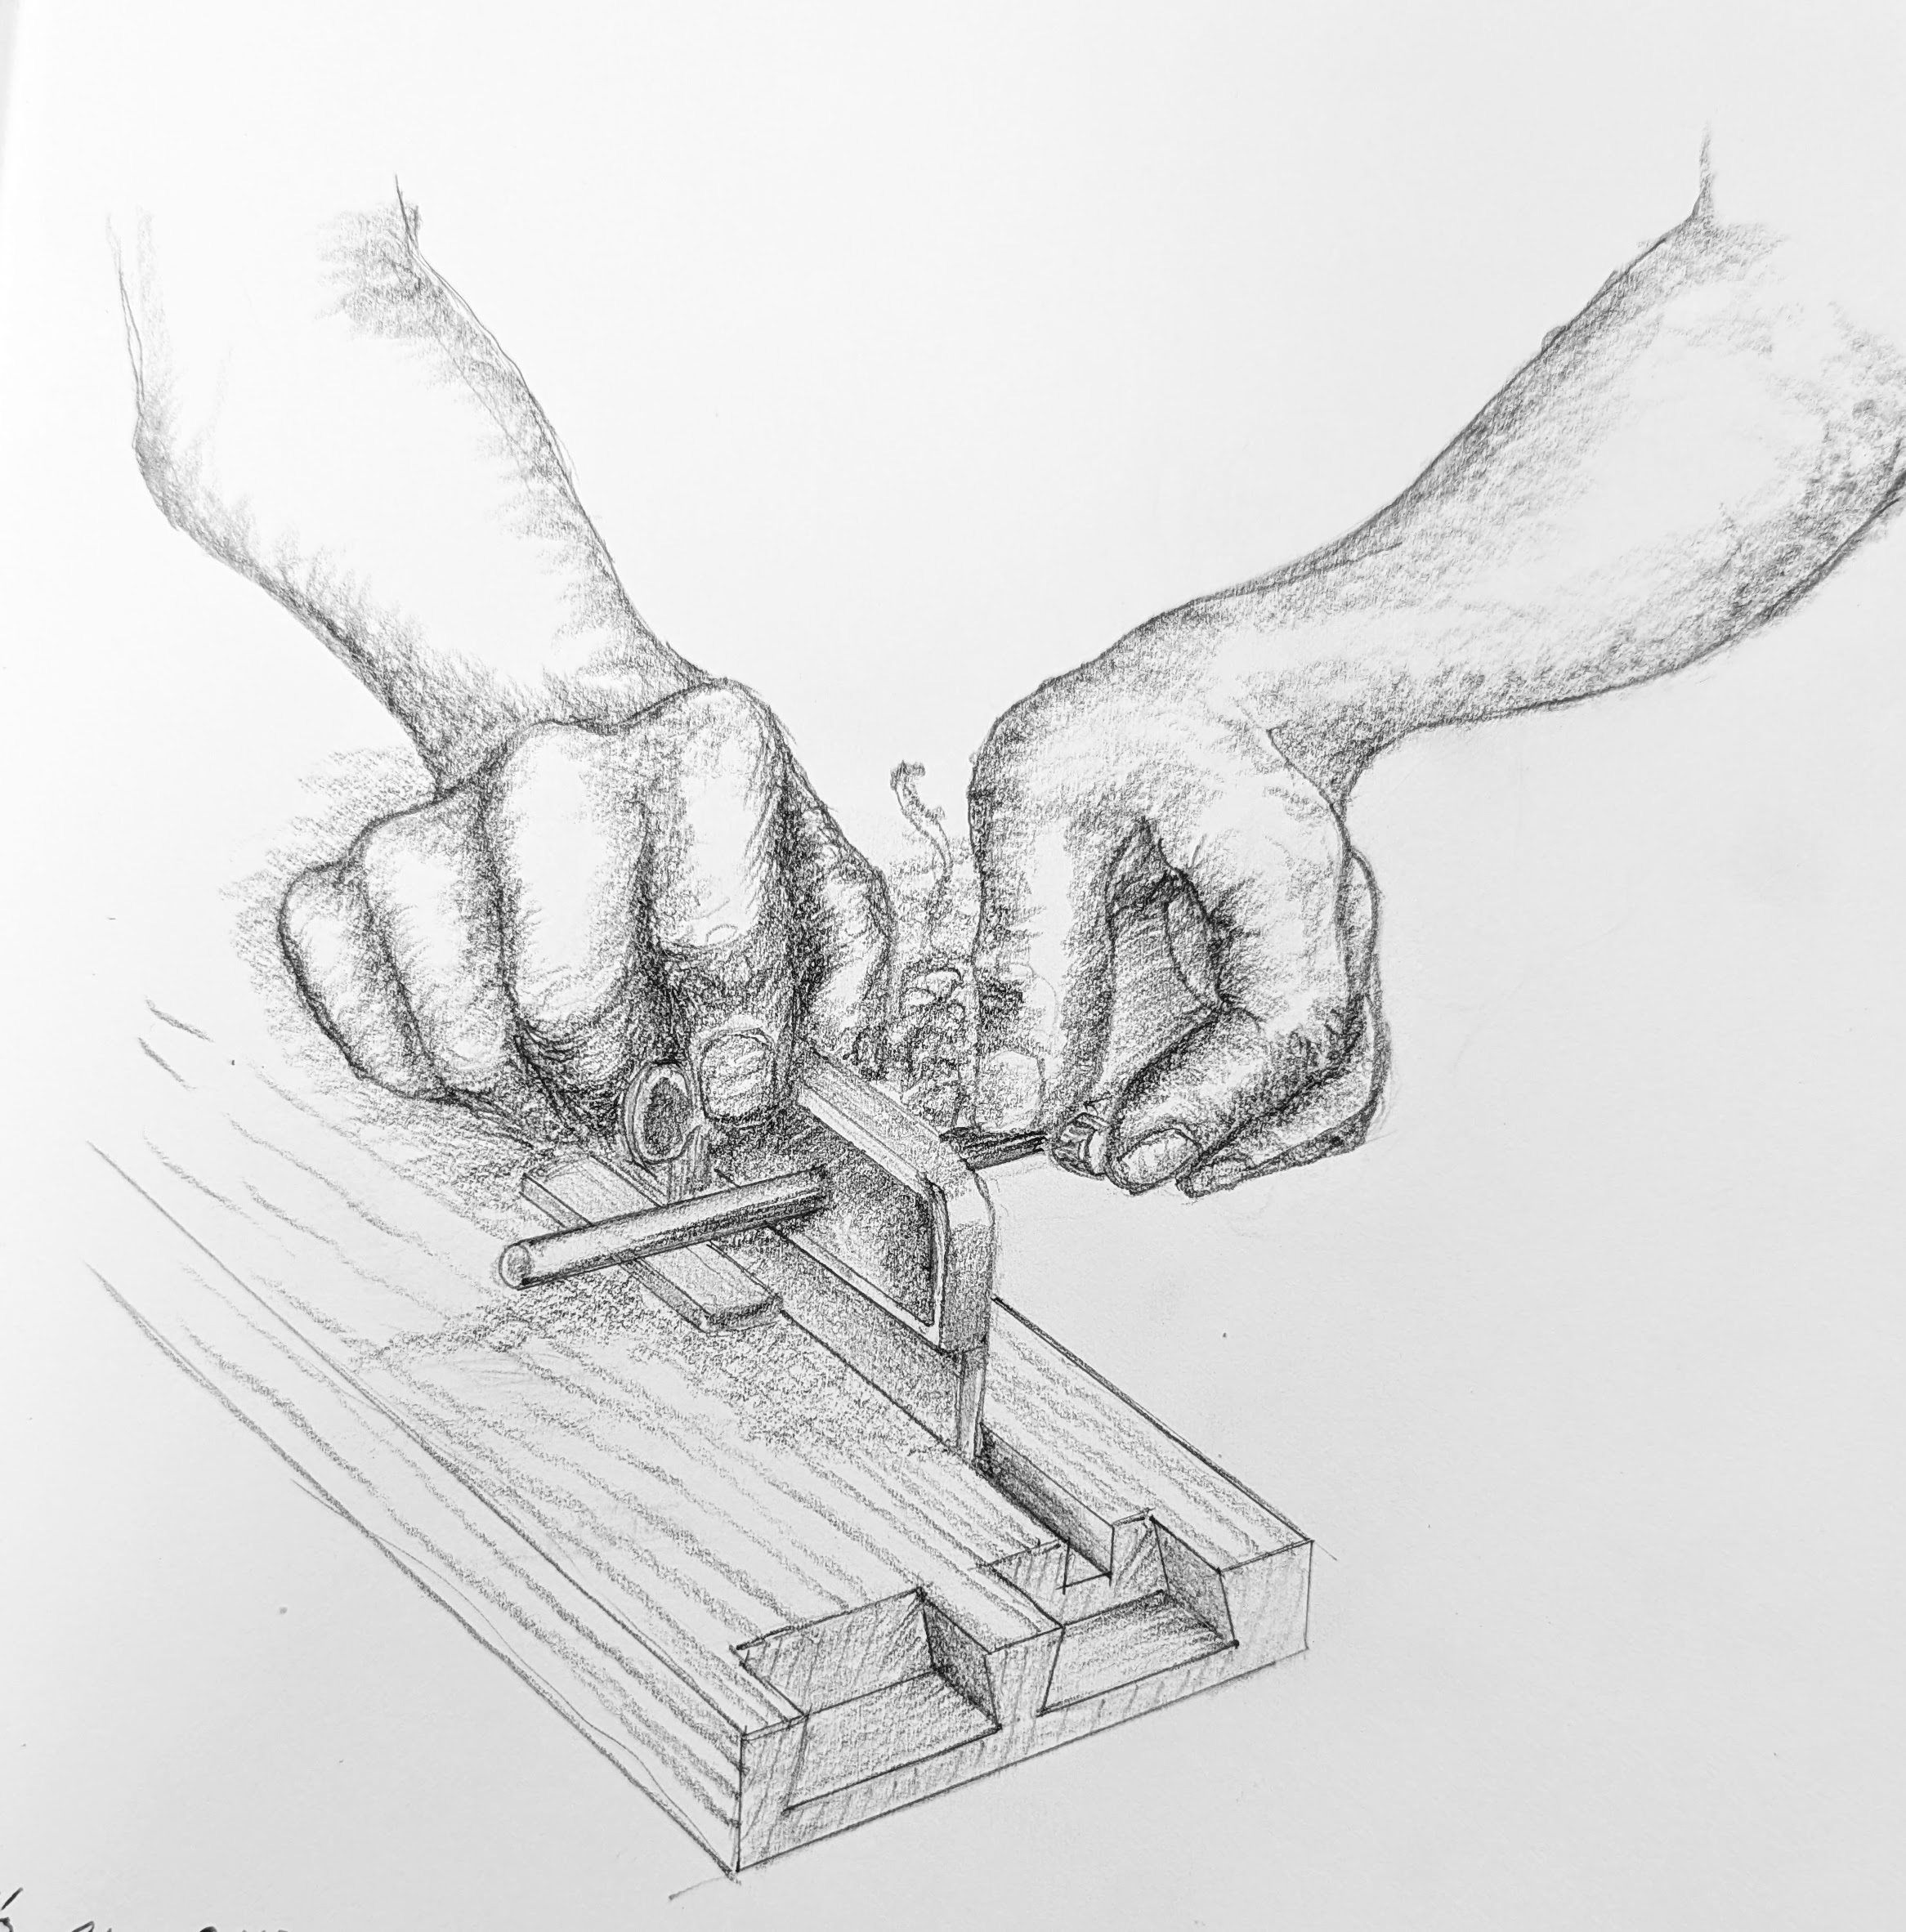
Use a dovetail guide or a sliding bevel to set the angled cut lines.
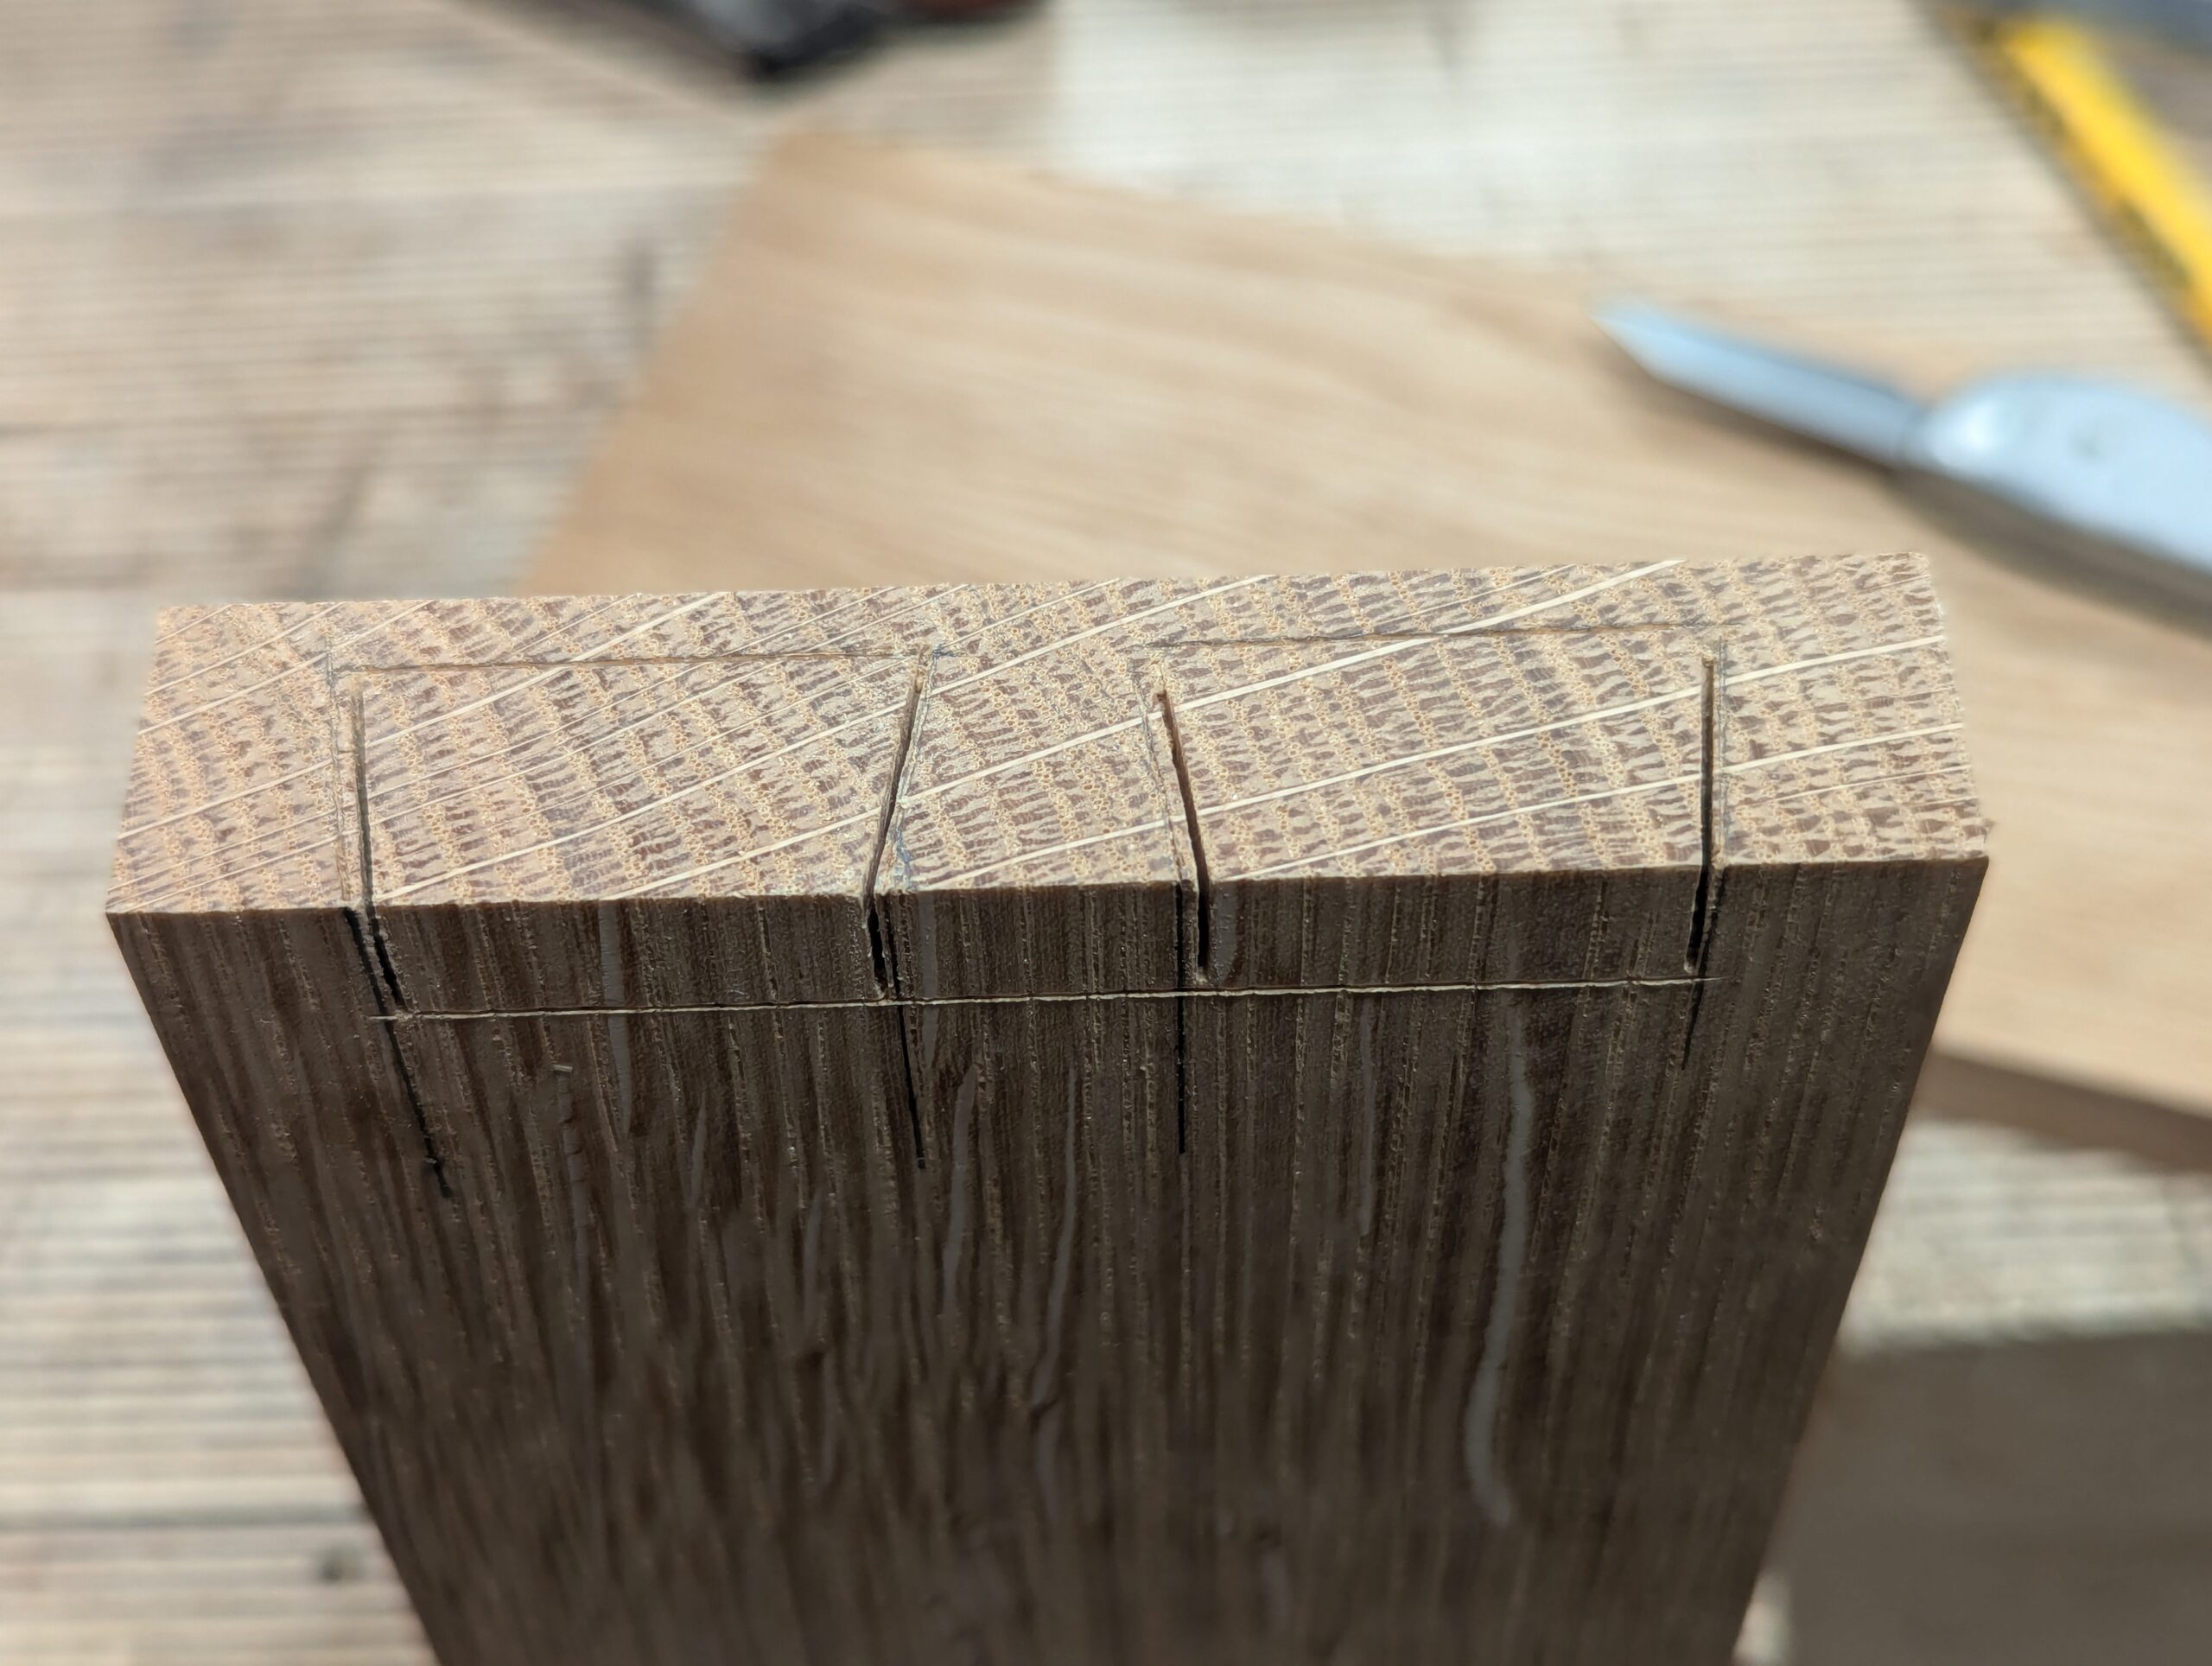
With the lines squared onto the end grain, you are ready to start sawing. Remember, these cuts must be square across, so allow no drift or inaccuracy.
My three pin recesses are 3/8" at the narrow points on the outside corner.

With your dovetails laid out, saw down the angles carefully to ensure the saw establishes the line of cut in the first half a dozen strokes. Any deeper and it will be hard to realign if you are off course.

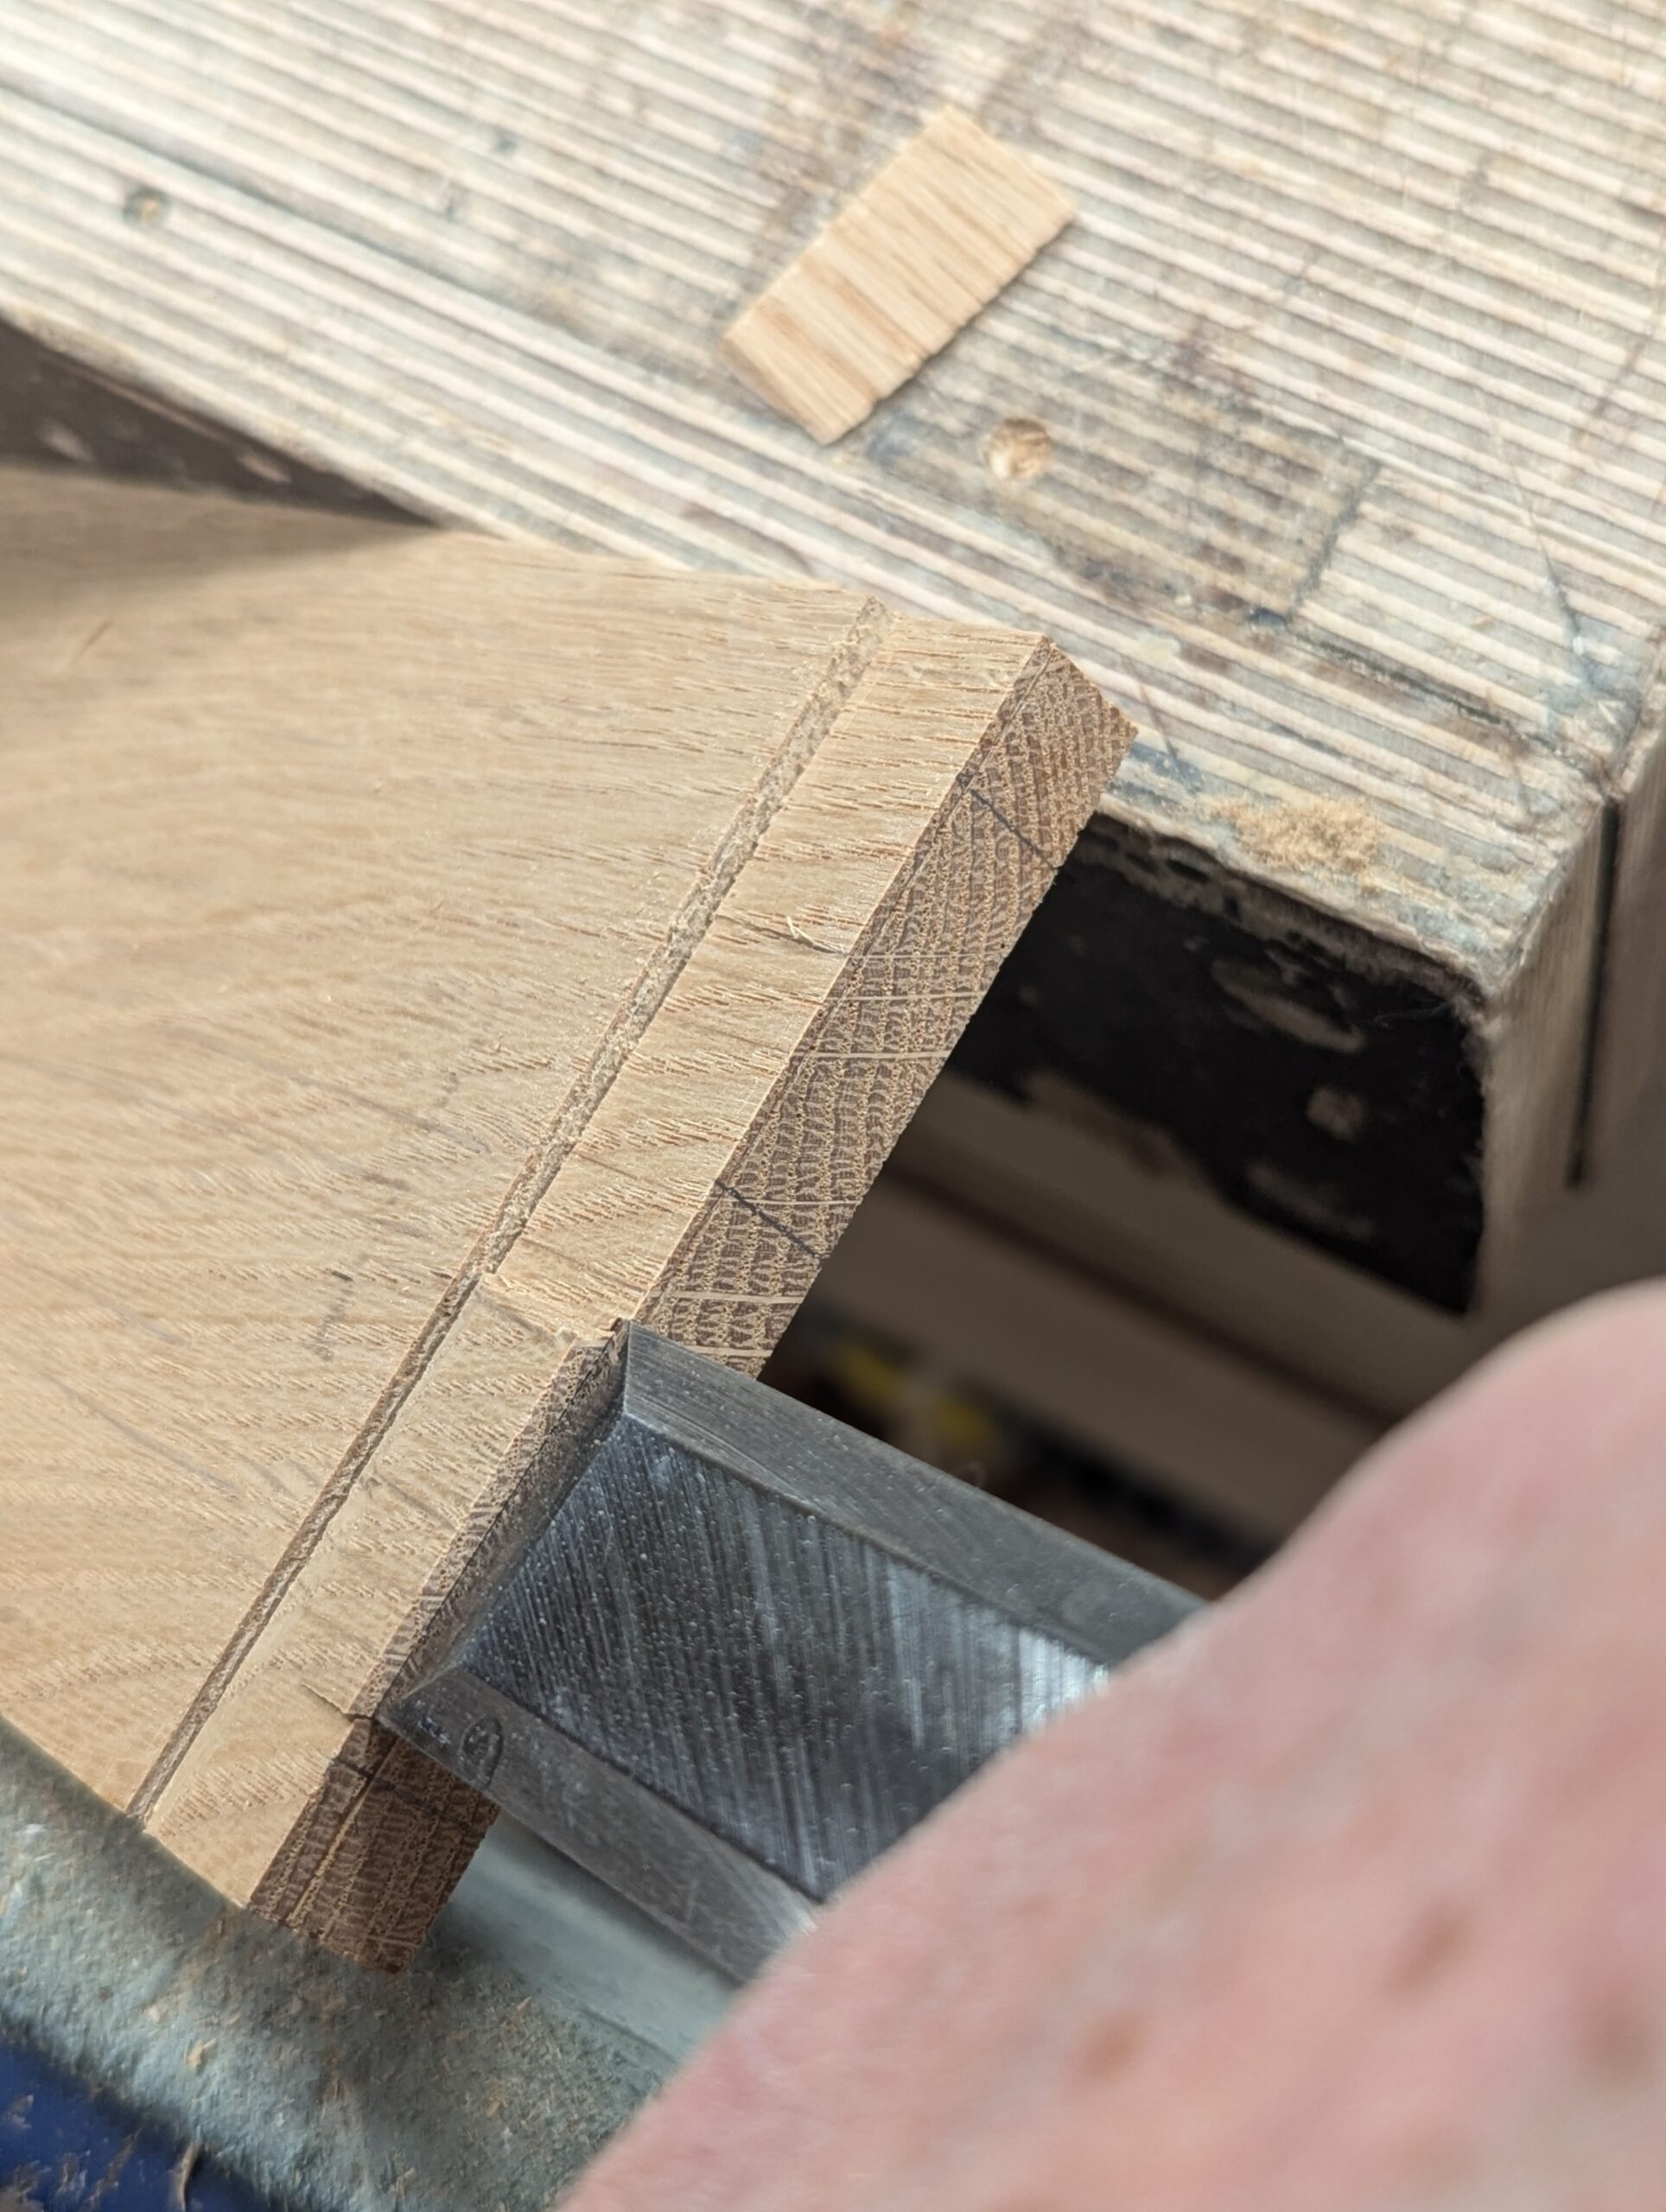
A knifewall on the opposite outer face of the dovetail piece establishes the exact cut line for you to chisel and saw to.
Saw down the end cuts to the knife wall carefully, or cut away and then pare cut to it. Remember that the top edge will be seen, so it's important to keep this inner corner crisp.
Again, use paring cuts to refine the end grain. It's best to use a narrower chisel than the width of the piece you are working on for this.
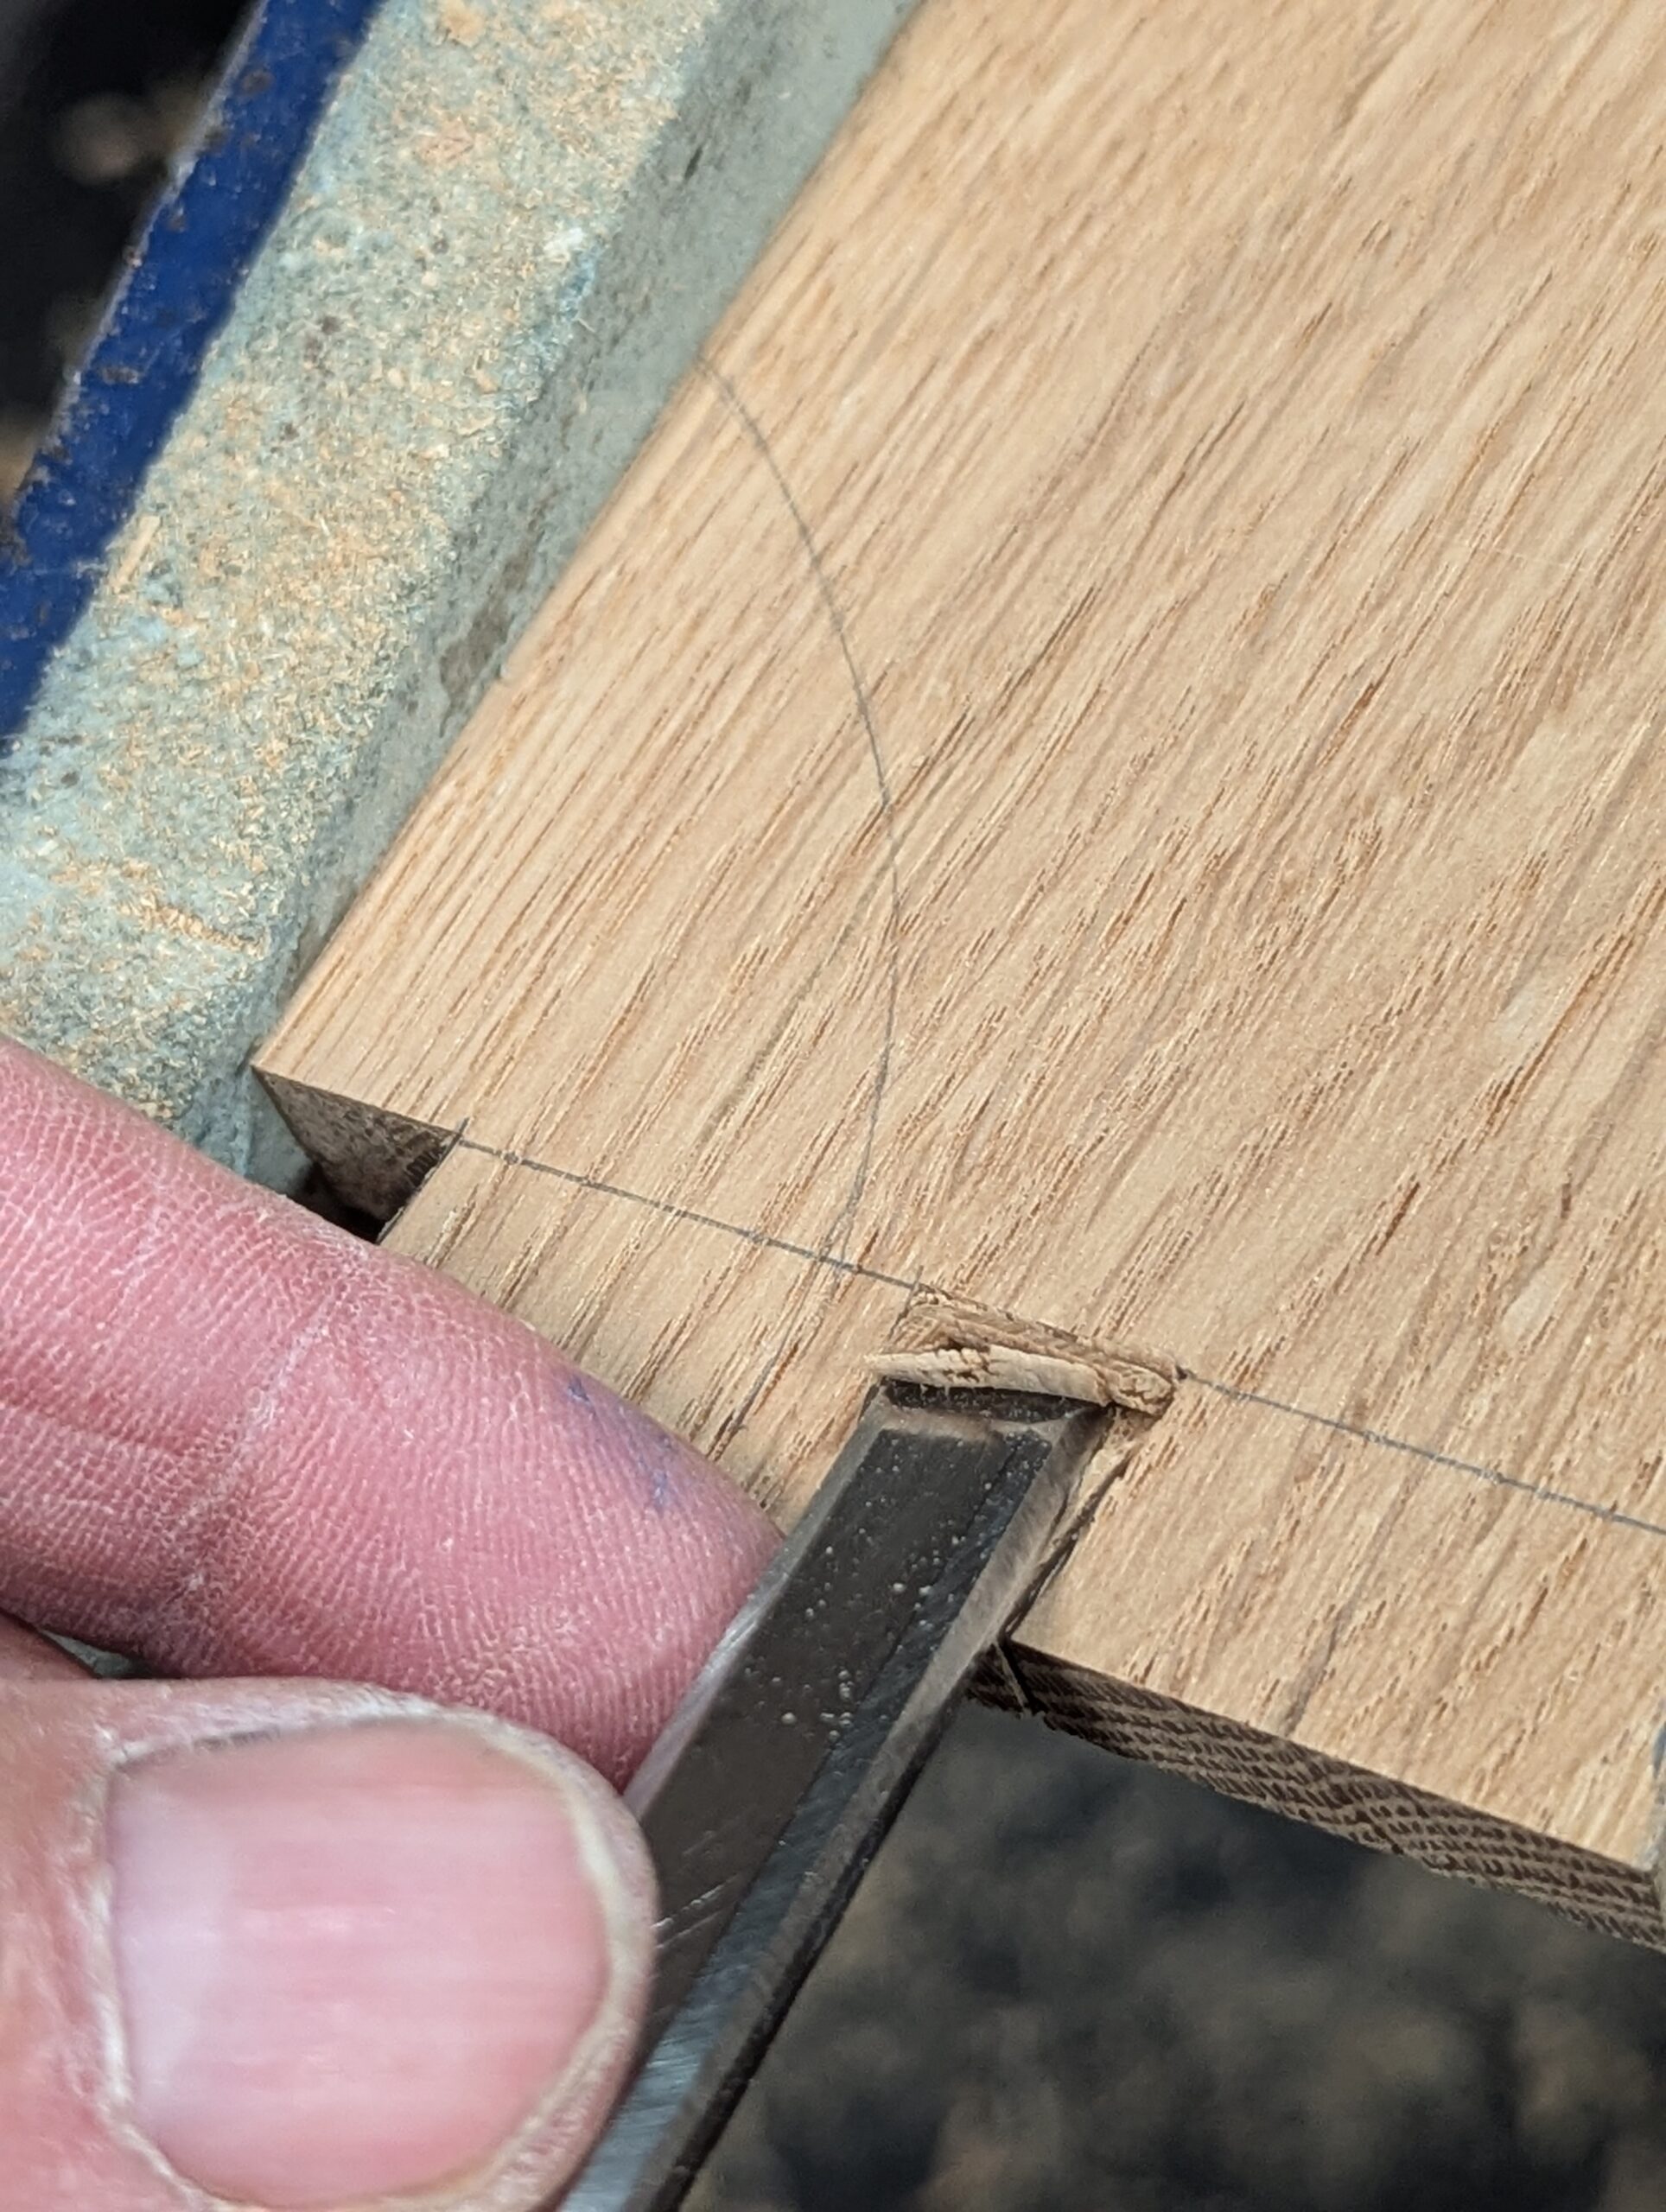
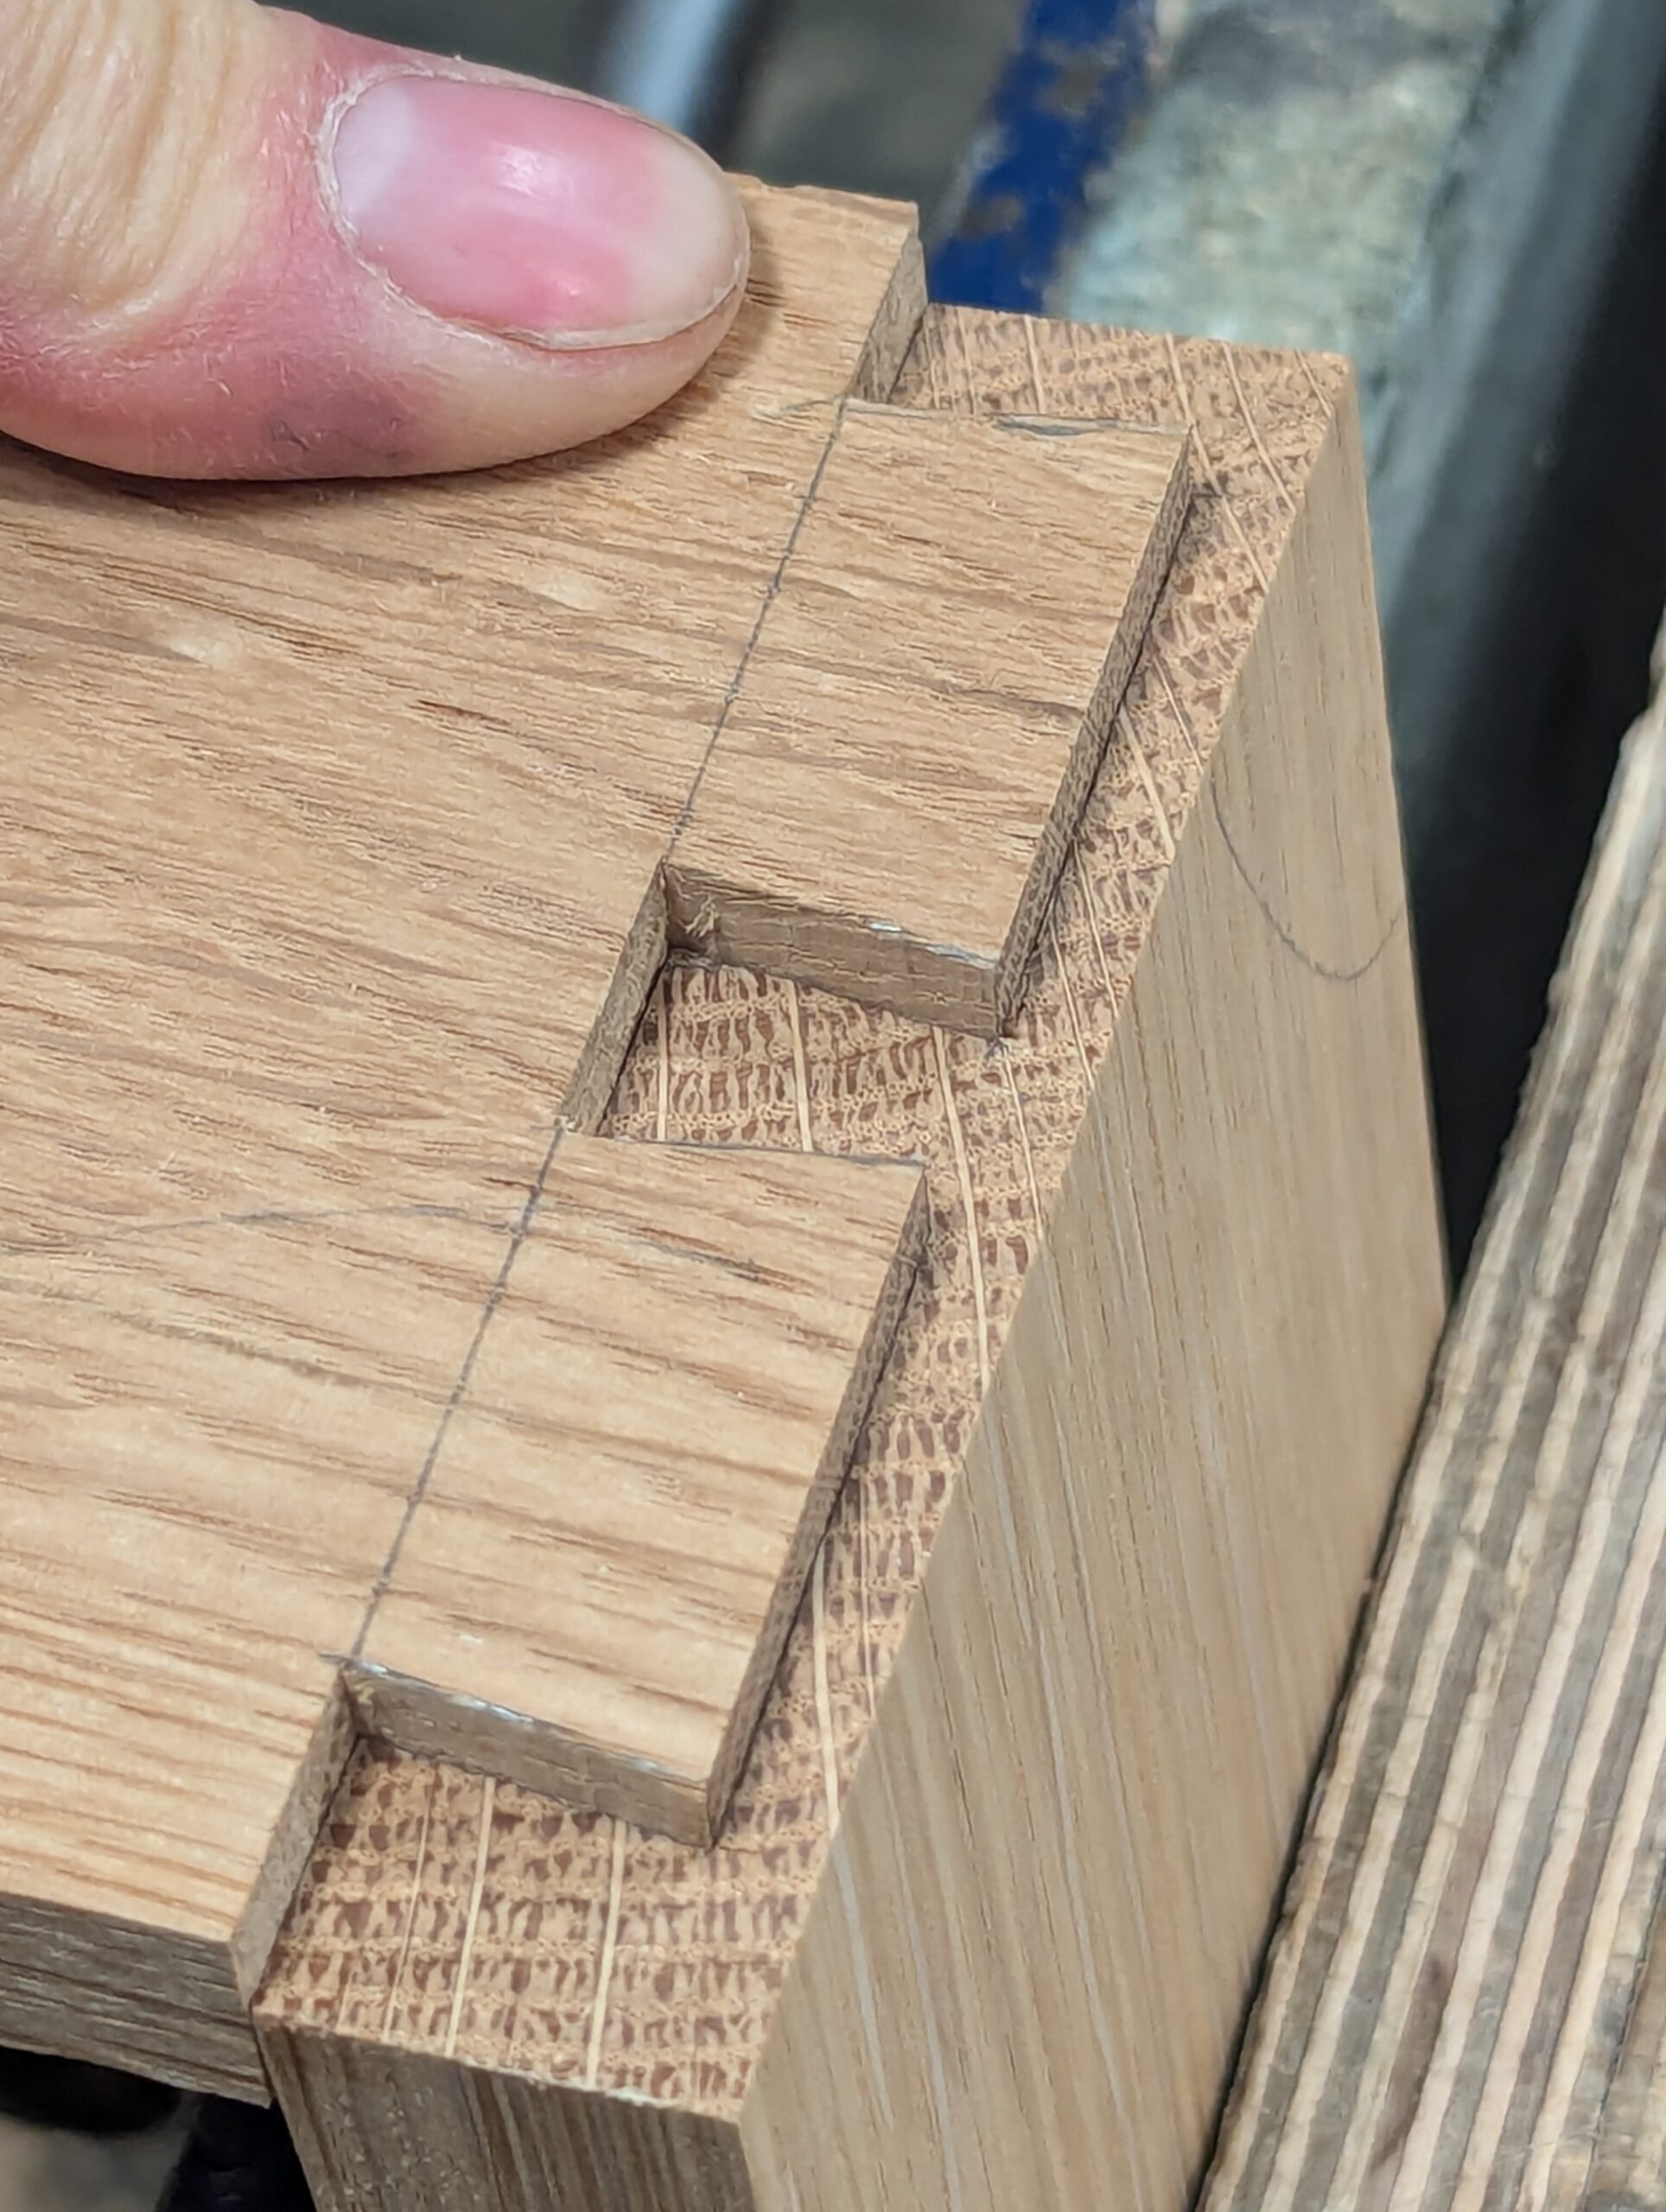
We can now remove the mid-pin recess between the dovetails. Align the square with the outer shoulders to establish the knifewall between the tails to cut to.
Though we do pare cut the end grain after sawing, we don't generally pare cut the dovetail side angles, as these come best straight from the saw with judicious sawing. Leave well alone!
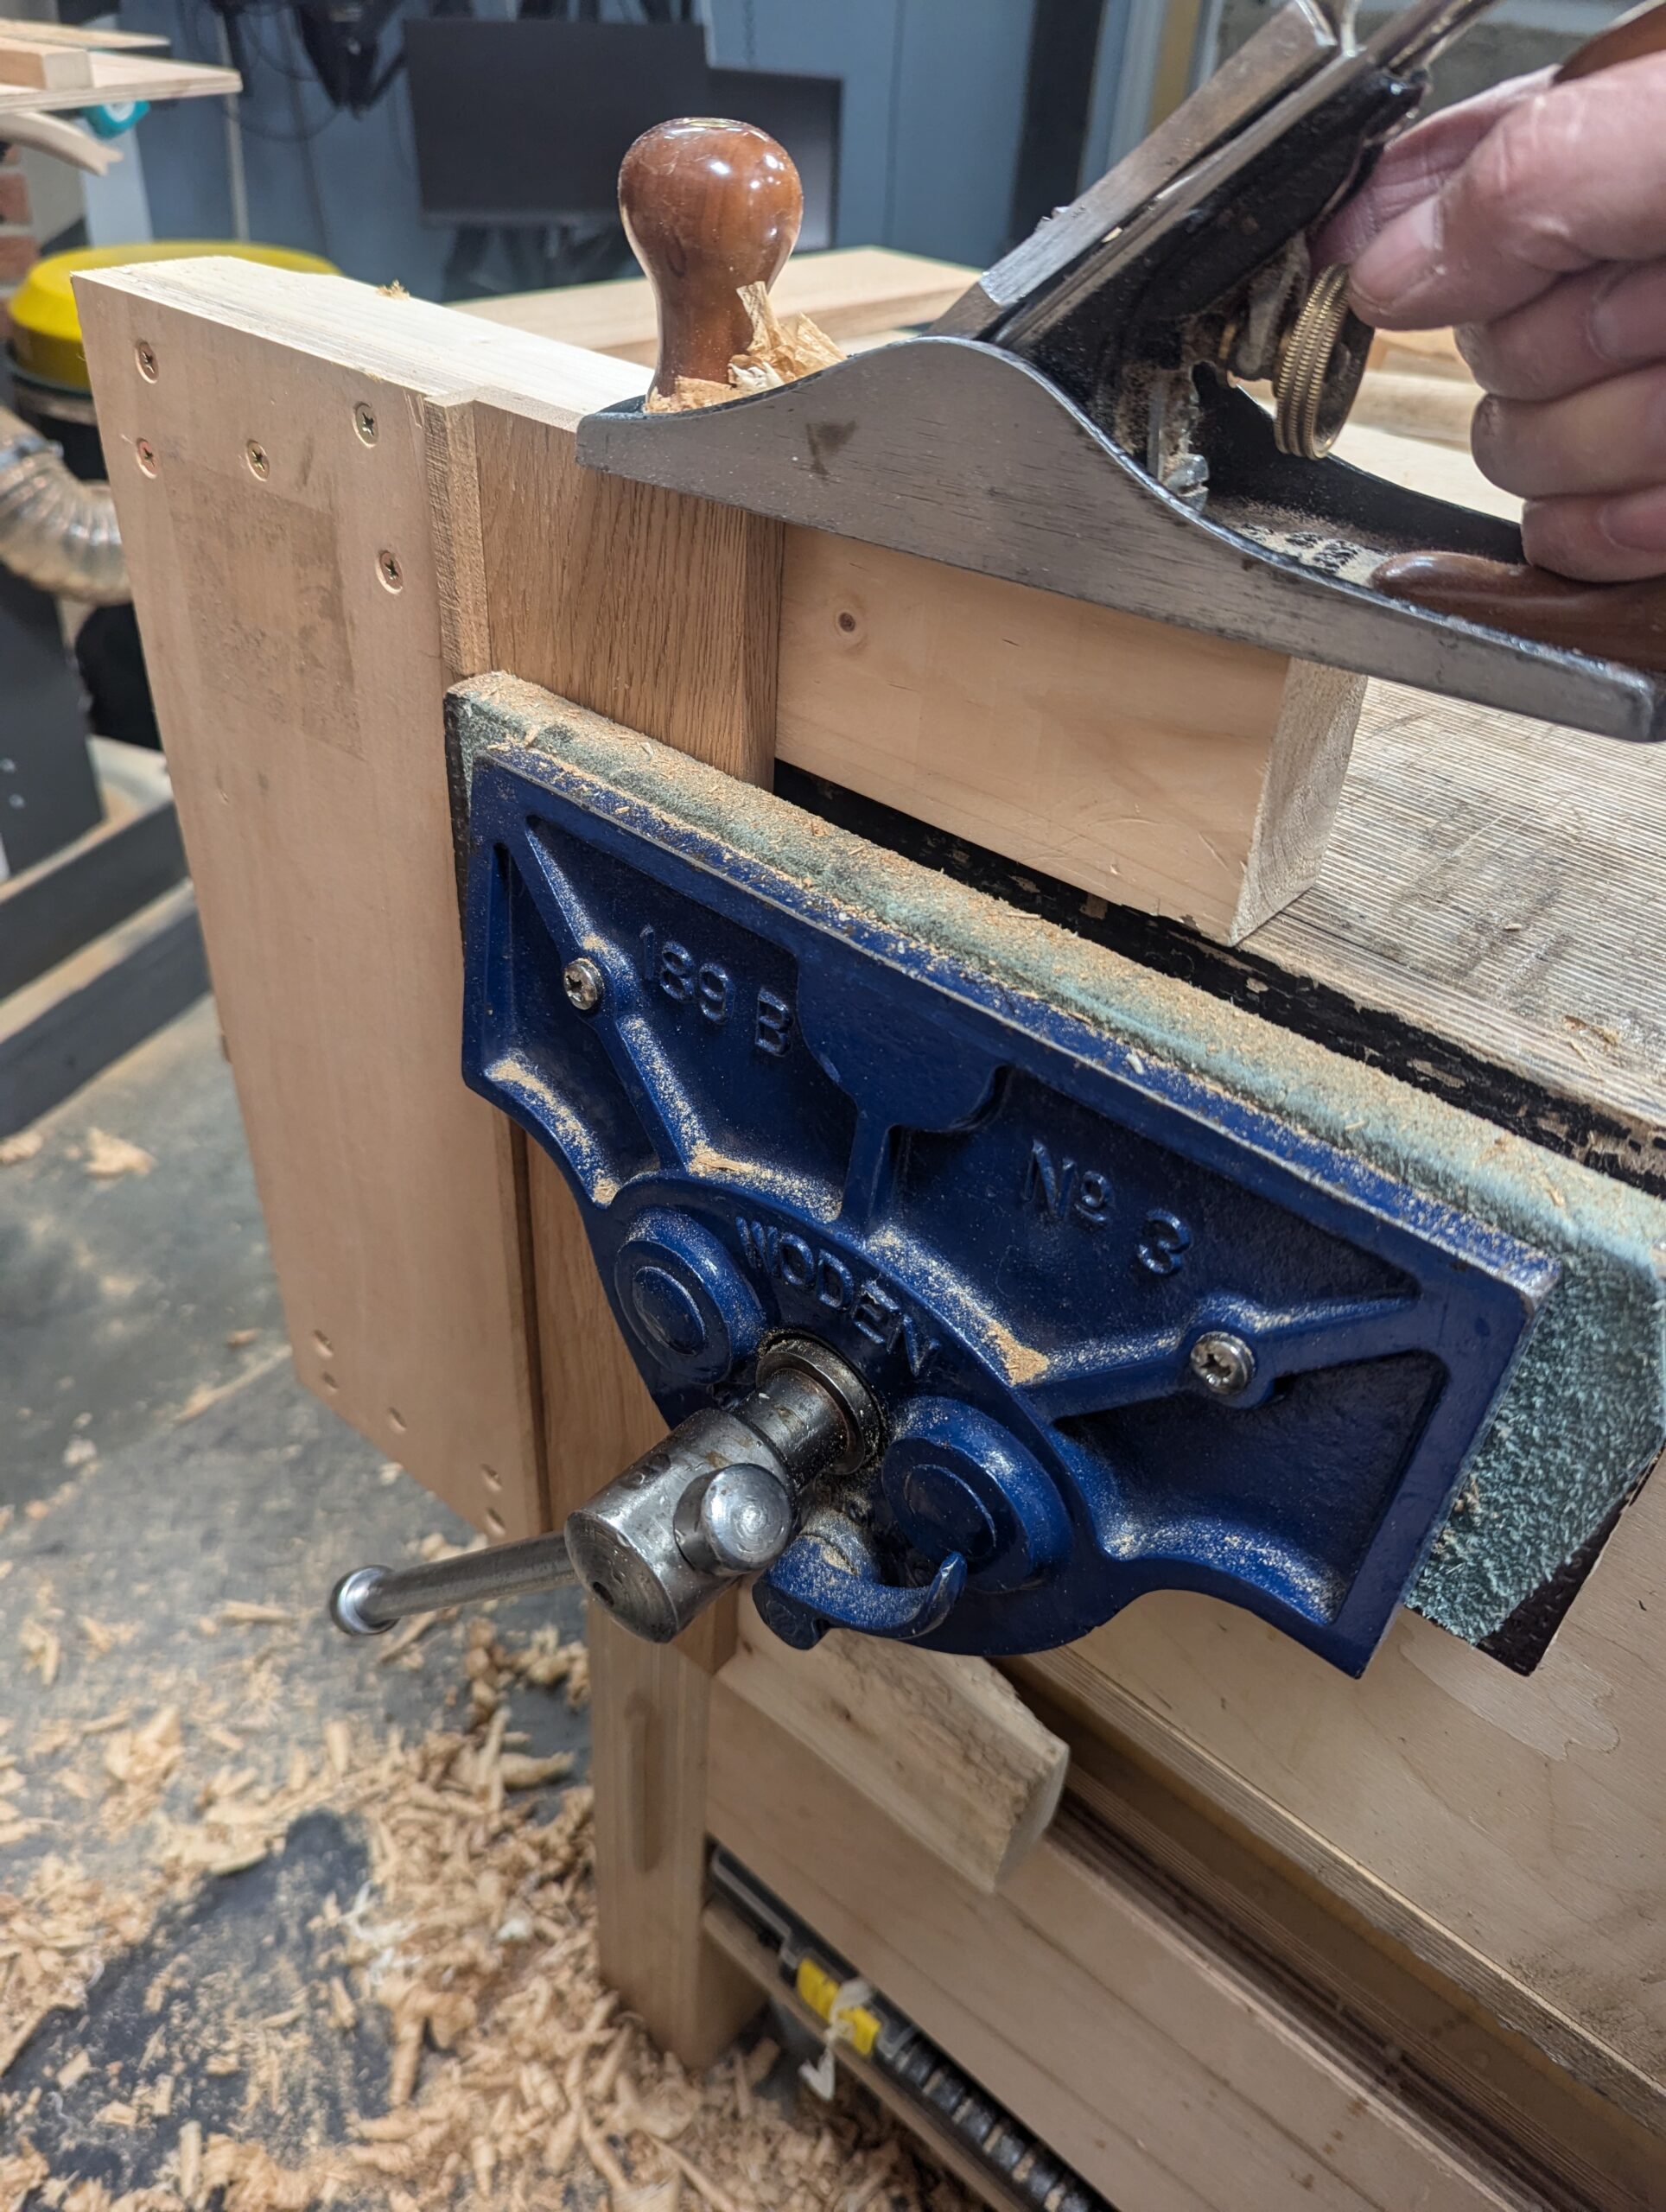
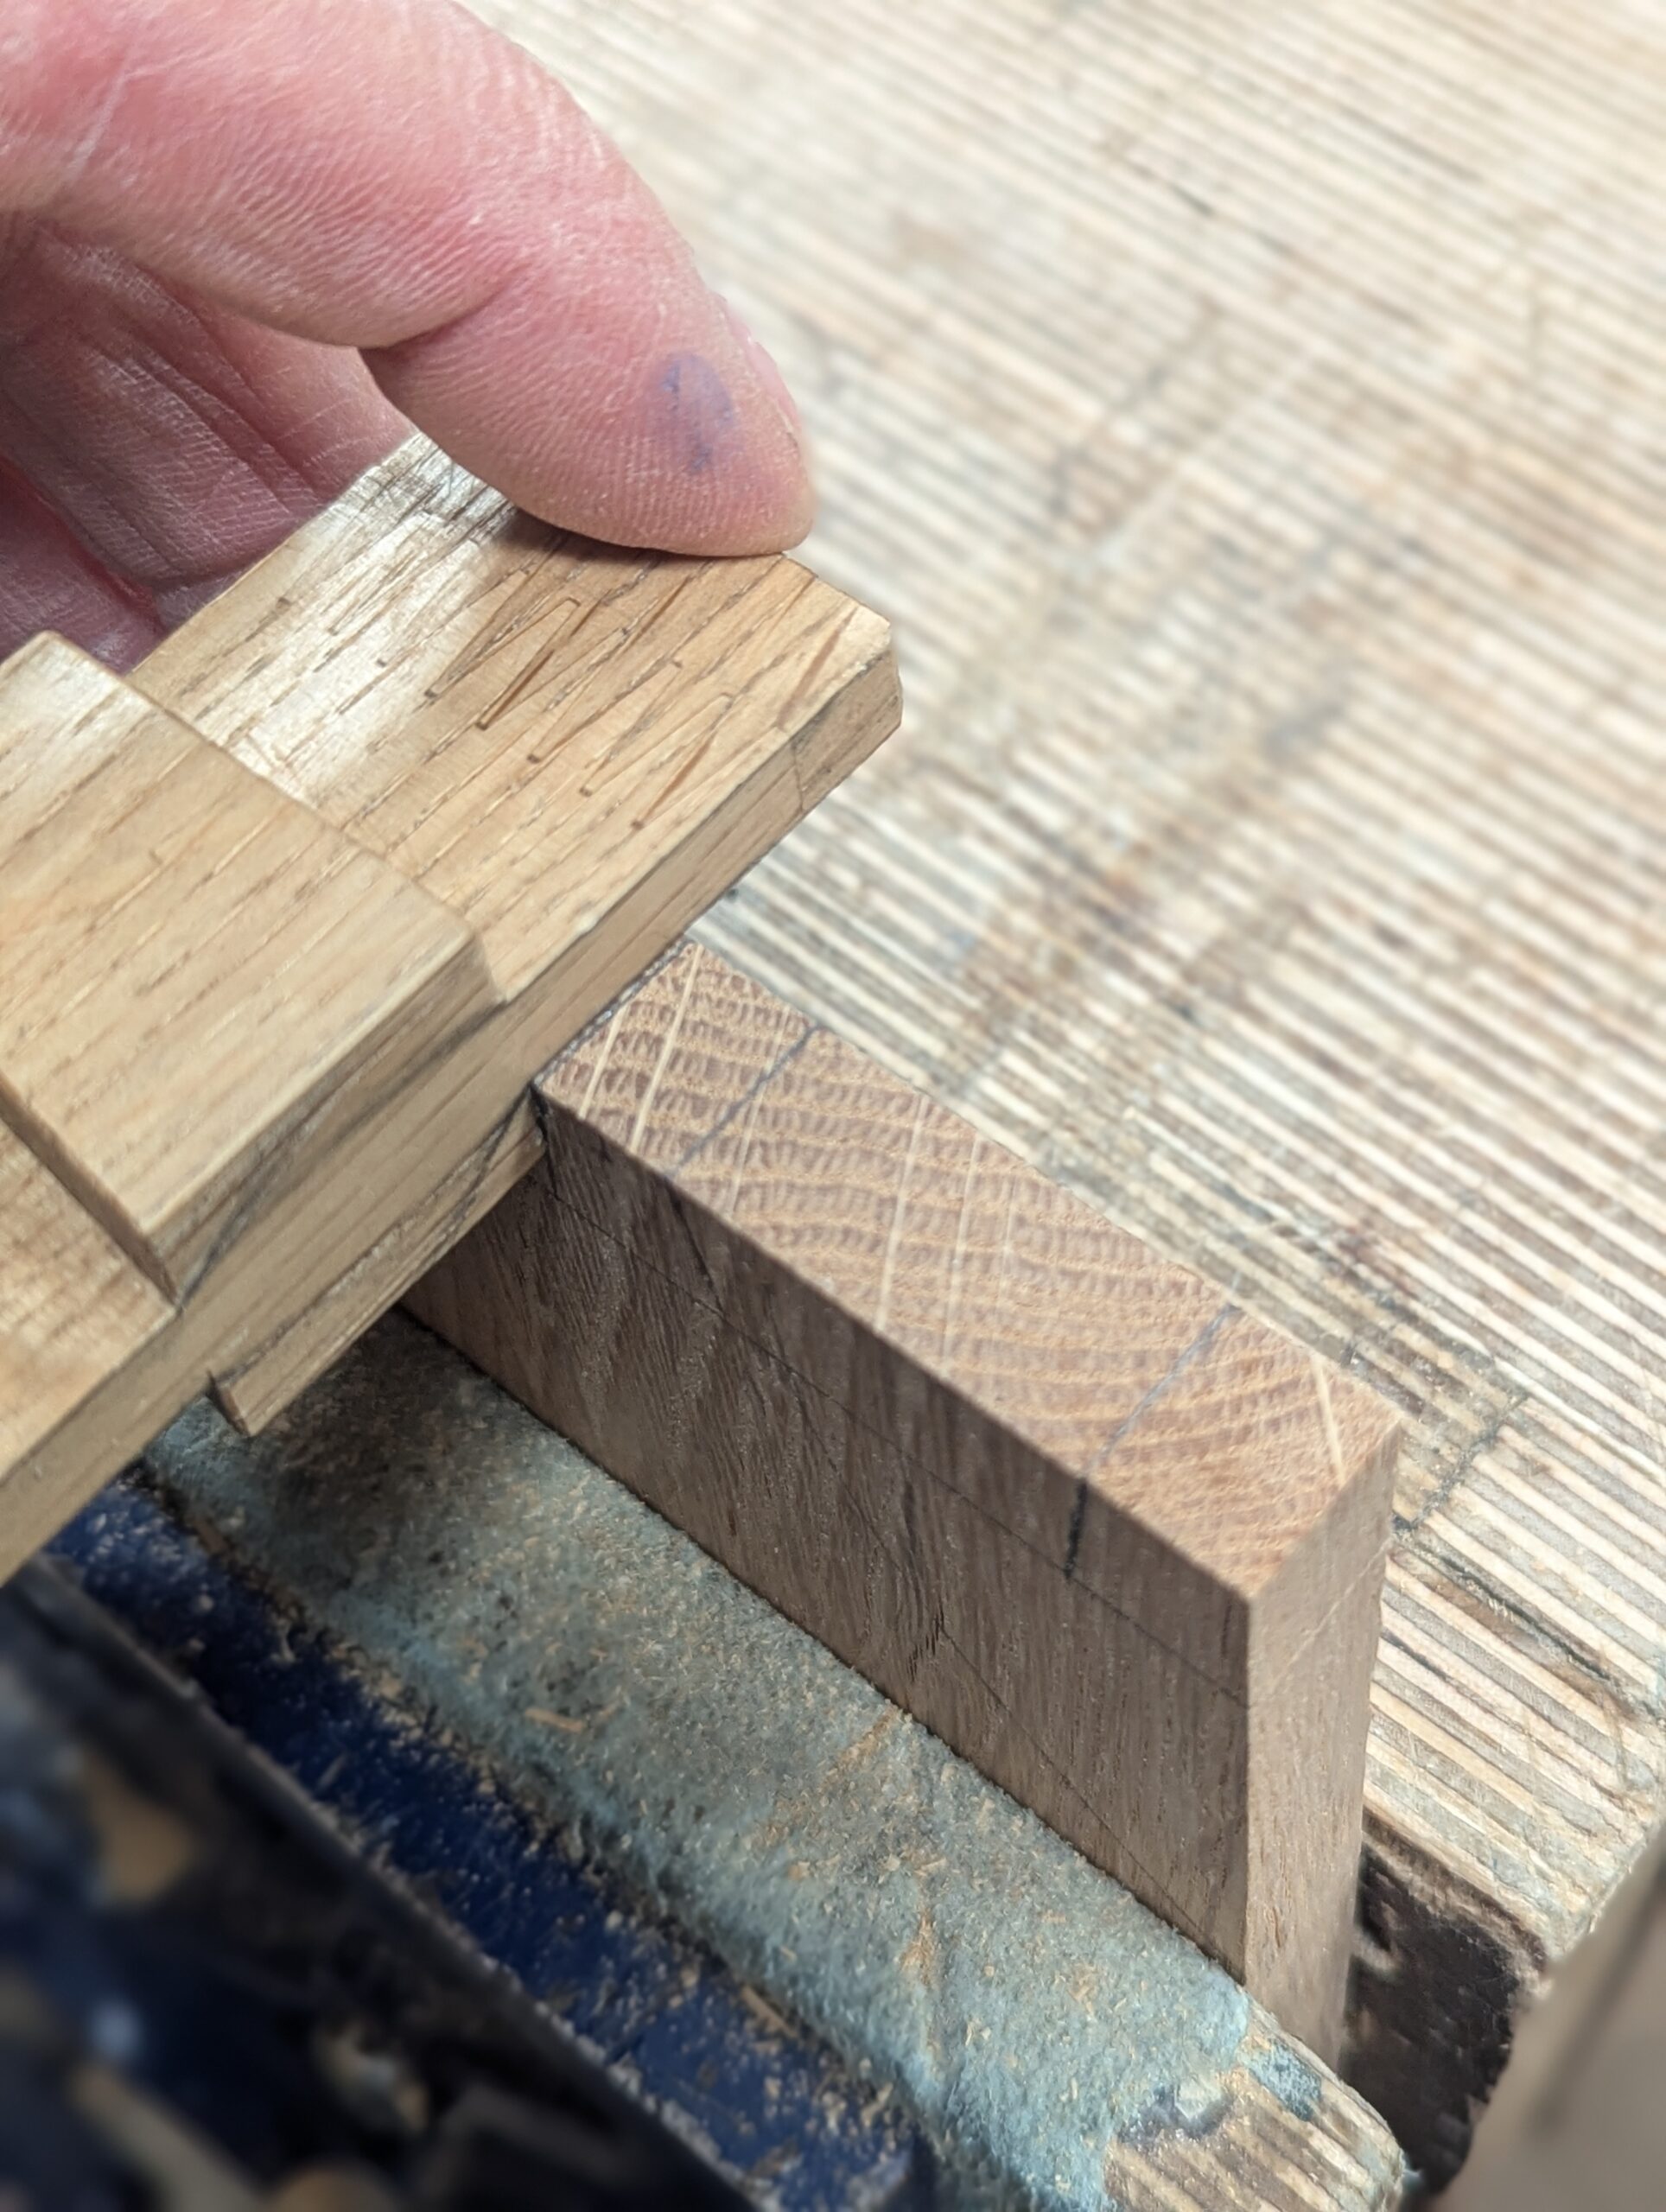
Again, with the end grain of the adjacent piece trued in the vertical guide, we are ready to mark the knife walls around the dovetails. Secure the piece in the vise at a height that will keep the dovetail piece level and firm.
Pull the dovetail pieces hard against the front piece in the vise so that there are no visible gaps and mark around the two dovetails as shown.
I angle my knife at these critical junctures, almost as though I am reaching underneath the wood to establish the knifewalls, though I am not actually doing that.
Pencil lines are perfectly adequate for guiding the saw parallel to the long axis of the workpiece for the tail recesses. I would never use a knifewall.
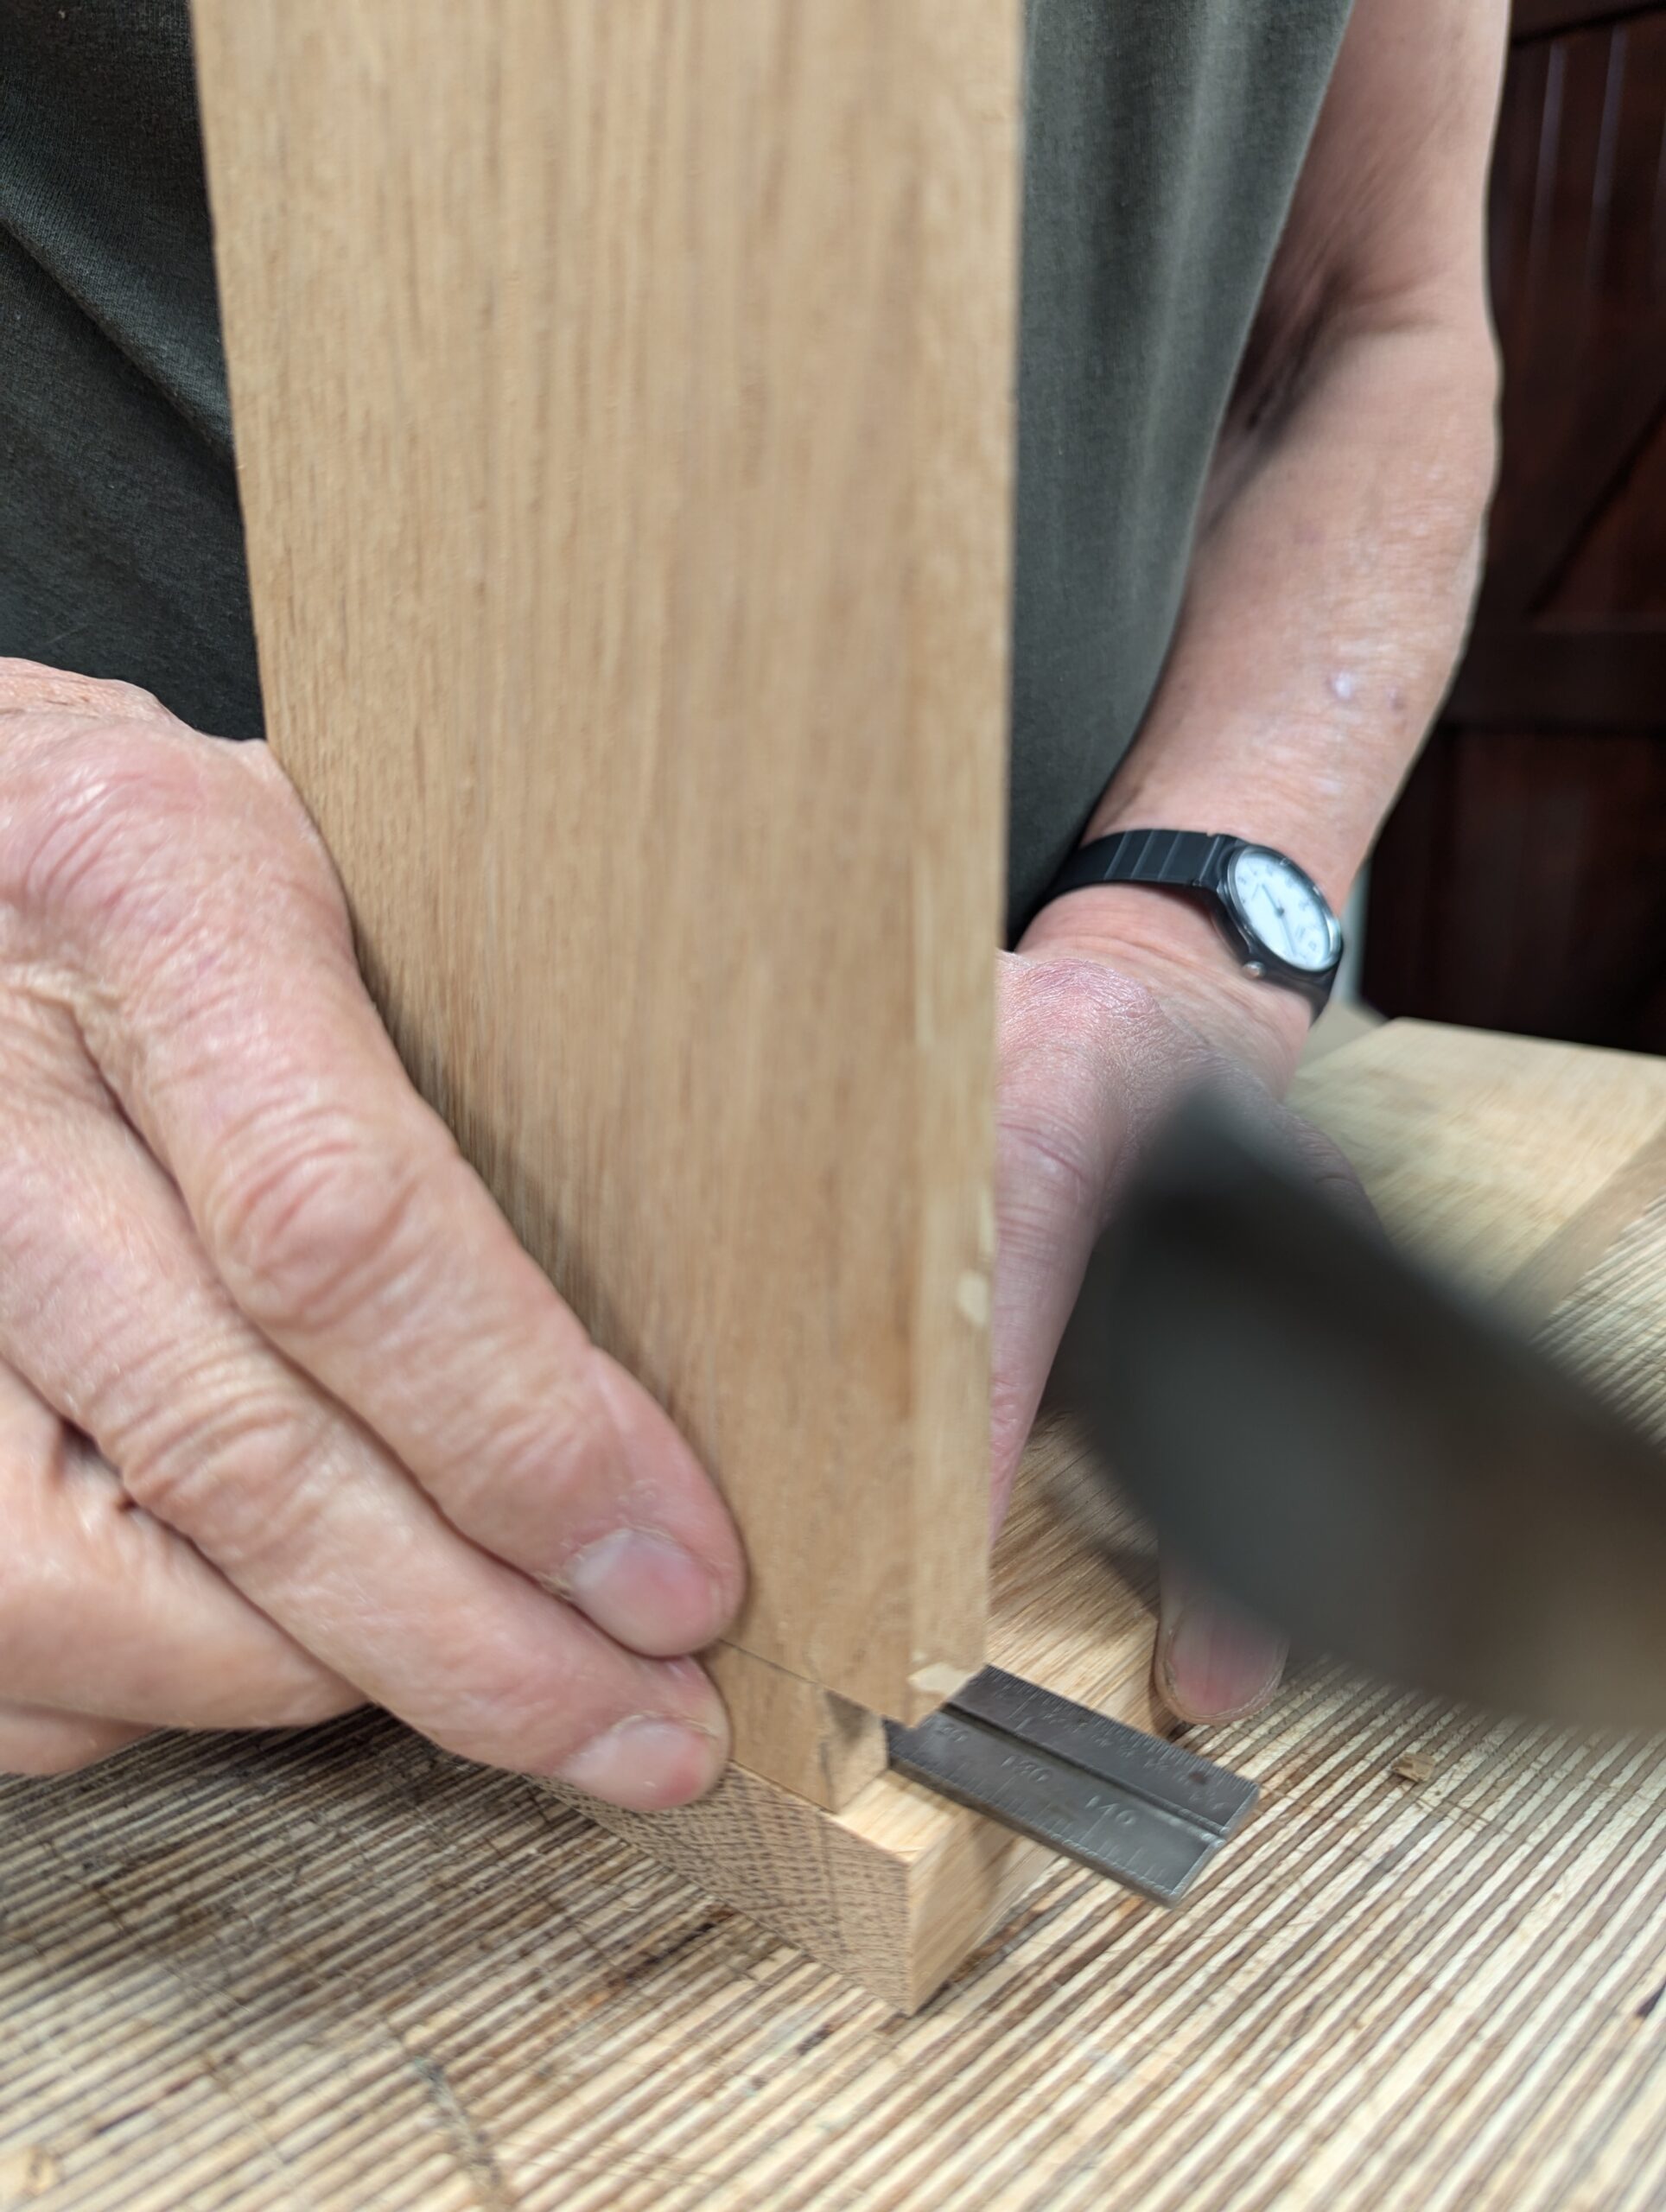
I use the square and my fingertips to get the perfect depth for the dovetail recesses. Pulling the dovetailed piece away leaves the square exactly where I need it for running the knifewall.

How the knifewalls look when settled. I do not use knifewalls with the grain, only on the end grain and across the grain.

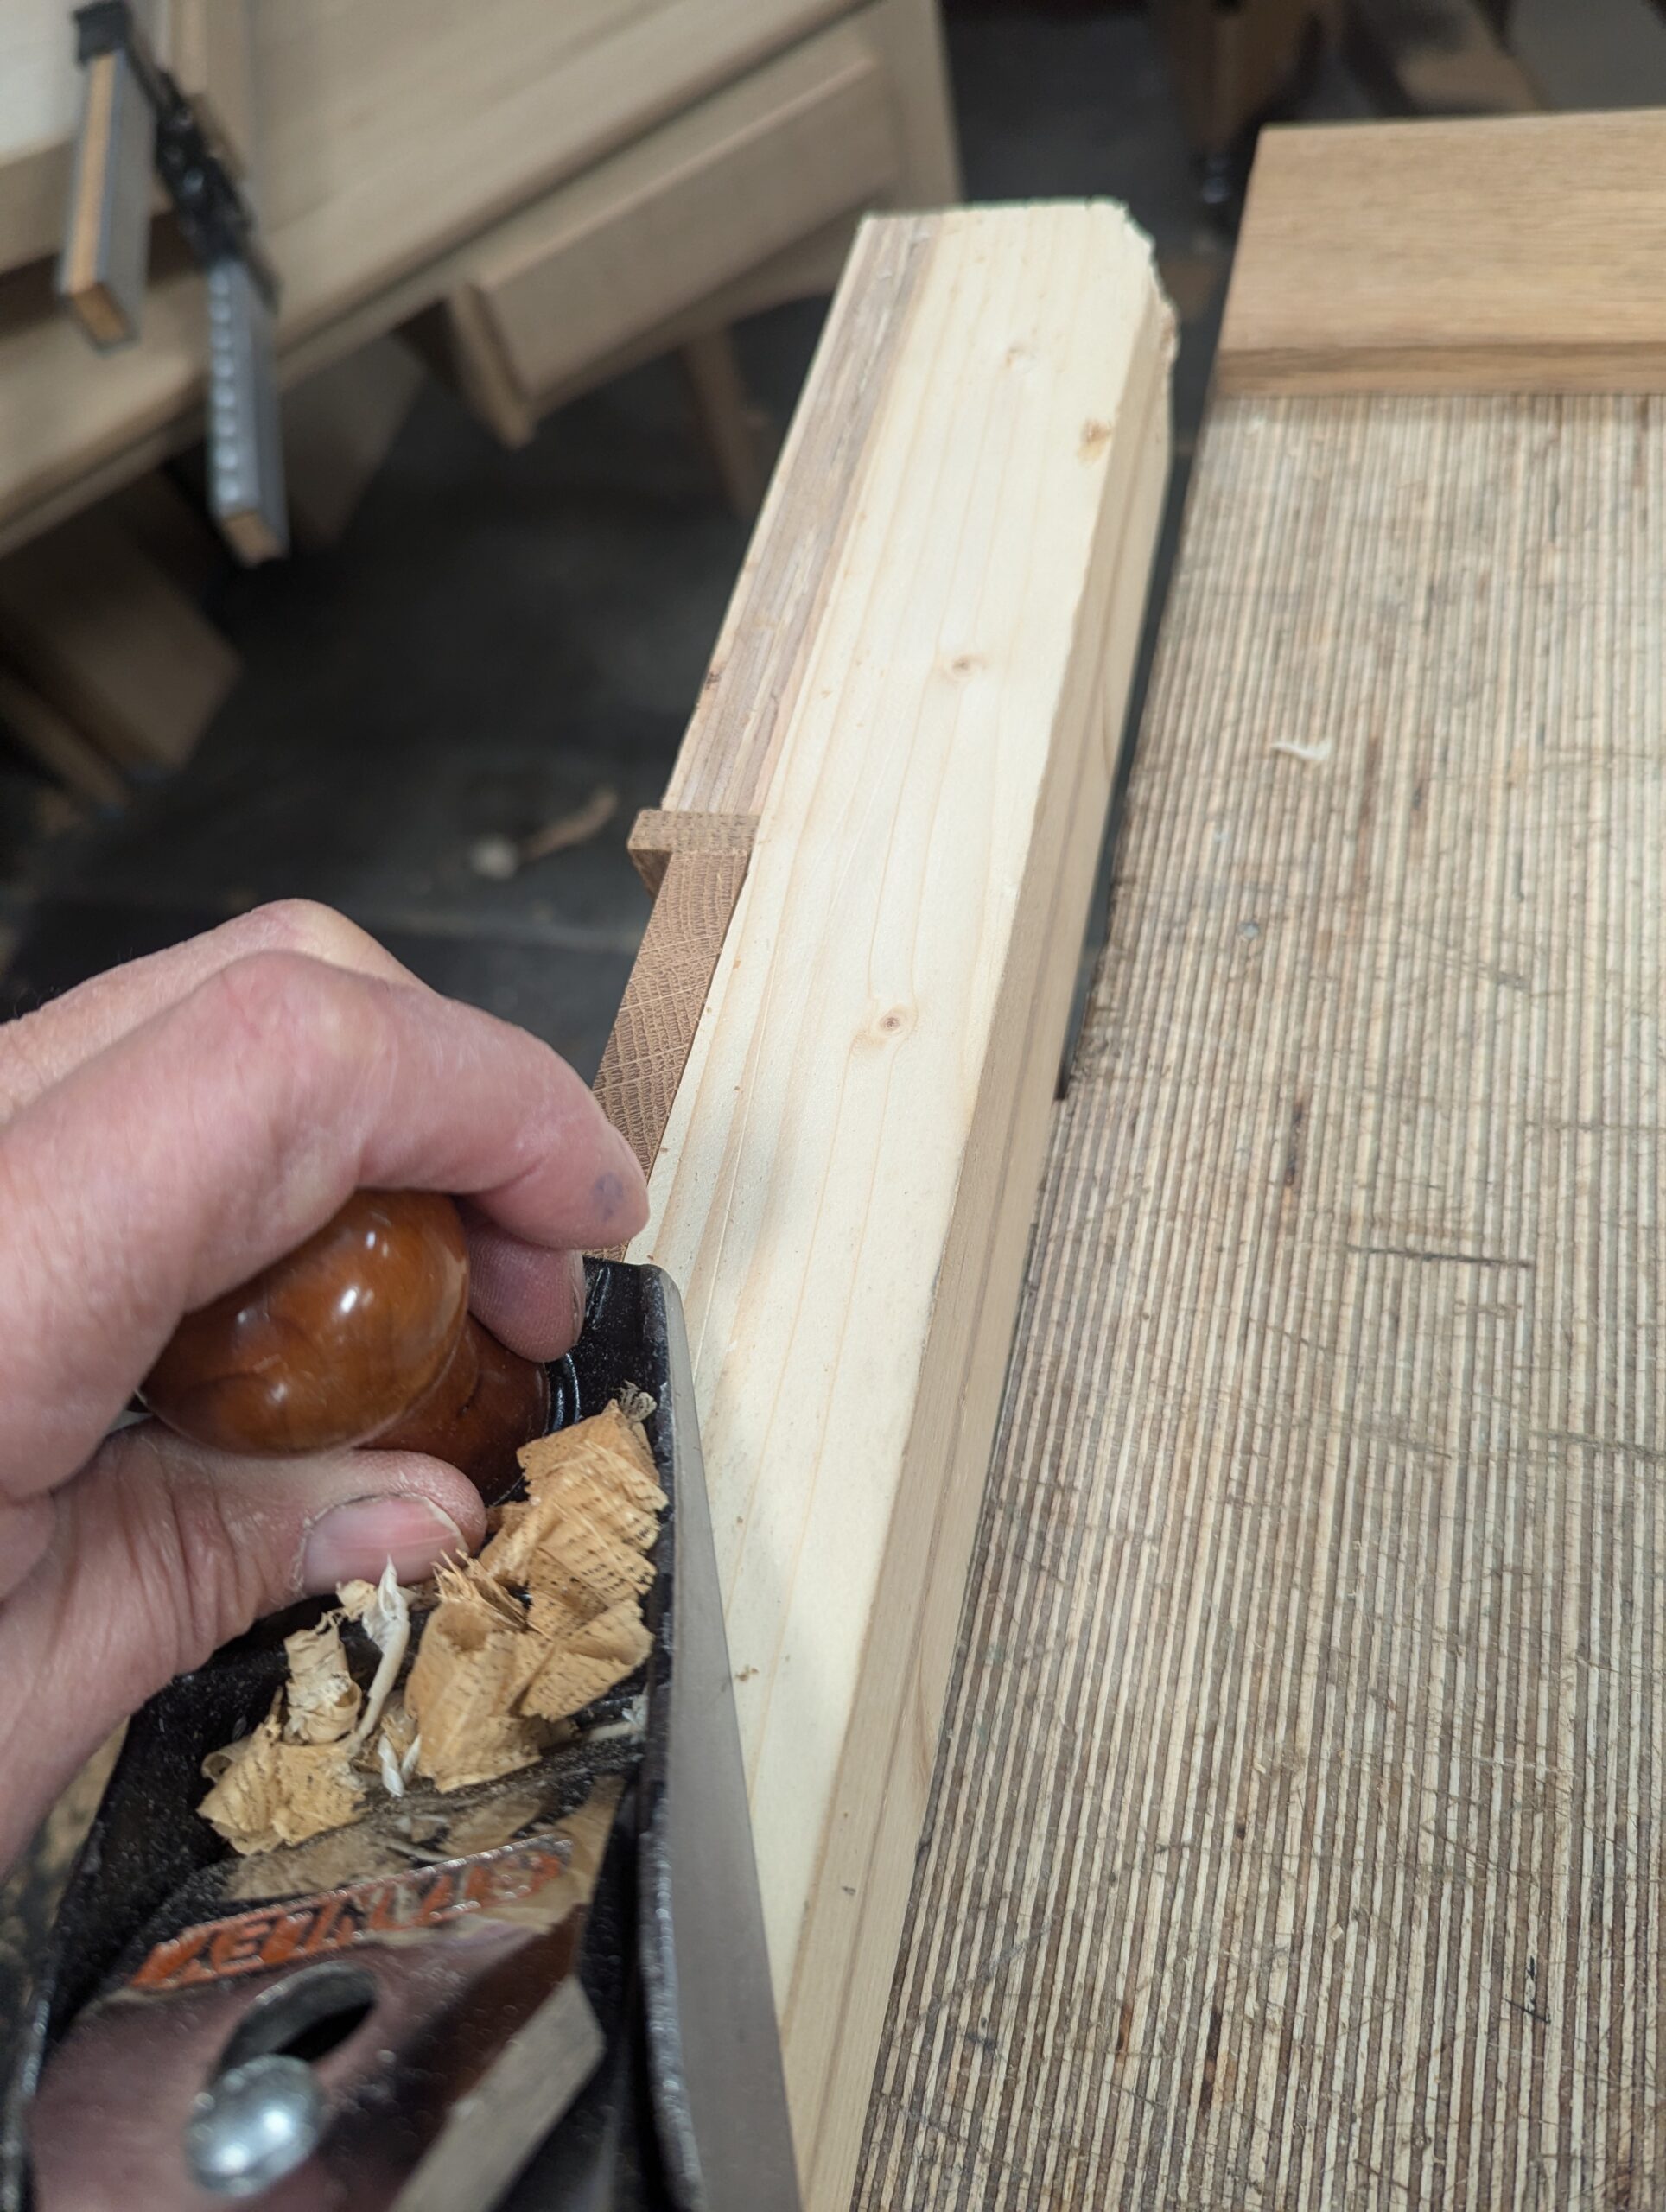
I saw close to but not up to the knifewalls onto the two faces.
On half-laps only, I leave a small gap for pare cutting directly to the knifewalls surrounding the dovetails.
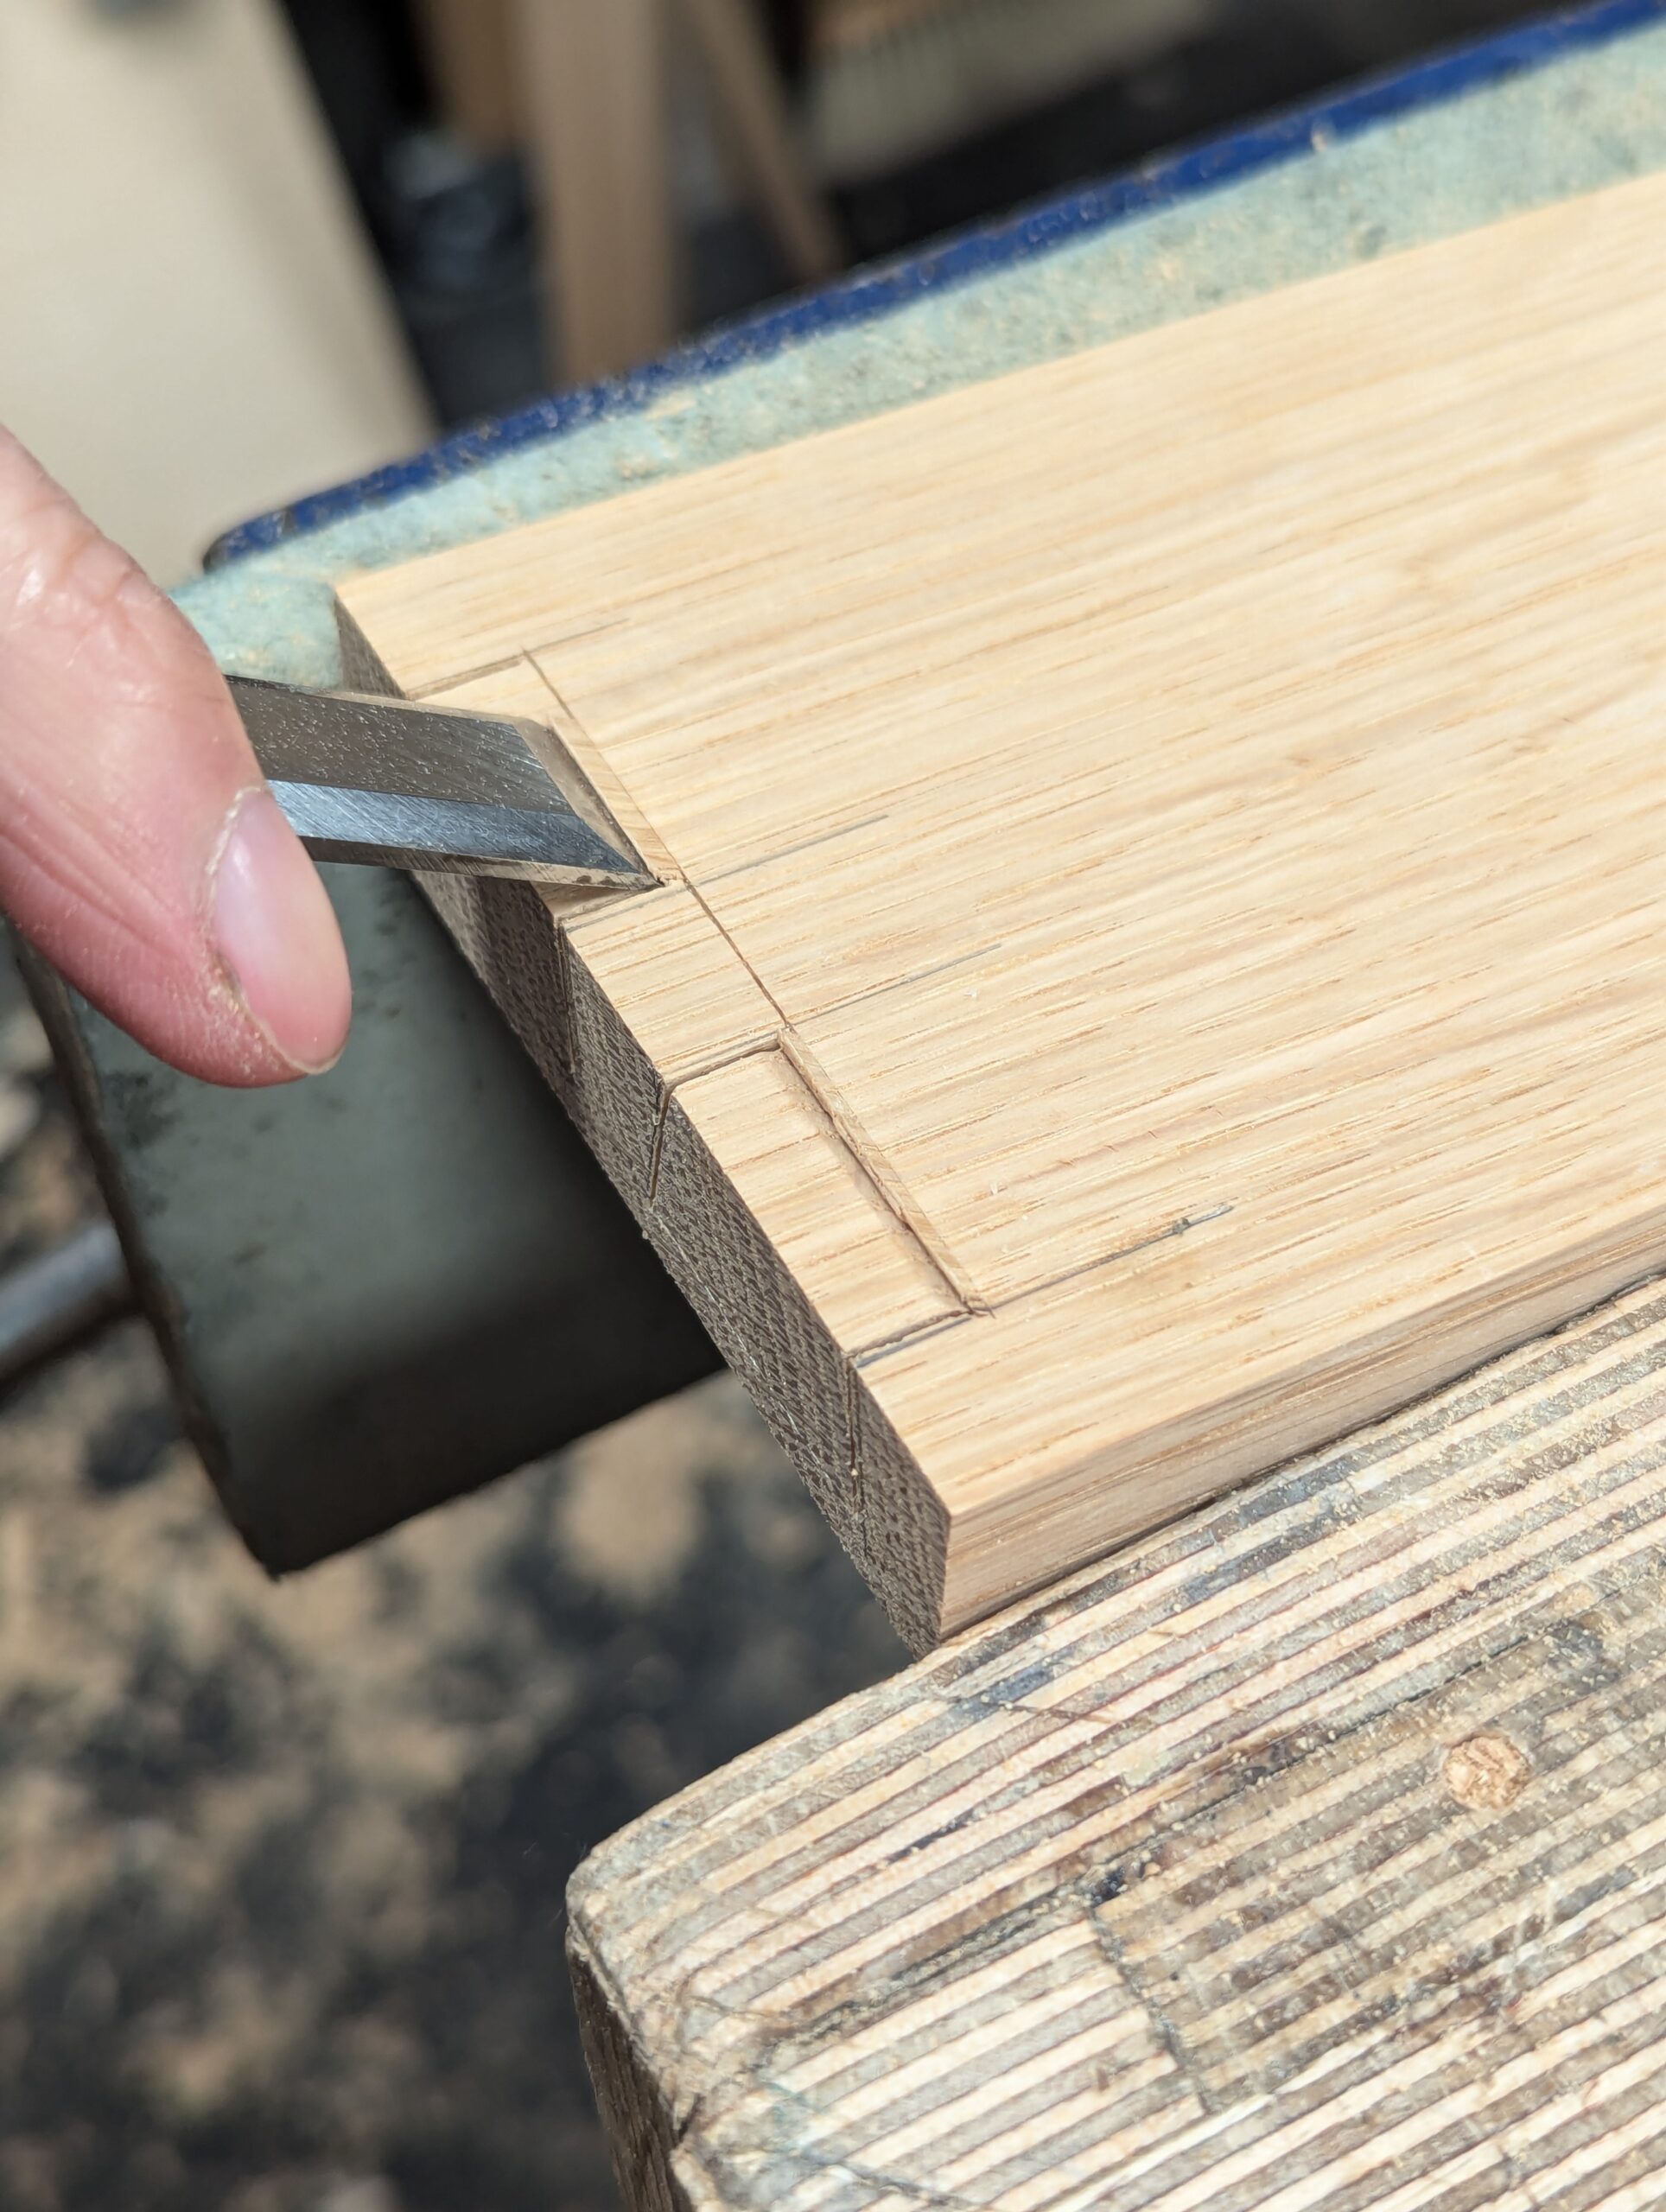
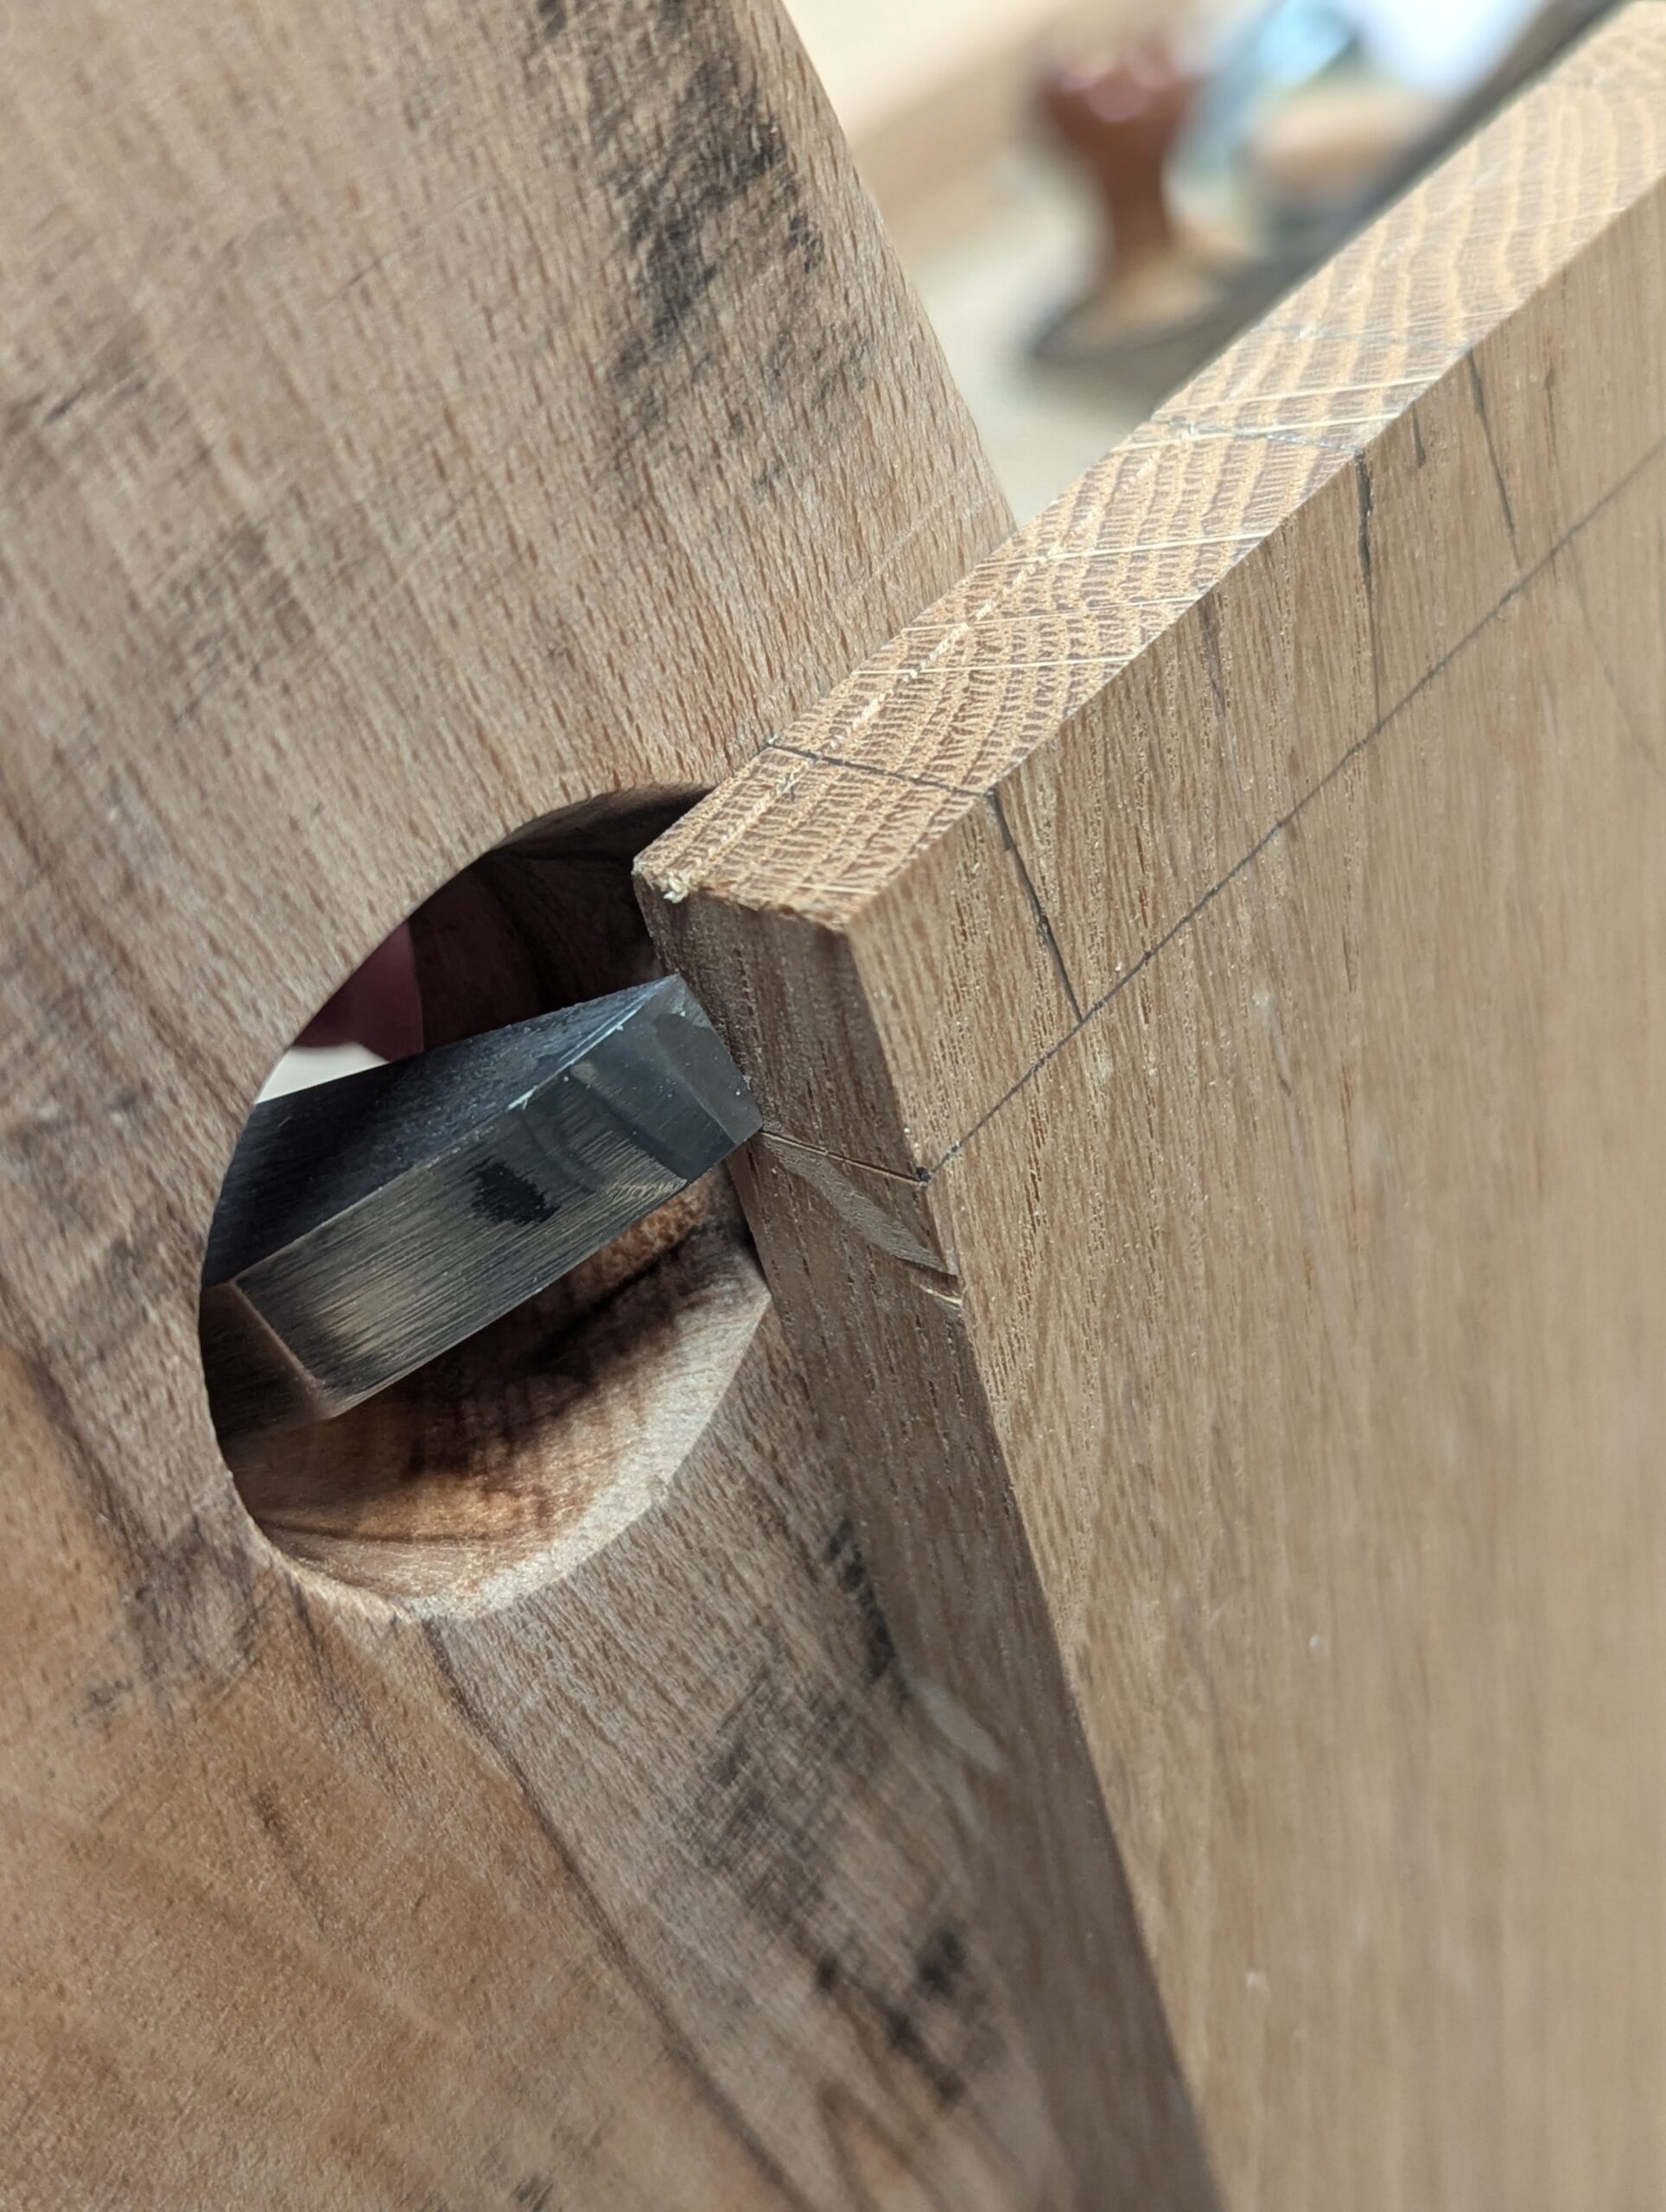
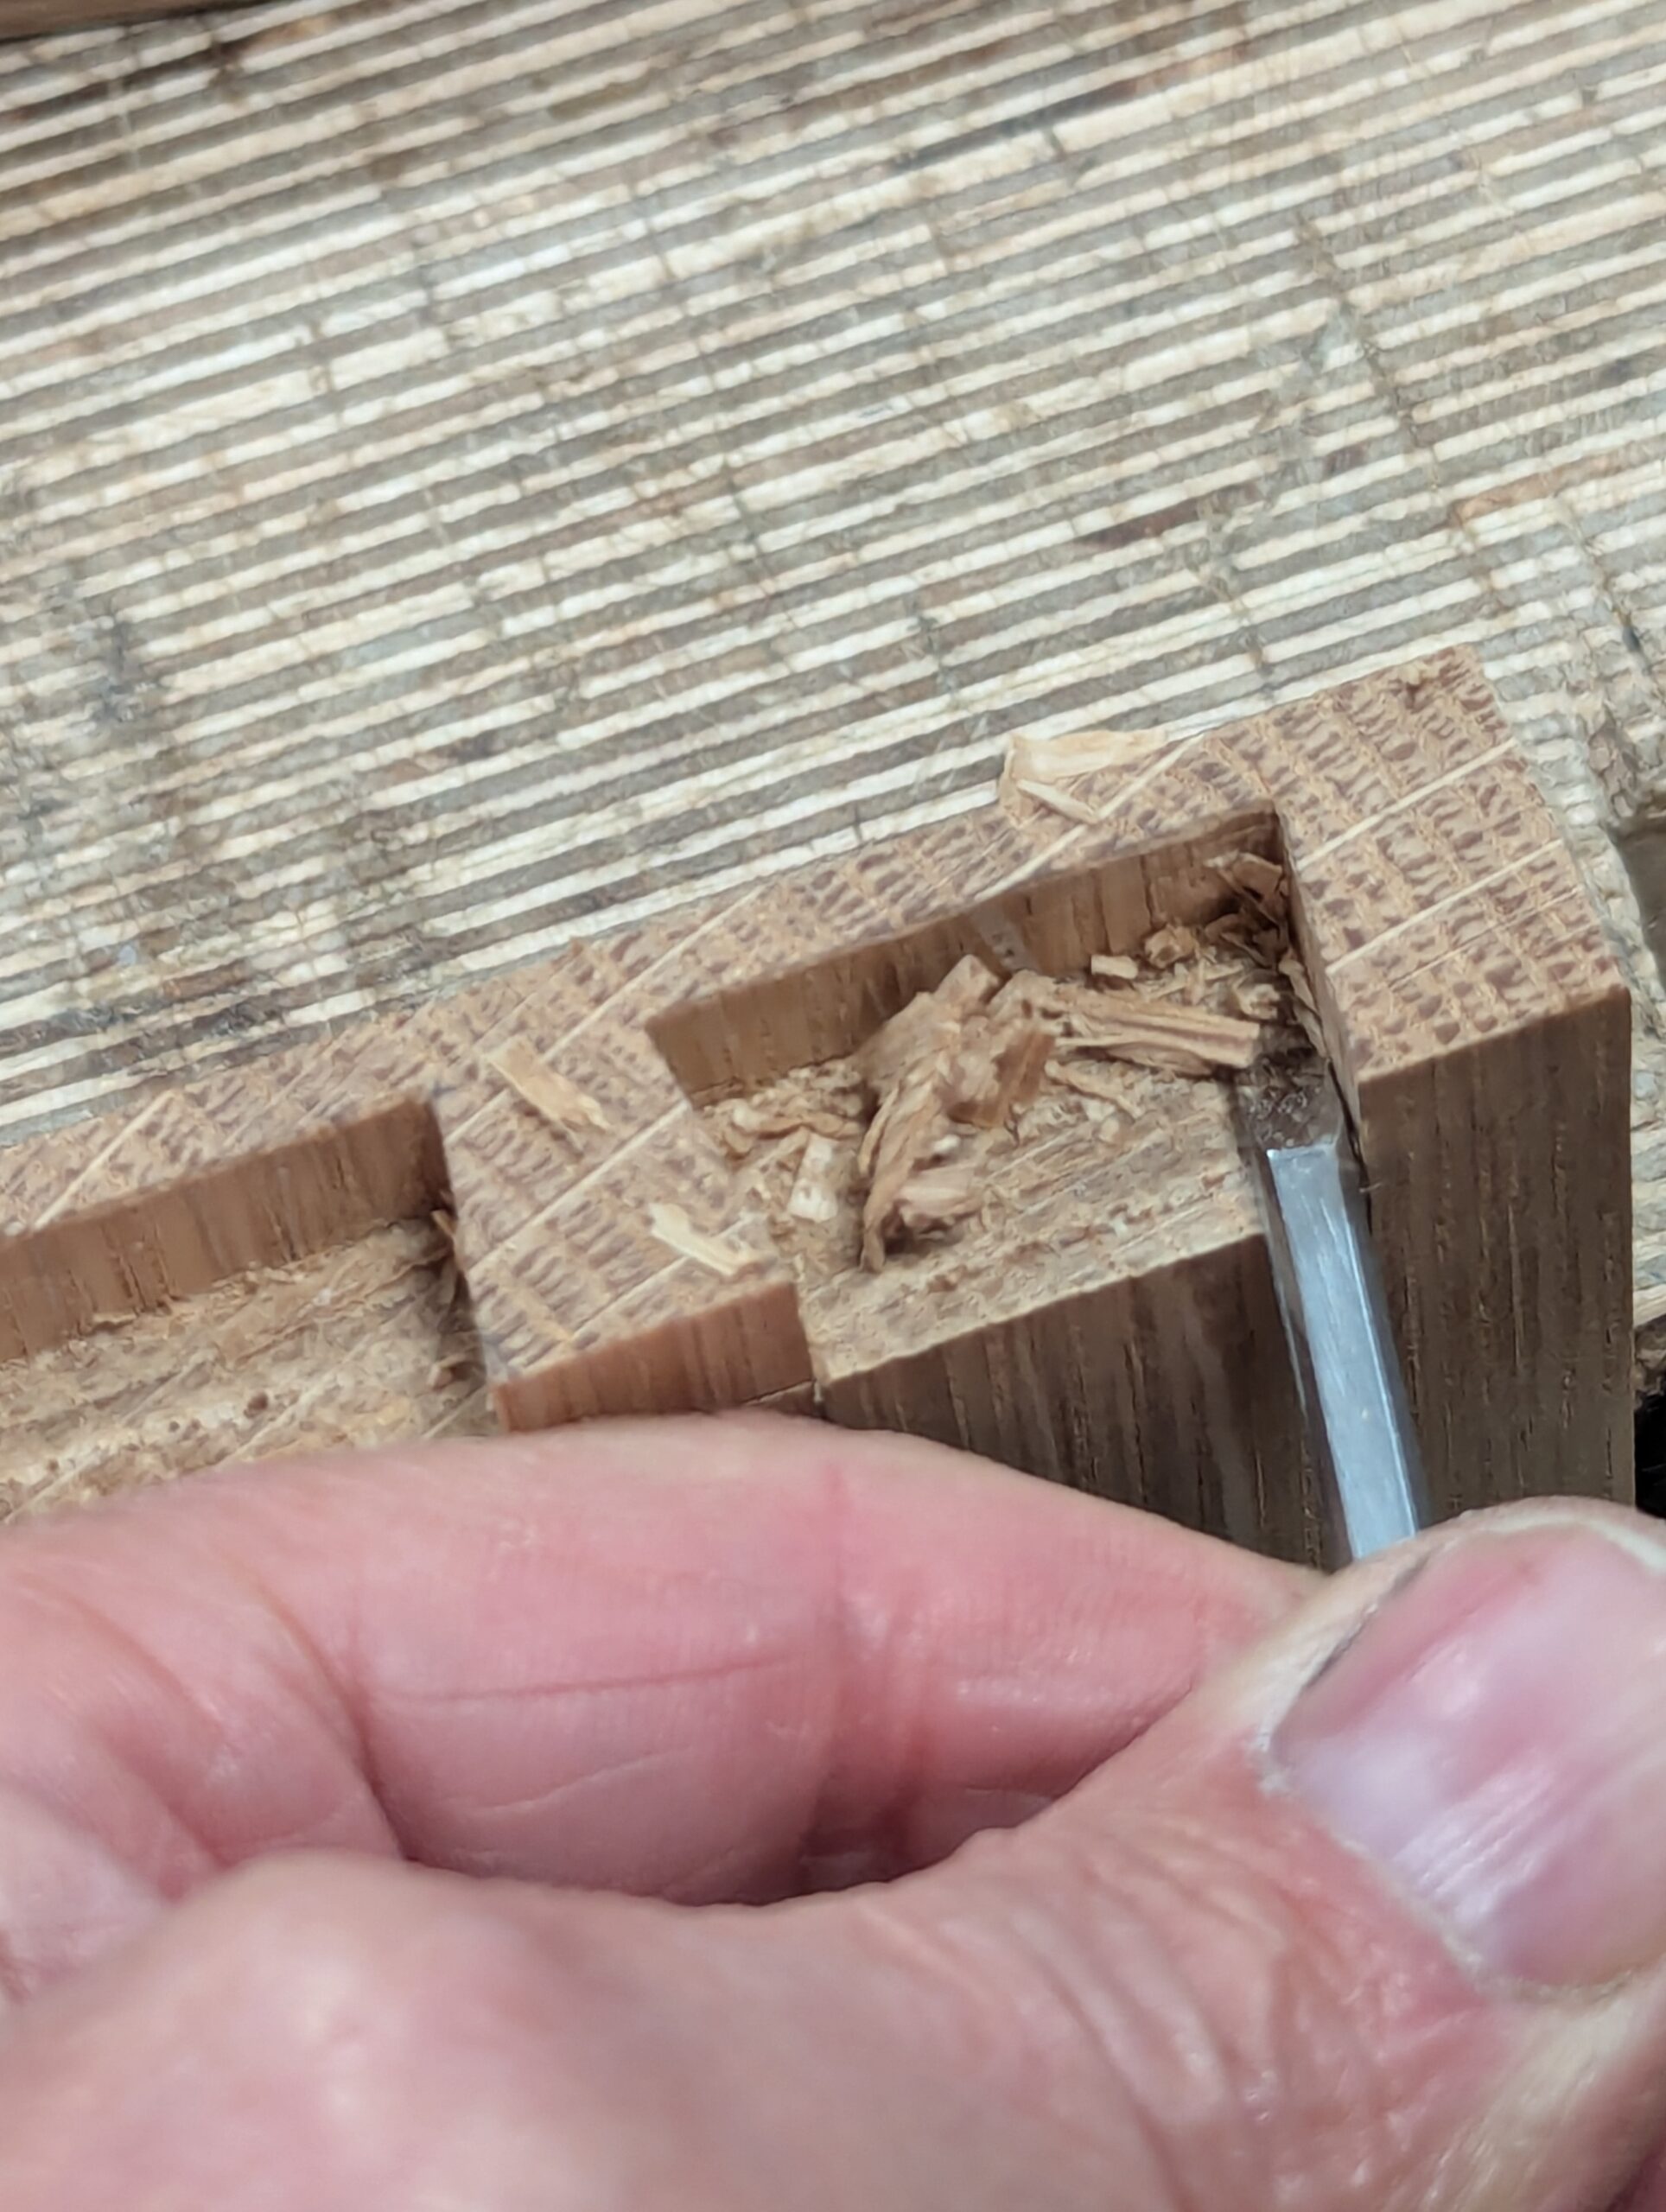
Chisel in at inclined angles towards the knifewall to establish a step-down for the chop cuts.
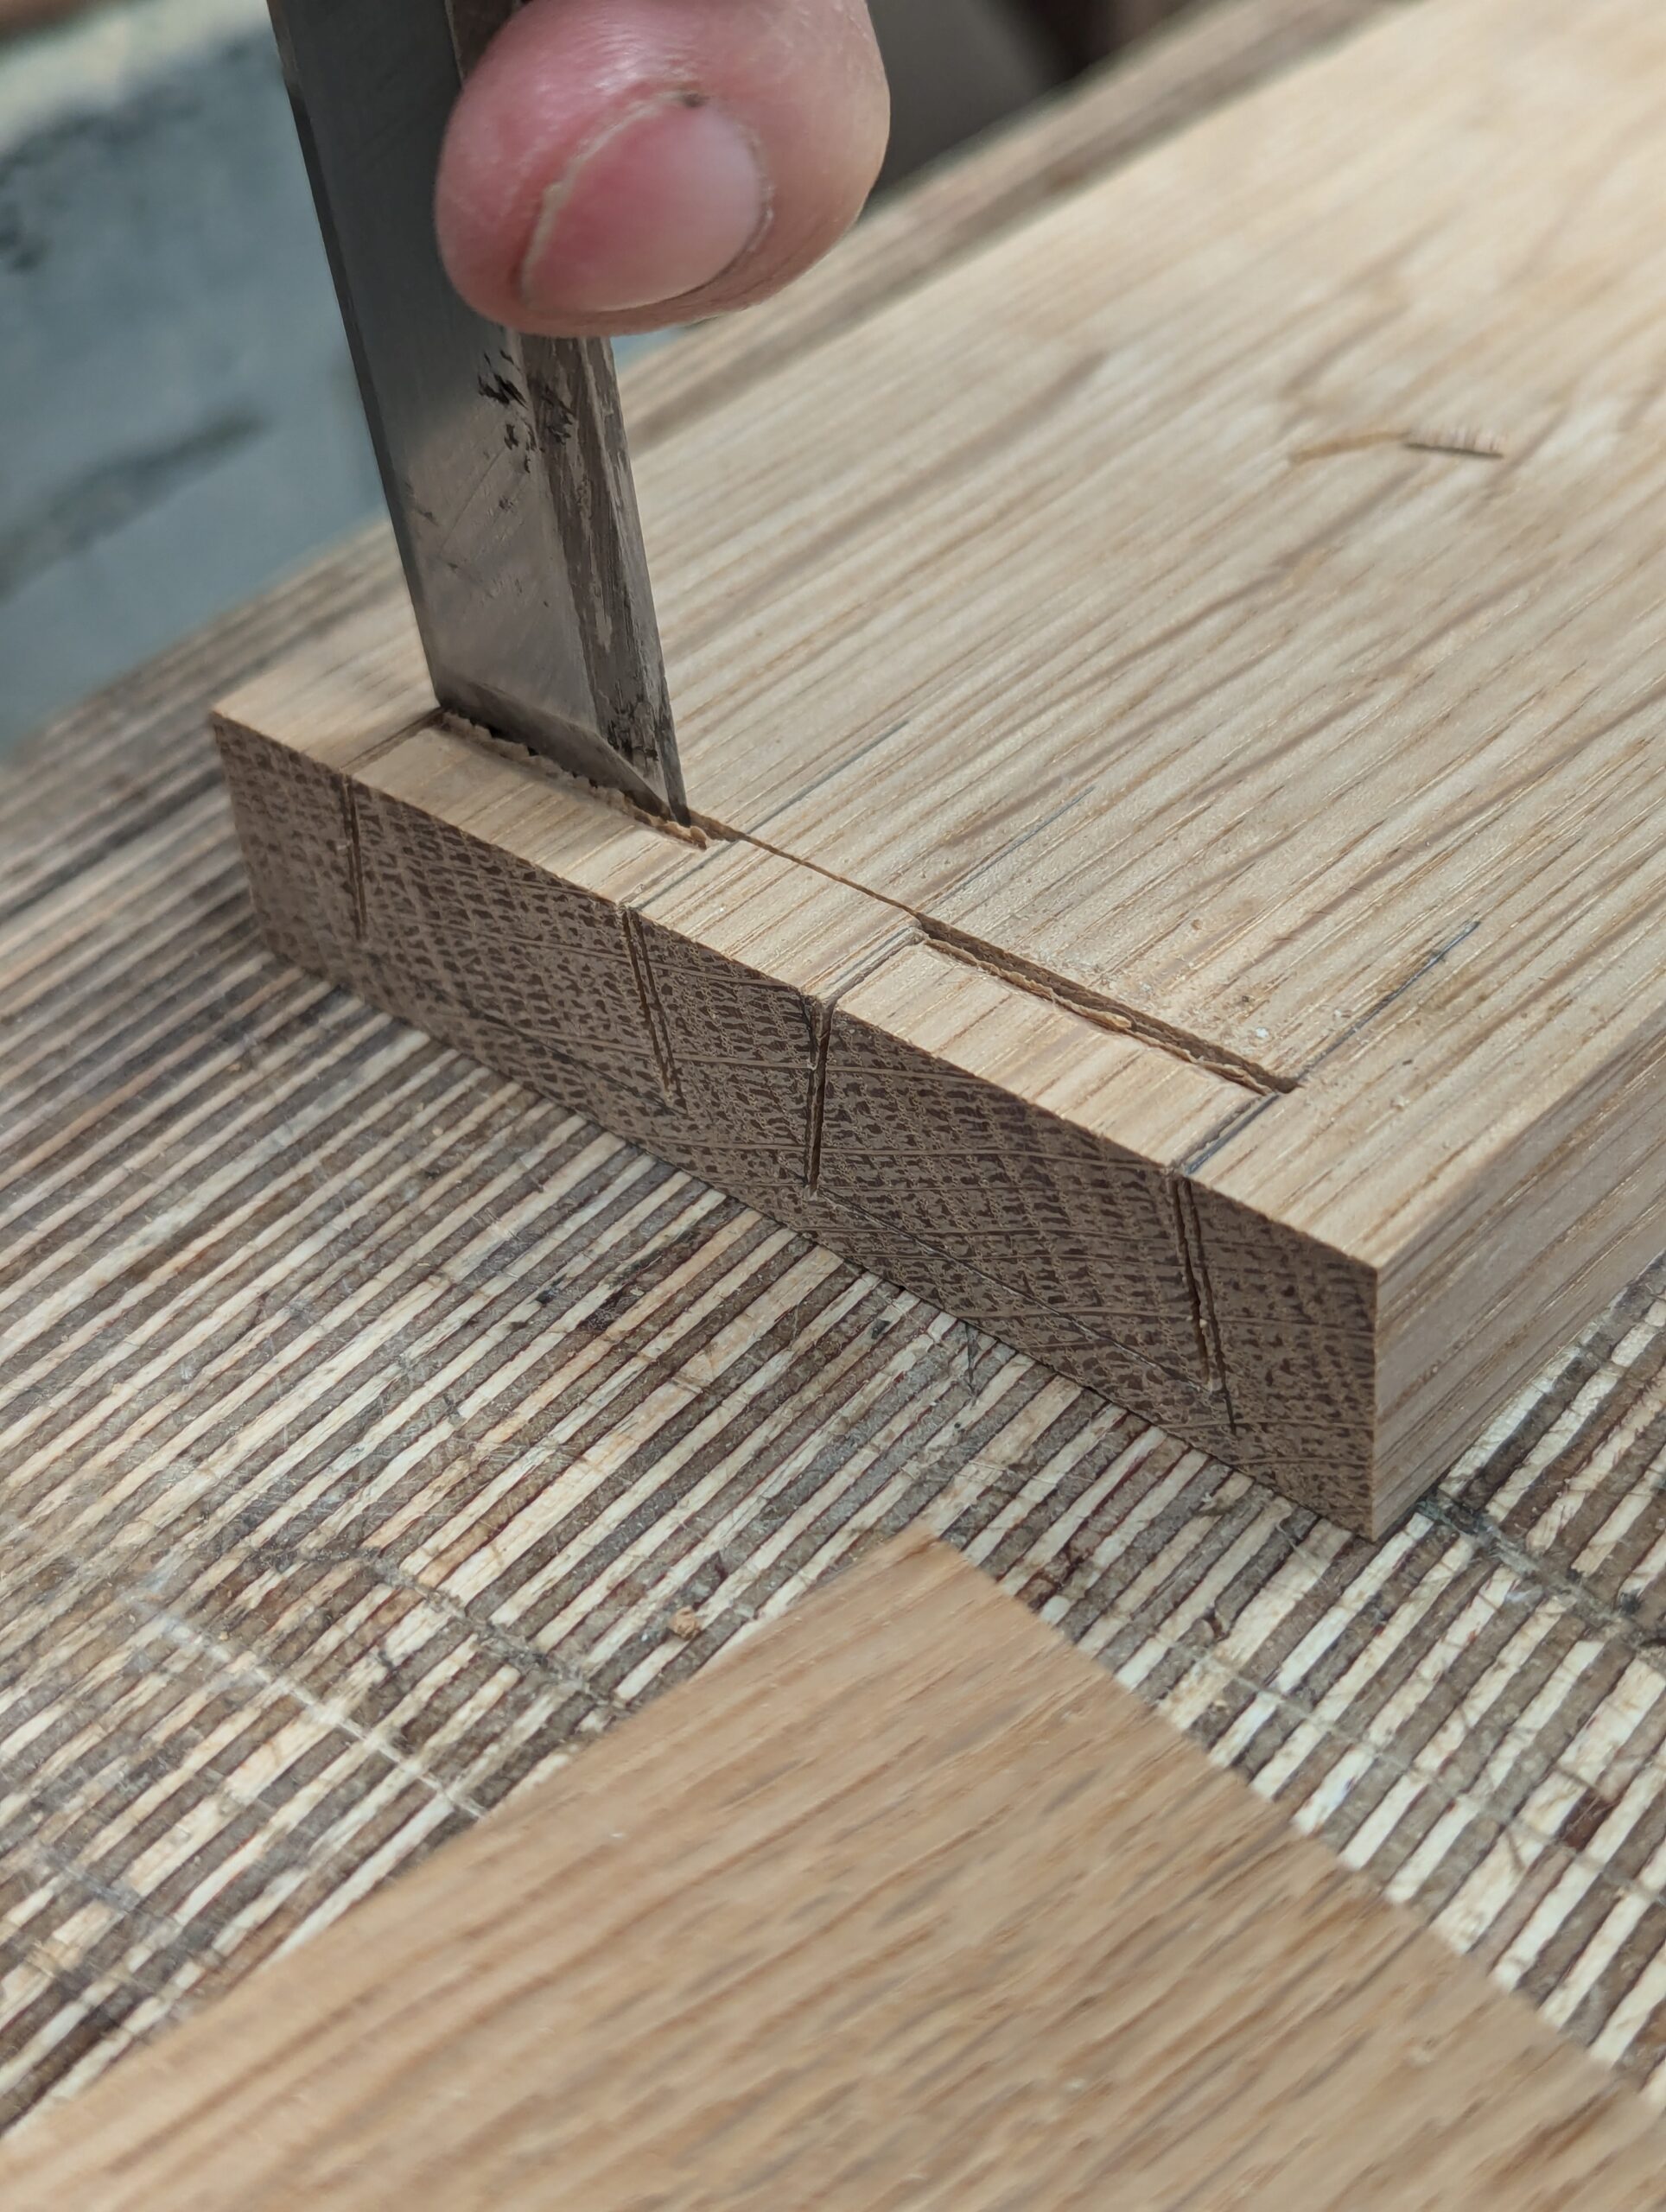
Chop cuts across the grain to create tight shoulder lines according to the knifewalls.
The chisel always settles the matter of tightness.
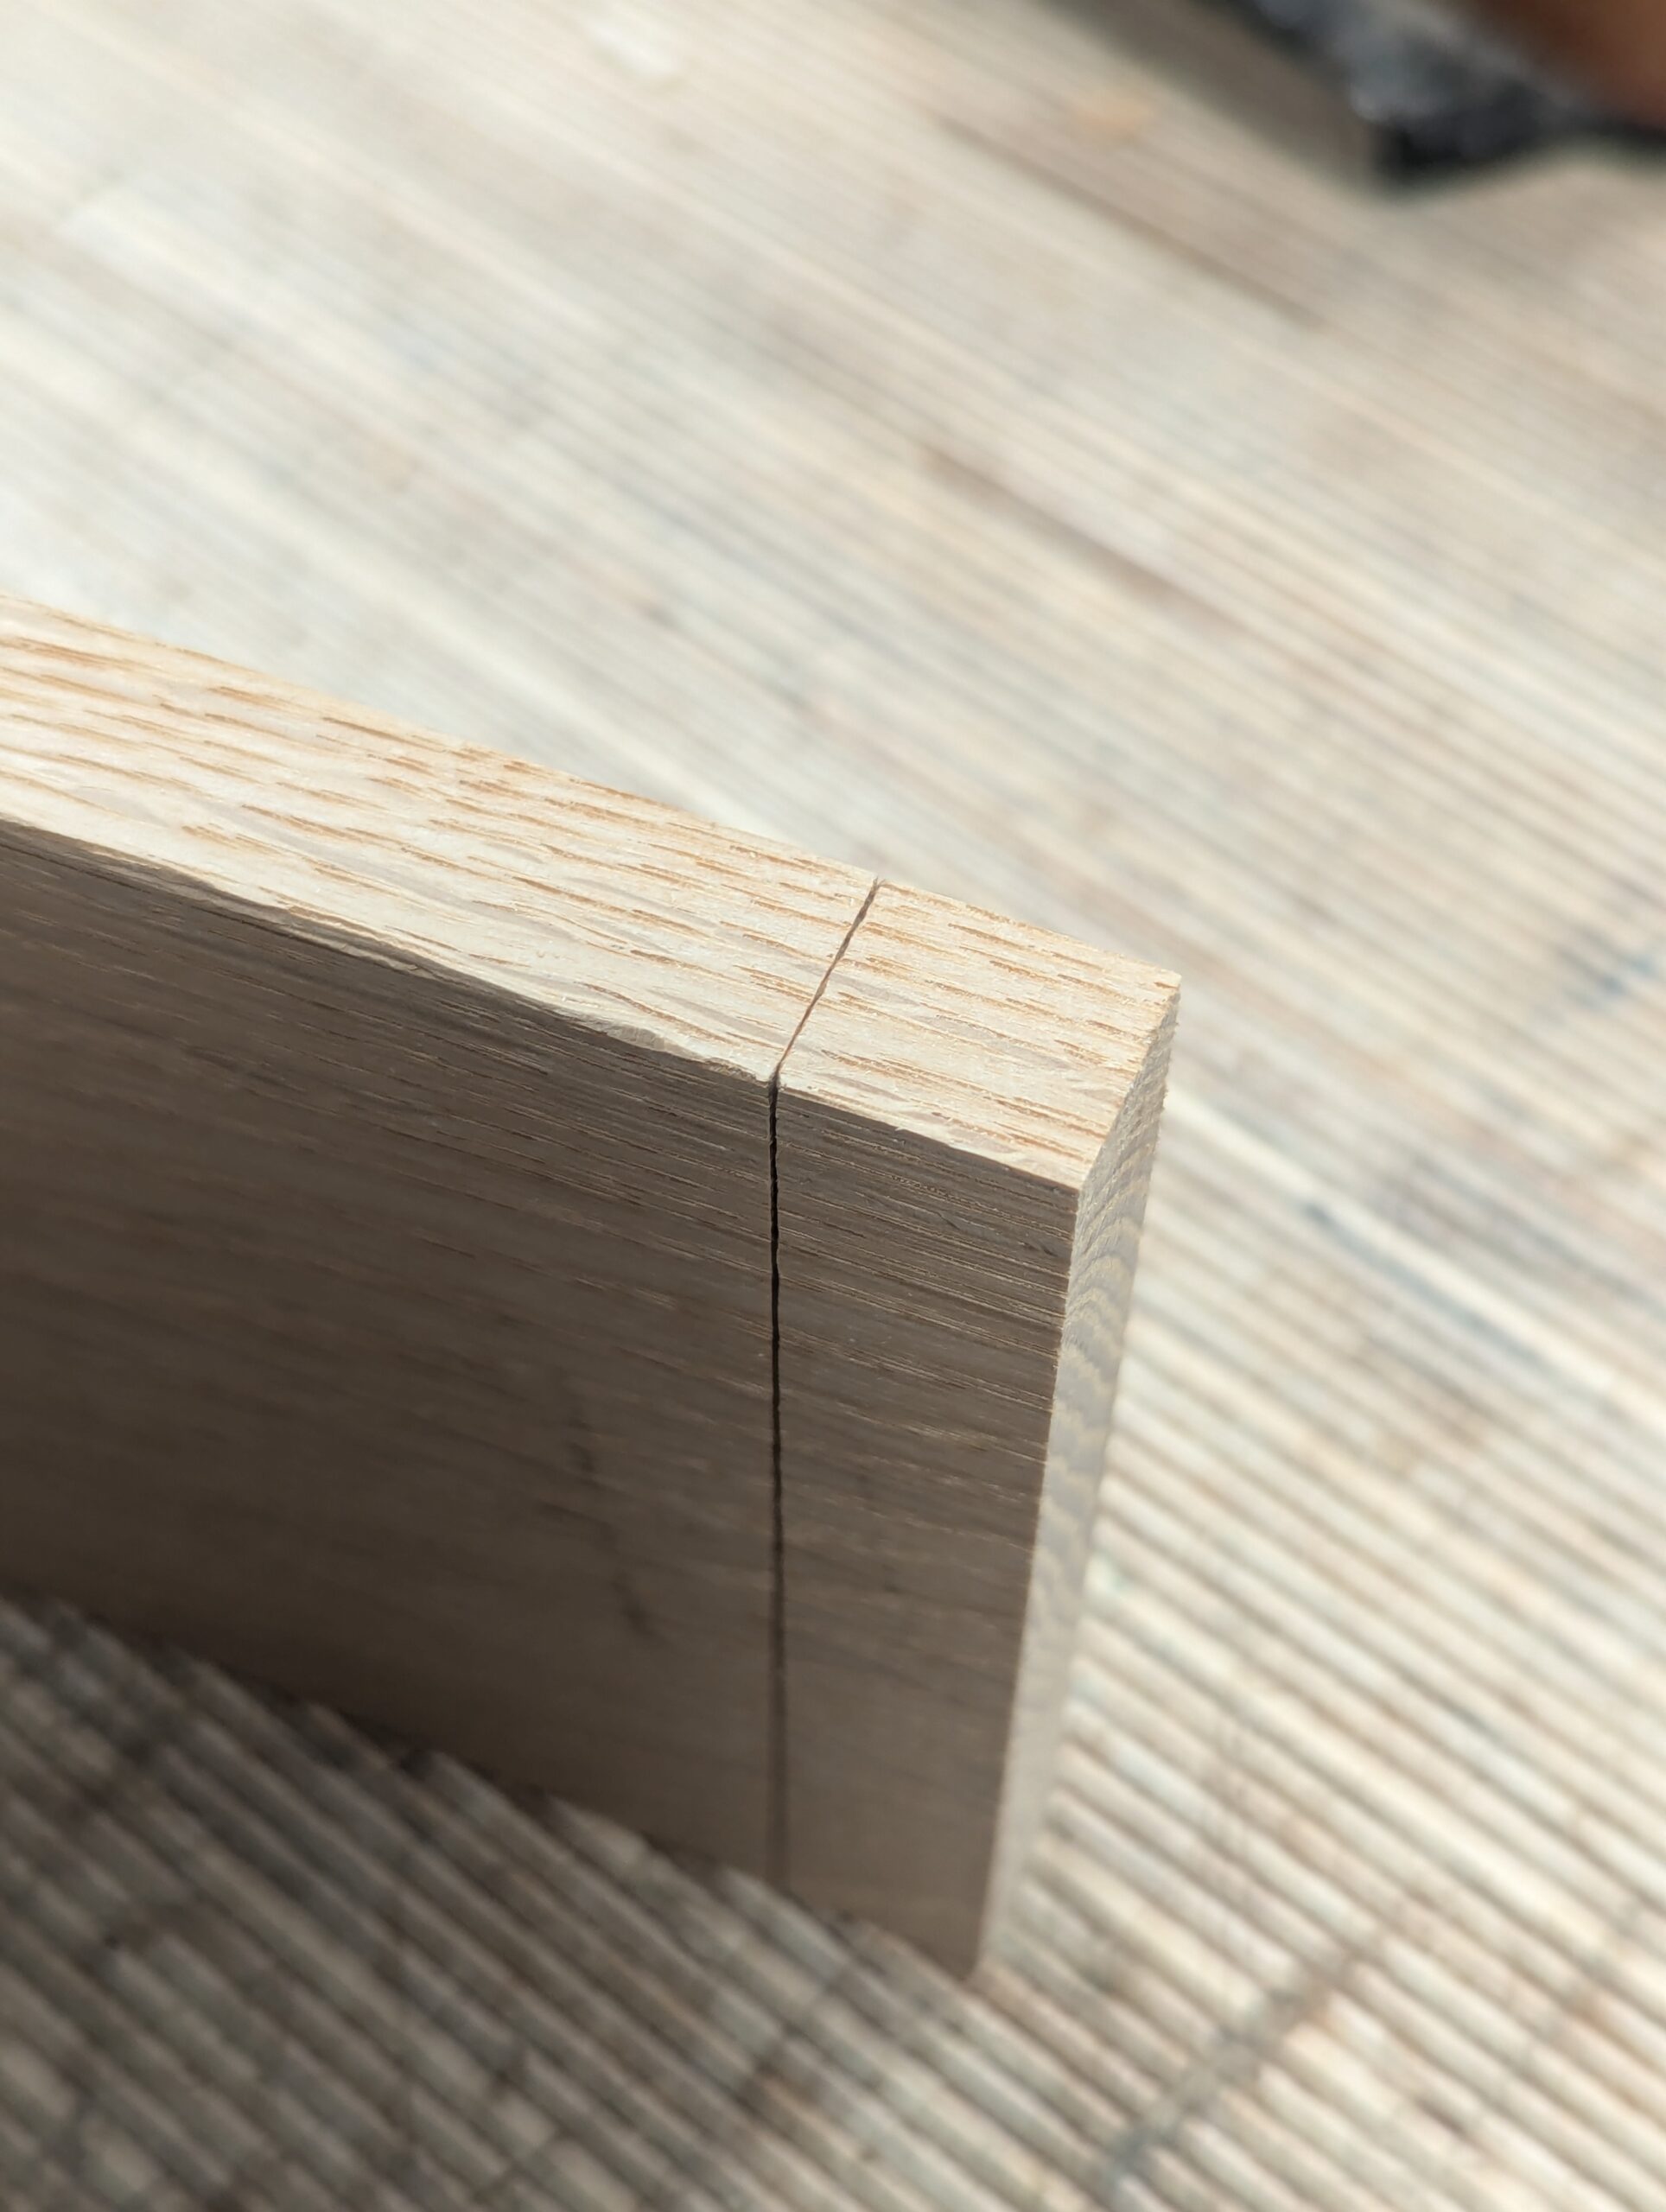
The knife walls bend the wood ever so slightly in oak, but they soon swell back in the glue up.
I used a 3/16" chisel for the internal corners. Not into skewed chisels. Waste of space.
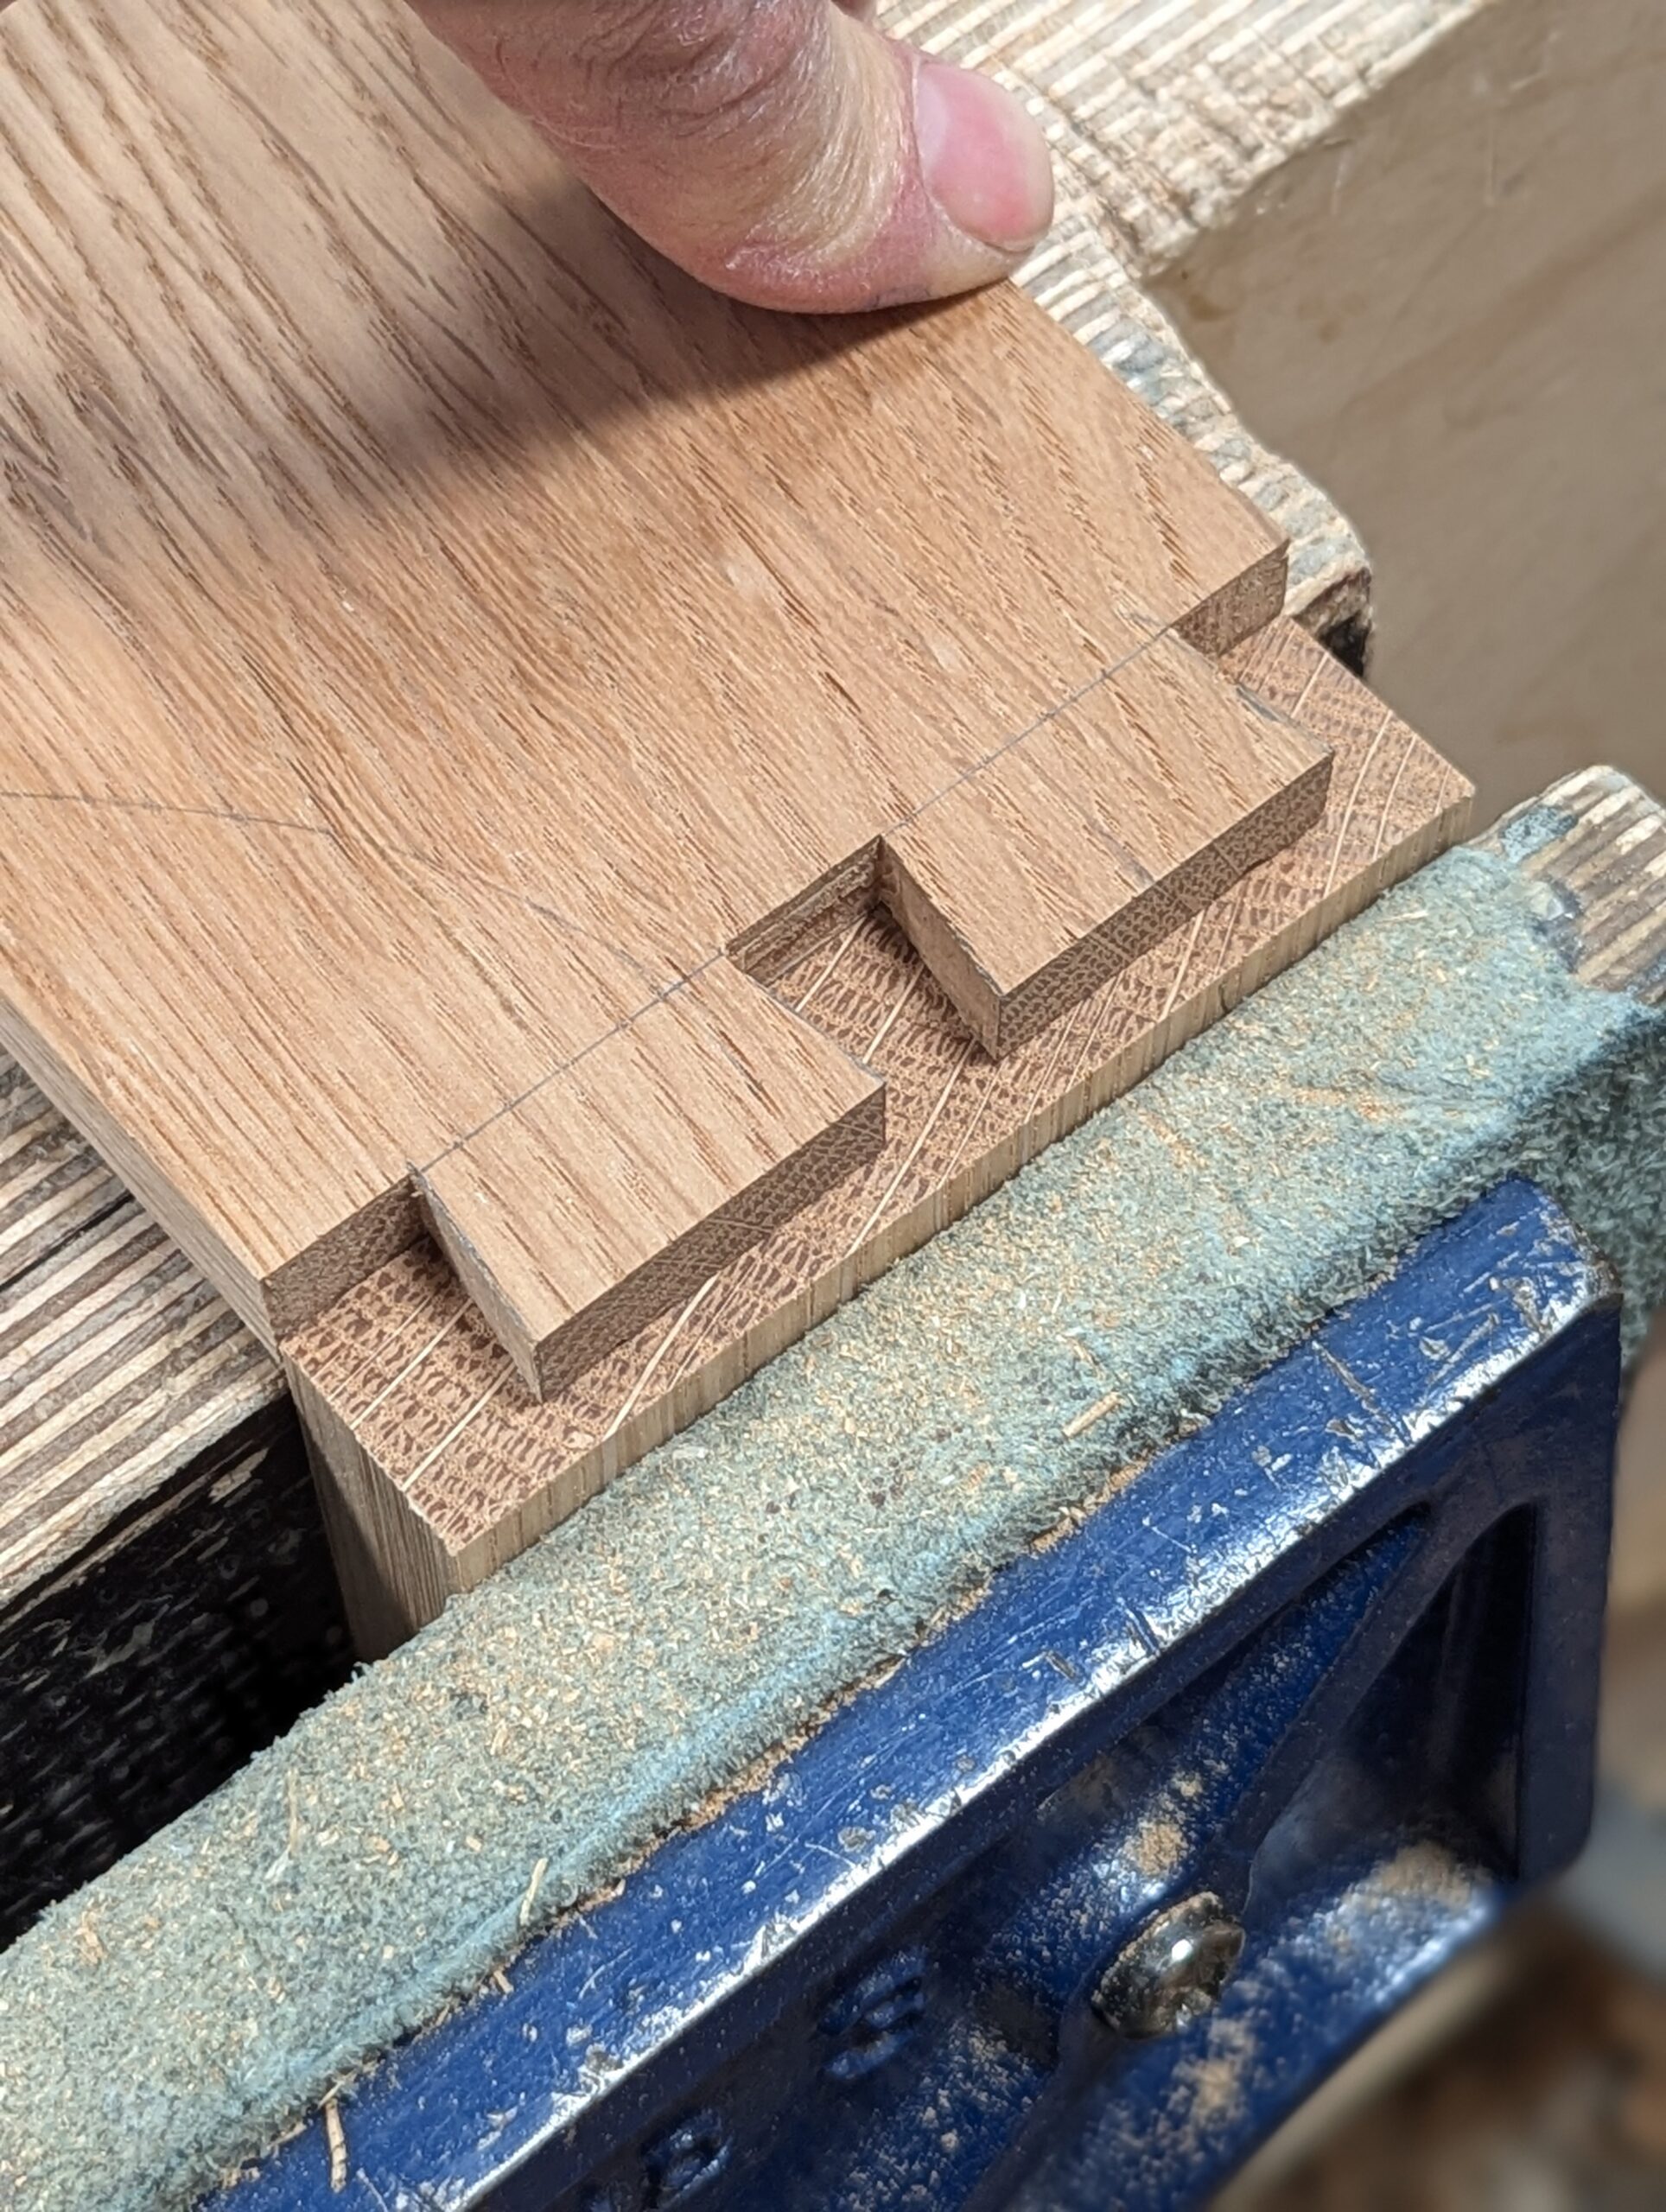
Thumb-pressed dovetails are pure joy.

Pressing unglued dovetails into their custom-made recesses brings with it the indescribable joy only a maker using inbuilt sensors and powers knows. Unconsciously, he, she uses every ounce of energy in their human flesh to direct each tool in the challenge of perfecting a dovetail that matches the expectation of their mind. Somehow, the making of simplicity this way, elevates the spirits, lifts the ordinary being to accomplish basic tasks using only two hands, and transports him into extraordinary elevations without warning and in the immediacy of it he feels an eternal joy in the Presence of his Maker.
I think makers new to the work sometimes, for a season at least, forget that glue in general swells the wood fibres and when the two parts to a joint come together they seem as though they didn't fit them too well after all. The reality is they worked too slowly and the wood swelled ever so slightly and uh-oh, the joints too tight. Coat the parts that need the glue efficiently and methodically. Get a rhythm down for glueing up. Practice makes perfect, and practice makes permanent. I coat both parts and press firmly and quickly. The extra glue is not for gap filling because there are no gaps. It works to lubricate the assembly so that there is no 'glue freeze'. Additionally, wood has memory and compressed wood to both elements ensures a positive union.
These areas are often neglected, but they can also be quite difficult to get dead square. The knife wall on three sides is the trick. I cut to the knifewall but then trim off the fuzzy surface after sawing, and it's this that settles the matter. In oak, it can be a little trickier, so you shouldn't be too hard on yourself if a cell splits along its long axis. Other hardwood, just about all of them, do not have such coarse grain with cell so large you could crawl through them. Only really oak.

I planed the surfaces level using my #4 Stanley for just about everything. It has never failed me in 60 years of daily use and even though I don't generally grind my irons, rarely, I'm currently on my sixth iron, so an iron seems to last me about ten years apiece.

Being happy with your outcome is a matter of mental compartmentalism. I could tell when the two parts were placed together that they were going to seat straight off the saw cuts. This is by far the best goal to have and get down early on in dovetailing. I once read an article I regretted reading in a woodworking magazine that decided me not read a woodworking magazine again. The author was saying to keep paring the tail recesses until the dovetail fit. Well, yes, an injudicious cut can need a touch of help here and there, but that's not the goal. The men I worked with said, "Get it off the saw, lad. Off the saw!" I say the same to the best of your ability.
Someone said to me, "You are using hundreds of pounds worth of hand tools there. " It was a really narrow-minded, ignorant comment: ignorant in the sense of them not truly evaluating the low cost of hand tools when the use of them is prolonged over many decades. The tools I use should last for around a hundred years and then some if I use them as I do every single day of the working six-day week. Divide a thousand pounds into my 60 years of woodworking six days a week and your perspectives change. It comes out at .0534 of a penny a day. I think that that is a half penny a day, but I am probably nearer to wrong than right.
Comments ()