Auguring Well With Augers
We tend to do better amassing tools without paying a premium price when we wait with a patient and watchful eye and are prepared to wait even a year or two to get the tool we want. Apart from starting out as an apprentice, where necessity forced me to buy tools according to need and on the day, I like the hunt and search to improve what I have. In my opening months of my apprentice days back in 1965, I spent every week's full wage in that first year on buying my initial tools. In those days, I could cycle to half a dozen hardware shops around town and buy just about any top quality hand tool over the counter. I earned £3.10 shillings and ten pence for a 42-hour week with five hours overtime, making it 47 hours. And that £3.10 shilling and ten pence was a week, not per hour. A swing (bit) brace would cost £2 and a set of bits around £4.
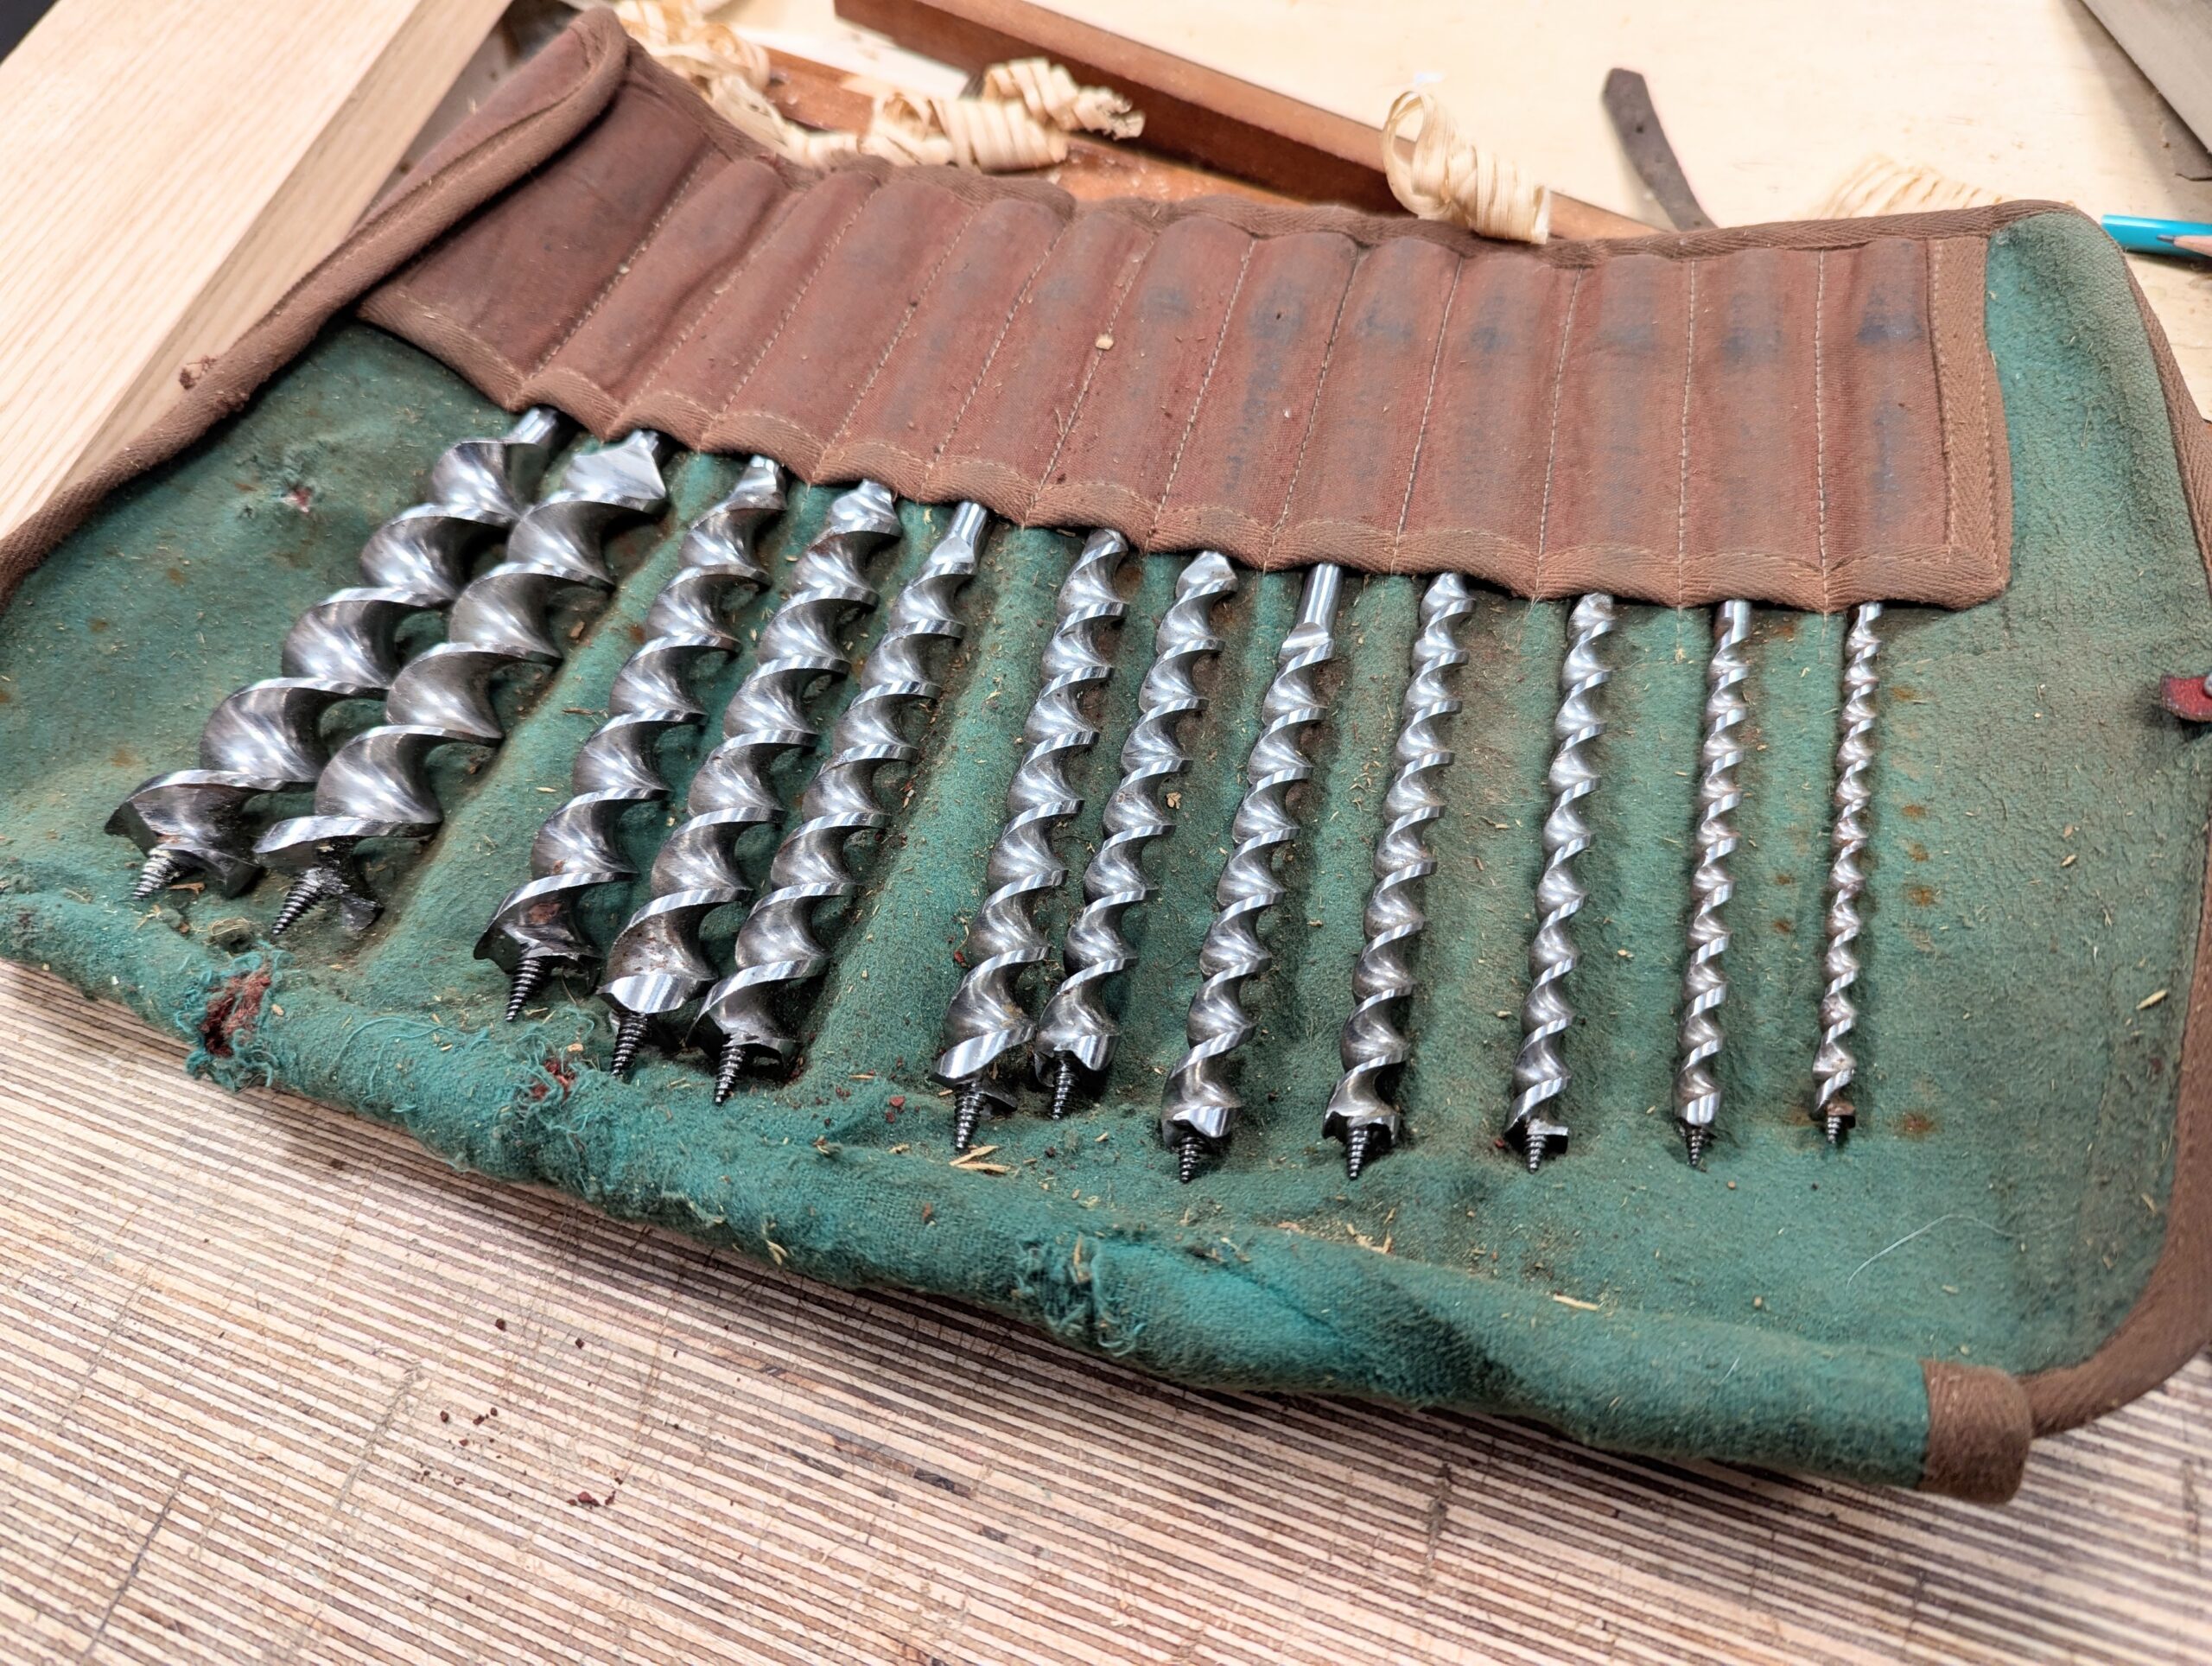
I'd been looking and waiting for this set of auger bits for a couple of years. It's not the scarcity or finding this particular set that took the time, but finding the level of cared-for quality I knew to look and wait for. What exactly was it I was looking for? Firstly, I was wanted clear close-ups of the business end of each bit. The thread of what's referred to as the 'snail' needs to be all there right up to the very tippy-top of the spiral, if possible, and in good condition too. Then next, I needed the outer spurs to be undamaged and definitely not broken off or mangled and the rakers inside each of these spurs and each side of the snail should be lower than the cutting edges of the spurs. The spurs cut the circumference of the hole just ahead of the rakers, and the rakers then come in behind like a paring chisel to lift and remove the now-severed waste. Additionally, I was looking for the character of the former owner. Who was he, and what was his job?

The bits I saw in the first picture on eBay pretty much told the whole story. The bits had been well-used over a number of decades, yet there was no sign of any kind of neglect. With every tool I have ever bought, I have been able to evaluate the people who have owned the tools before me. In this case, I felt that he was a good quality craftsman joiner. Remember the adage, "Look after your tools and your tools will look after you!"
Before I bought, and I went for a buy-it-now rather than a bid, I looked at the bit roll inside and out. There was a sense that a modest amount of oil had been used just once on the green baize lining, but in no way was it ever soaked because it was barely discernible. No rust appeared anywhere on the bit roll and neither on any one of the bits either. Each of the bits had been consistently and carefully sharpened and used by the owner, and these bits seemed to have belonged to this one owner only throughout their lifetime. I suspect, like me, he very occasionally wiped the bits with oil on a rag and that this oil went onto the baize in minute amounts every other year. Simply put, the owner of these bits cared.
I prefer never to grind my hand tools using machines. I enjoy the hand processes and had I not trained and constrained myself to sharpening tasks I would be sending them out to professional people who use only standard practices and never sharpen to task. Also, I learned the basics when I was 15 years old and owned mastery for a lifetime after a short period of doing it. Had I not done this, I would never have discovered the joy of discovering, discovering, discovering what it is to own skill. The main benefit of hand abrading is that you use exactly the amount it takes to get to the edge and no more. Your tools and blades will last a hundred times long. Read the next para to understand better what I mean.
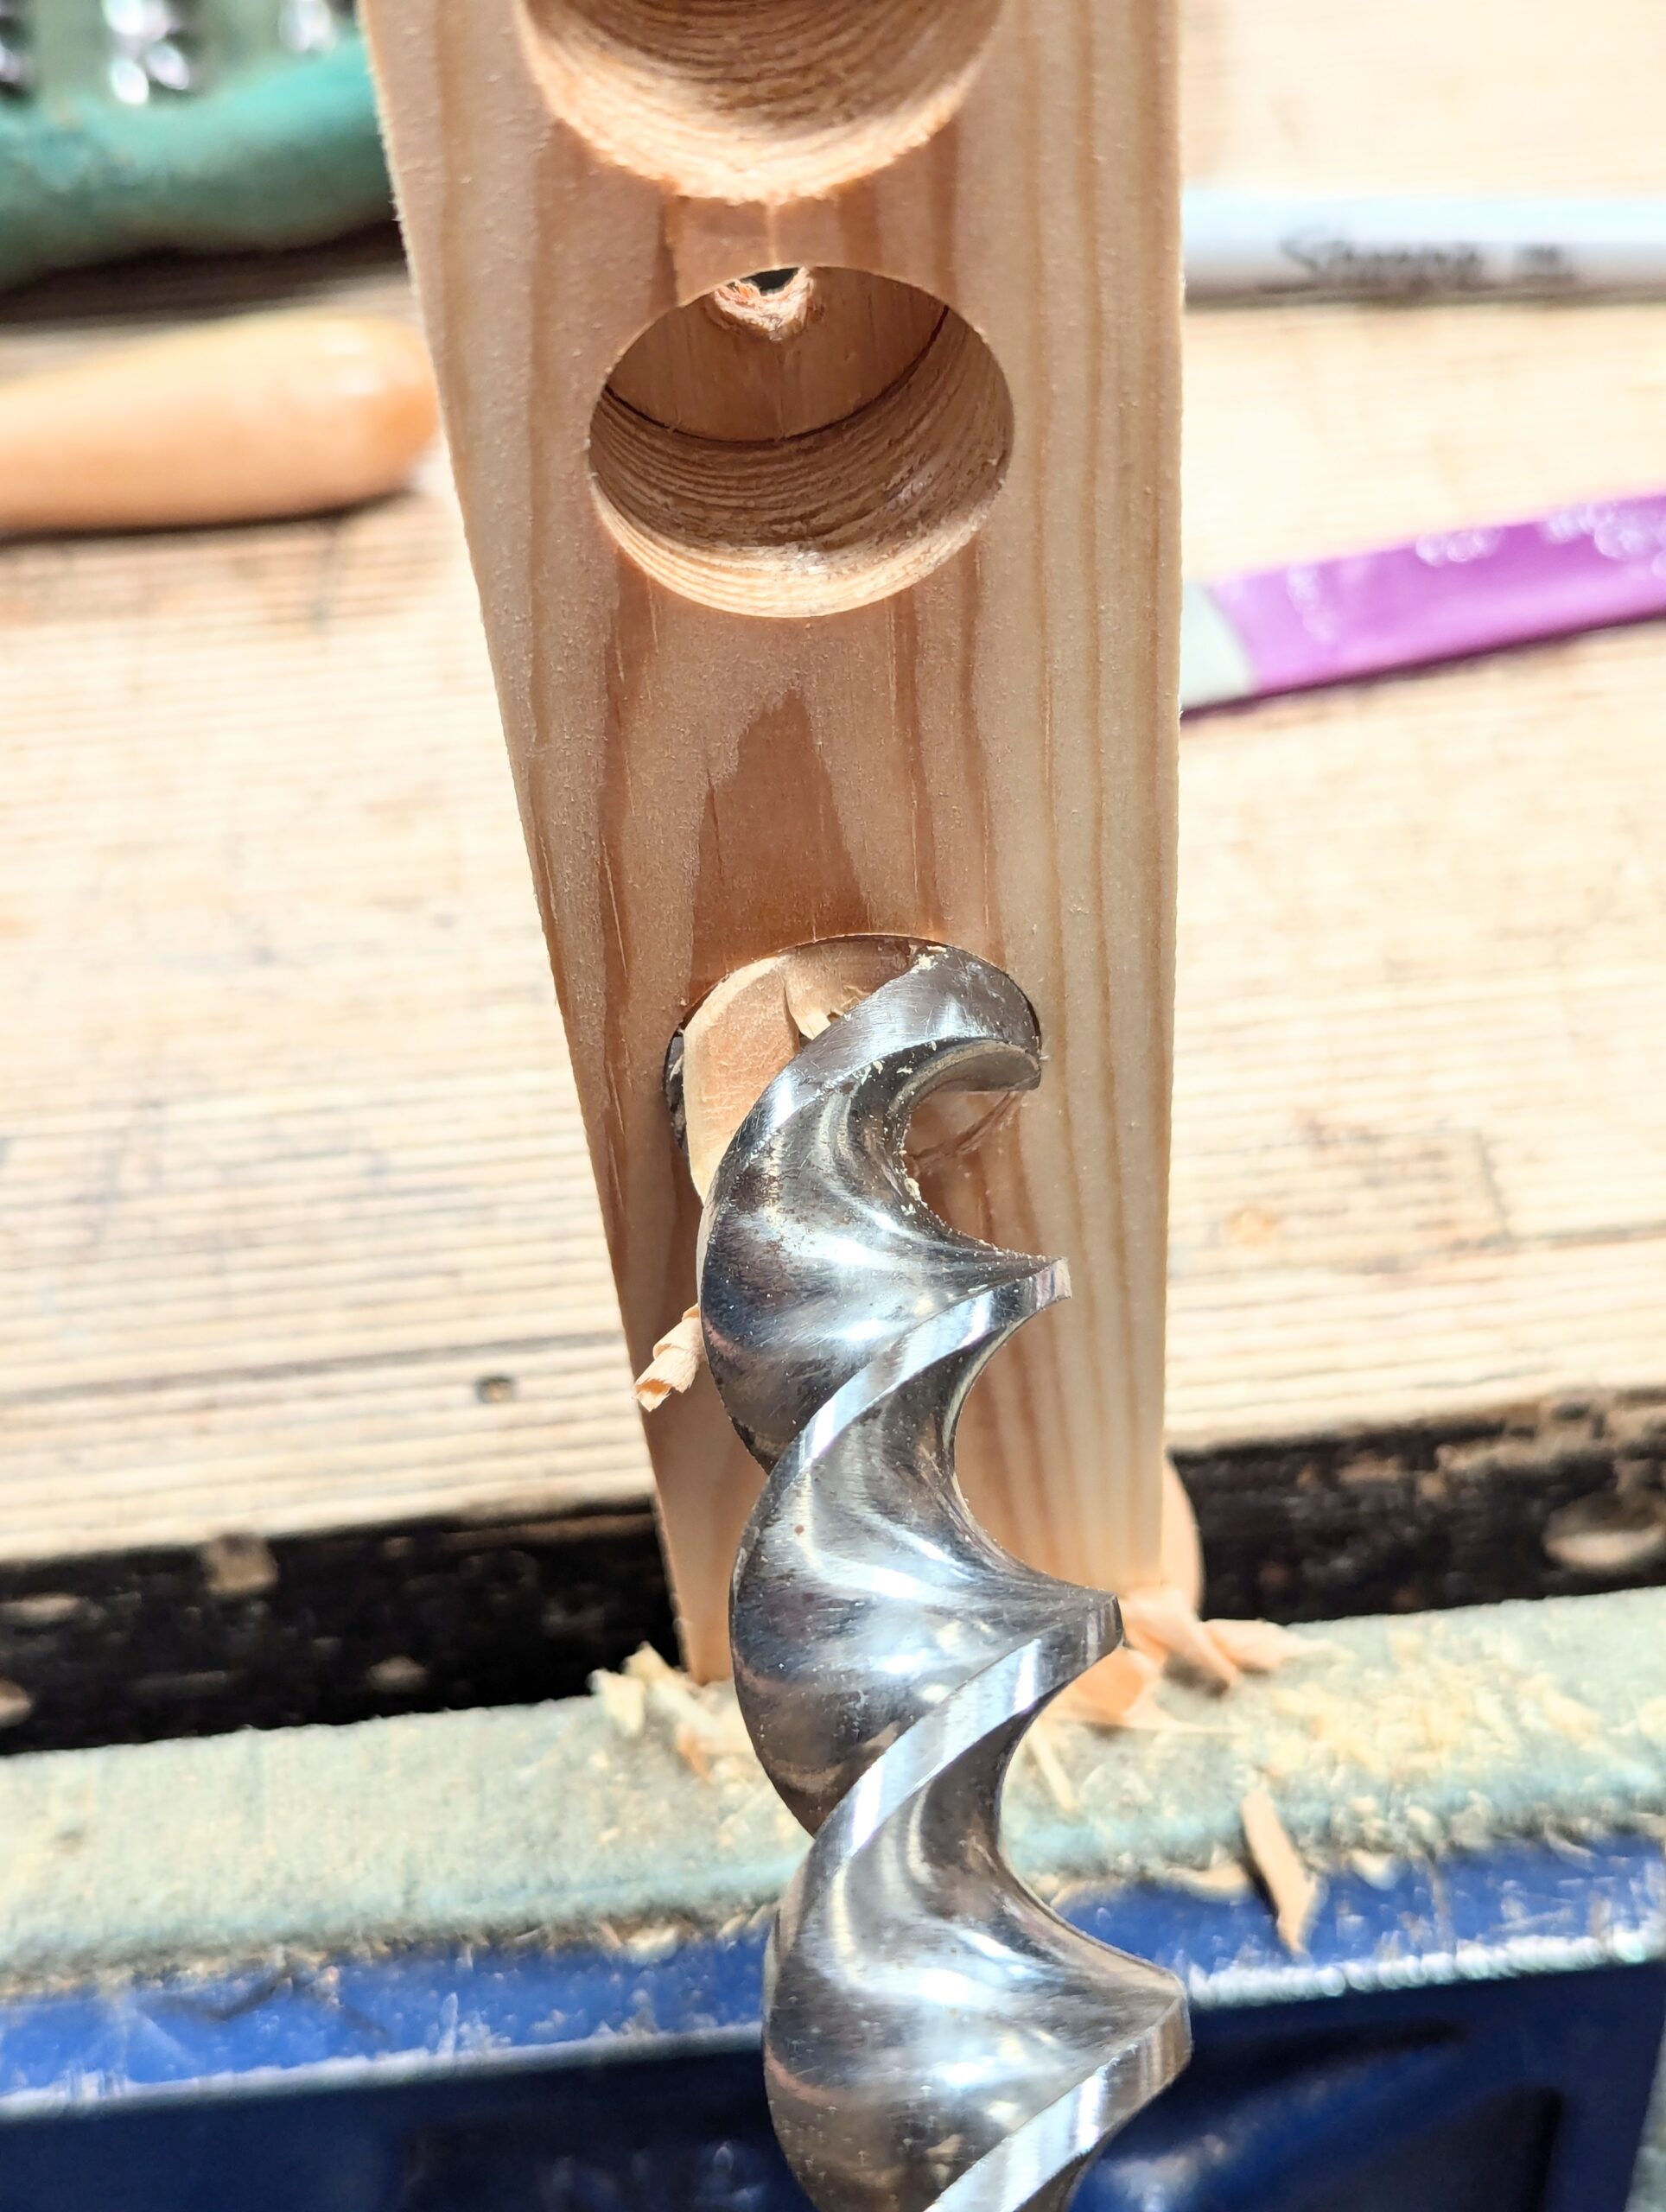
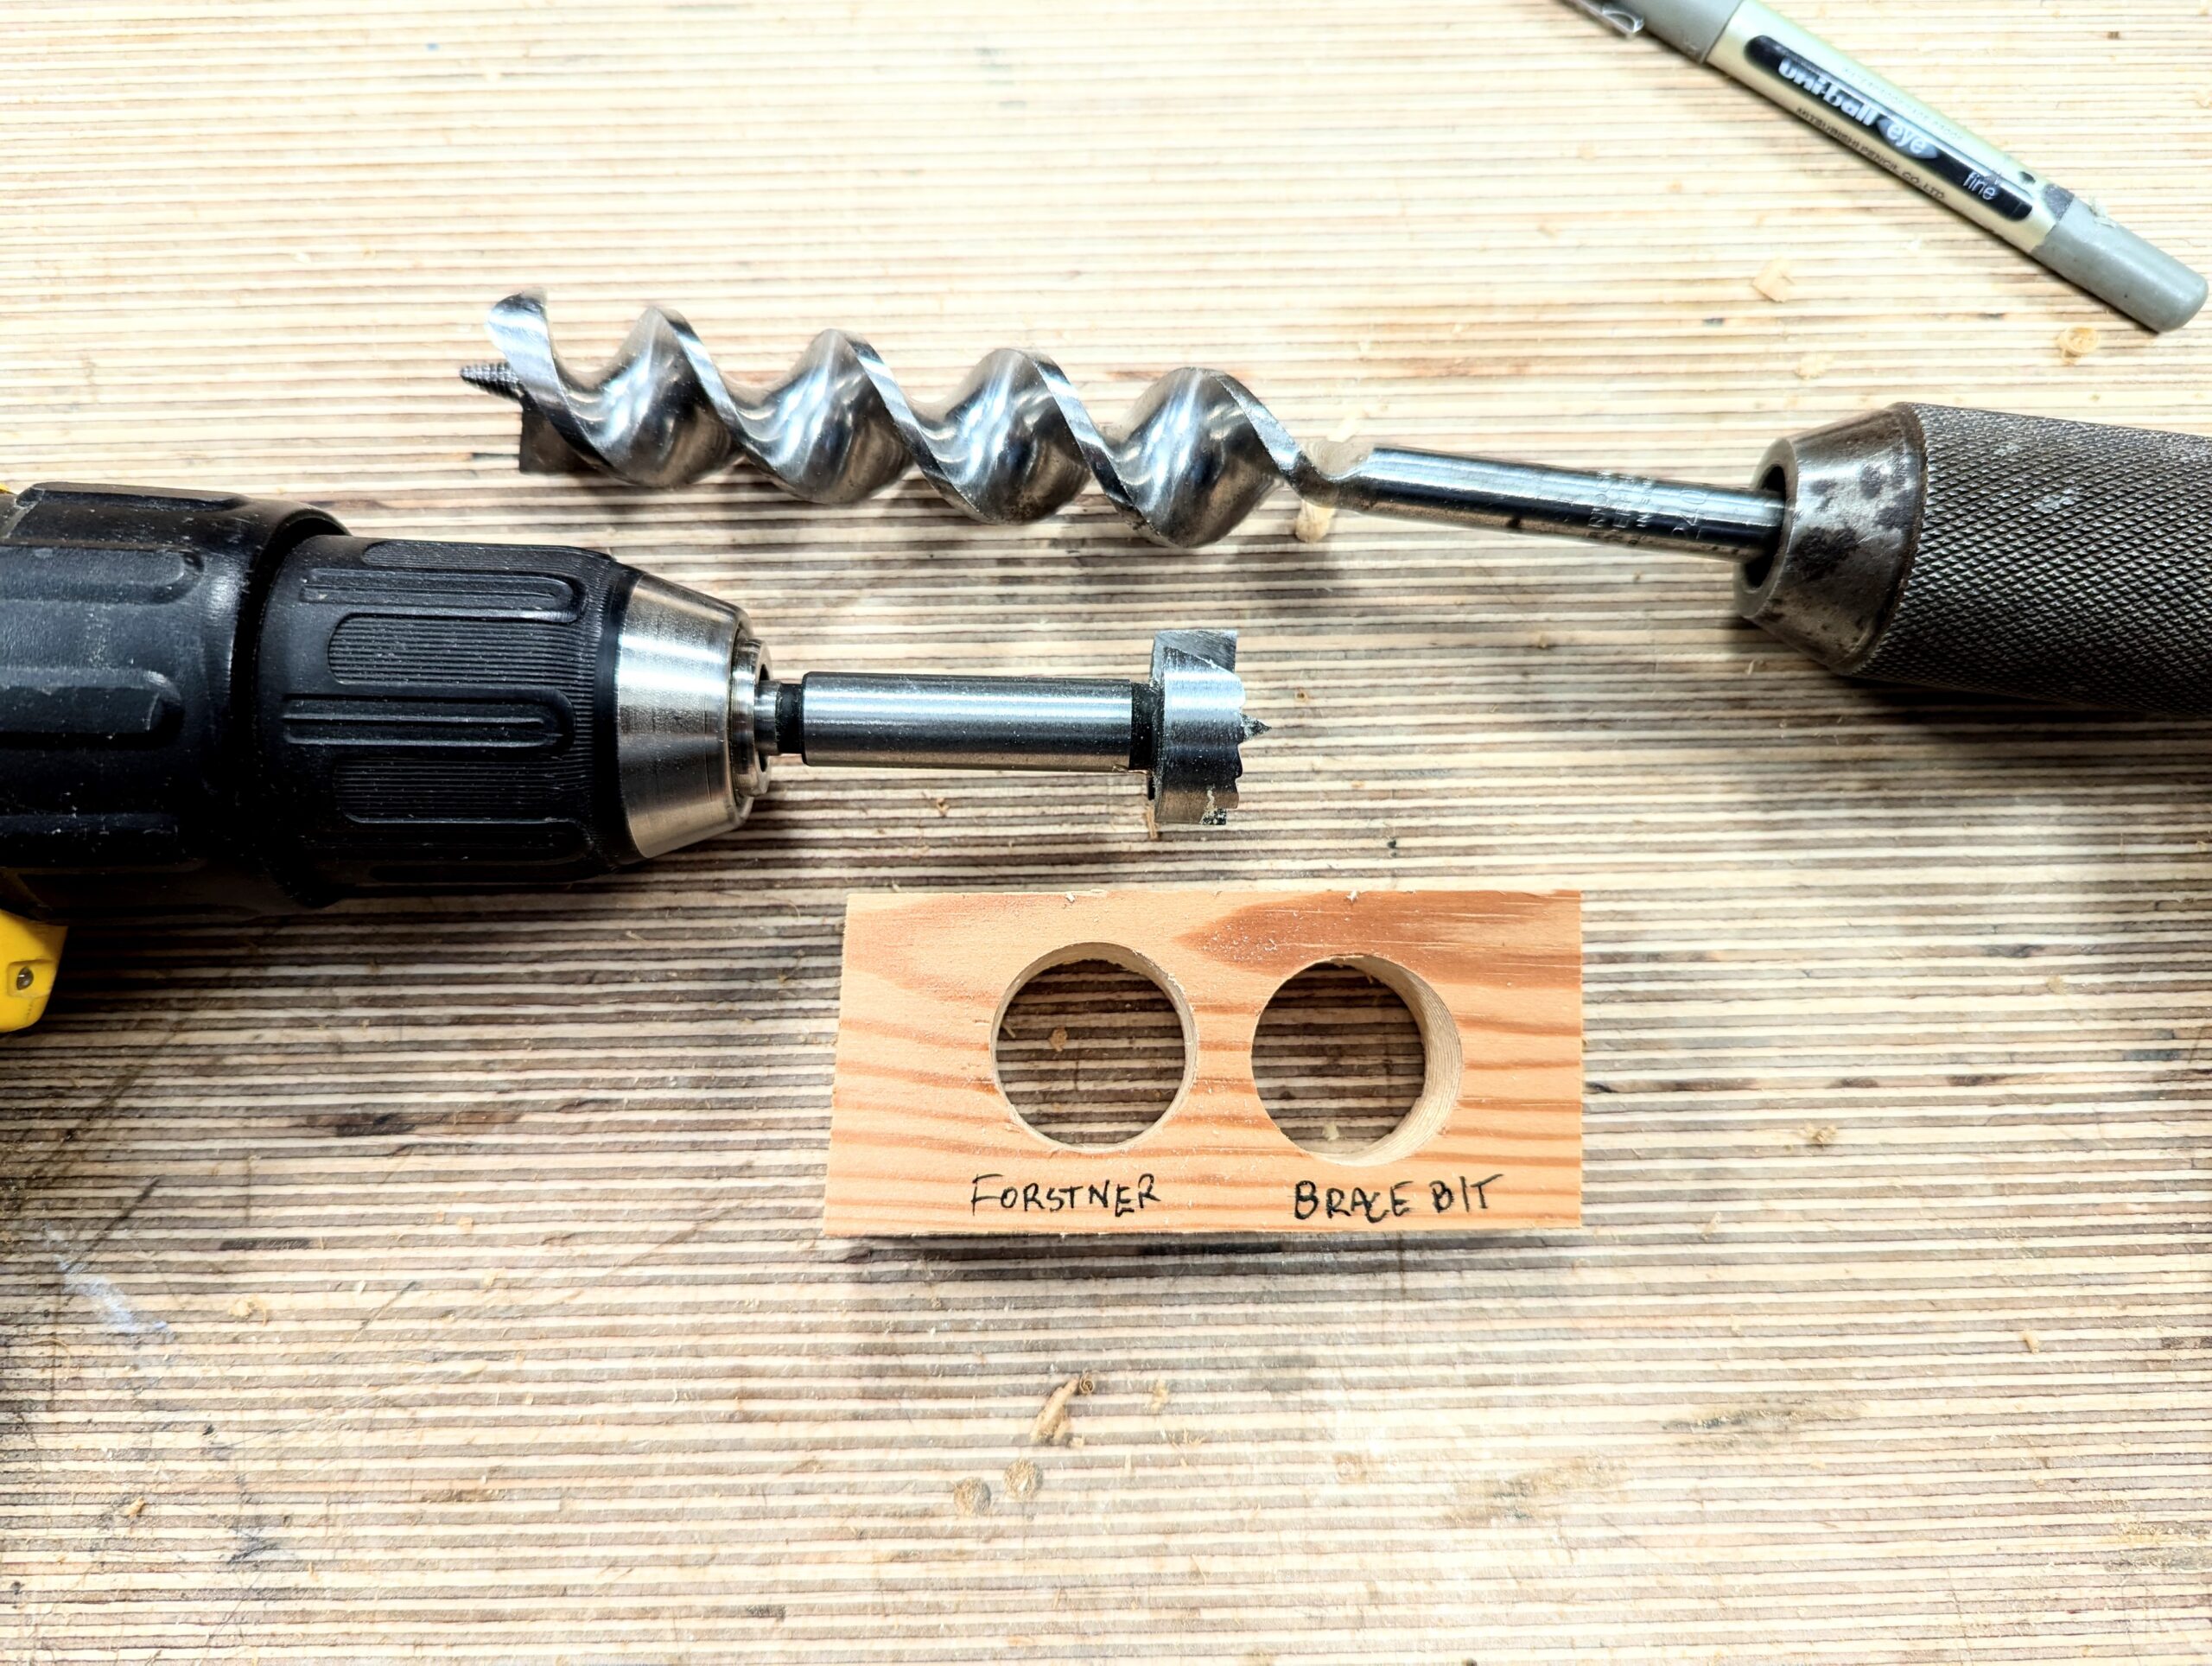
I drilled holes with each bit and found some needed small five-stroke, five-second tweaks to refine the cutting parts. As I said, all the snails were in pristine shape. These twists pull the bit into the wood alongside your pressure pushing the brace at the wood. You can actually count the turns to establish how deep each revolution takes you, so in the case of my 1" bit, each revolution deepens the hole by precisely 1/16". I set up a drill driver with a newly sharpened, 25mm Forstner bit and drilled through a 3/4" piece of pine. It took 41 seconds. Then I bored a hole next to is with a brace and bit, 1" (25mm) and that took 9 seconds. The quality of the holes was the same. One hole with the battery driven Dewalt drill-driver took 1025 revolutions plus a continuous human energy, without which it would not be able to drill. The brace bit would still drill without my energy pushing, but the energy used is not to push the bit into the wood, but only to keep it engage so that it pulls itself into and through the wood. I cannot say what the difference in human energy was because I have no way nor any desire to measure it, but it felt like less than 10% of the energy I employed with the drill driver.
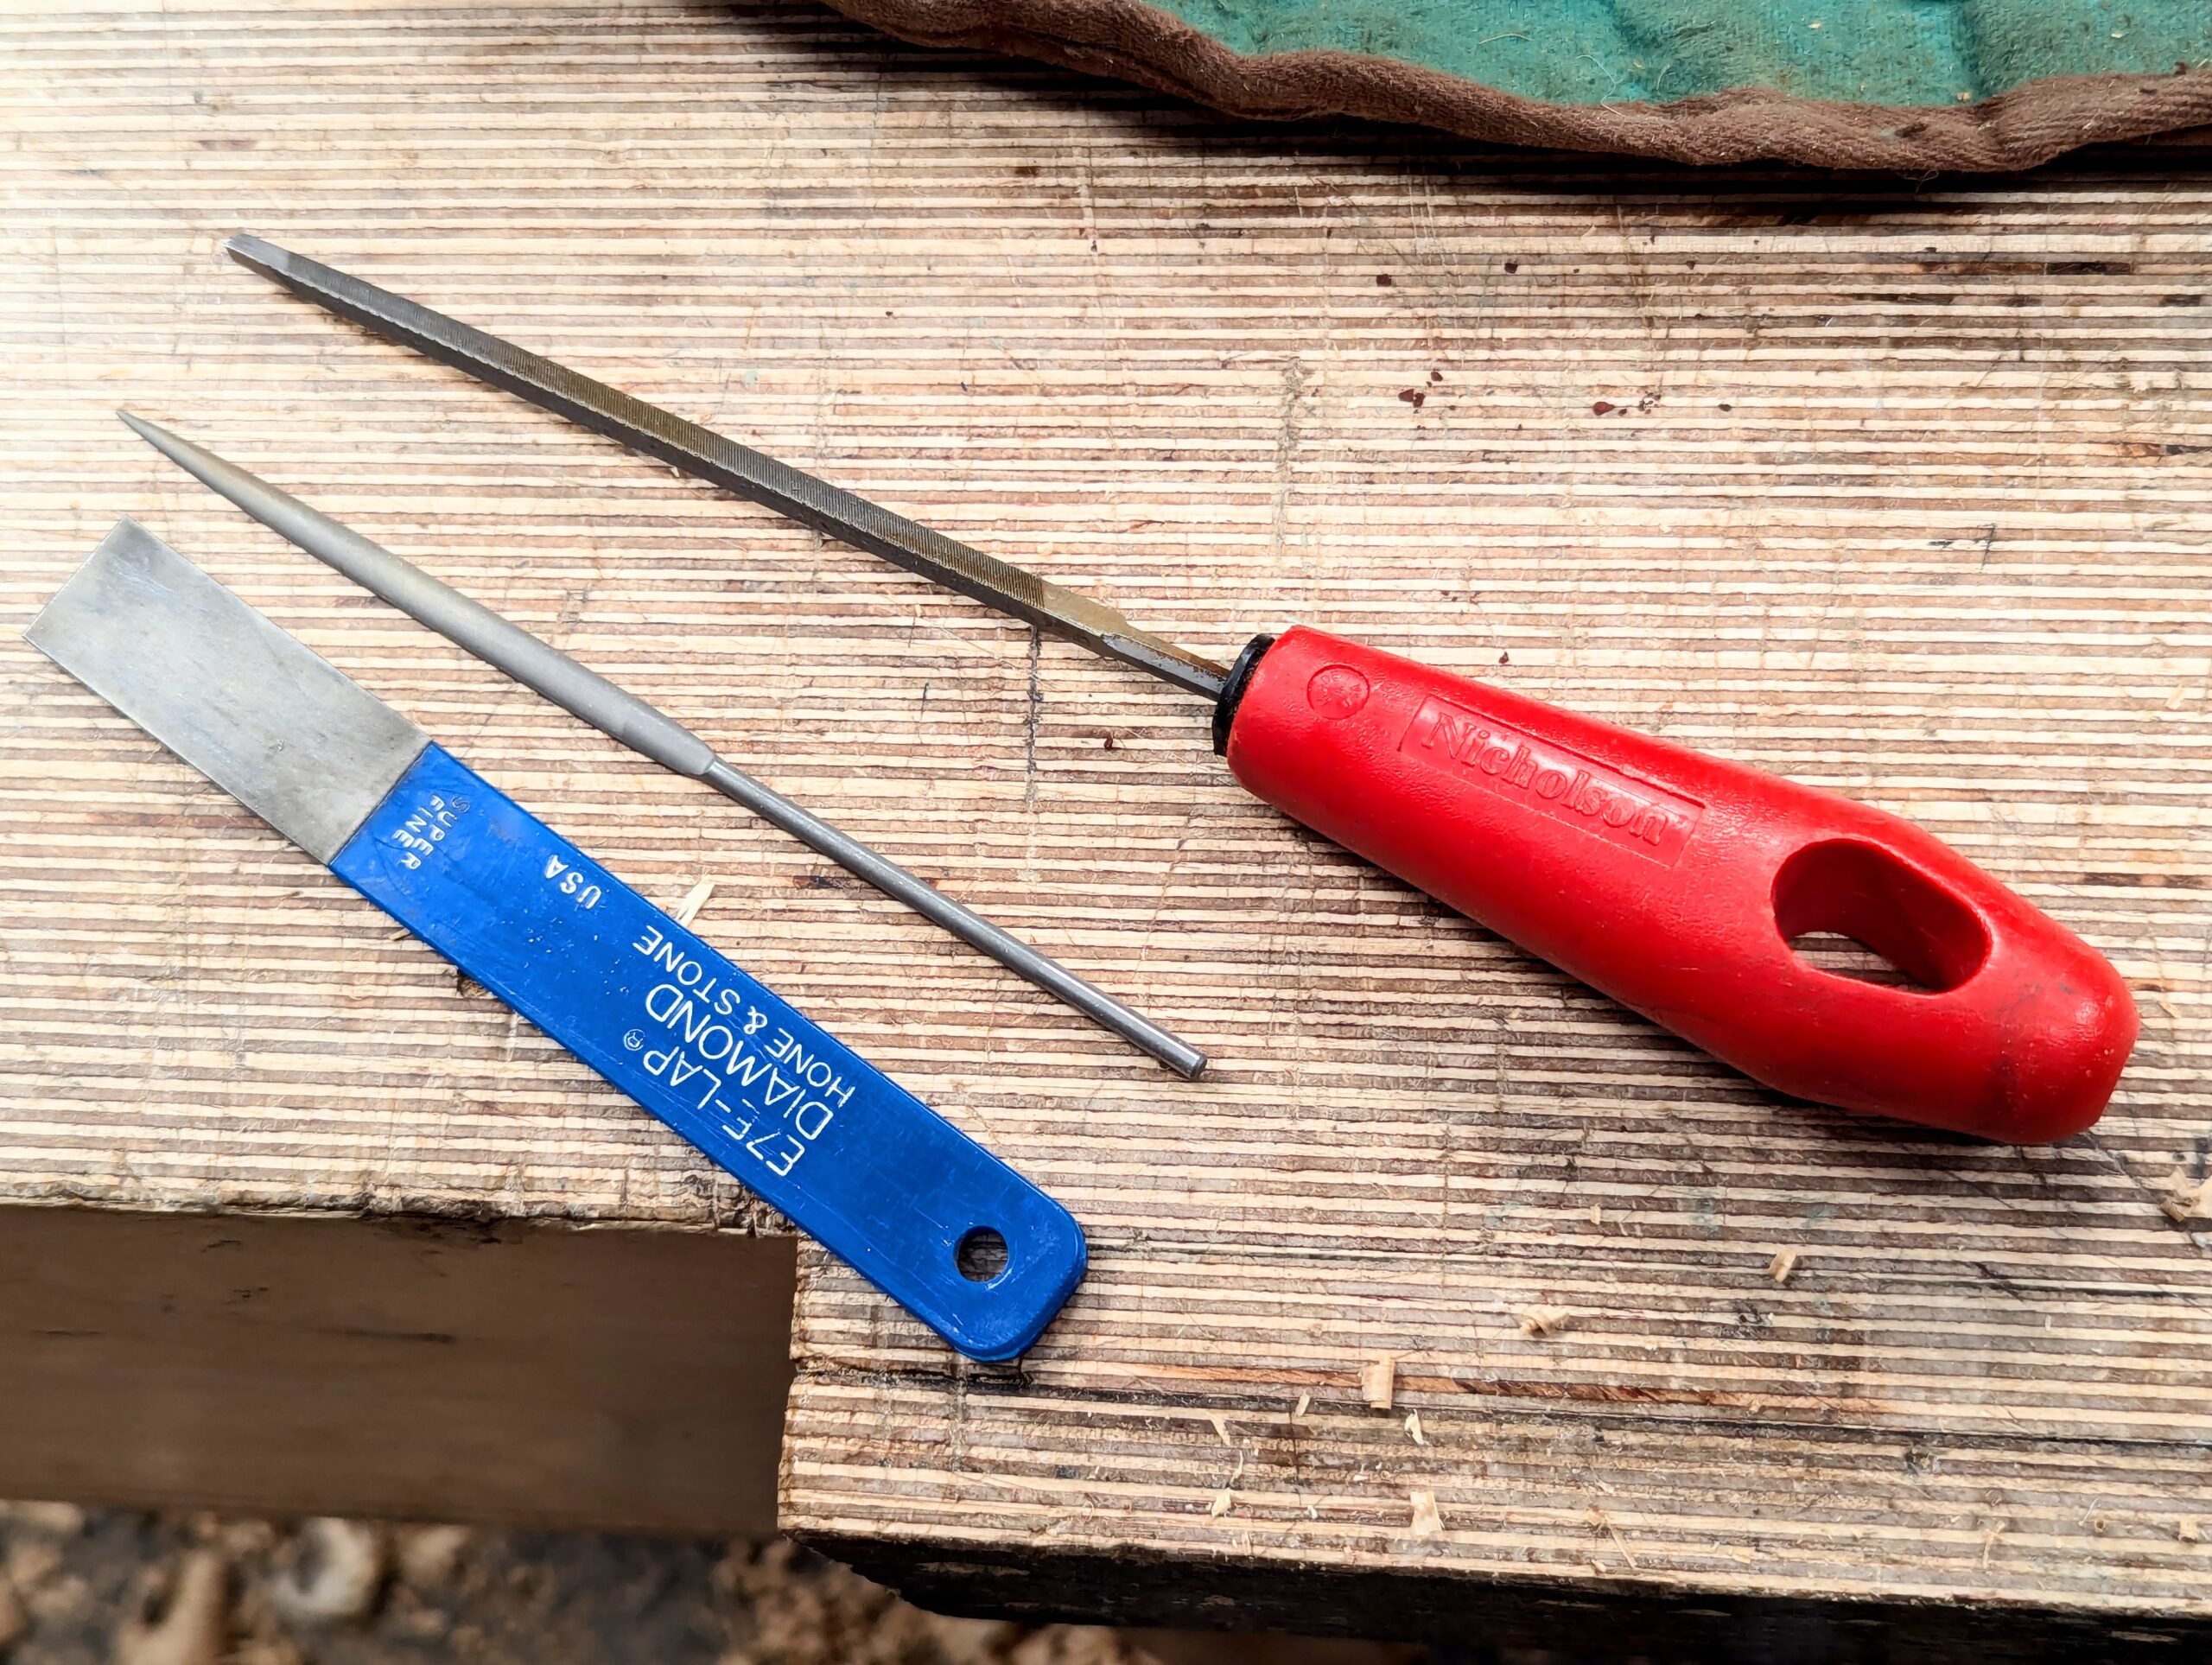
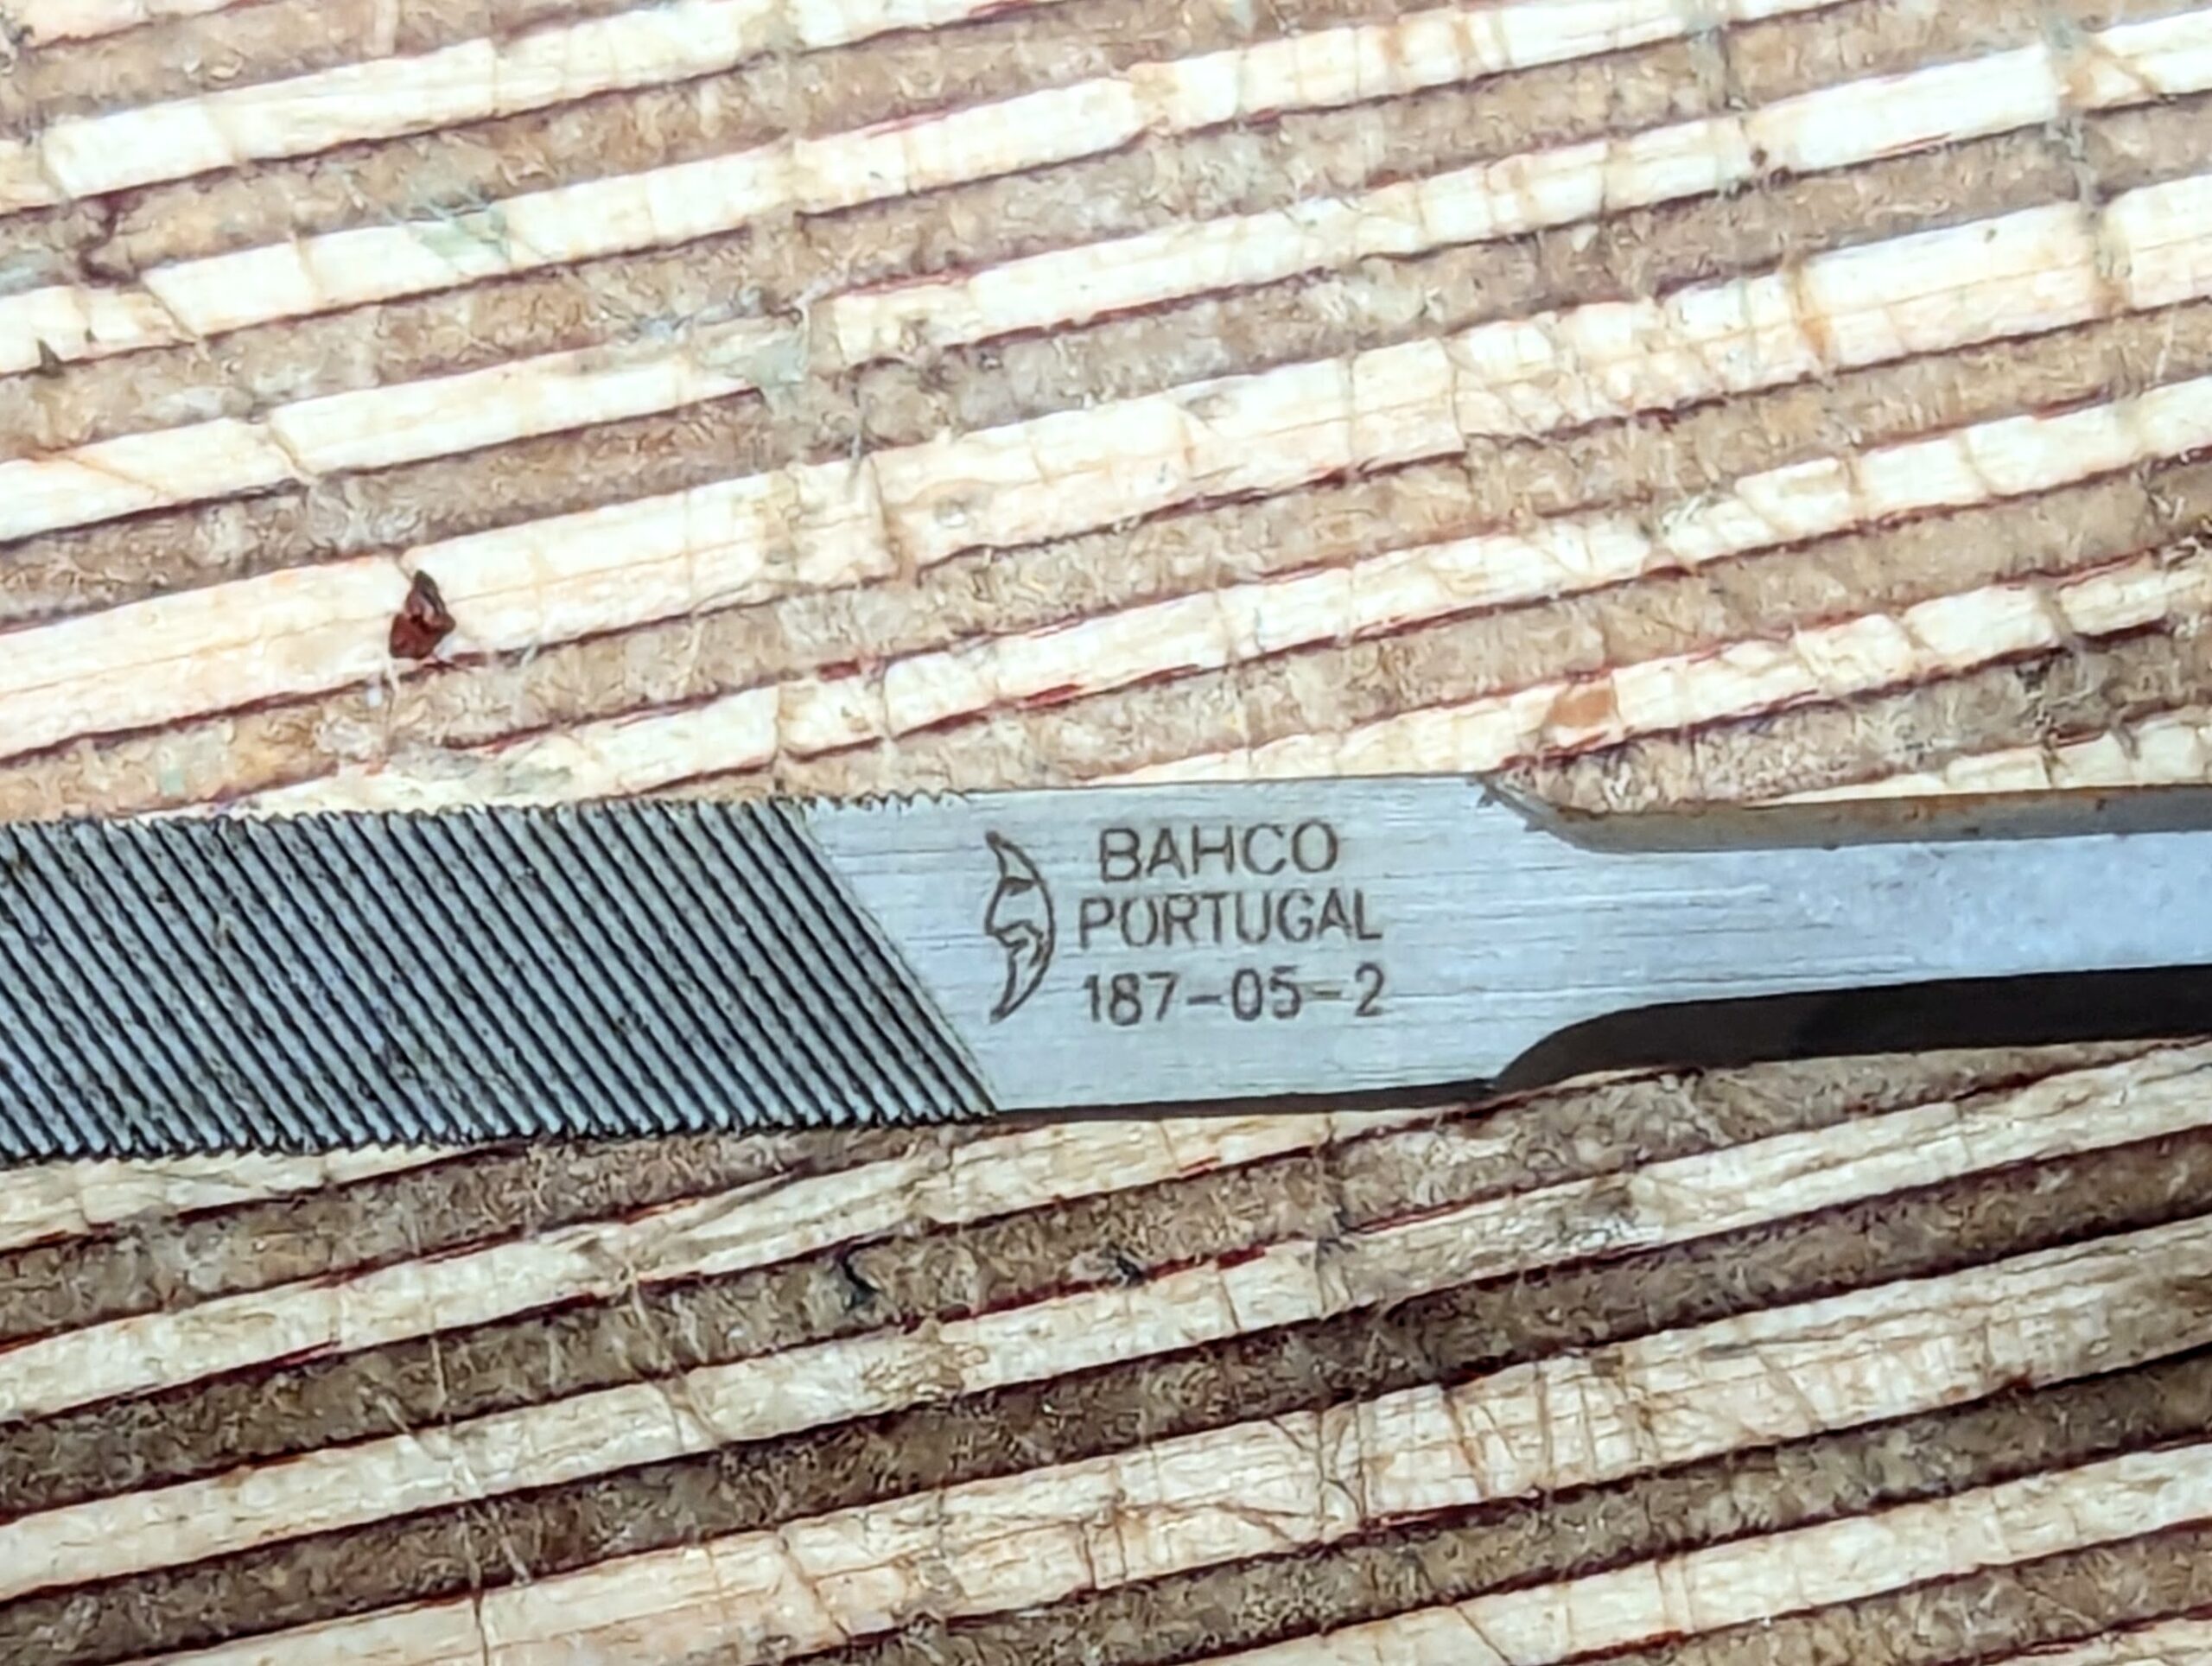
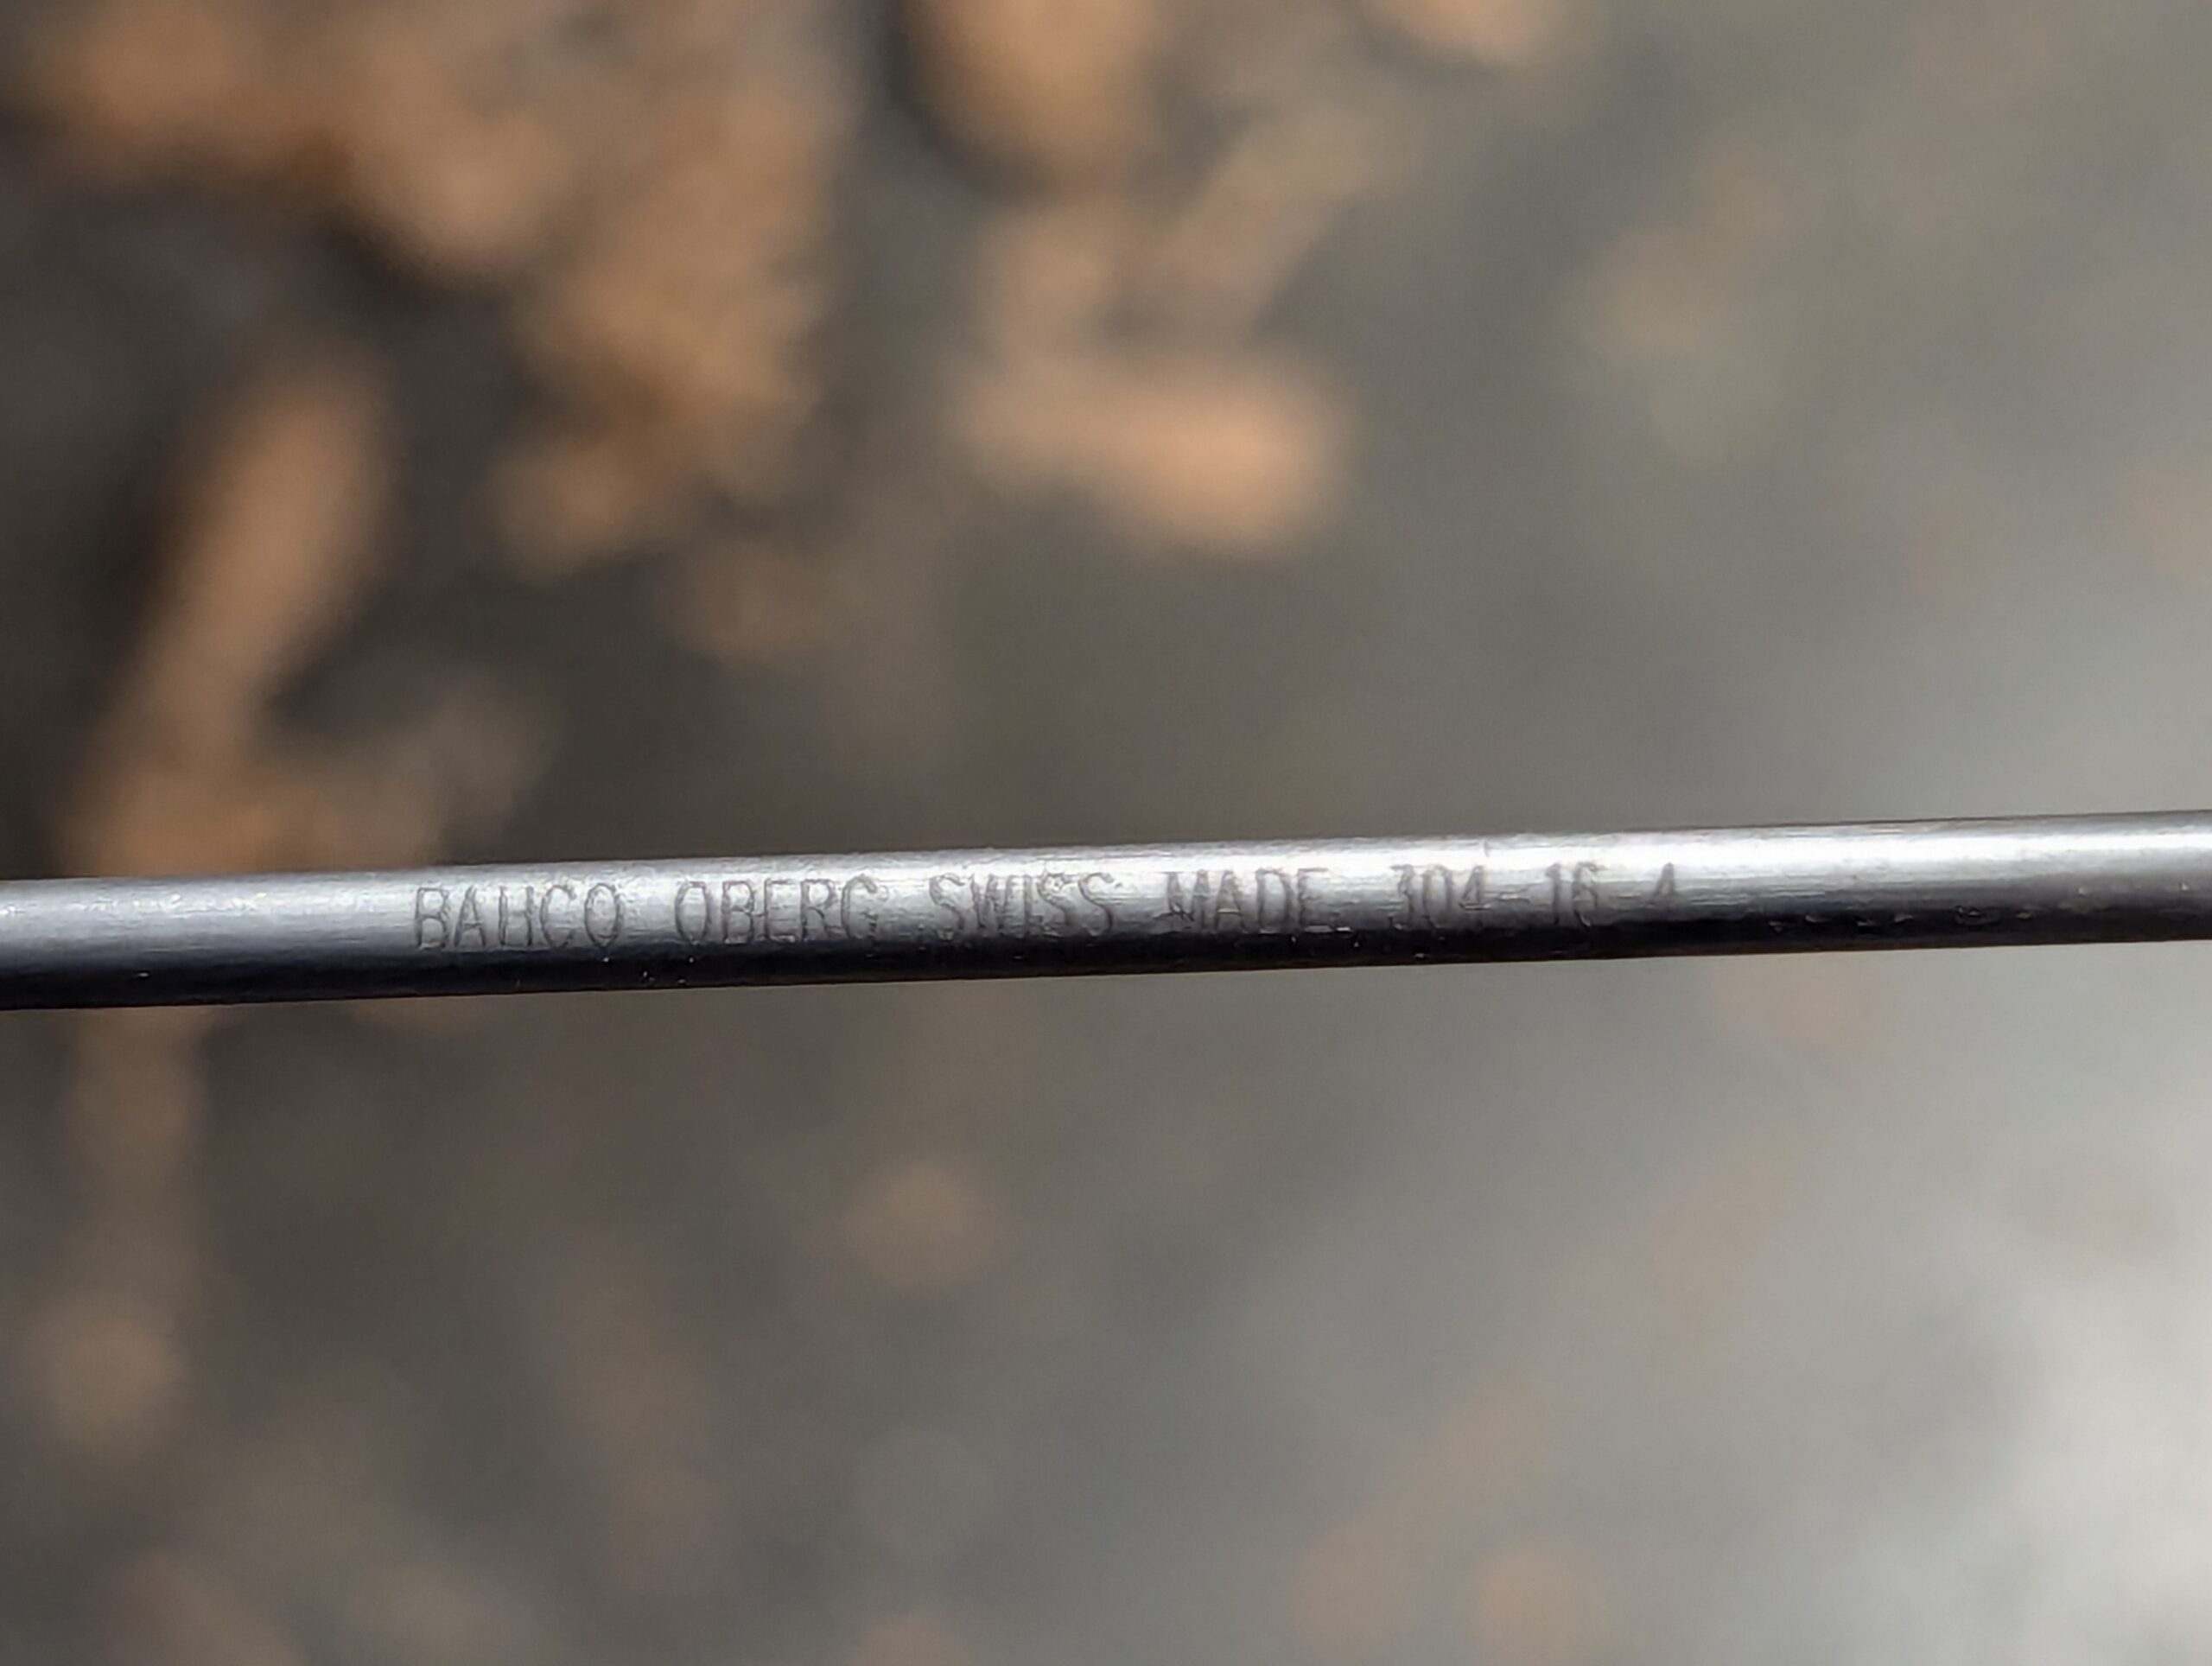
For sharpening the bits, I used a Bahco saw file 187-05-2 so no need to go out and buy something special, just your regular saw file. I like to use a refining file to get nearer to a sharper edge, even though the saw file gets a decent cutting edge. This additional file is round on one face and flat on the other. Because it tapers to a narrow boat-shaped point, it allows you to get tight into the inside corners. This useful file is a Bahco Oberg 304-16-4. Remember that these files are not a single use throwaway item. The saw file should sharpen 30 saw sharpenings easily, so that's a few years for many of you.
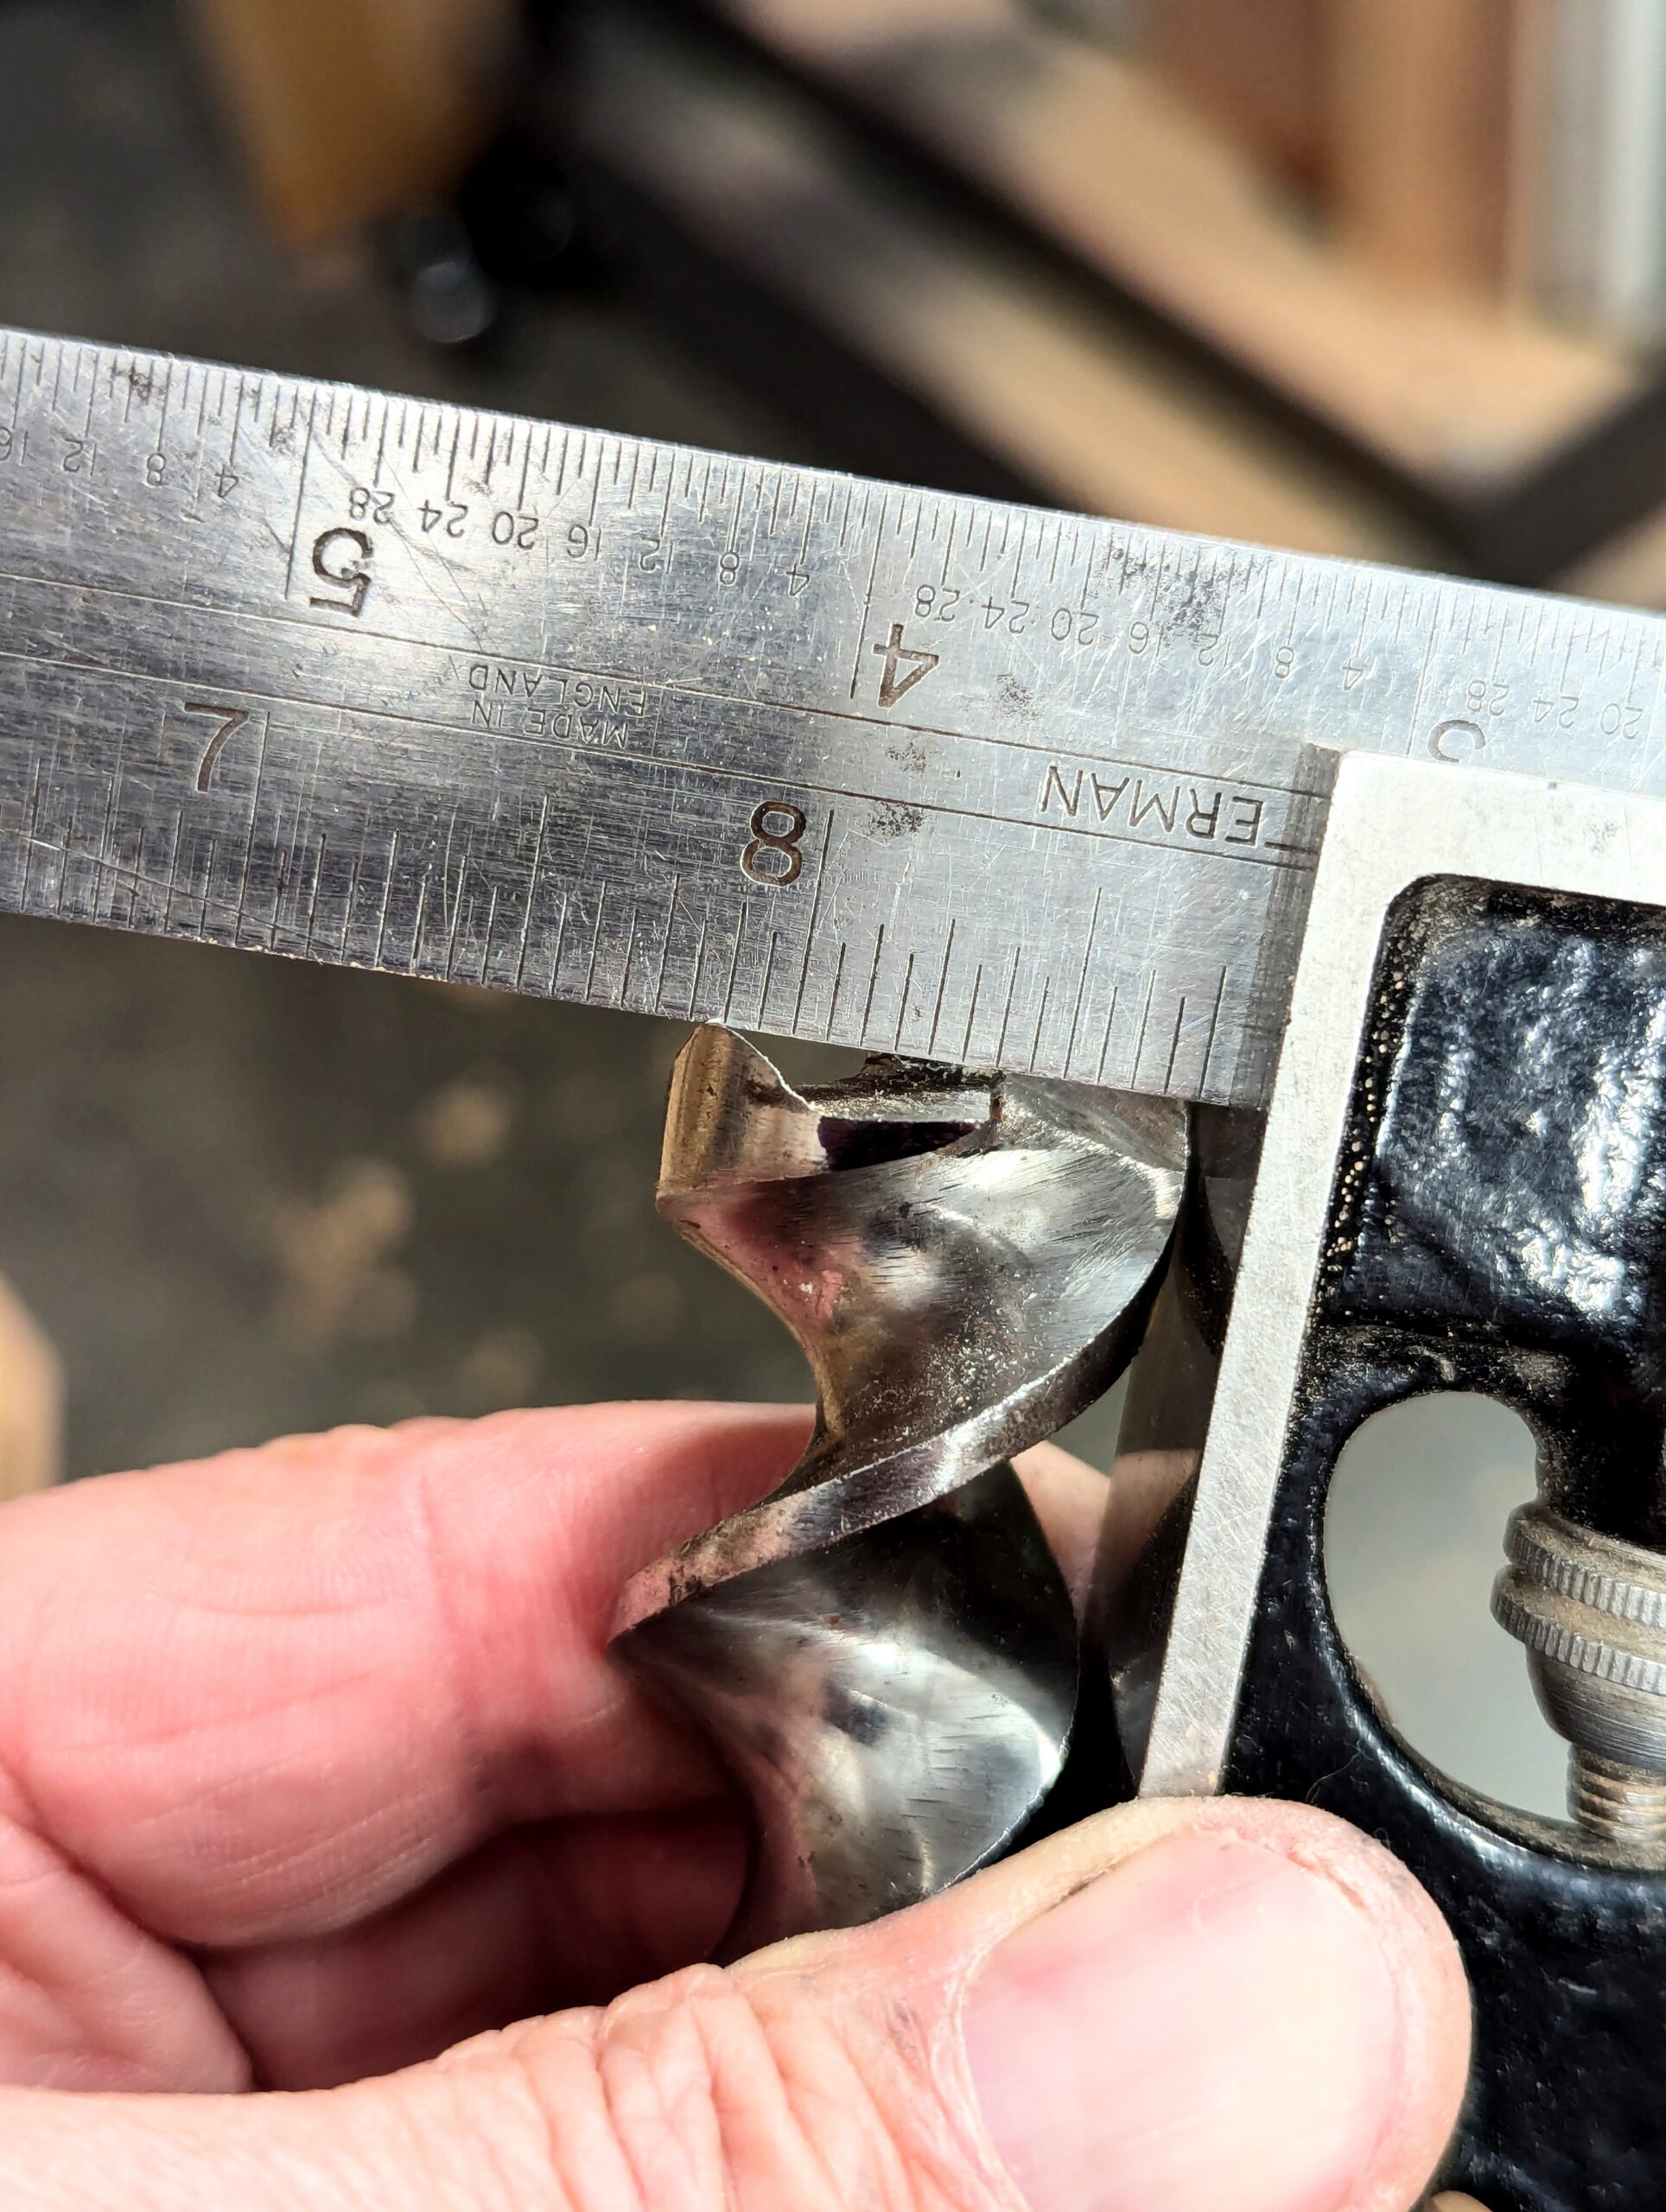
Before buying, I checked the outside walls of the bits to make sure they had not been filed at all on the outside. This area around the spurs needs to be perfectly inline with the main barrel of the bit; otherwise the spurs will cut inside the rim and the bit will bind as it deepens in the cut.

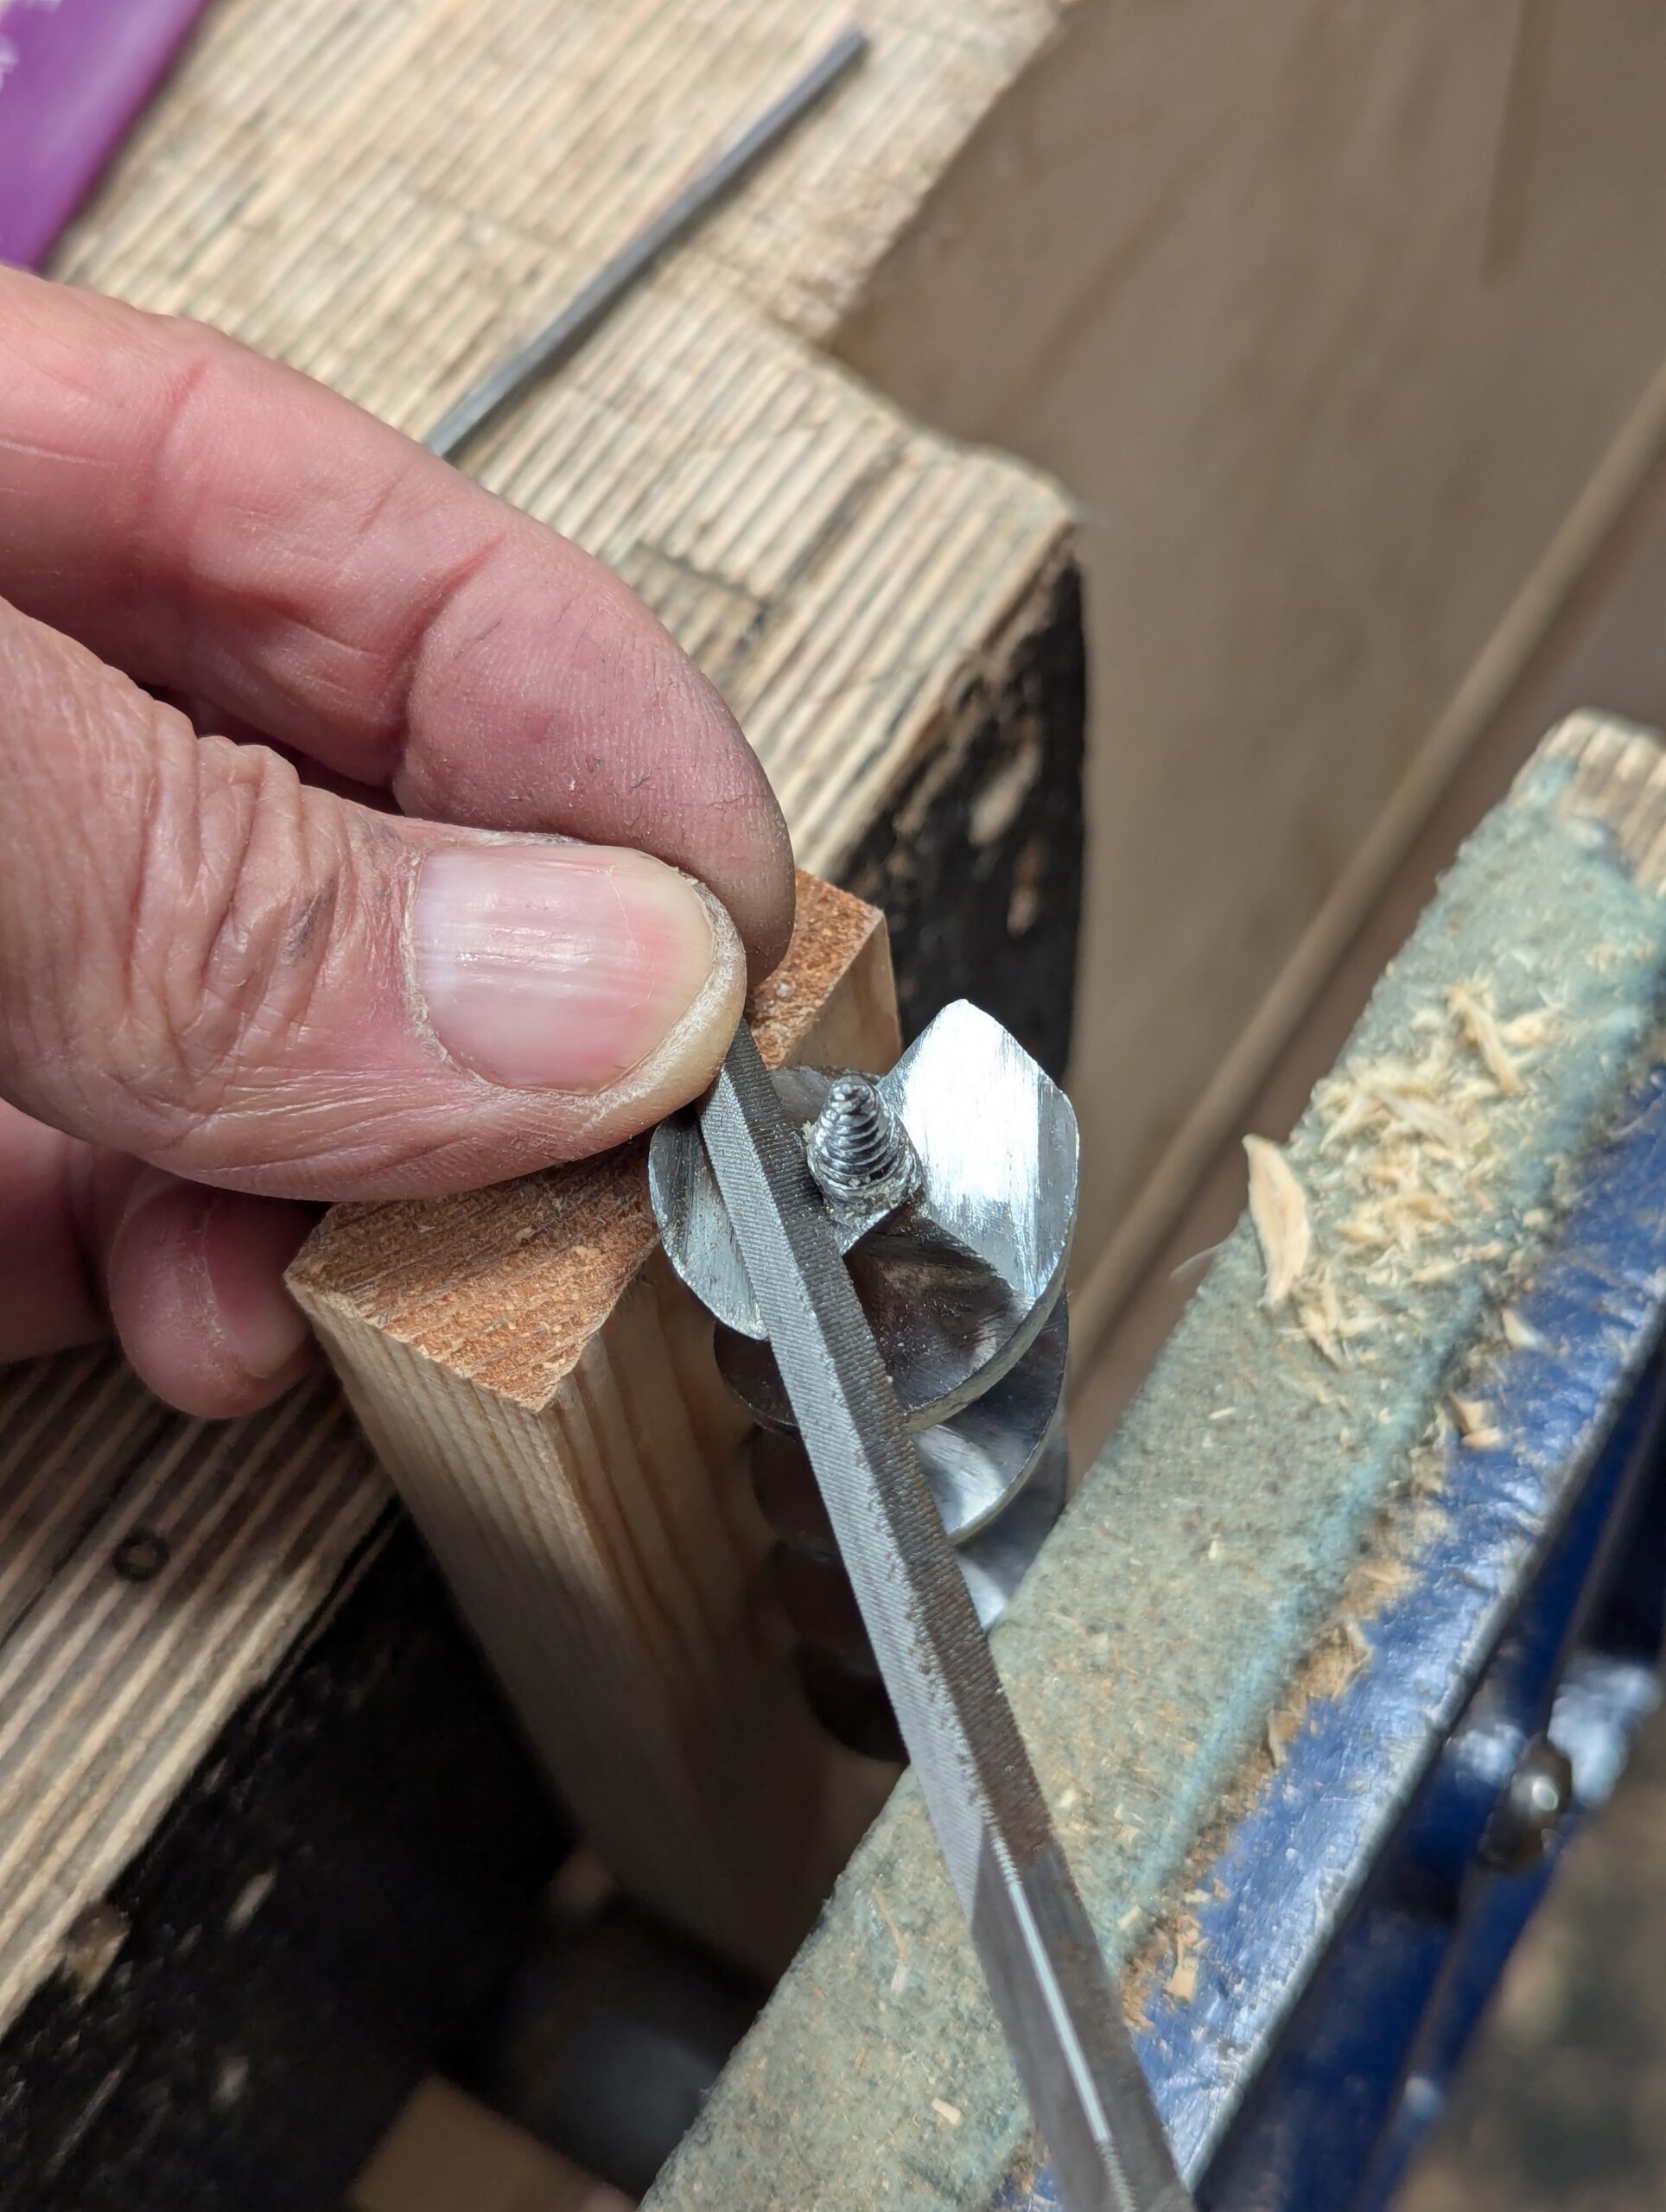
Clamping the bit against a 2" by 1" stick minimises any flex in the bit and clamping it in the vise gives excellent support. Take care doing this. You don't want to bend the bit.
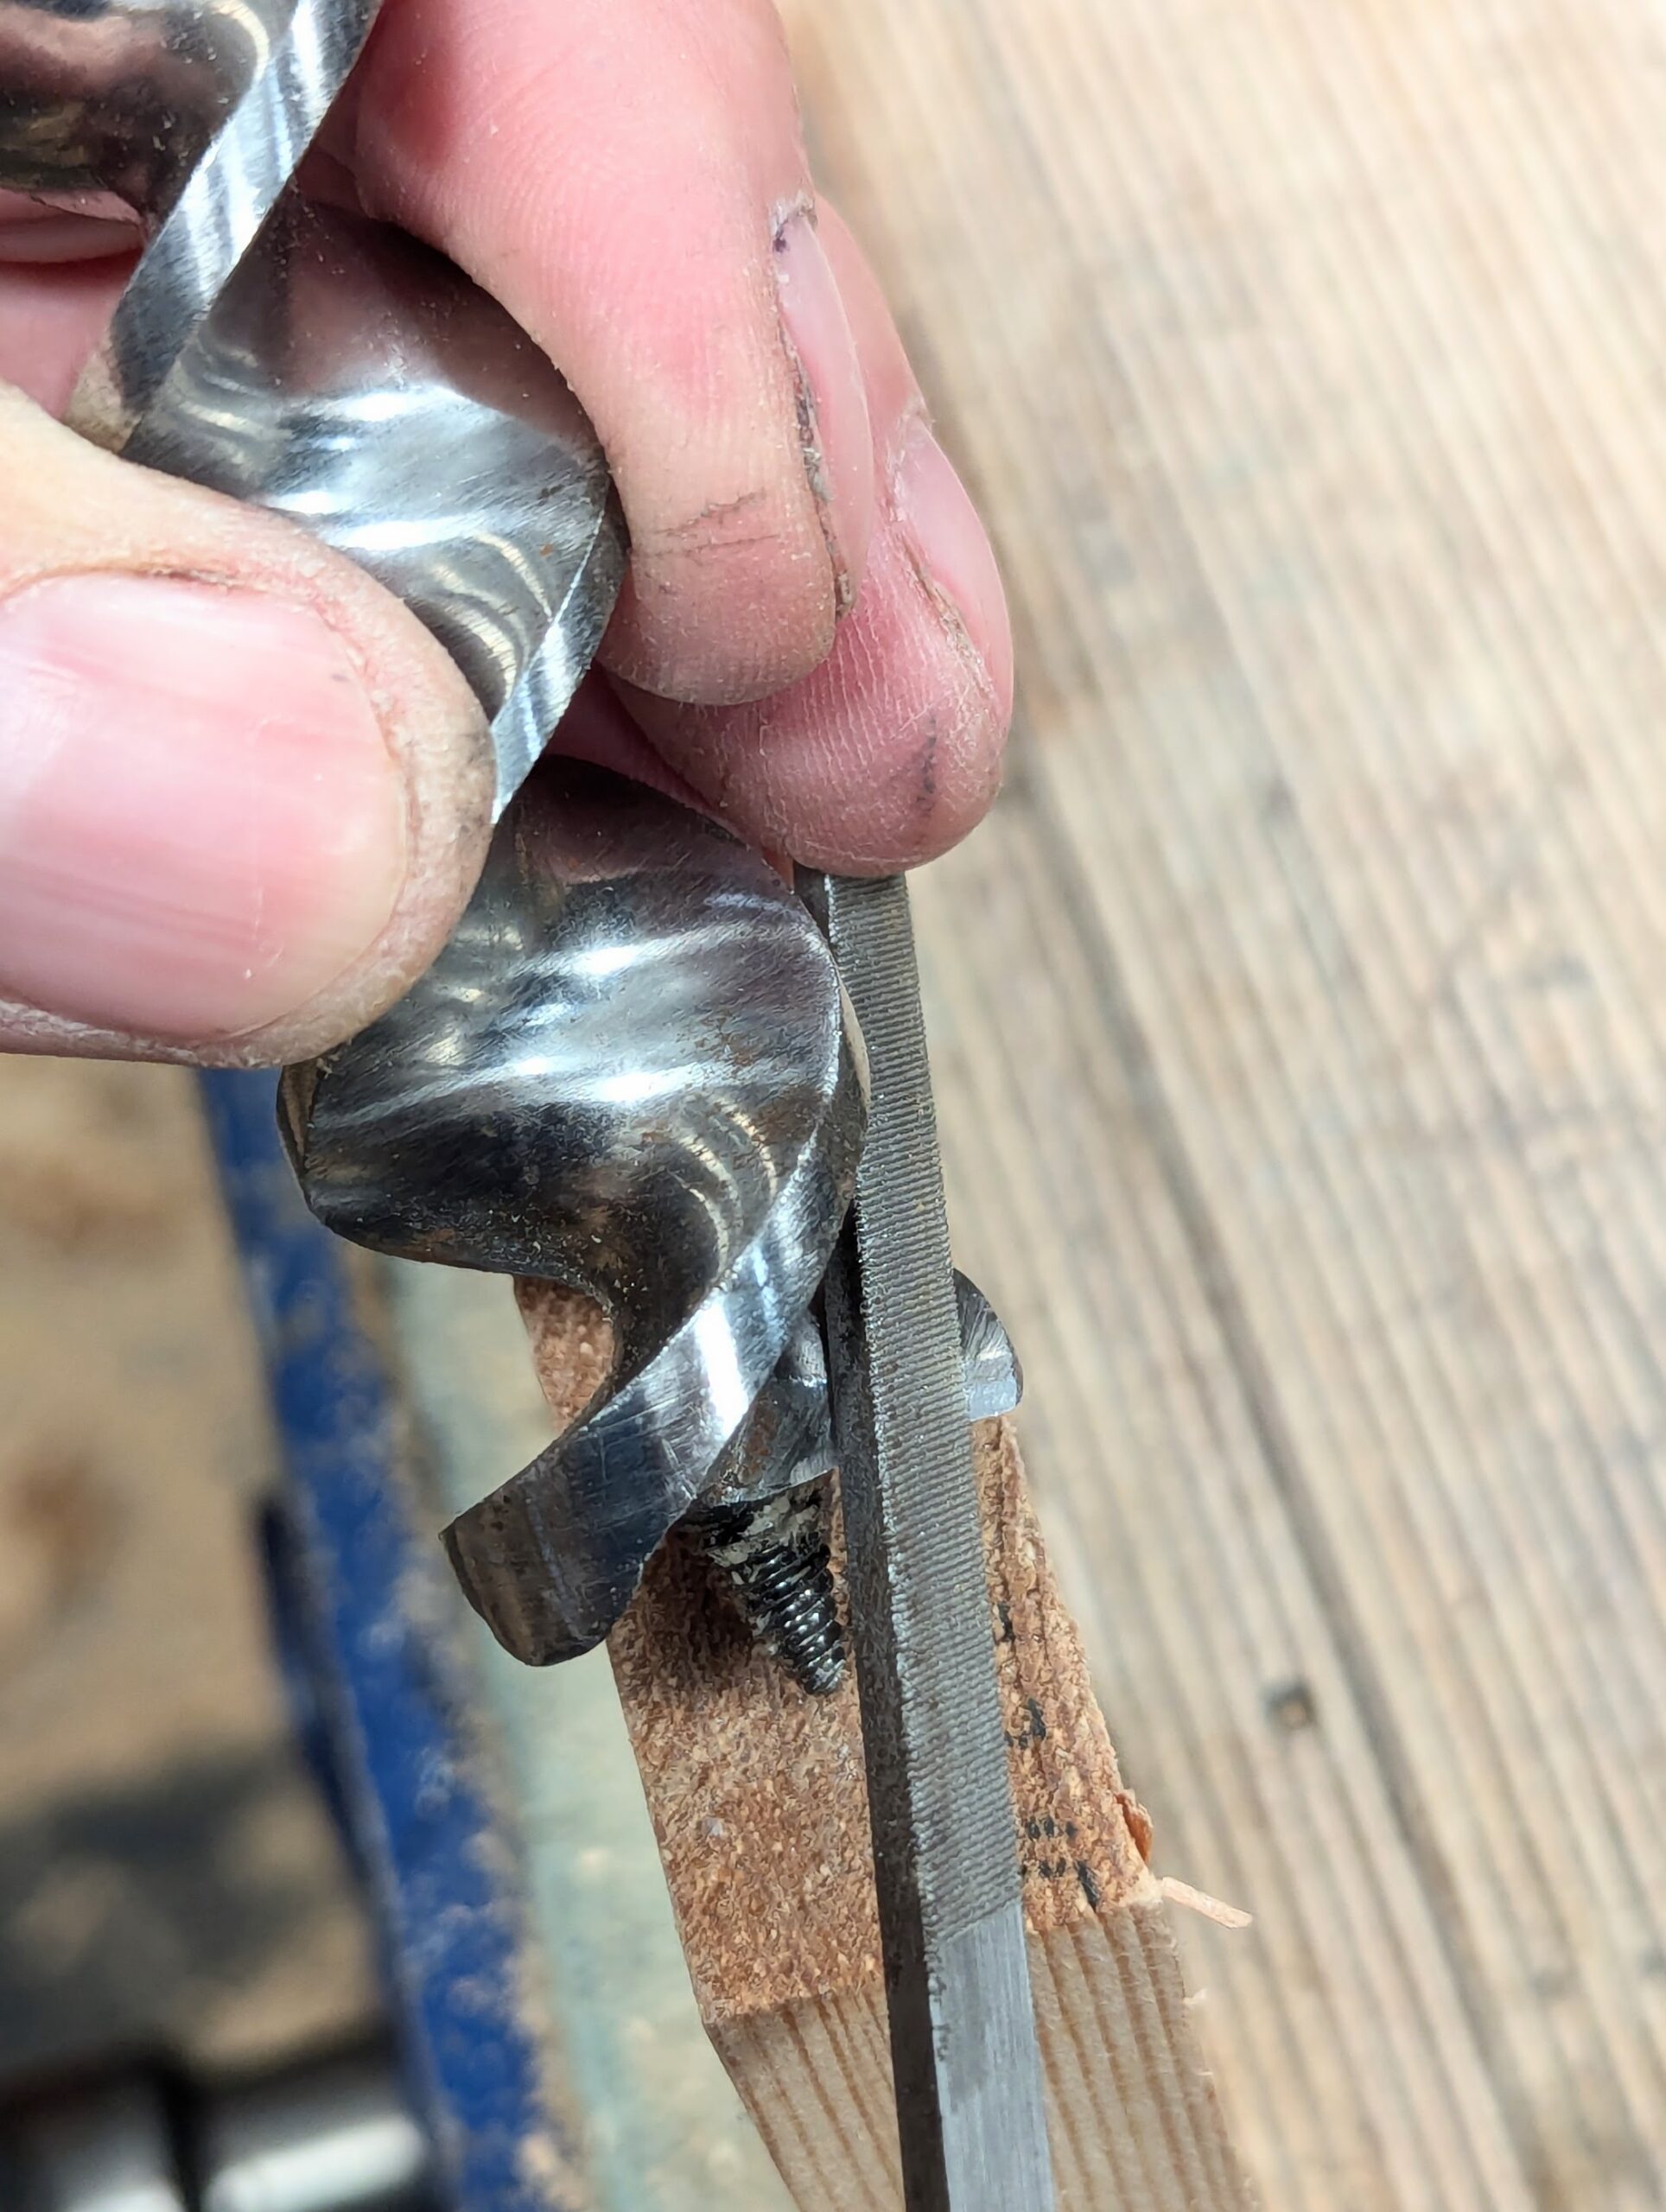
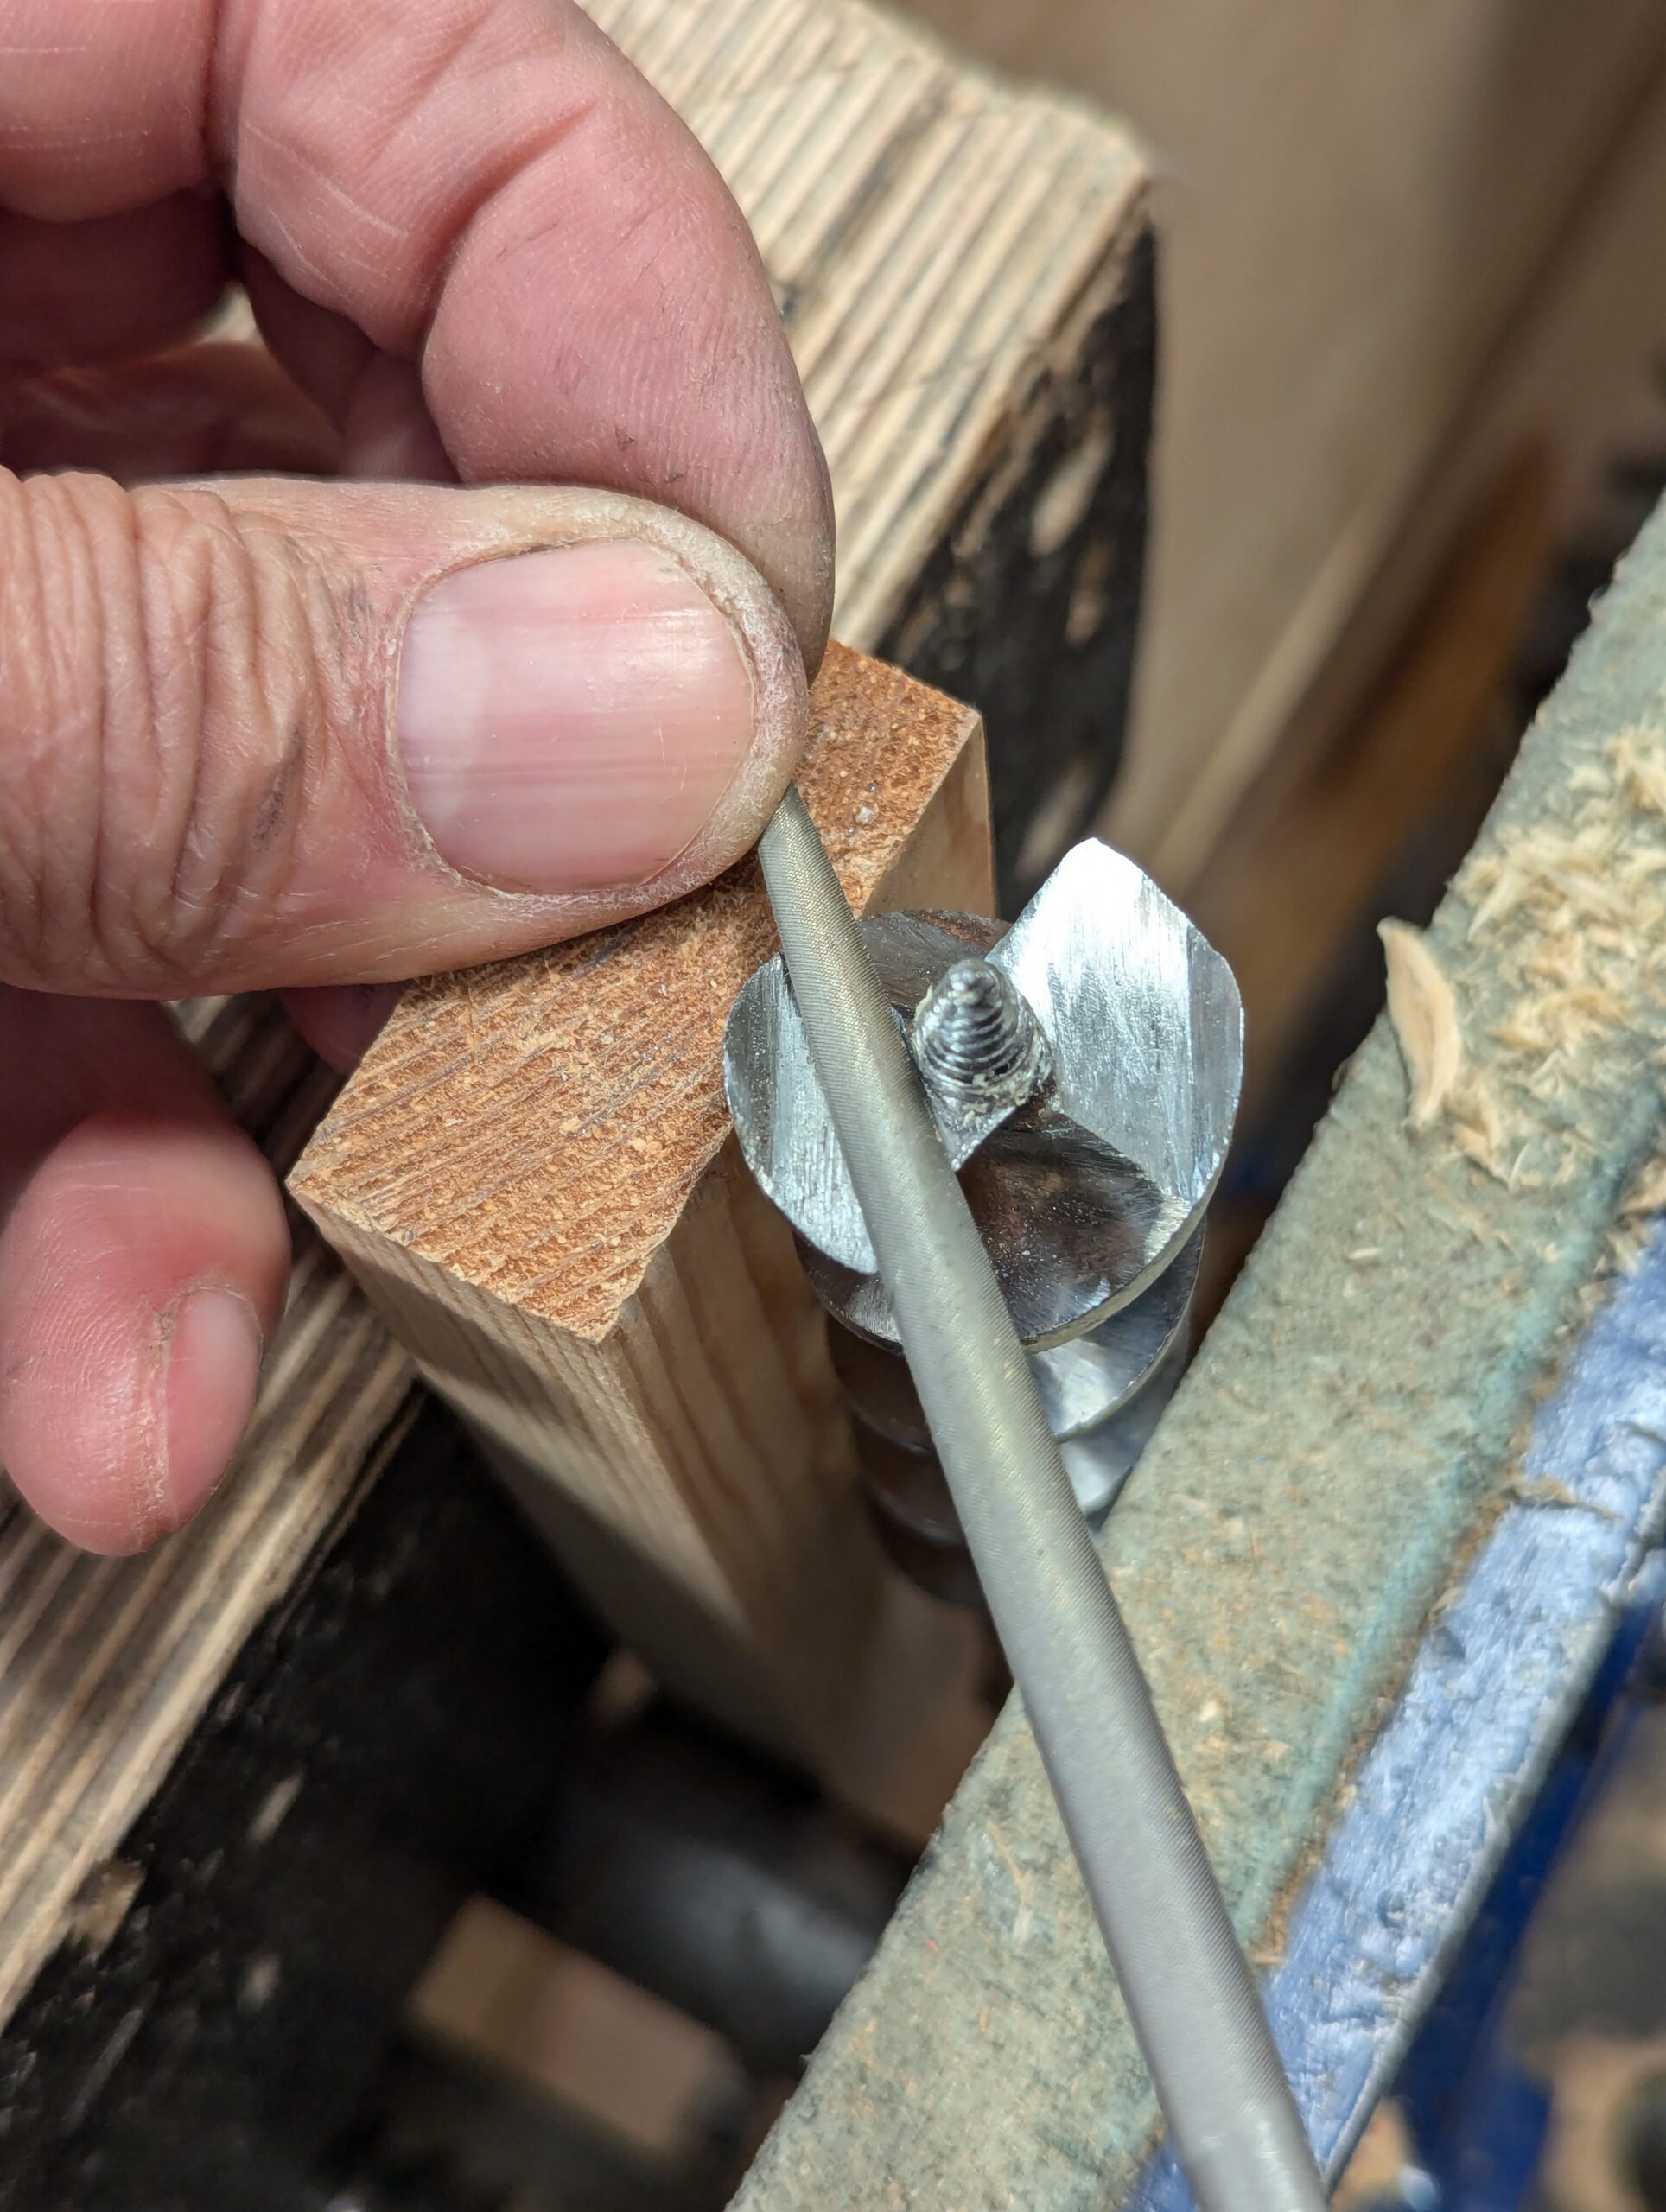
My first sharpening with the saw file is on the top side of the inner incline of the rakers, each side of the snail. For this work, I use the top end of the stick as a platform, lean the bit away from me and file the incline with the saw file first. There is a tendency to steepen the angle of presentation to get to the edge quicker, but this is false economy, it is important to bring the high point furthest away from me down rather than keep 'thickening' the angle.
After the saw file, I switched to the refining file, working at the same pitch. The last level, which is a bit of a luxury really, is with a super-fine diamond hone. I must say here that this is a luxury level and far from essential. I just happen to have a diamond hone, and it only takes a few seconds to improve the edge, so I do it.
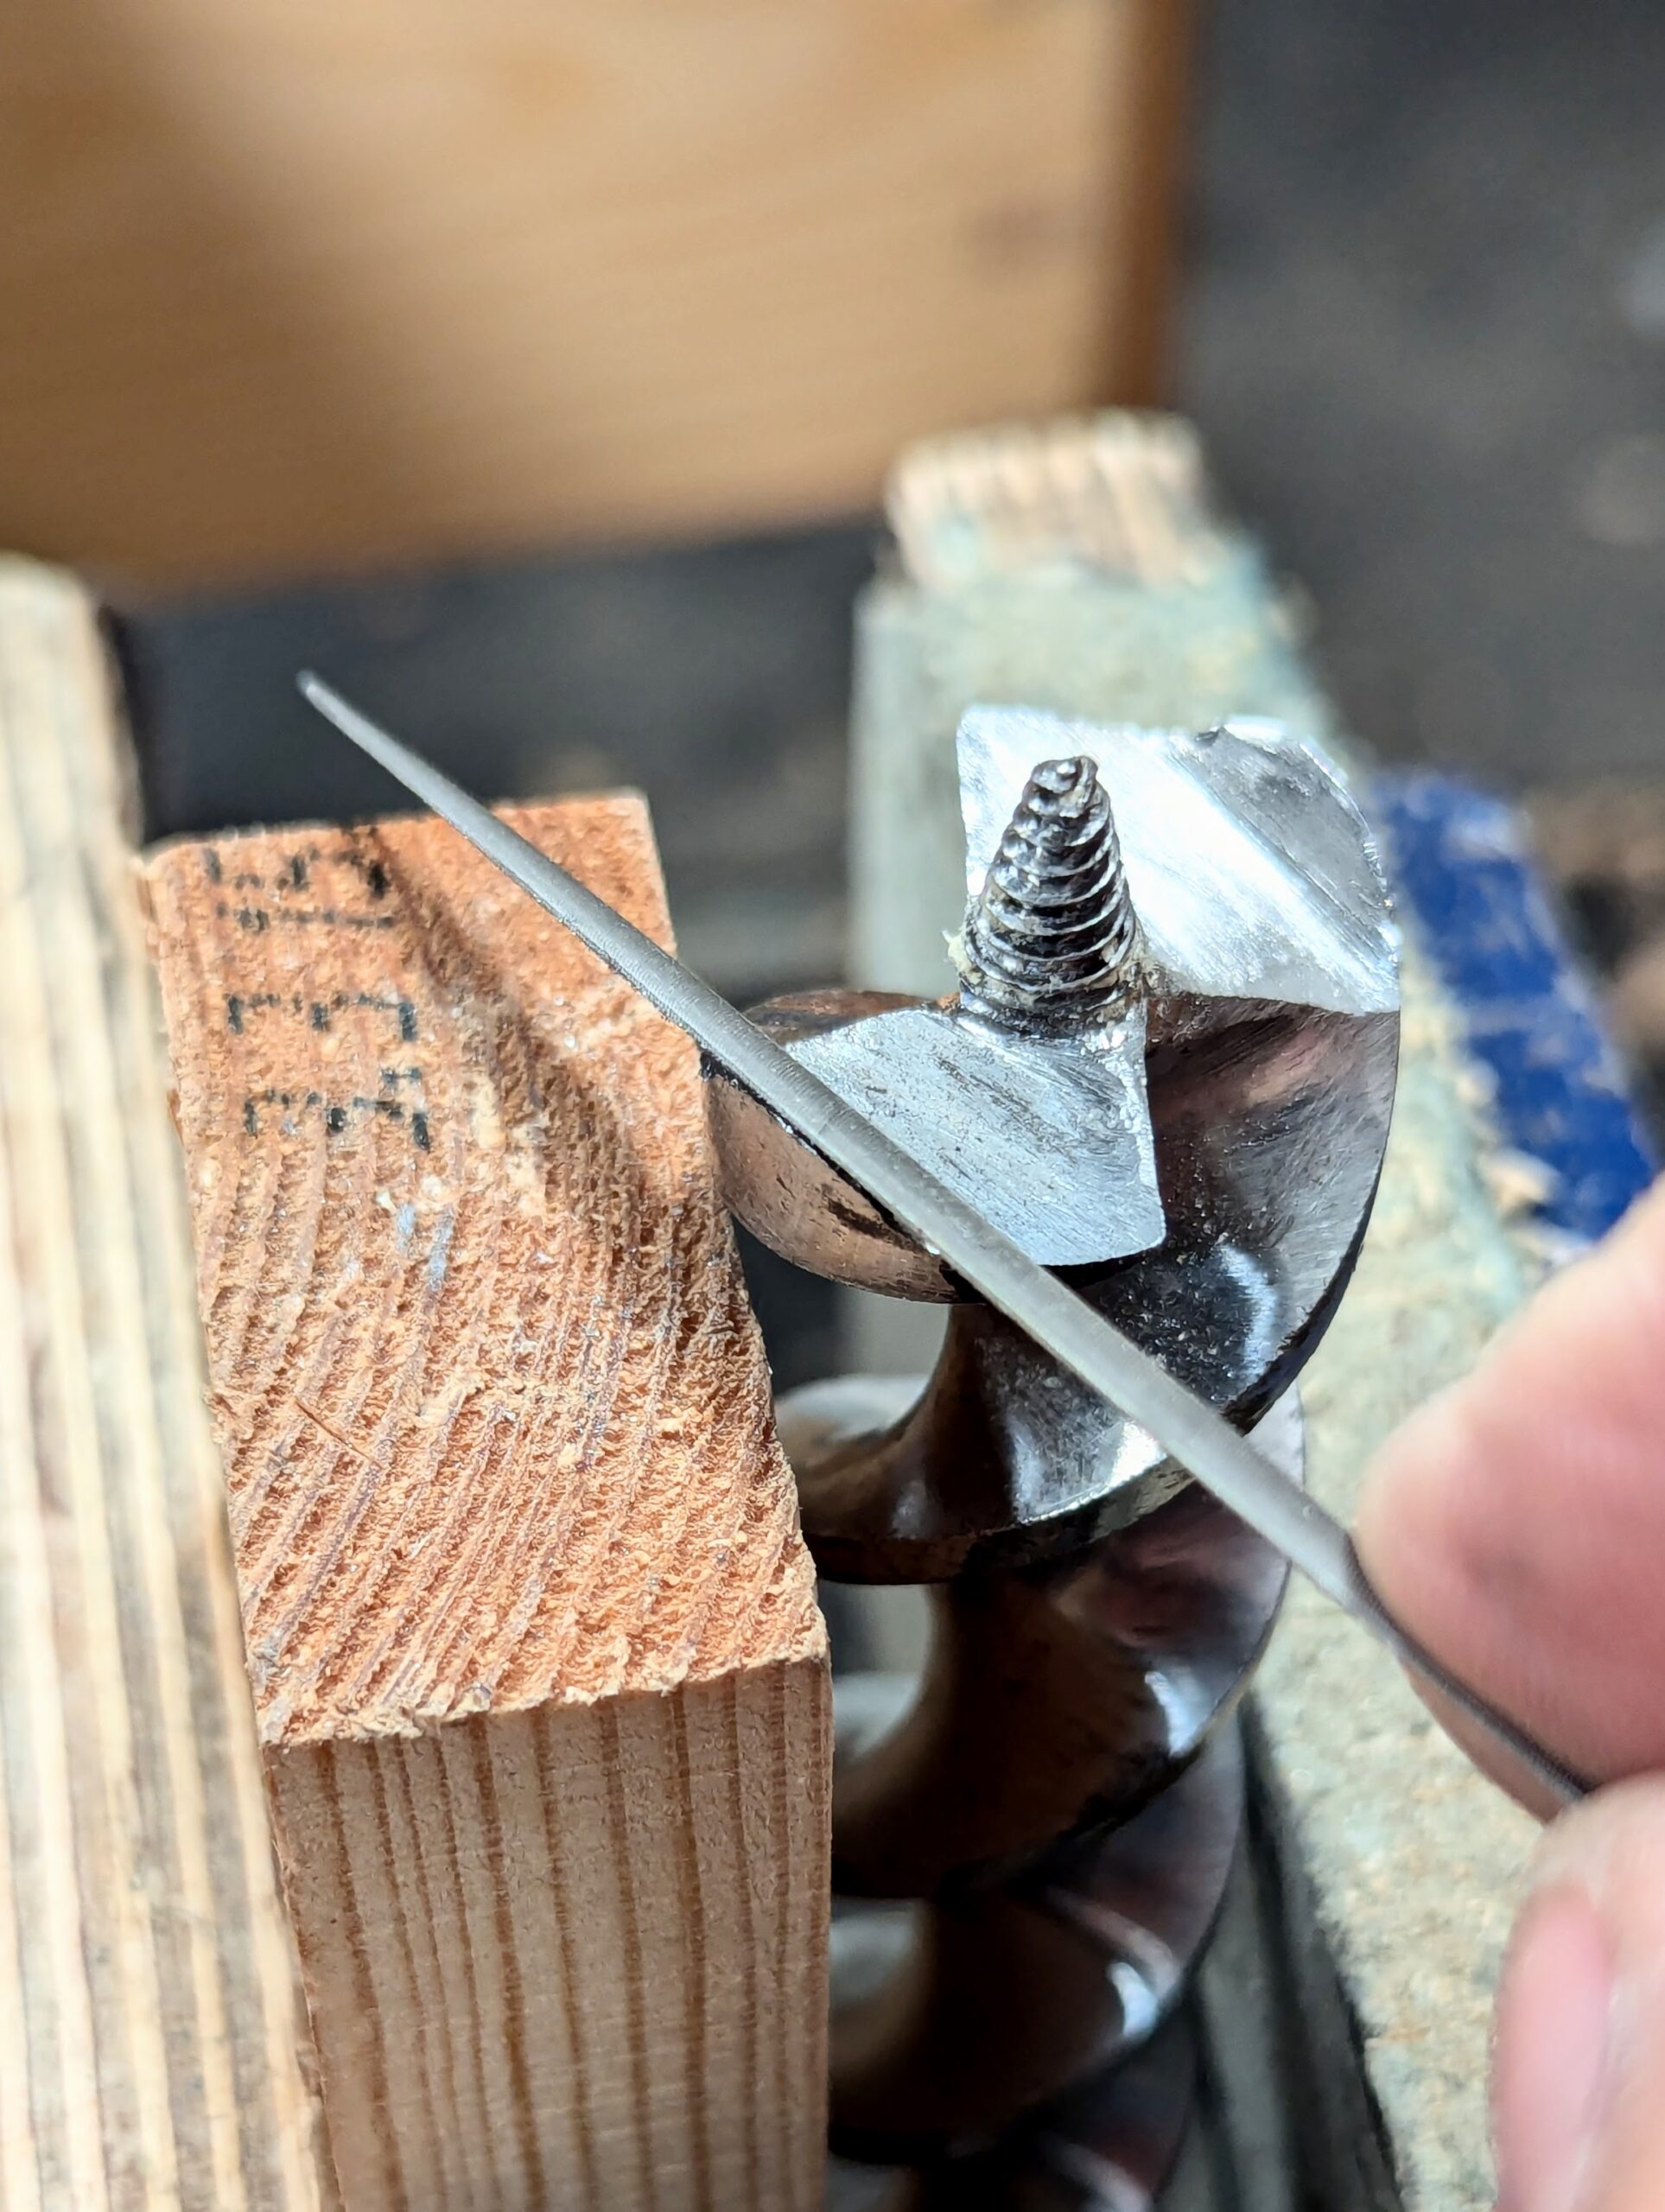
With the incline sides completed, I flip to the underside, which has to have a negative rake to cut efficiently. Most of this is taken down with the saw file again . . .
. . . followed up with the refining file. I can't really get the diamond hone in here, but I'm not particularly bothered about this. These rakers are essential to making the bit work well and should never be neglected.
After these are done, I switch to working on the spurs using the three file types in succession. These are easy to do. You work the insides of the spurs and follow the inside with an arcing stroke to create a slight bellied face from the bottom inside corner up to and following the cutting edge. This is difficult to describe, but doing it you will see the shape and learn to follow its shape.
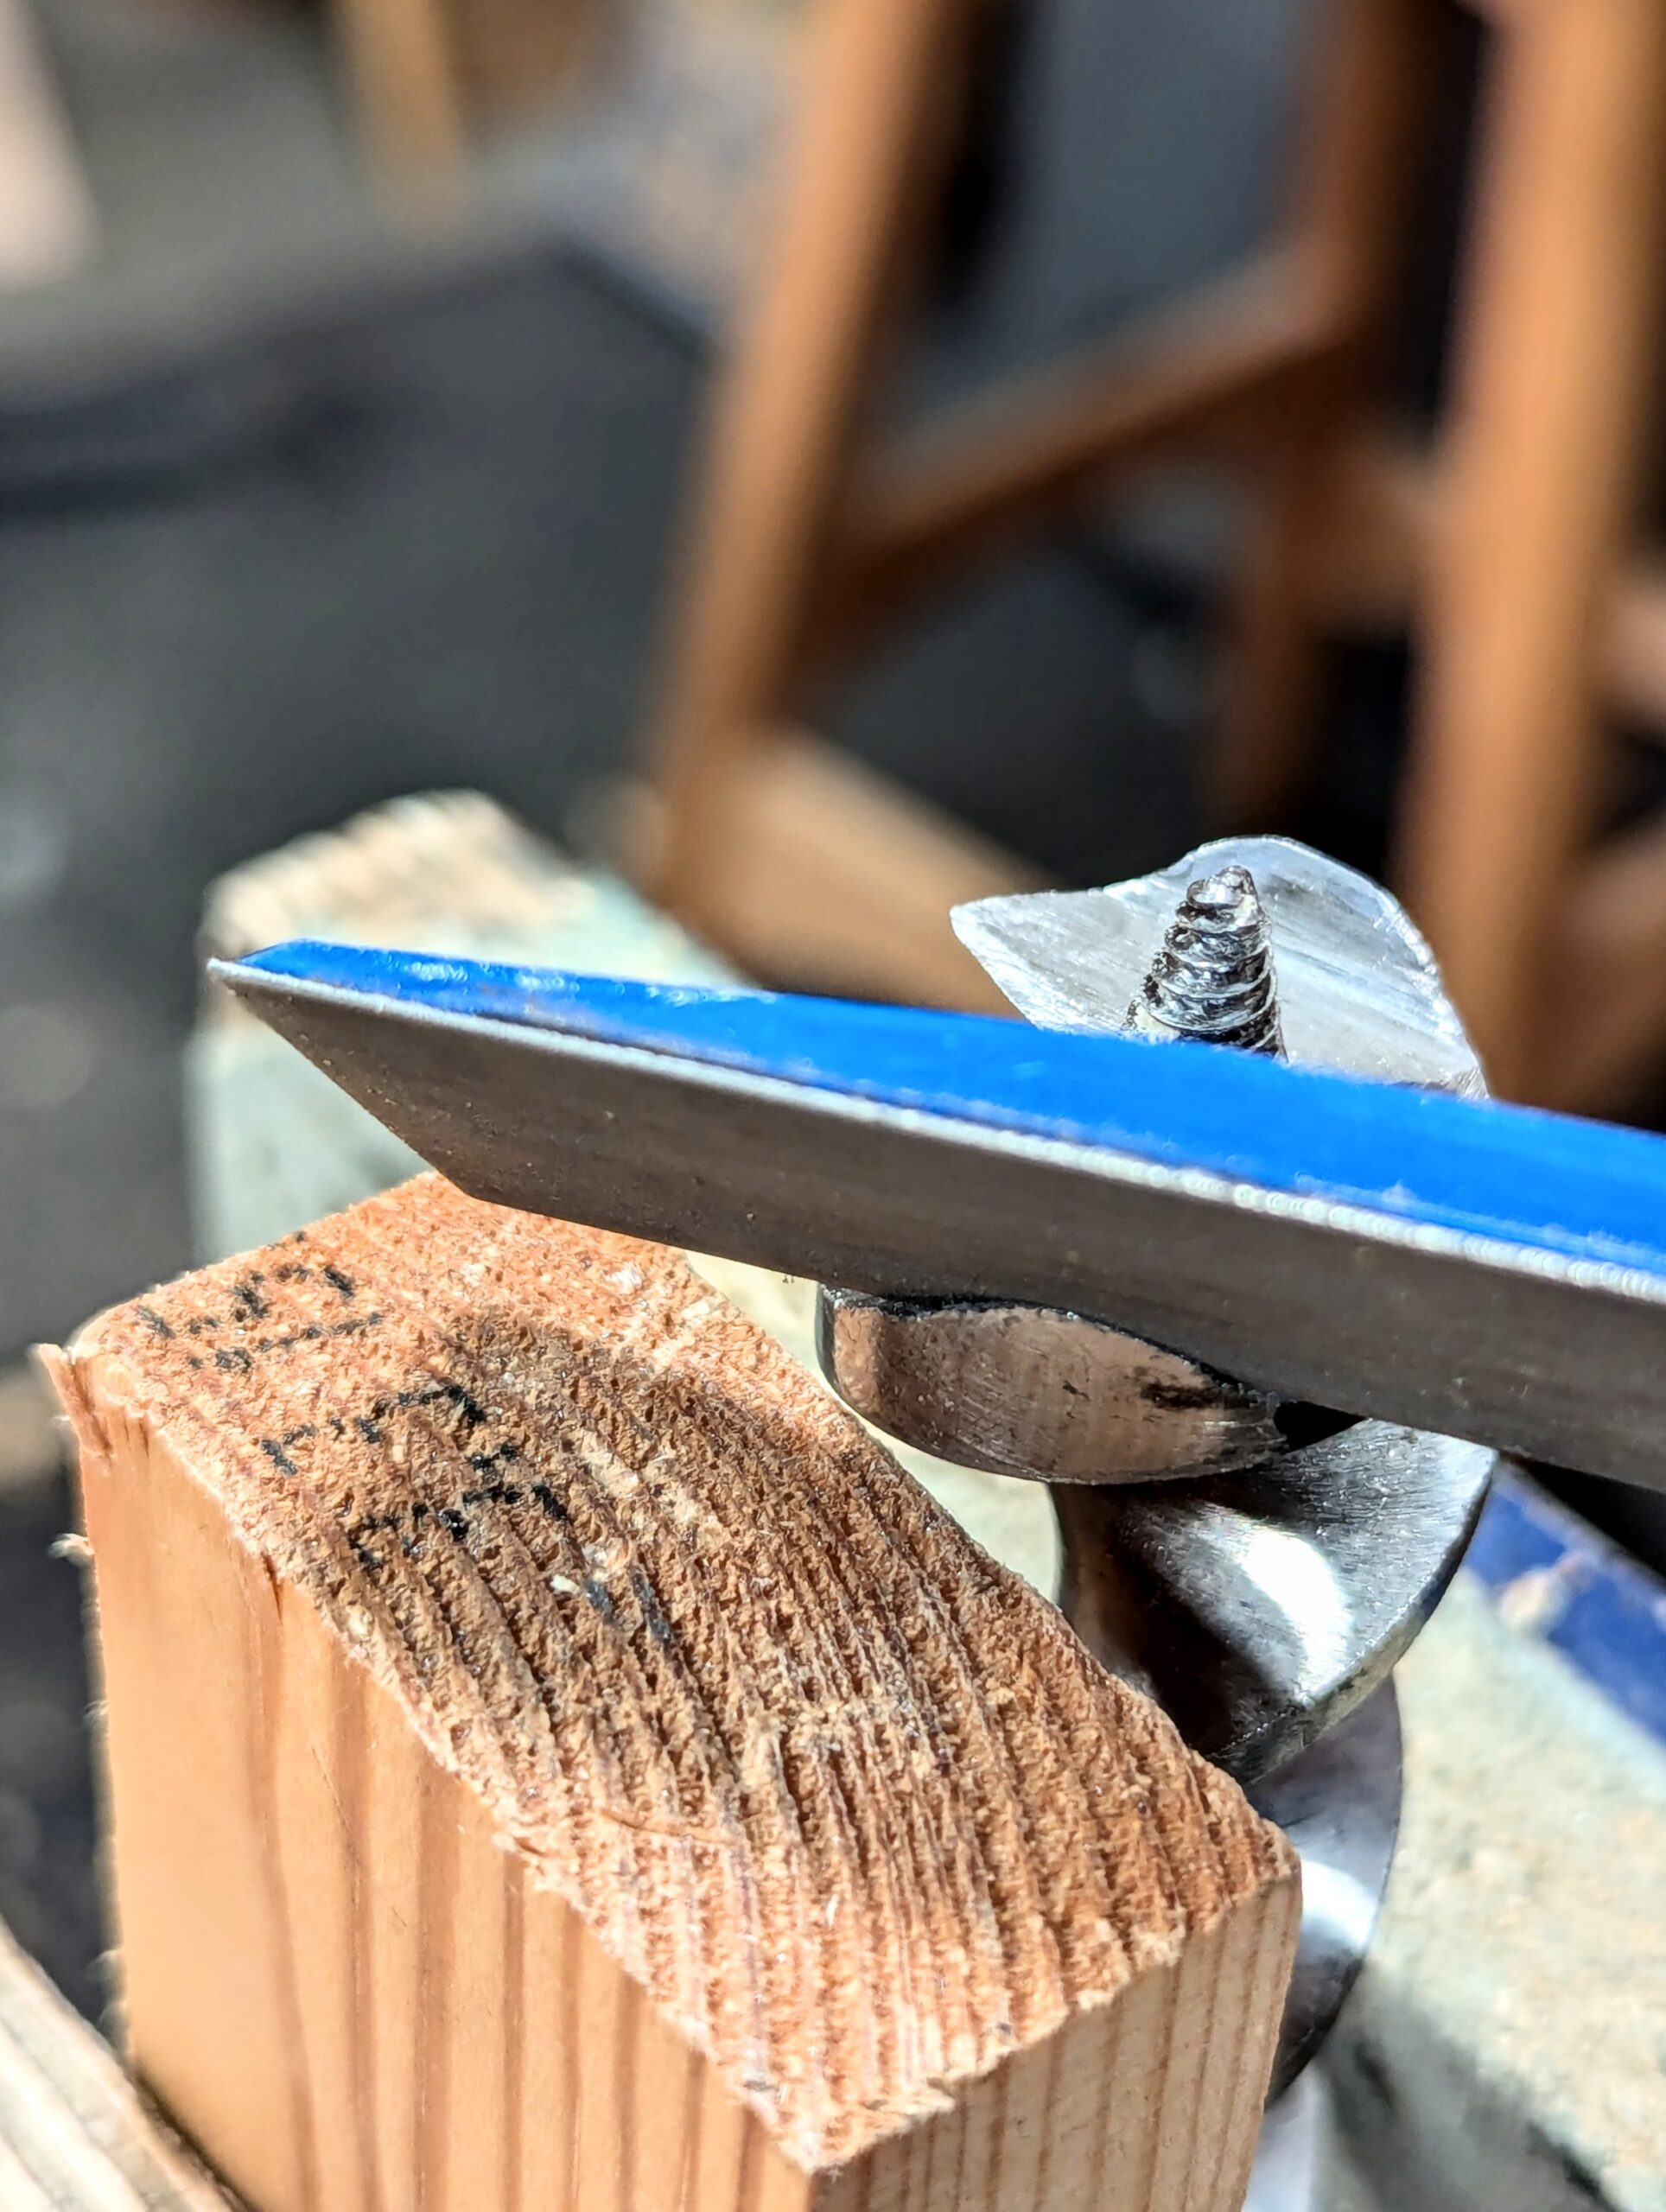
I think the spurs are refining cuts to the rime and inside wall of the hole, so refining with the diamond hone significantly improves this critical point.
I anticipate that this sharpening should last me for a year or two. The very worst thing to happen to these bits is hitting a screw or nail. This almost ruins the bit and thereby the beautiful set, and this is why I never loan out brace bits to a novice or non hand tool user without my supervision. It's not worth it.
Comments ()