A Good Start . . . Learning to See
I often think that the many things we are drawn to as children may well indicate what we will embrace in our unfolding future. Several things jump out at me that became integral and cohesive elements of adult life for me, woodworking, artwork of several types but especially pencil drawing, nature and the study of wildlife local to my at-the-moment habitat and writing. Unquestionably, these four stalwarts have remained firmly in my daily life. In the great cities of my youth, starlings held my gaze in their murmurings, swift-circling flocks that never collide and the poop-dodging public moving from the pavements to the road for safety to the isolated grubbing of the lone Dunnock under the hedges. Several other interests colour my life with less impact.
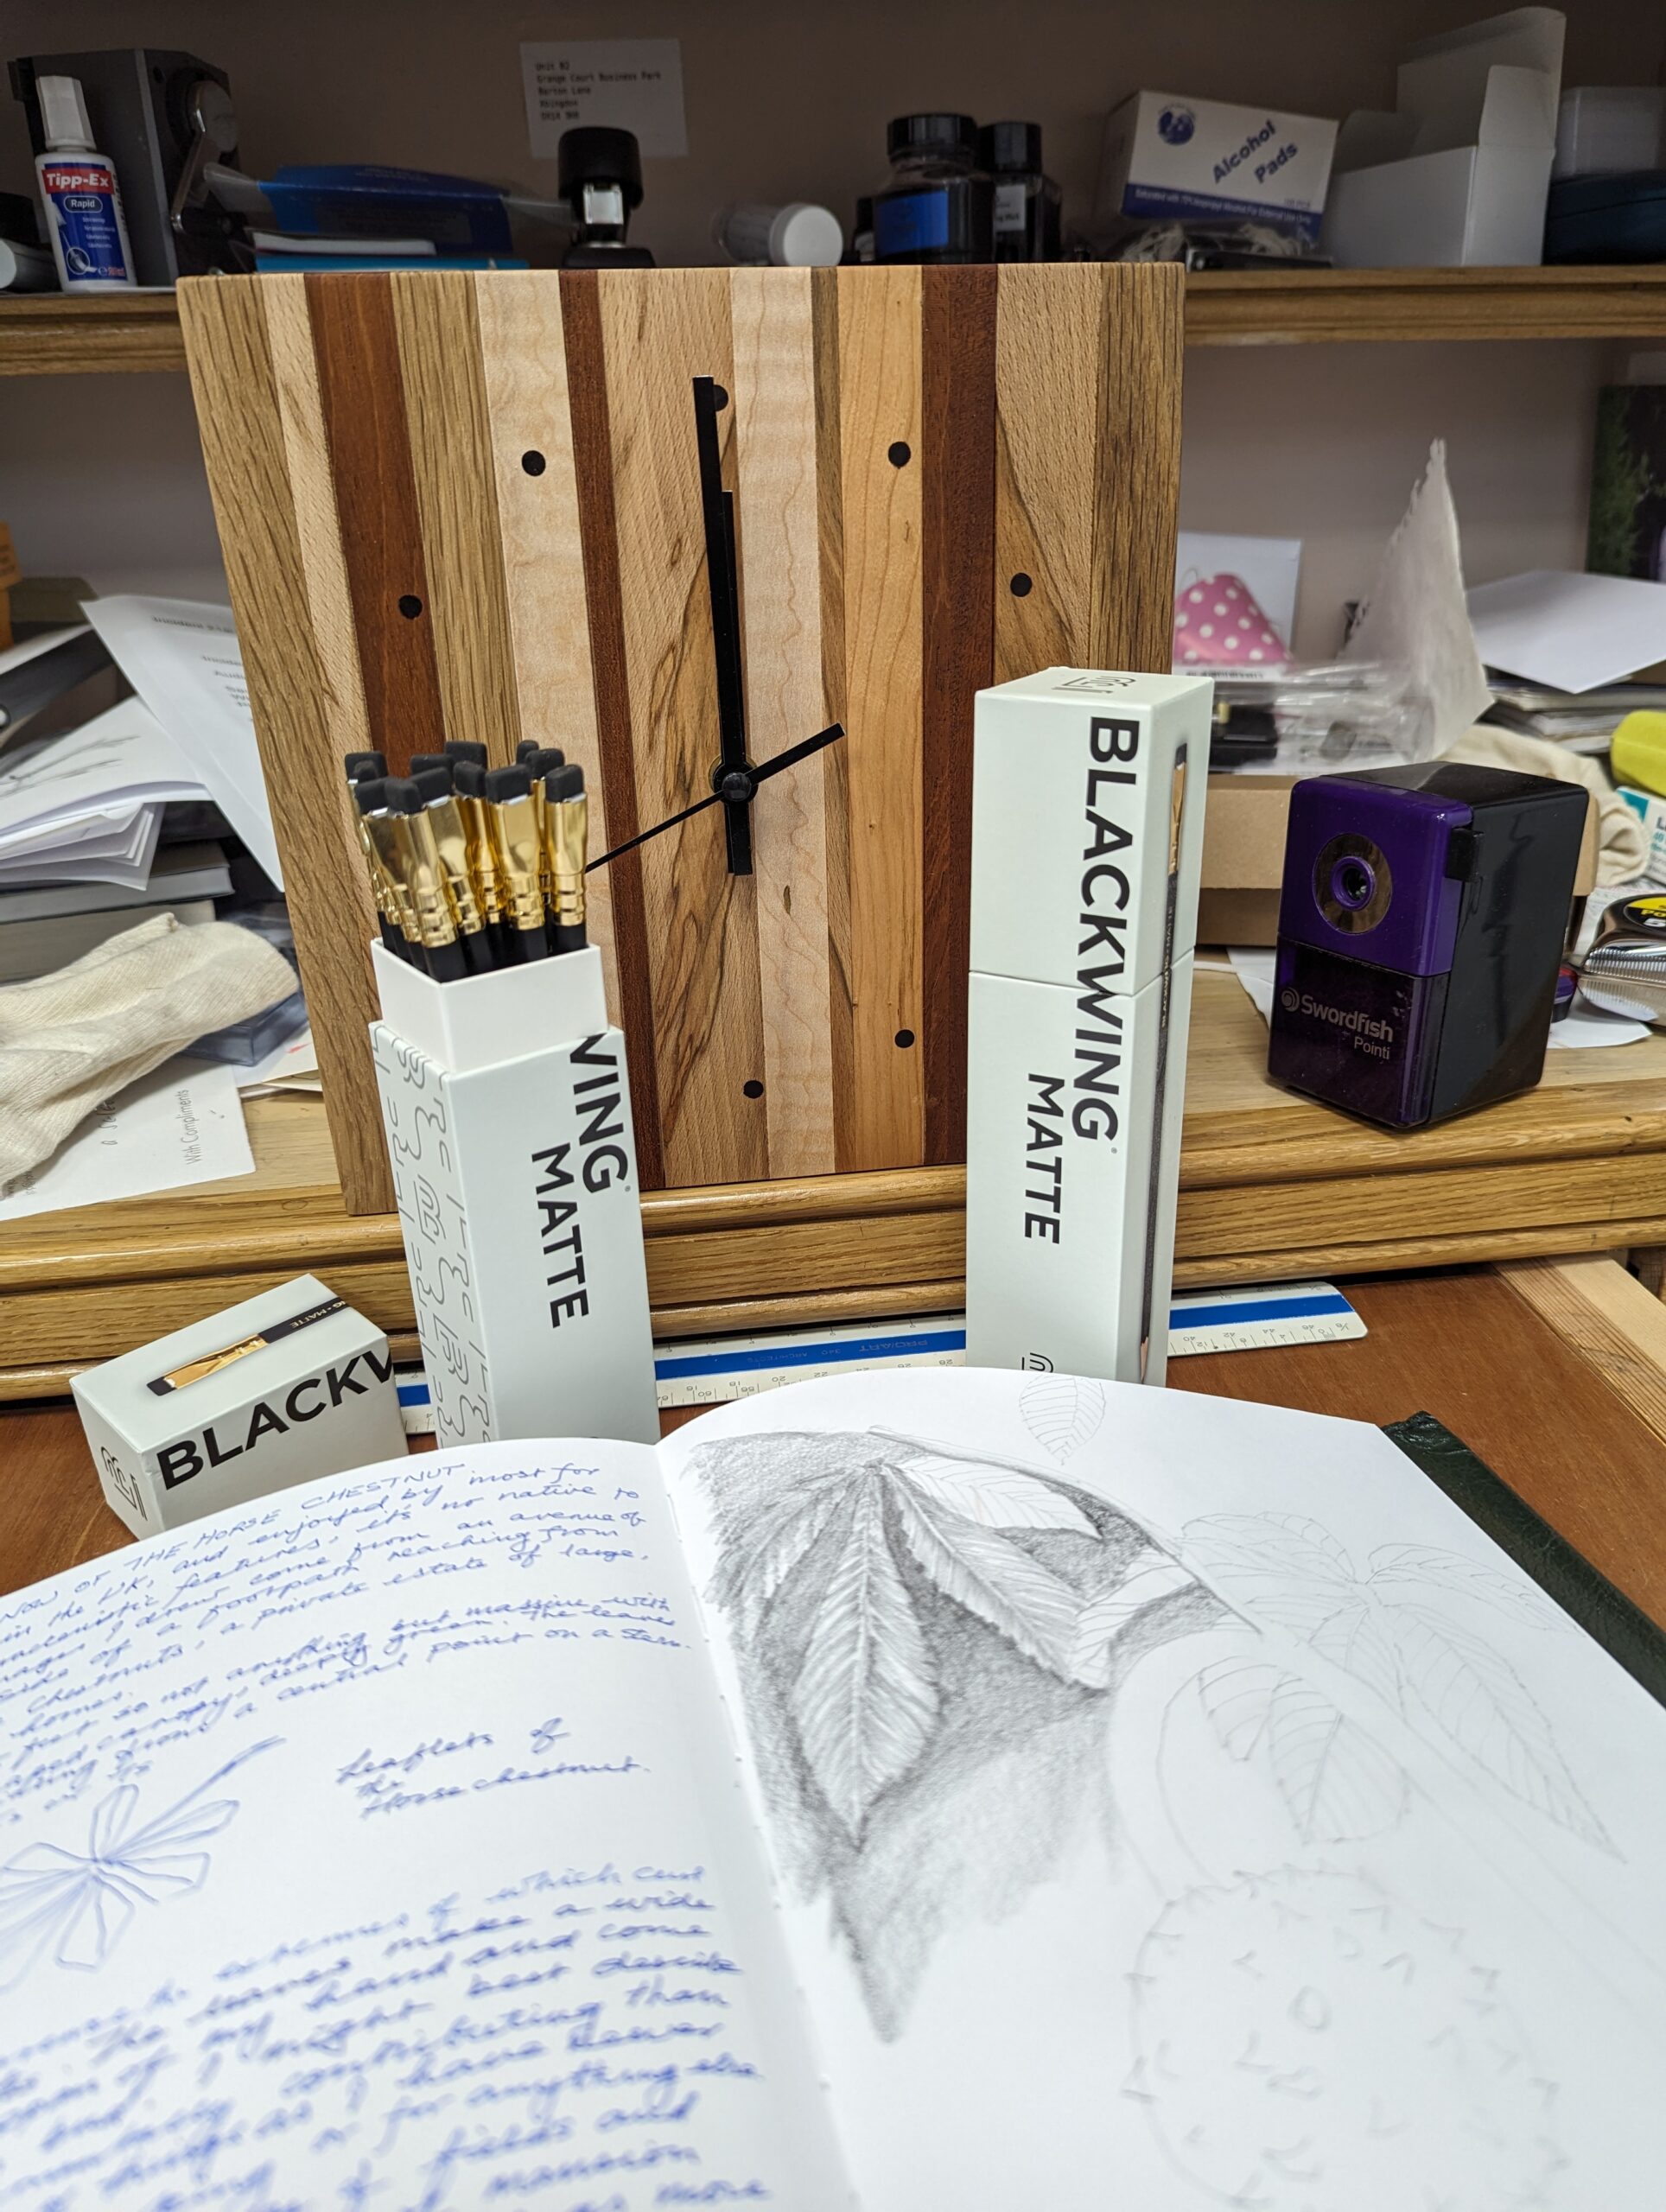
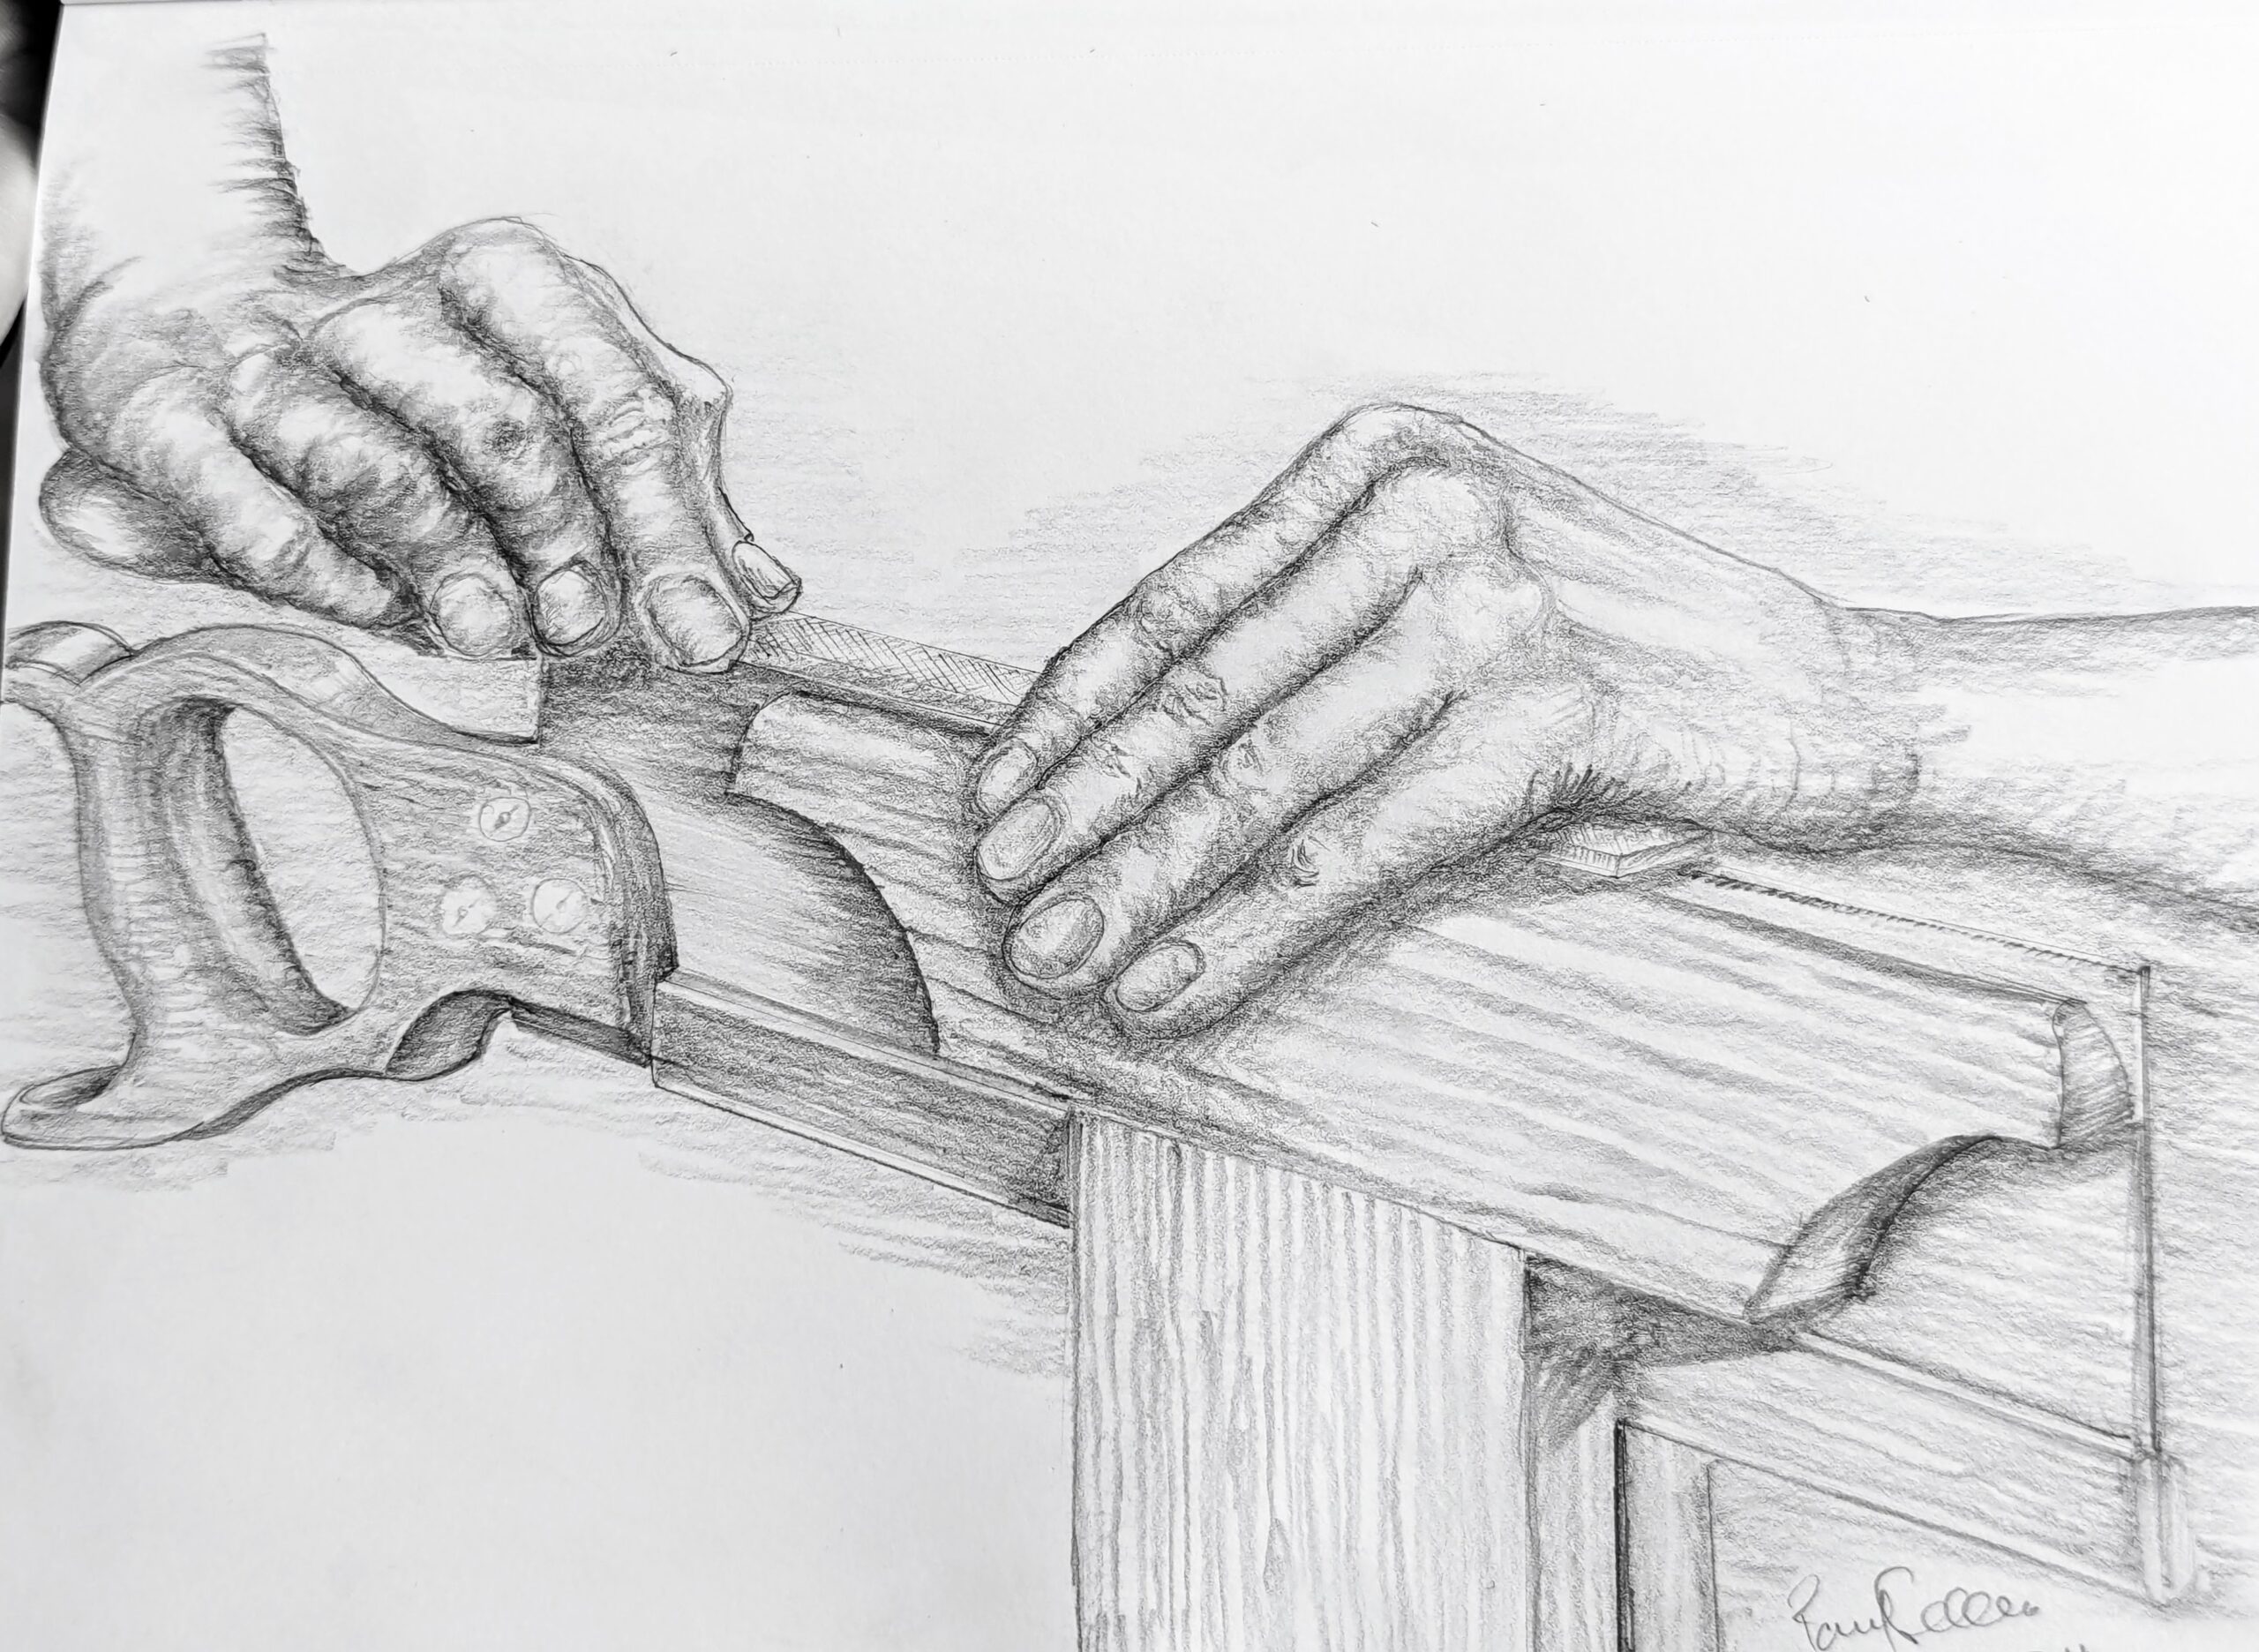
Most days I start with breakfast as no doubt others do. I have two main meals a day and rarely snack if ever. I'm something of a fruit and veg man and cook all things from scratch be that stir-fry fresh veg, frittata, soup or a curry. I make enough to serve for three or four meals. From there I am usually in a cafe for my first drink of the day and enjoy an Americano (UK for a coffee type-type). By seven I am working. My writing starts with long-hand in my journal and when I feel the need, every other day at least, I start a drawing. Though I have challenged myself with hands through the years, and the theme range is narrowed to woodworking, what I draw is rarely drawn. People hate drawing hands, apparently. According to them, others that draw and sketch, "Hands are so hard!" And it's true. They demand pernickety (adjective Informal-British 1. placing too much emphasis on trivial or minor details; fussy) attention to detail. And working hands all the more.

If you do fancy drawing then buy a drawing pad and a couple of half decent pencils. A "#2" (USA) equals an "HB" mid range, "H" stands for hard and we generally use "H" grades for more for technical drawing and the "B" range from "B1" to "B9" with the soft range of graphite for sketch type drawing, etc. These "B"s take take you through a good range from lighter with the lower numbers through darker to near black. In general I use a "#2" or "HB" for initial outlining and some light shading before changing to "B" grades.
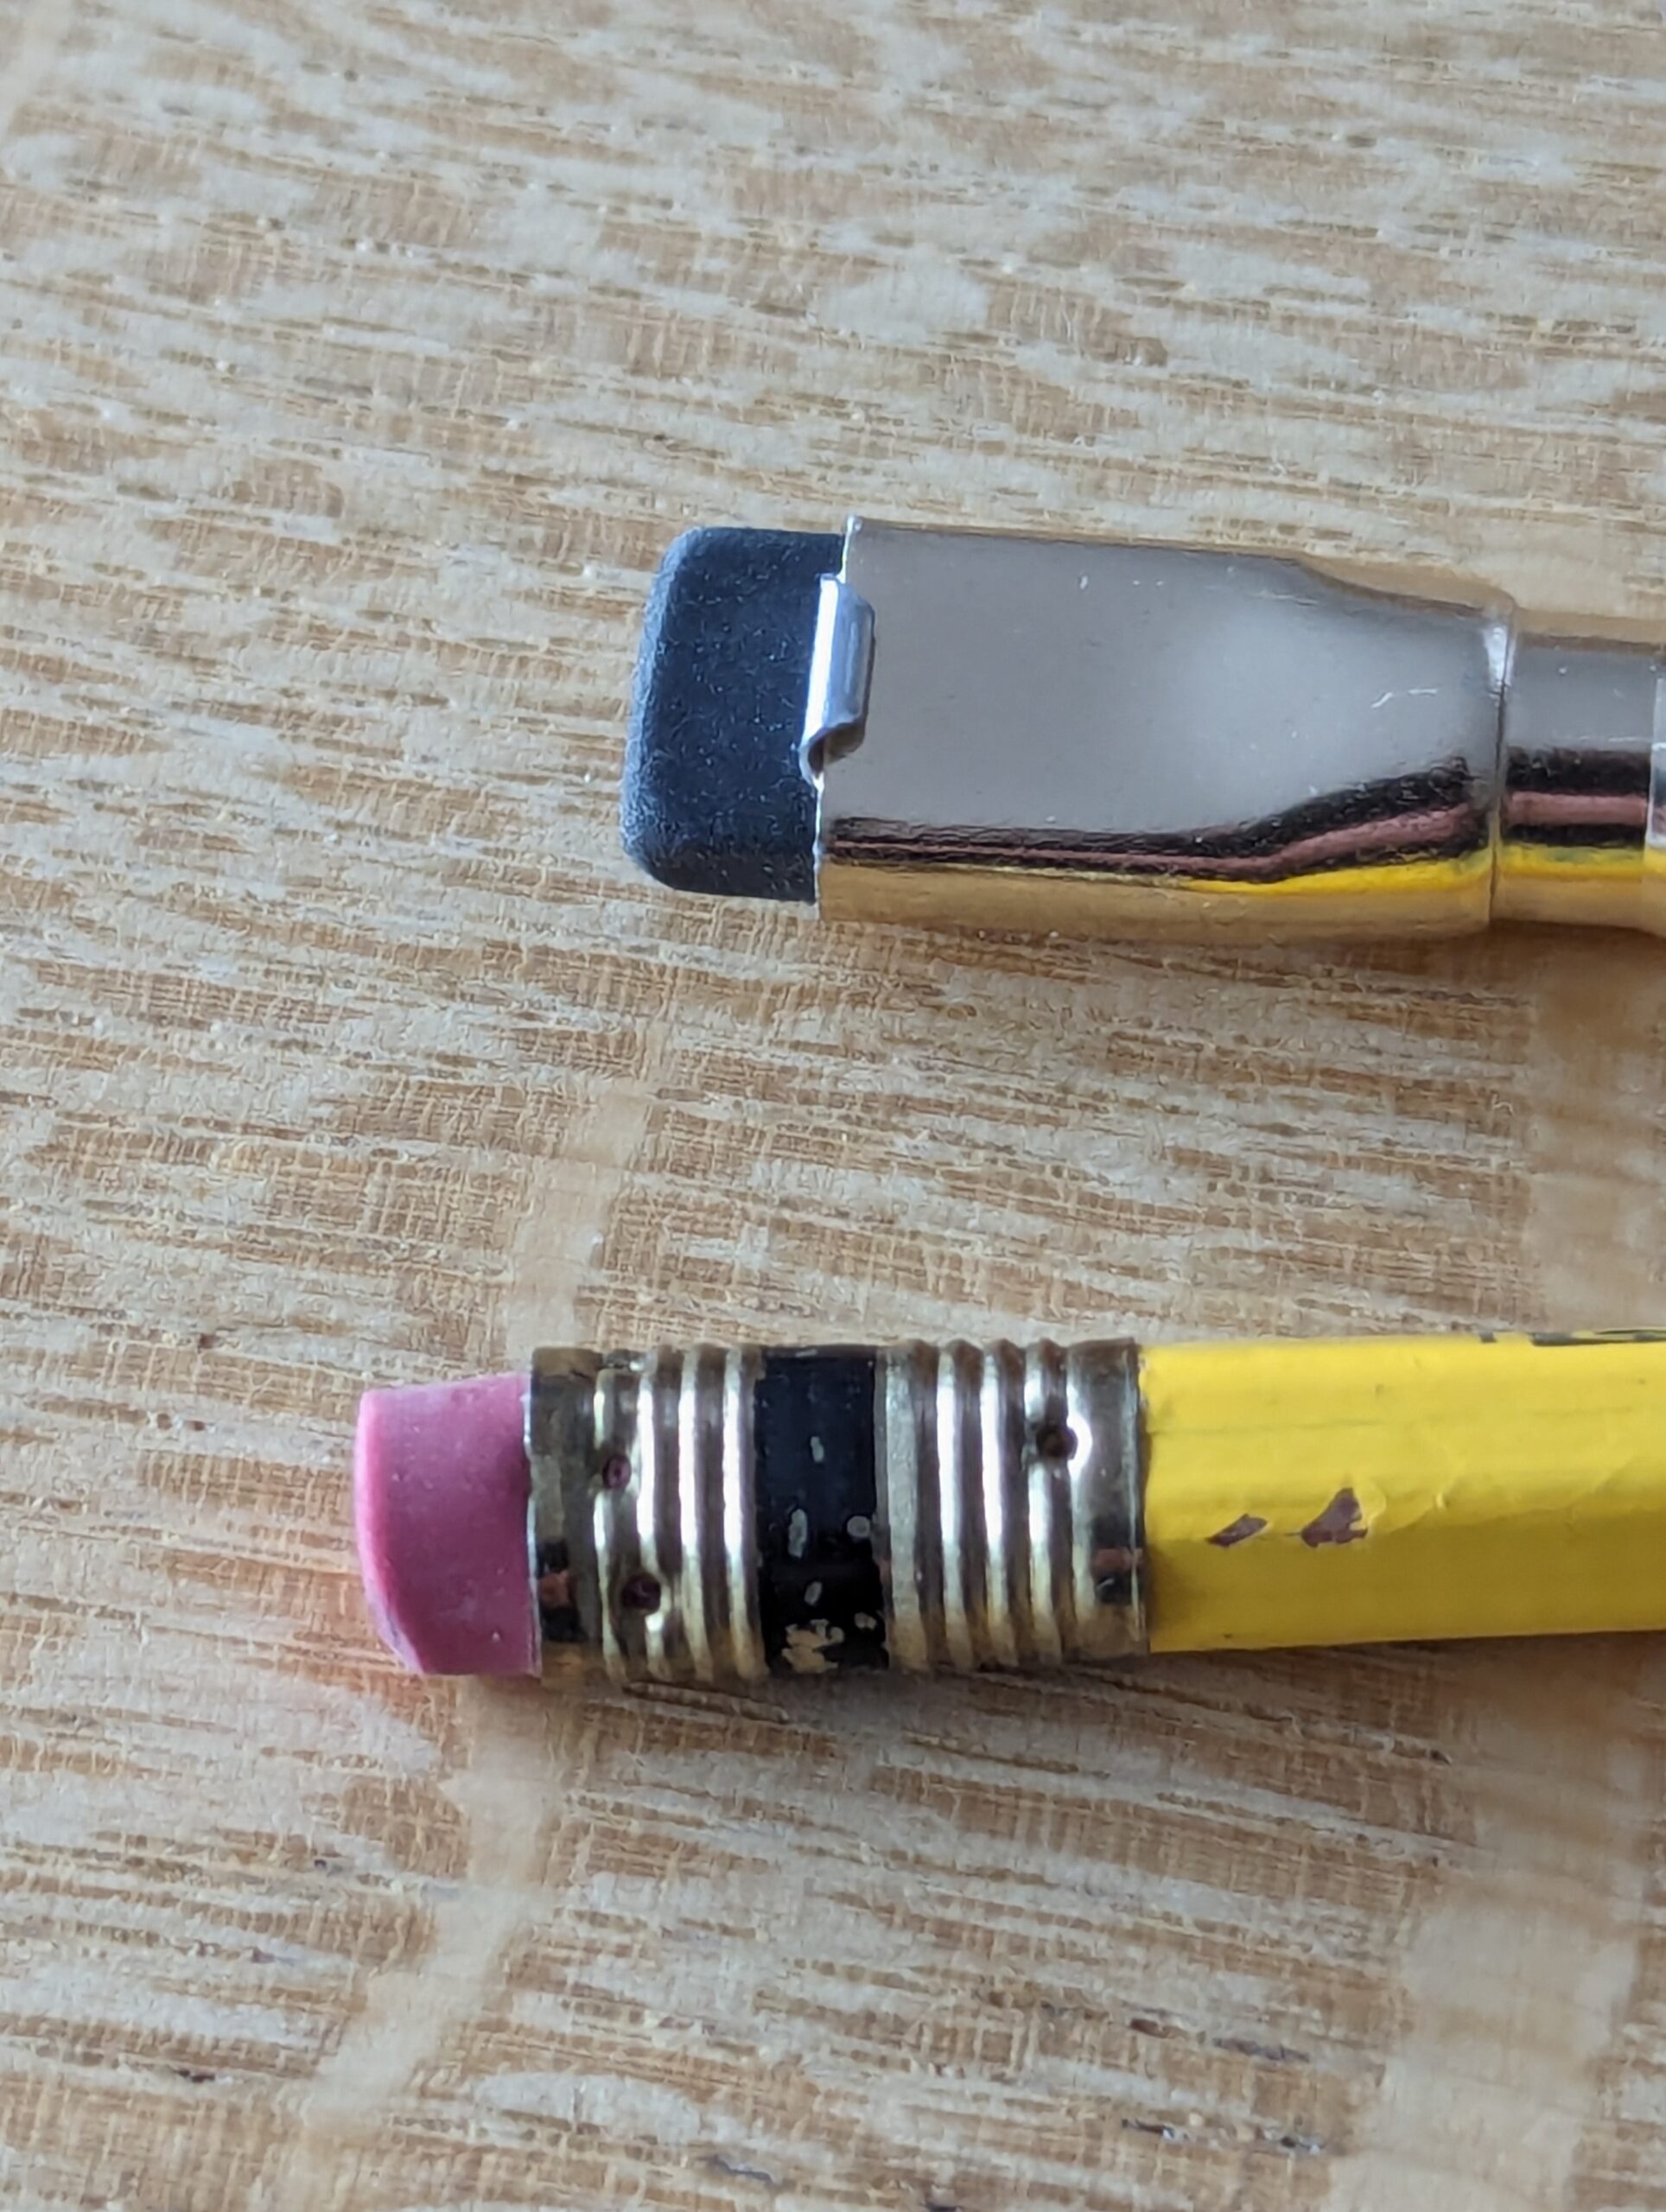
Whereas I like an eraser on the ends of my pencils it is more an American expectation than a European one and certainly not a British one. When I arrived to live and work in the USA in the 19880s you couldn't buy a pencil without one. It made sense. I never really understood why European makers didn't adopt the US versions by installing a very convenient eraser at the ends of their pencils. Unfortunately, when they do, they usually go for a cheap imitation plastic version that smudges the pencil marks unerasably but never erases it.
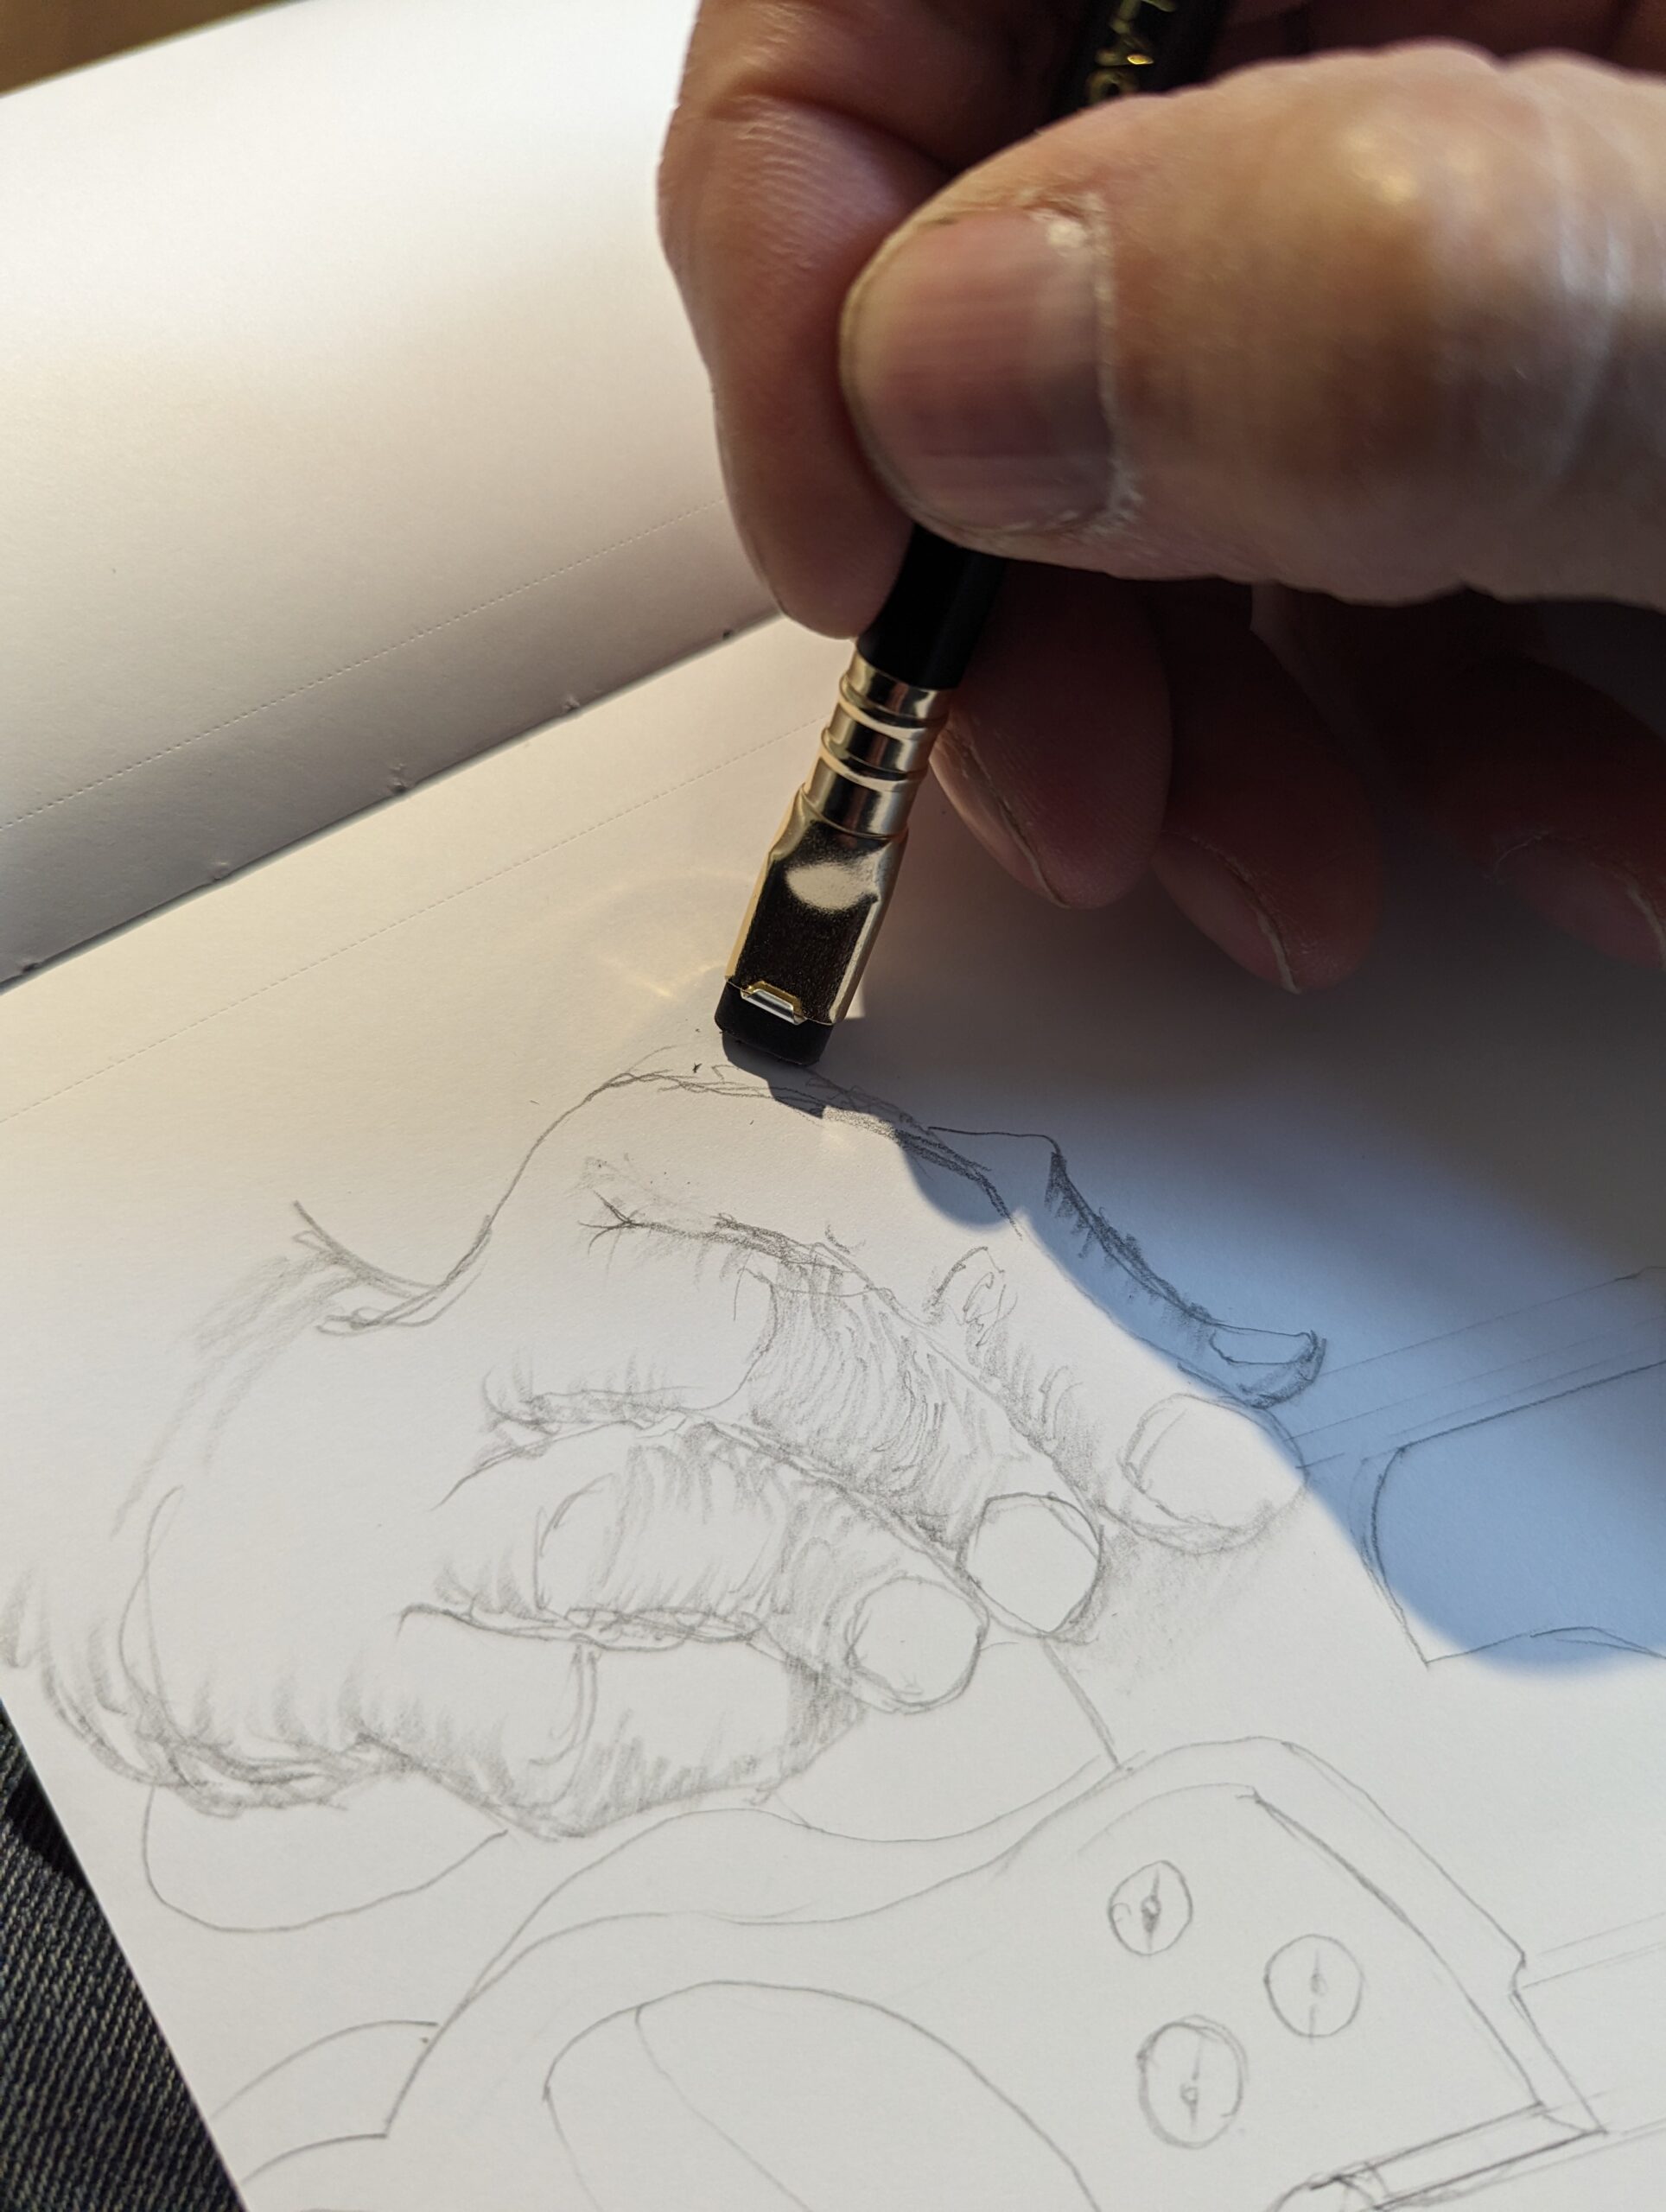
The wonderful thing about graphite pencils is the erasability throughout any work in progress. I find this especially important and especially in the early days of learning to draw be that technical drawing or sketch studies. I have heard of and hear of art teachers saying, "No rubbing out!" but this is the real advantage to erasable pencilling. Who is the one who can place lines on paper that perfectly represent the intent of the artist? A 2mm distance in correction is often transformative. Placing my opening lines on the page is preliminary; here is the point when I step back or extend the drawing with my arms to take a retrospective look at what I have pencilled. Alongside the fraudulent line I place a corrected one, half close my eyes and then remove the ill-placed one and look again. Perspective for hands and especially working hands holding tools and wood and such becomes all the more critical as 'close-ups'. A fingernail at the wrong angle on the finger and a misaligned finger knuckle or a twist to the hand can mislead the eye even when the hand is distorted quite markedly from those hands that don't work too much manually. Small corrections, pernickety ones, redirect the work in a most positive way. So, yes! Erase as necessary and make adjustments before you get in too deeply into the drawing. Do it!

Blocking out as in above comes first in the training training to draw. Remember you are not drawing for the approval of others so don't be saying to yourself, "I can't draw!" and "I am no good at drawing." If you haven't been drawing a few times a week since you were ten years old and you are now 30 and didn't draw since school how will you be good at it? And school is a good place to learn the three R's of reading, 'riting and 'rithmetic but not the best at all for anything relating to the arts unless those teachers are true creatives. I have a close relative who currently teaches fibre crafts even though she never handled fibres beyon a few hours a week doing her course in college. She was recently told that she had to teach woodworking in the same college as part of her work. This person only ever handled wood when she was 13 years old in secondary school. Her knowledge of woodworking is right at zero. Who made this decision?

To begin with, you try to take in visually the picture in front of you by a quick exchange of glances where you separate out the blocks of solidity and open or blank space in what's in front of you. Considering what you see engages with your pencil hand and you start to move your pencil to create roughly placed outlines according to what you see. `The two things that engage with one another through the brain are what you see with your eyes and then the pencil in your hand. You must think constructively to understand what you see and place the first few lines accordingly. I think it is important not to overthink this or spend too much time on it. Let the mental acuity come to the fore and don't get rigidly locked onto anything.
Everything and anything is drawable. What stimulates us will draw our eye and inspire us to take up a pencil or record some image in our brain and then commit it to paper.
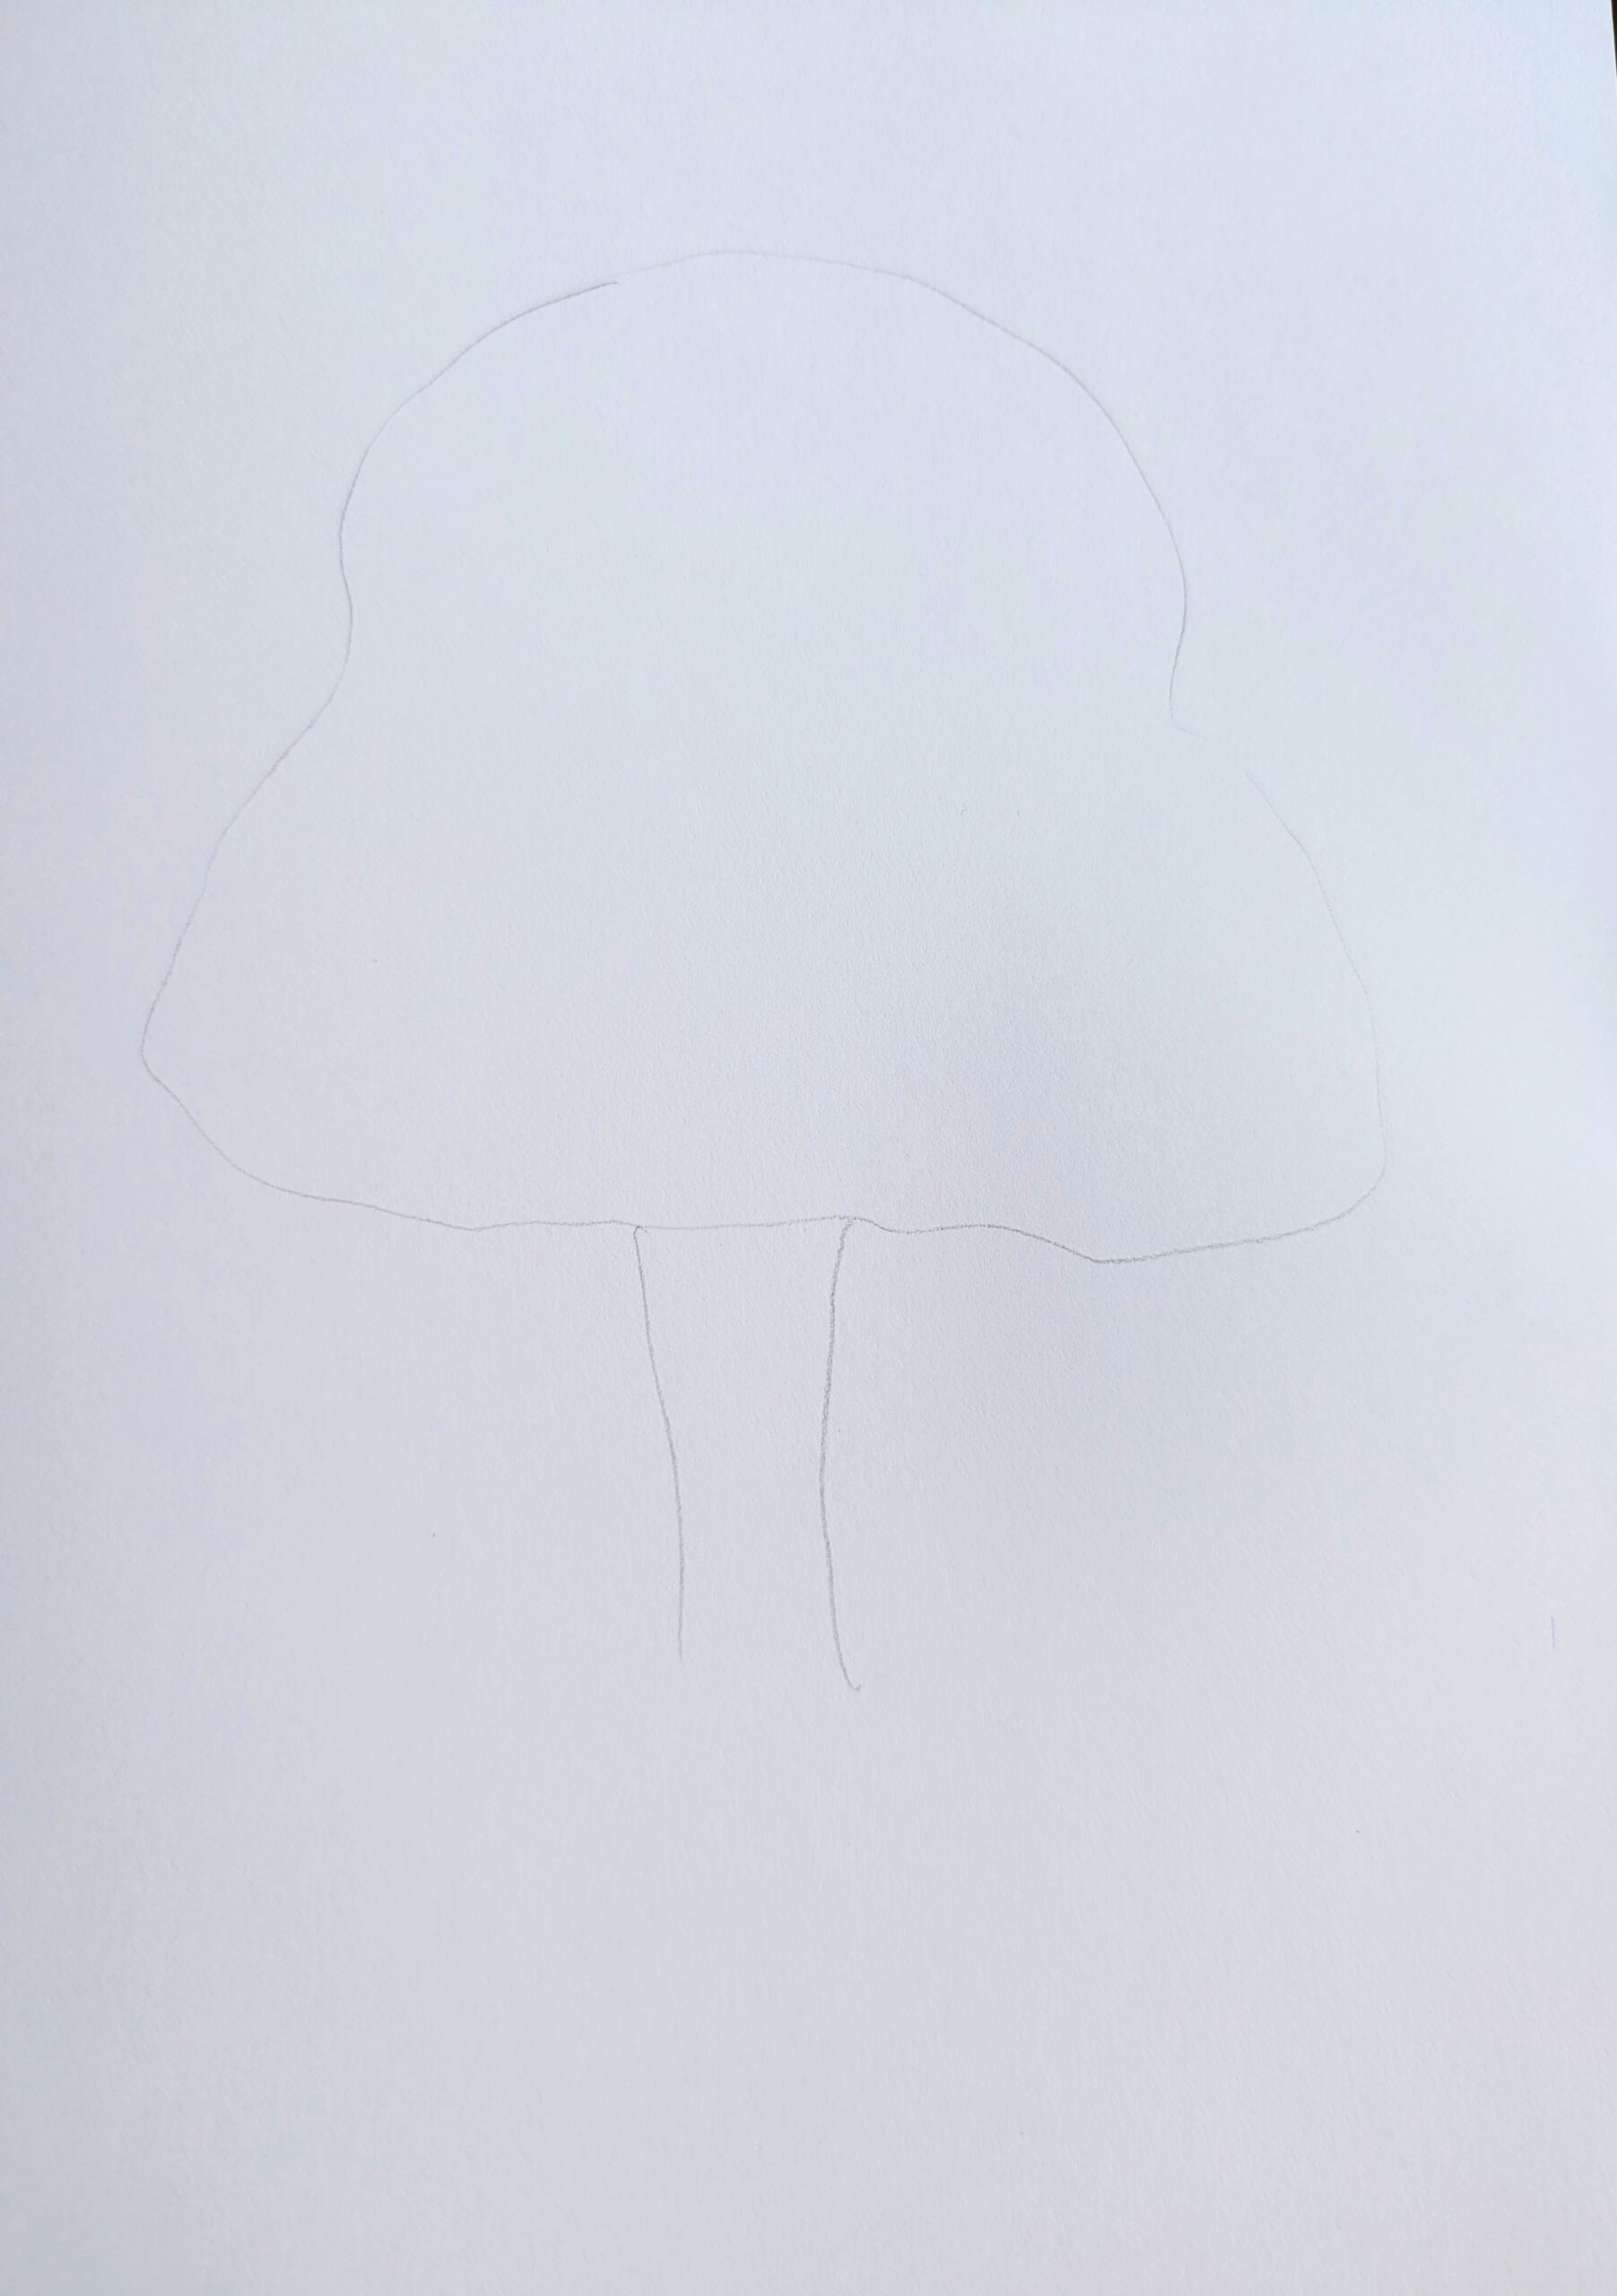
A tree might first take on the shape of an odd-shaped balloon with an ultra thick string for the stem. A continuous circling of the pencil for the dome and understory and two downward stokes for the trunk.
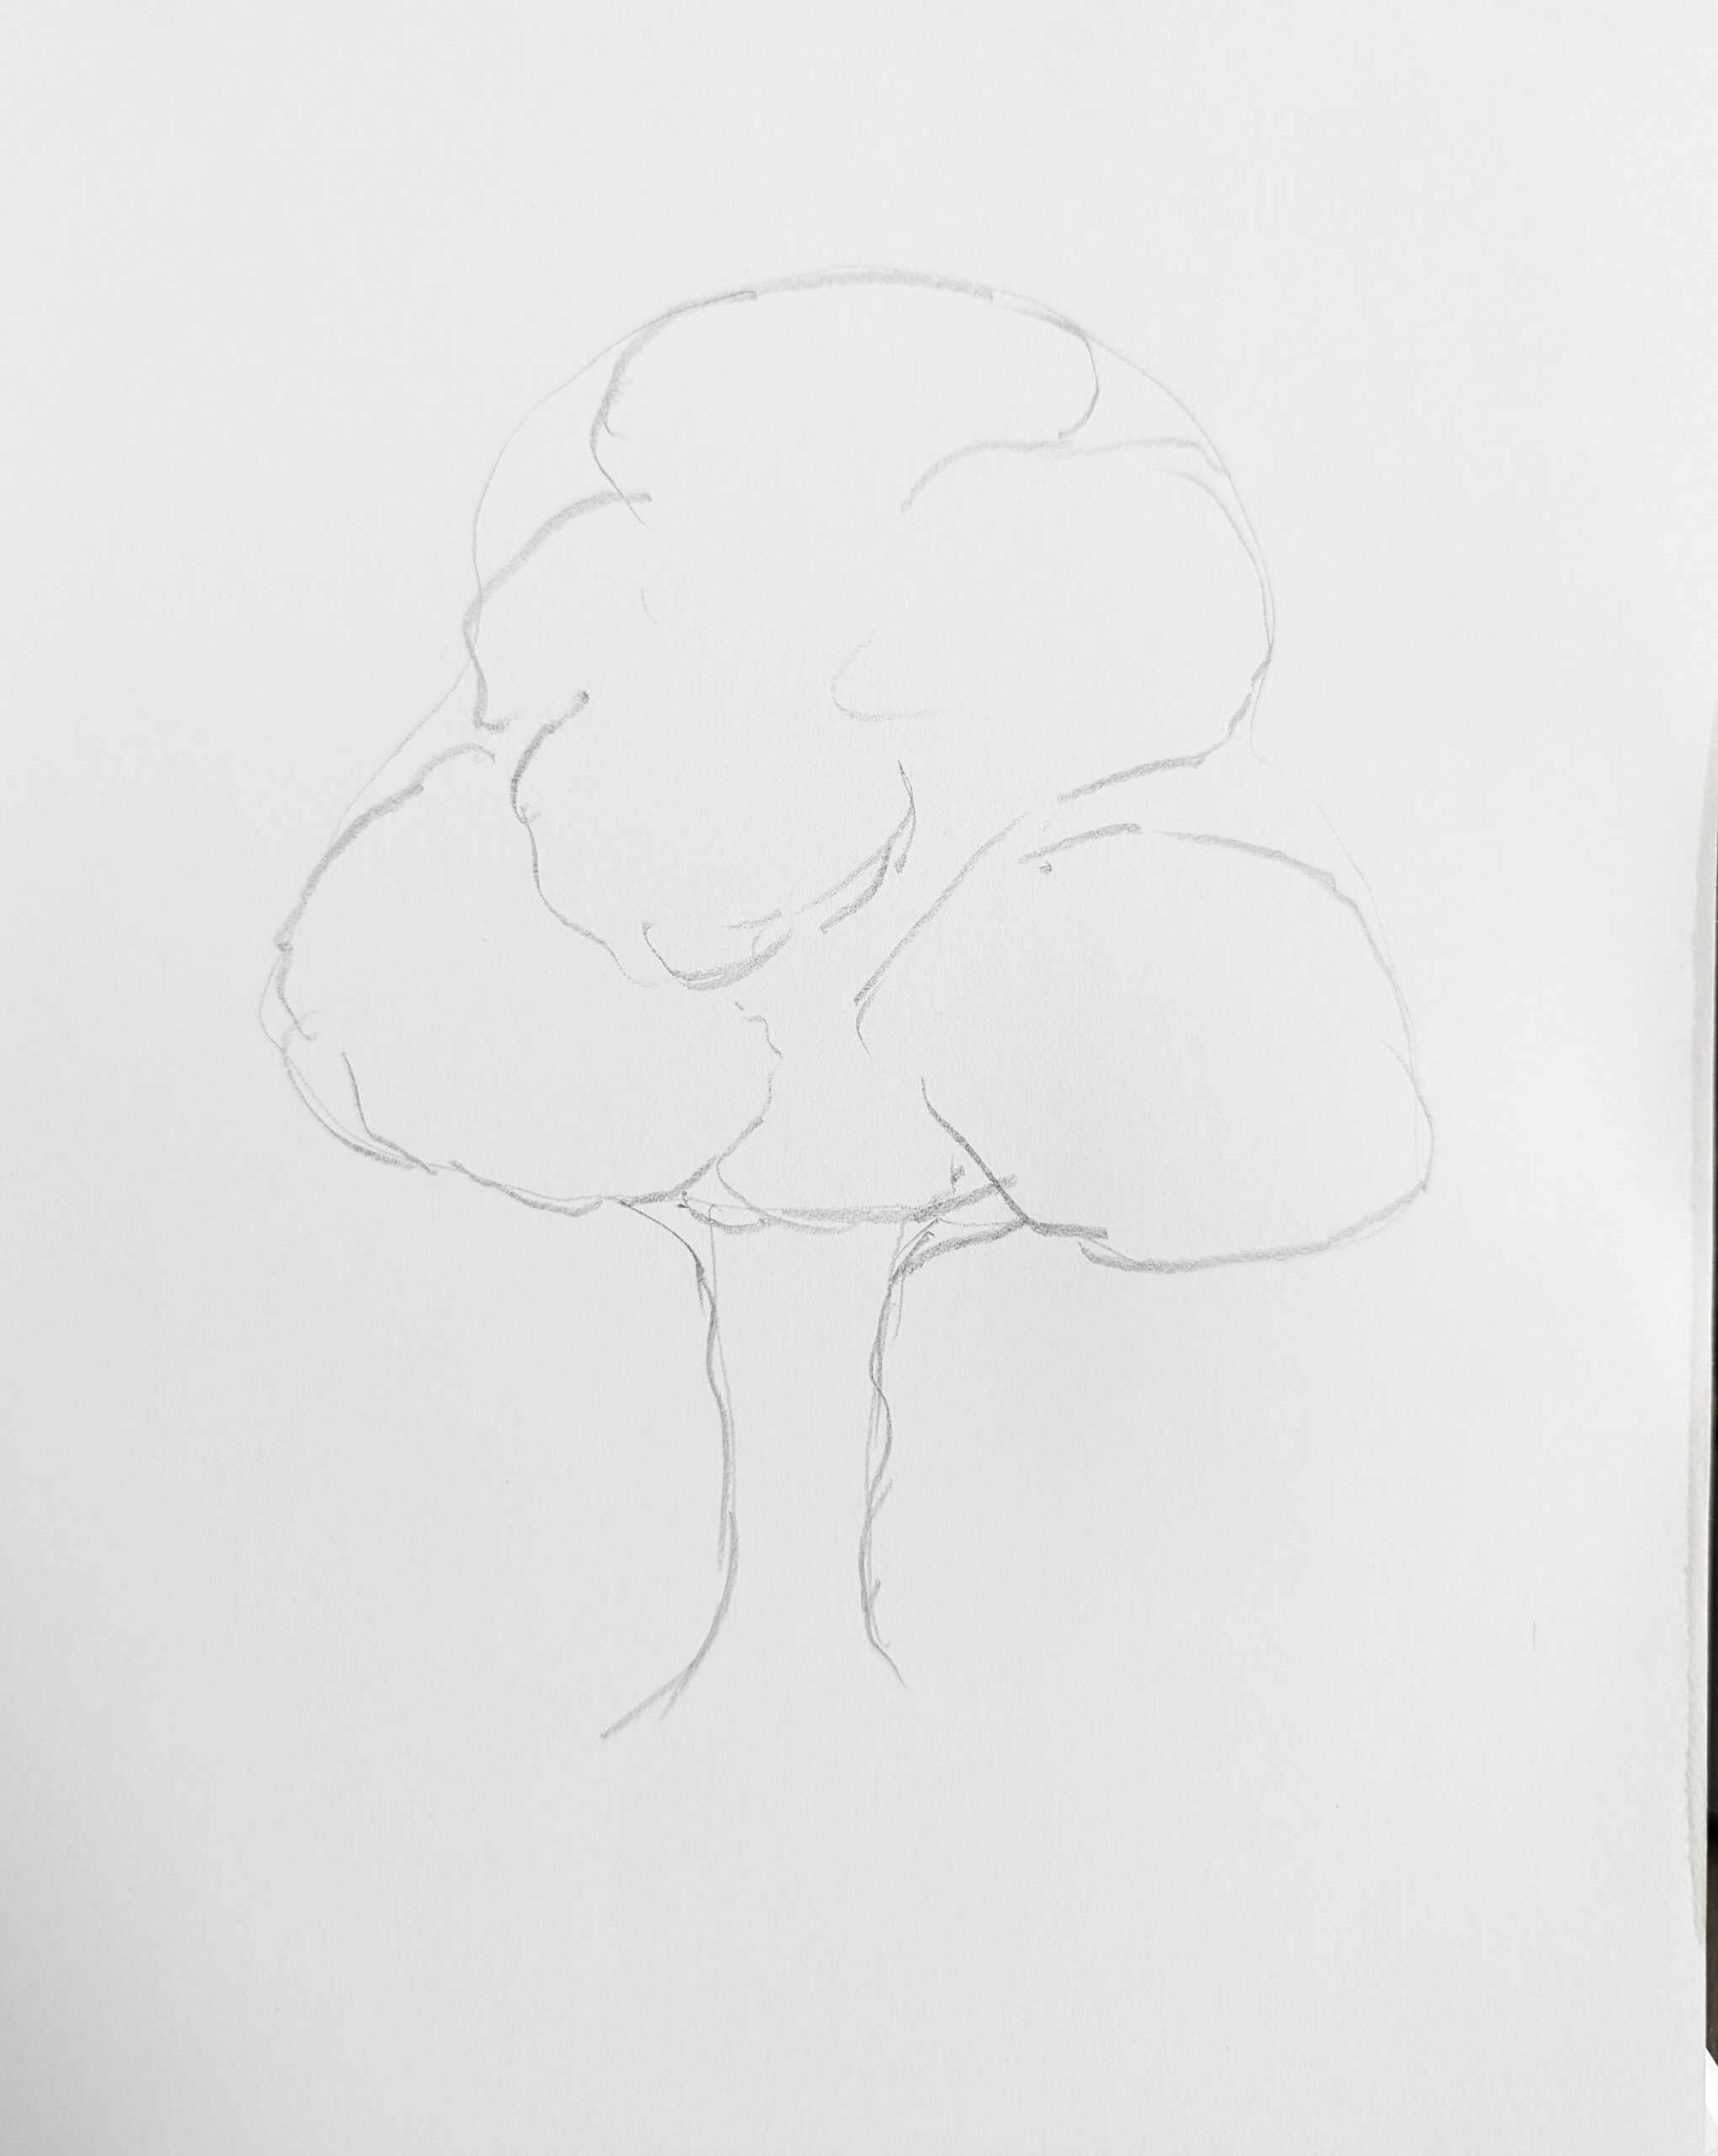
Once laid, you can go back in and define or refine things more accurately and clearly according to what you see. You can be working from real life in a field or wood or from a photograph. The next images show what I mean. This is under three minutes of drawing.

The initial outline gradually takes on additional detail,
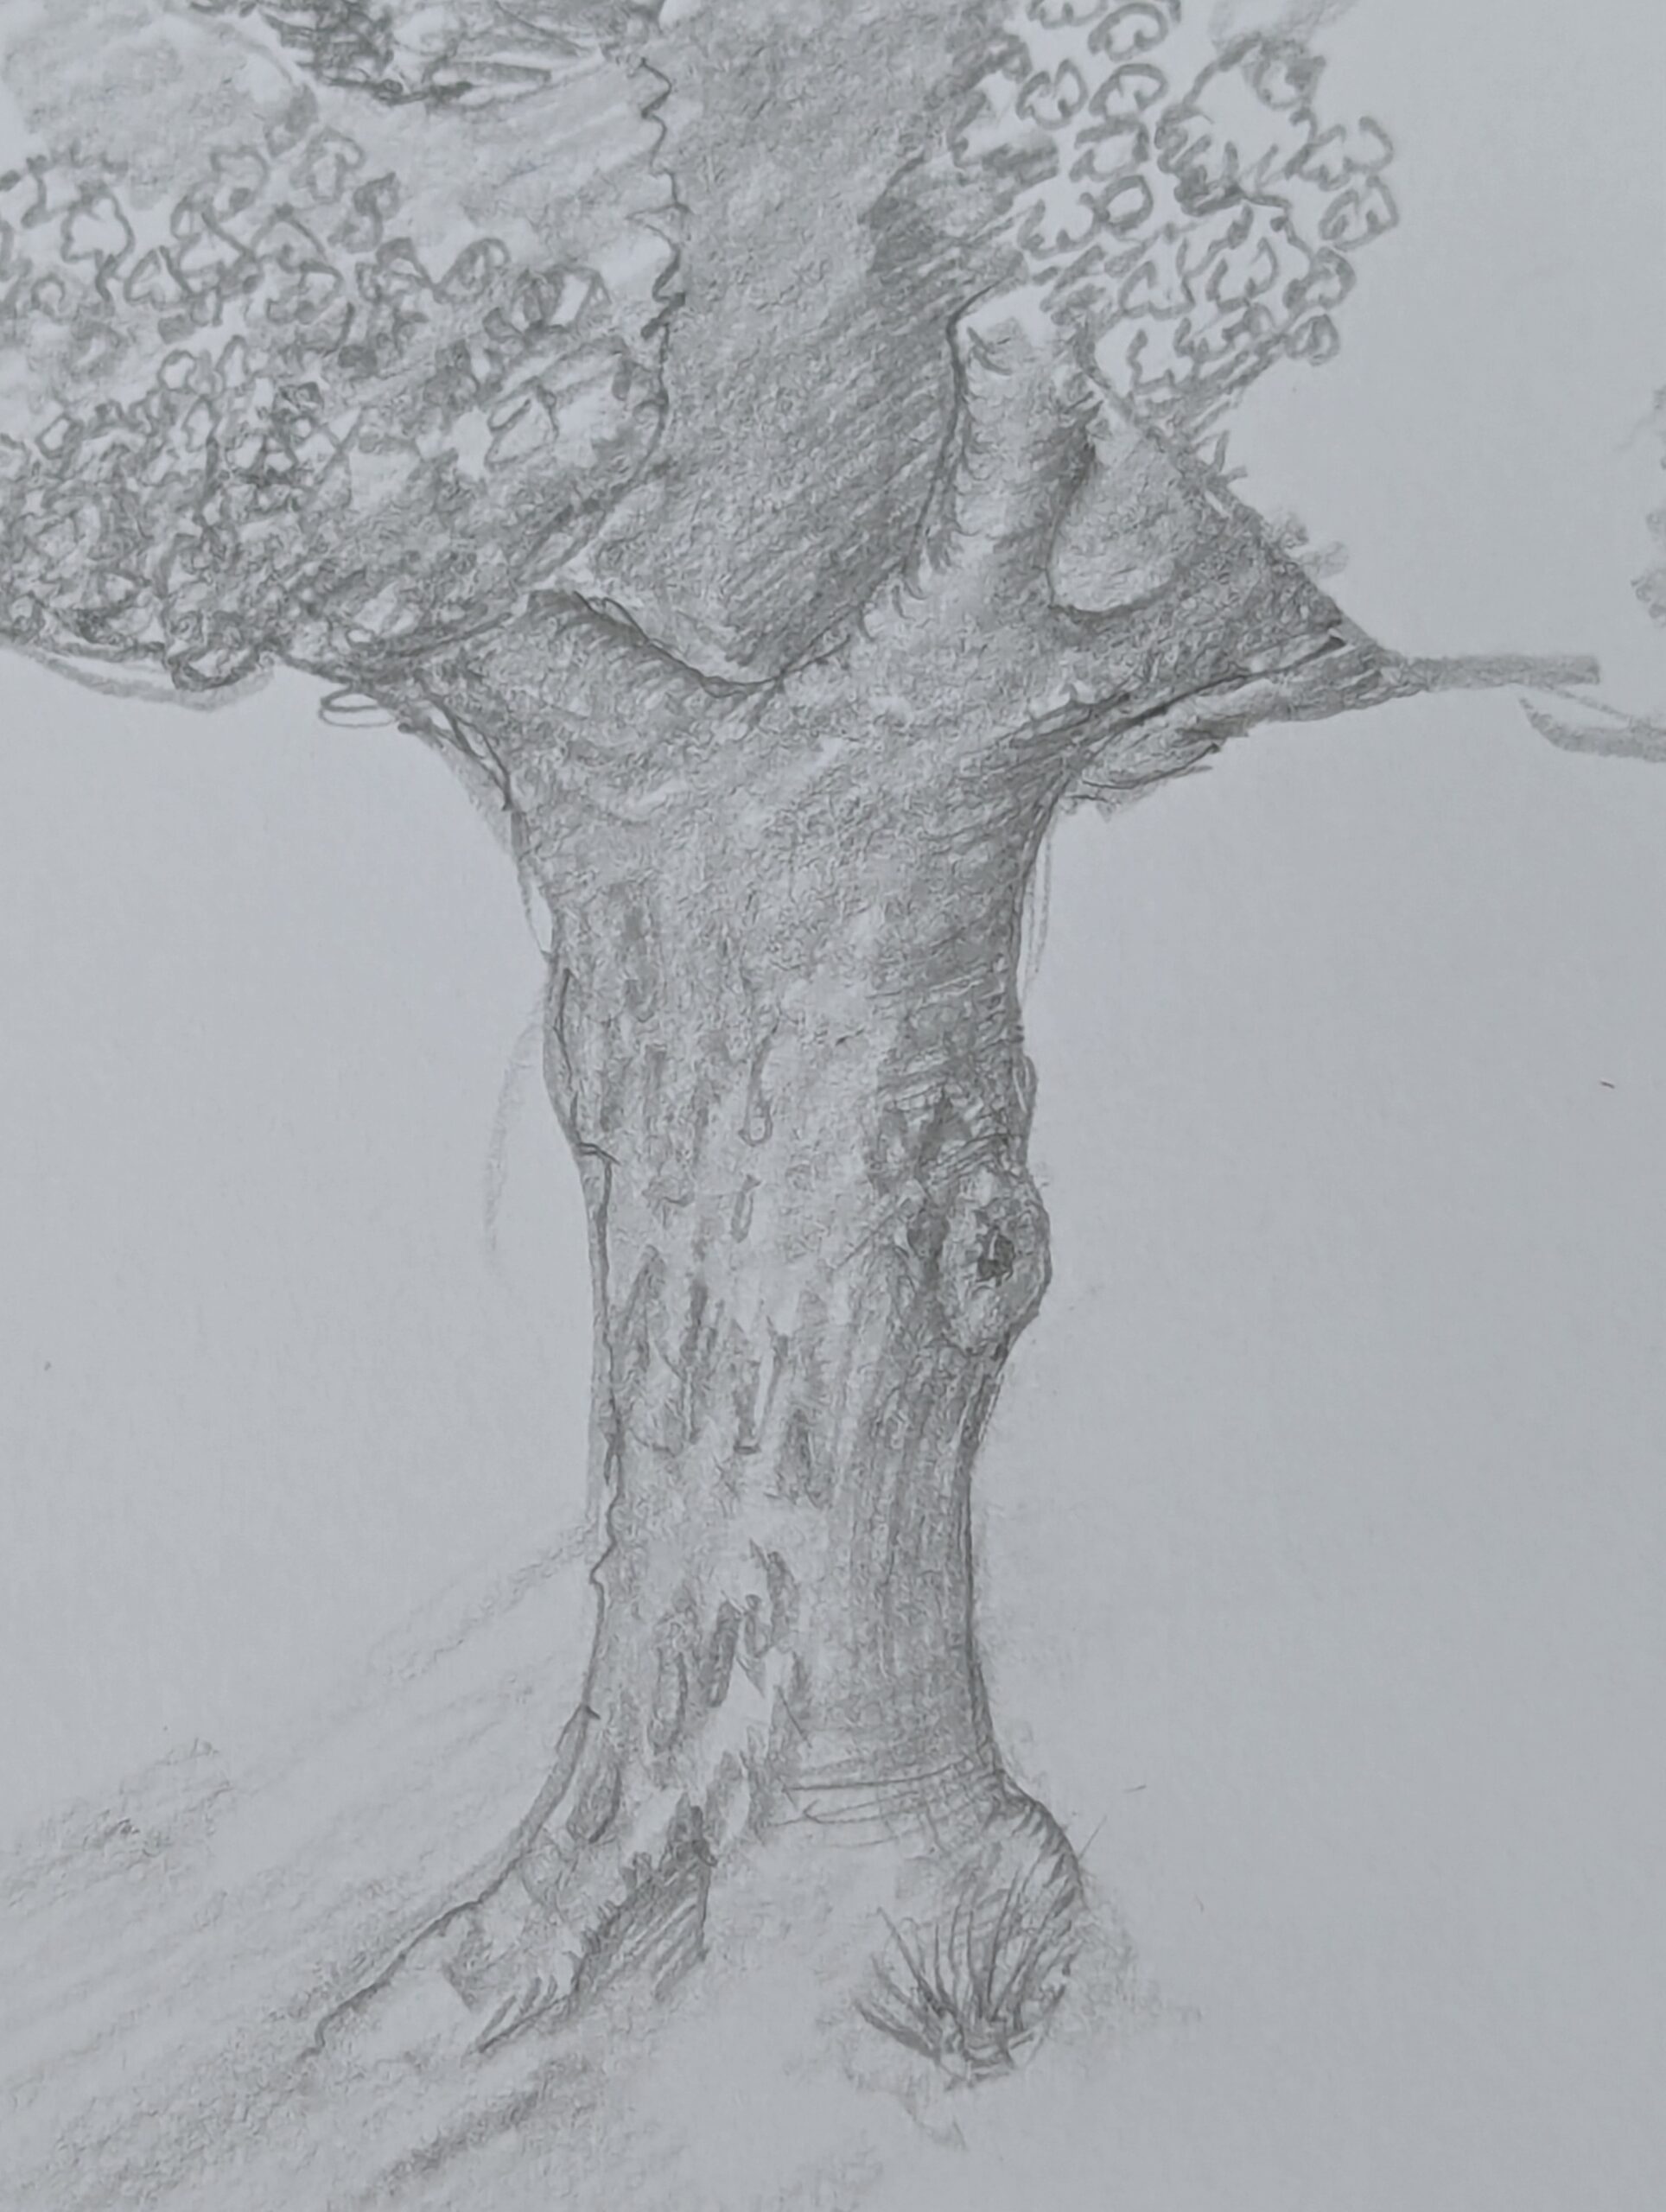
Remember you have experiments you can adopt the outcome of for textures to bark and leaf sections.
When it comes to straight lines you might well have heard never use a ruler unless it's a technical drawing. i would say use a ruler wherever and whenever you feel it best to even if it is a temporary line. I use them all the time for man-made elements of my drawing world. Buildings and furniture usually revolve around straight lines and comprise some sort of box. Remember the song, "Little boxes, Little boxes" by Malvina Reynolds, sung by her and by Pete Seeger? It was a kick against consumerism in the 1960s USA. Well, for us it's about all the things being made are made with corners placed at 90º and forming boxes. Houses too are little more than boxes with angled roofs.
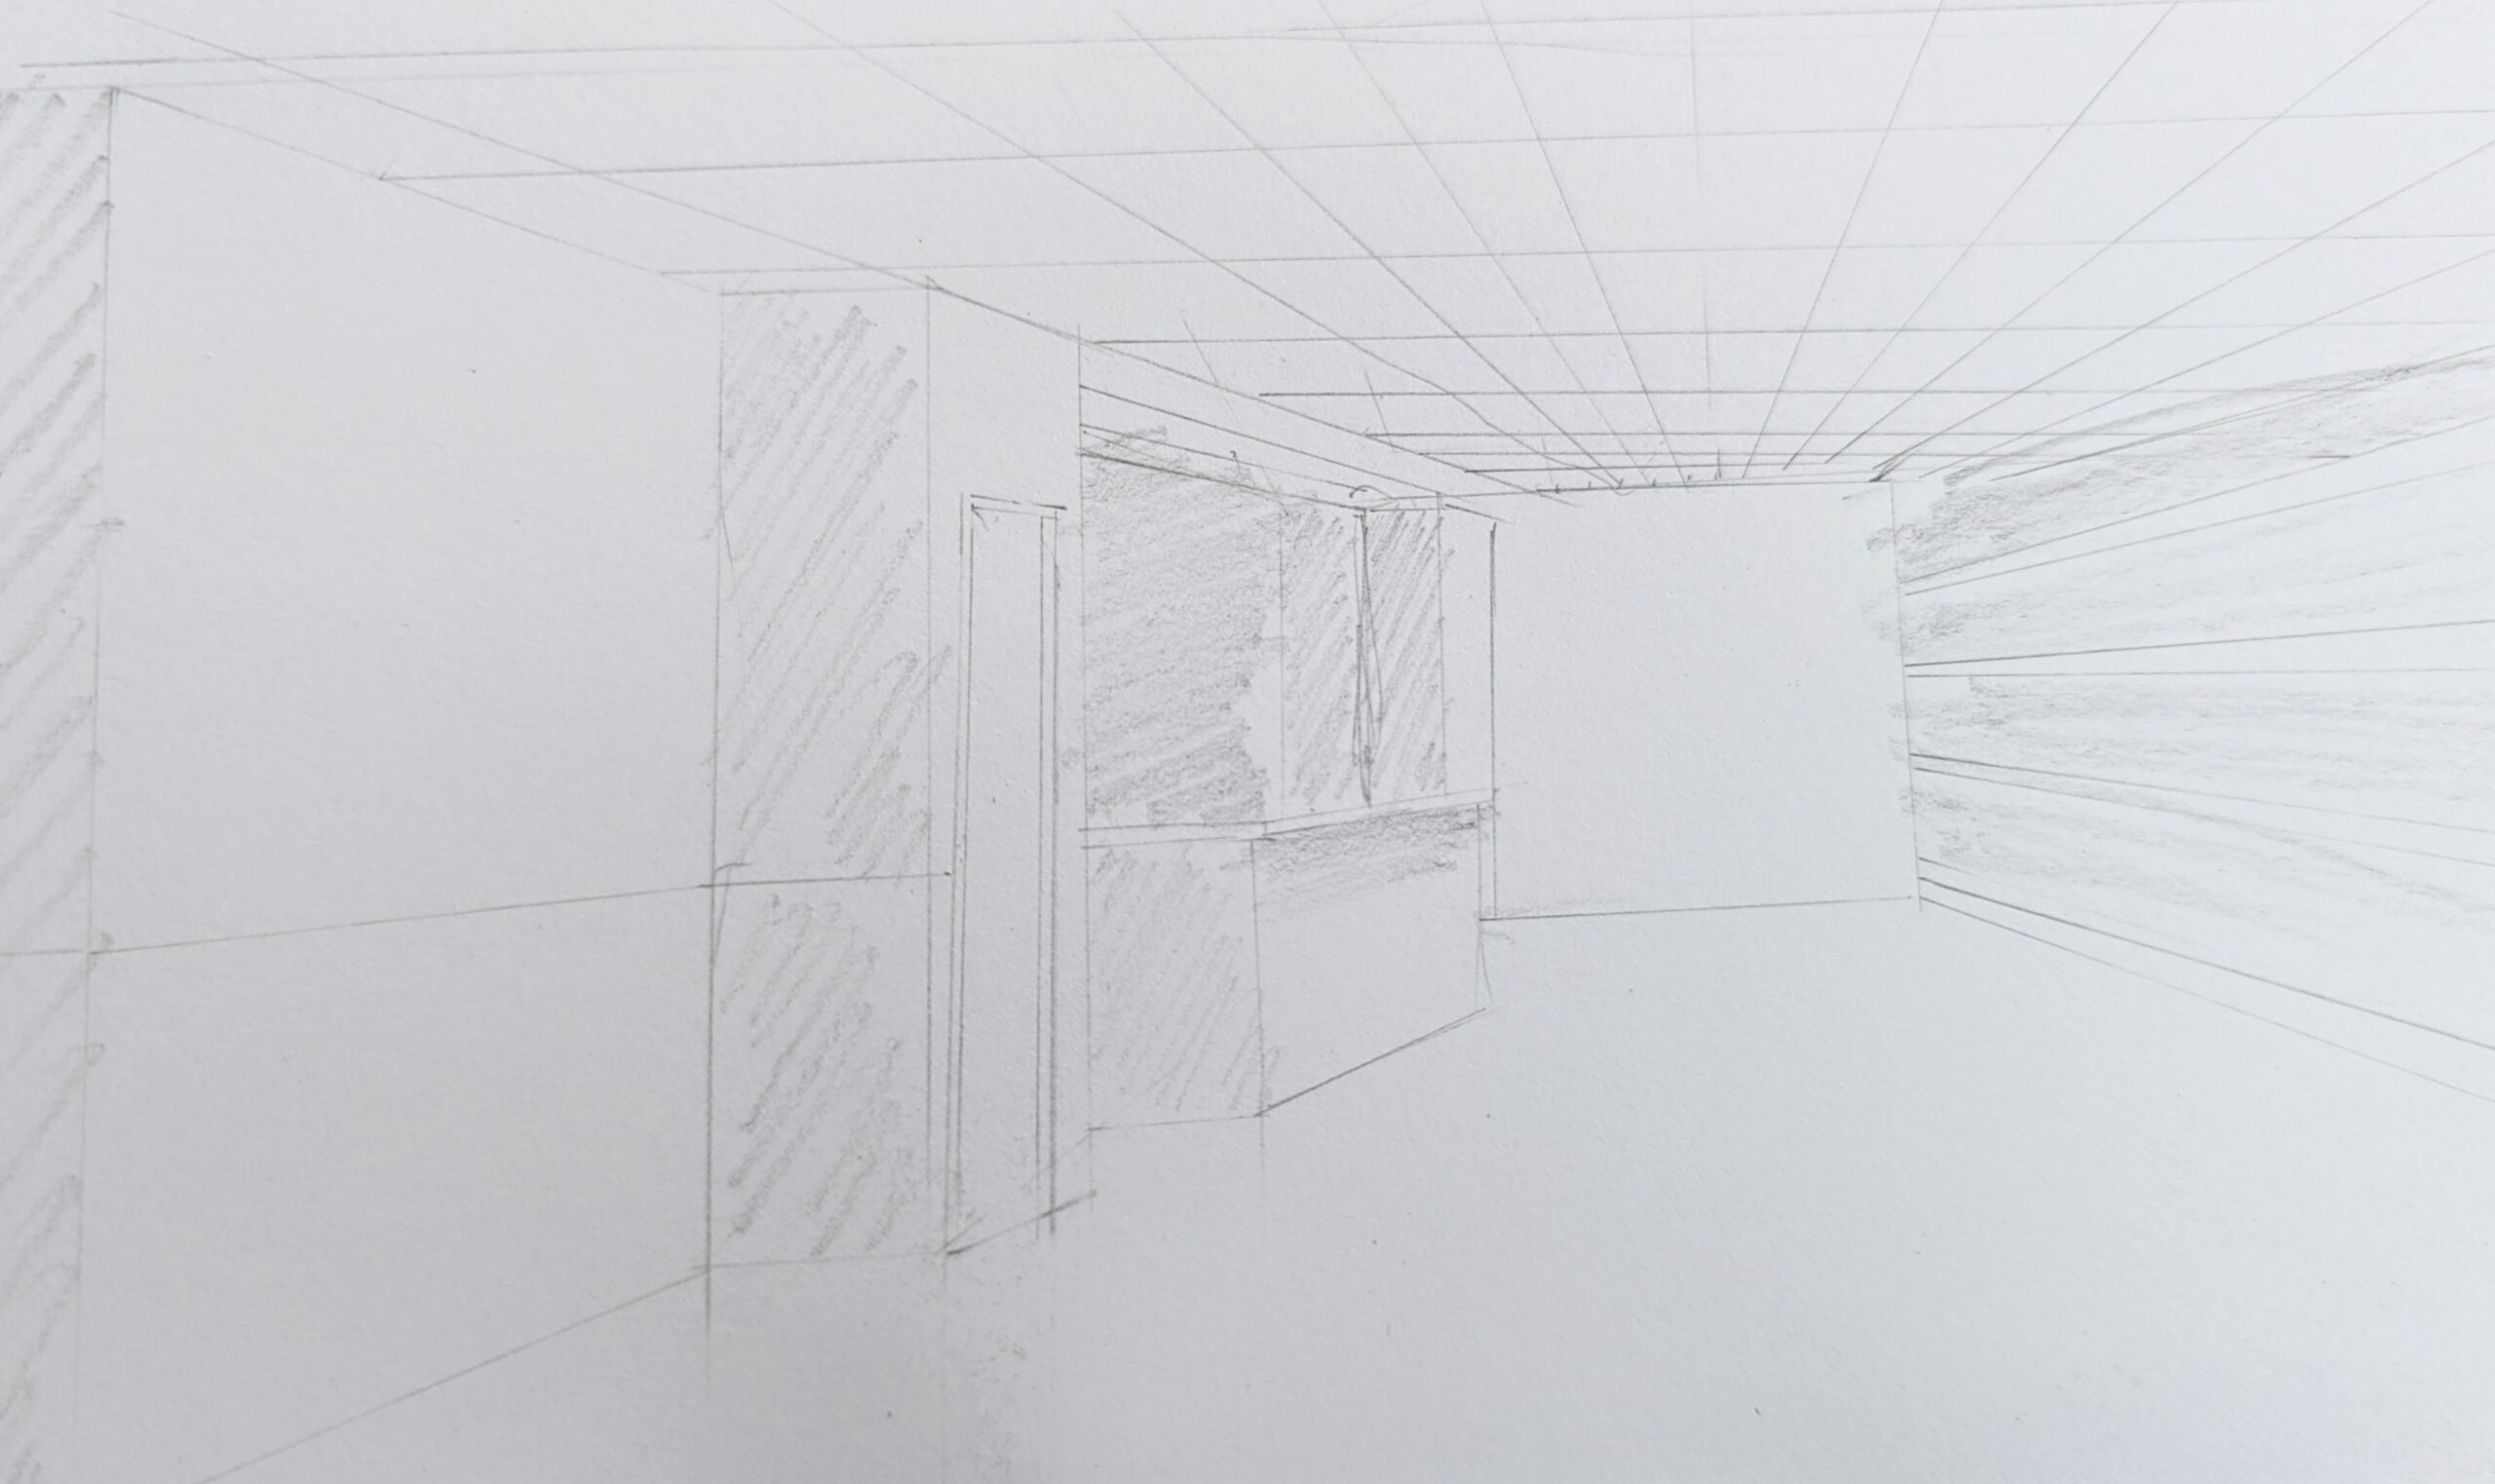
More symmetrical, angular, flat-faced sights like inside the interiors of buildings usually comprise what we might consider as large scale boxes looking angular and made up of many straight lines. These angled planes come to us as flats in squares and rectangles, triangles and appear as what we call solid geometric three-dimensional shapes where we see more than one flat face around us, perhaps as if we are looking at the inside of a box. Capturing these straight lines from our sitting or standing position can be difficult to put down on the page as we look up, left and right because our living and moving inside the 'box' only involve moving our head. from this 'point of view' we adjust to take in the lines and when we turn to our flat page we lose sight of whether the lines went up or down. This makes this type of drawing highly deceptive when we start out and that is because in the day-to-day of walking, working, shopping and so on we unconsciously pass through places and spaces that need none of our conscious processing––we rarely if ever give any of it much attention at all. But when we look at something to draw we start to actually 'see' differently. Instead of passing through the scene we enter it from that point using only our eyes. When we begin to actually draw it is when we begin to really see the proportions, the heights and depths of what's contained in our field of view; the distances, the angles and therein the lines that take our eyes from near to far and side to side begin forming and transforming the way we see things. And it is then that we begin to see tones and shades that give the depth we are looking for and this, these, begin our ability to understand contrast. Contrast, from the Latin contra "against" + stare "to stand," to make firm. Literally to stand out.
To maximise contrast, depth of tone and so on, half close the eyes to exaggerate the lights and darks. You will often see artists do this. It's a way of isolating the parts to work to.
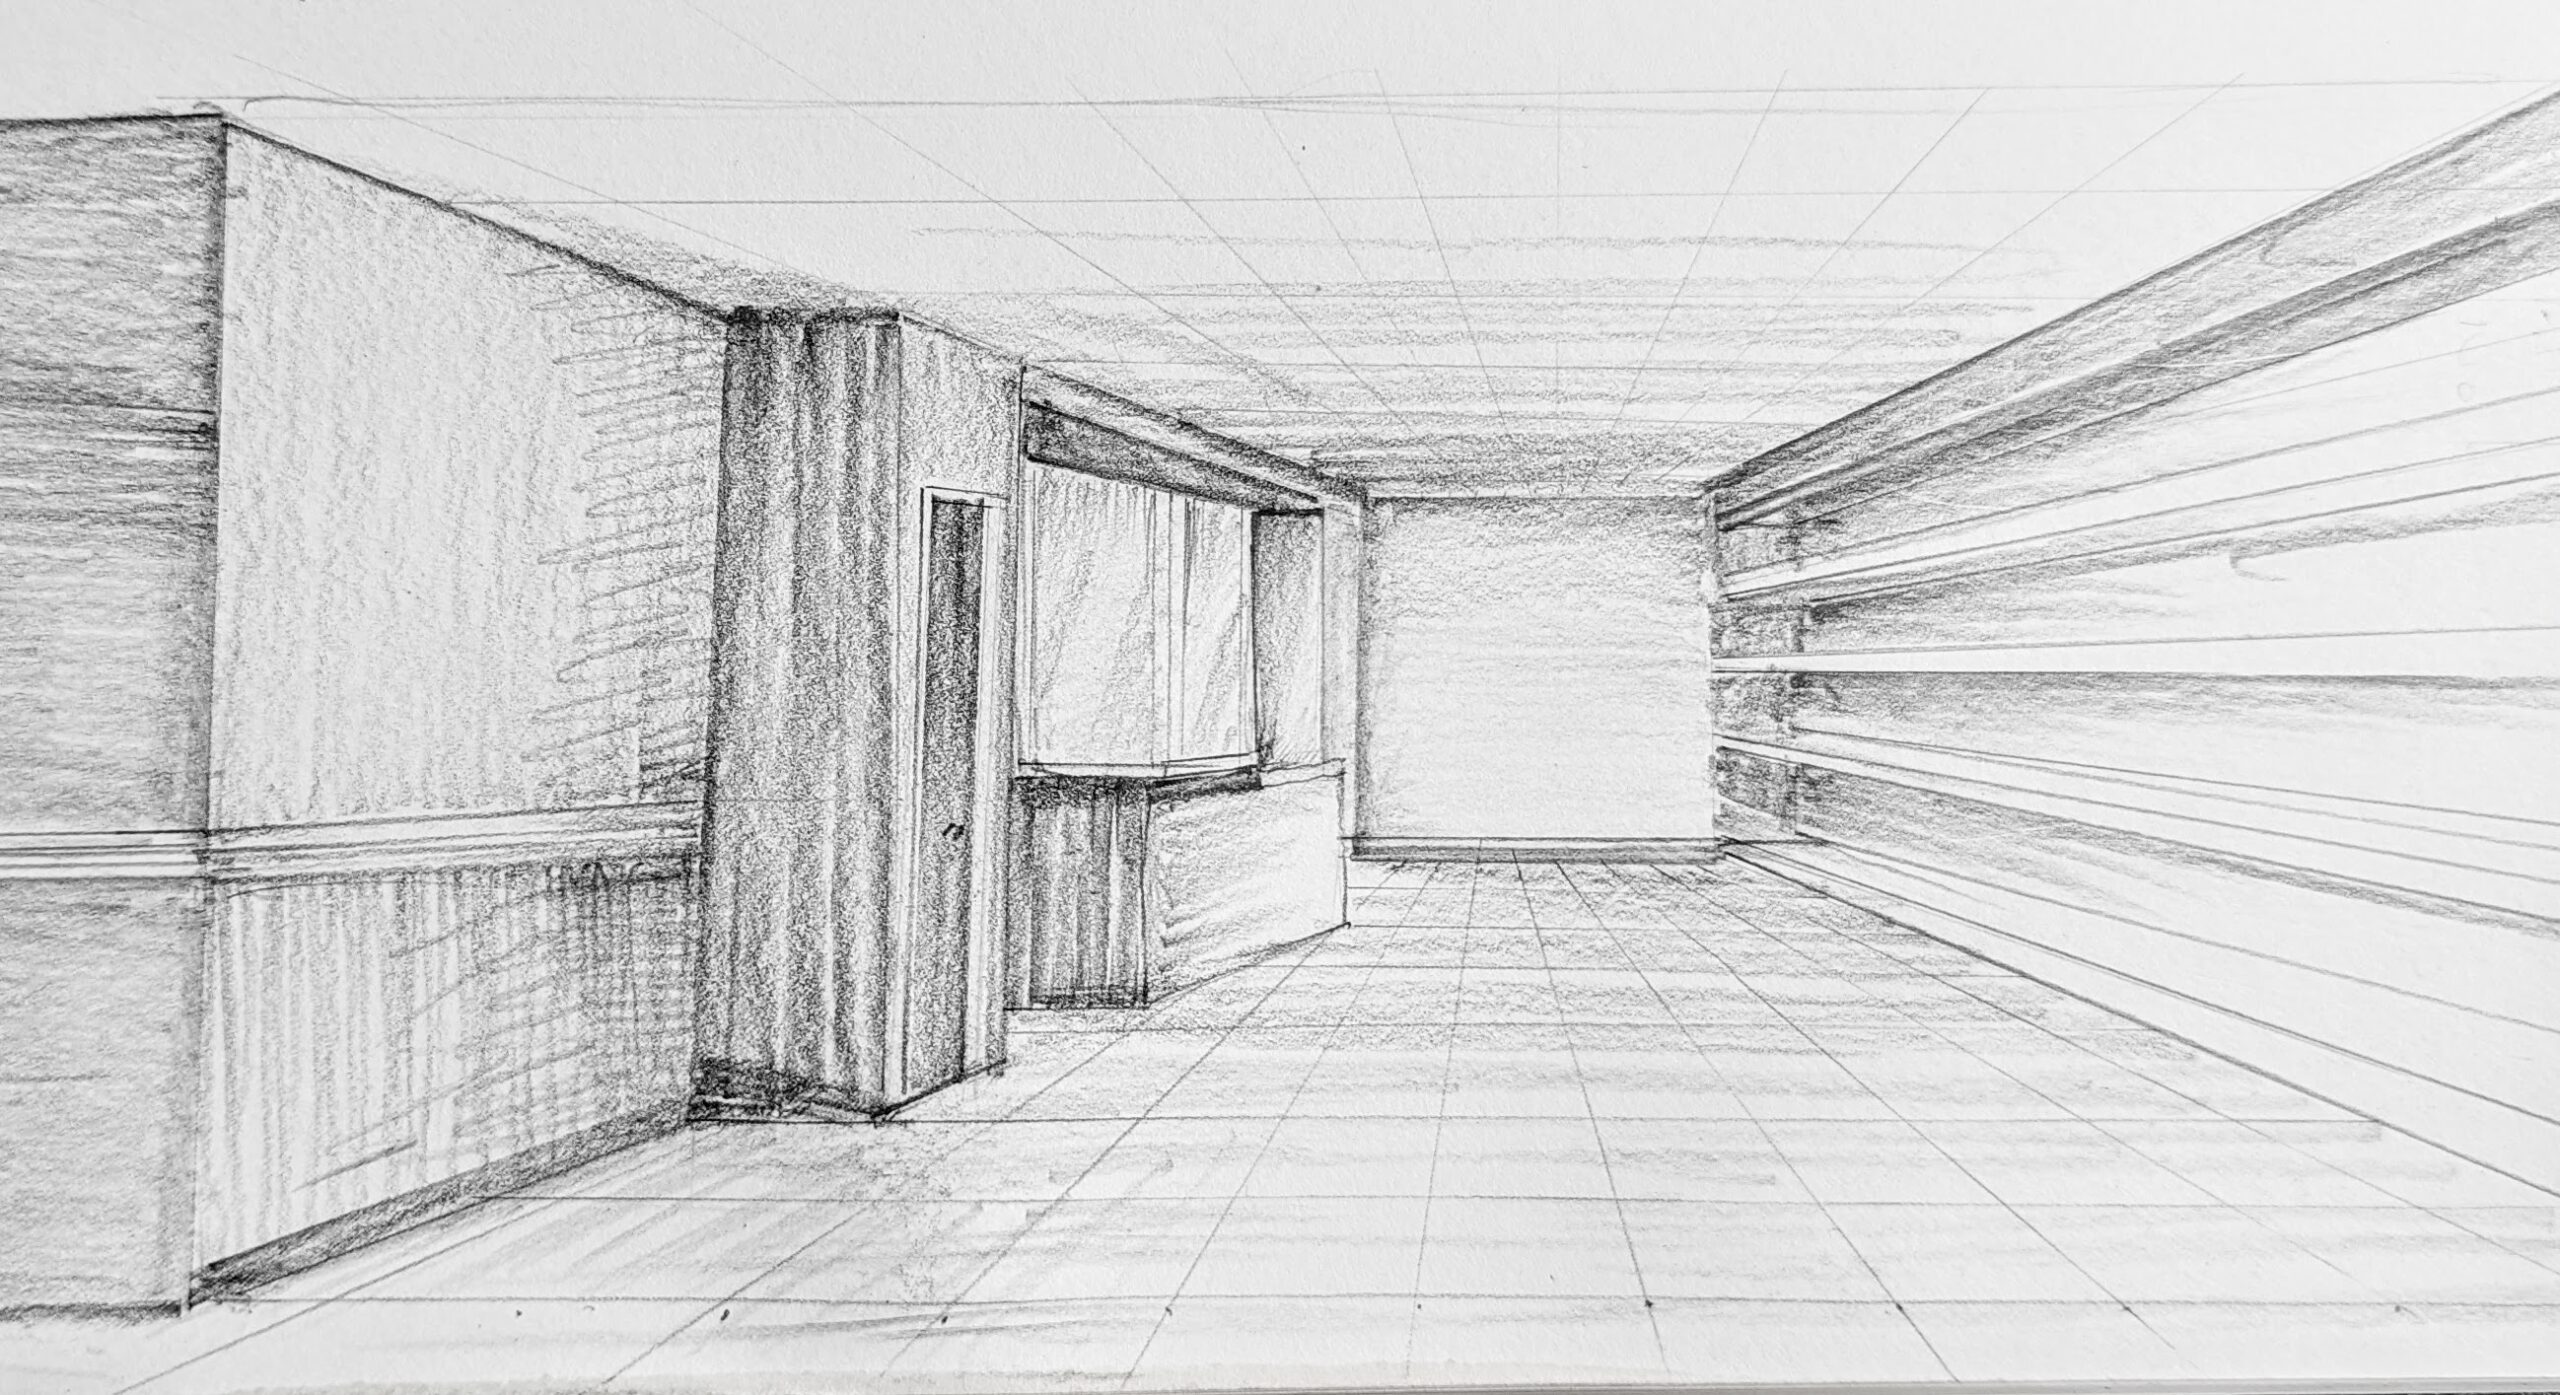
Go into a natural outdoor woodland setting left to its own and hardly a straight line exists anywhere you look. If you are indoors, look up at the ceiling wherever you are and you will see the straight lines converging somewhere in the furthest distance from you. In the image above you will see how those lines seem to narrow as they move furthest away from you––parallel ceiling lines and the vertical lines of walls, doorways and cabinets at corners, etc, where the walls and cabinets meet the ceiling or in the furthest distance, seem to get closer together even though, in reality, tape measure in hand, the distances of tiles on the ceiling or the passage between walls are all equally spaced.
Quite unconsciously, our minds simply (actually, more complicatedly than we can actually think) fill in the blanks. If we were to deny what we see we would not retain the visual perspective through our retina where our perceptions process all we see through photoreceptors that send the signals to the brain for interpretation. Unconsciously, we extrapolate what look like vertical parallel lines to create distance and depth of vision. This would not create a depiction of what we actually see at all yet the one that looks 'out', as in 'not quite right', is the truer of the two. Well, this can be the same with the drawings we make of hands working even though there are no straight lines in hands anywhere. I'm hoping that this makes sense. It does to me.

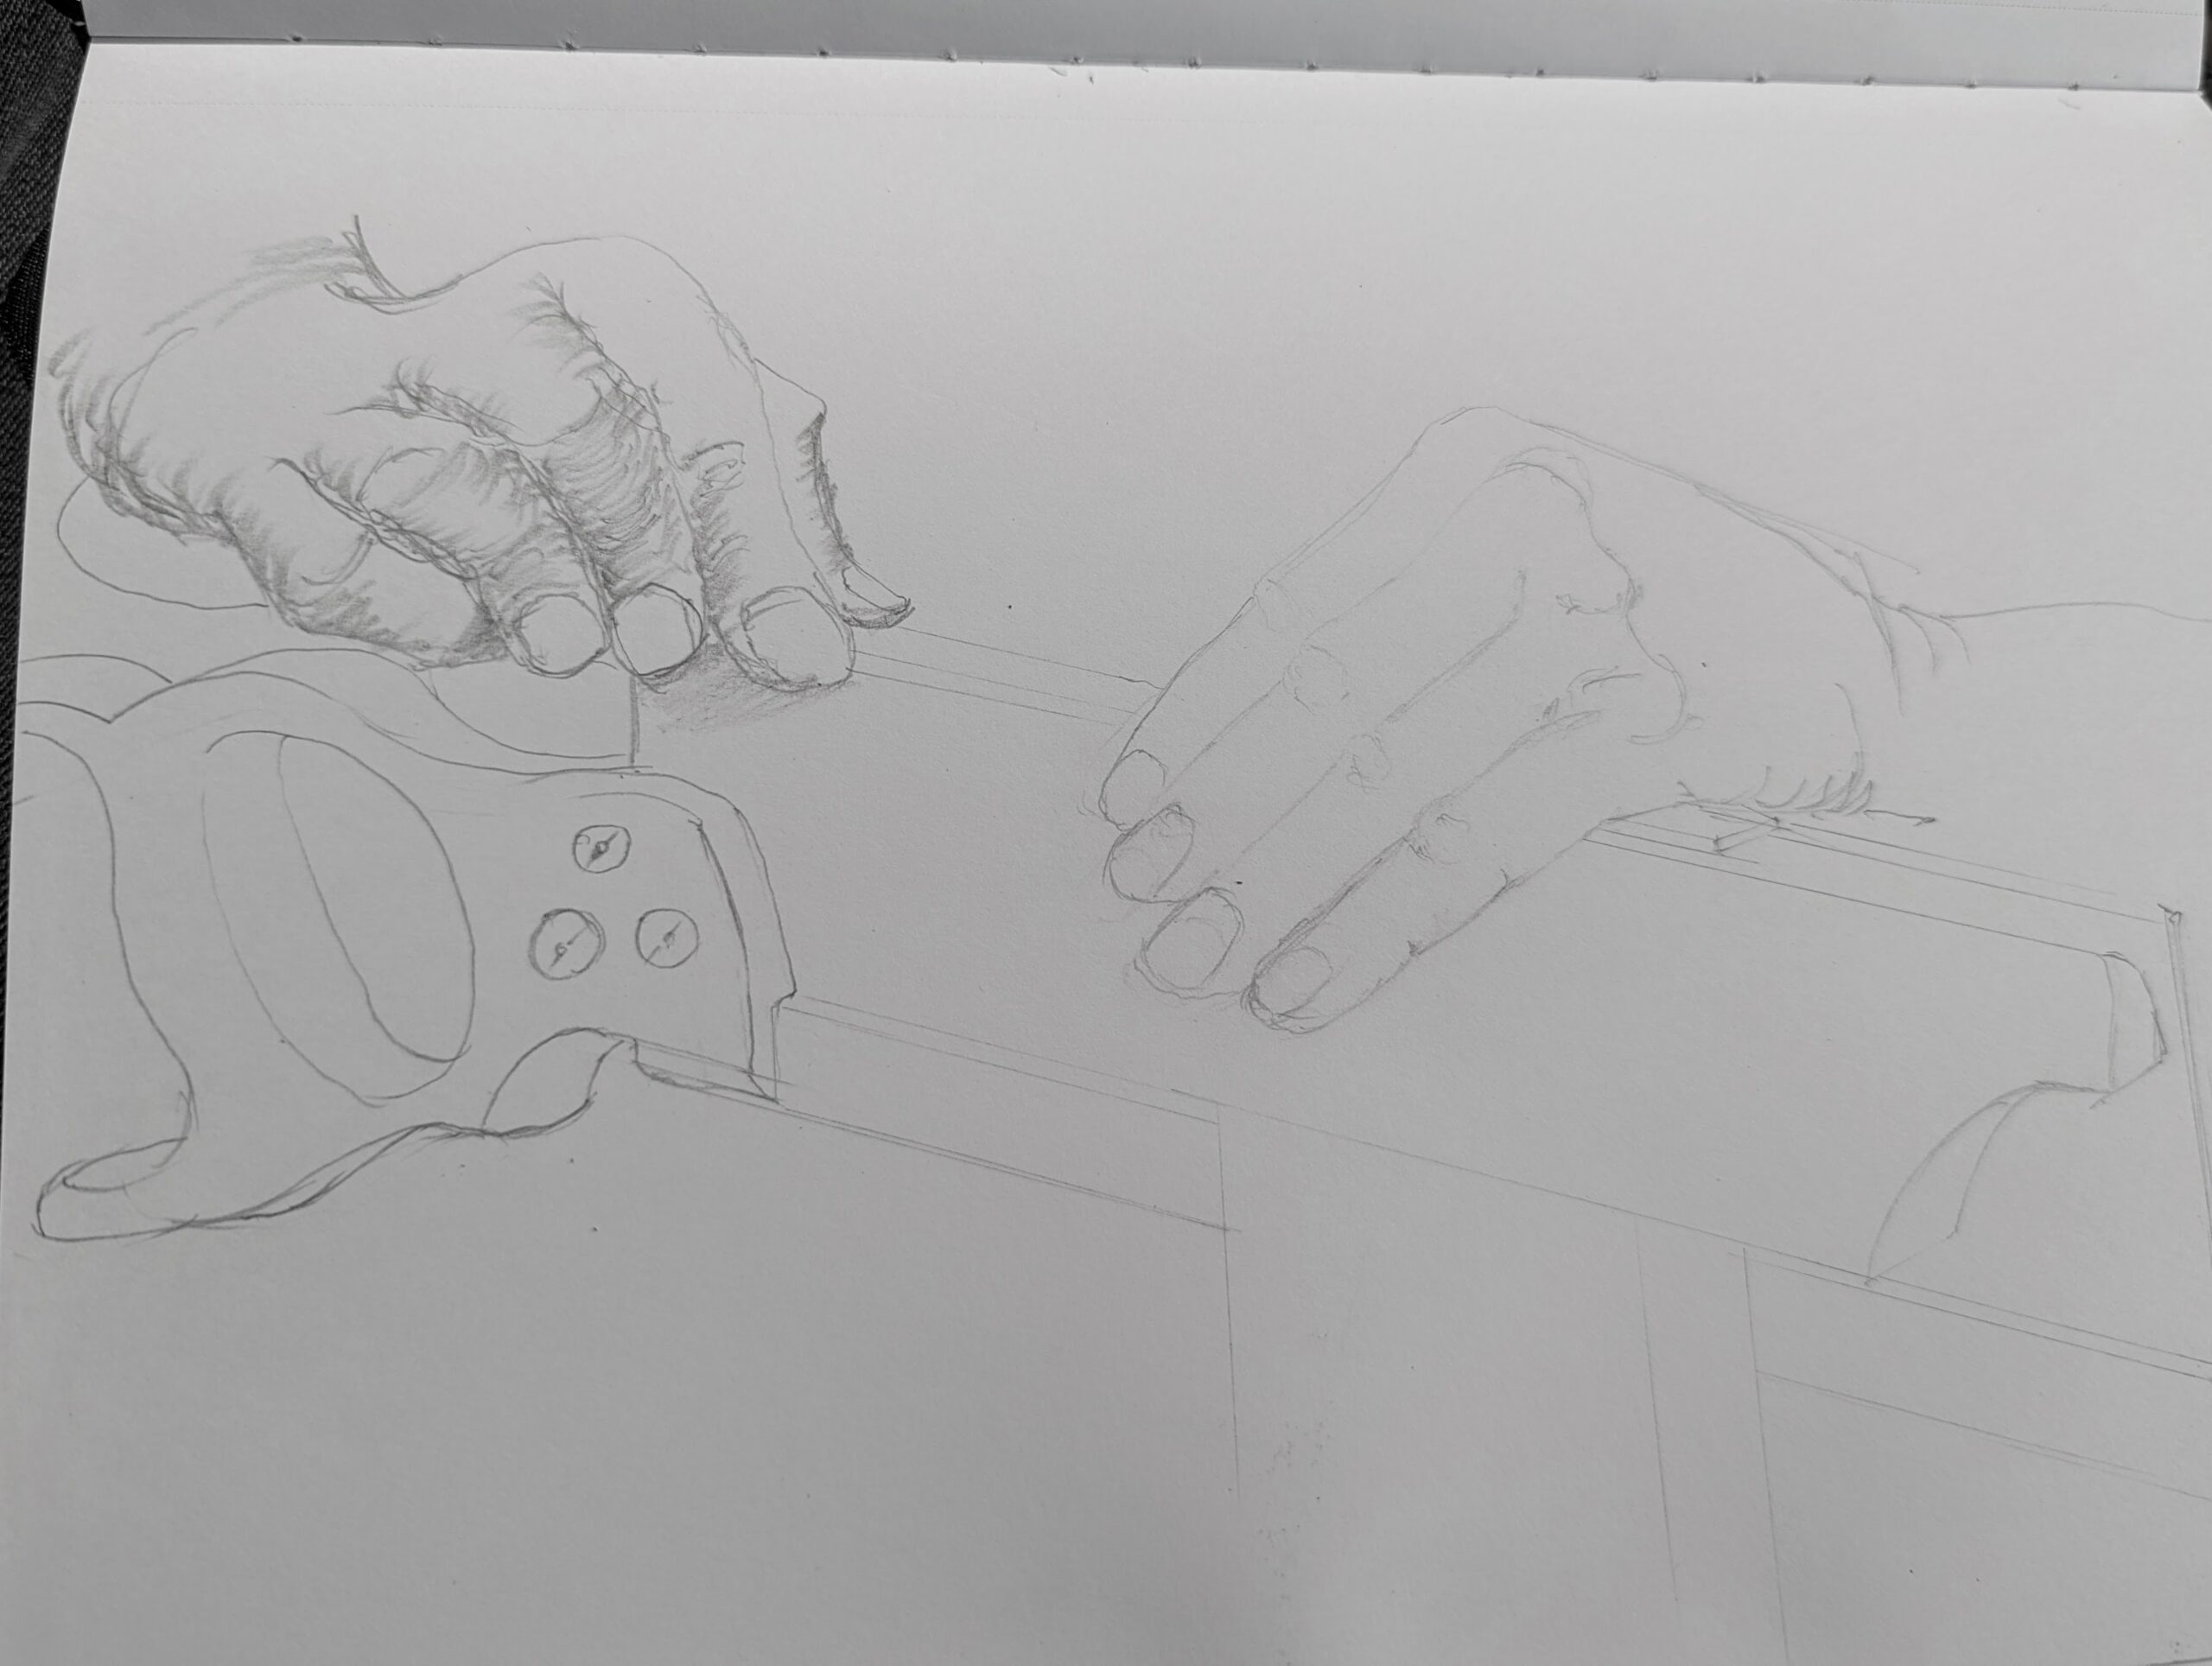
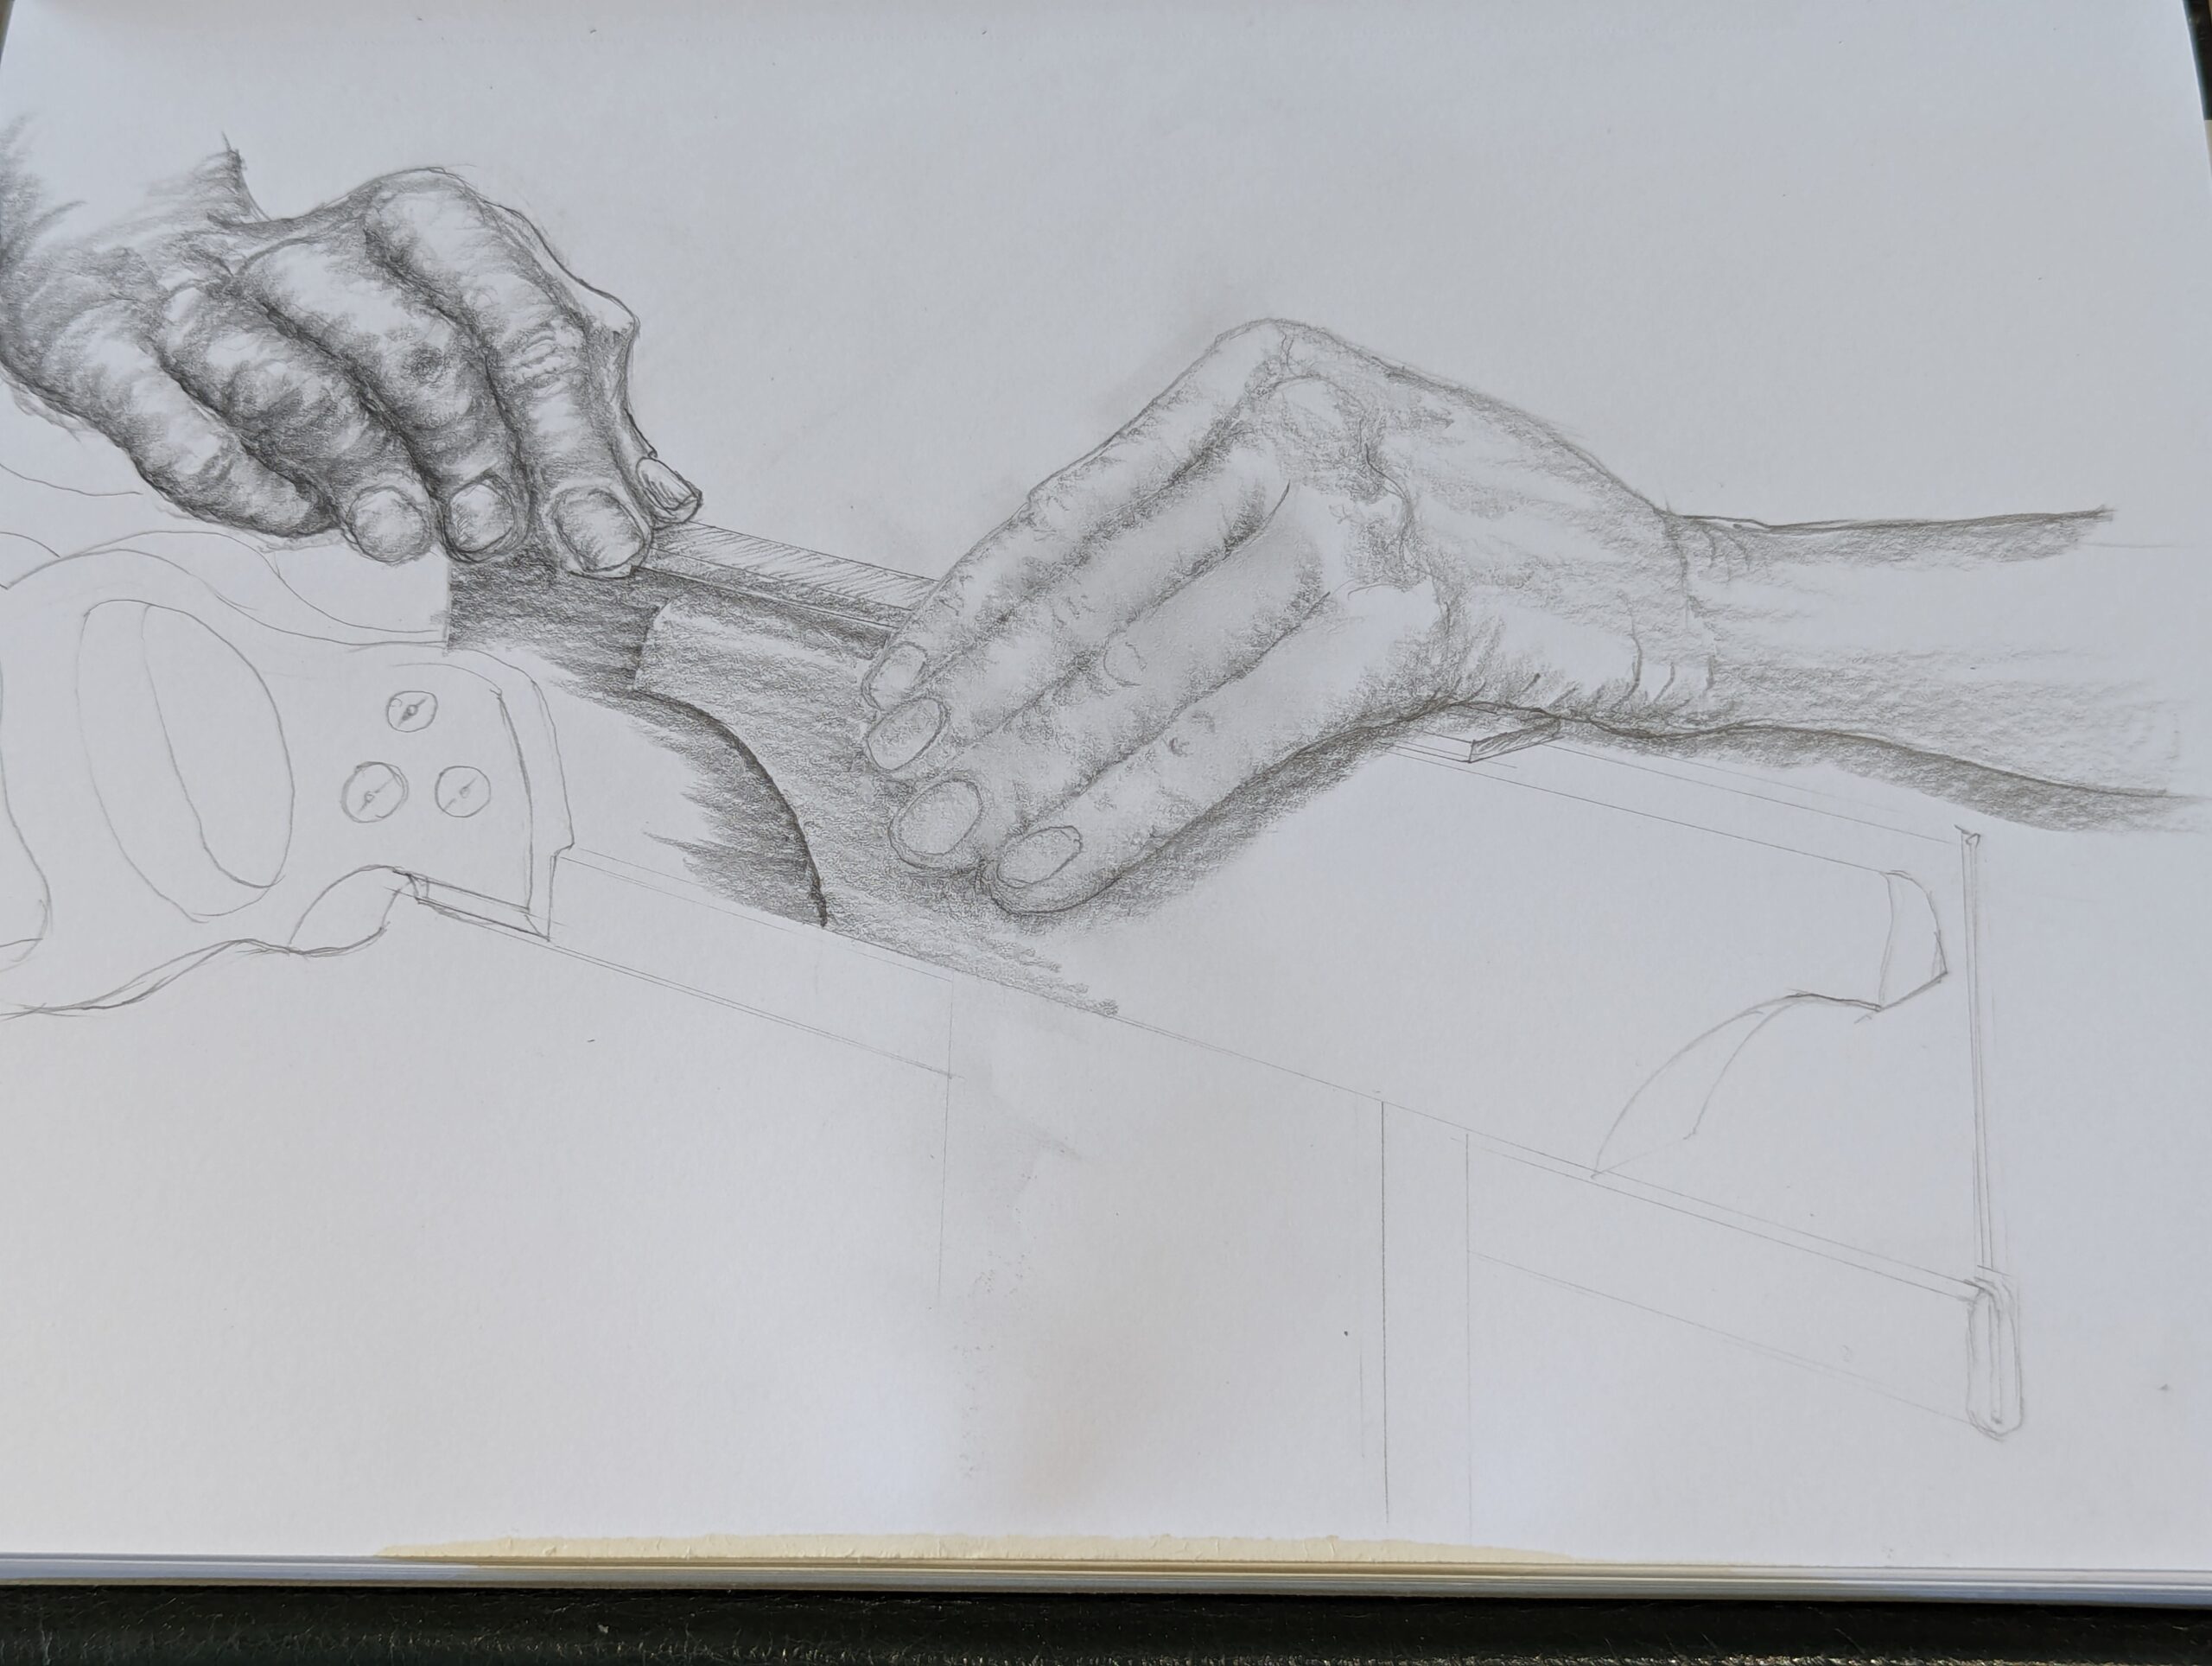
My first or opening pencil strokes position the components in several ways. For these hands jointing or topping a saw with a flat file to even the tooth tips I have the component of angles and these then relate to distances followed on by rough shapes all of which serve to establish positioning of the two hands, the tool being used and the work being done. There's an etc in there too. There's a lot going on, but what we are doing is breaking the scene down into bite sized pieces first. The best thing about pencil is you can erase and move the parts until they seem right to you. This comes as we go–– a work in progress.
I place these opening strokes with a certain degree of flexibility using the side of the pencil to make representative strokes on the page. I avoid using the actual point of the pencil as this impresses the paper and can be difficult to erase. Also, I want to stress that I use a very light application which makes any erasure quick and non-stressful on the paper. A light pass with the eraser then removes marks in a pass or two and doesn't scuff the surface texture of paper.

Once blocked out I look for shadows. Drawing is all about contrast and by adding some light shading I can add some pockets of contrast to guide me later. This early shading changes perspective and dimension to show under-shadow, finger bend and separation lines. This type of action is the same as making a note to myself that reminds me of something later. This becomes especially important where the drawing is from real life where two things can change in a minute, the person might move irrecoverably, or the light can change the shadowing. Isolating these things early on keep as notes for your later refining work.
We are working by seeing colour because life is full colour but as we develop our image we are working pretty much in monochrome or perhaps more accurately, greyscale. Greyscale images are a type of black-and-white or grey monochrome composed exclusively of shades of grey. The contrast ranges from black at the weakest and white at the strongest. We push the boundaries of grey or graphite drawing from intense white, the paper we work on, or extreme grey, the nearest we can take graphite to black
In the reality of our grey-scale monochrome drawing the dividing lines are not so much lines as we know them but shifts of tone from soft, slight and subtle or extreme tonal changes one up against the other and blended in gradients. It's this then that takee the parts of our sketches and drawings from very direct contrast on through various levels of shading to achieve a lively outcome in our work––some pencil work moves more sharply and some moving from sharper to softer and all shades in between according to what I want to depict. These depths of darkness contrast the light ones. If you see an artist half close the eyes as they work they are creating tonal contrast in their eyes (and brain) to guide their pencil on the work.
In the composition above I relied on the shadows to give depth to the working hands and as these are representative of my own hands I am looking for a masculine look I get from my personally being a manual worker. Some times I am just plain pernickety and go for lots of detail, even too much sometimes, I admit, whereas a more minimal look might just convey more, it's my choice as I move along. By the time I have reached this stage I usually do not go back into the drawing but I might.
Comments ()