Making Wood Work
Throughout history, making tools of all types has always been a part of many a woodworker's life. The ones that were skilled enough to produce levels of excellence surpassing other woodworkers became tool makers. they established patterns of work and design that exemplified levels of refinement other woodworkers wanted. Instead of being just carpenters they became tool makers of excellence. When wood married metal in the making of tools more specialised makers adopted specific areas of making that raised the bar in their craft. By competitive making, those who made the best stood above the rest. Wooden planes in Britain came from massive beech trees where in Britain the trees thrived to stems of massive girth: a three-foot diameter, twenty-foot long trunk is commonly found. Two trades harmonised side by side with blacksmiths hammering raw steel into cutting irons and plane makers making a wide range of plane bodies numbering 300-400 types in a massive range of profiles, sizes,etc. Metal foundries grew in number over a couple of centuries and specialisation took on the work to mass make cutting irons and cap irons for the makers of planes. For saws we had amazingingly beautiful saw handles the like of which modern makers merely copy using powered equipment and leaving the telltale signs of power routers and CNC machines.
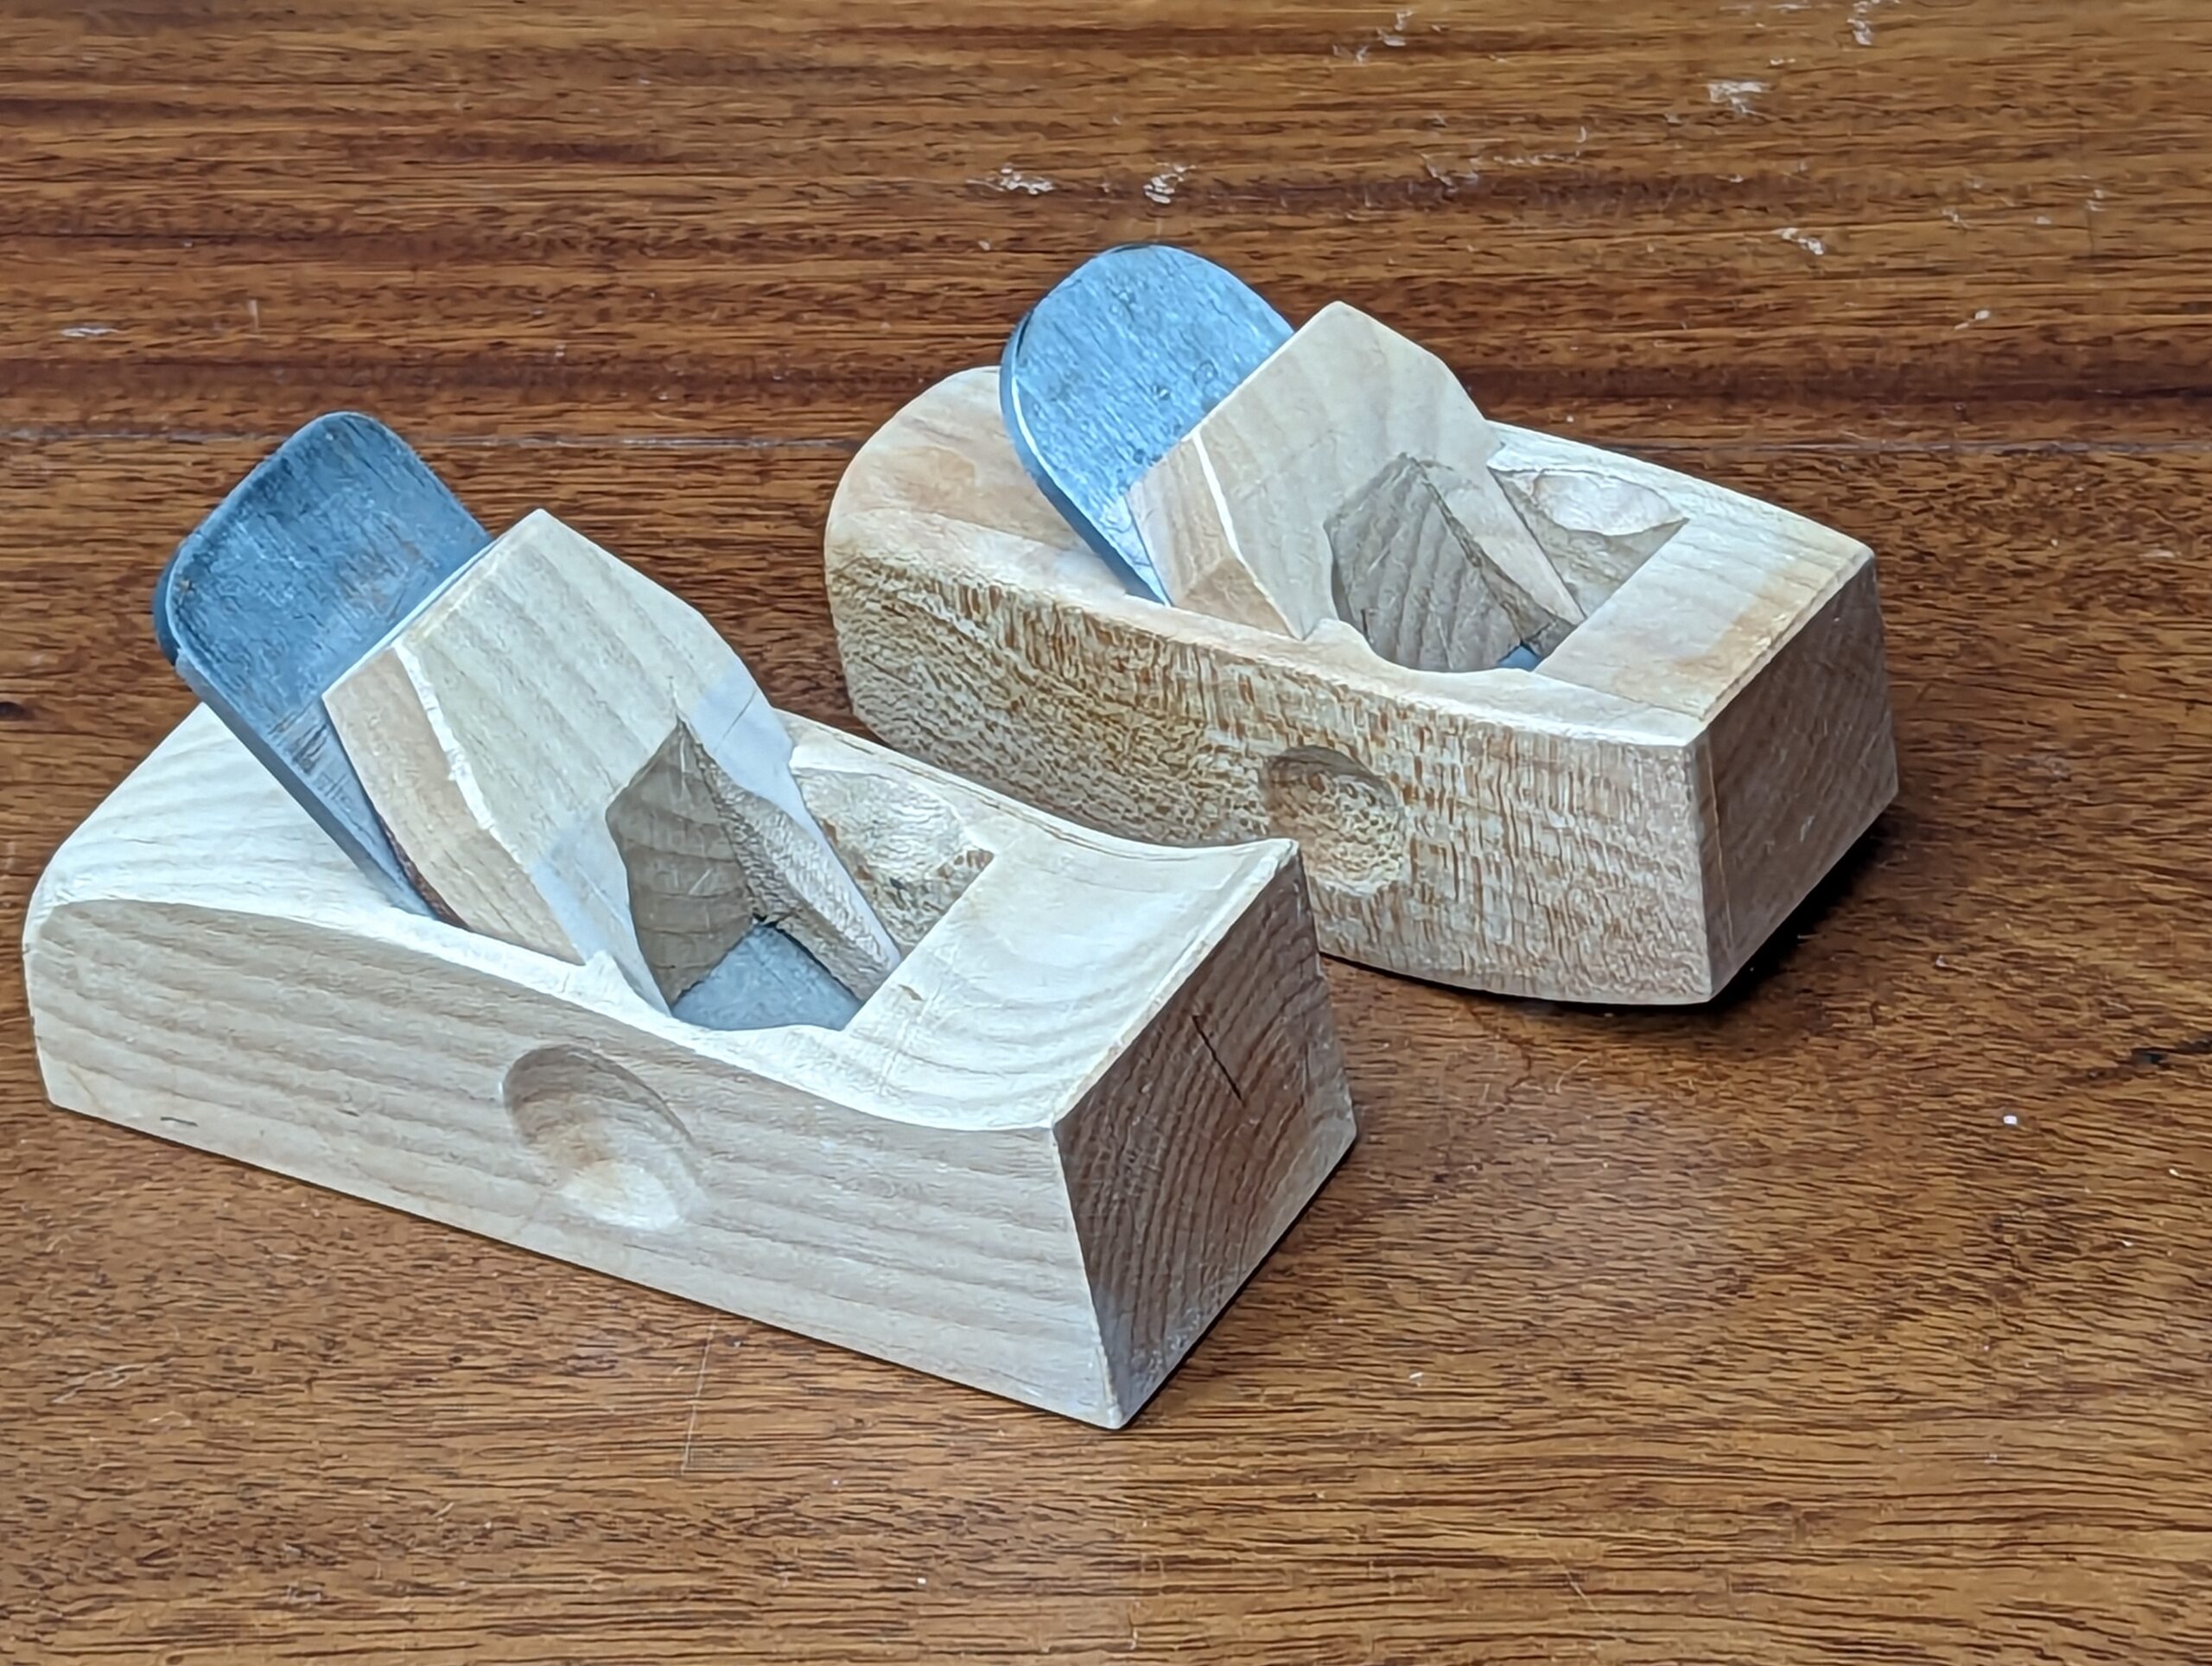
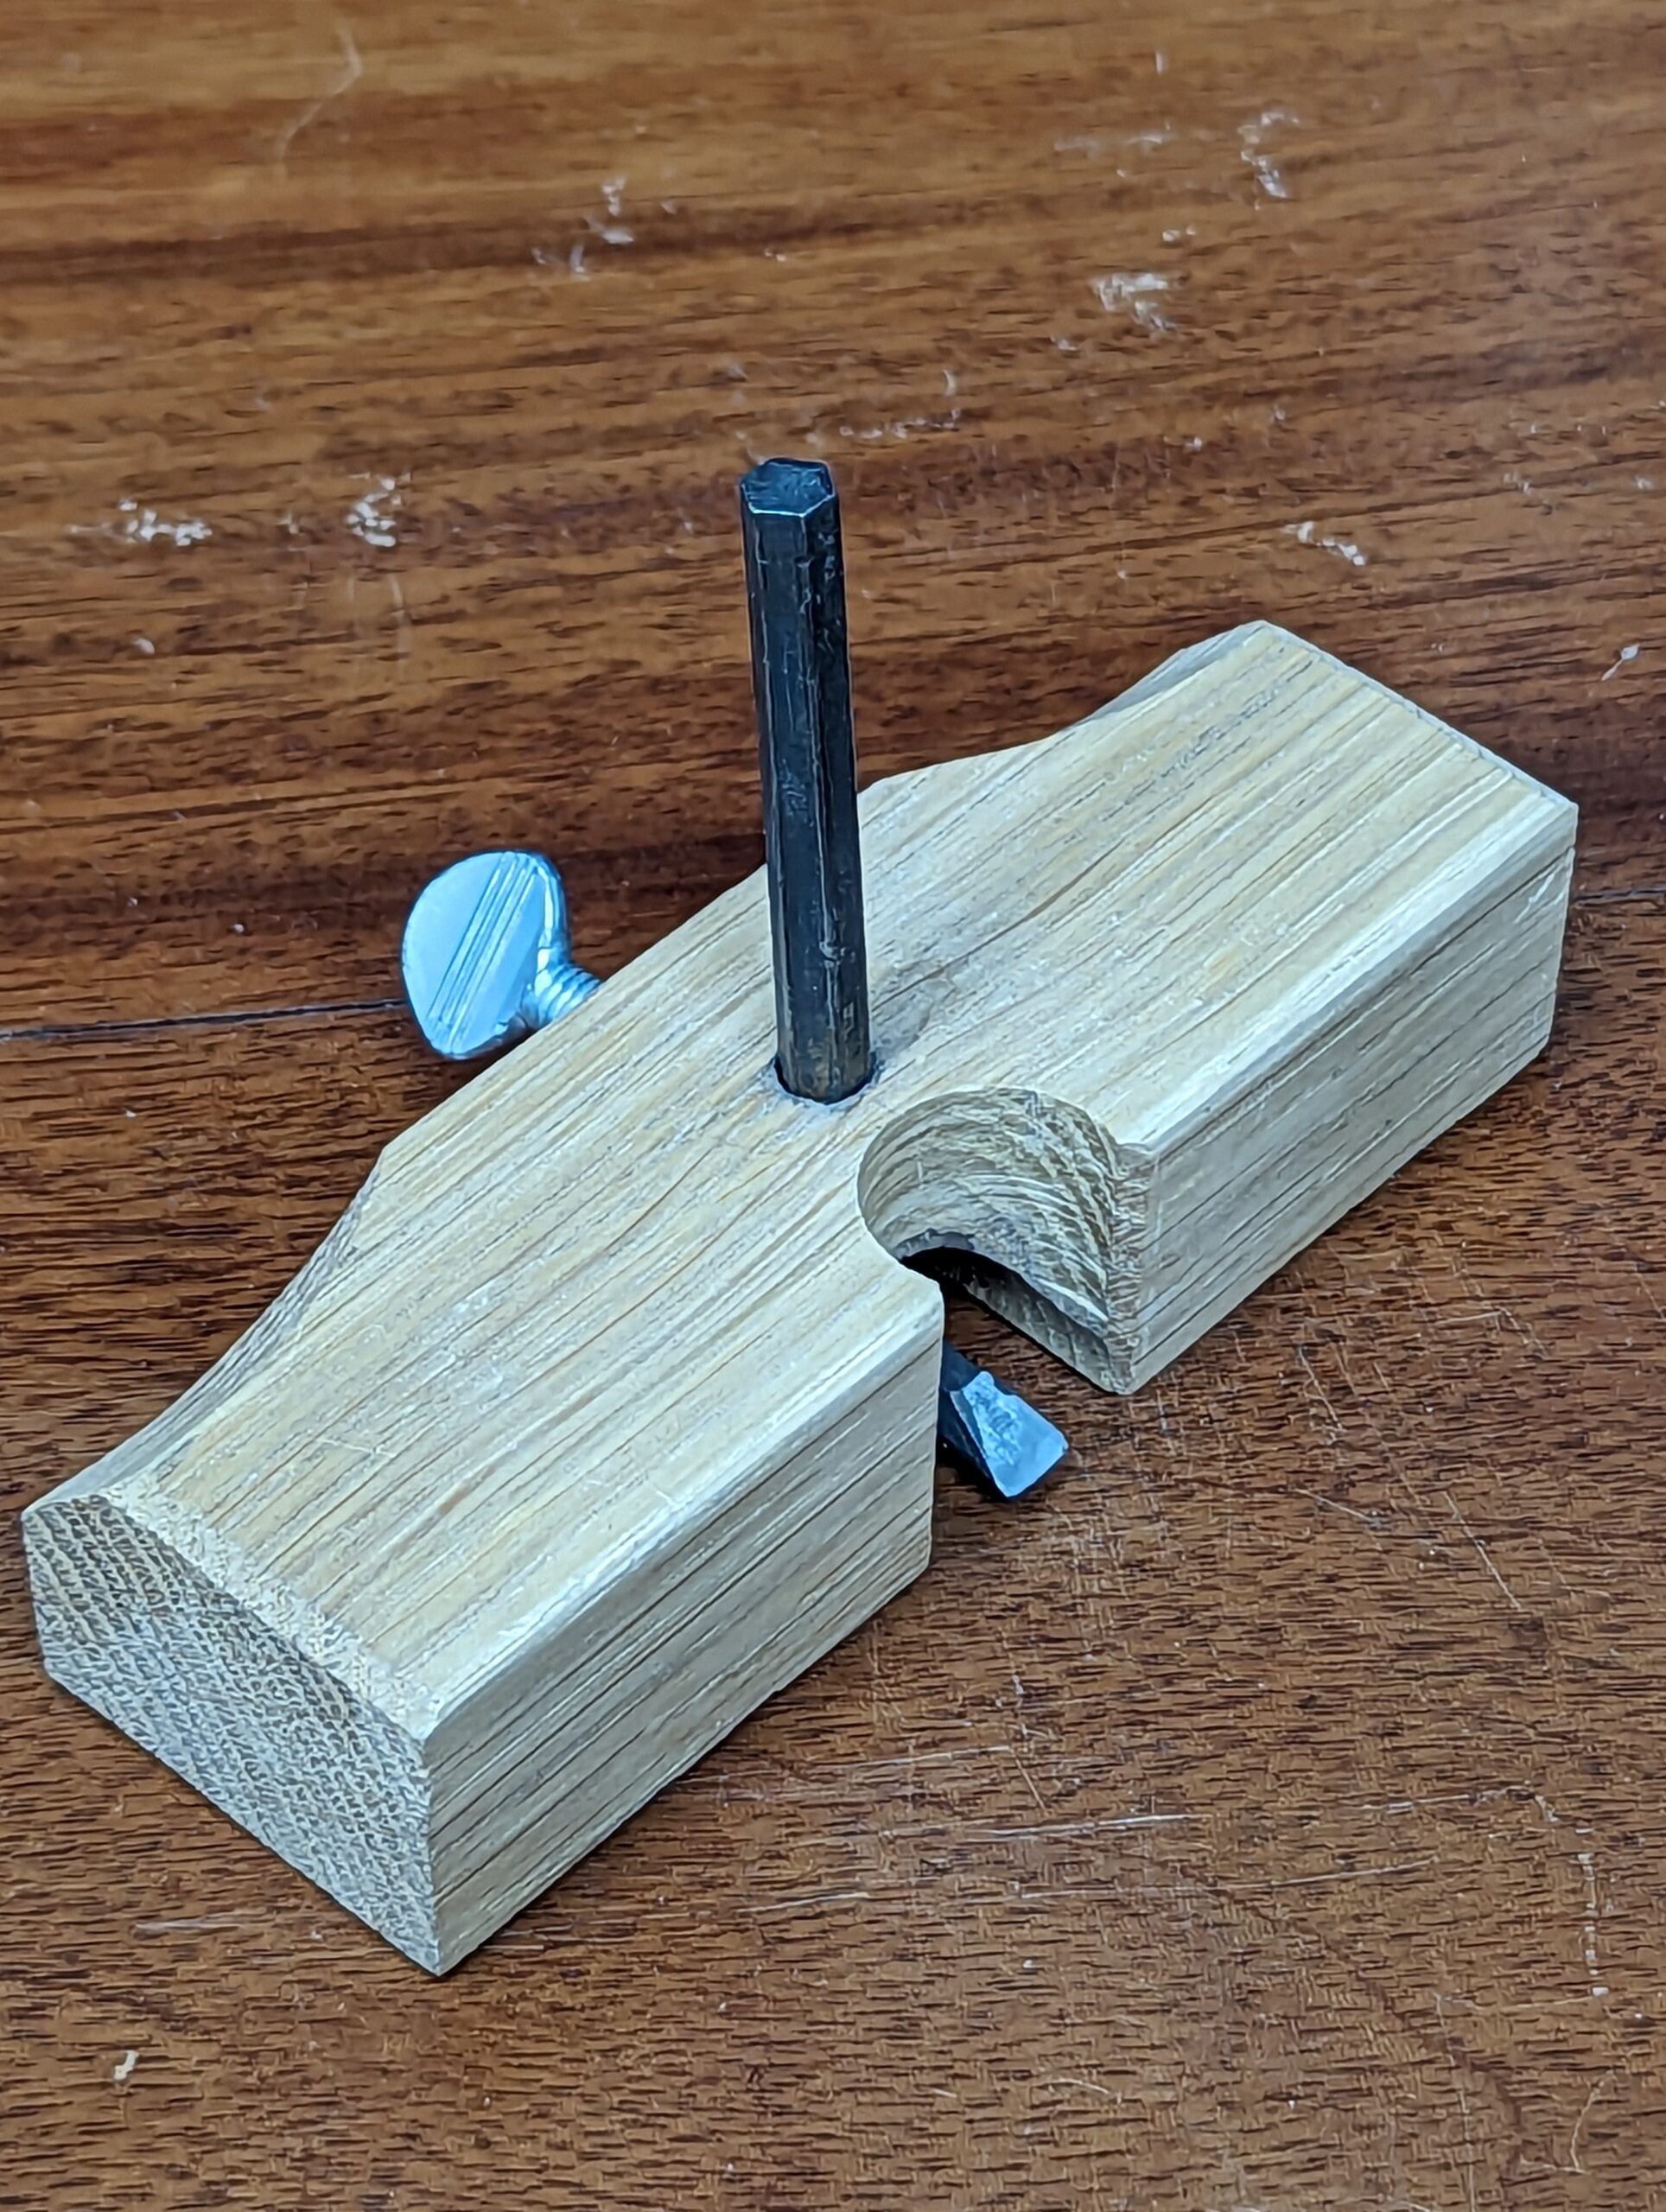
I make a plane I need when I can't find one to suit my work. Most often I do own a plane that matches the work I want to create and this is more the convenience rather than my preference. But there is something about making a plane to make a coving mould three inches wide for a three-foot length you just cannot but and would be far to expensive to tool up for. In an hour I can make such a plane from a two-by-four scrap no problem. Owning most manufactured planes satisfies the majority of my work until I need one that's not common and that then sends me to the bench to make one. When Joseph and I made his first cello we needed a round-both-ways plane to shape the insides of the front and back plates, We took some wood and made one and an hour later we were shaping the plates. Another tool we didn't have was a purfling tool to inset strips of purfling the strengthen the rims of the instruments. We made two. One was a more traditional, commonly used version but then I invented a second one that just worked so much better but remains my own unique design. From plough planes to smoother and even some saws, I took the raw that once existed as a tree or a branch or a scrap from the bin and together with some steel from an old file or somewhere other than a tool I made what I needed.
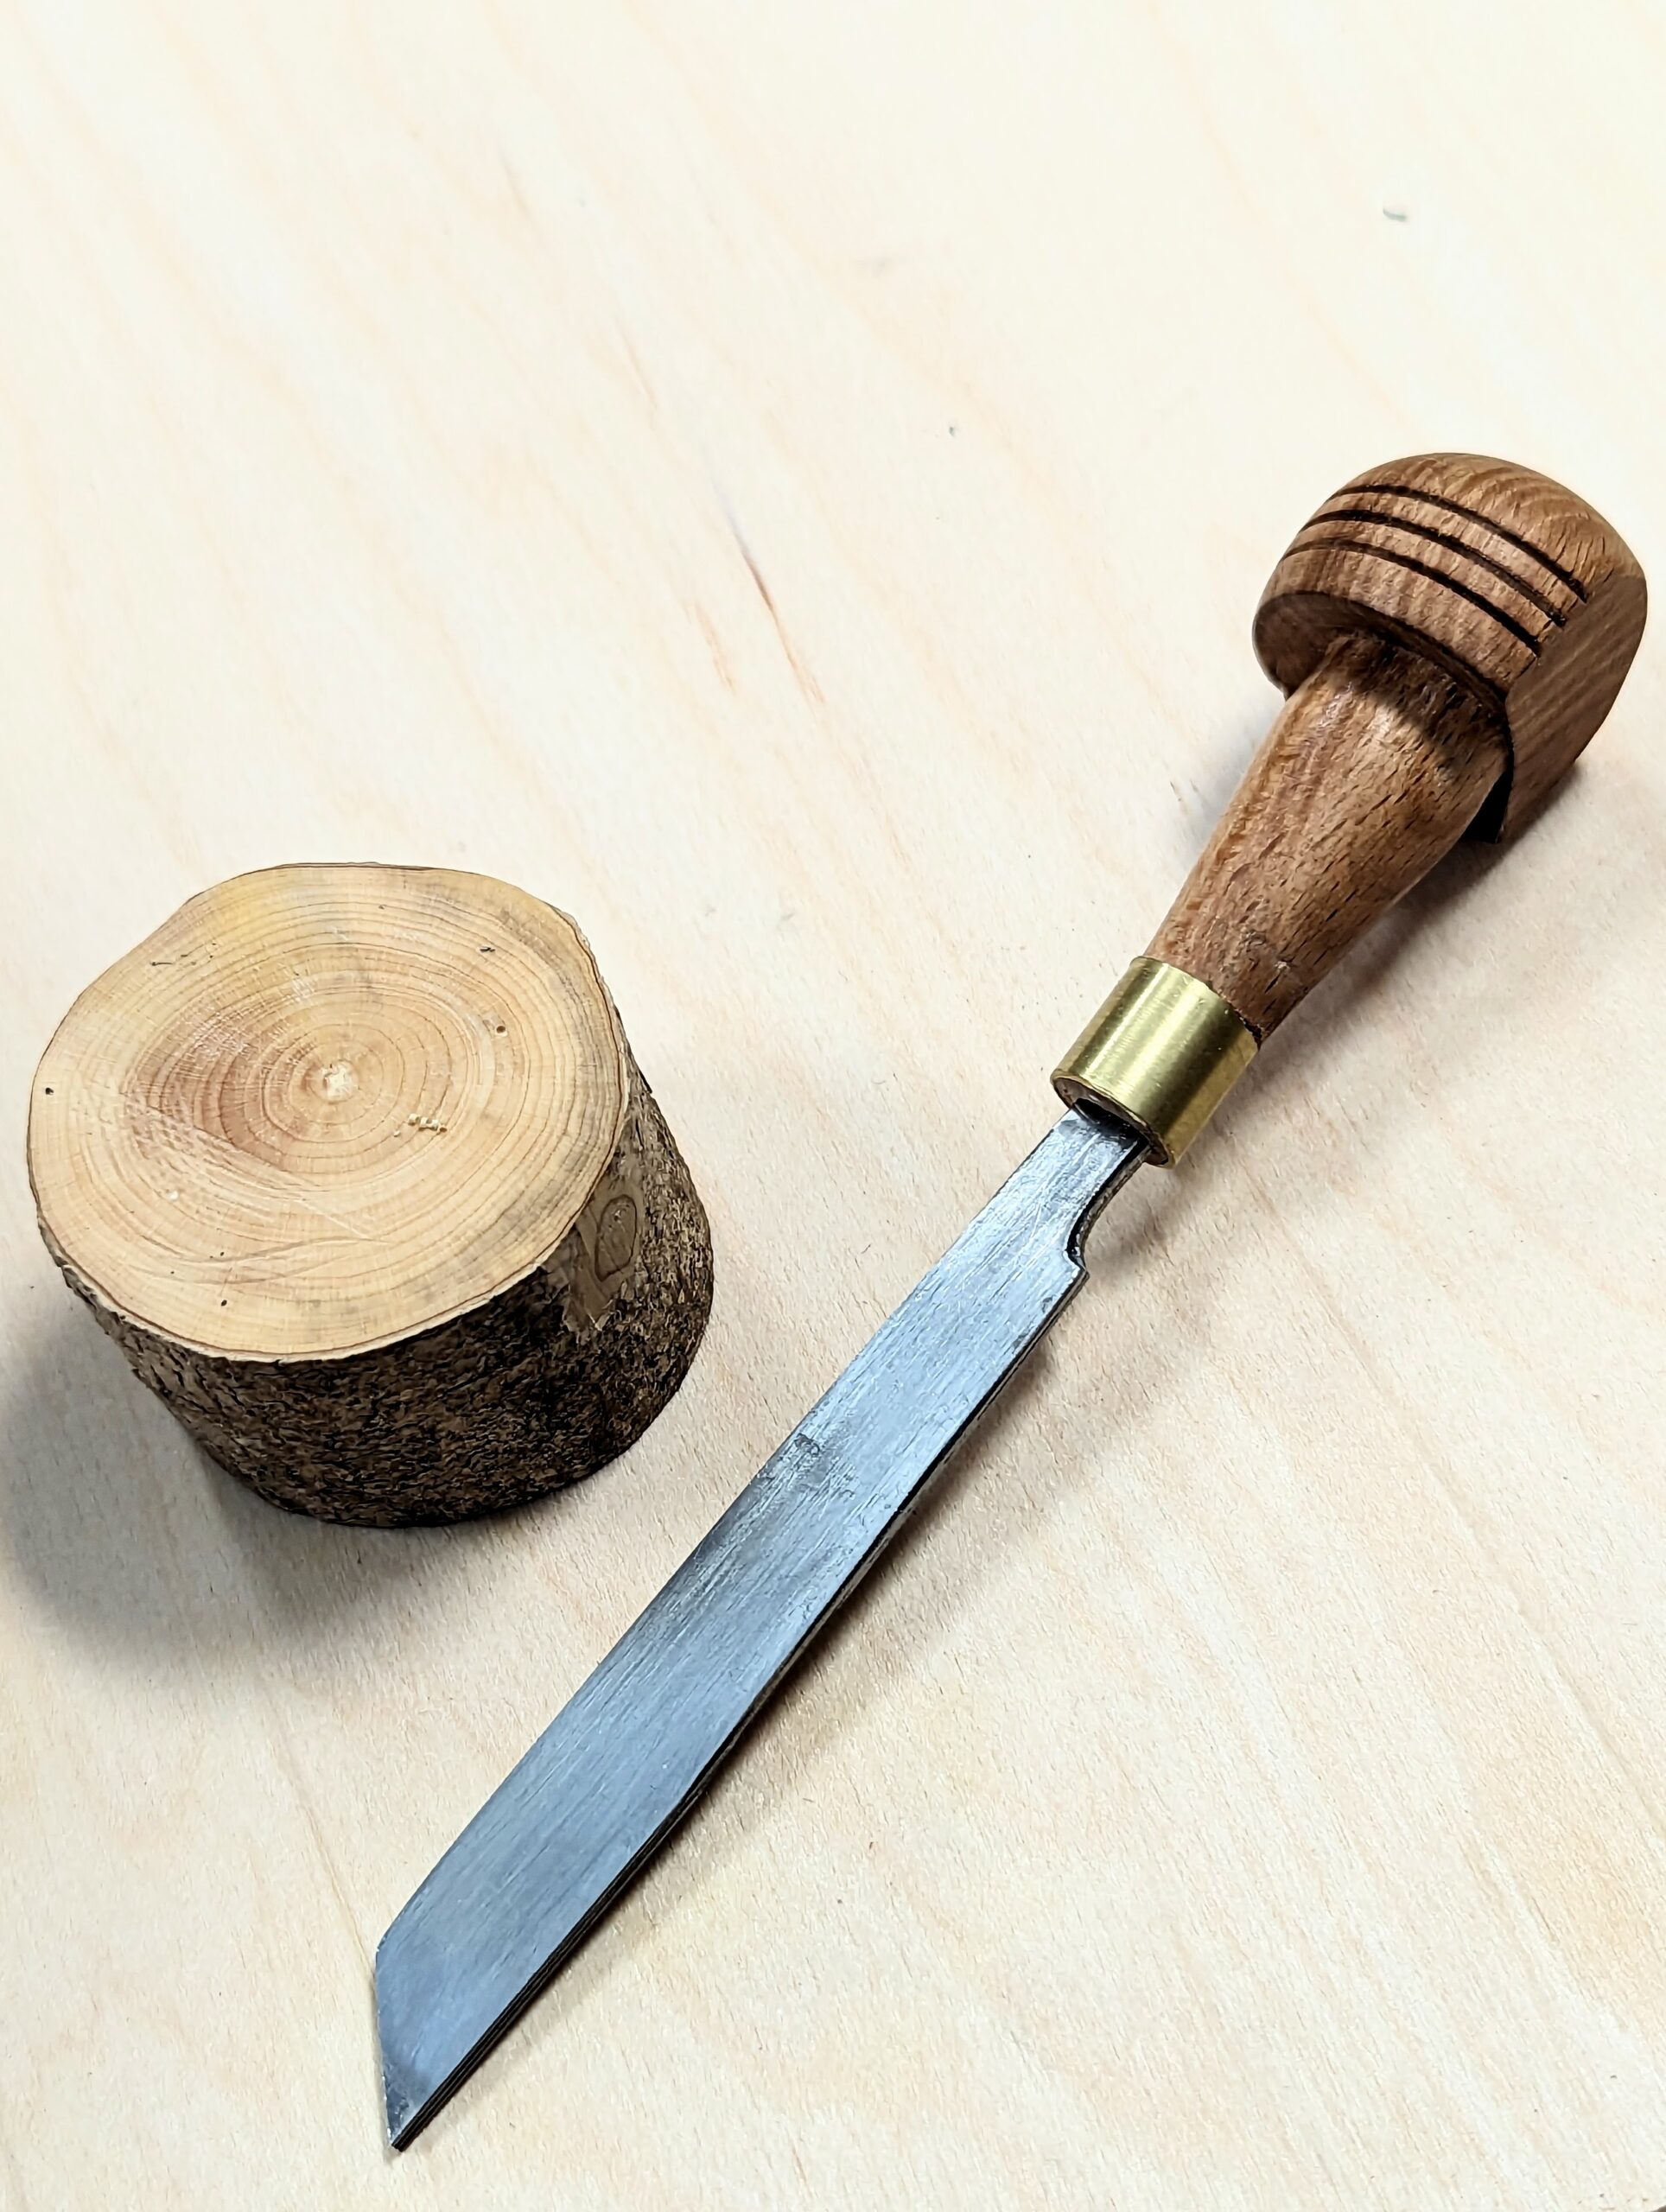
For wood block engraving and lino cutting, you need tools that have no use elsewhere. Unlike a bench plane that's commonly used in joinery and furniture making alongside other woodworking crafts, gravers are pretty dedicated tools with no second craft in the background. There s a contrast between block engraving and lino cuts. Whereas gravers for end-grain engraving relies on a single, bevel-up cut that cuts upwards from the underside of the wood fibres in a thrusting push cut, lino cutting generally comes from bevel-down cuts using a variety of profiles in like manner to wood carving tools in relief form. Drawing a comparison, wood block engraving delivers more refined image in much tighter restraints. I know both realms can be highly skilled, and an artist one usually works in the other for different output, but the wood block delivery is much more demanding in many ways.
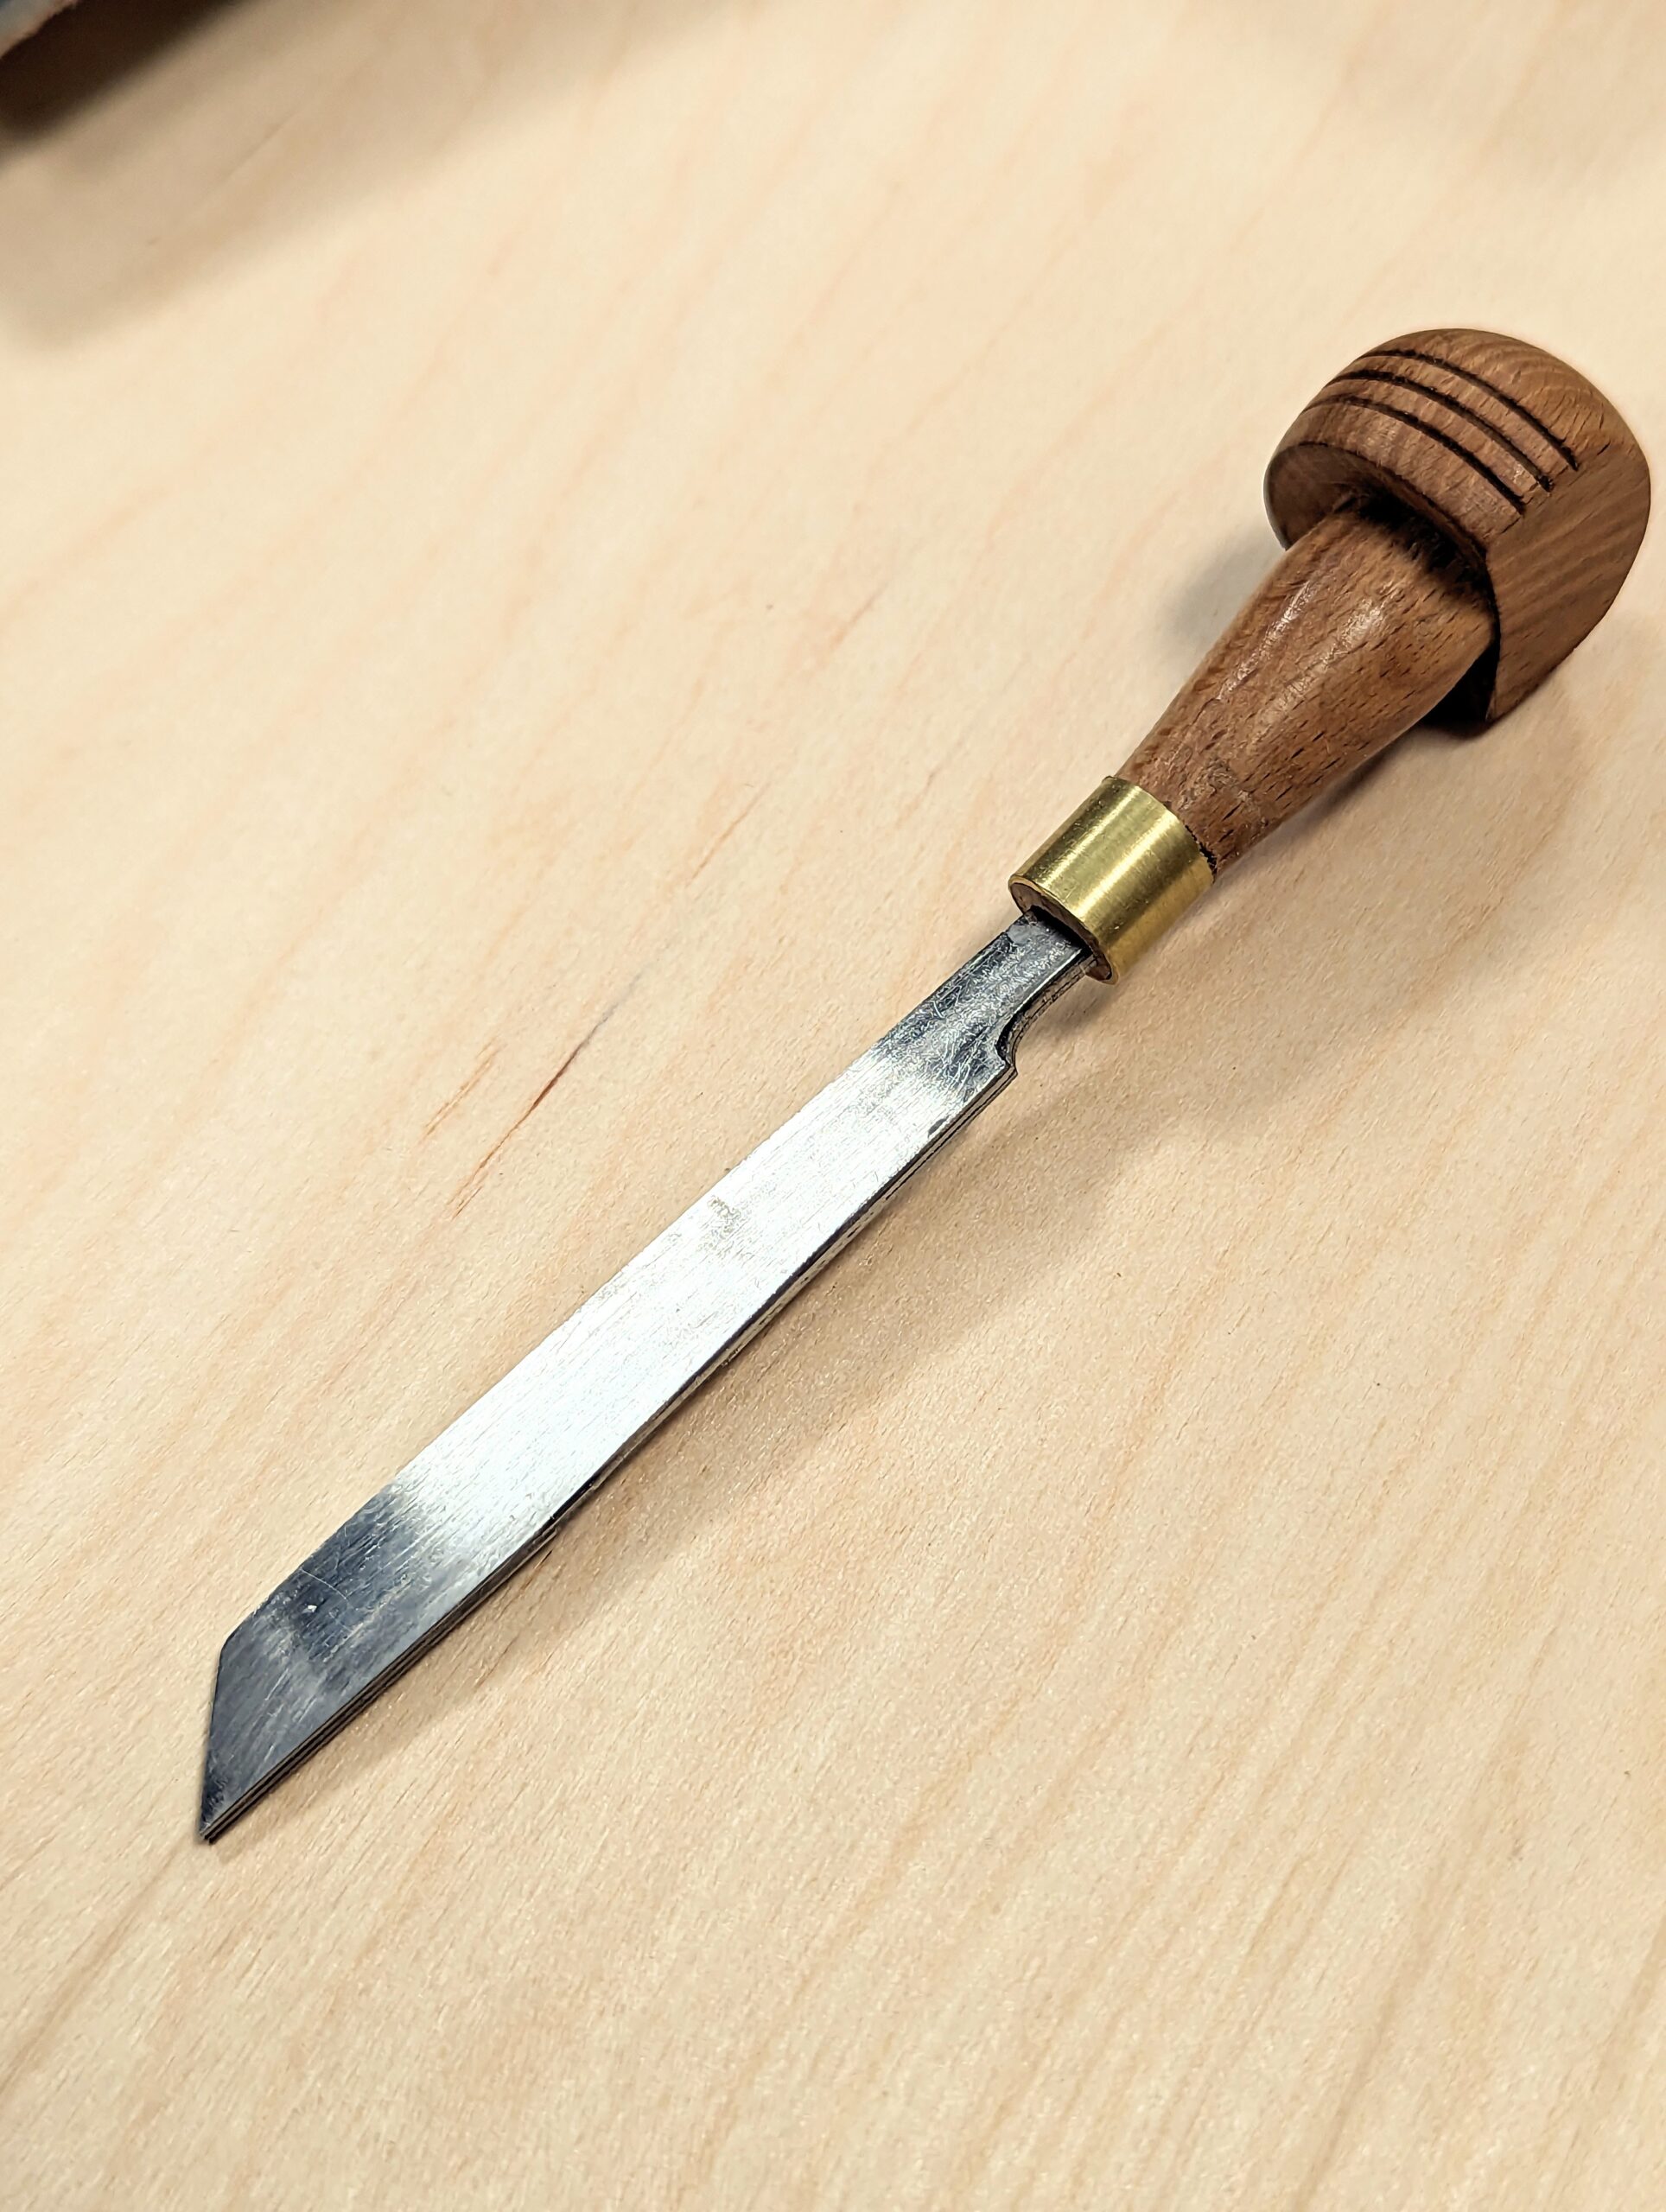
In buying graving tools and then using them I realised that some of the tools benefitted from a slight bend along the long axis of the tool for a couple of reasons not the least of which was to 'bend' the strokes or increase flexibility. I also wanted some highly refined supremely fine lines for different work and outcomes. Heating the blade allowed me to tap-bend the lengths and I found that the tools were more versatile and more comfortable to use.
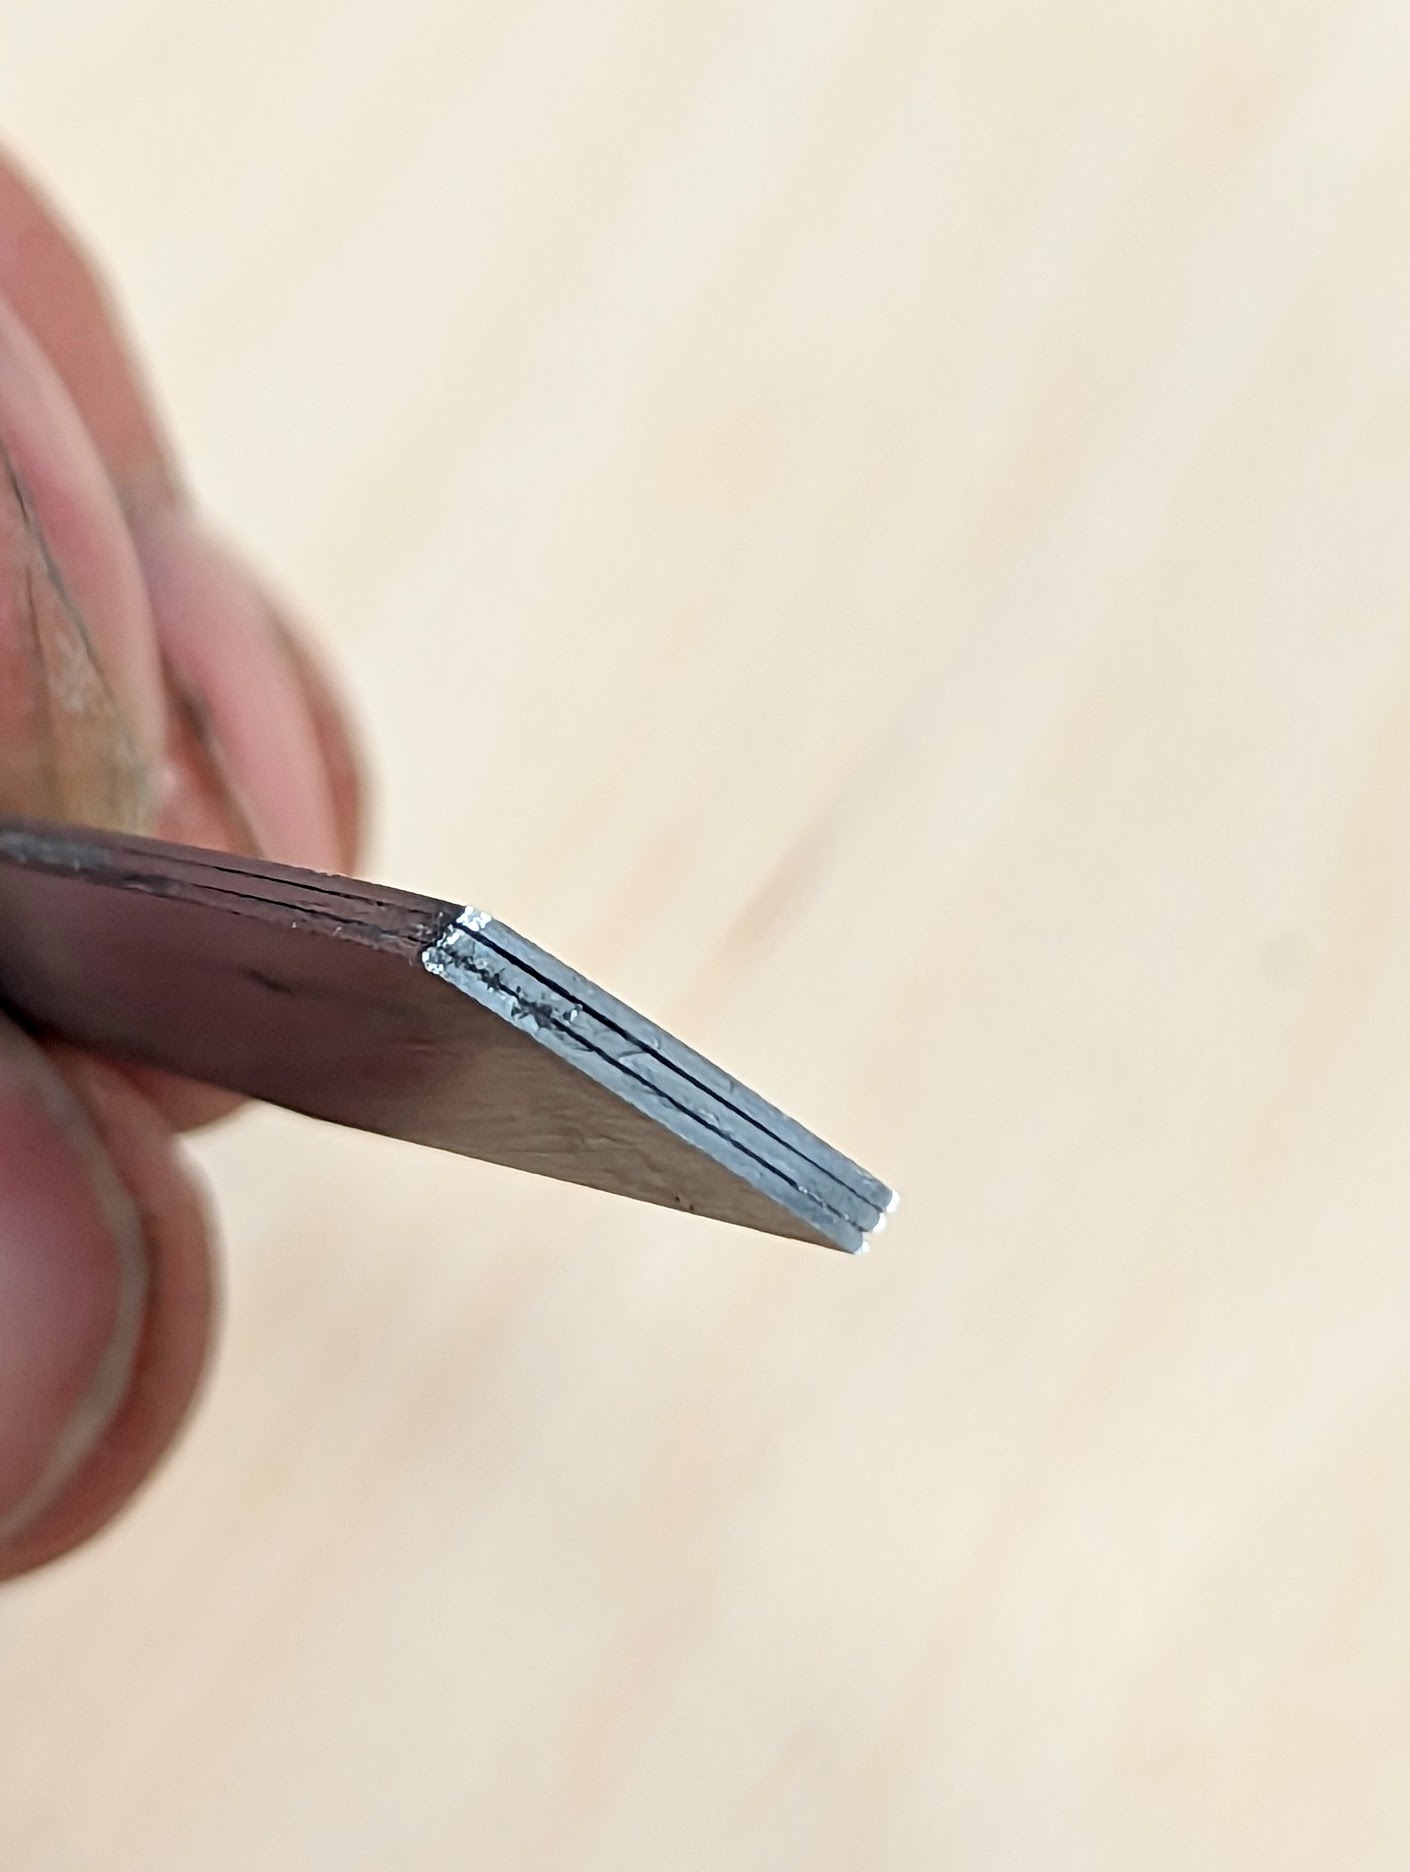
There is a graver called a multitool which may or may not be a misnomer in that it may function to create different stroke but that depends on the artist/user and less so the ability of the tool to be changed for different tasks. Think plane with different cutting iron widths and/or profiles. These multitools simply enable precision parallel lines to run along the surface of the wood block. The one I bought cost £57 including shipping. It was way to fine for what I wanted. Looking around my shop I saw a discarded bandsaw blade. I snapped off three four-inch long pieces, ground off the hardened teeth, squeezed them together and thought to myself, "This will work".
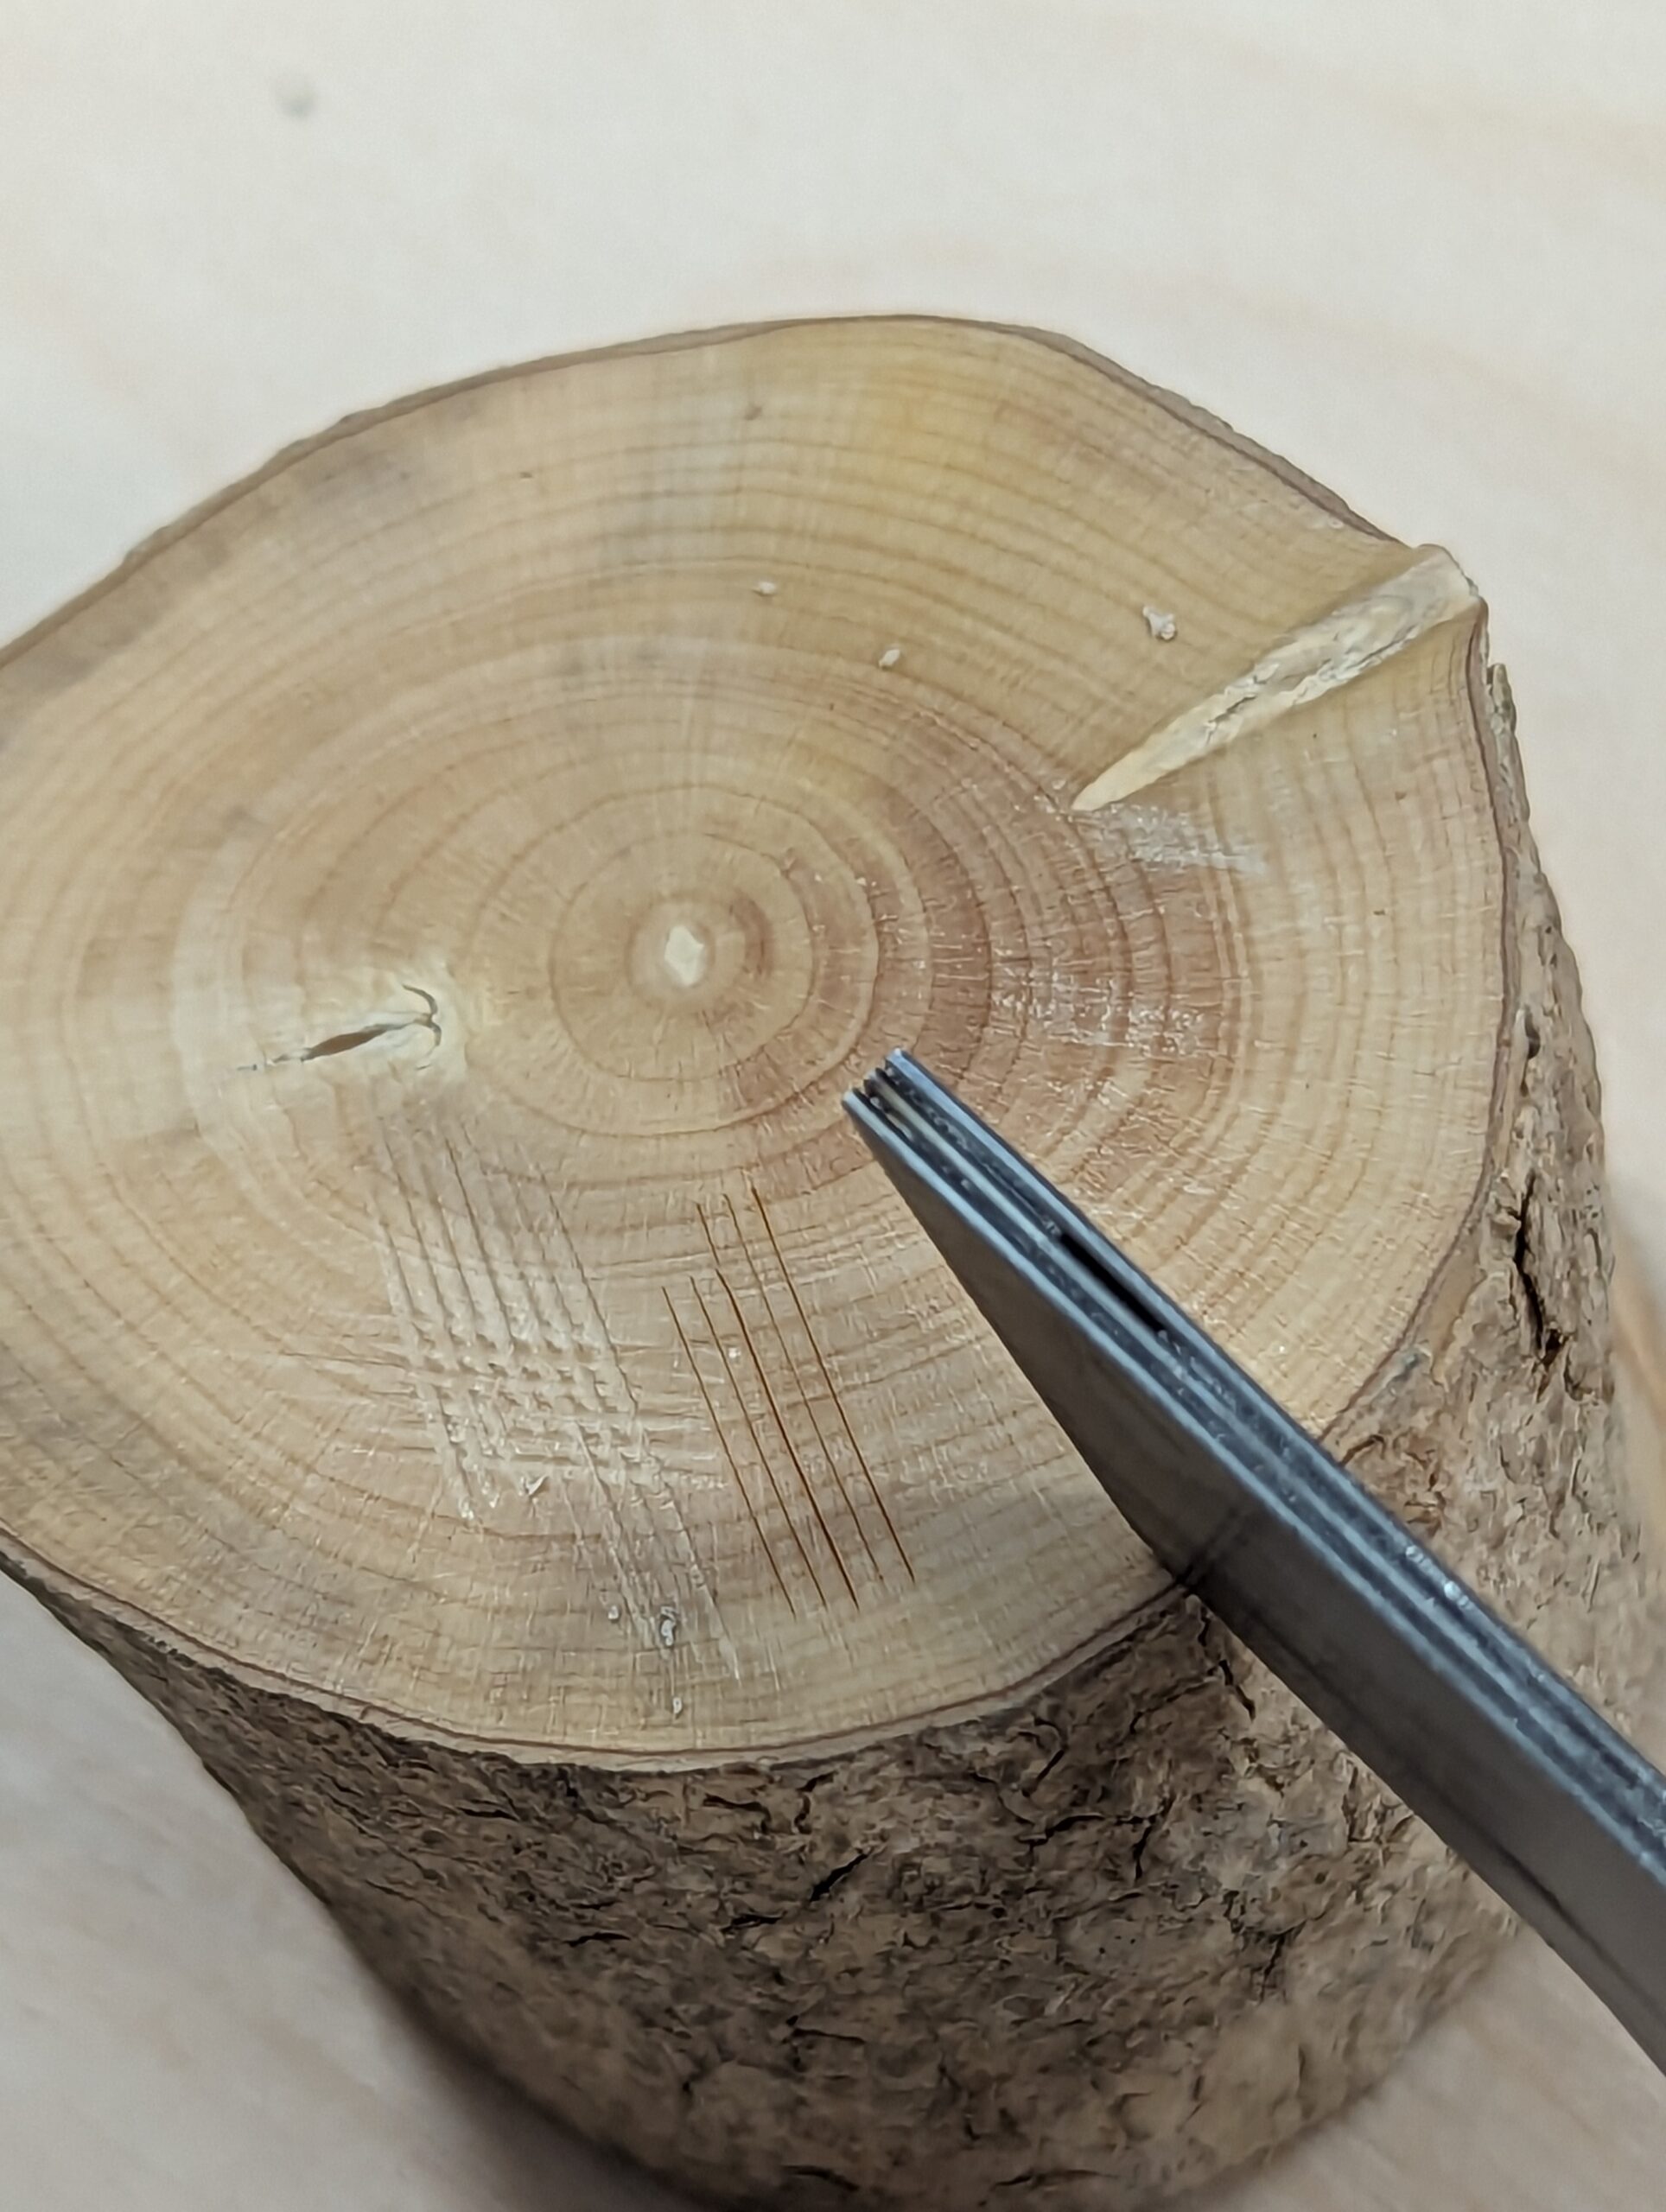
I didn't have the soldering materials I needed to unite them permanently together to hand so I reached for the super glue, scored the surfaces of meeting steel with coarse sandpaper and glued them up. I ground and filed the shape I wanted and sharpened the bevel and applied it to the wood. It worked quite beautifully. The cutting edges of the triple layer are on the back edges of bandsaw blade sections which is already uniformly rounded and ultra smooth. I can change that profile from round to V with a slender riffler needle file. or make a second version with sharper profiles as I like. There is nothing more to do to this. Pushing the tool along the surface of my boxwood with the ploughing action was really a treat. My next task was to make the idea and prototype permanent with something like silver solder.
My second tool I will update you on later.
Comments ()