It's Swell
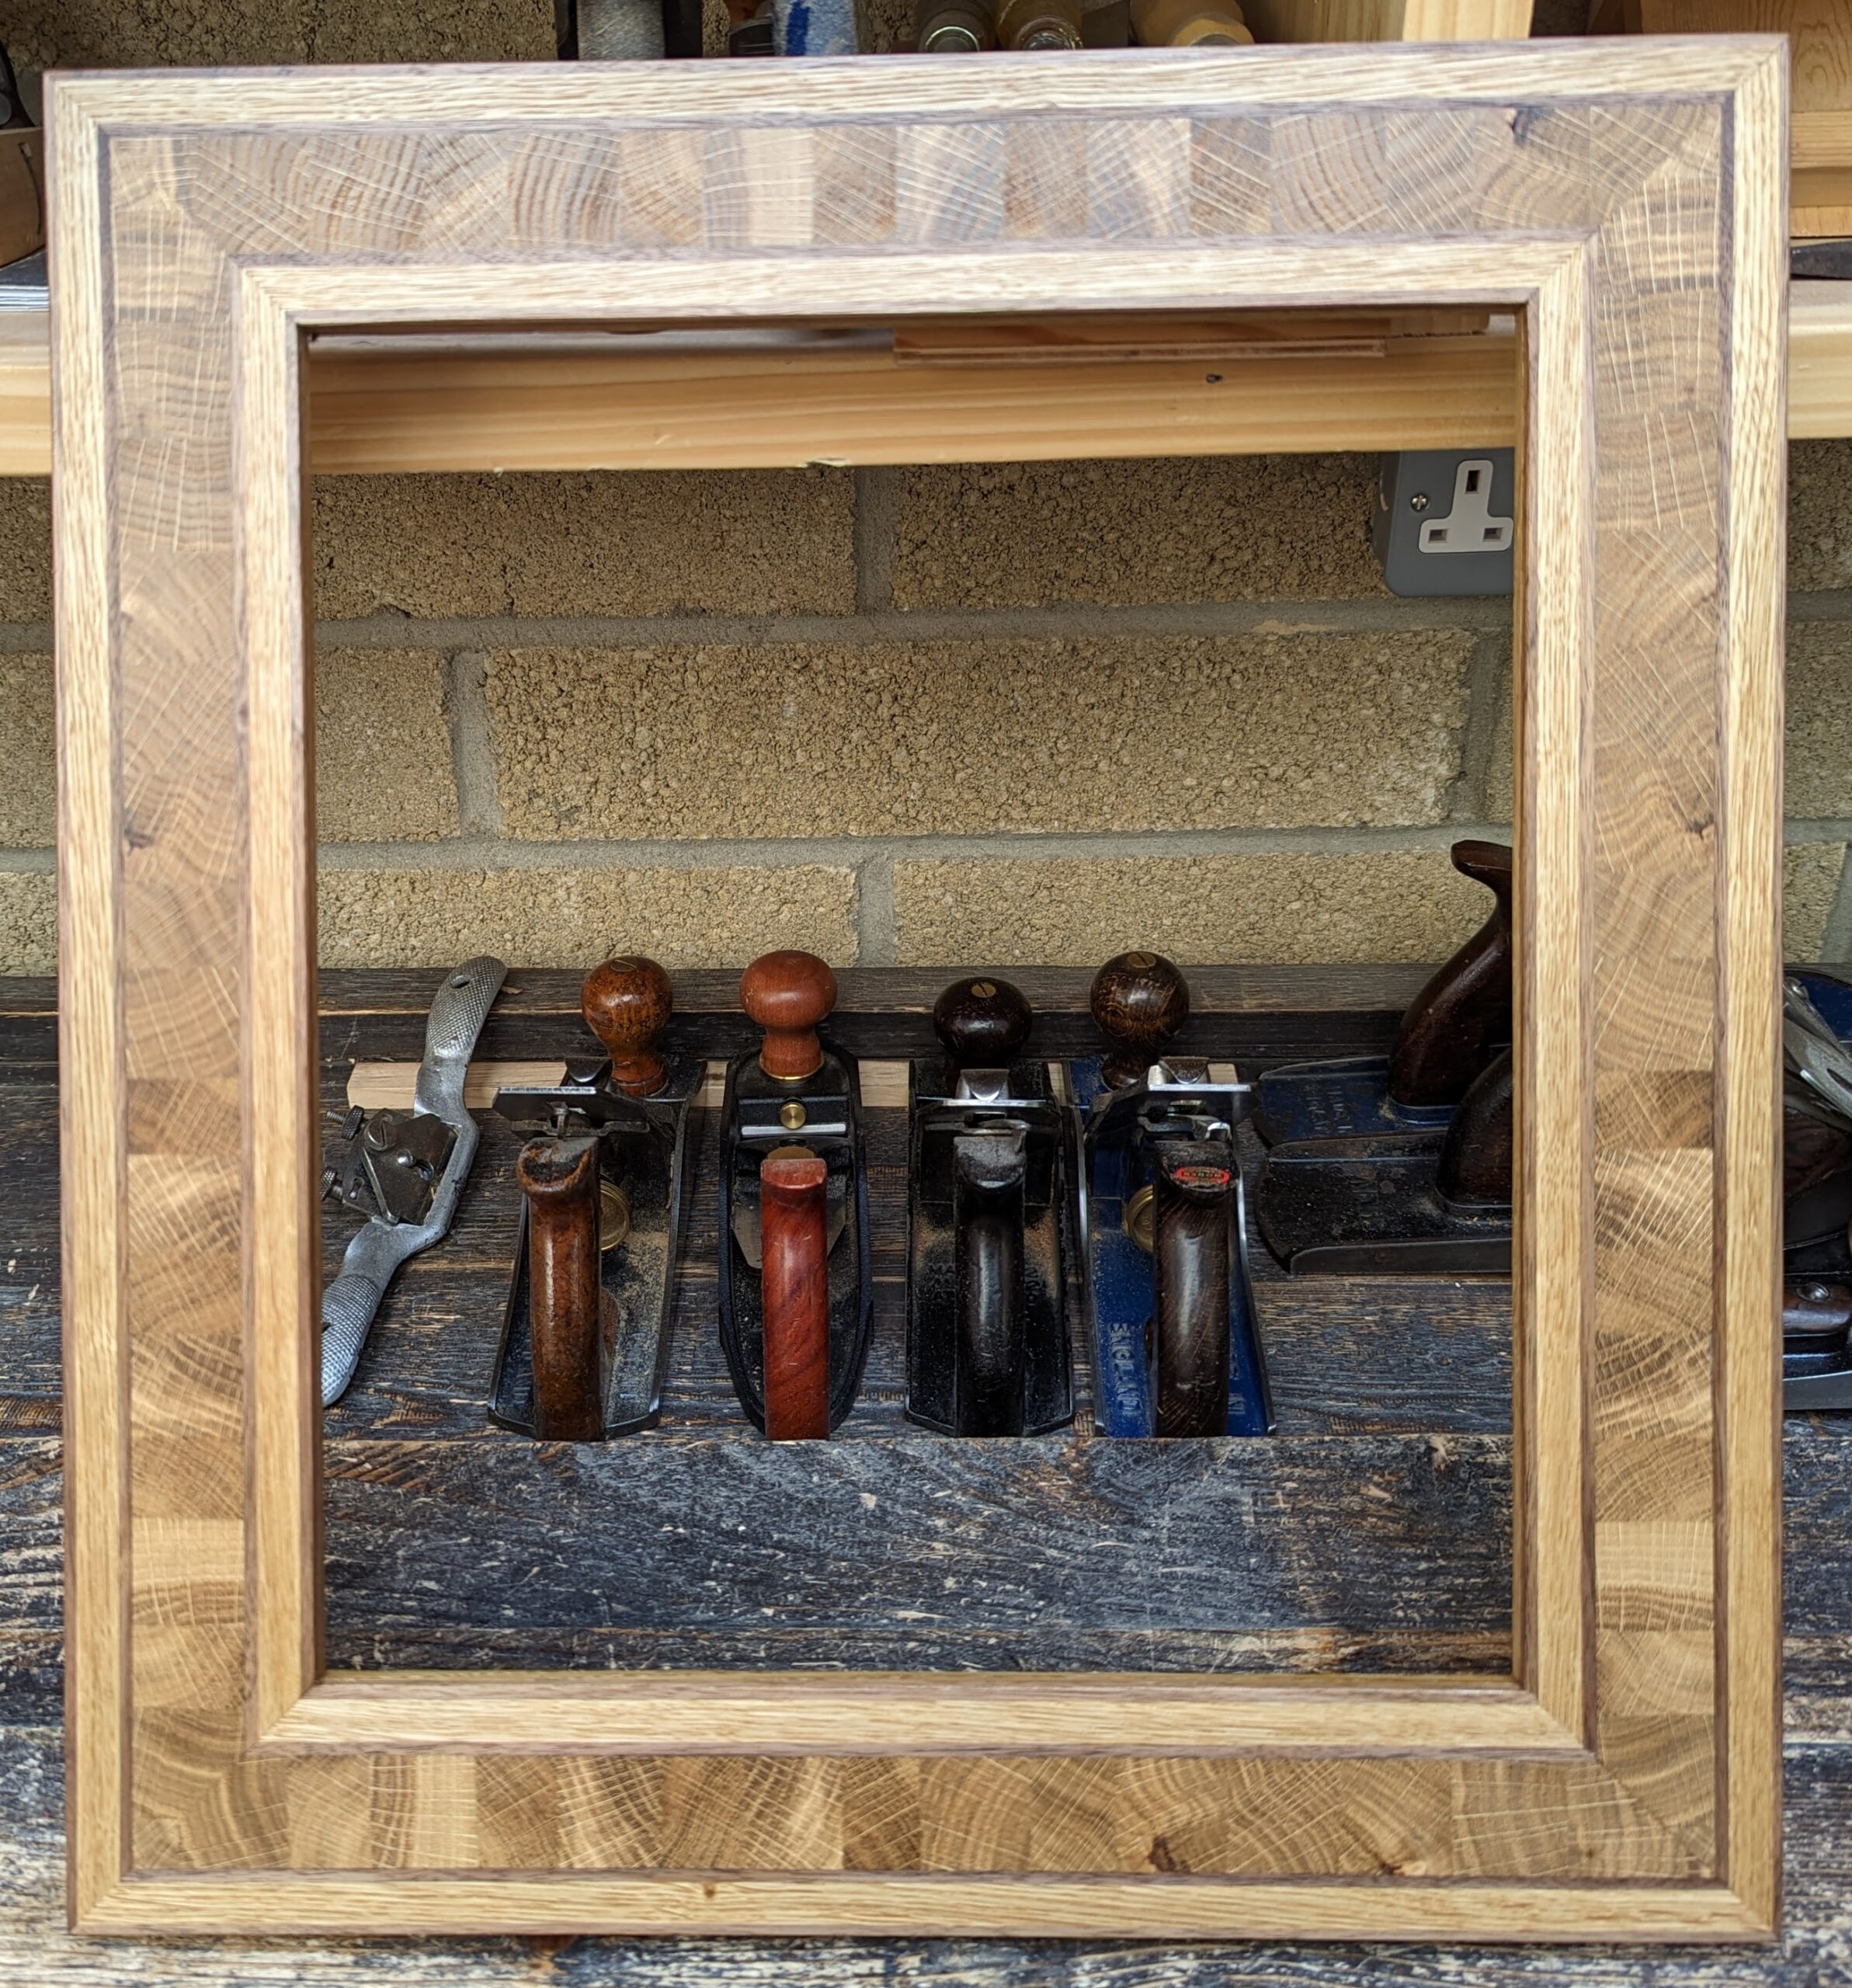
I made different versions of my latest mirror and picture frame designs. My first types went well to get from idea to finished frame and I quickly ended up with five new frames and made some decisions along the way to improve methods of making. I also grew in confidence but my confidence failed me as confidence often can when you make a seemingly minor change meant to improve something and you find your change affected things negatively in the grand scheme of designing.
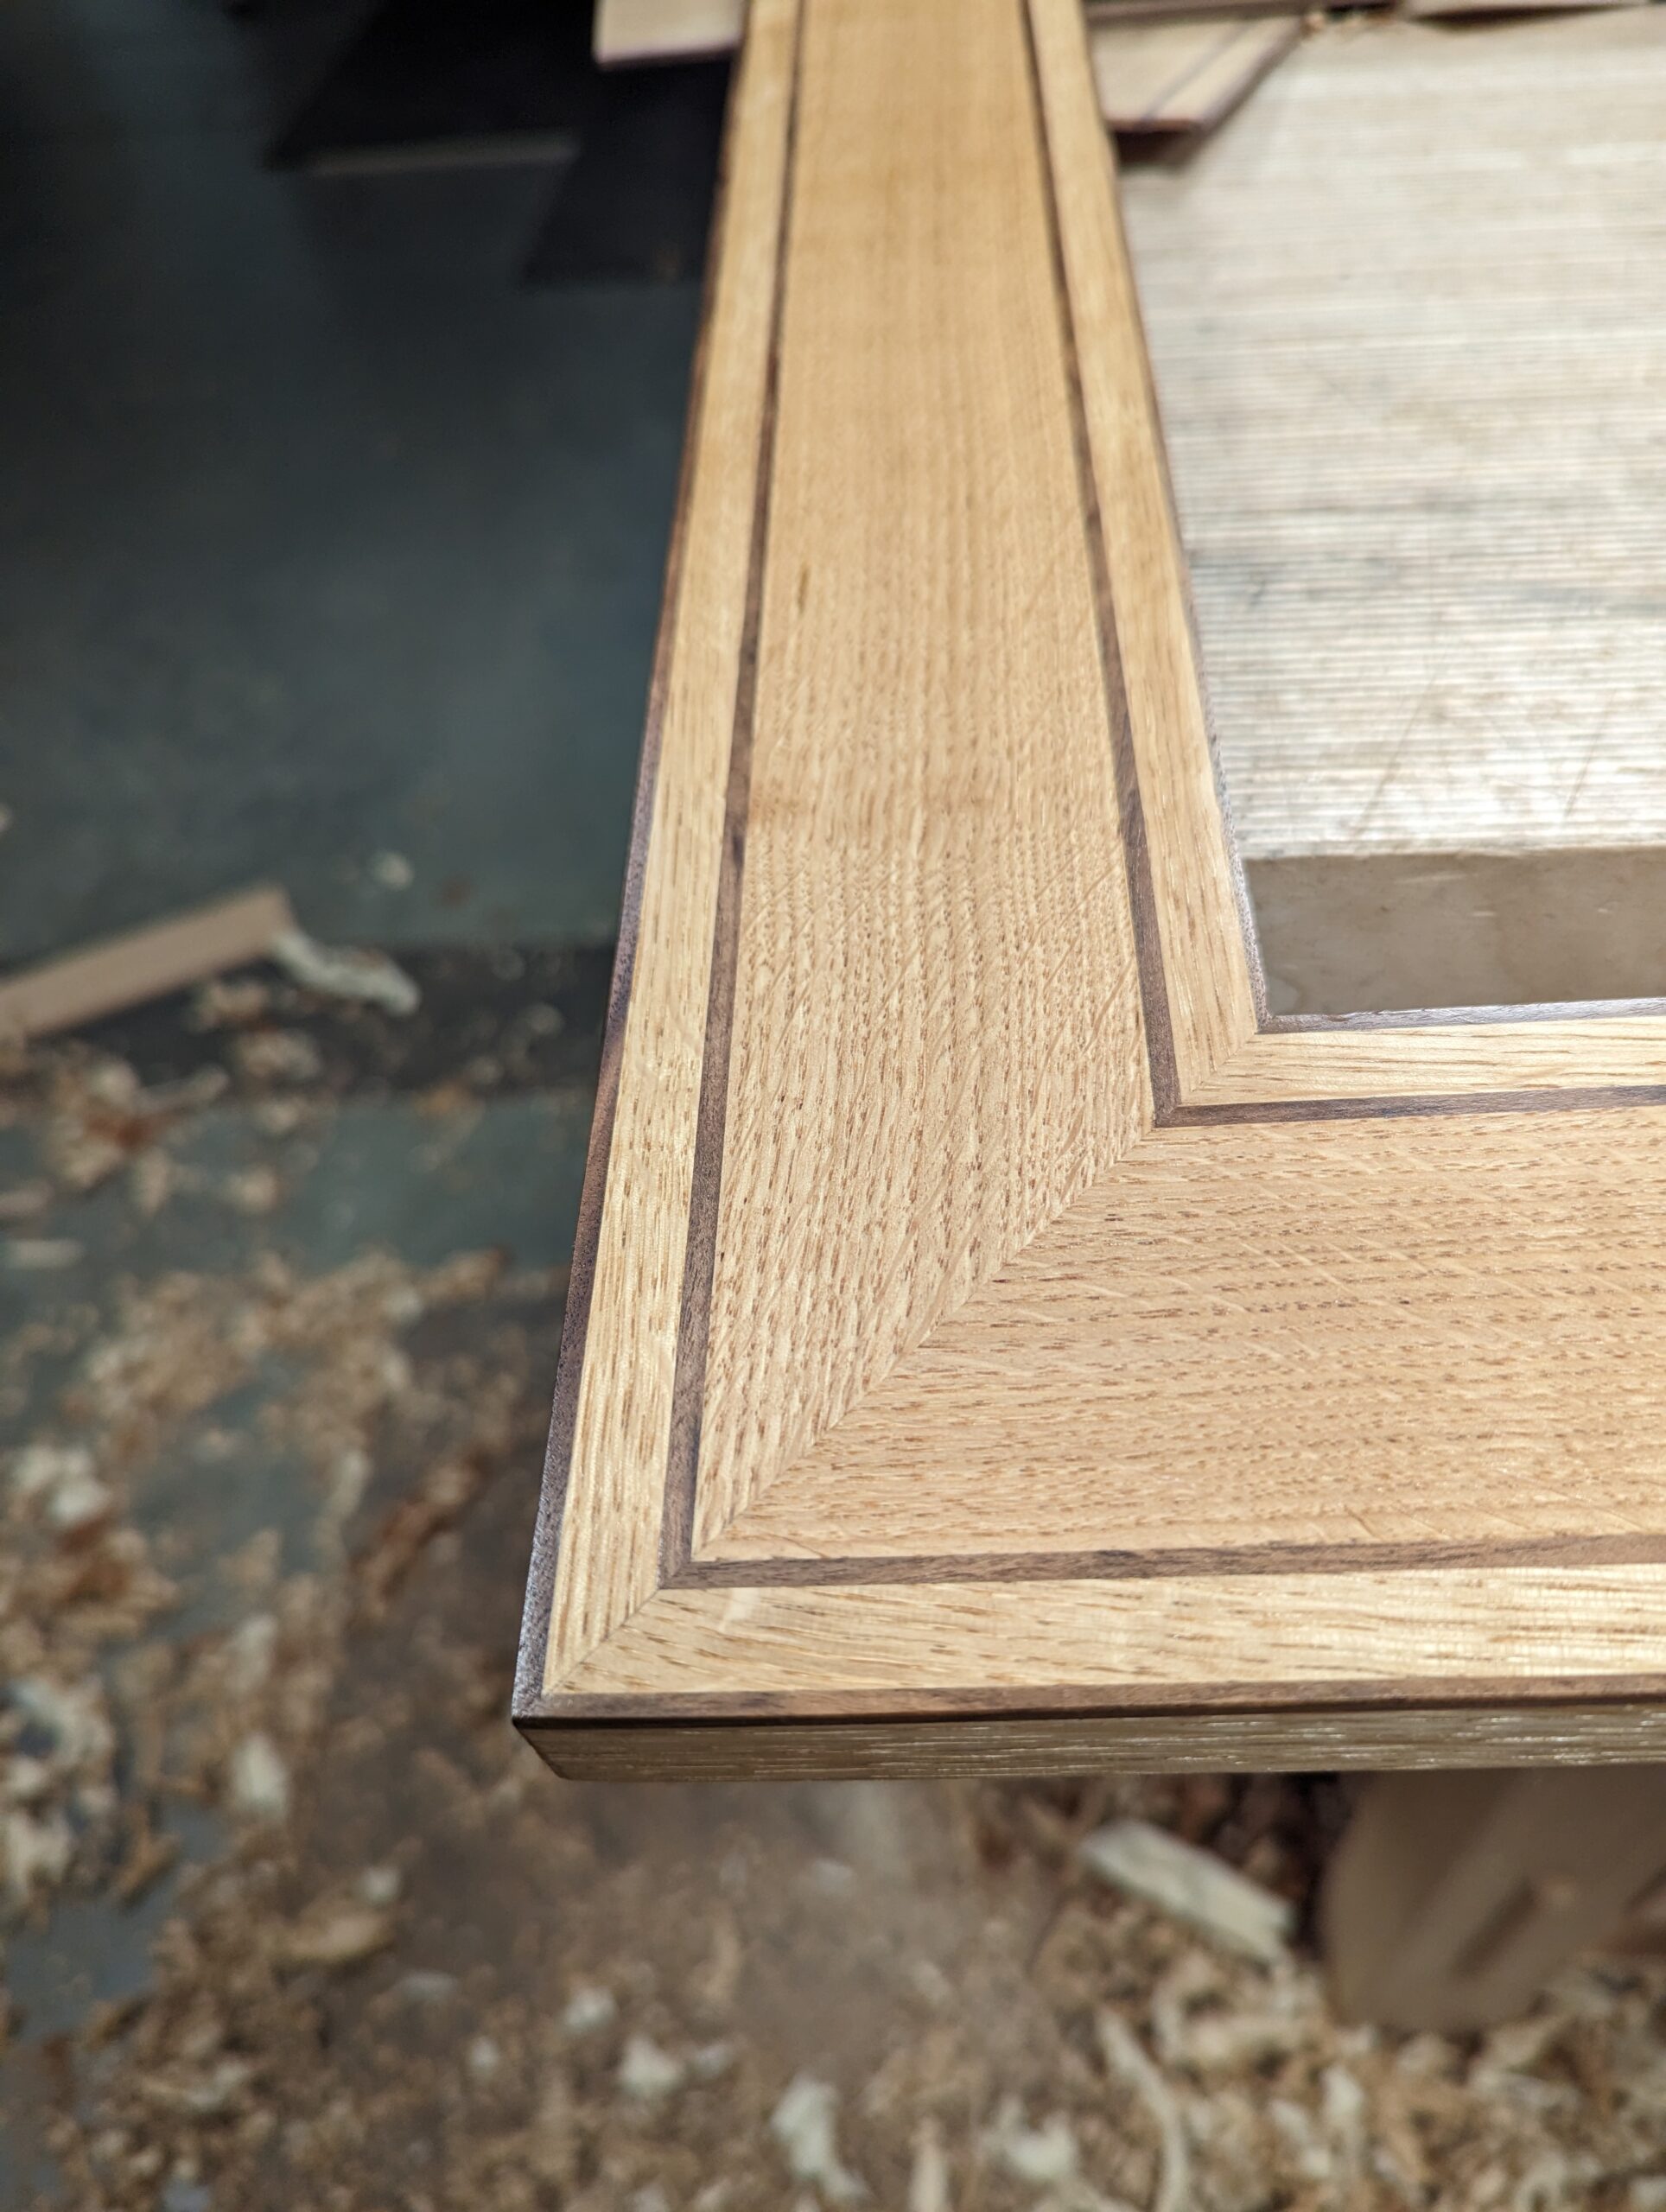
I cannot say that every mitre was perfect. These are far from conventional frames with moulds cut at 45 in a matter of a single downward cut on a powerful machine working from a rigid axis. But the cuts were close enough to nail if indeed any nails were or could be used. They weren't, nor could they be and neither did I want to either. My quest to escape moulded stock on all things had to be success and metal, expanded foam or wood in classic Greek mouldings are no longer an option for me. Perpetuating default mindlessness and ornately carved just fills me with dread.
Glueing and clamping each of my hand-cut mitres one to the other had that mark of human hands where the smallest of gaps could be accepted but you didn't want it when one became an eye-catching glare of a massive mistake that drew attention from a critic without a word but you'd catch the extra split-second linger of an eye on a specific point in the work. "Good enough!" I'd said to myself in the final pass of self-approval and the pressing of a clamp lever or the swivel of another. Nothing more to do now at this stage with the glue on. And there it sits ready for later scraping planing and sanding. In my first five frames, I was happy with the near-perfection I'd achieved. I doubt that a machine method would have particularly pleased me more.
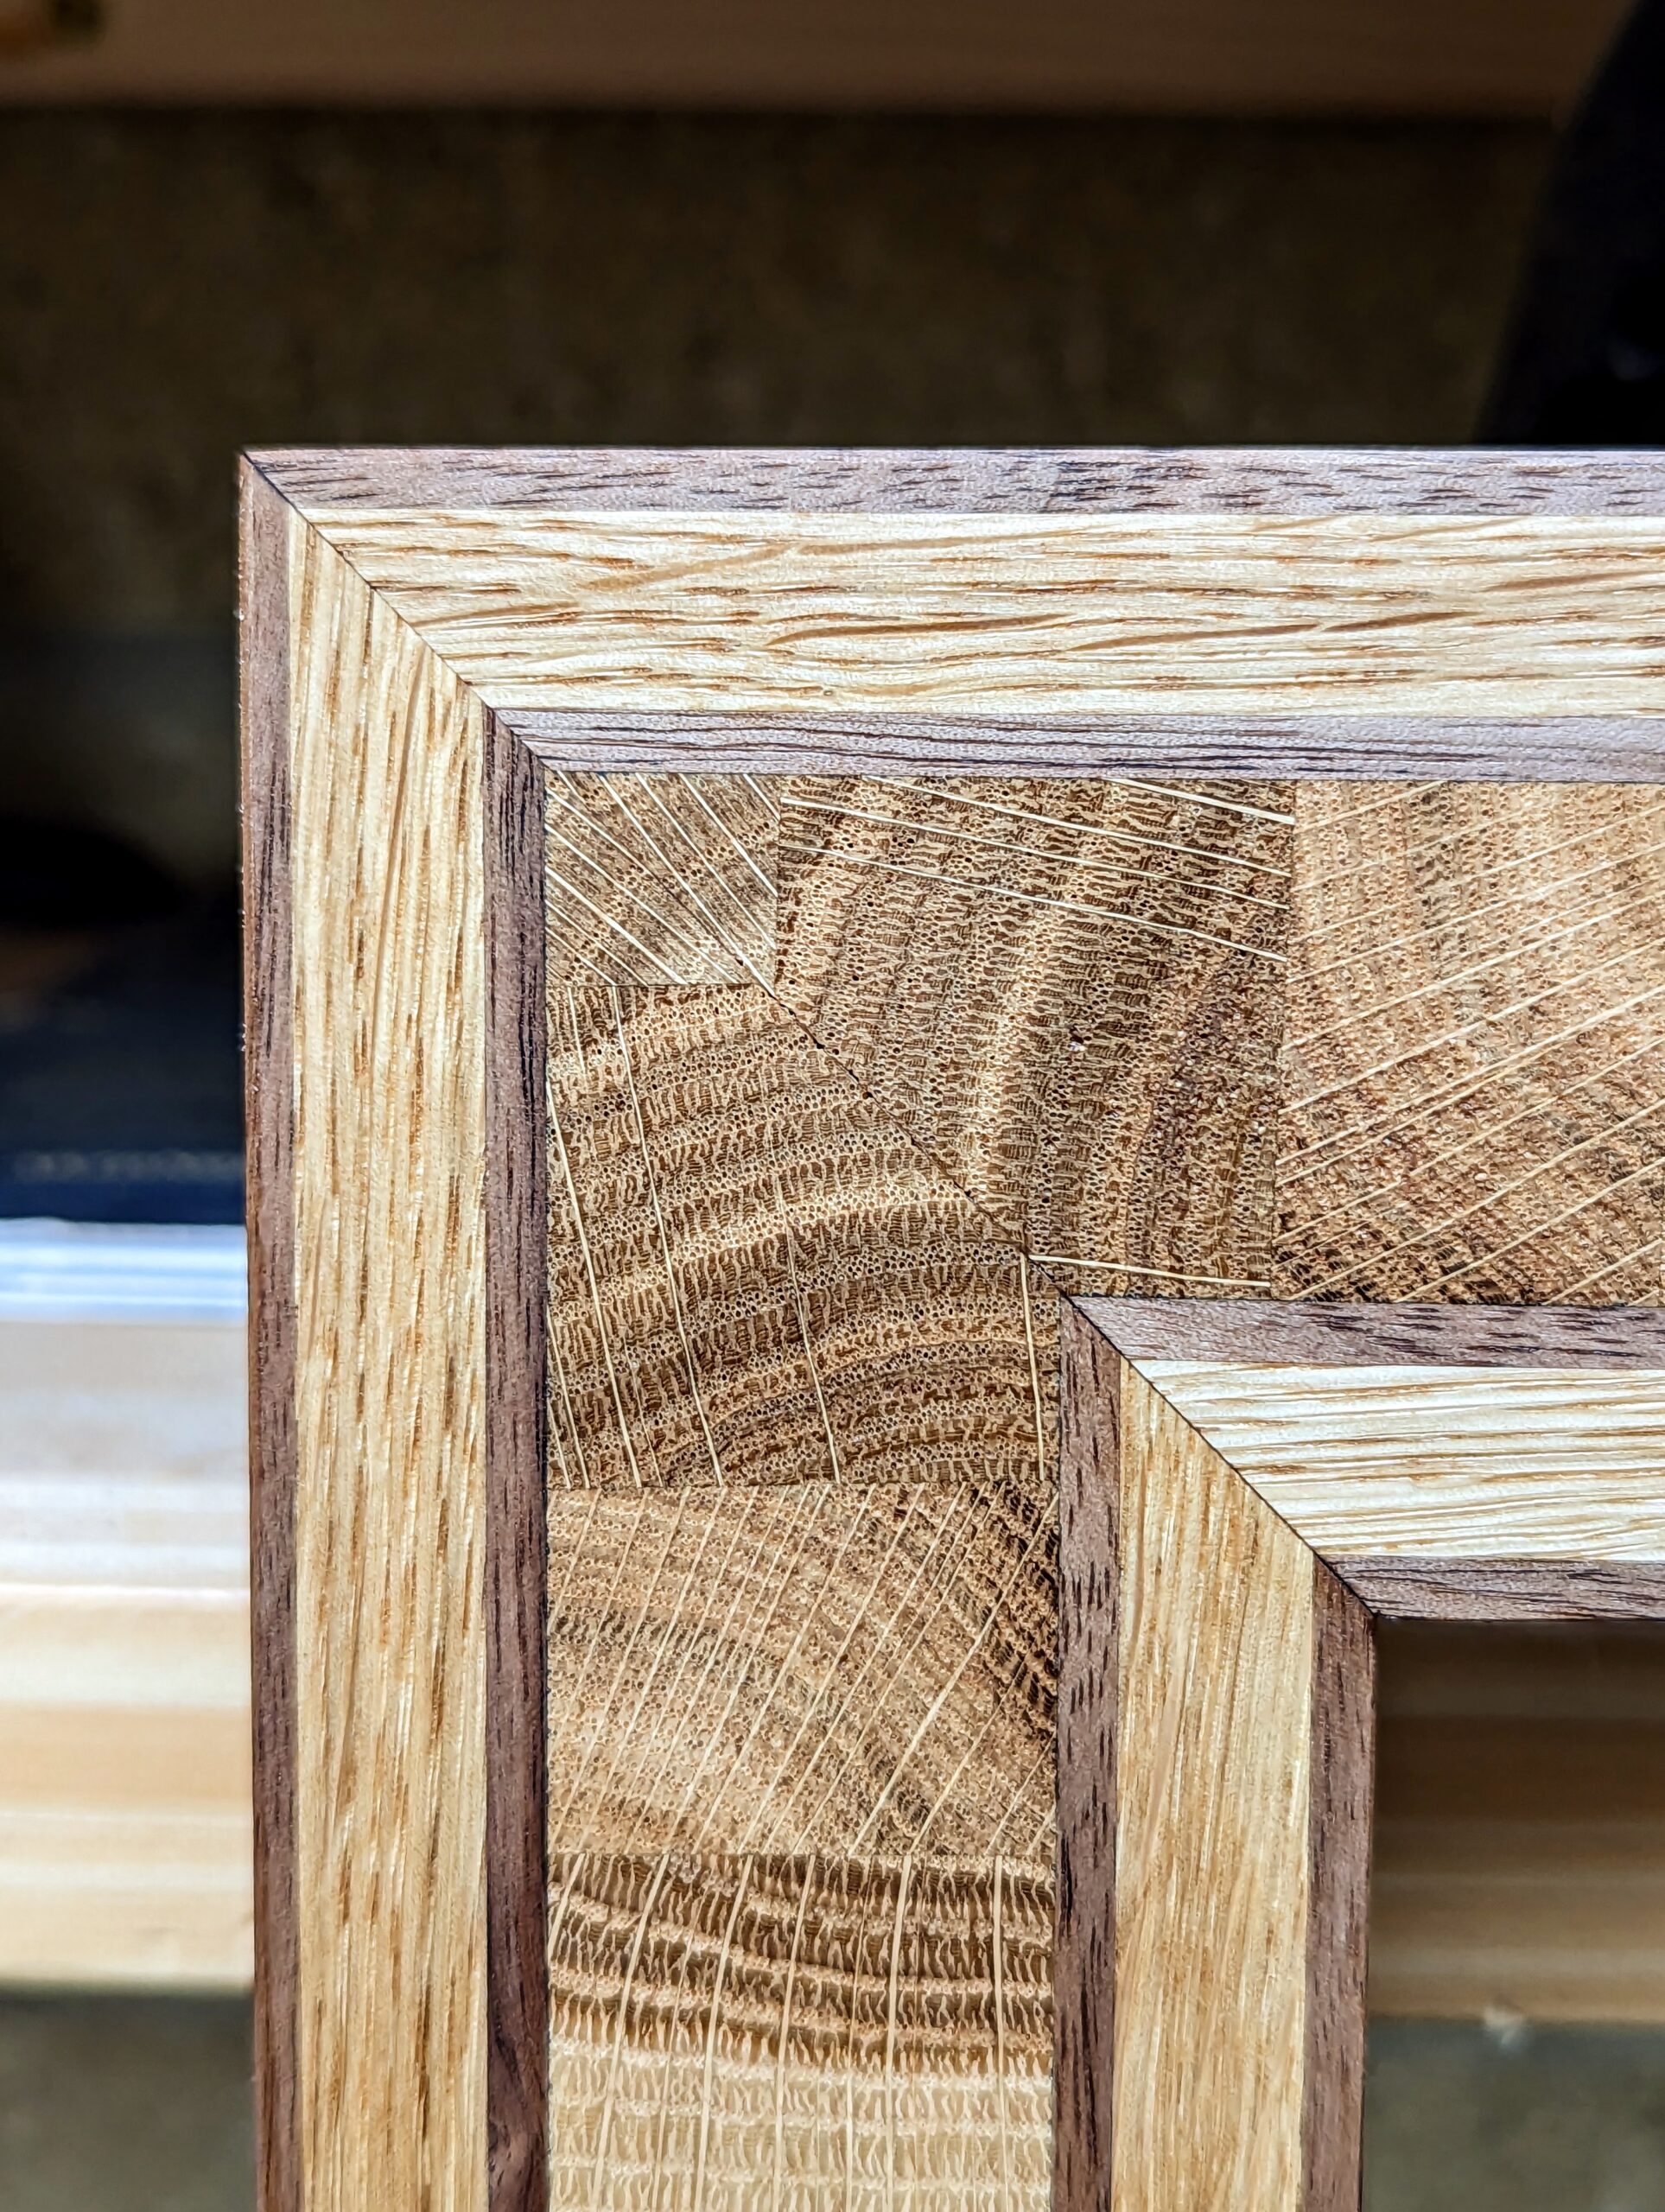
So what happened on the next one? This frame was radically different to the others where the core field centred along the length was long grain. In this case, I liked the idea of using end grain and decided that book-matched end grain at the corners would be distinctive and good-lookingly different. These frames are to frame some of my personal drawings from my book Essential Woodworking Hand Tools. With all of the pieces cut and fitted to perfection, I glued and clamped the first piece in place with no lingering and everything was good. I glued the second piece to the first mitre gap-free and easily. As I worked around the corner I came to the last two mitres that had to fit simultaneously in this final glue-up. This was where something failed. I placed the piece between the two opposing end mitres and a slight difference occurred. I thought, how did this happen? Could it be 'gain' in each of the mitres compounding the problem?
The end grain had taken in the water from the PVA and swelled that centre section more than the long grain sections because of the extra time it took to fit the one corner perfectly before the opposite end went down under the clamps. I was at the point of no return. The only option was to remove the section and refit after all glued components had dried, but it was too late.
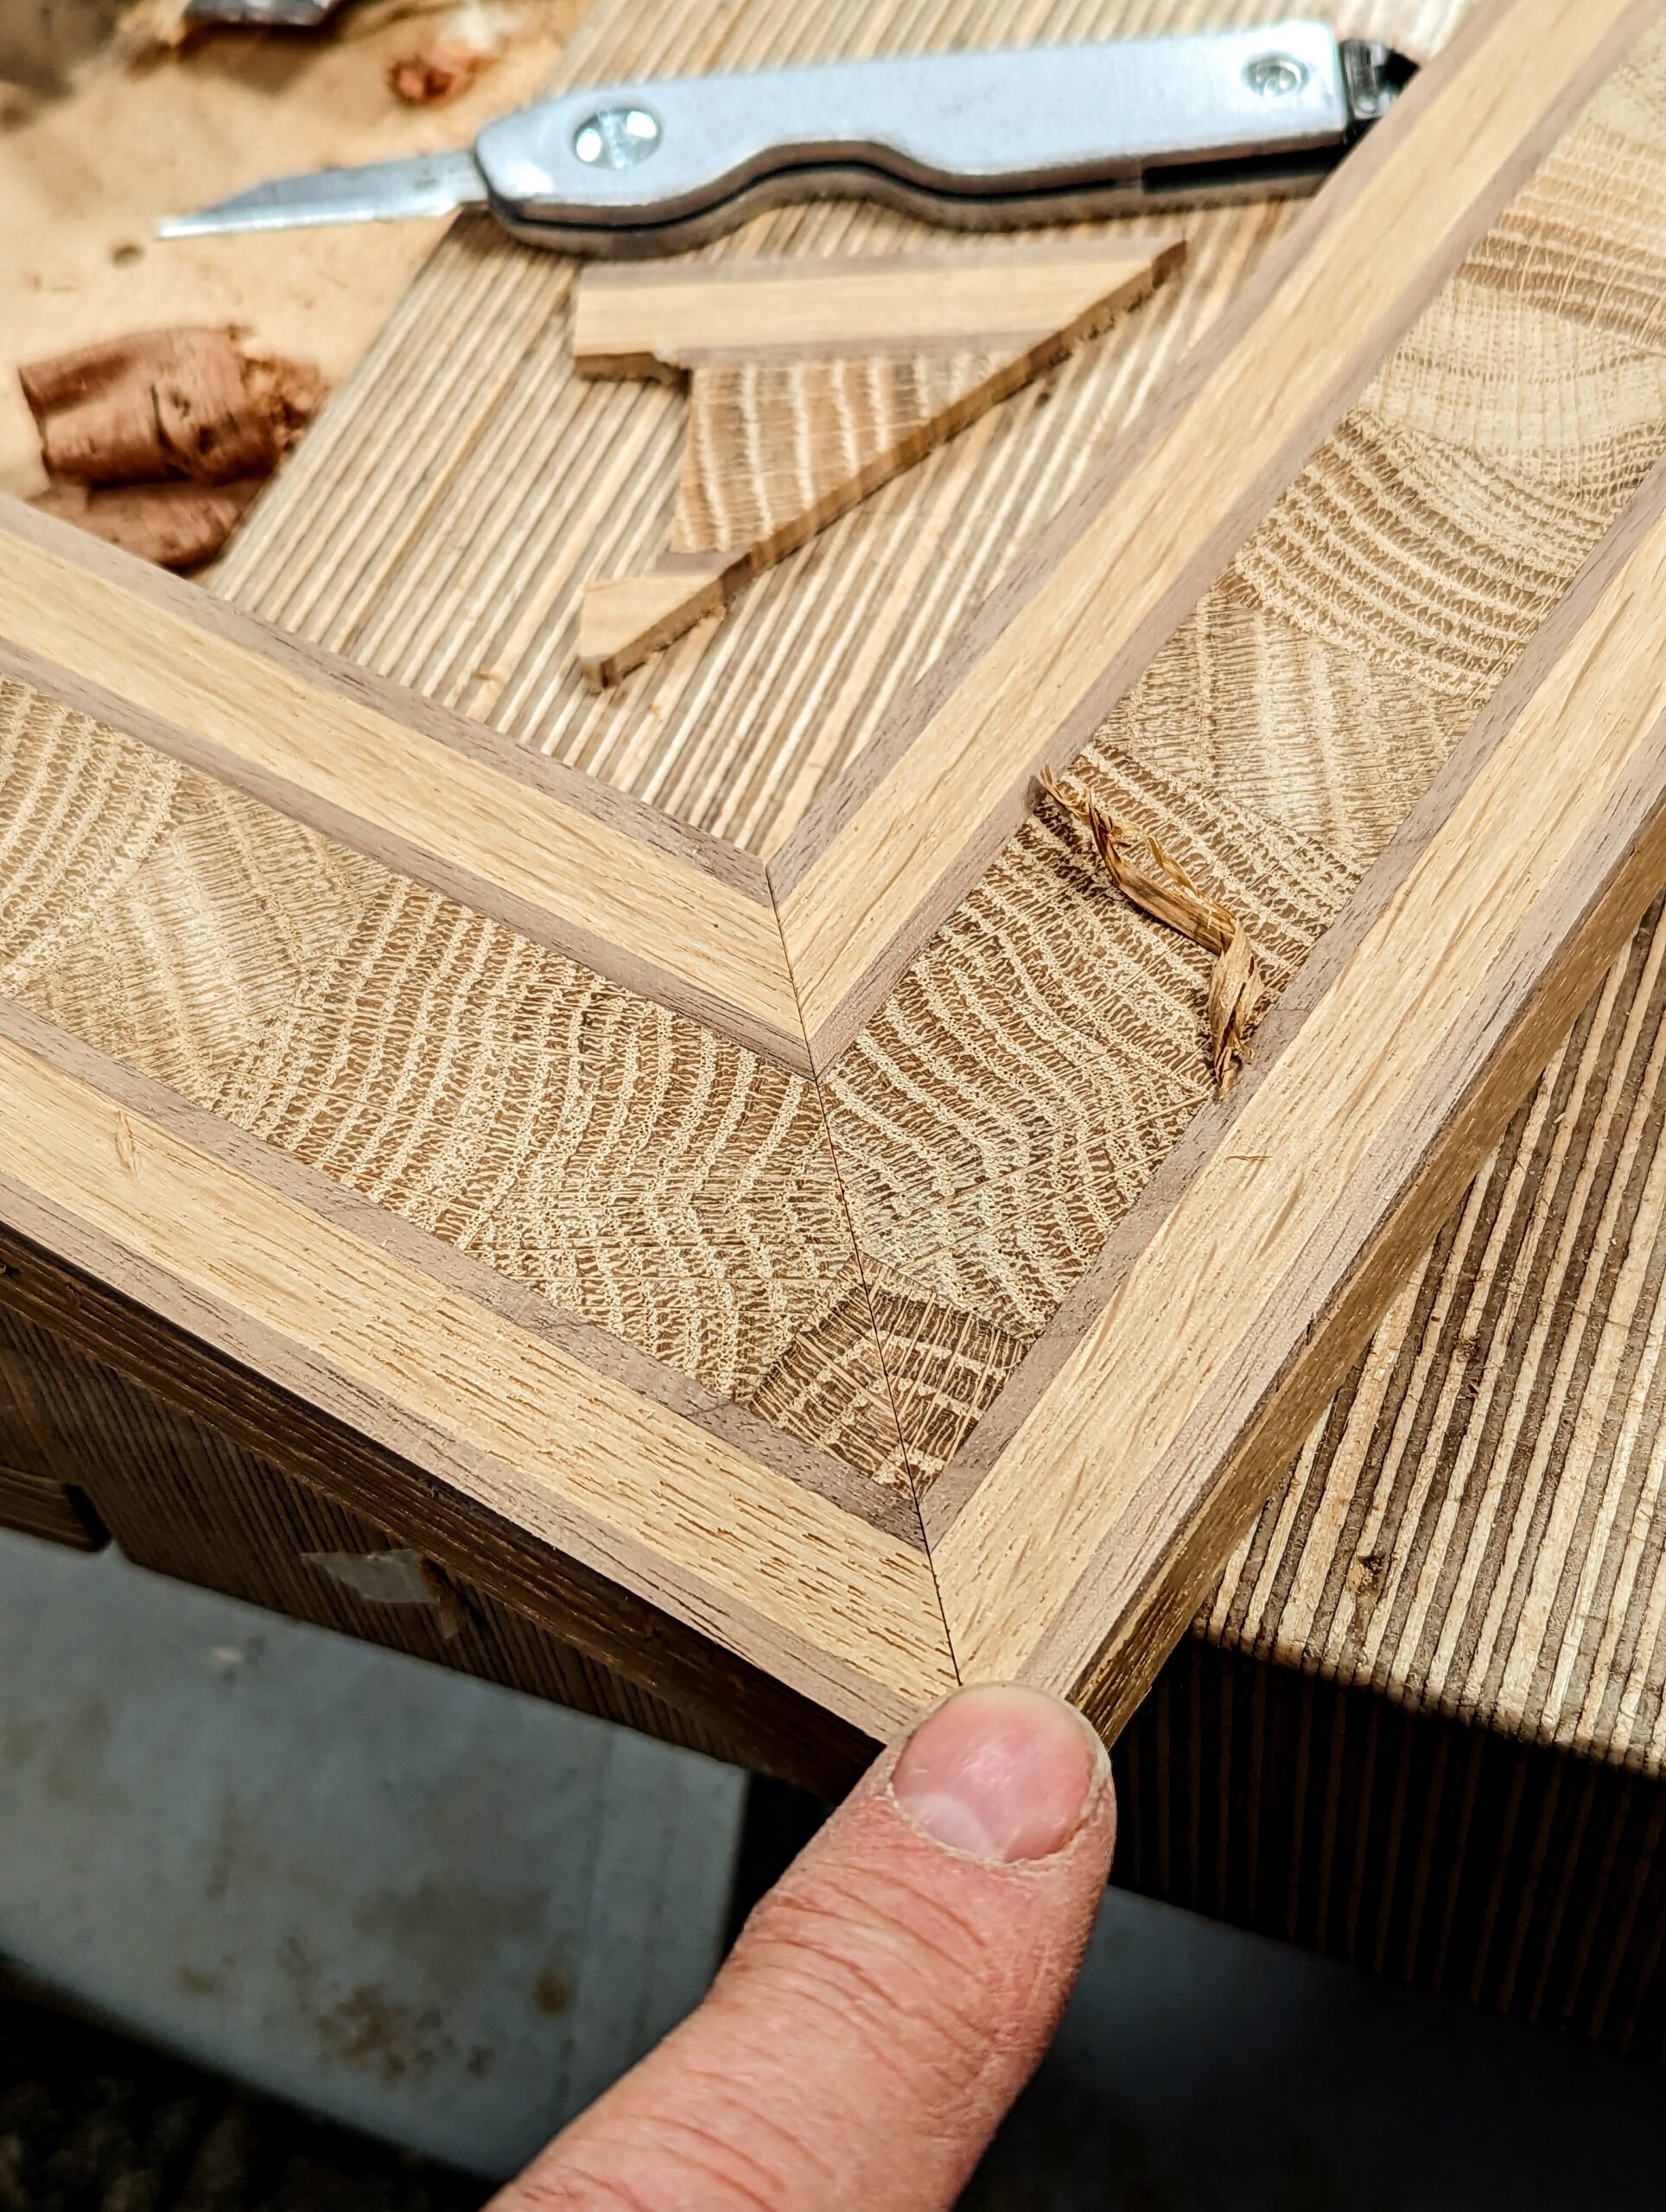
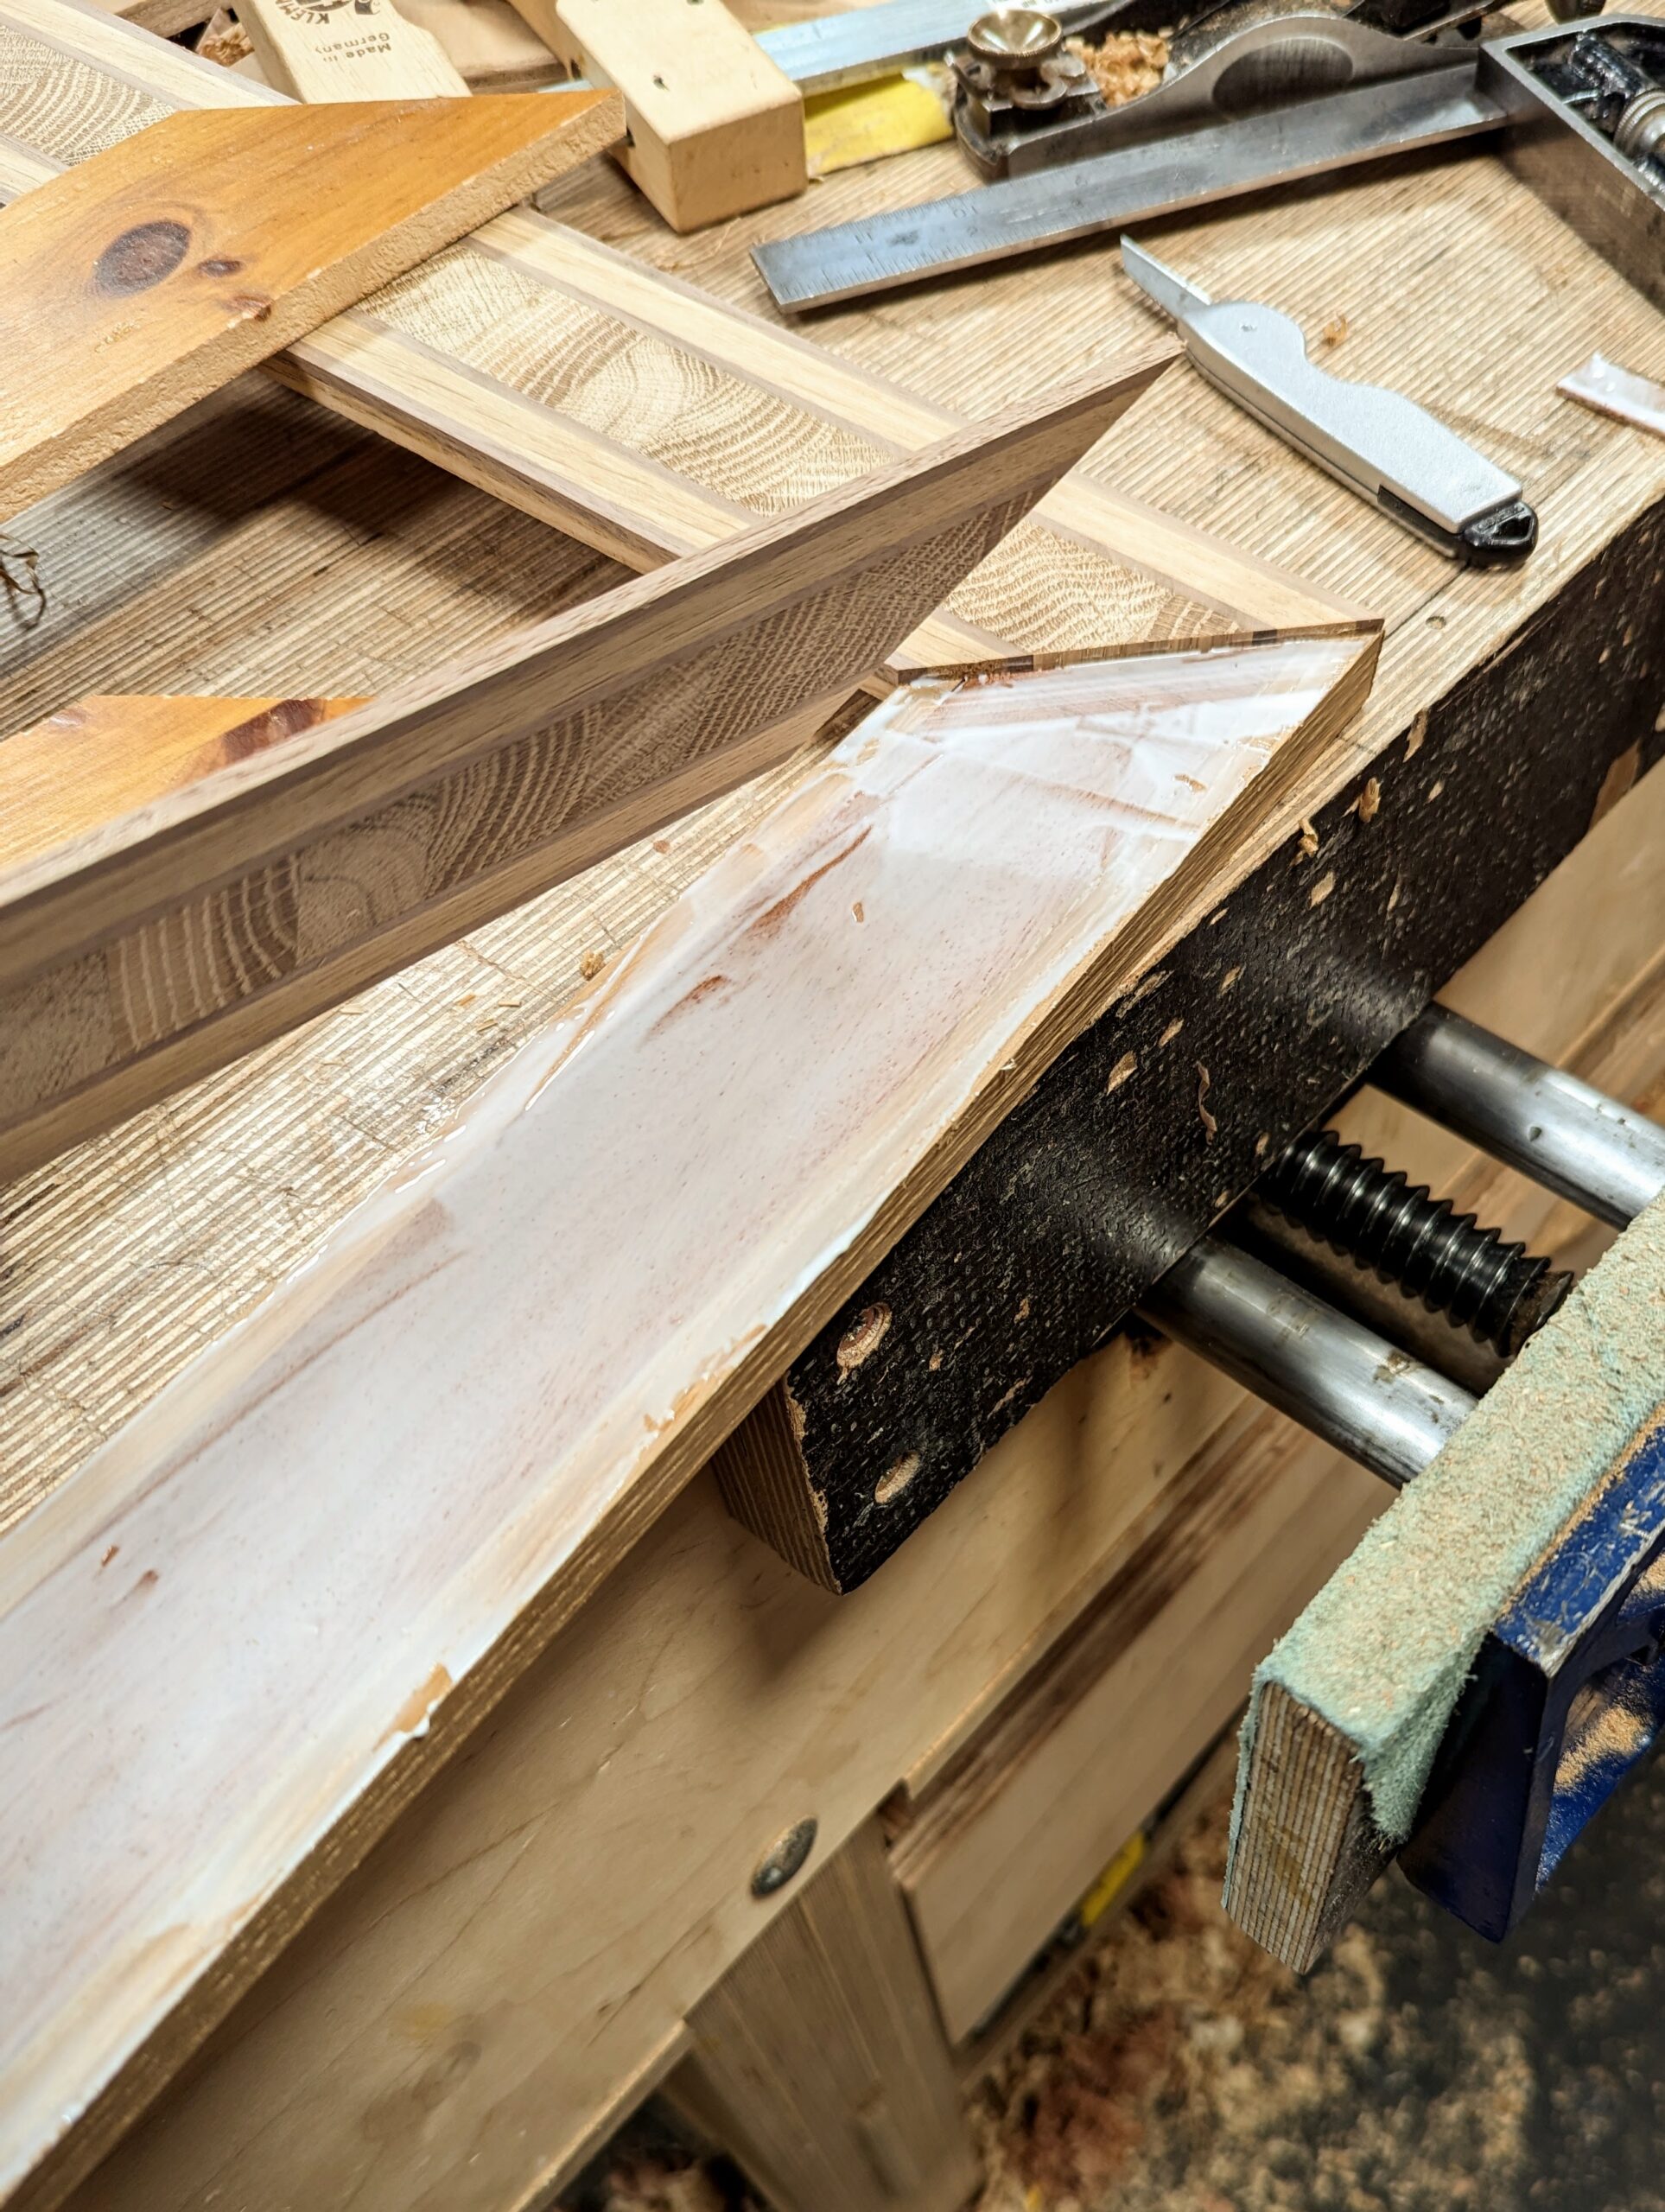
So what did I learn? I preferred not to change my glue type. PVA is a long-term glue so I preferred not to change my glue type. I decided to change my glueing-up methodology because it was simpler though a vacuum press would have been the easiest of all. What I would not want was to send my audience out to spend an unnecessary few hundred pounds when the clamping methods work fine and is plenty easy enough. Instead of glueing the pieces in succession I glued the frame and adhered the veneer facing to the frame one piece at a time and then left each piece for three hours between the sections to ensure the glue was dried independently piece by piece. I checked the mitre after the glue was cured and found the end grain section had indeed swollen very slightly and that the glue had held the wood fast to the frame. I then used a shoulder plane to correct the swollen midsection to align with the long point and heel and then fitted the adjacent pieces and glued each opposite side, left those for the three hours again and then trimmed the mitres with the should plane. It had worked on the first one and I felt confident for these two too.
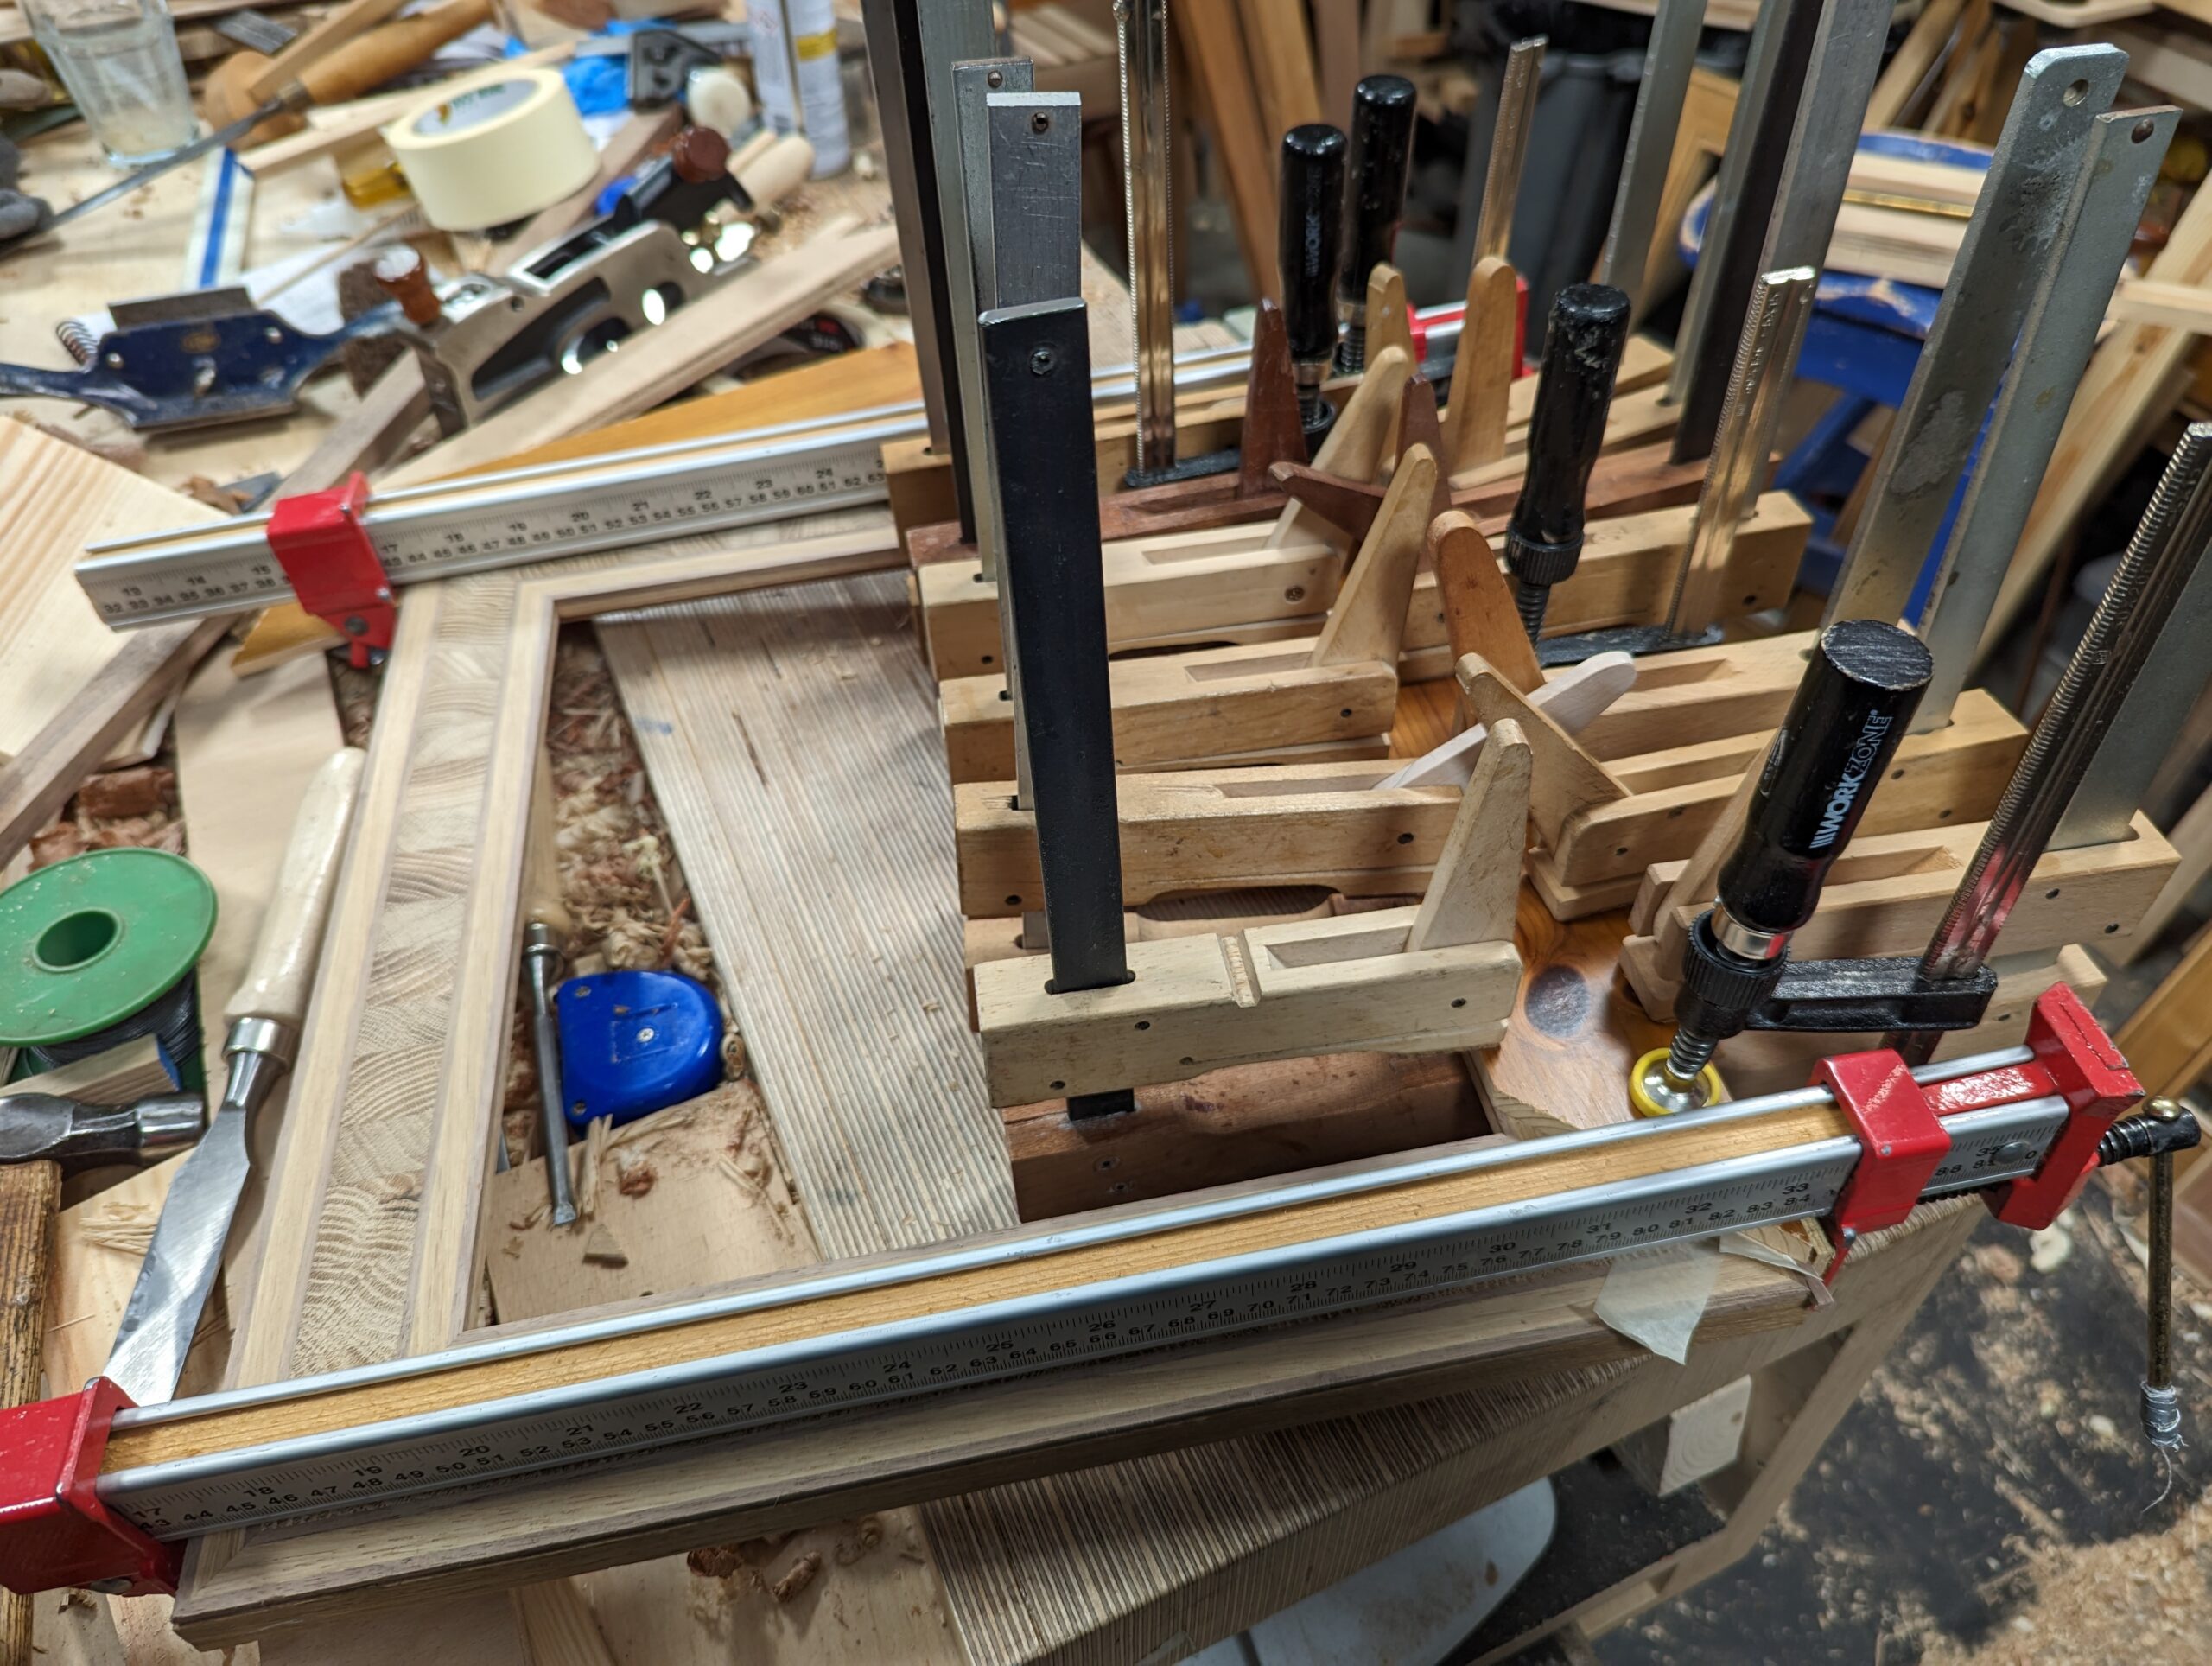
Adding in the last section between I did not hang about in the glue up. I got both mitres cut trimmed and fitted just right, stretched masking tape to pull the mitres firm to one another and then clamped it in situ to reduce the risk of swelling freely. With the long points clamped firmly, I knew there would be enough power in the clamp hold to stop any swelling to a level resulting in expansion. Adding subsequent clamps kept everything secure and pressed down. When I removed the clamps everything was just perfect.
Notes:
It's best to apply PVA (or any water-based) glue to the main wood frame rather than the facing. This will not expand the material by any marked degree and neither will it cause any distortion. Applying the glue to the facing will cause the wood to cup into a curl as the glued side expands from the moisture of the glue.
Apply the maximum amount of clamps you can and definitely use a board to distribute pressure more equally throughout the facings and minimise any risk of cavities, etc. In light of the majority not owning or having access to a vacuum press, and it might seem excessive looking at the picture below, clamps for laminates work just fine and you will always need and use these clamps over the decades to come.

It's important to work quickly in the glue application and the clamping process if you do indeed use the end-grain midsection especially but also on any laminate. Ensure clamping the mitres ends in place first and then work the inside clamps. Watch for the edges that are seen as sometimes these can end up slightly open.
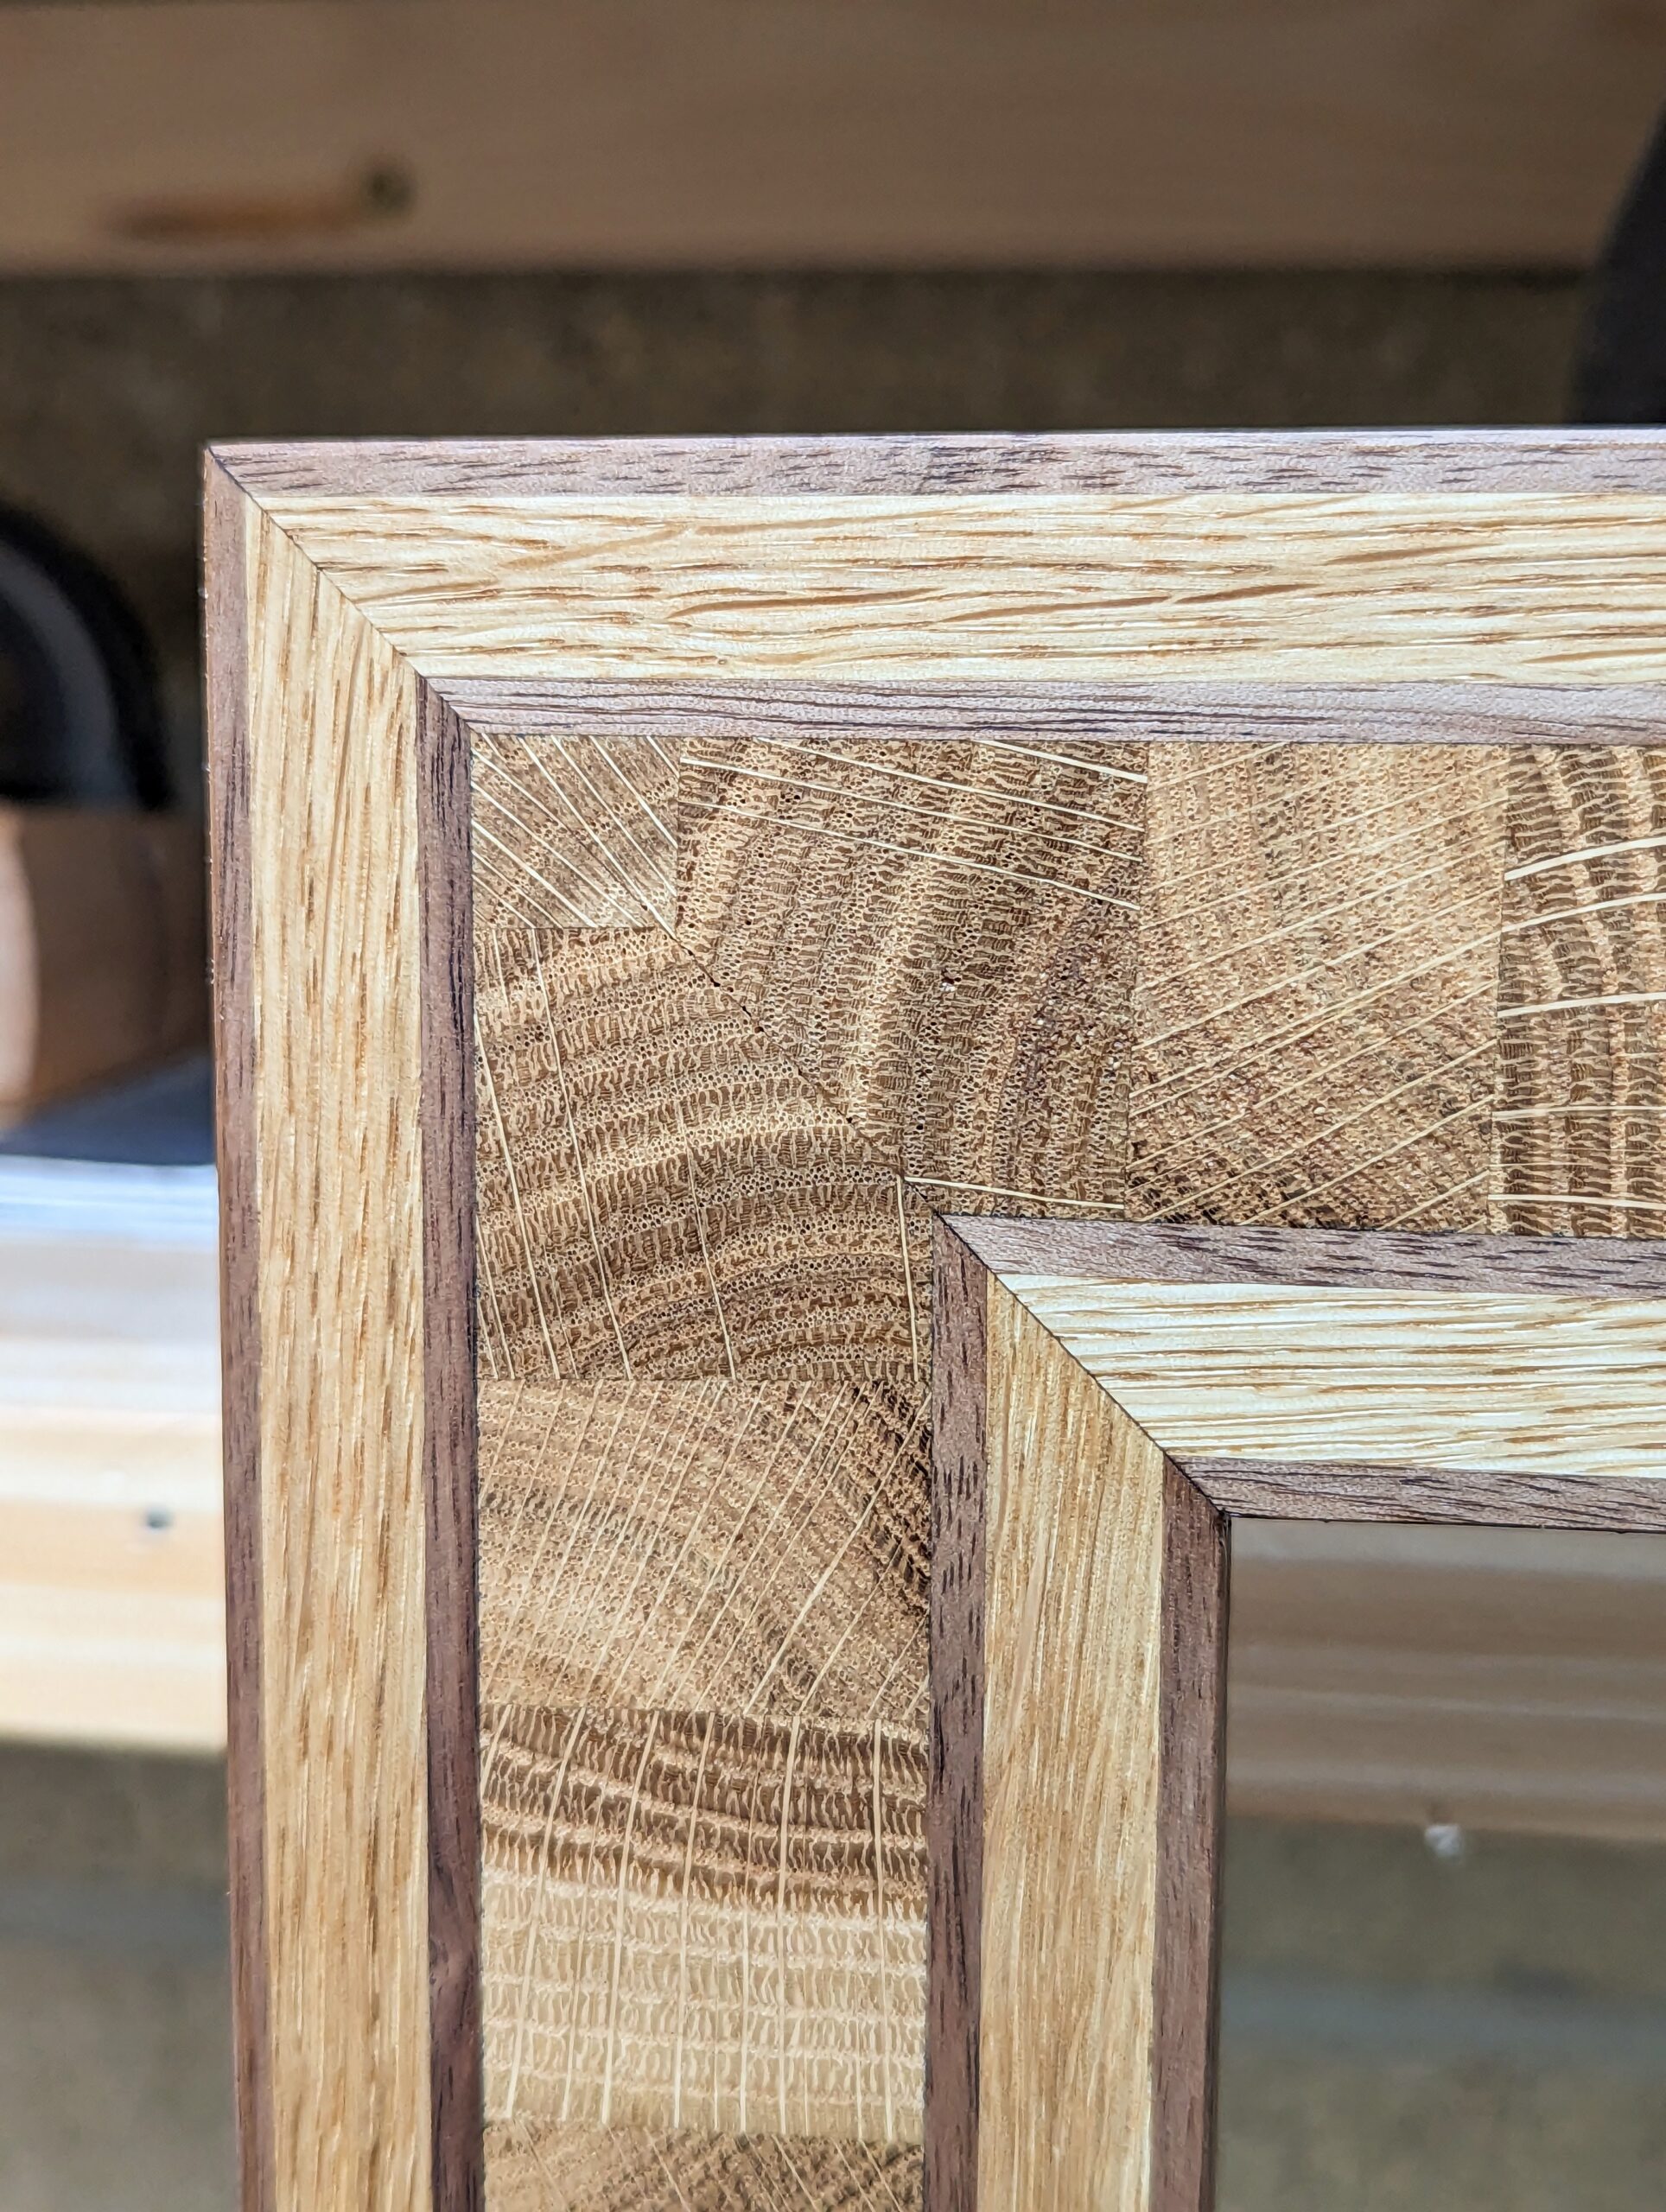
Unless all of the sides are equal in length, as in a square frame, you can only book-match three of the four corners. No one will probably notice the shortfall with the final one unless they are woodworkers.

Using sash clamps at the corners helps to pull the extreme of the points in if they have indeed opened slightly. I put a small strip of the same thickness as the facing to apply pressure to the corner as the oak frame is made slightly bigger so that the edge can be planed flush to the facing when dry.
Comments ()