A follow-up
The steeper the bevel is on a plane or chisel the more resilient the cutting edge will be but depending on how you use the blade will affect how it feels in the wood. Bevel down and with the blade elevated as in a bevel-down plane will make no difference. Bevel up, as in bevel-up planes, can make a marked difference depending on the steepness of the bevel at the cutting edge. Chisels are different. Chisels interplay throughout the day to be used bevel up and bevel down. Used with the bevel up is the paring cut used at the very lowest angle of presentation possible and an angle no plane can really work at. I doubt anyone would really notice much difference with steeper bevels on the chisel when used this way. An advantage of bevel-up planes is that it is easy to change the bevel by steepening the fore-edge with a micro-bevel topside; you might do this to plane potentially awkward grains such as figured or wavy-grained woods but, all too often, your bevel-up plane has already torn the grain irreconcilably by then so not always of benefit. Whether it is worth buying such a plane is a matter of pure choice. In other words, it depends on how often you need to change the dynamic because of the regularity you face in planing an area of wood that needs it. Personally, bevel-up planes work well on non-contradictory wood which is primarily end-grain planing only and that's why they are popular. On most low-angle bevel-up planes it is mainly the added weight that helps bolster end-grain planing. End-grain planing is always approached with a predictability that face-grain planing does not have at all. Bolting your thick iron to a mass of weighty steel with no frog linkage and no cap iron solidifies the coupling. No gaps between the cutting iron right at the mouth of the plane, as there is at the bevel of the bevel-down plane, even though quite small, then eliminate that minute flex at this critical juncture and that's why it feels and sounds different. Is it enough of a difference in planing the end grain of wood to justify spending £360 then? In my view no, not really. It's purely a matter of choice and preference. You will get excellent results with a well-sharpened bevel-down plane. Makers, demonstrators and sellers of planes (ultimately salespeople anyway) and plane irons even suggest that there is a "trick" and that, 'the trick is buying two or three extra cutting irons with different bevel angles, etc' that cost a mere £60-100 a pop. I think that that's quite a luxury for most woodworkers so I really do not want anyone to think that this will make anyone a better woodworker. I never saw a man use a bevel-up plane in my apprentice days even though they were planing end grain often enough most days. I say all of this only to put things in a bit better perspective! if you have disposable income spend what you like on what you like. If you don't then be discerning and put your money in the essentials. No one should ever think that a bevel-up plane does as much as a bevel-down one. it only does a small fraction of what the bevel-down plane will do but a bevel-down plane does everything a bevel-up version will do.
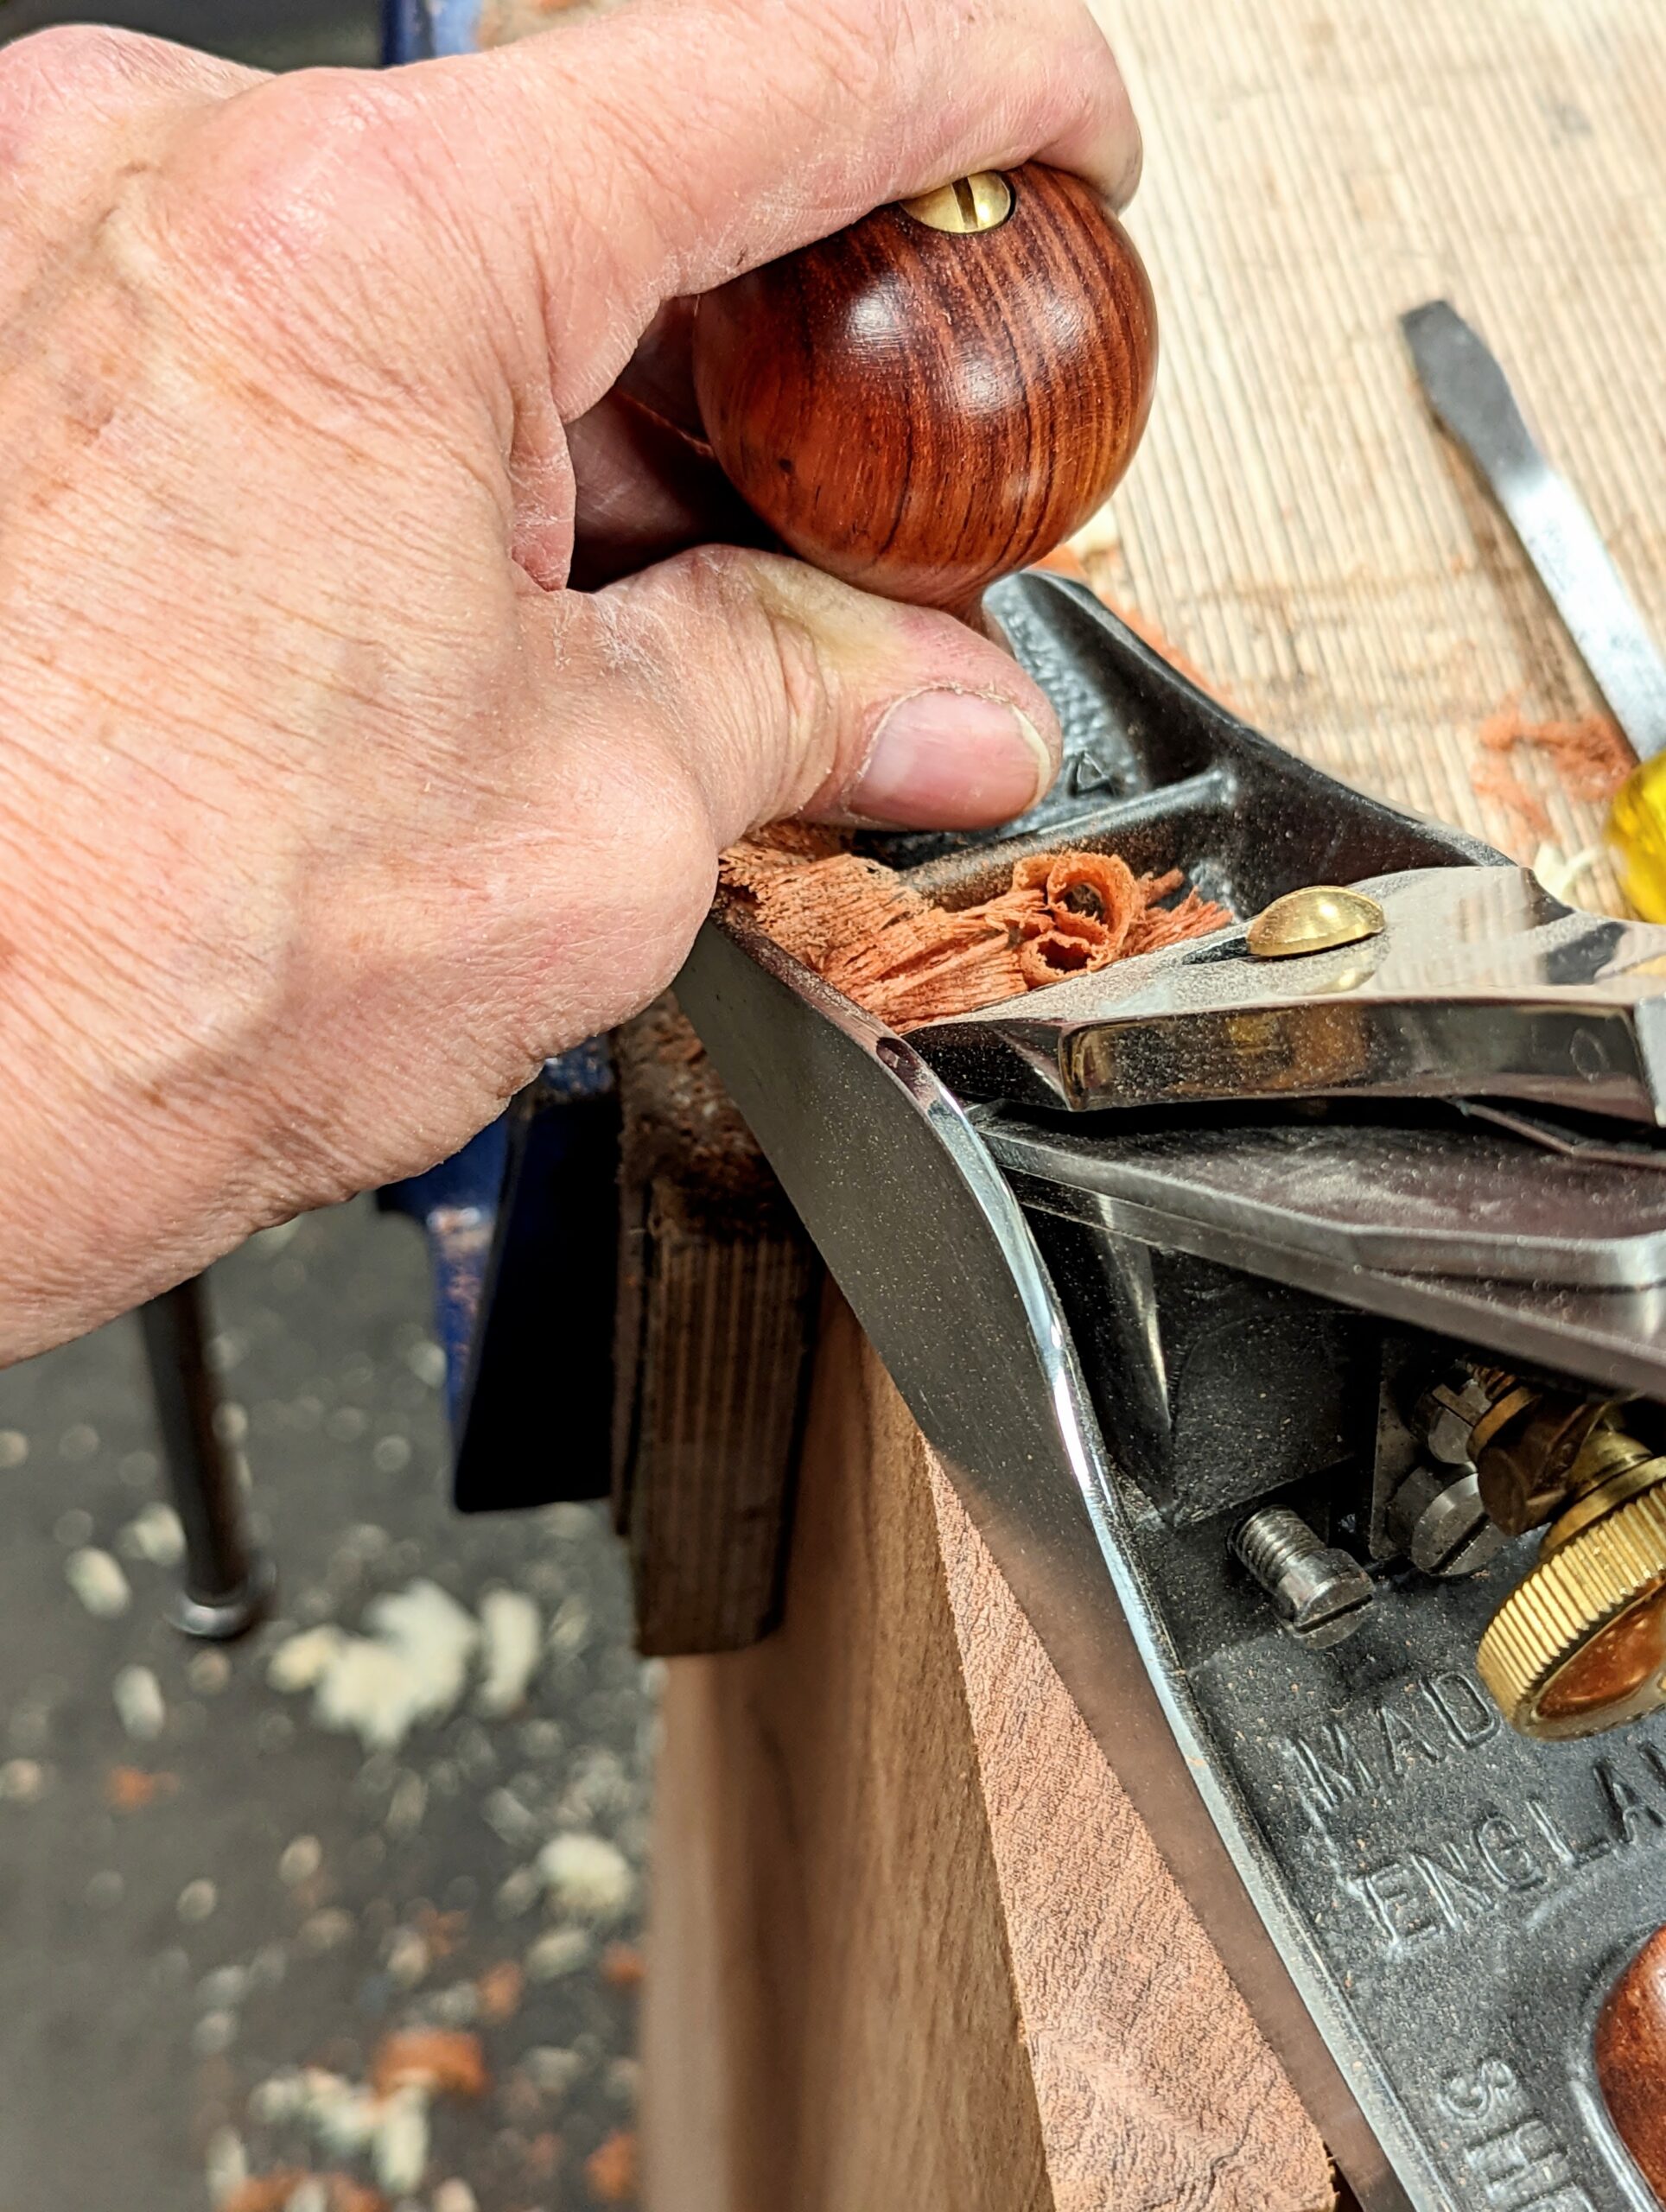
With a well-sharpened and correctly set plane, bevel-up or bevel-down, end grain readily planes no matter which way the plane is pushed from simply because the plane sole is perpendicular to the long axis of the grain. This effectively makes the cutting iron cut as directly as possible across the fibres because the wood has zero continuous grain that in face-grain planing can dip and dive in any multi-directional way it chooses according to its grain growth. The unpredictability is because in 90% of cases you cannot see these dips and dives and switches; we generally hazard our best guess at it. Hit rising grain and it's as if you took the switch-back too fast. The grain is ripped from its rootedness in the main body of wood beneath and a repair is most likely too deep to fix. How would you fix it? Funnily enough, always with the bevel-down plane you should have used in the first place. A bevel-down plane rarely tears anywhere as deep as a bevel-up plane will unless it's badly set and not sharp at all.
I am always surprised (and humoured) by woodworking lovers of bevel-up planes who tell me to change out the cutting iron for a steeper-pitched one. They never stop to think that these things are almost always unpredictable and the damage has already been done. They don't live in my world of real making where the bevel-up plane is so very restricted in its functionality. Do I own bevel-up planes? I do. I own two modern ones and then the most beautiful vintage mitre plane from somewhere in the 1800s. Do I like them? I do. The reason I share these things is not at all to be ugly or discredit fine people making planes but because mostly they are unsaid by authors and makers of fine furniture and if I don't I am guilty by default.
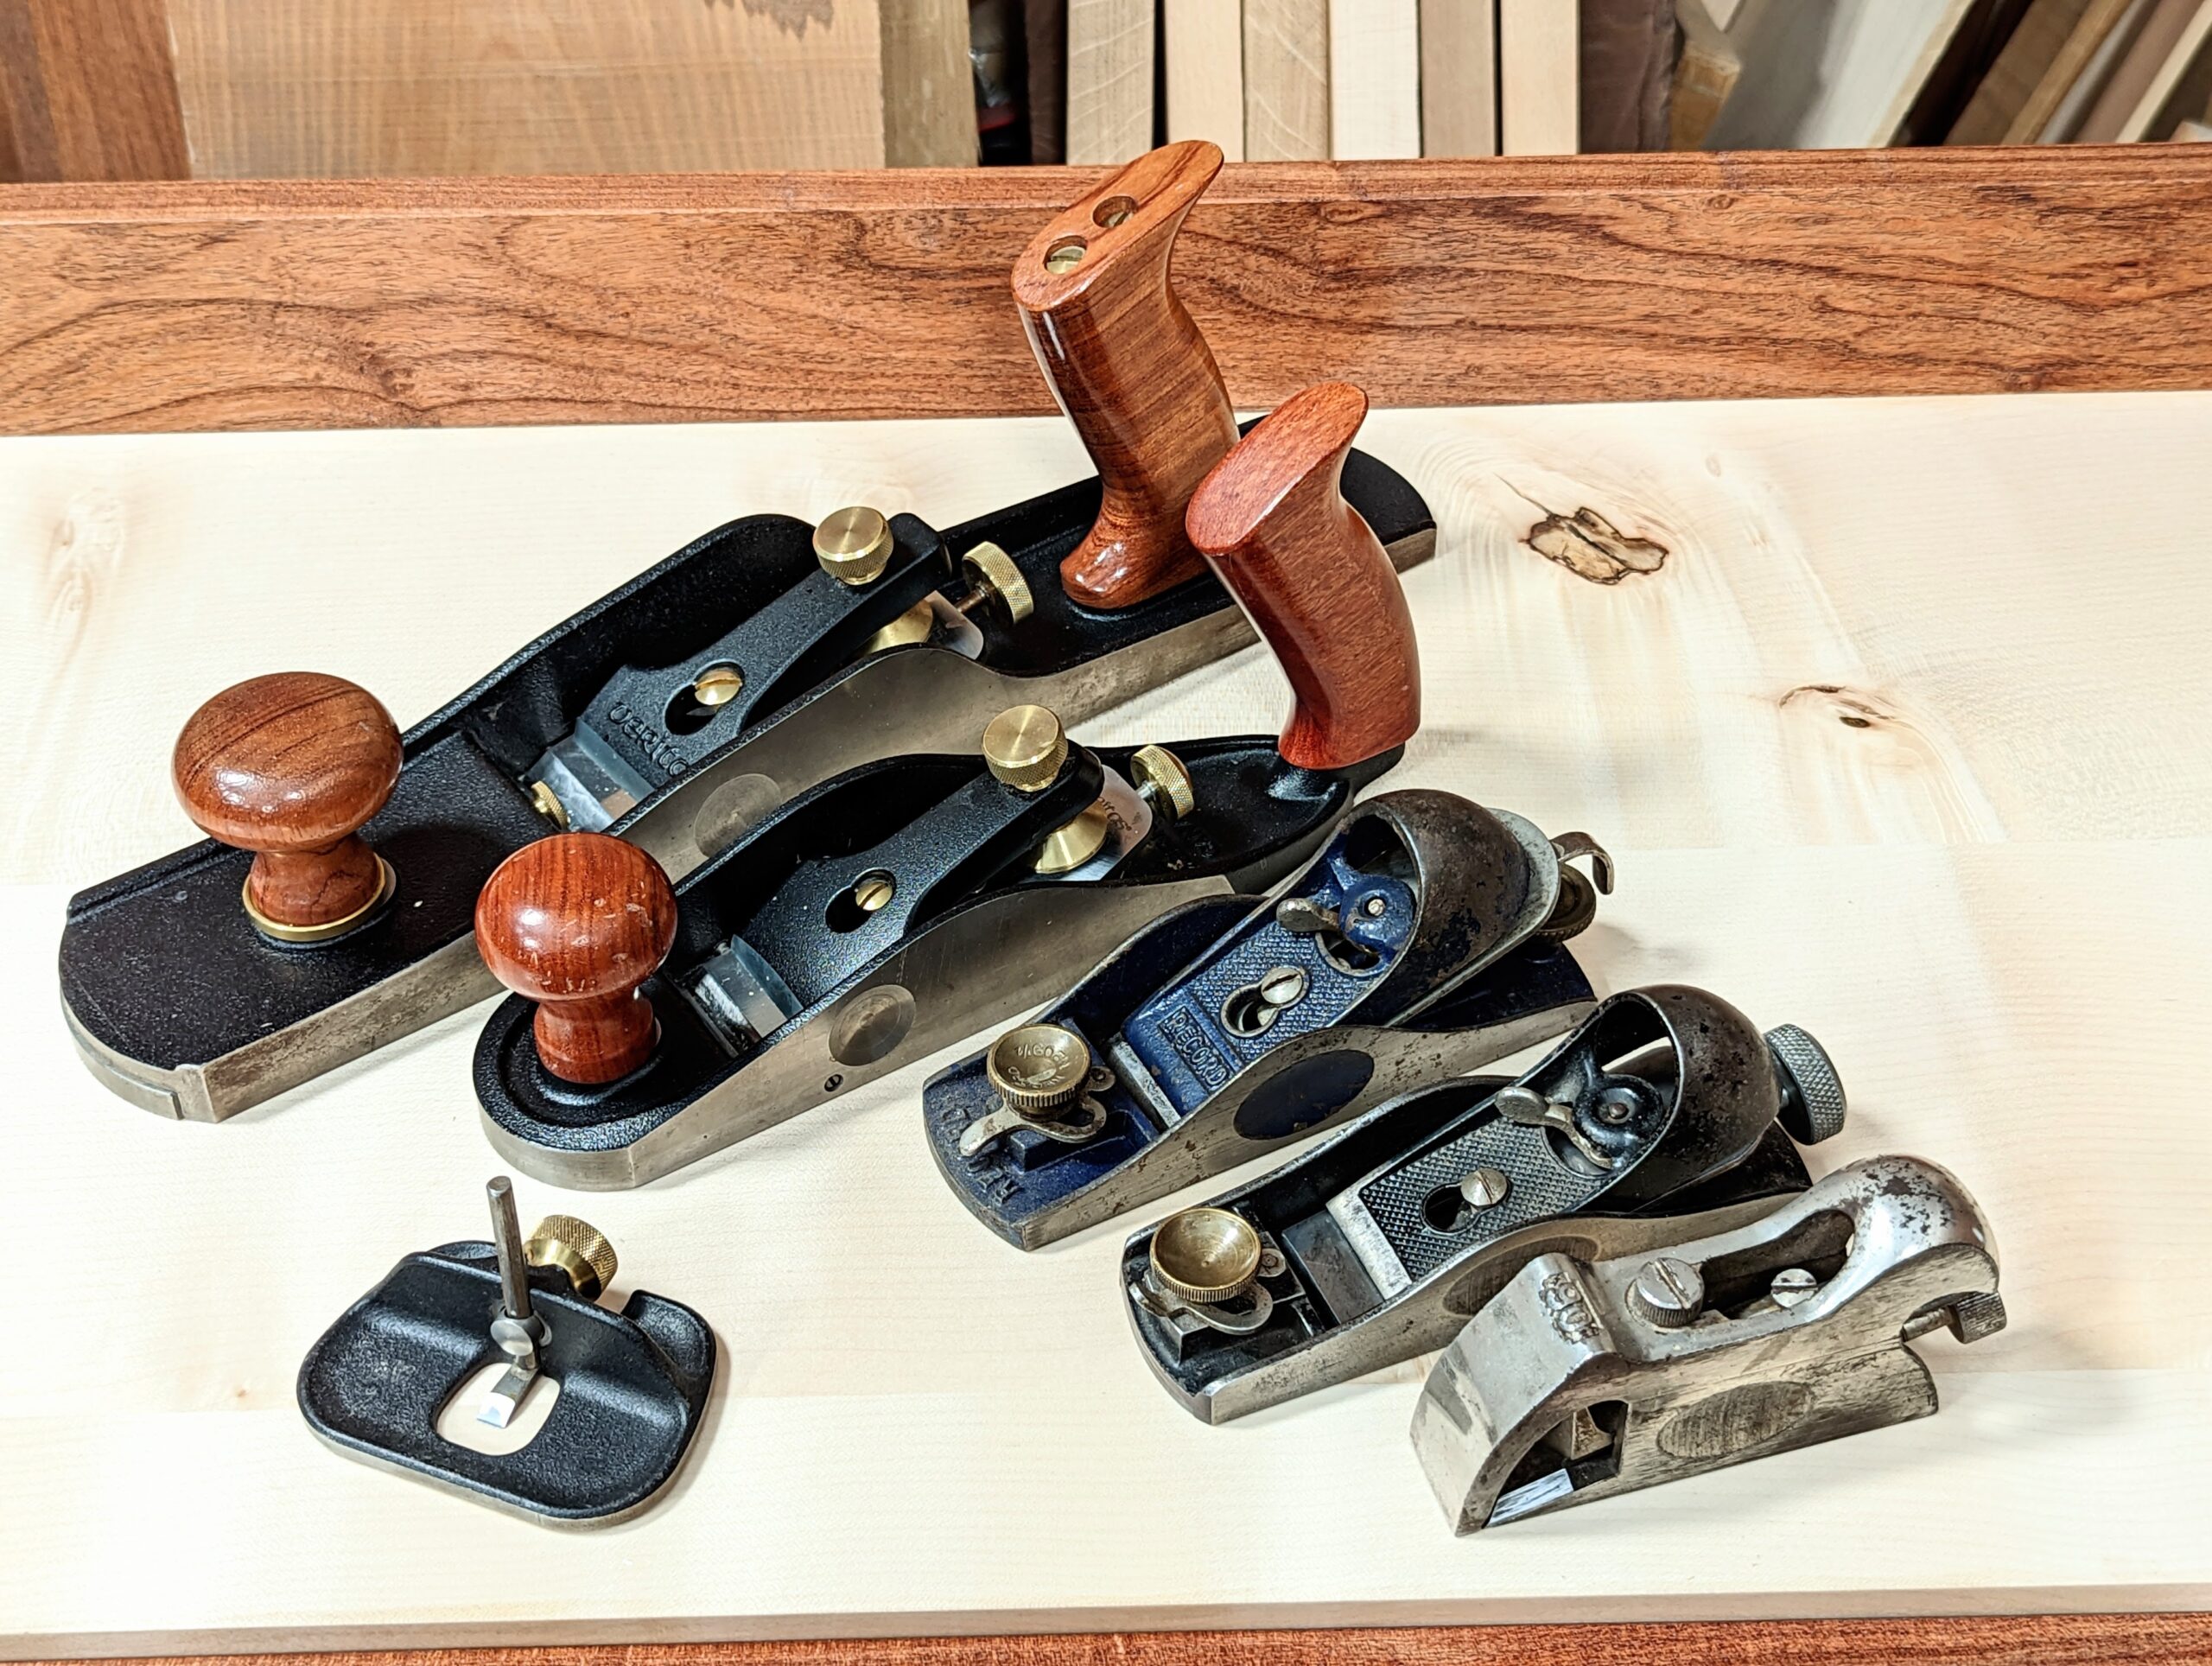
Most router planes are low-angle bevel-up planes with dedicated and limited use. Because these bevel-up versions work with the blade suspended and therefore without a bed to sit on at an angle, the blade presented to the wood needs only the smallest relief angle beneath the blade. Their main function is to level the bottoms of different types of recesses to ensure evenness and then too parallelity to the upper surface. They are ideal for recessing hardware such as hinges, catches and so on. In use, they work more like a chiselling pare-cut.
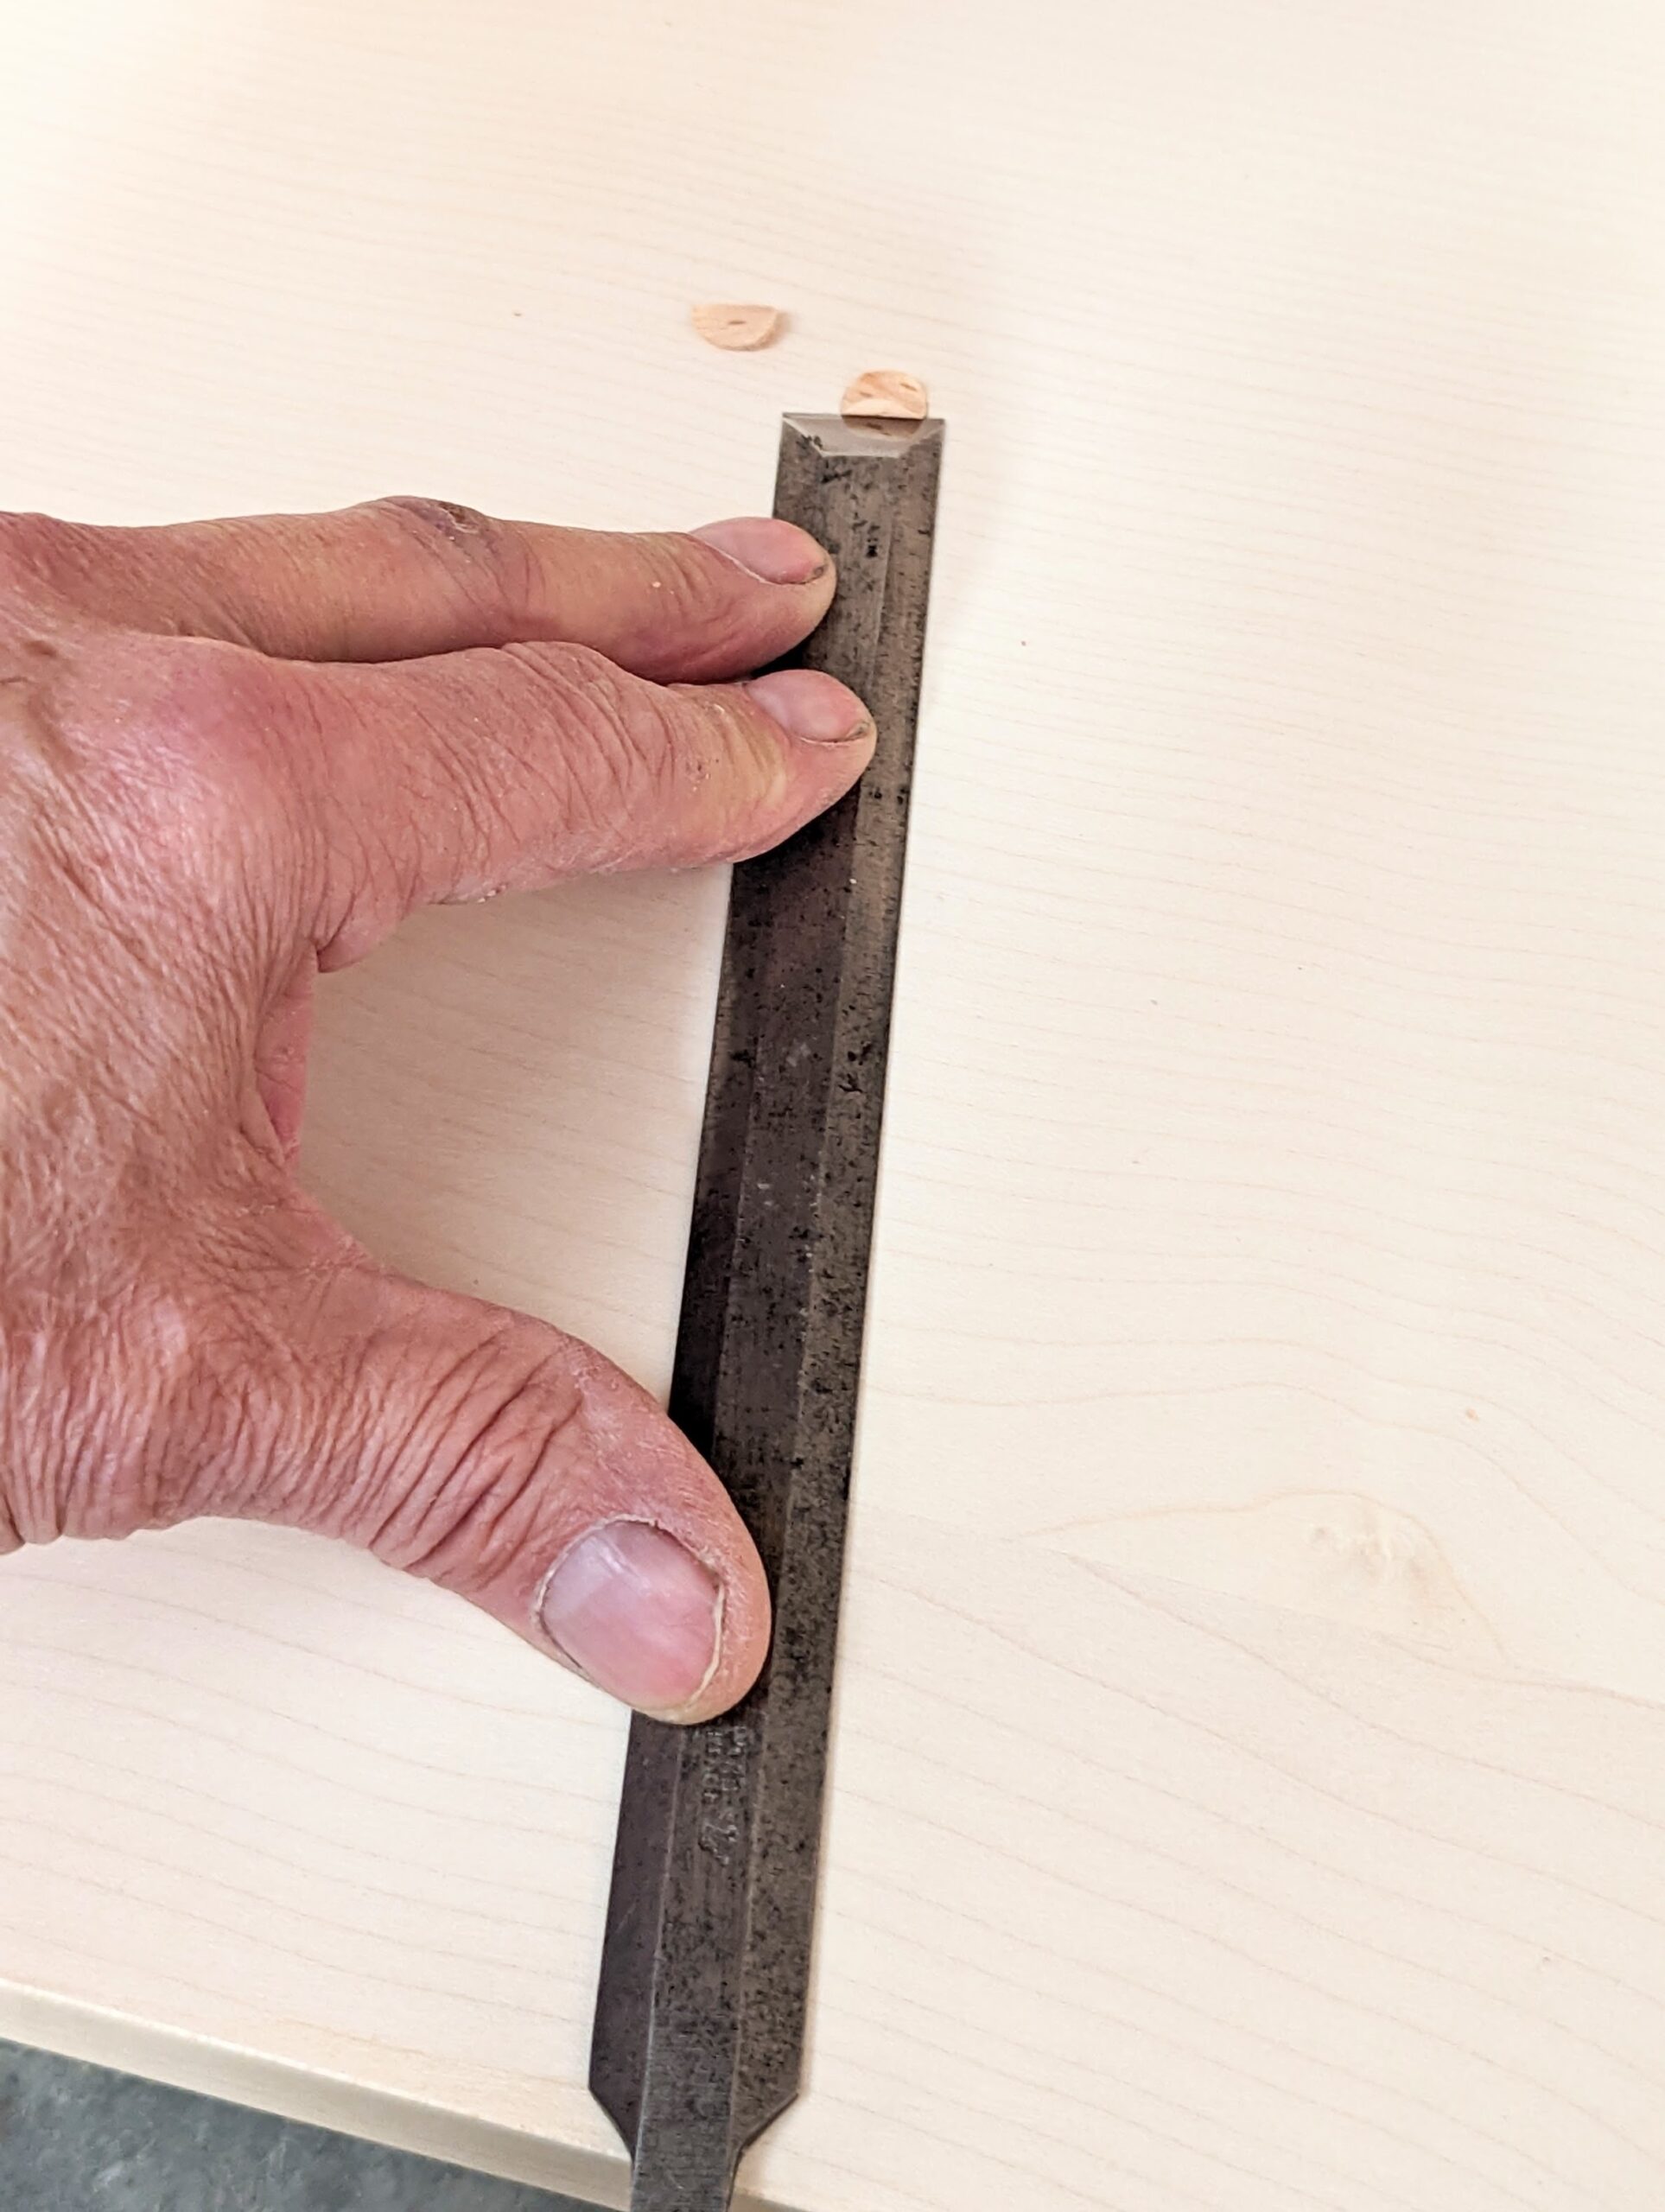
Though we refer to surface trimming with chisels as paring cuts, and we can use just about any chisel to pare with, we also have very specific chisels that are called paring chisels. These chisels are long-reach chisels designed to reach into inner surfaces such as long dado-housings or pare cutting a few more inches into the centre of a board and the like. A paring chisel is long and thin and comes in various sizes for the different widths of dadoes, etc. A couple of other tools will work well for paring but are is seldom spoken of.

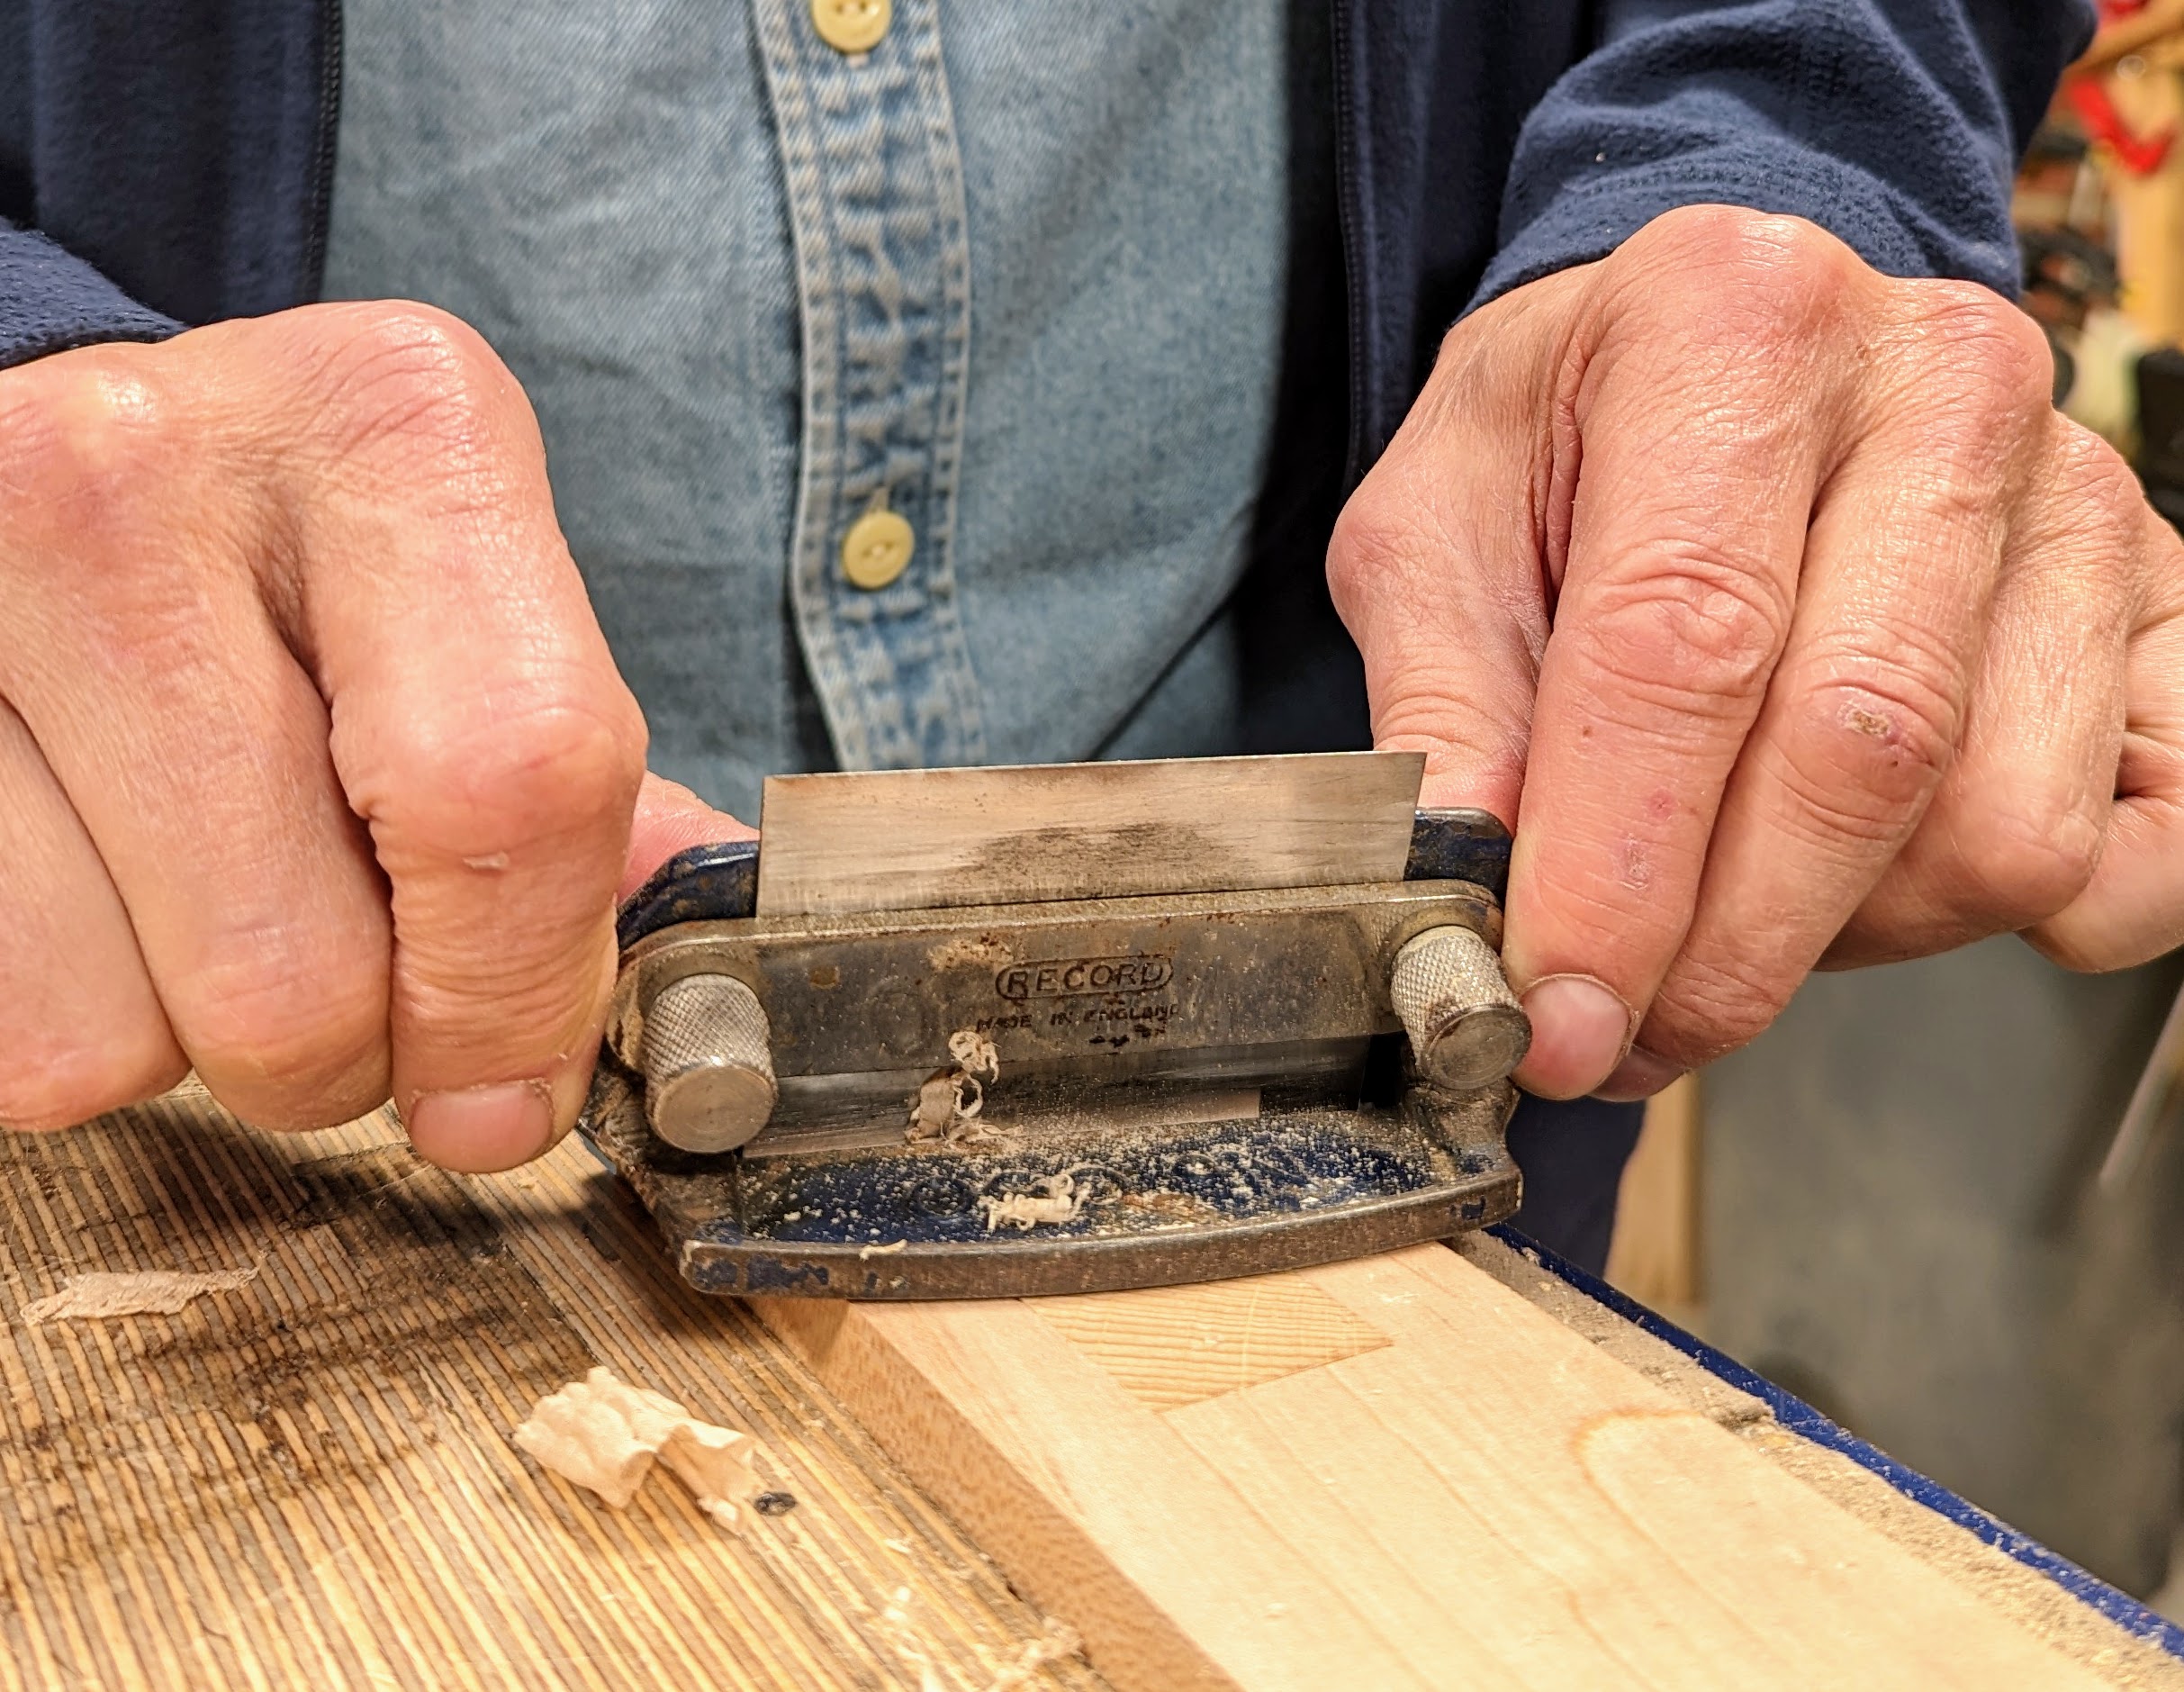
On an open surface, both the bullnose plane and the hand router will usually take care of levelling the excesses of a protrusion. So-called chisel planes are also available but hardly worth the money at all. Better to go for a bullnose with a removable front if you think you need one, that way you have two planes in one with the highly essential bullnose plane to boot. Can't lose! Then you also have the cabinet scraper and the card scraper to follow up with after any chisel work.
Also, remember that it is good to practice trimming protrusions with a bevel-down ordinary bevel-edged chisel. It comes in handy to own this skill when in a bind. Mostly we lock the chisel to a rigid contortion of hands, arms and upper body and shoulders and jab at the protrusion in short repeated stabbing actions. We can also use a chisel hammer. Watch for grain direction and work from the best side so that the split cuts rise from the surface of the wood and don't nose dive deeper than the surface.

Bevel-edged paring chisels are about twice as long as a regular bevel-edged chisel: about 9-10" long is standard. In the days of pattern making, paring chisels and paring gouges were used extensively by pattern makers for making moulds of every kind used for sand casting molten metals. Plastics shaped and moulded by CNC machines and now 3D printers have replaced this craft completely. Paring chisels are very thin and can be moderately bent to sit flat to the wood for highly refined paring cuts near to the protrusion but many inches from the handle. I would suggest you never resort to using mallets on paring chisels except for the most gentle of taps. They can buckle and crack or even snap.
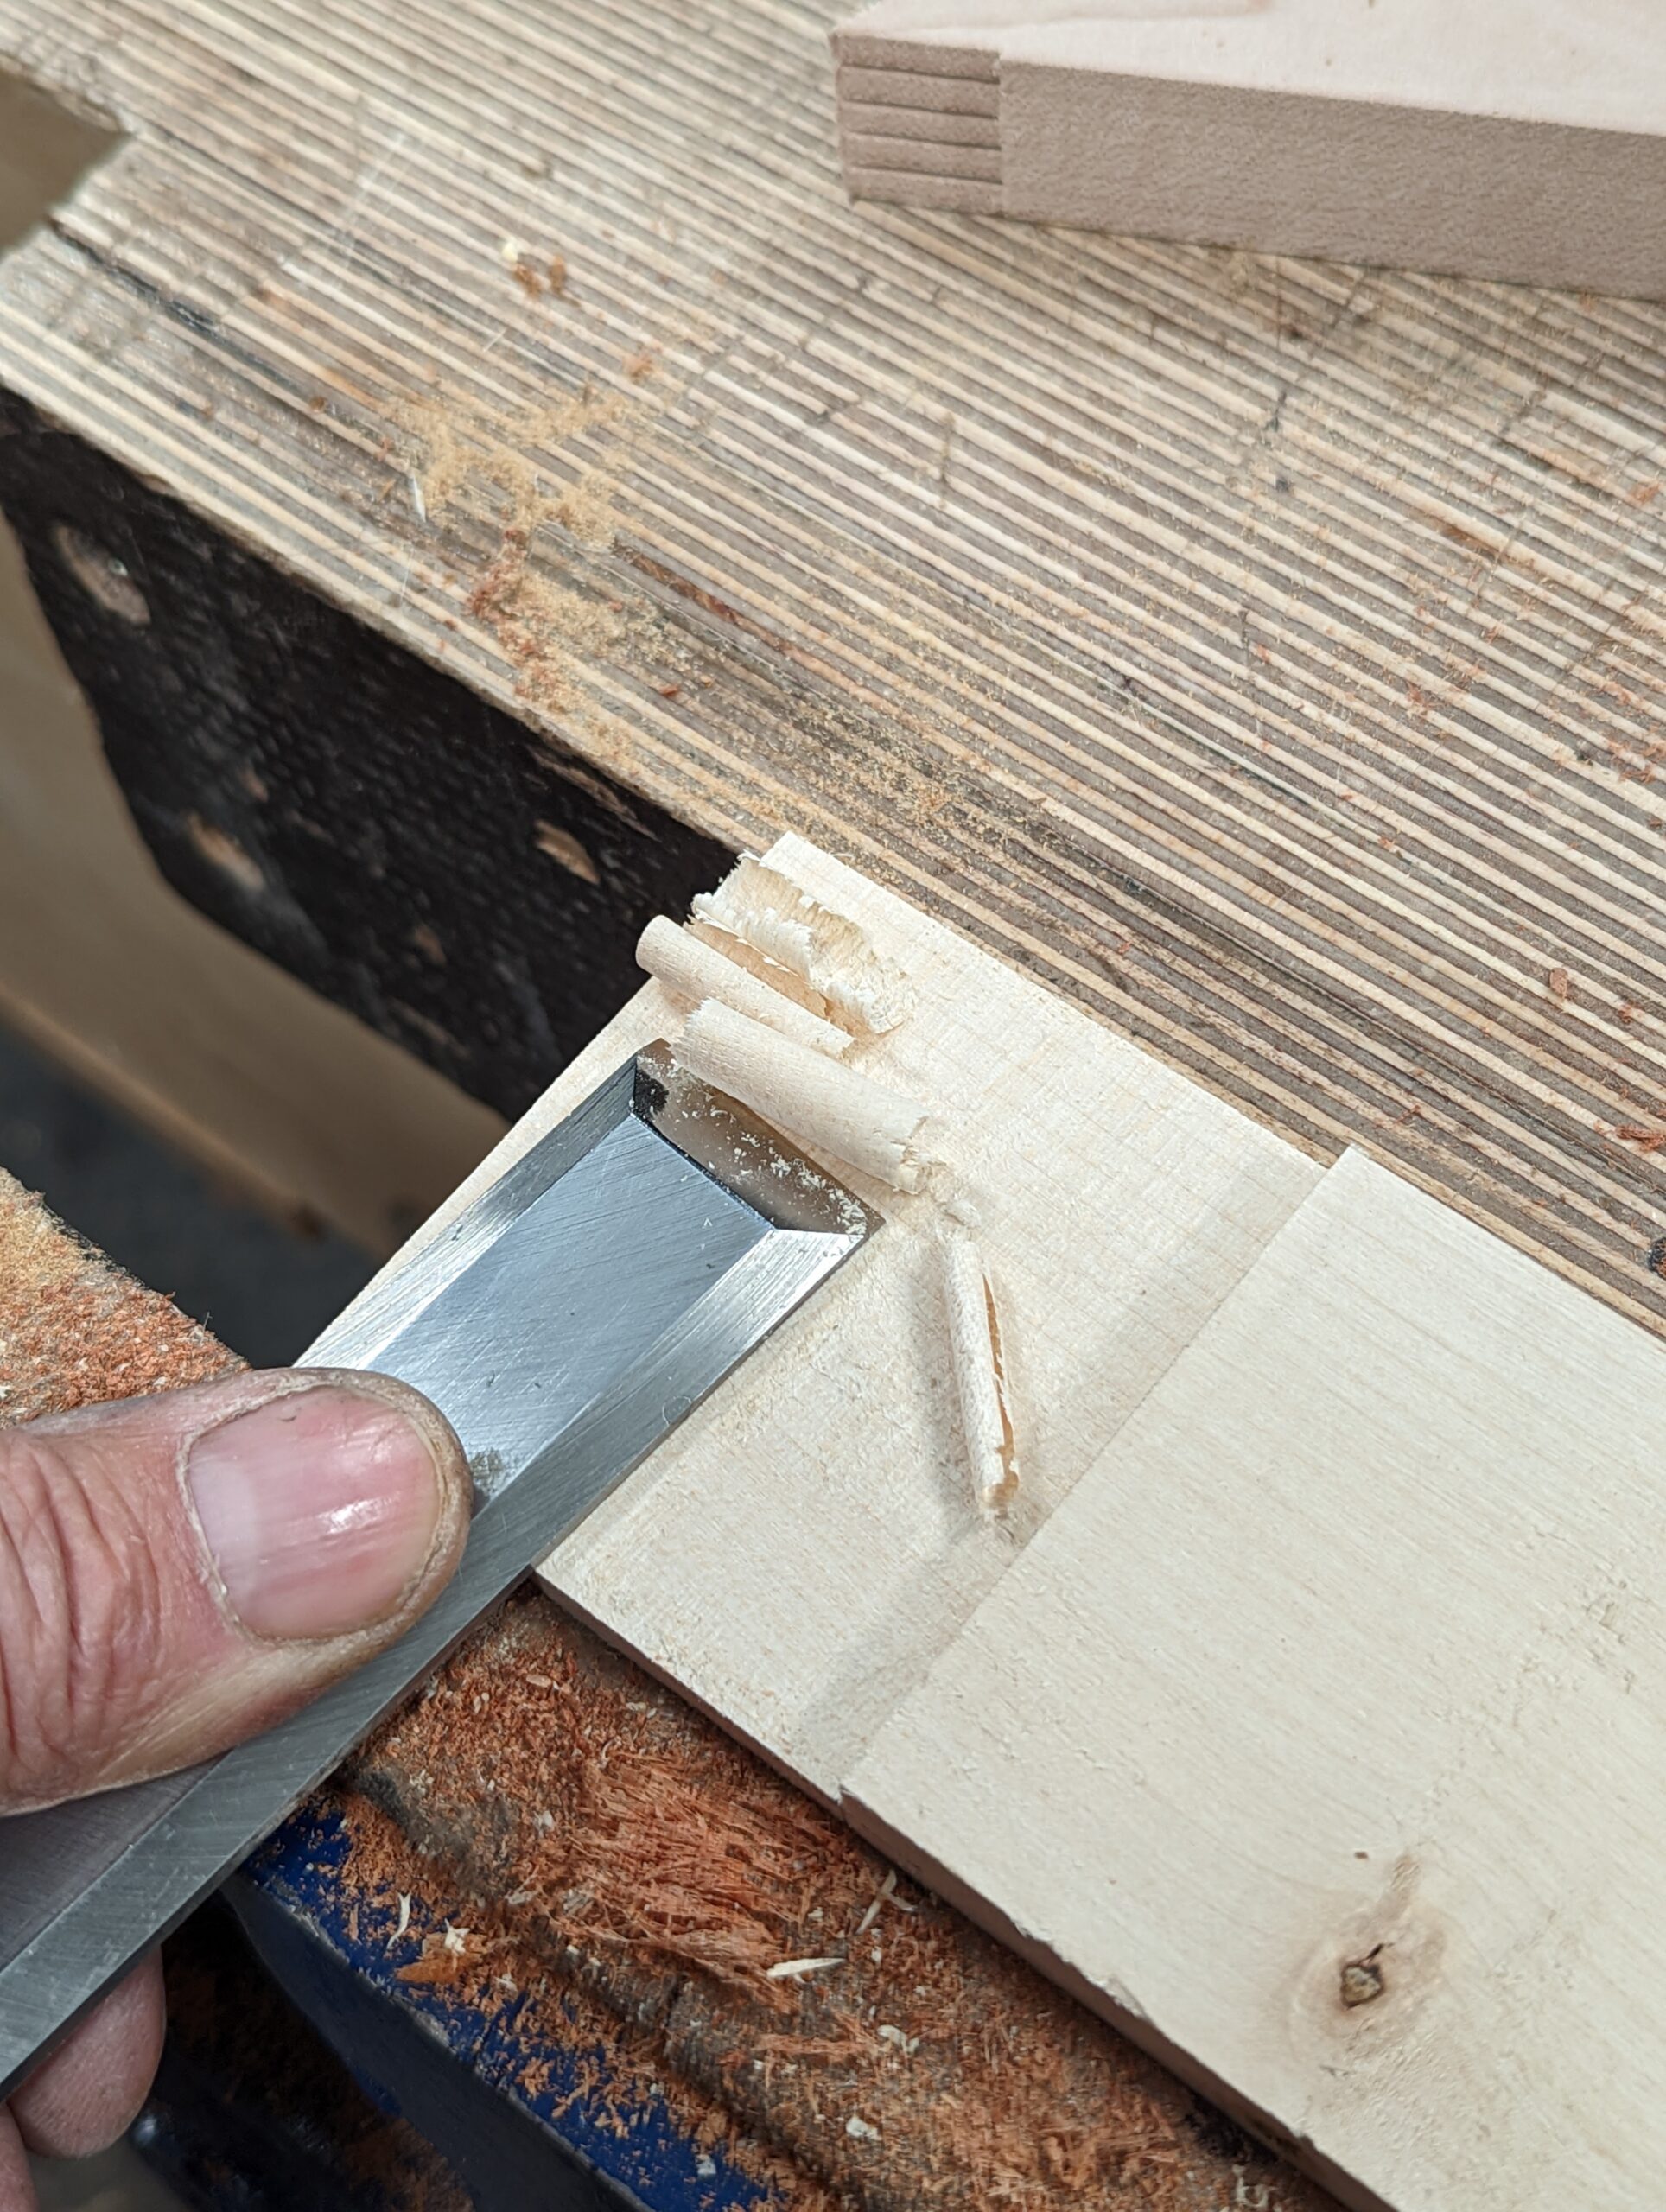
Surface trimming tenons with paring cuts from a chisel allows for very variable depths of cut and is especially well-suited to cutting across the grain as shown. Pare cutting gives you a very high degree of control because of the length of the flat face of the chisel where you can incline ever so slightly to reduce the height of protrusion very gradually down to the final levelling stroke. If you have a lot to do it works well but you can combine this with the use of the bullnose plane level with the face of the sole to take that final pass. I do this when I have many plugs to trim. Another trick is to use a regular bevel-edged chisel bevel down with the cutting edge a millimetre or two above the final surface, pop it with the chisel hammer to check for grain run and then final trim with the bullnose working according to the grain.

Abrading to different angles to establish a primary bevel is best done with a honing guide. They usually keep the tool square and allow good control for applying even pressure to the abrasive through the honing guide. Of course, it is faster to establish the skills of freehand sharpening and honing but that comes with time. the honing guide helps you to develop muscle memory for honing and today I always hit the mark without using the assistance of a guide. Does that mean I don't use a guide? Most of the time I don't, no, but if I have a lot of correcting to do, say after a longer class of 15 students, I will use a guide and even a grinder if they are far out.
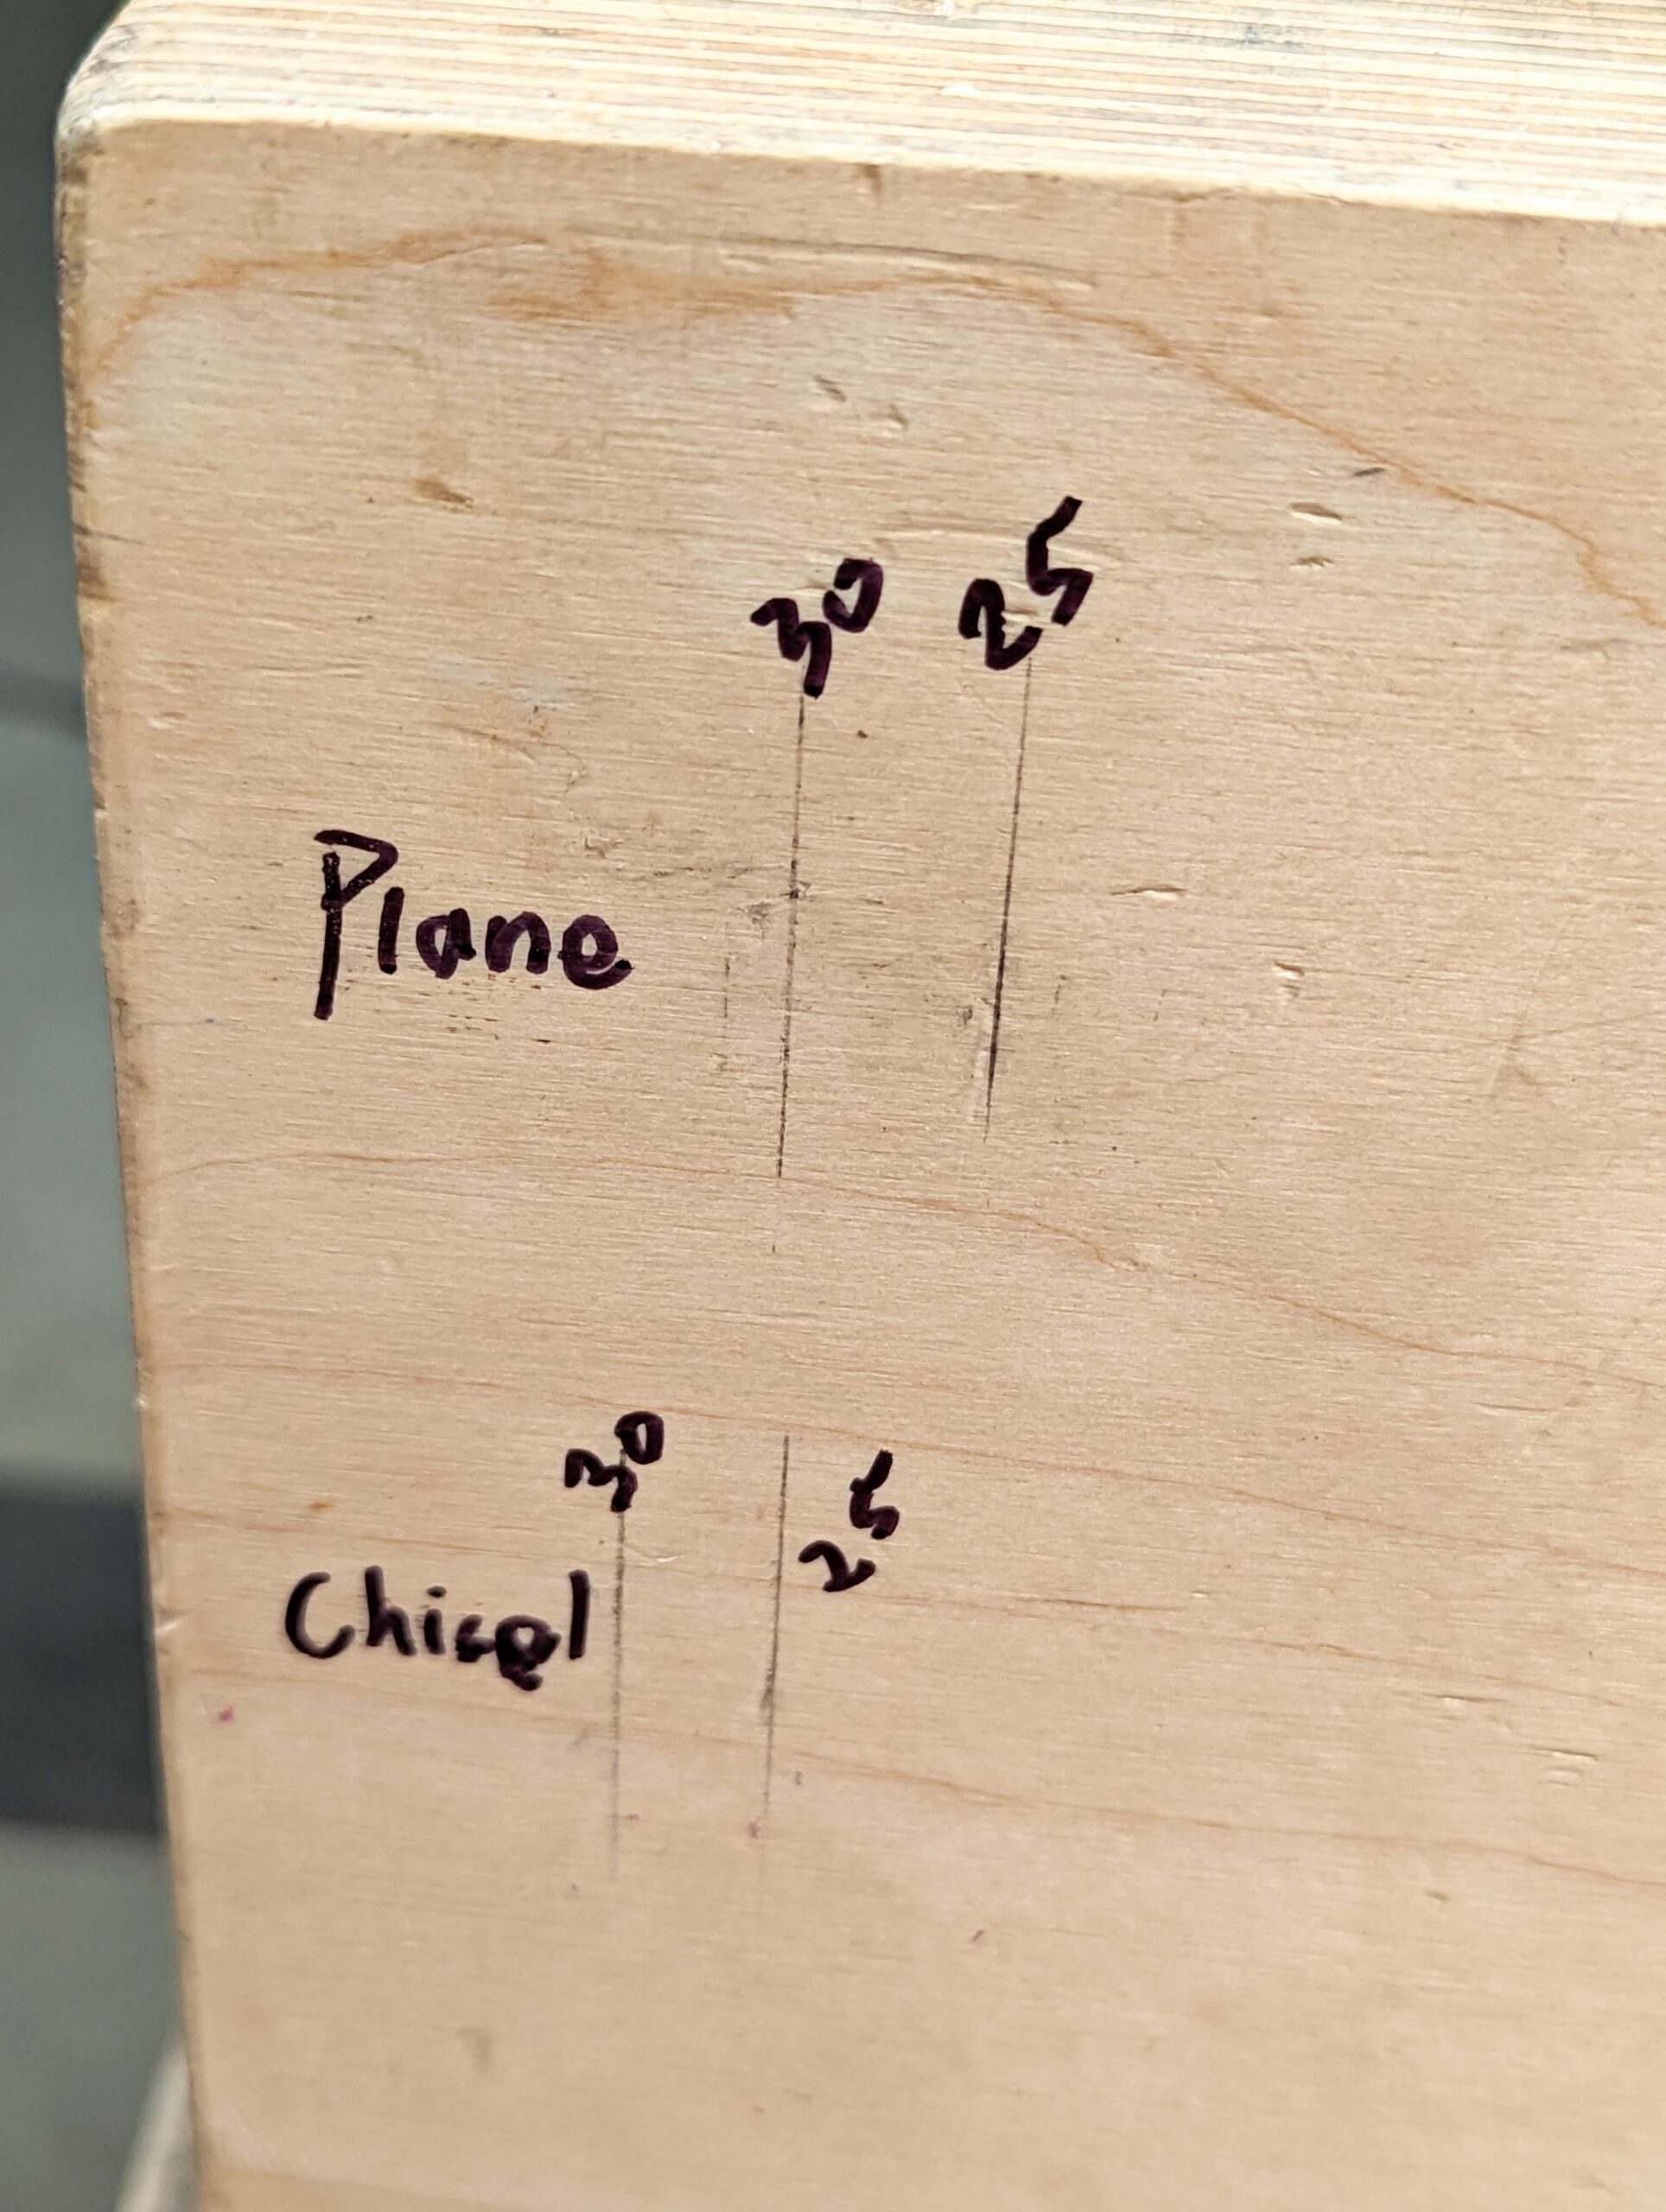
In the day-to-day of my work I have four marks on my workbench even though I do not advocate double bevel sharpening as in primary and secondary bevel or so-called micro-bevel sharpening. The marks are a quick reference for setting the chisels and plane irons to specific angles. By bumping the edge of the honing guide up against the edge of the bench apron I can slide the blade to the correct distance, cinch tight and go straight to the appropriate abrasive. I have yet to find anything quicker.
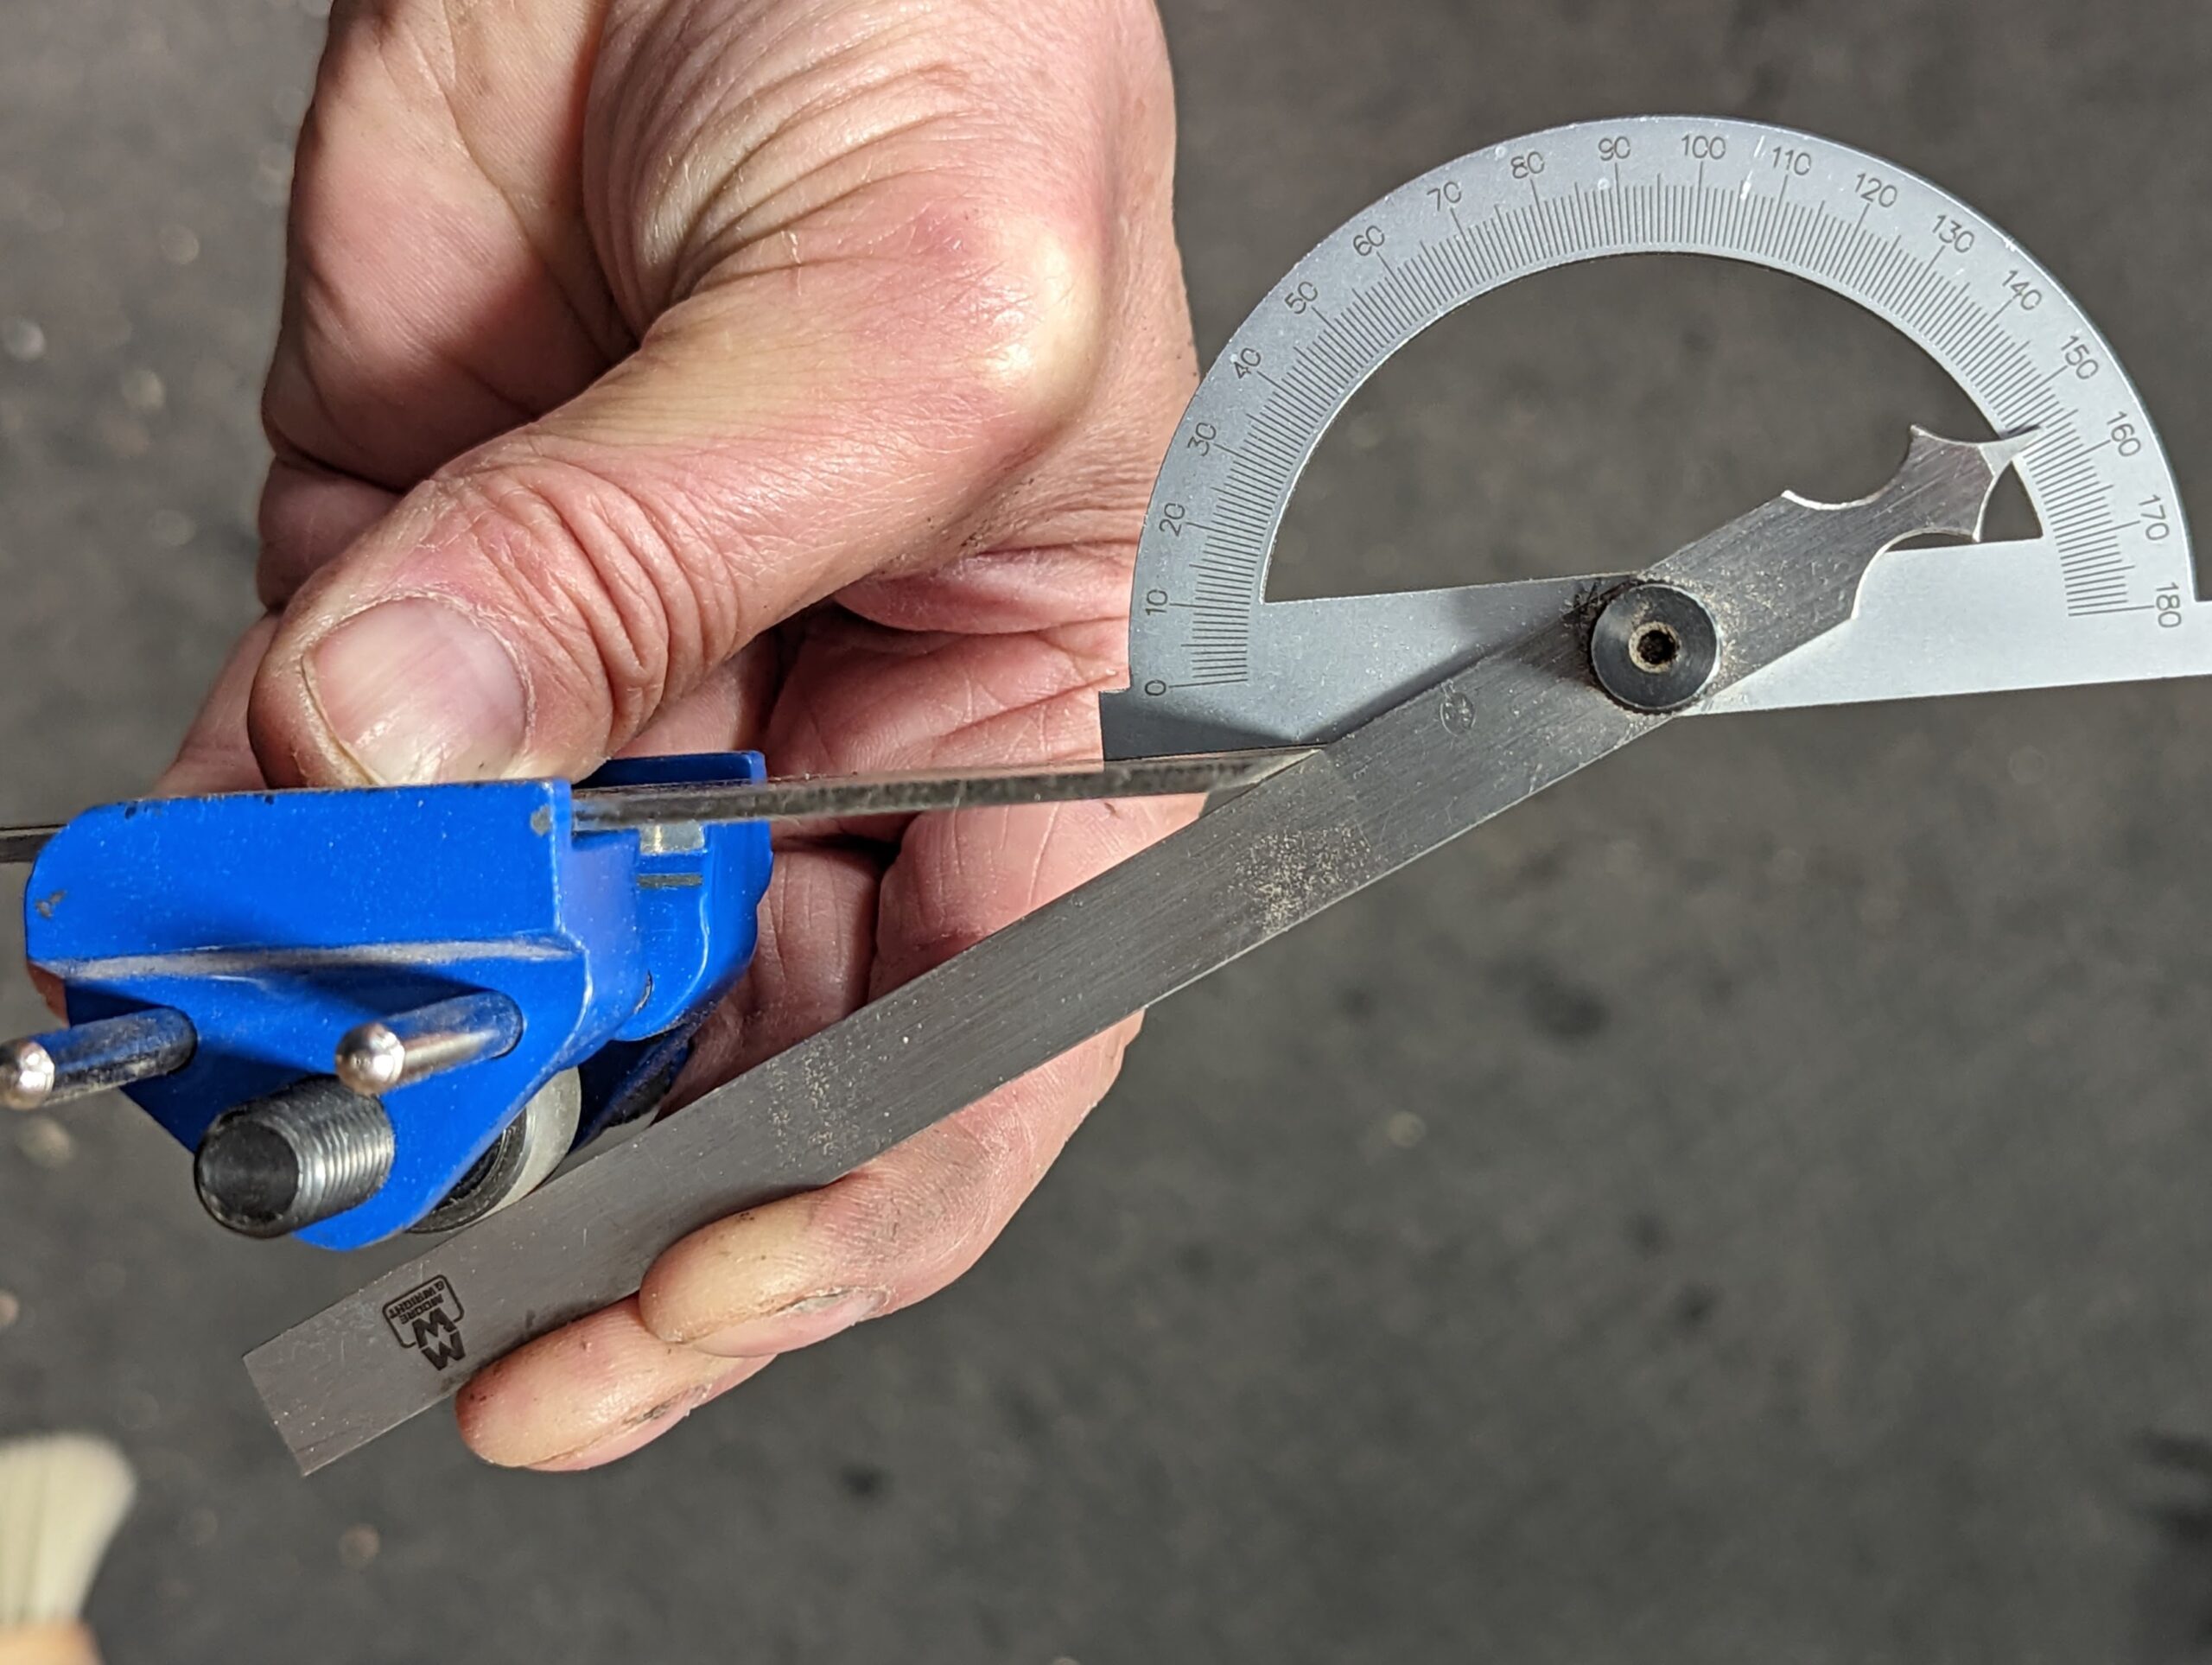
To set up this system, install the tool at the appropriate level in the guide (this Eclipse guide has two steps, one for plane irons the other for chisels. That's because of the different widths needed) and slide the tool along with a protractor set to the appropriate angle; see below. Lock the blade in the guide and place the honing guide against the end of the apron. Mark that distance on the apron and all you have to do in future is set the plane in the guide according to the mark on the apron. It is generally accepted that chisels, planes and spokeshaves are first abraded on a coarser paper to establish the 25º angle the full width of the bevel. By using a protractor angle finder you can set the distances of 25º and 30º on the bench.
Because chisels are narrower than plane irons, the honing guide has a narrower holding part beneath the plane iron recess on the guide. Because of this, you need one setting for chisels and another for plane irons. Hence the two holding areas that can seem confusing as to reasoning.

Comments ()