MAKING A Drill Bit GUIDE
Even with experience, it can be difficult to drill holes square to the wood in both directions with a handheld drill no matter the type. In cabinet work, we often rely on holes to be as perpendicular as possible for accuracy, alignment, etc, and even when we do have a drill press it is not always possible to take the workpiece to the machine. I use a simple homemade guide that can be made from scraps in just a few minutes and that ensures the hole runs true to guide either pilot holes for screws, twist drills and auger bits and more.
The following steps will show you how to make the drill guide. I designed it to work as a guide in making many projects as in the case of making my router plane where accuracy is critical for attaching all of the metal components.
Making the Guide
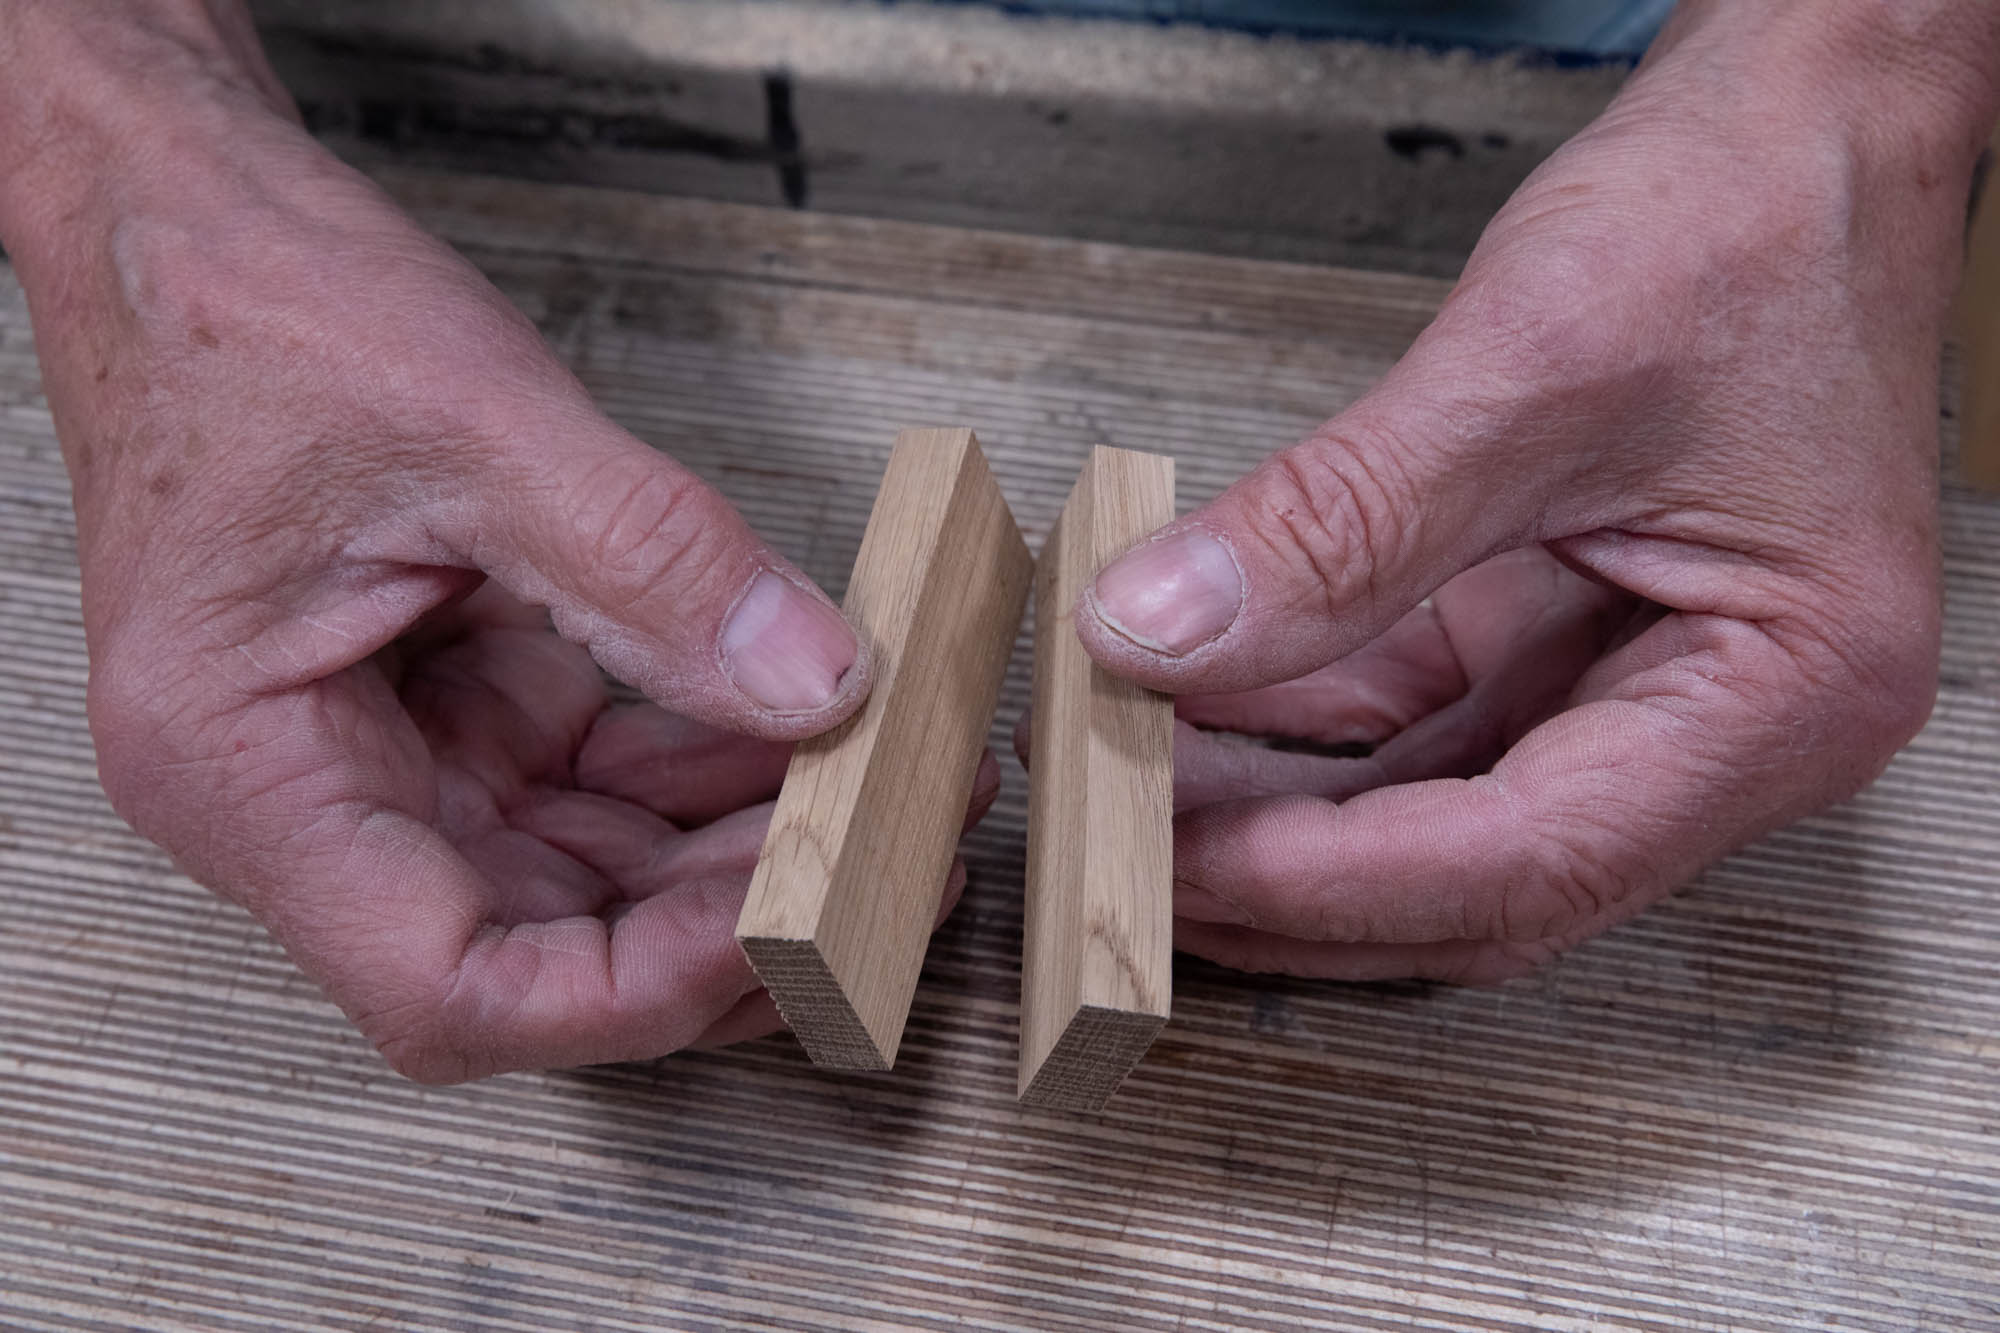
To make this guide, I started with a block of wood 3" long by 1" wide and 7/8" thick (approx. 76mm x 25mm x 21mm). I trued the block square and straight and then ripped it down the length so that one half measured approximately 5/16" (8mm) and the other 3/8" (10mm). (I did this so that the guide would sit against the internal corner where the upstand meets the base on the router plane.)
I used the bandsaw to rip the trued blank into two but you can saw down accurately with a handsaw and true up the joining faces. You could also start with two separate pieces of wood, as long as they are square and the same height.
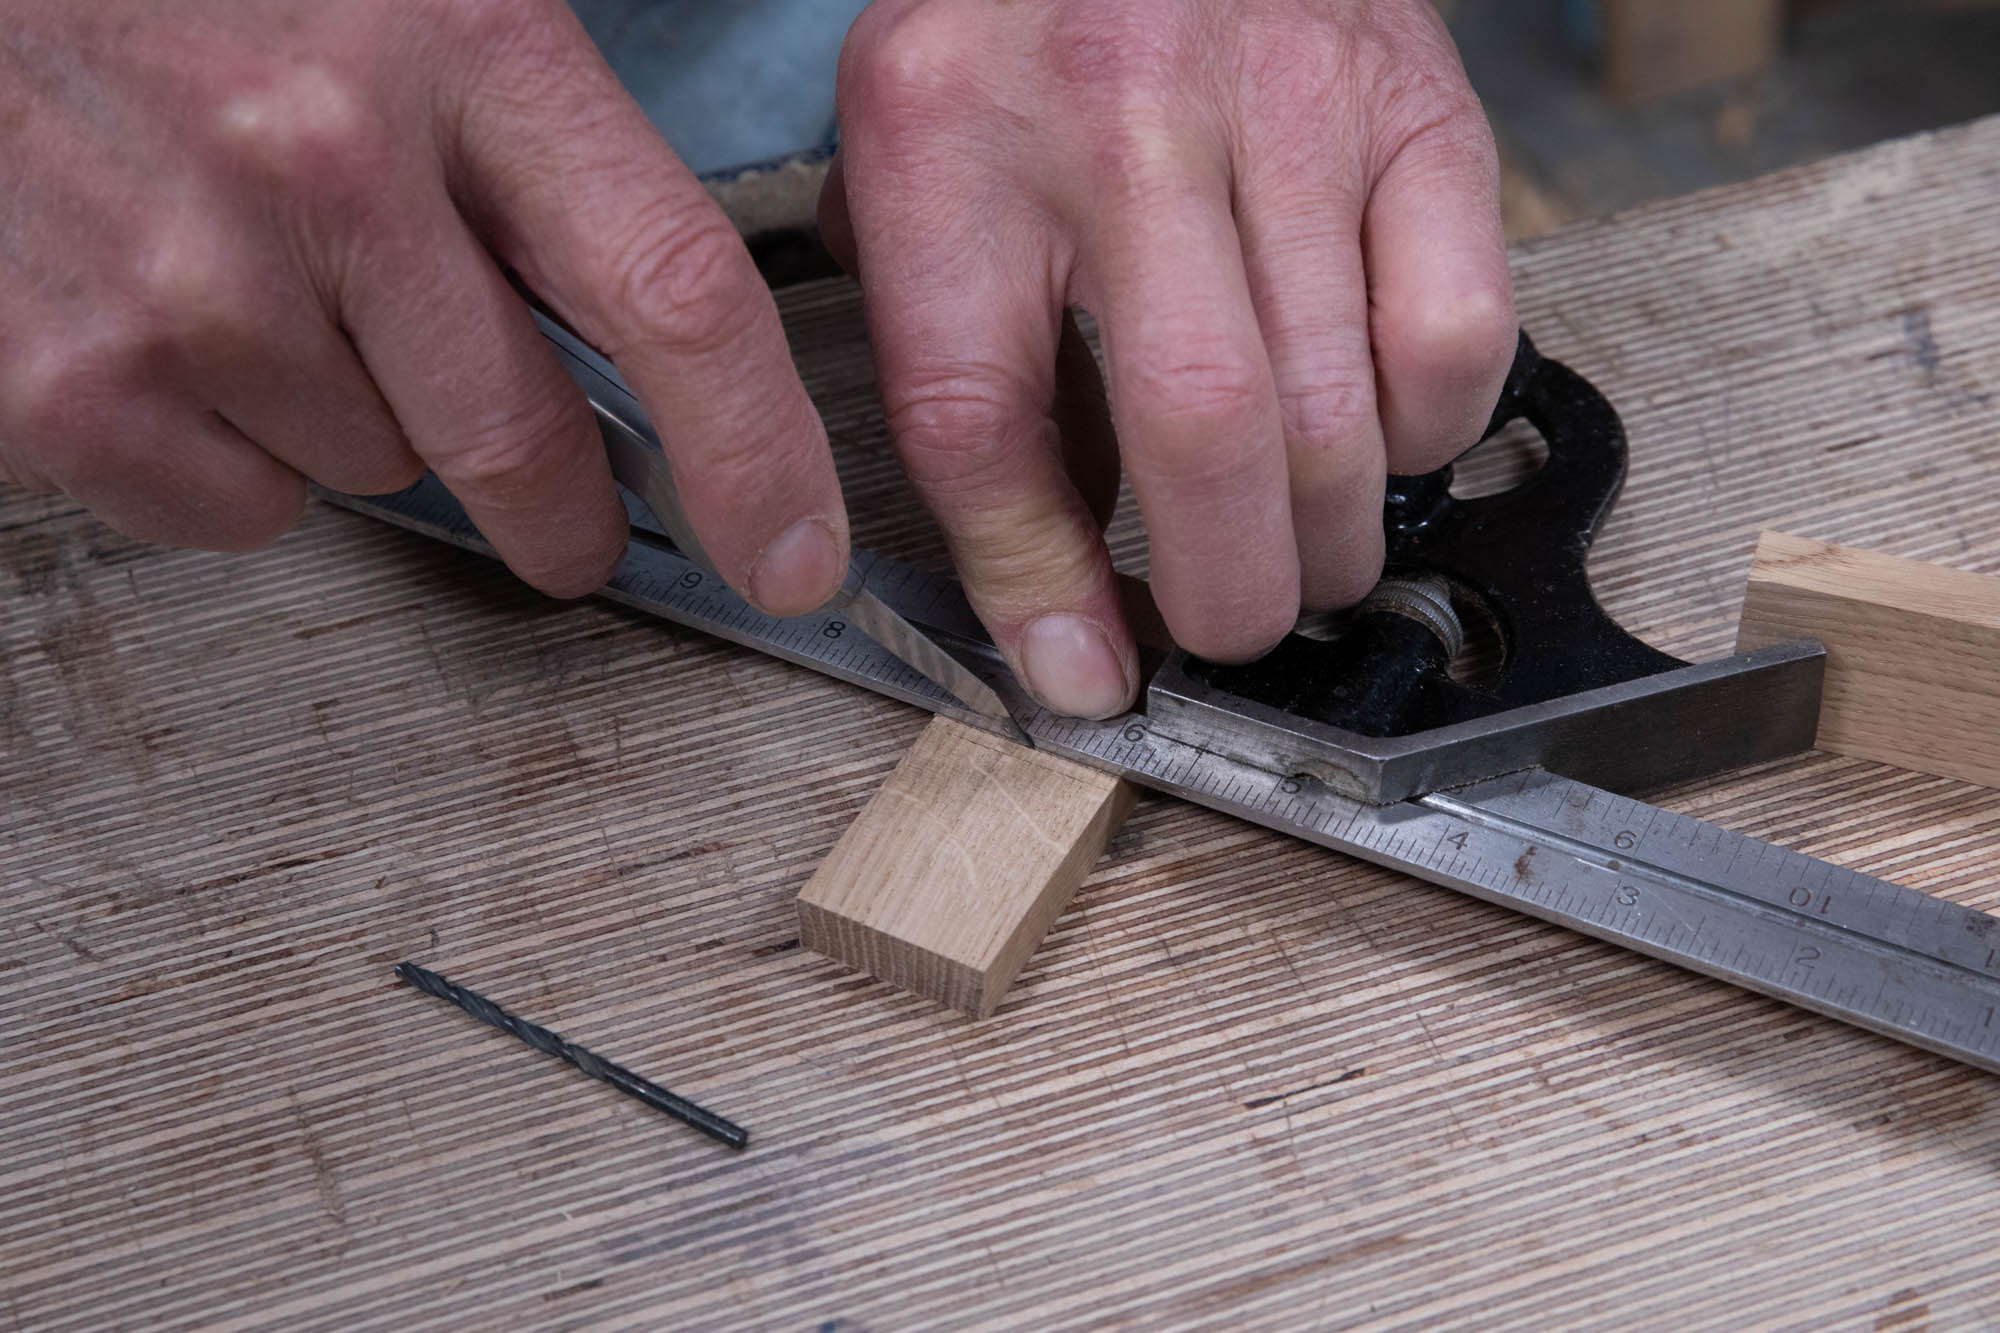
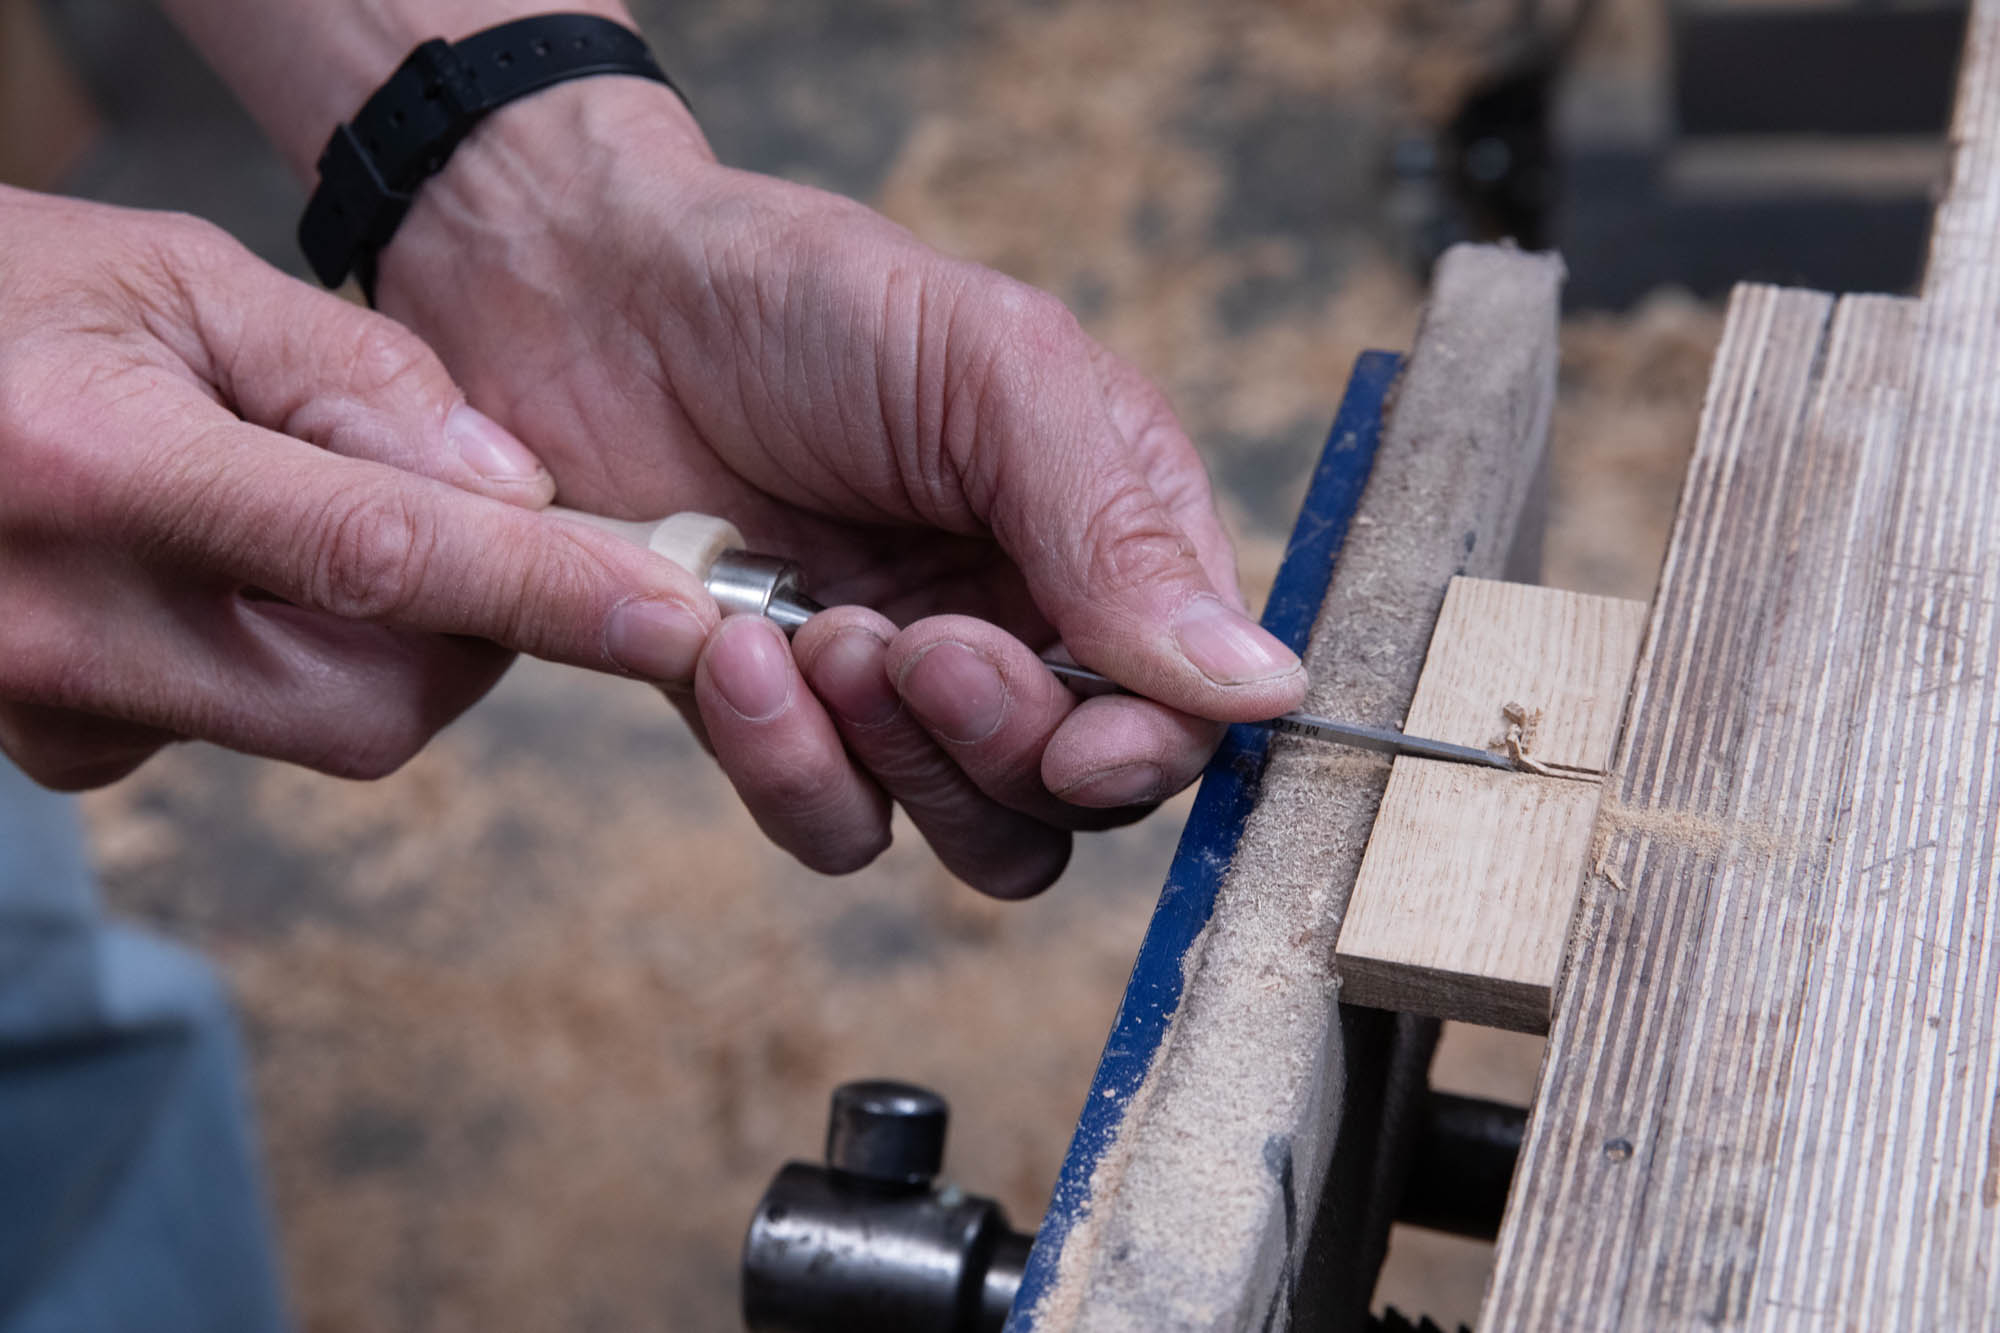
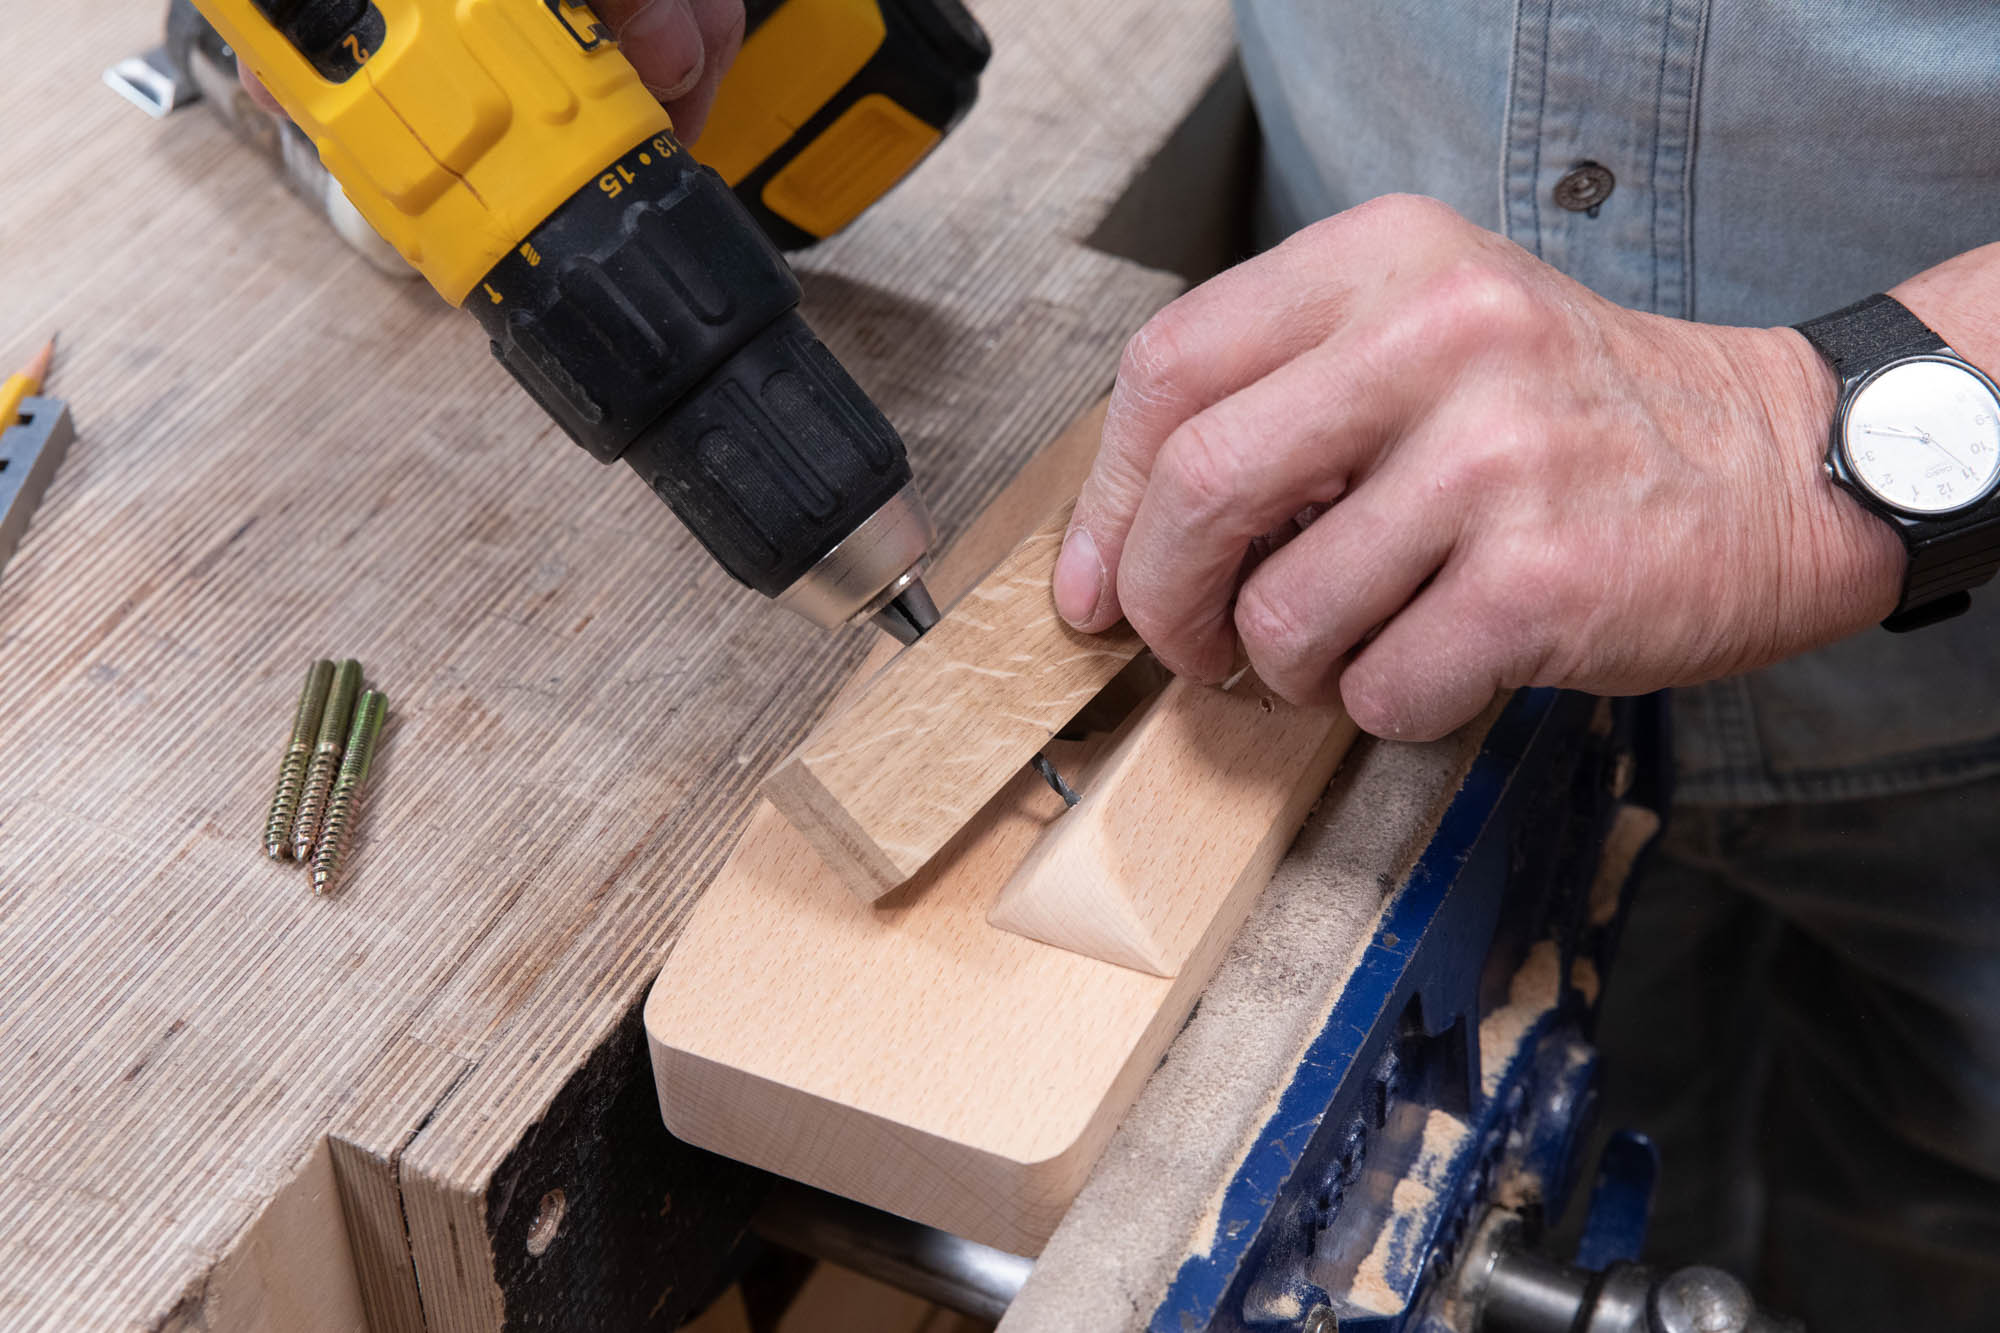
Make two knifewalls 1/8" (3mm) apart across the 5/16" (8mm) thick piece somewhere near the centre.
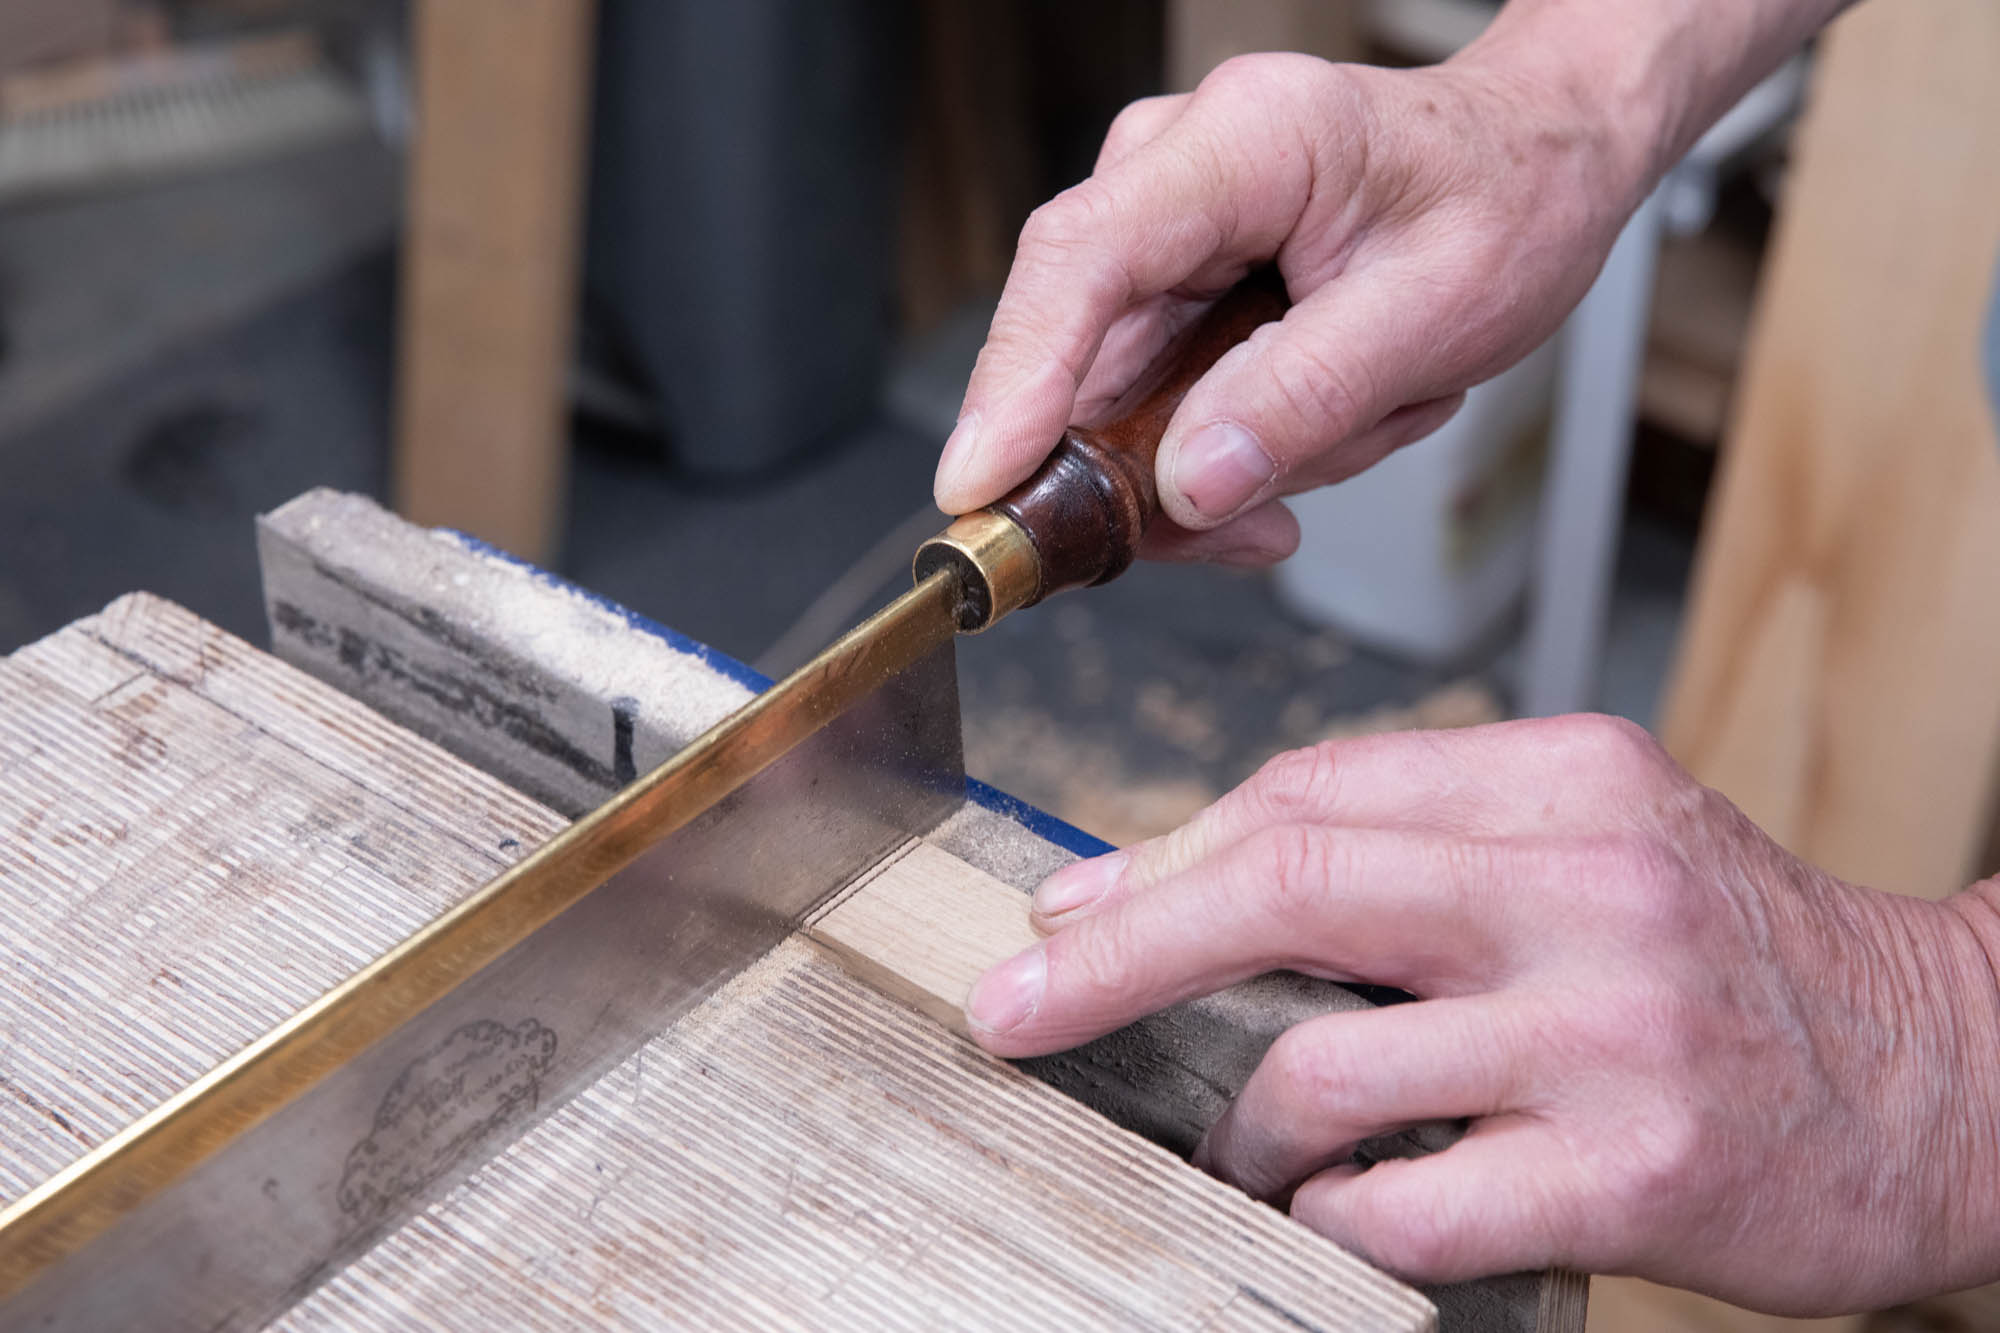
Saw down the knifewalls to a depth of 1/8" (3mm), and then use a narrow chisel to remove the waste working from both sides of the blank to an approximate depth line.
The exact depth is not critical since the drill bit itself will define the walls of the hole once the guide is glued up.
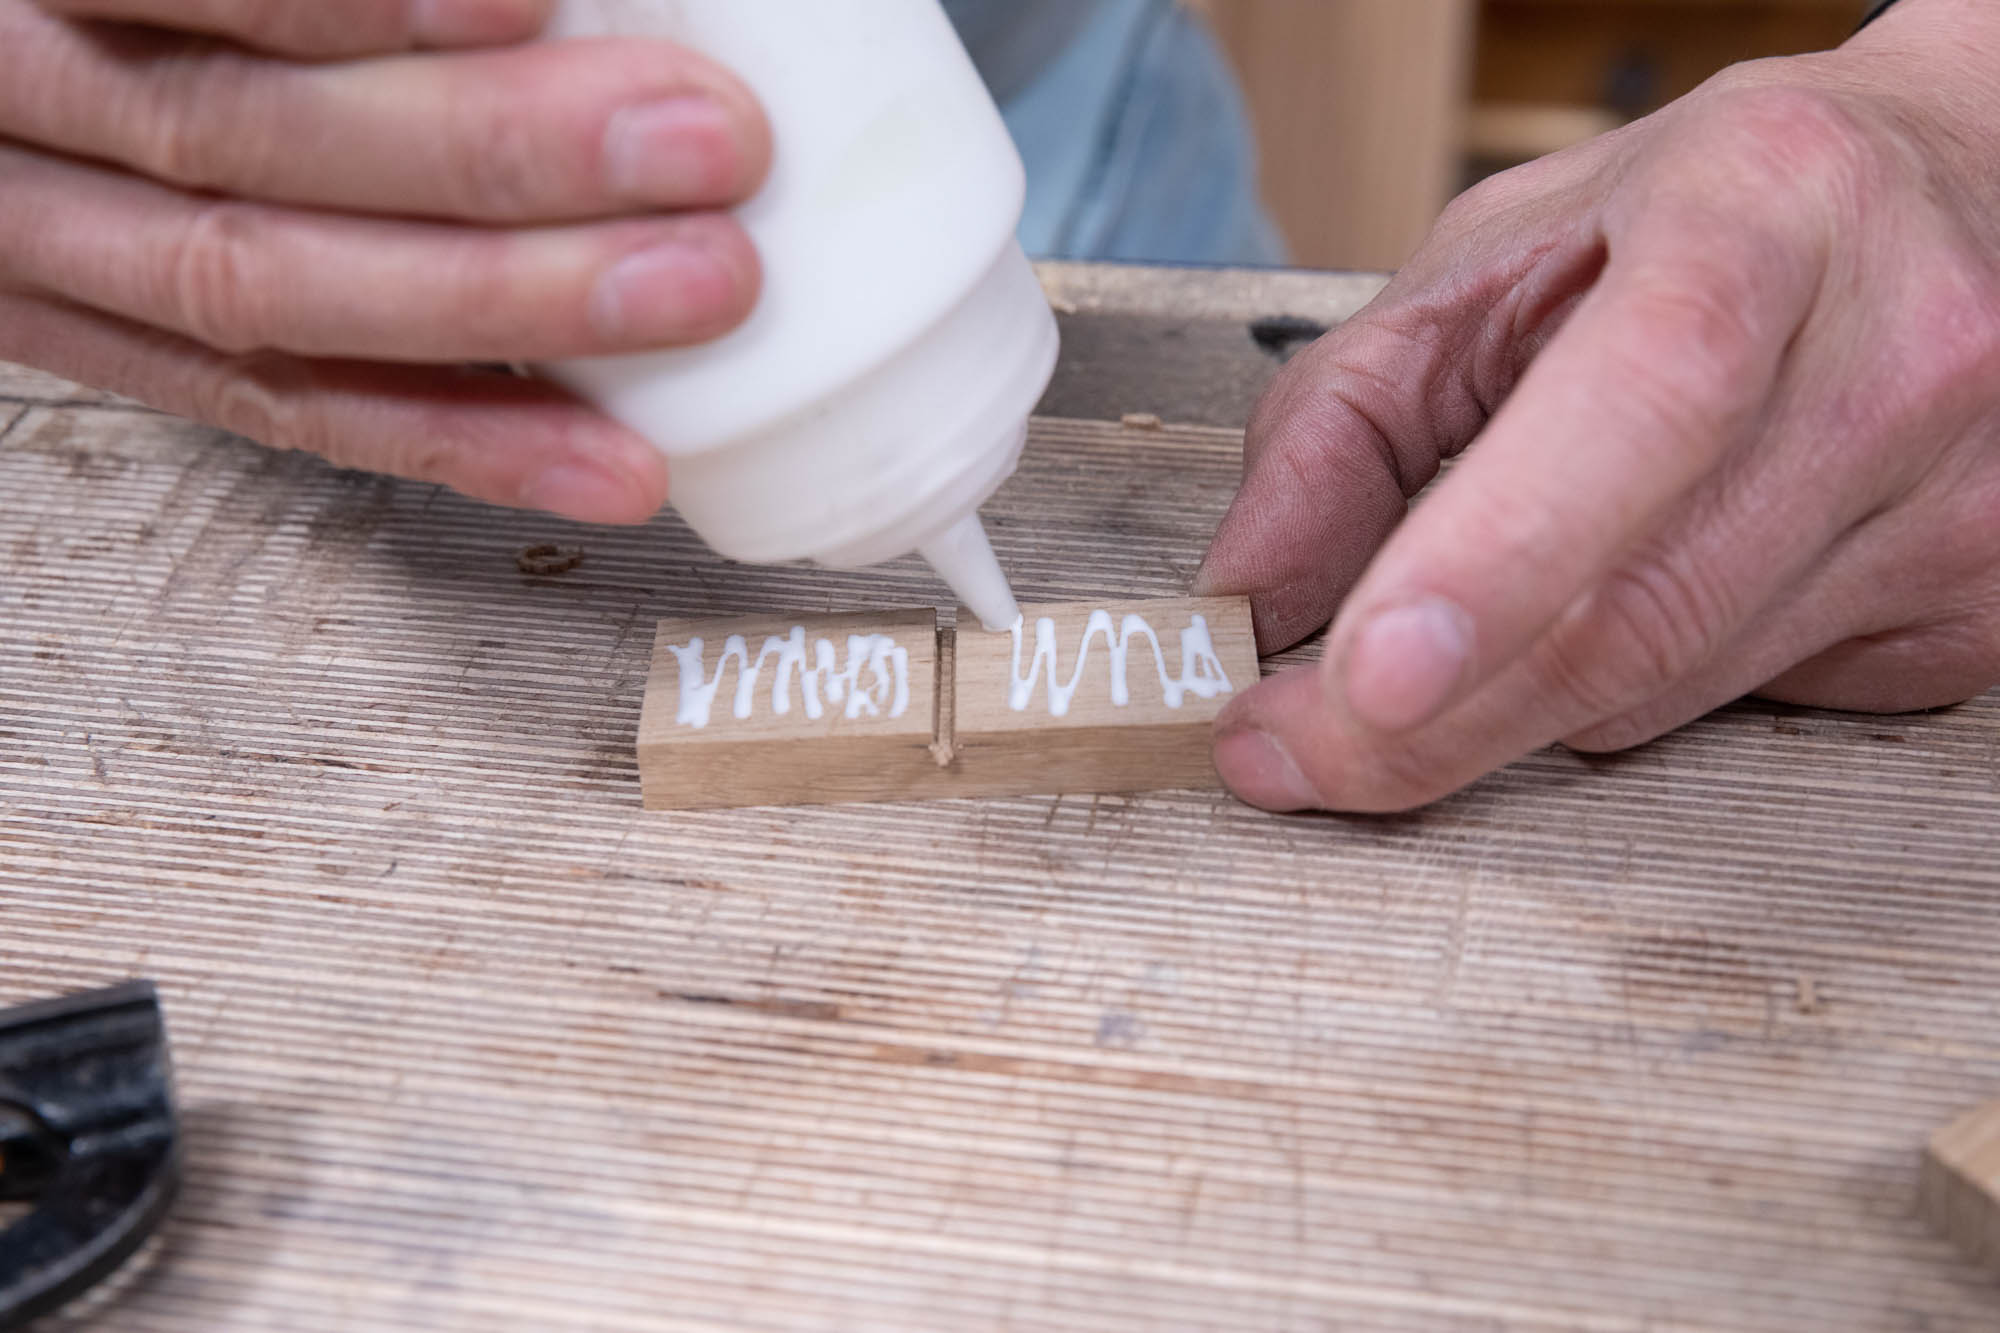
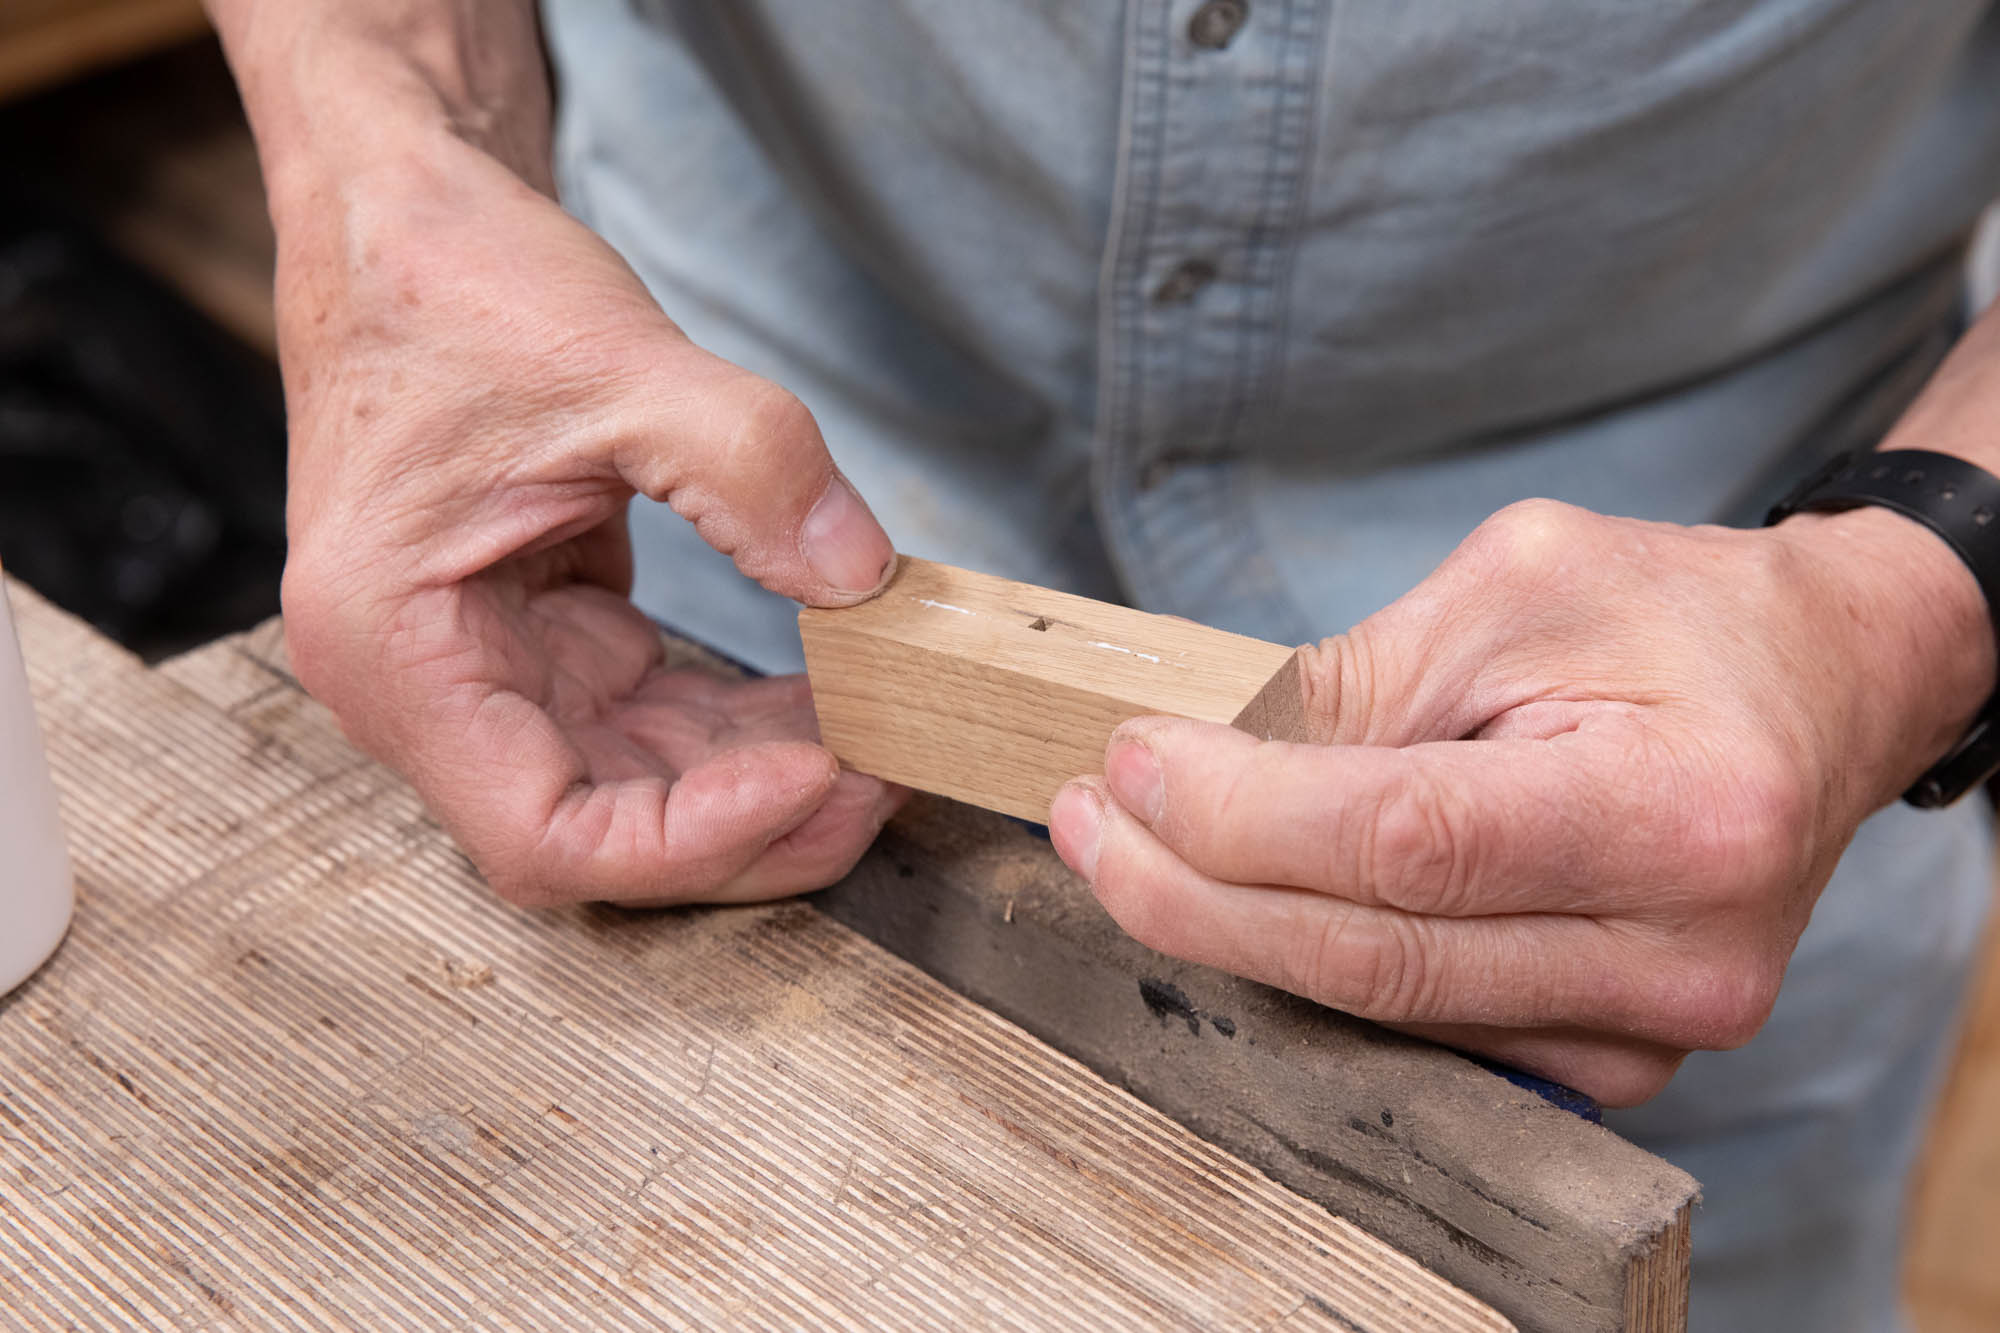
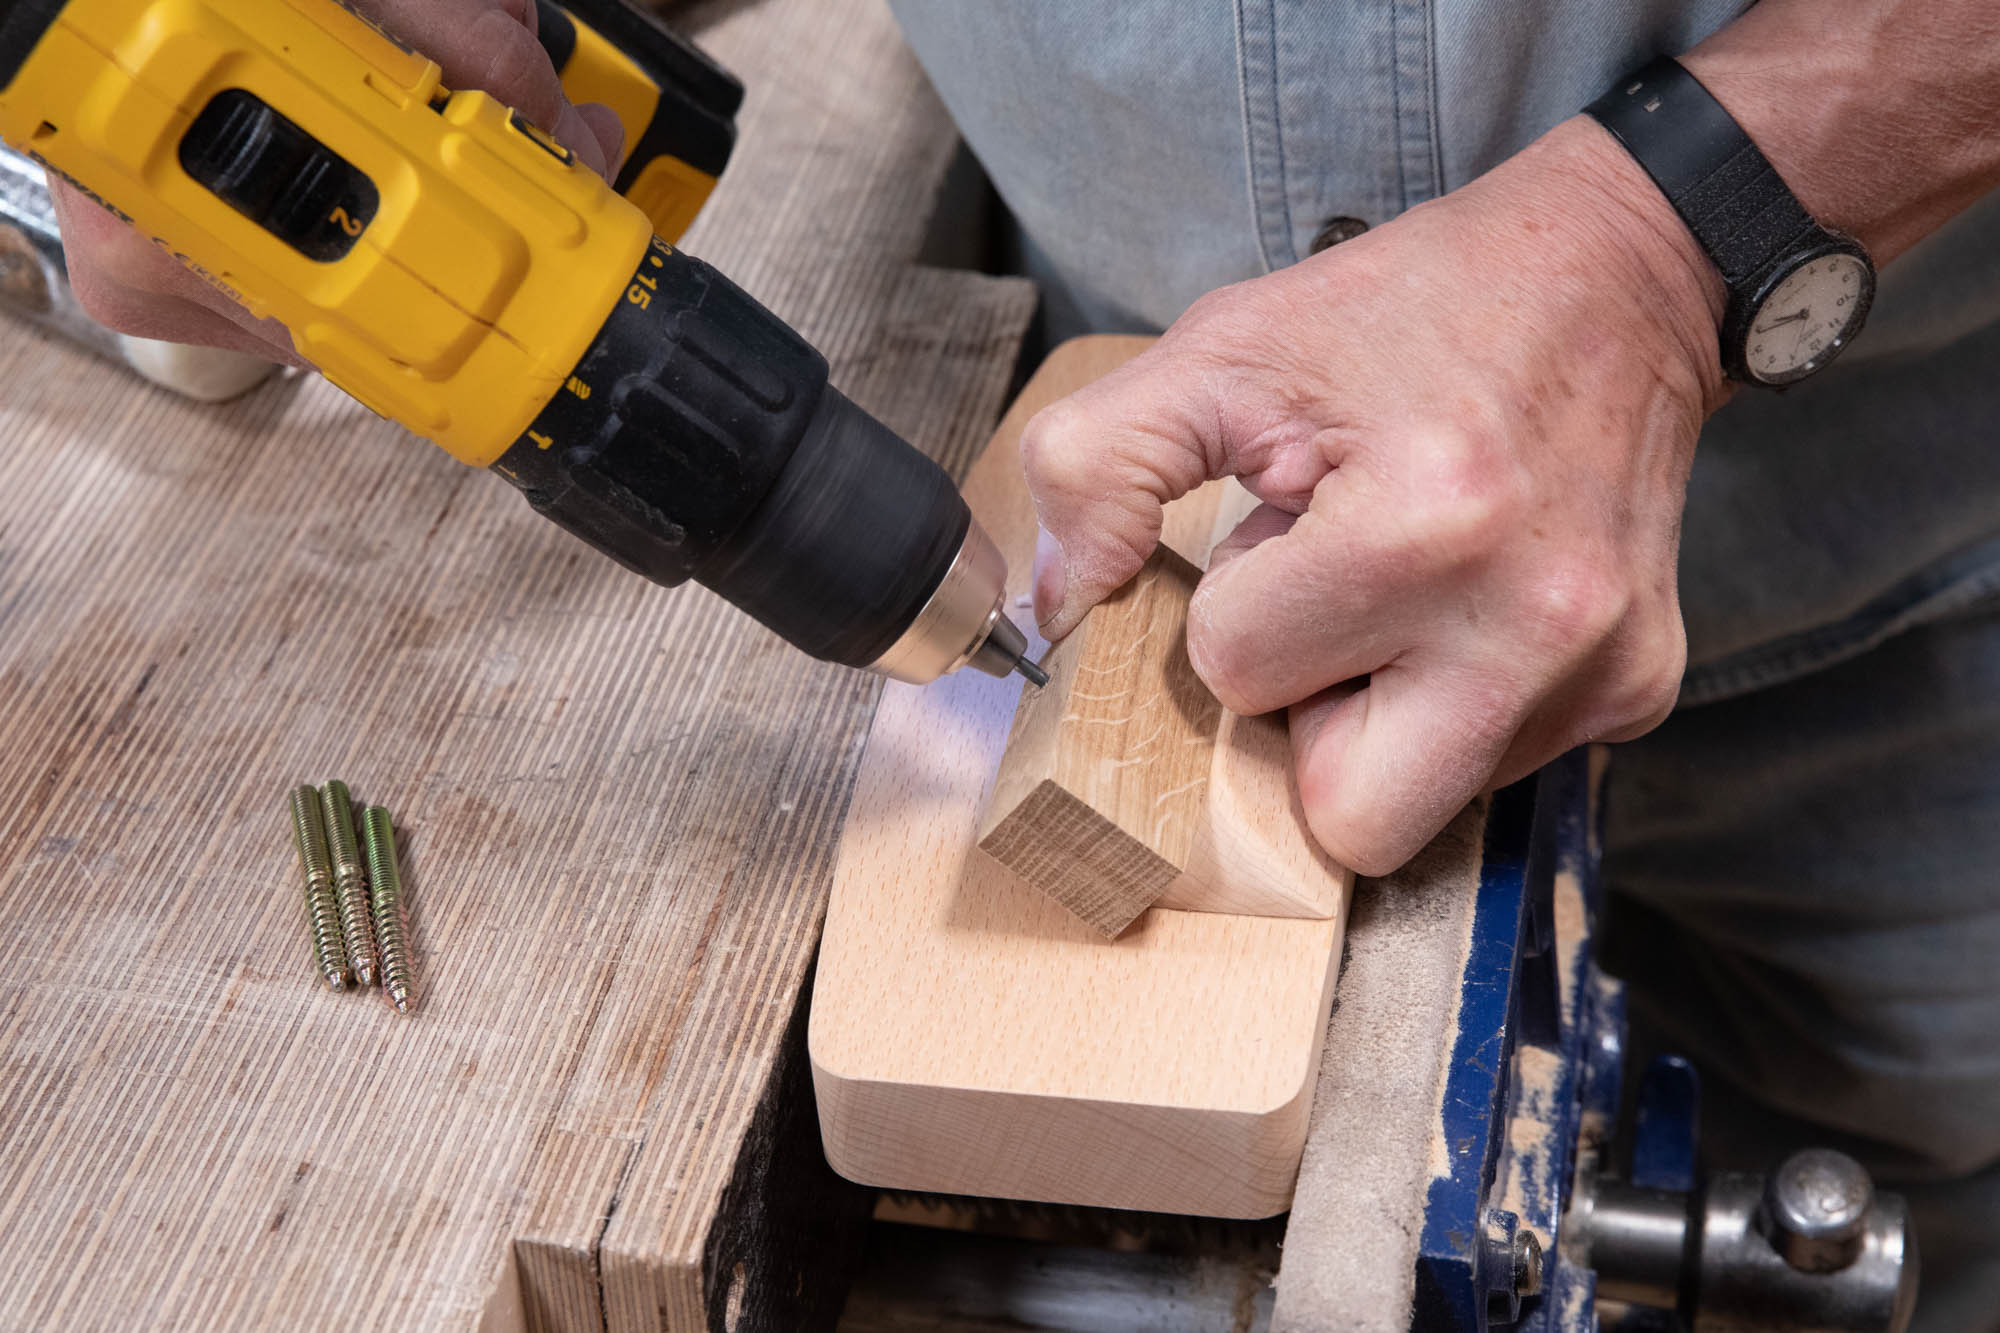
Gluing the two parts together again ensures that the parallel walls will keep the 1/8" (3mm) drill bit square when we use it to clean up the hole after the glue has dried.
Press firmly together to even out the glue and clamp in the vise until dry. Ensure that the surfaces align accurately and that there is no slippage during clamping.
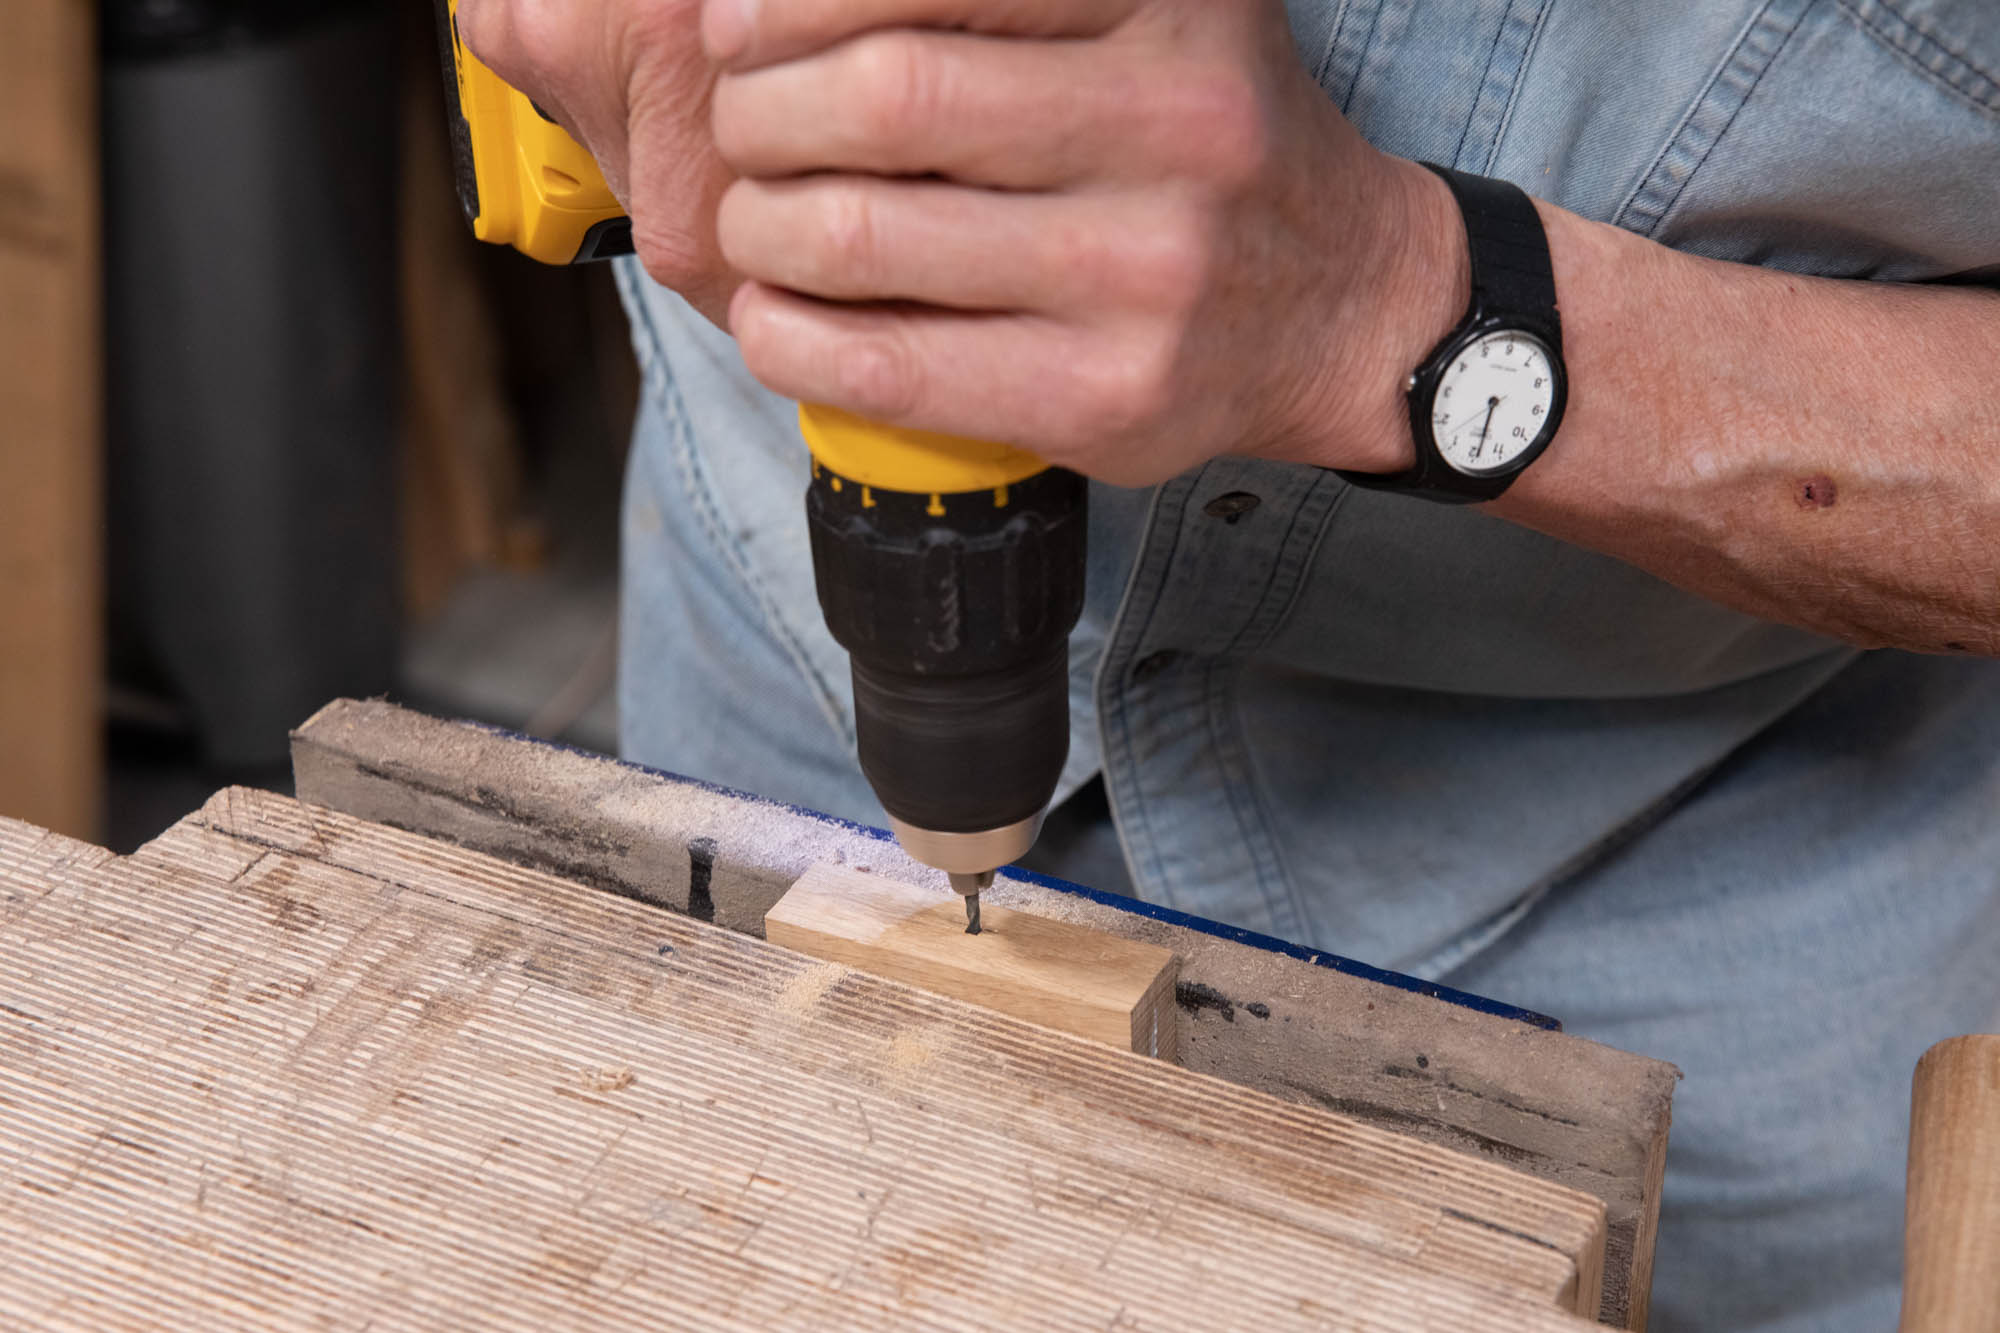
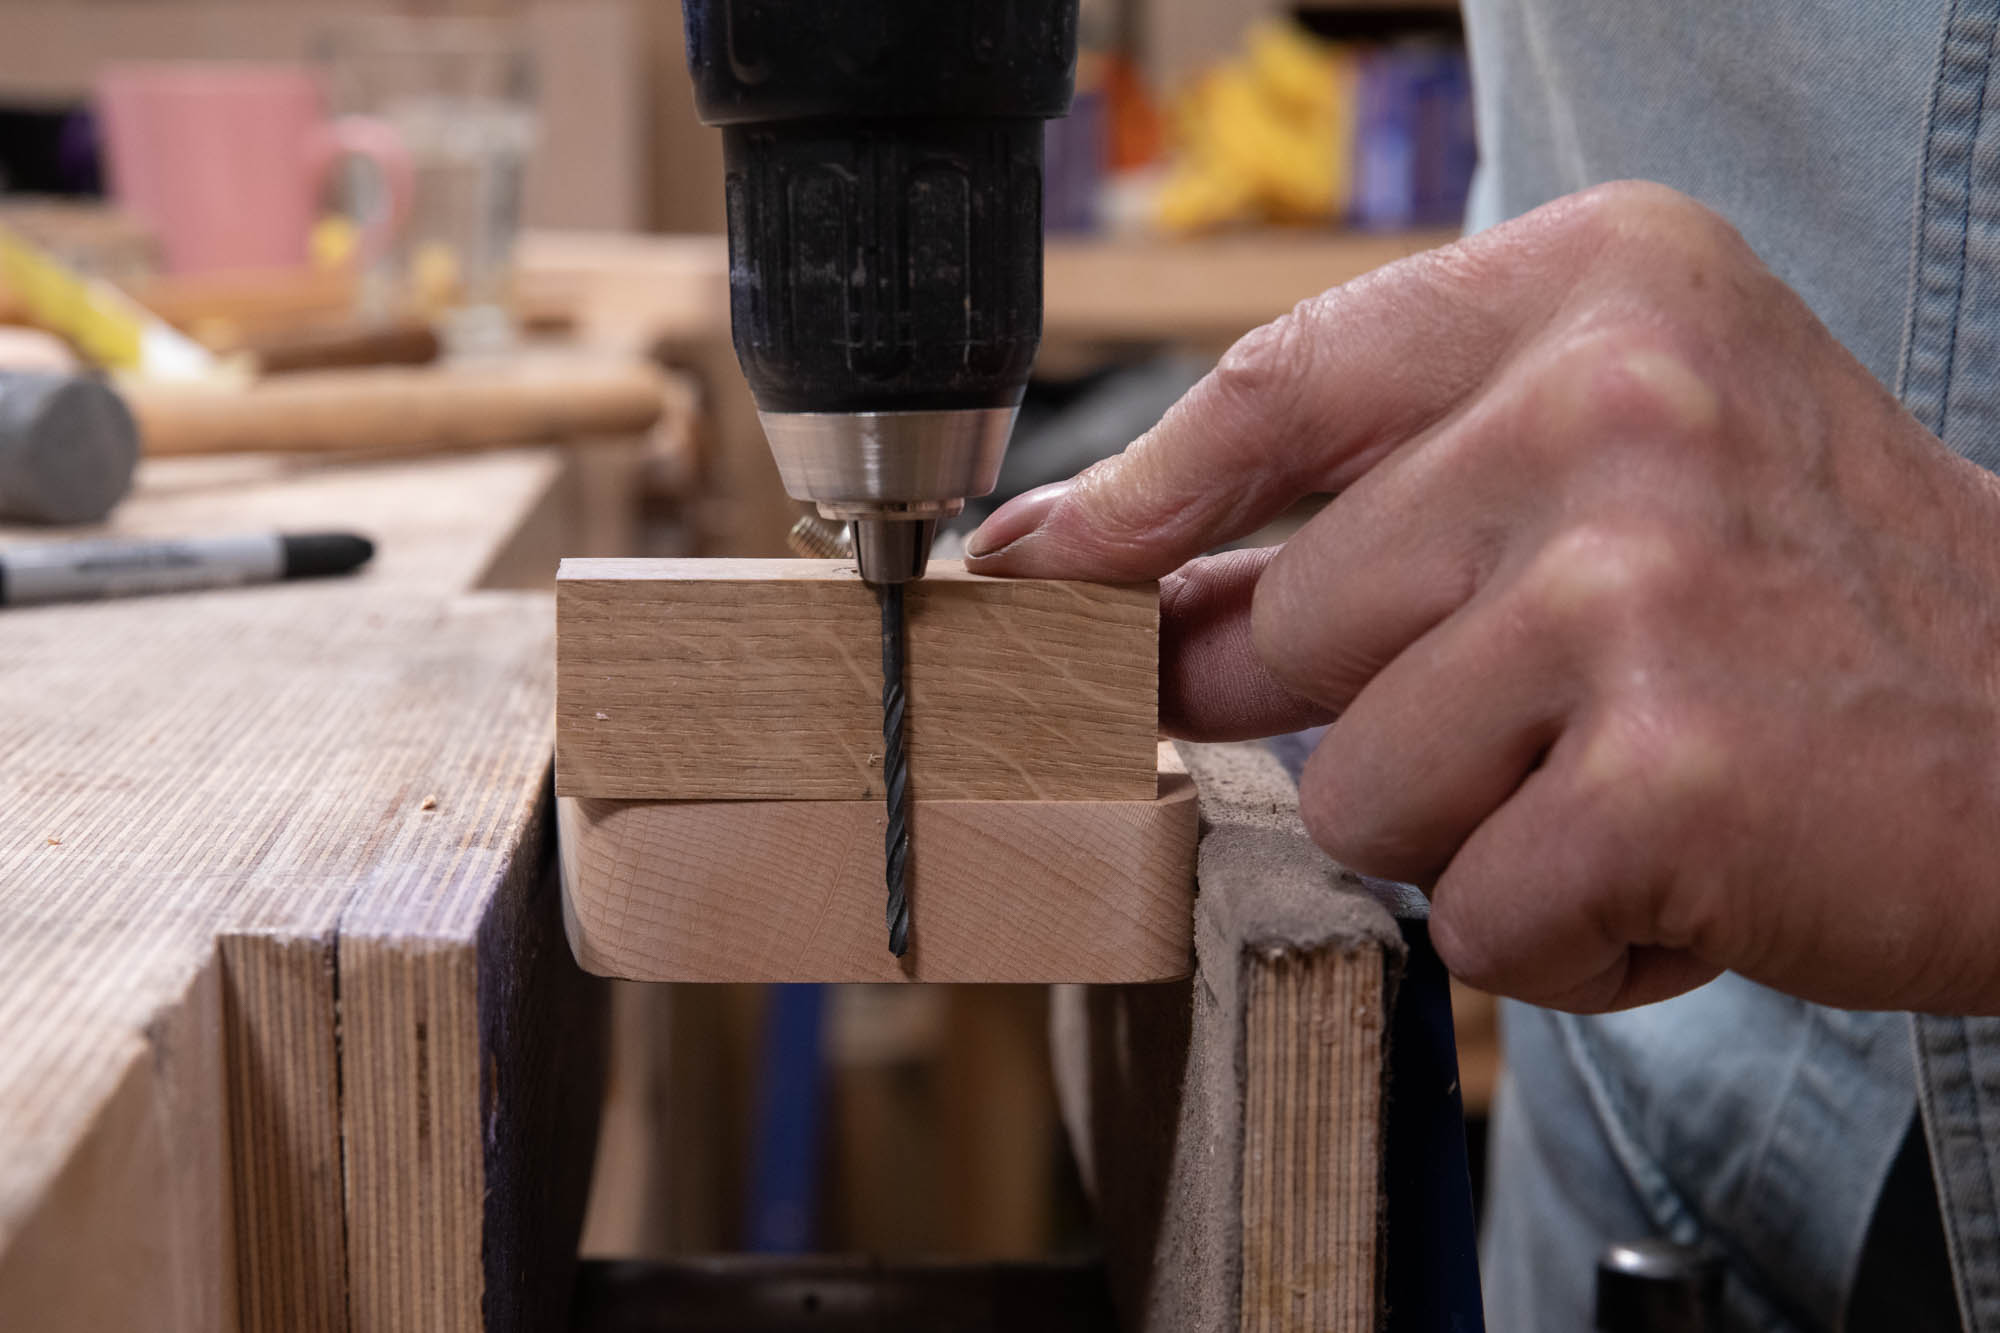
Once the glue has set, drill through the guide with the 1/8" (3mm) drill allowing the bit to follow the guide into and through the wood. This will remove any dried glue.
Using the Guide
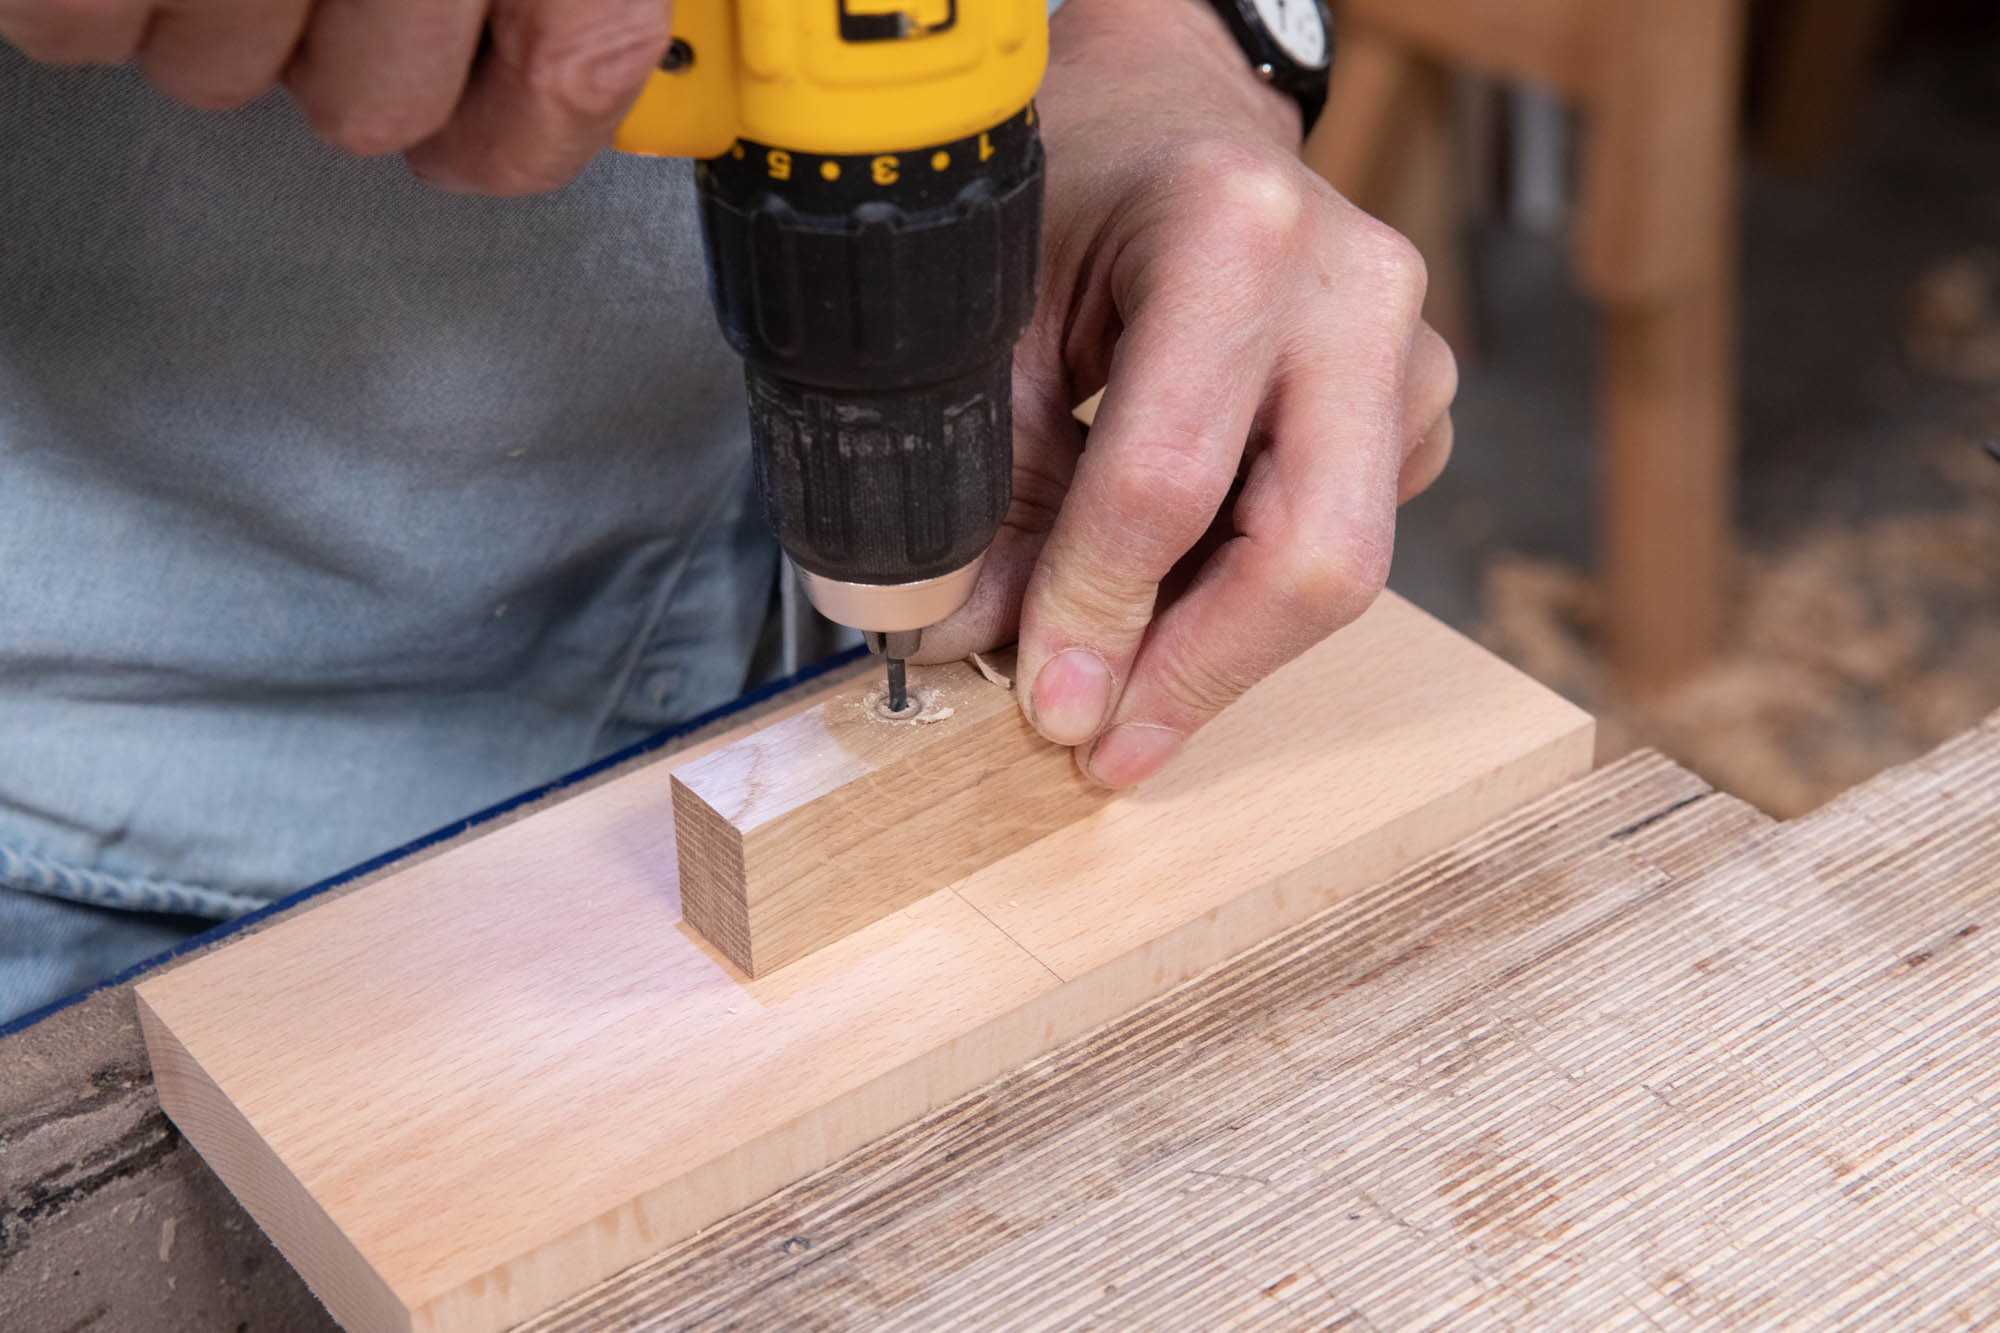
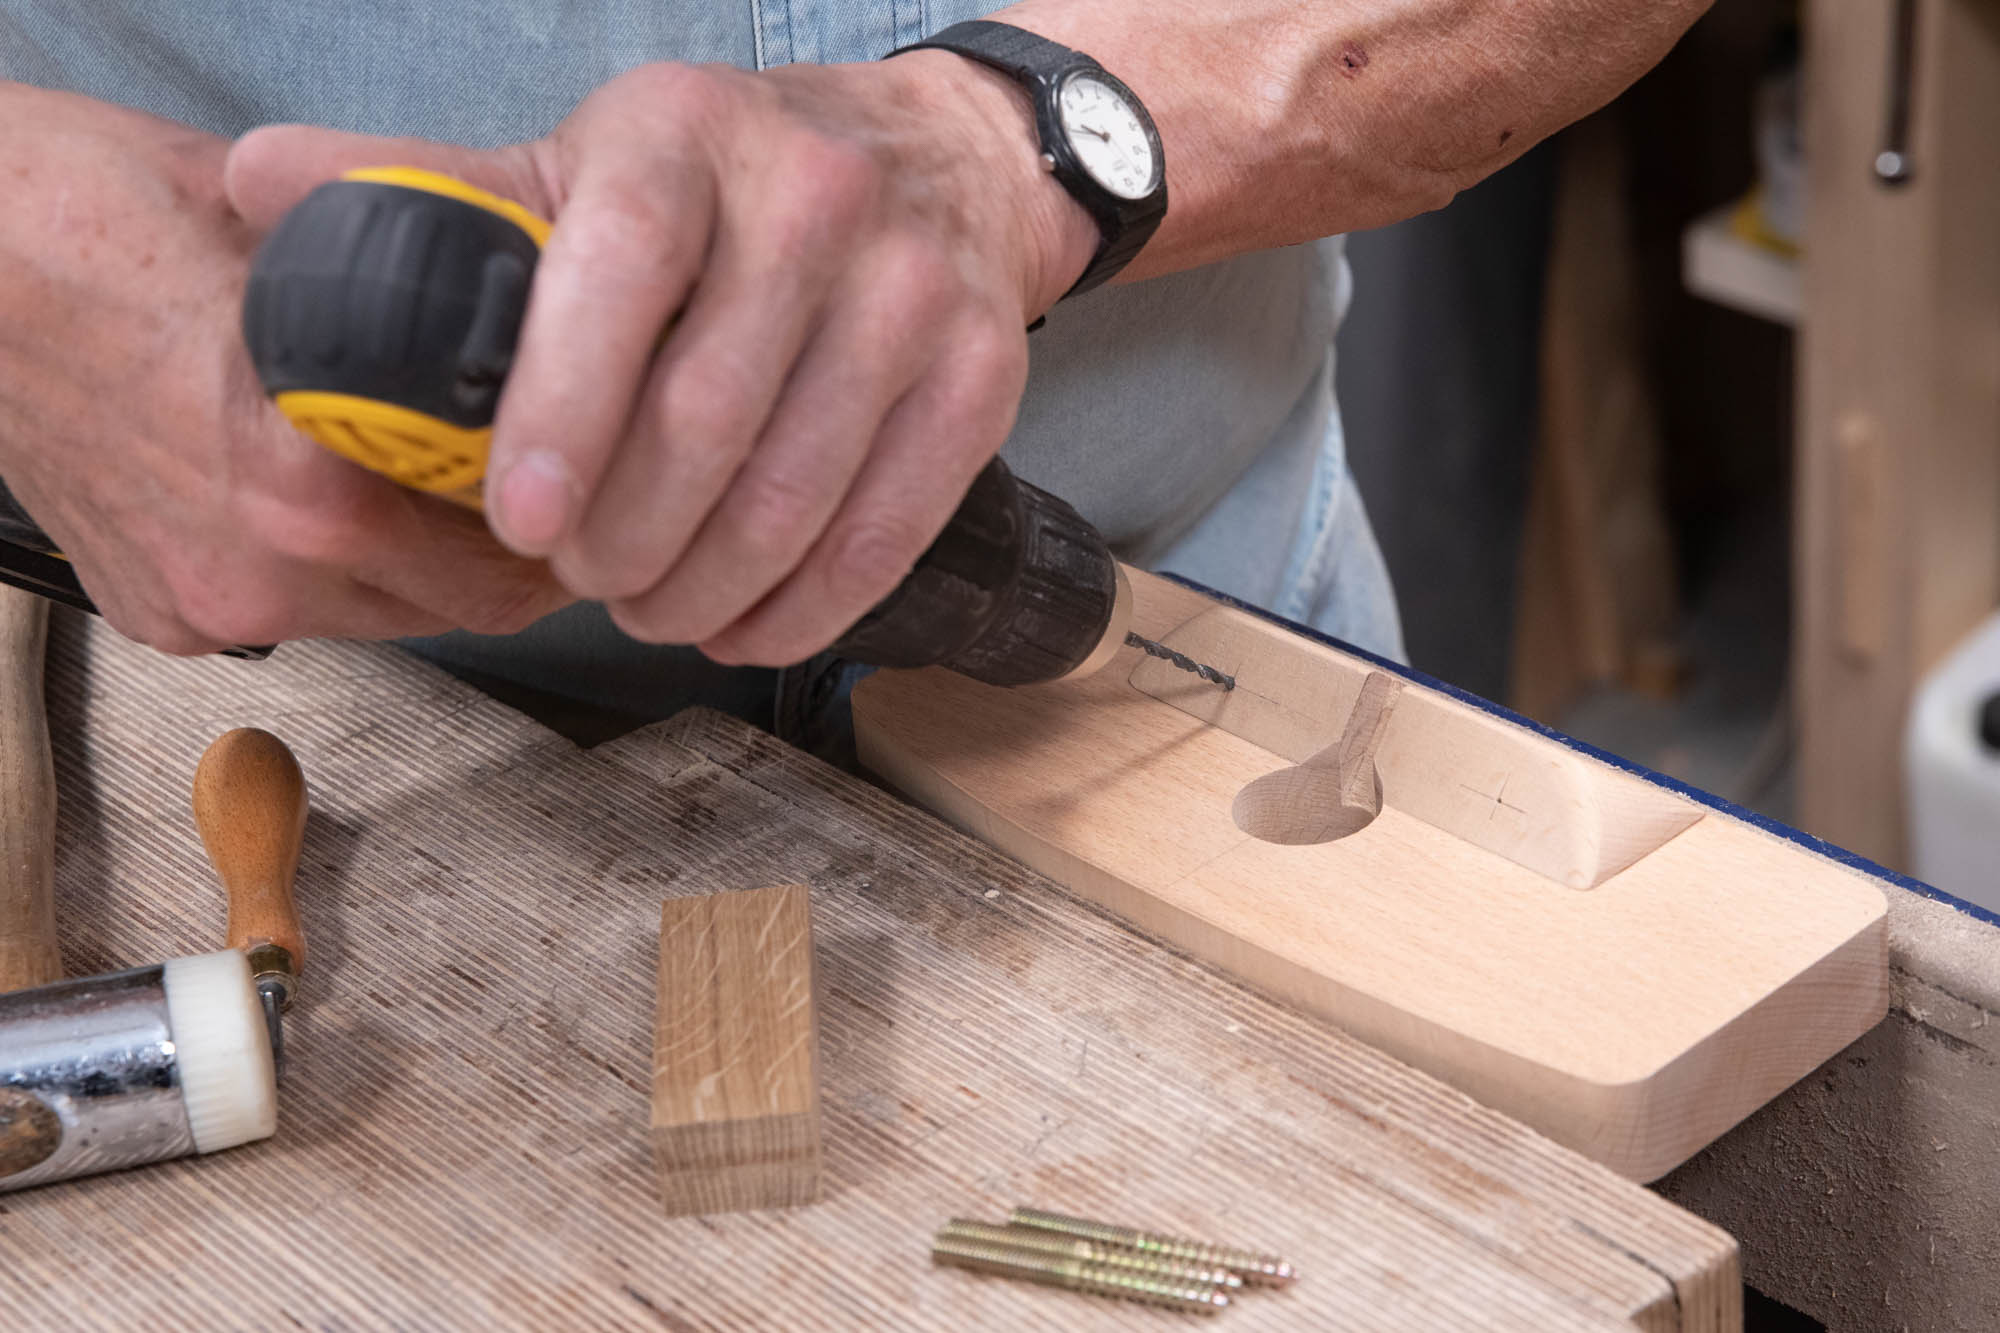
Having worked accurately, use an awl to start the hole, place the tip of the 1/8" (3mm) bit in the hole and rotate the bit just enough to locate the centre of the hole.
Insert the bit through the hole in the guide, locate the tip of the bit into the start hole, press the guide firmly against the surface and drill.
Having drilled to a reasonable depth, you can carry on drilling deeper without the guide, as the hole itself will guide you.
If you need to drill to a specific depth, preset the twist drill in the chuck using both the guide and the thickness of the wood to guide you.
Comments ()