Hand Tools Used
Below are the only tools I used for making the furniture pieces for Sellers' Home. I am putting this list in one place with some minor explanations for everyone to consider how my work continues to reach and influence woodworkers around the world. The important thing for me has been to show how an ordinary man using ordinary tools makes his furniture and that all ordinary people can learn the same ordinary skills once they are told and shown how it's done. You will not see me using a fancy and expensive plane or saw that cost me more than £25 and more likely the ones that cost me £3.50, 57 years ago. I have not nor ever would retrofit a plane with a thicker cutting iron as there is absolutely no reason to. The handsaws cost I am currently using cost me under £20 and as you work down the list of tools below you will see them in use throughout the videos we made to train you and a hundred thousand more just like you. Yes, I did apprentice, but time for my training was short, one explanation only was given with a clip around the ear when I got something wrong and even when I didn't. George, my mentor, was the only one who didn't, so I stayed close to his bench most of the time.
I keep everything simple for good reason. I'm here for your training and that alone. Whereas many complicate my craft because of inexperience and agenda, my presentations are always simple no matter the platform I use. If I succeed in distance training you, and of course I do, then I have succeeded in my original intent of 30 years ago and that was the conservation and preservation of the craft I have loved throughout my work-life in the actual doing of it. Something I learned from my gardening is that the best way to preserve a seed is not to put it in a glass jar in a dim, dark cellar but to plant it. When you plant a seed (I realised then), this one seed has the potential to produce a hundred times what was planted. Today, we are reaching and teaching hundreds of thousands of woodworkers every week. There is a lot of competition out there but the competition is not to give what I give in anywhere near equal measure but for time and airspace. Finding the needle in the haystack is getting increasingly more difficult because we only have so much attention we can give to the search. That's why you are so important in telling your friends about our work in woodworking craft conservation. We are indeed making a huge difference to millions of people worldwide and it is not just woodworking either. factor in a sense of purpose and wellbeing and you will touch the tip of this wonderful iceberg.
So there you have the reasoning and now I give you the tools I used to make all of the pieces for Sellers Home thus far. But something is important to me -- I don't want you to think I shun so-called premium tools or machines because I don't like them, can't afford them or that a basic Stanley bench plane and such are in any way inferior to the so-called premium knock-offs being produced by engineers worldwide. That is not the case at all. If just one of them would get rid of the fallacy that BedRock pattern planes are superior to Bailey-pattern versions and the lightweightness of them and then give us what we really want, the lighter weight Bailey-pattern no-frills bench plane, we would be making some very substantial progress. So far, there is no reason to fix what ain't broke and a vintage (Pre 1970s) Stanley has everything any woodworker needs

I guess this is a good time for me to plug my book Essential Woodworking Hand Tools which gives in-depth information from my background as a user craftsman using them for 57 years to date. We don't have too many left though so jump in now before that all go. You can also buy the DVDs. Here is the link.
Planes

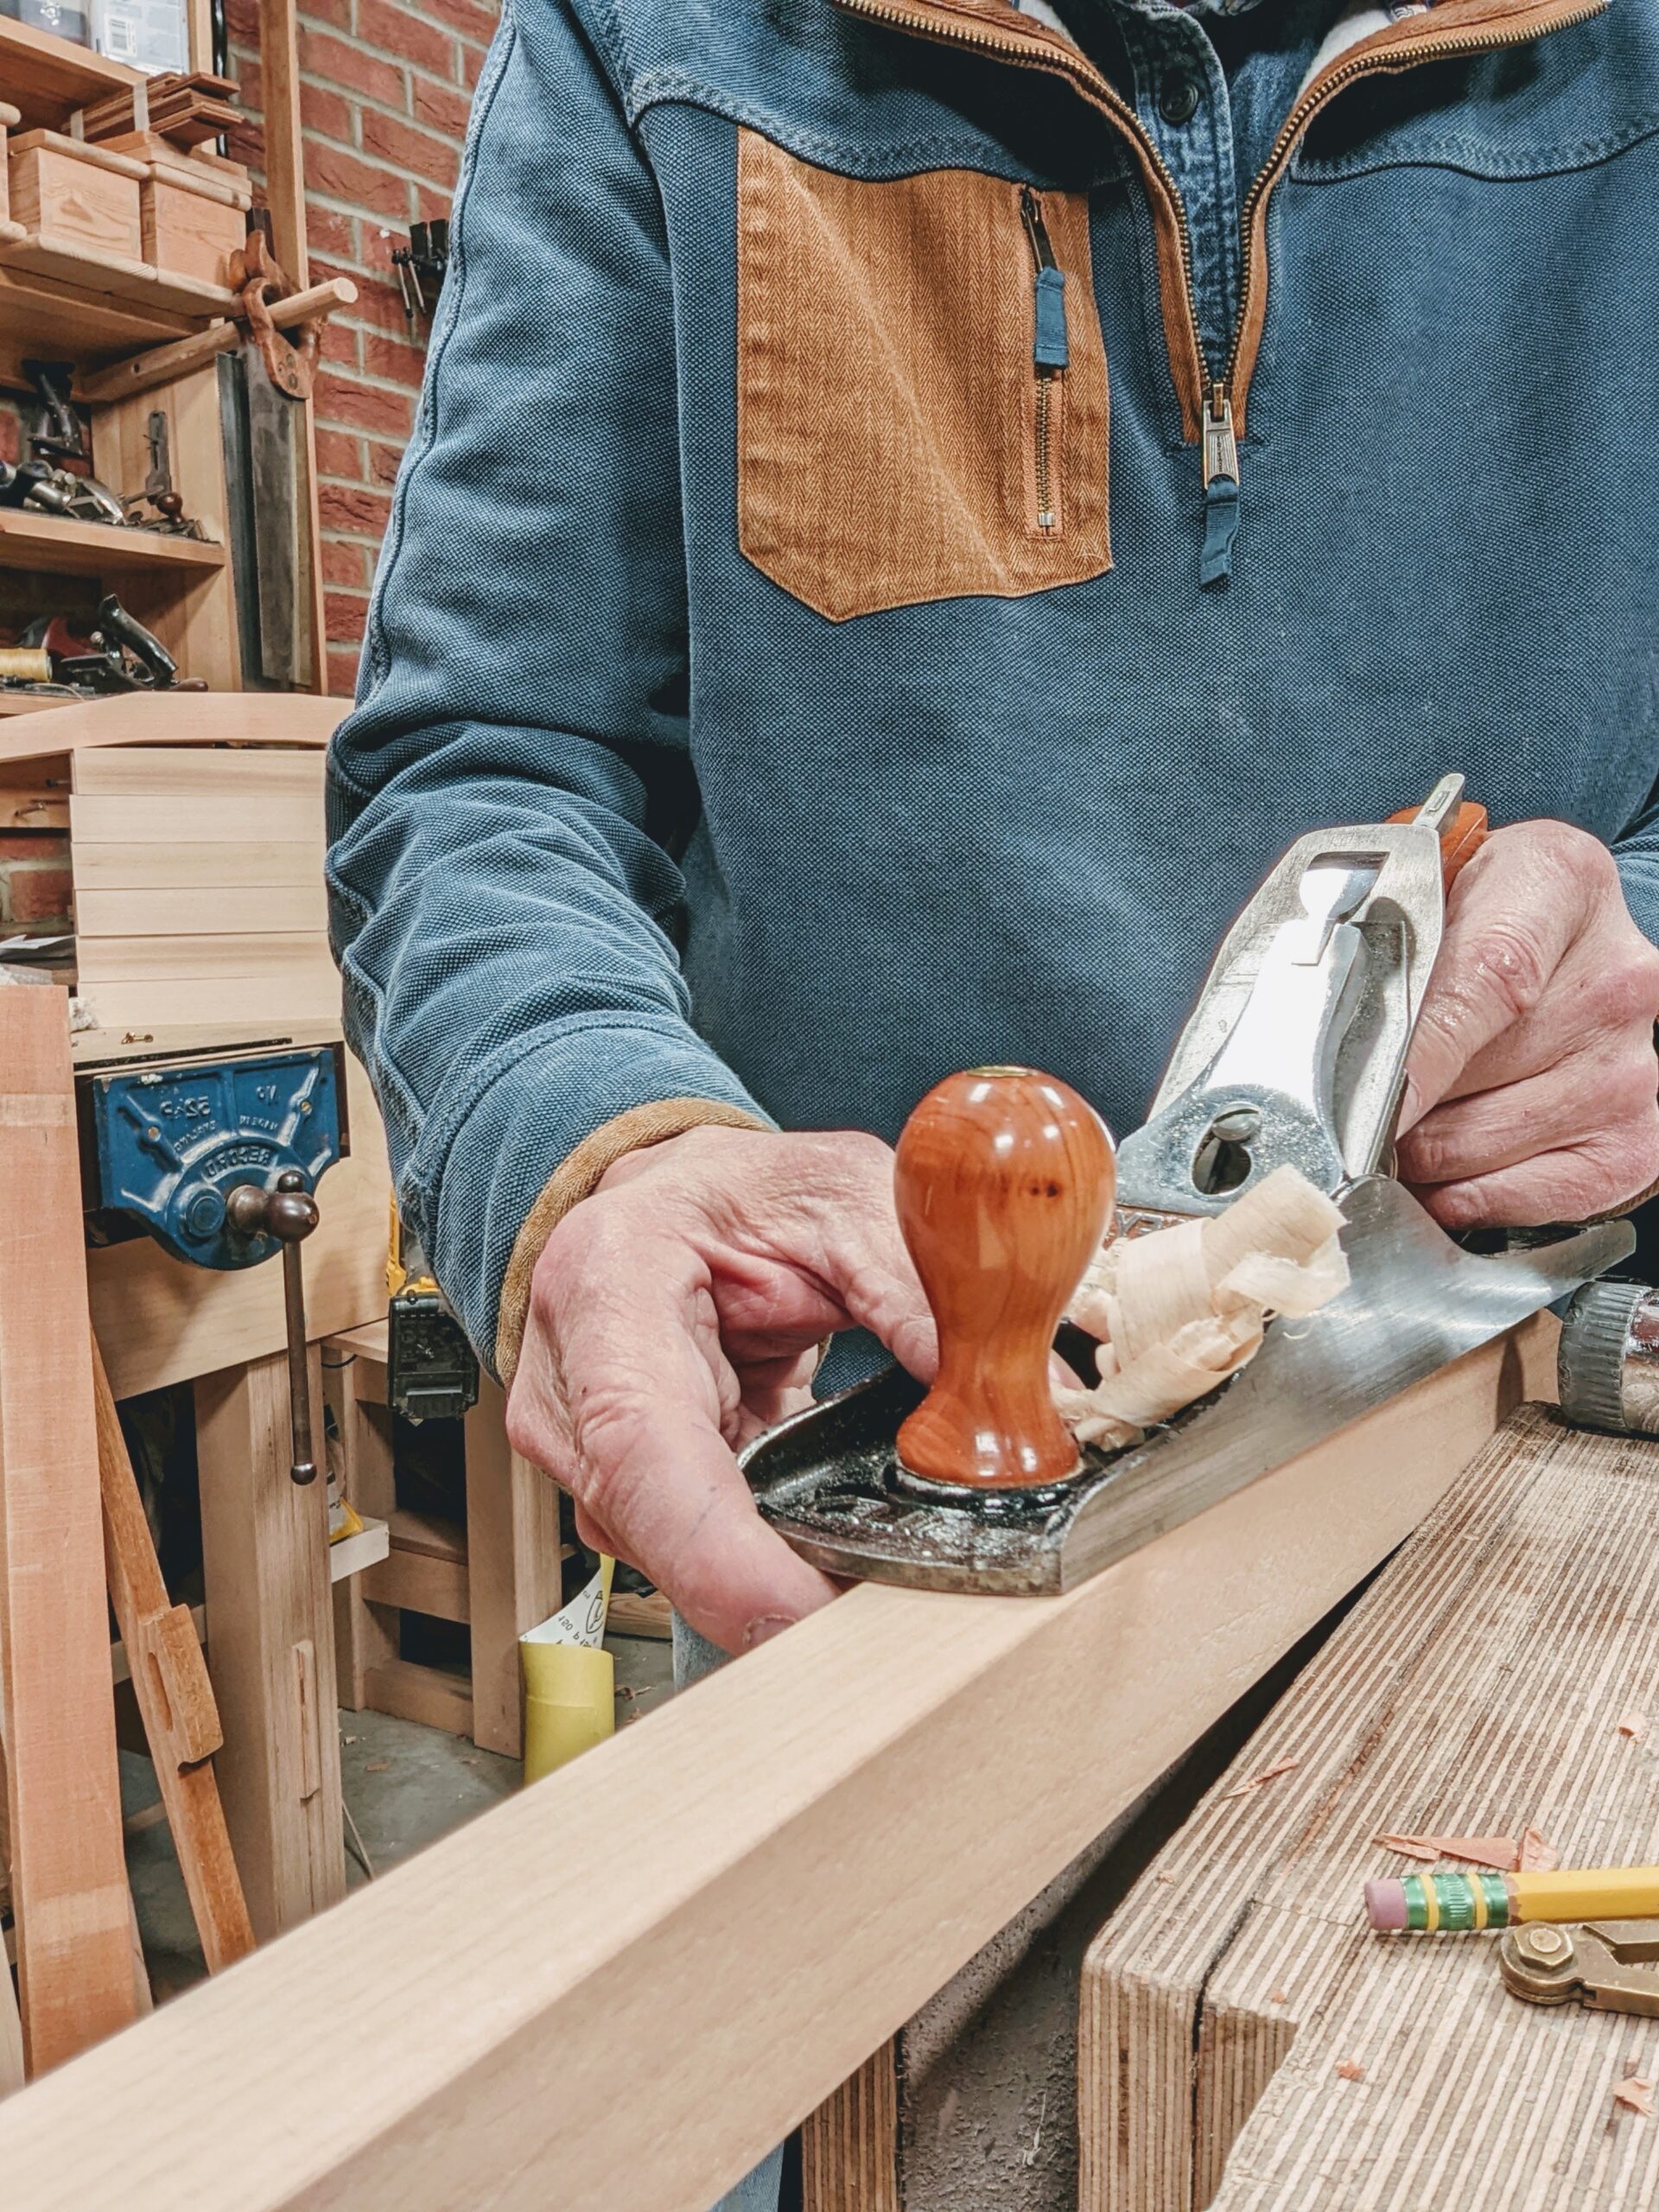
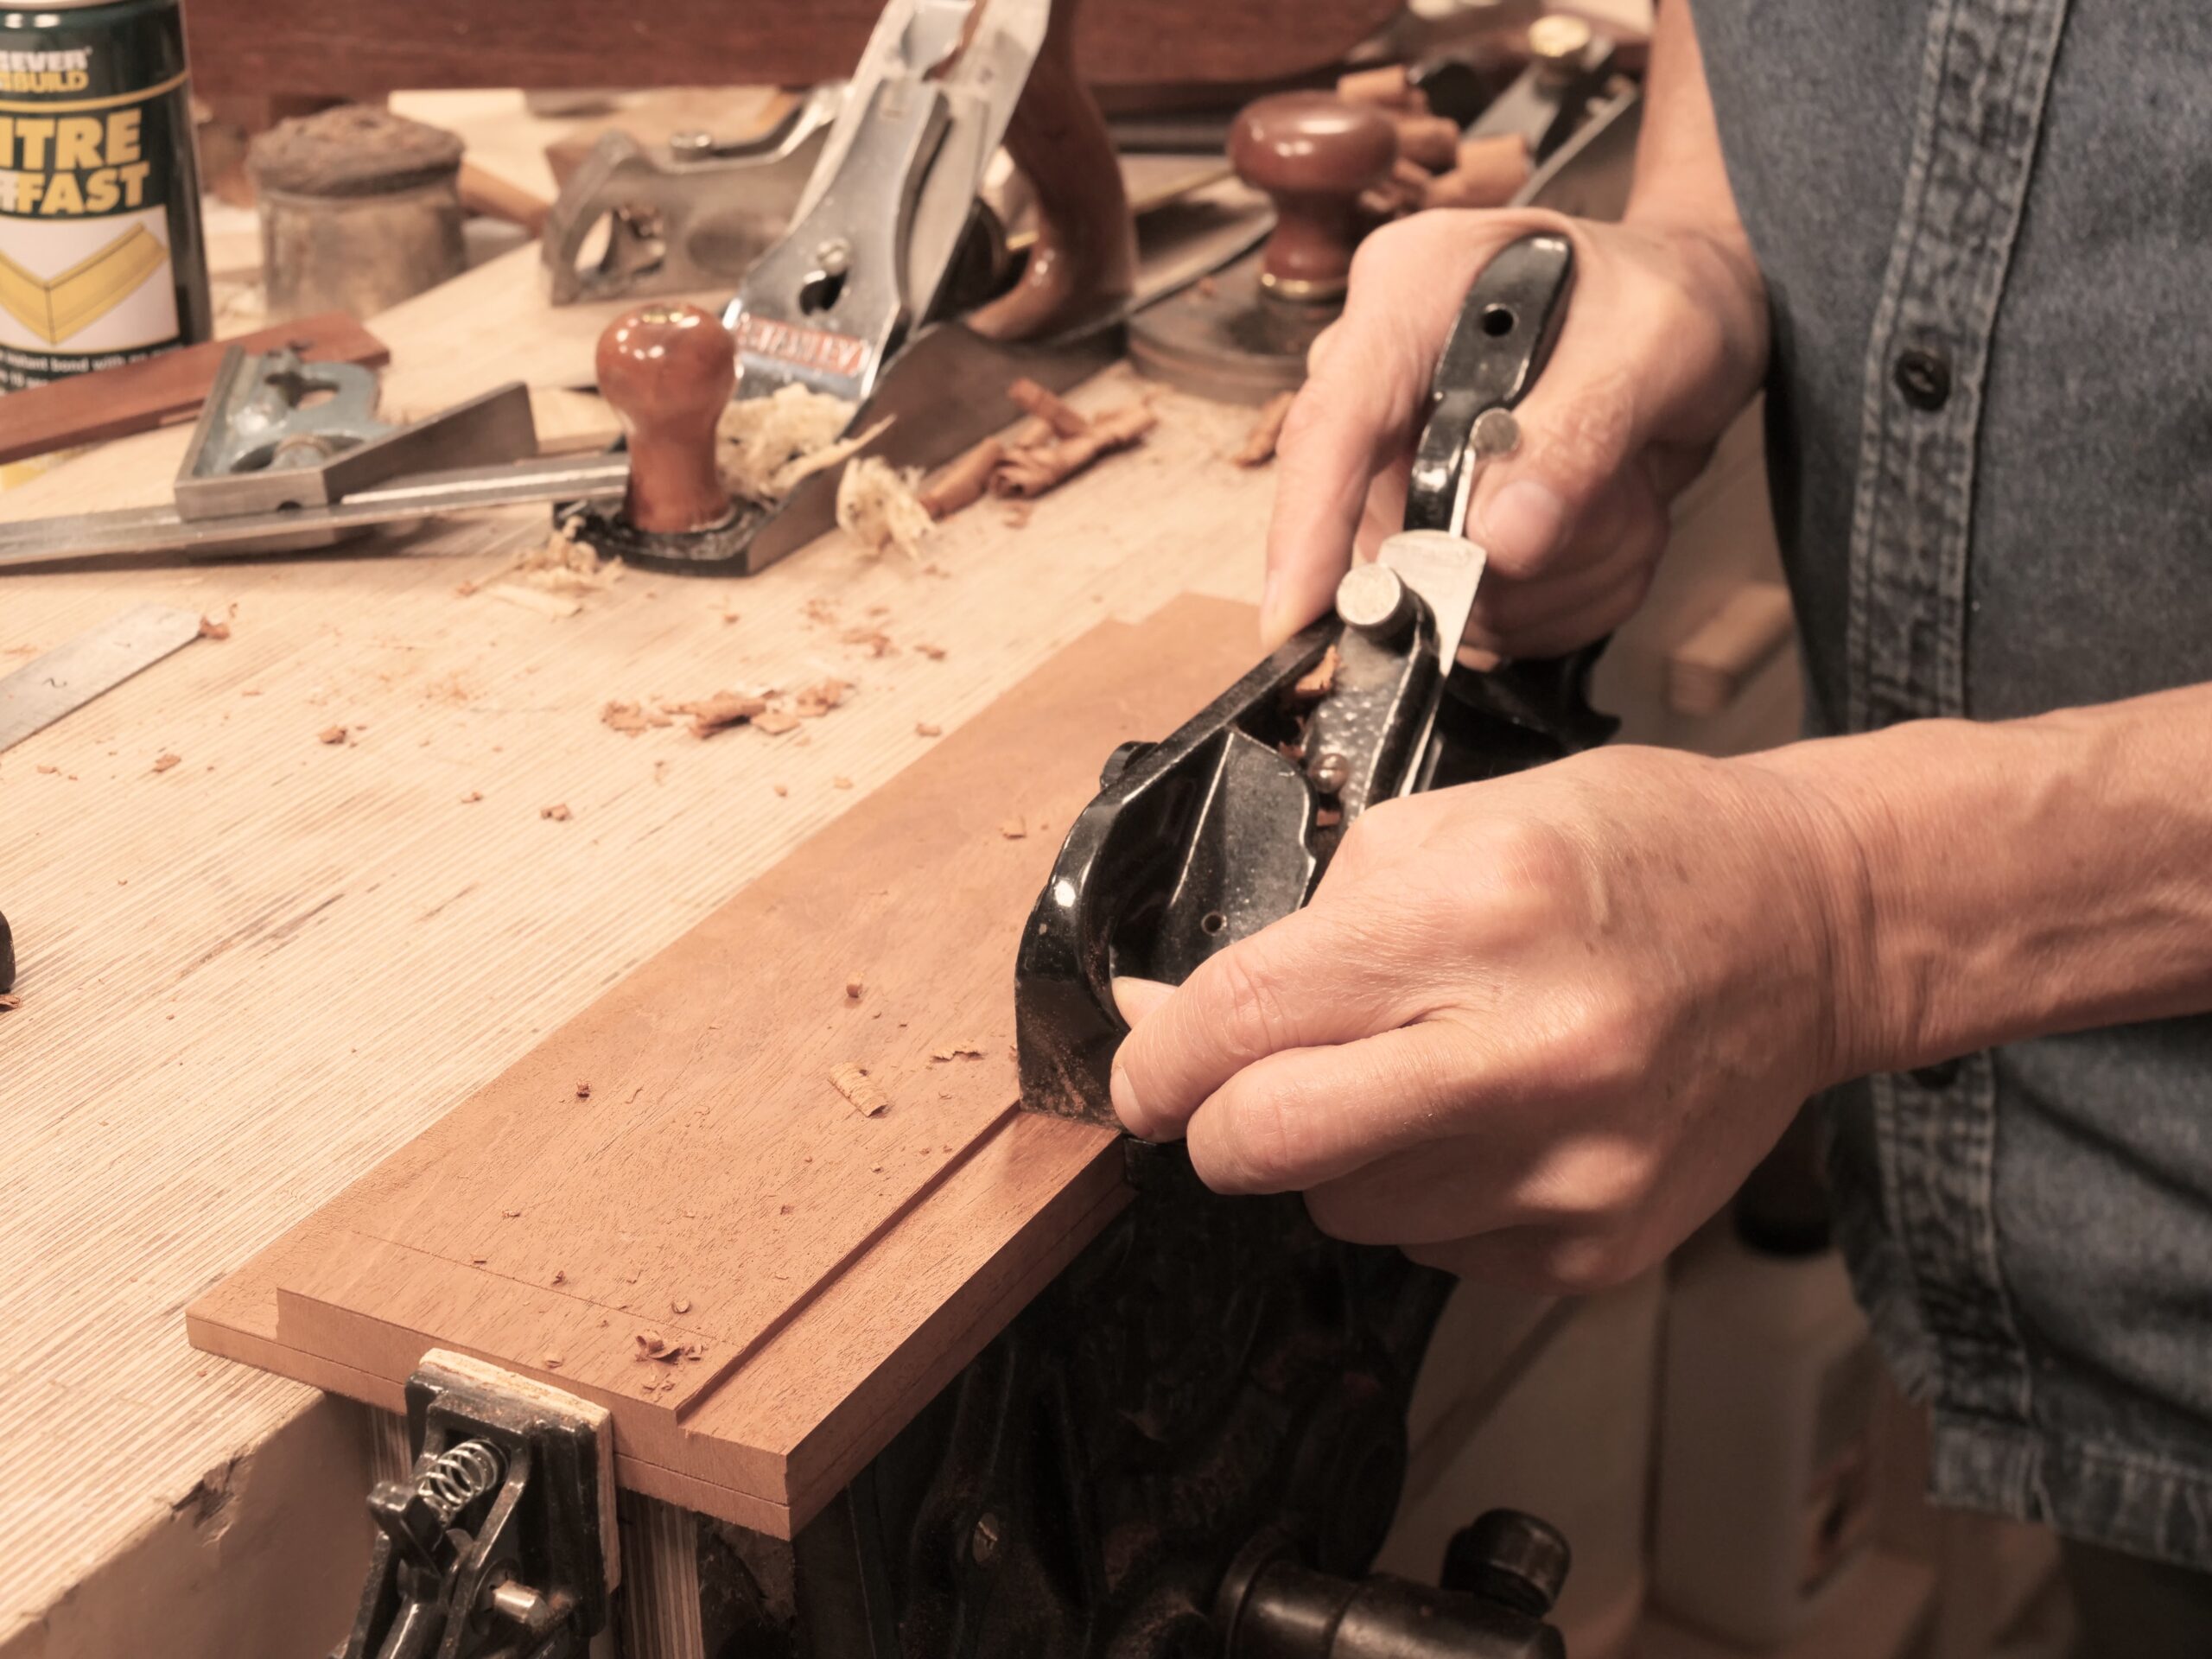
I used a hand full of planes, notably my favourite Stanely #4 smoothing plane, another #4 converted to a scrub plane, my #78 converted to a coarse scrub plane, a #5 and a #5 1/2 jack plane.
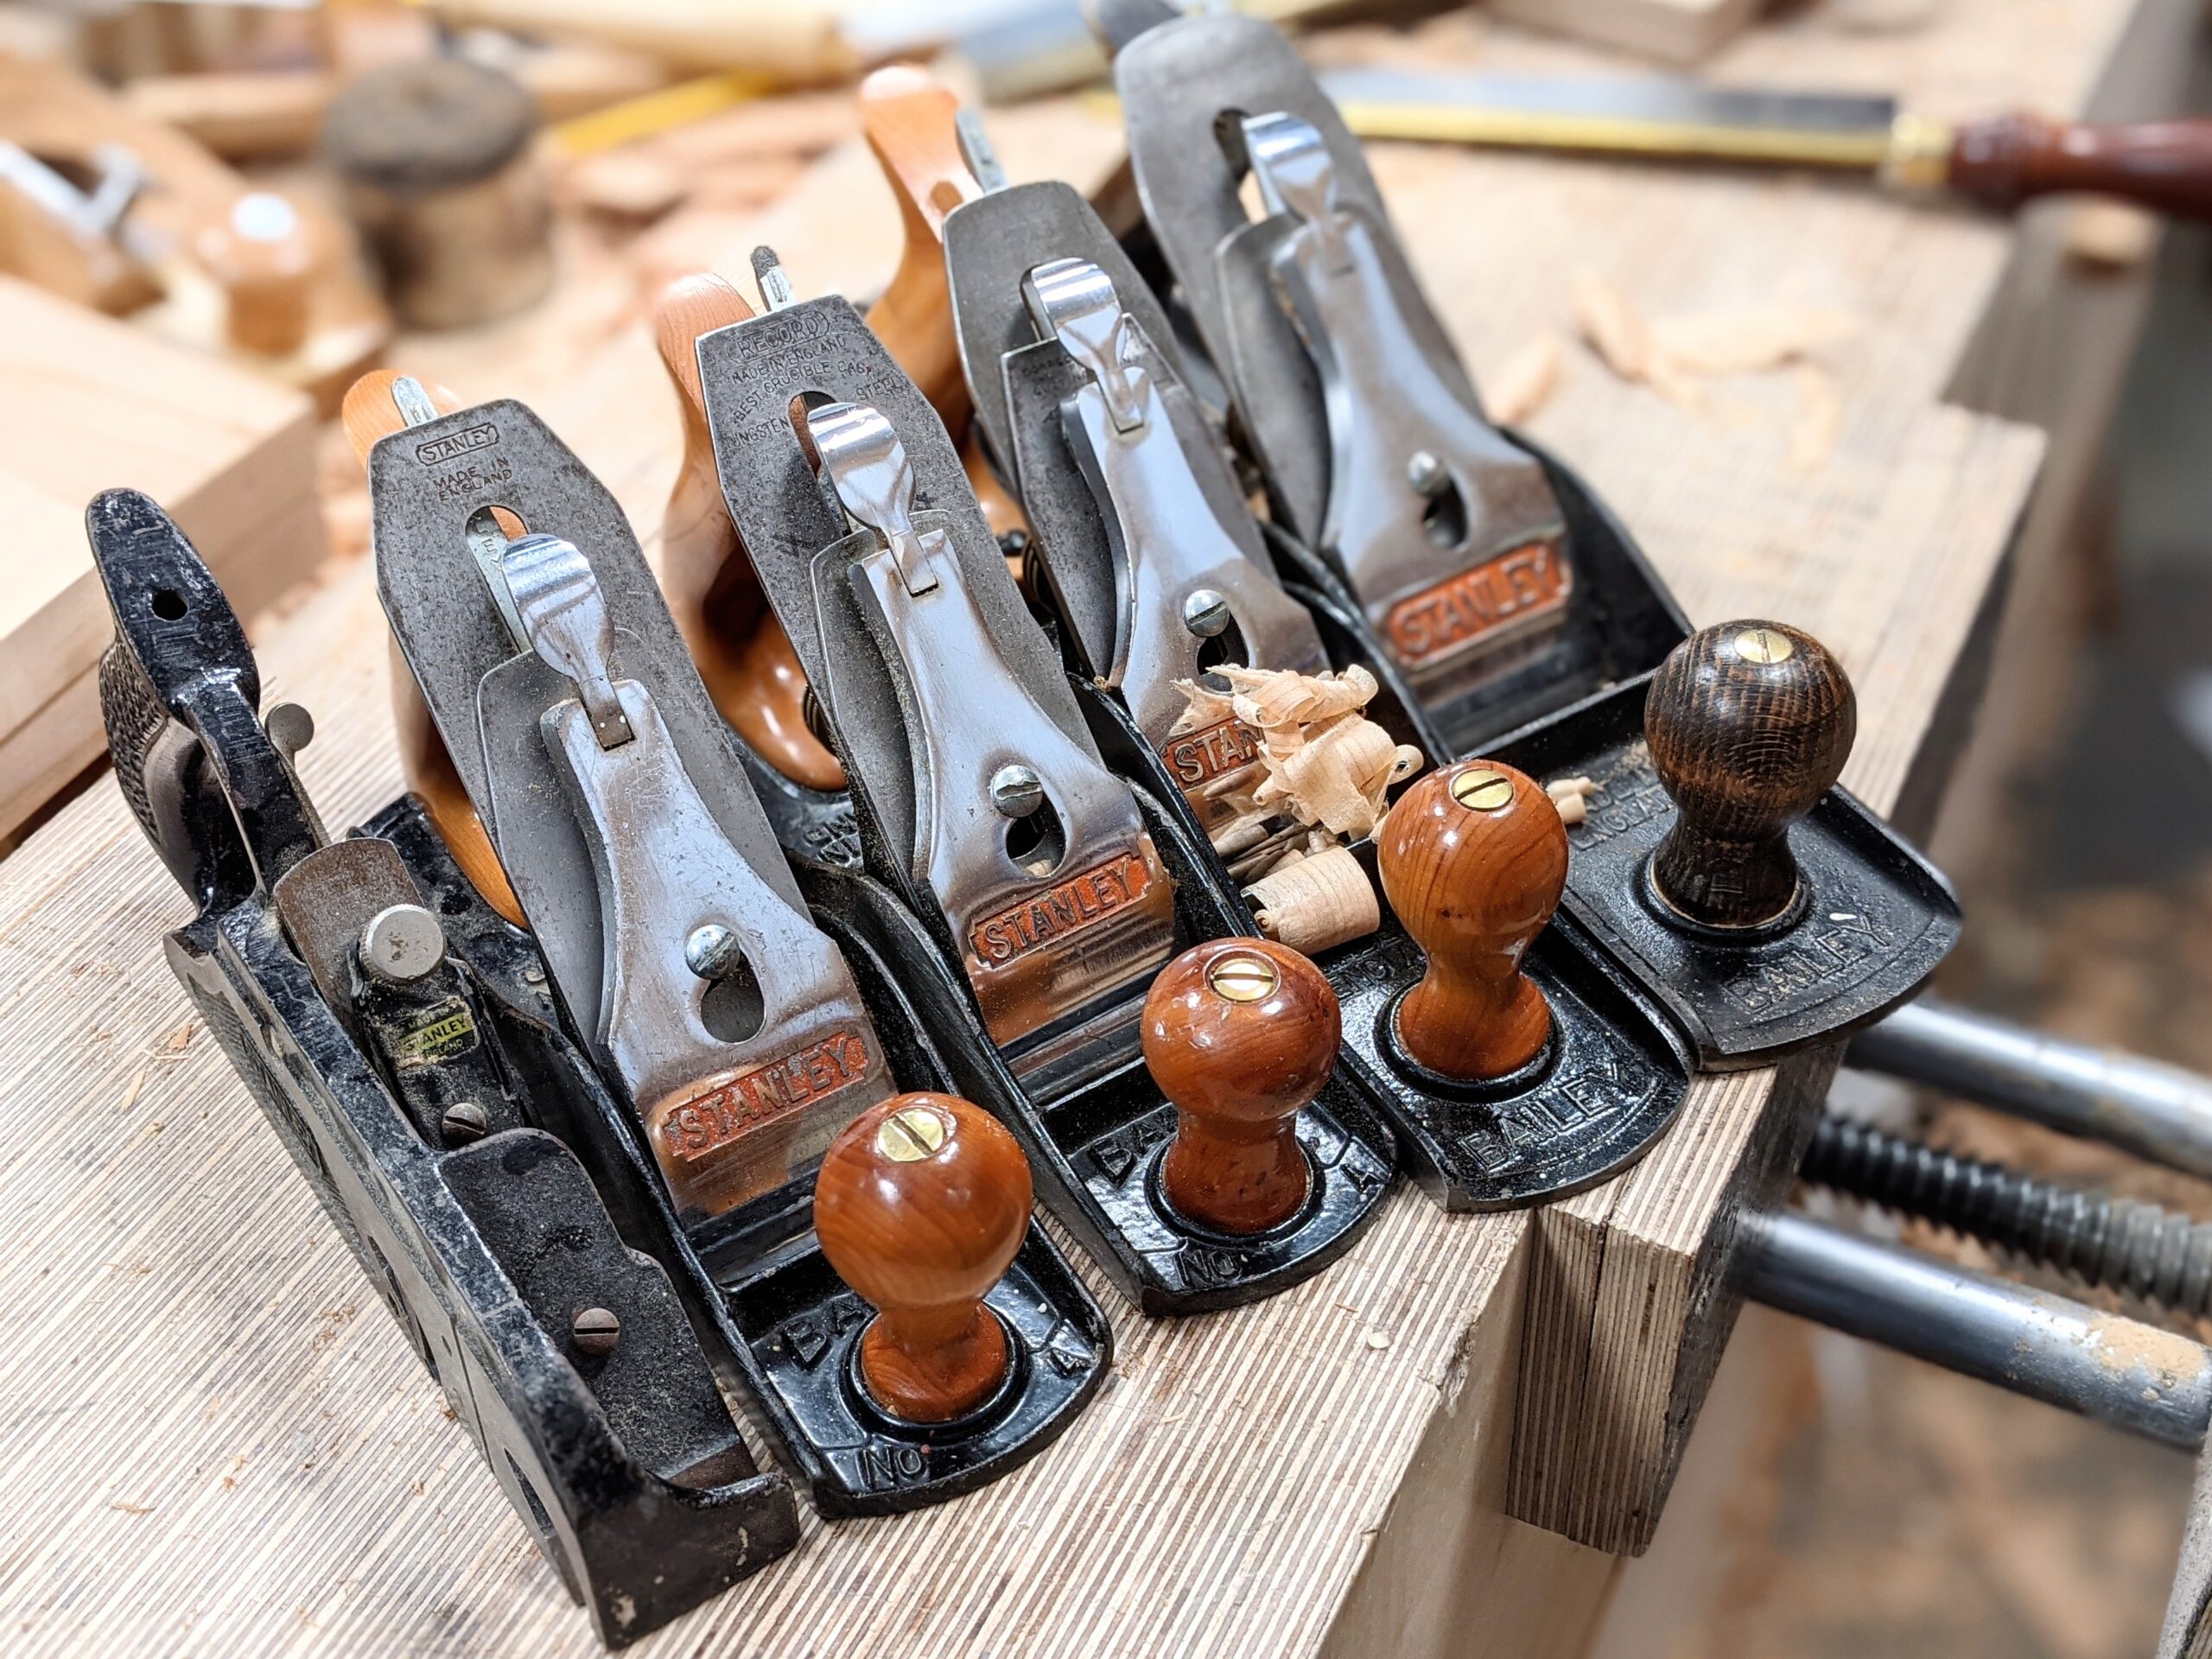
Now I should say here that I could manage perfectly well with a plain #4 smoothing plane for everything but having the others really helps to increase the ease of working and the efficiency of the various planing tasks. Technically, I would say that these other planes are non-essential but nice to have.
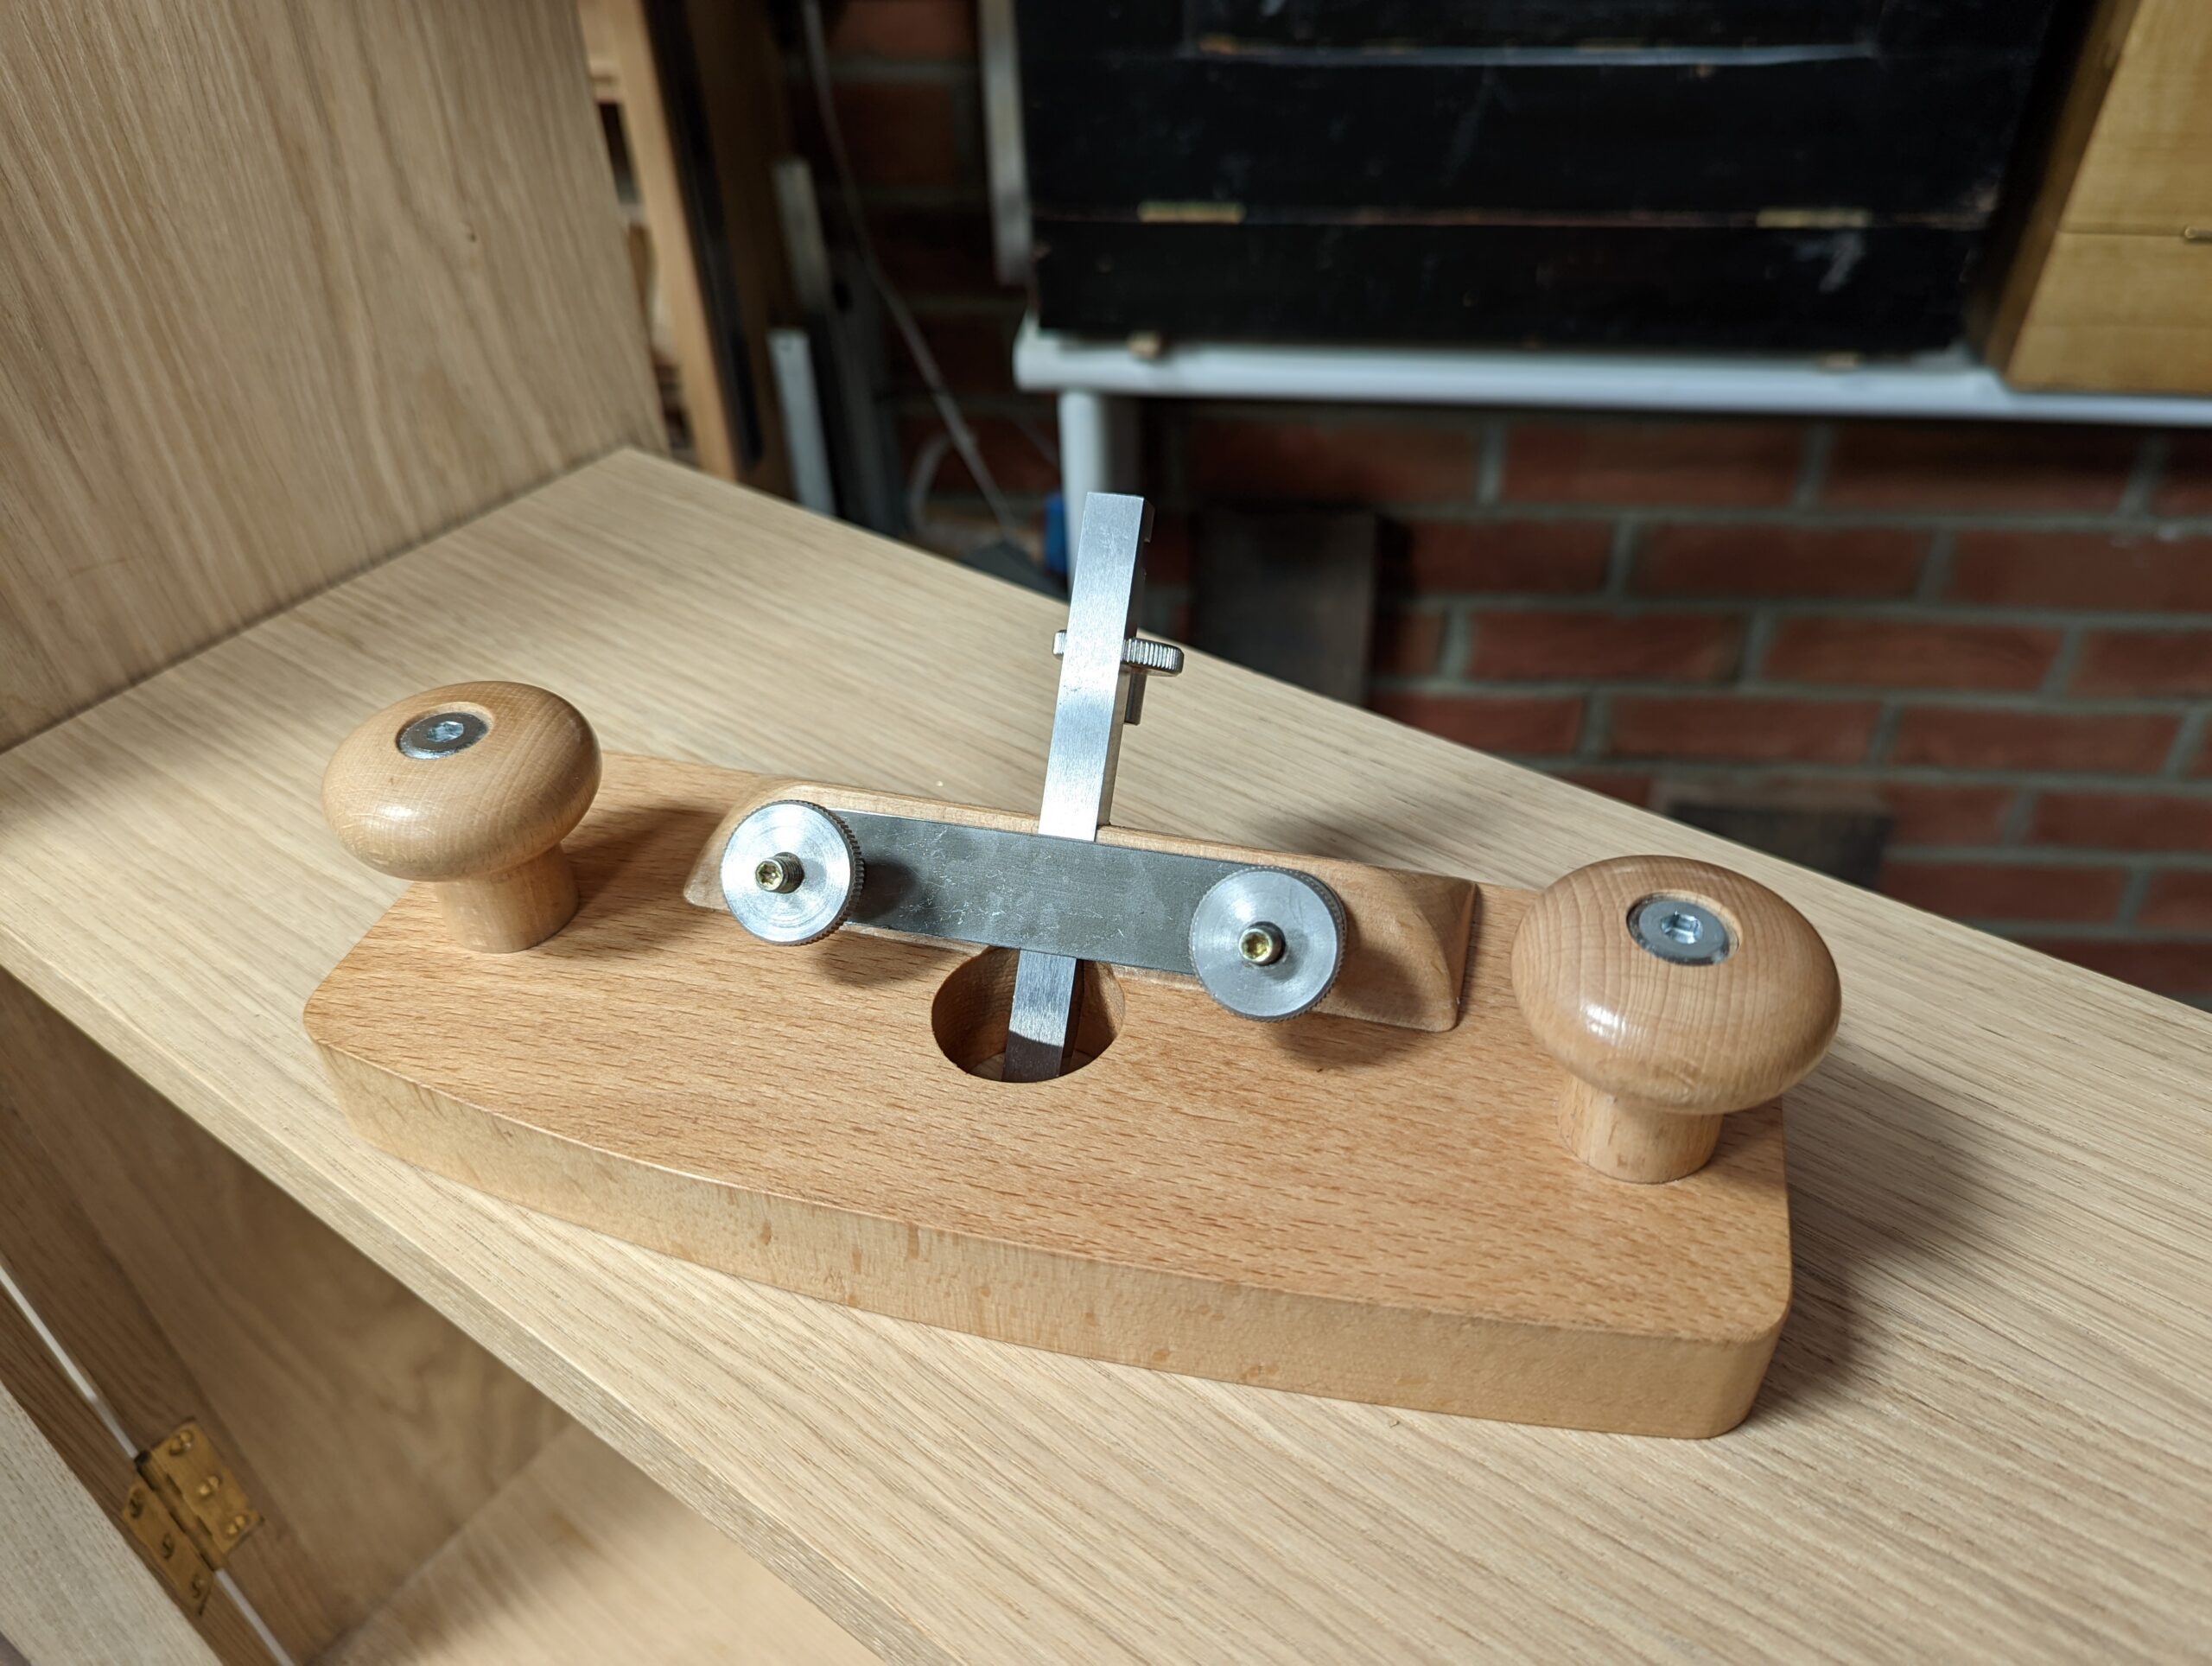
Router Plane
I created a problem and fixed it. My advocacy and use of the commercially made router pane caused the prices to increase by first two, three and fourfold but then they went up fifteenfold and the price became prohibitive along with a shortage of supply. Modern makers could not keep stocks in and so I went to the drawing board and designed my own version. Thankfully it surpassed the commercially made ones and it has become very popular with wonderful feedback. Over the years I have been able to show woodworkers how to use the plane for many tasks the makers never thought of. Surfacing tenons paraplanar to the rail face for one and then parallel to each for the other. It may not seem radical at first but it made the most amazing difference to every student I ever taught in class and eliminated twisted doors and frames were no longer misaligned. It's an afternoon's work to make one and we have a kit available with all of the metal parts including the hardened and tempered Sheffield-made cutting iron.
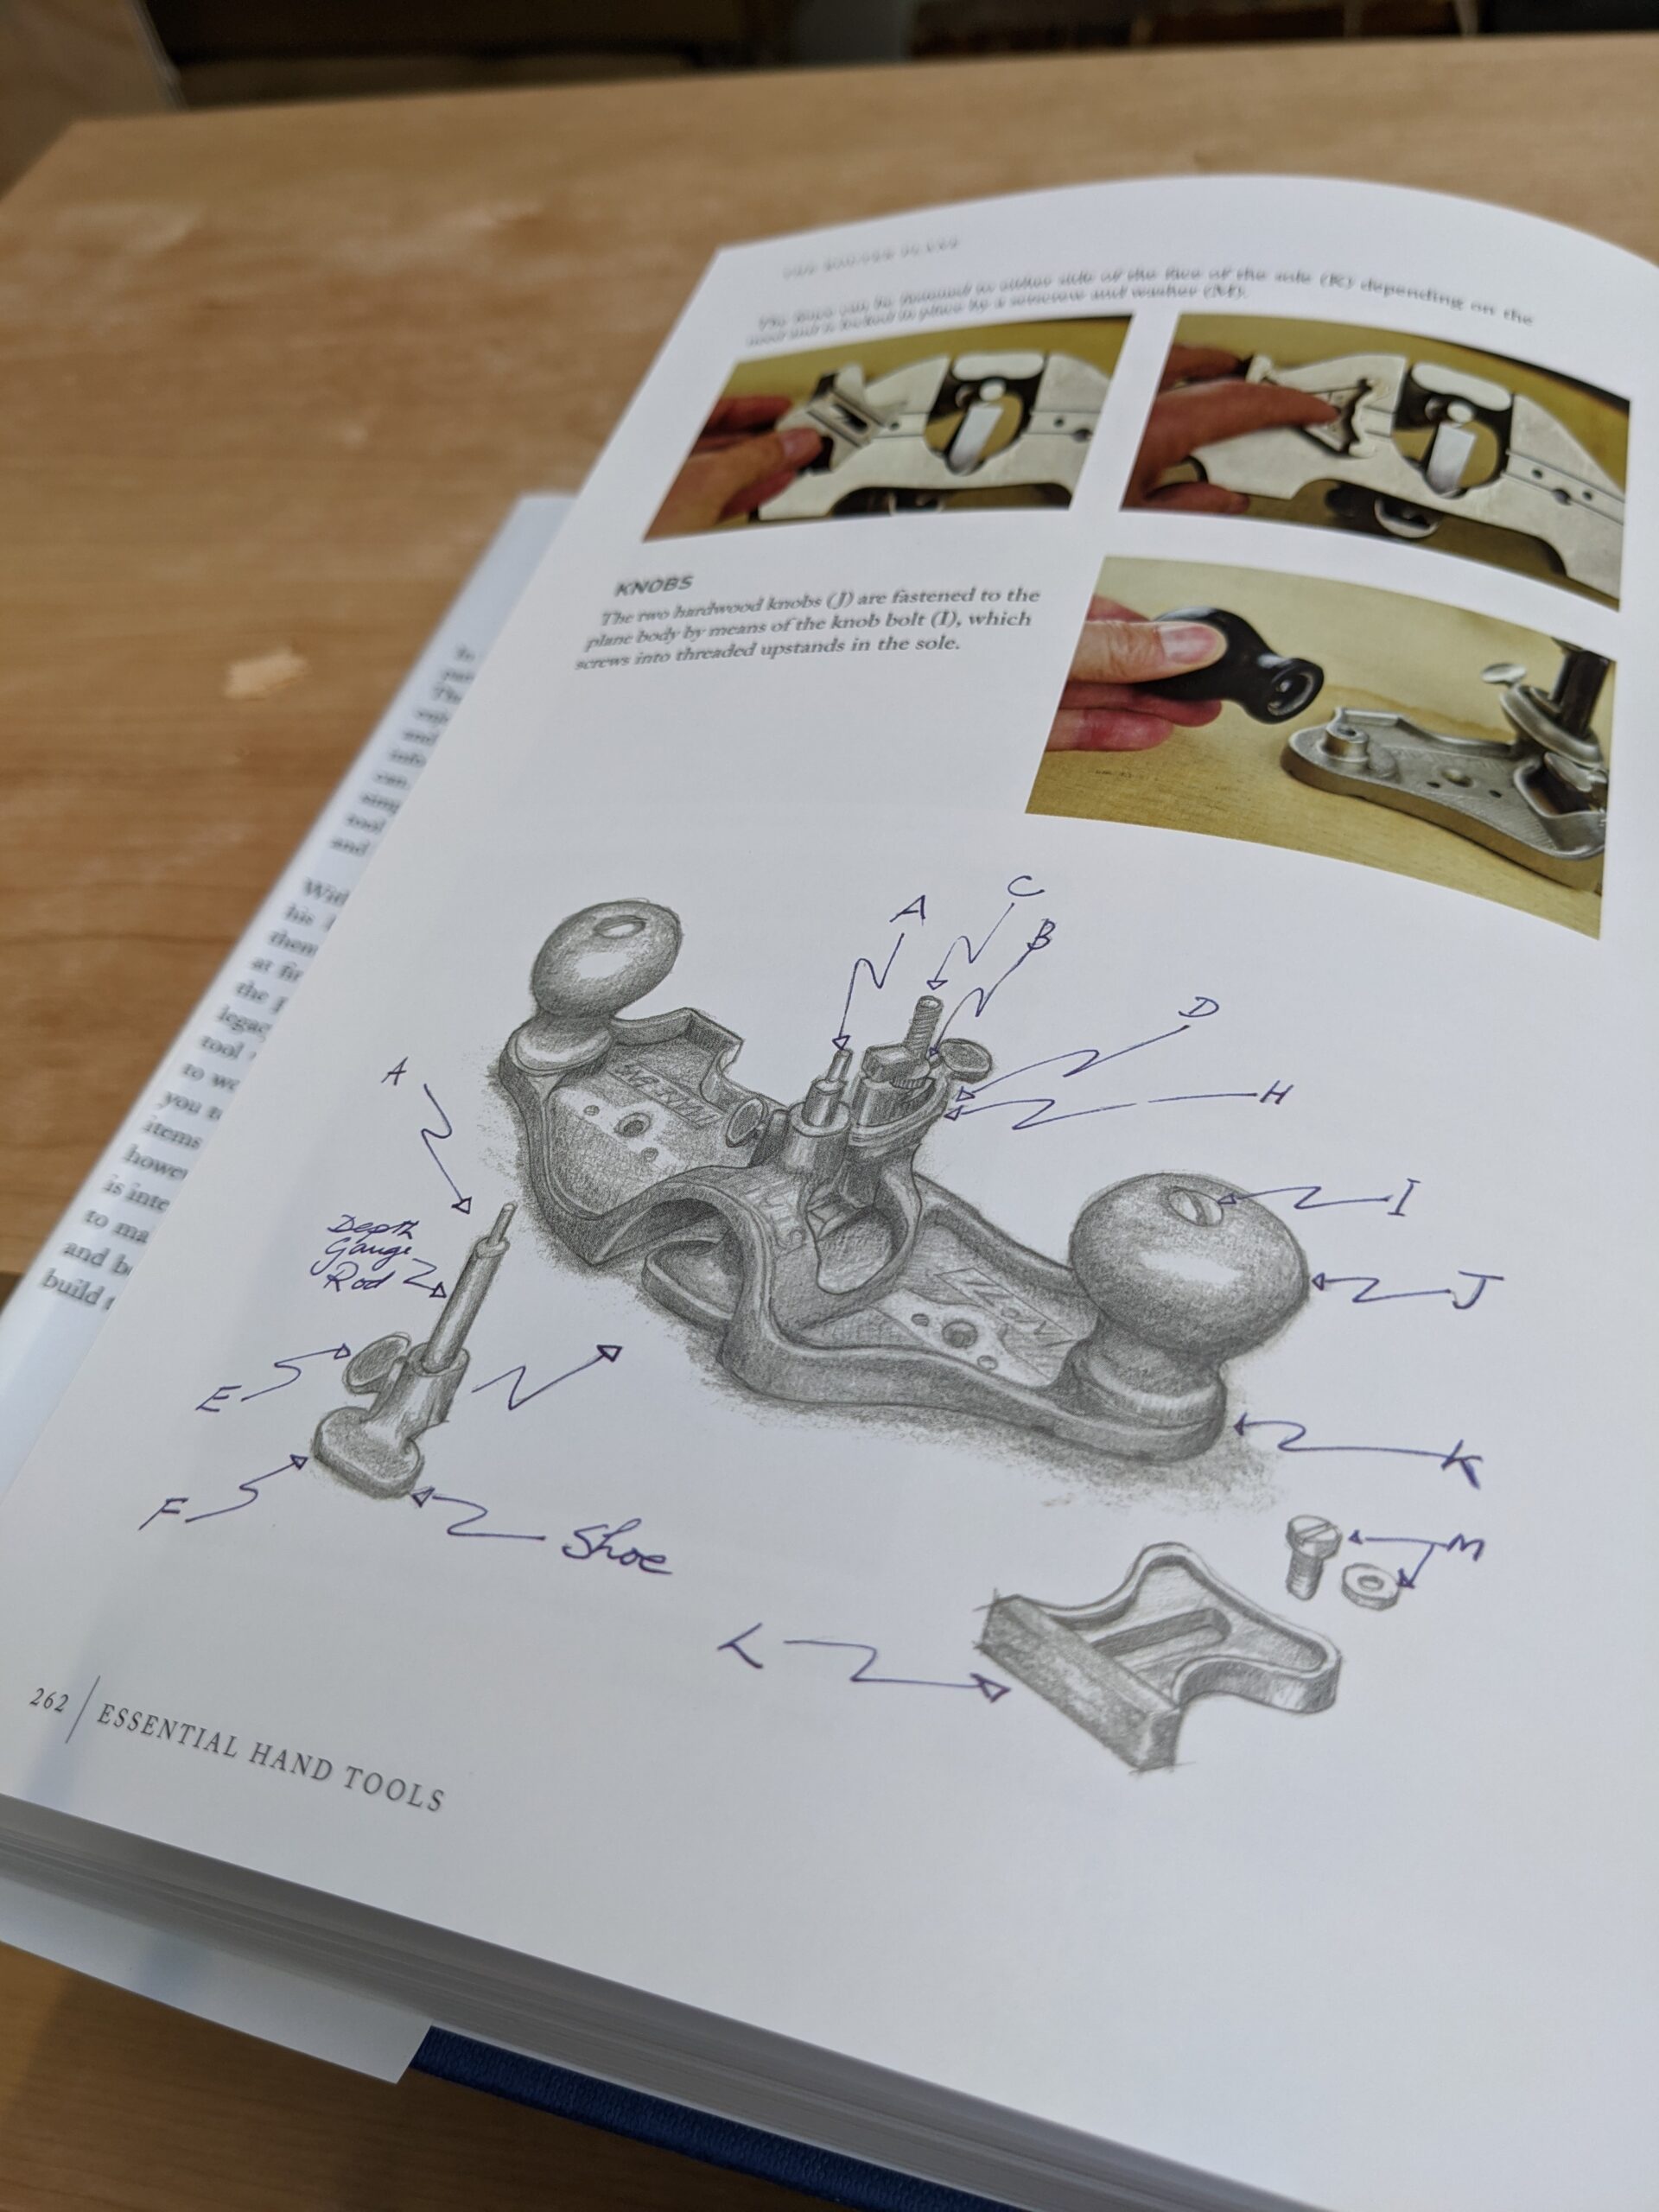
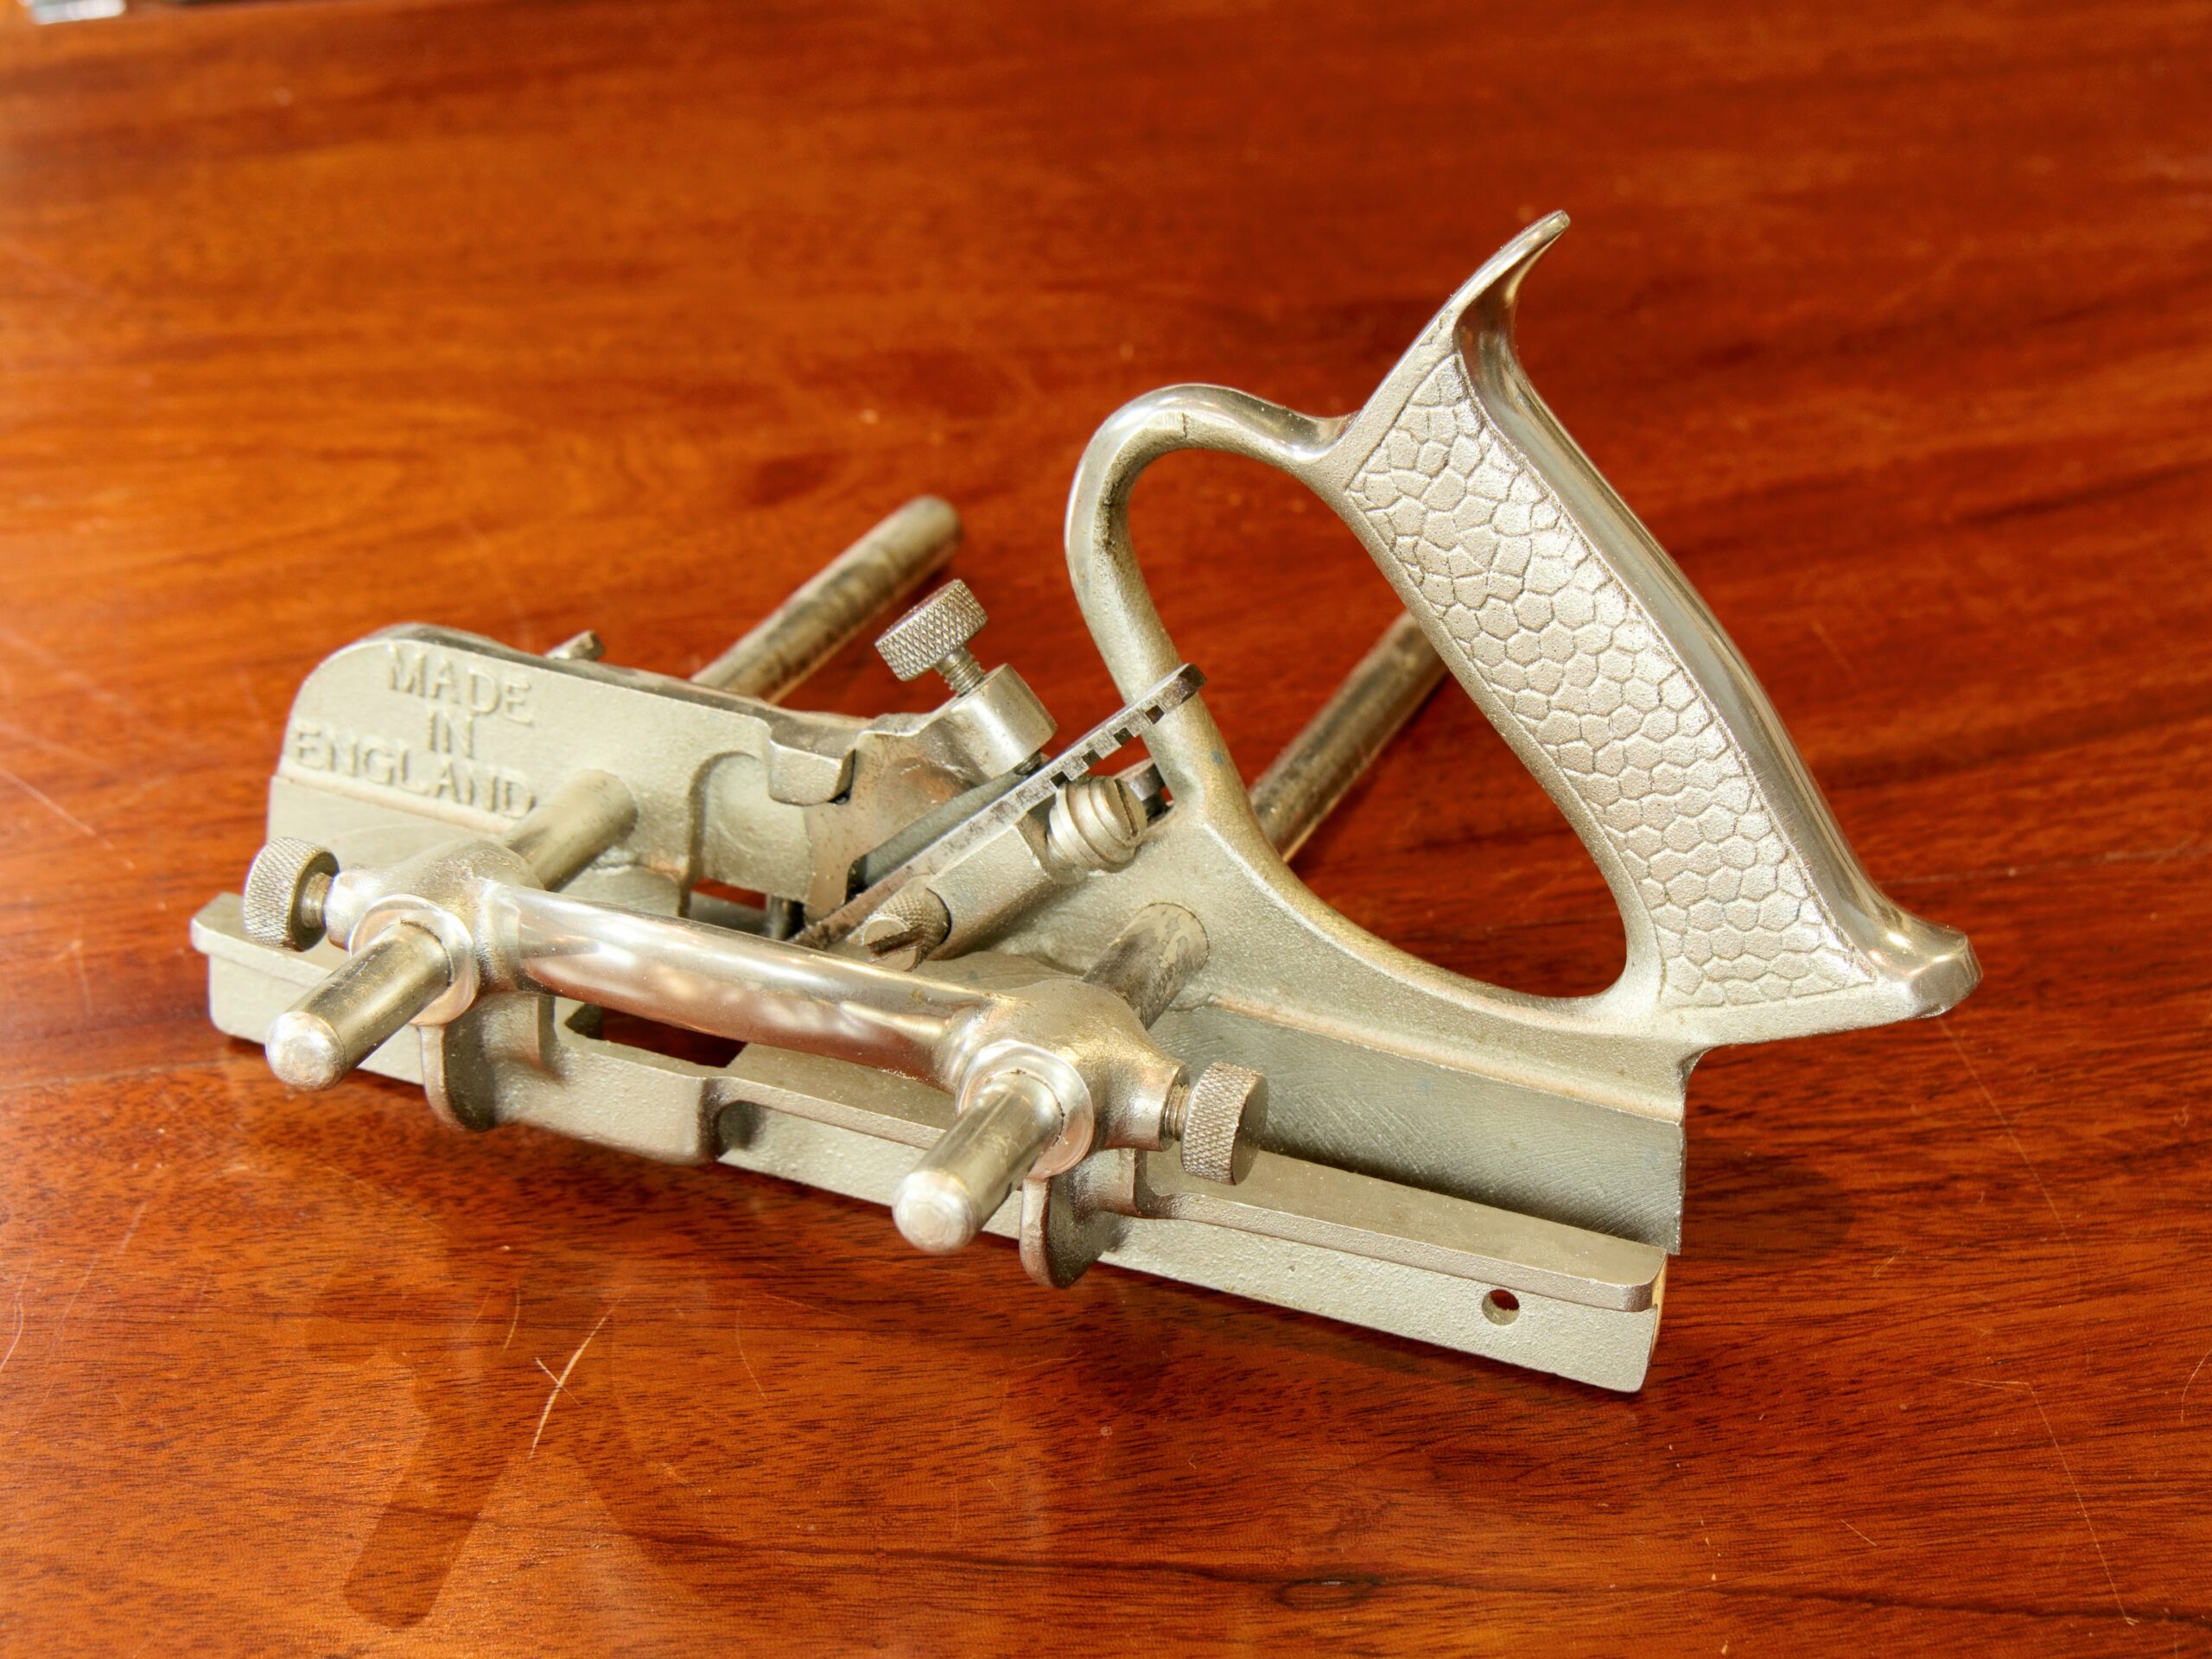
Plough plane
My other planes include a Record or Stanley plough planes Both Stanley and Record versions all work exceptionally well and are equal to one another in performance.

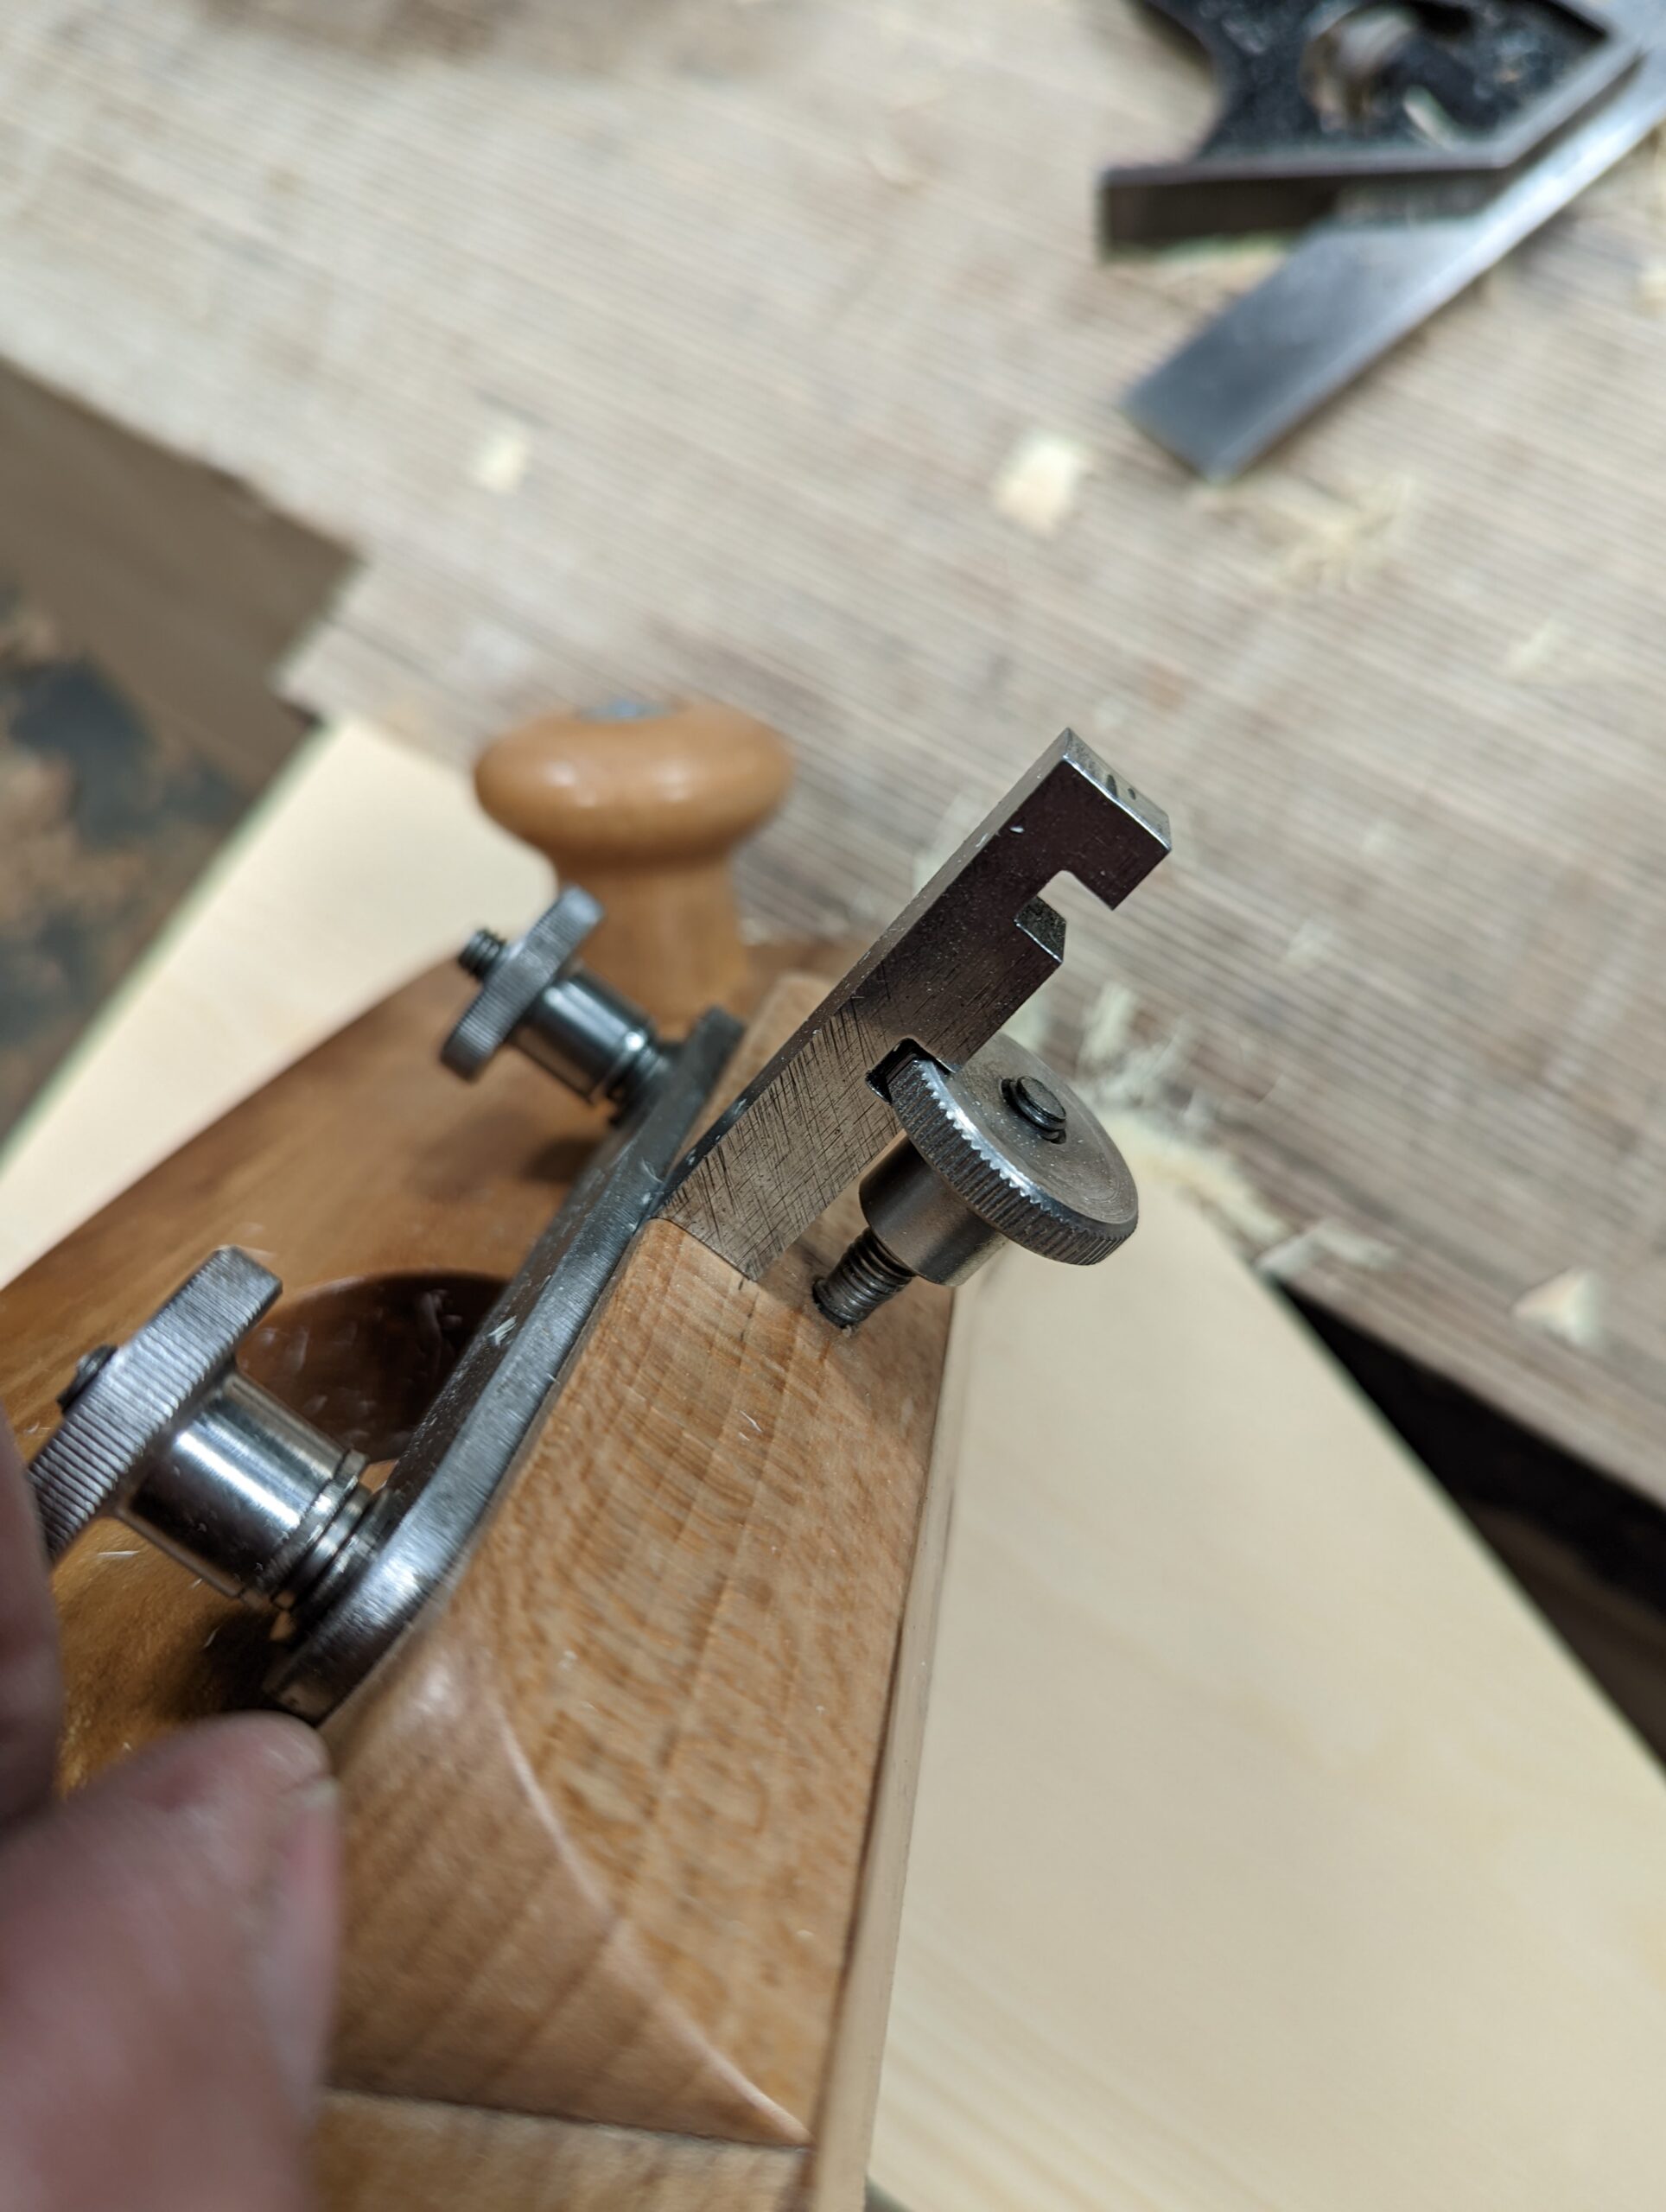
Rebate Plane
Though I use a #78 rebate plane as an excellent scrub plane, I also rely on one for treating all manner of things throughout my projects. It takes a while to fully understand the dynamics surrounding forming rebates because there are non-obvious idiosyncracies affecting the performance of the plane and these include the plane itself, the wood you are working and then of course your humanity. But they are really worth persevering with and my book goes into great detail for setting them up and using them.
Cabinet scraper
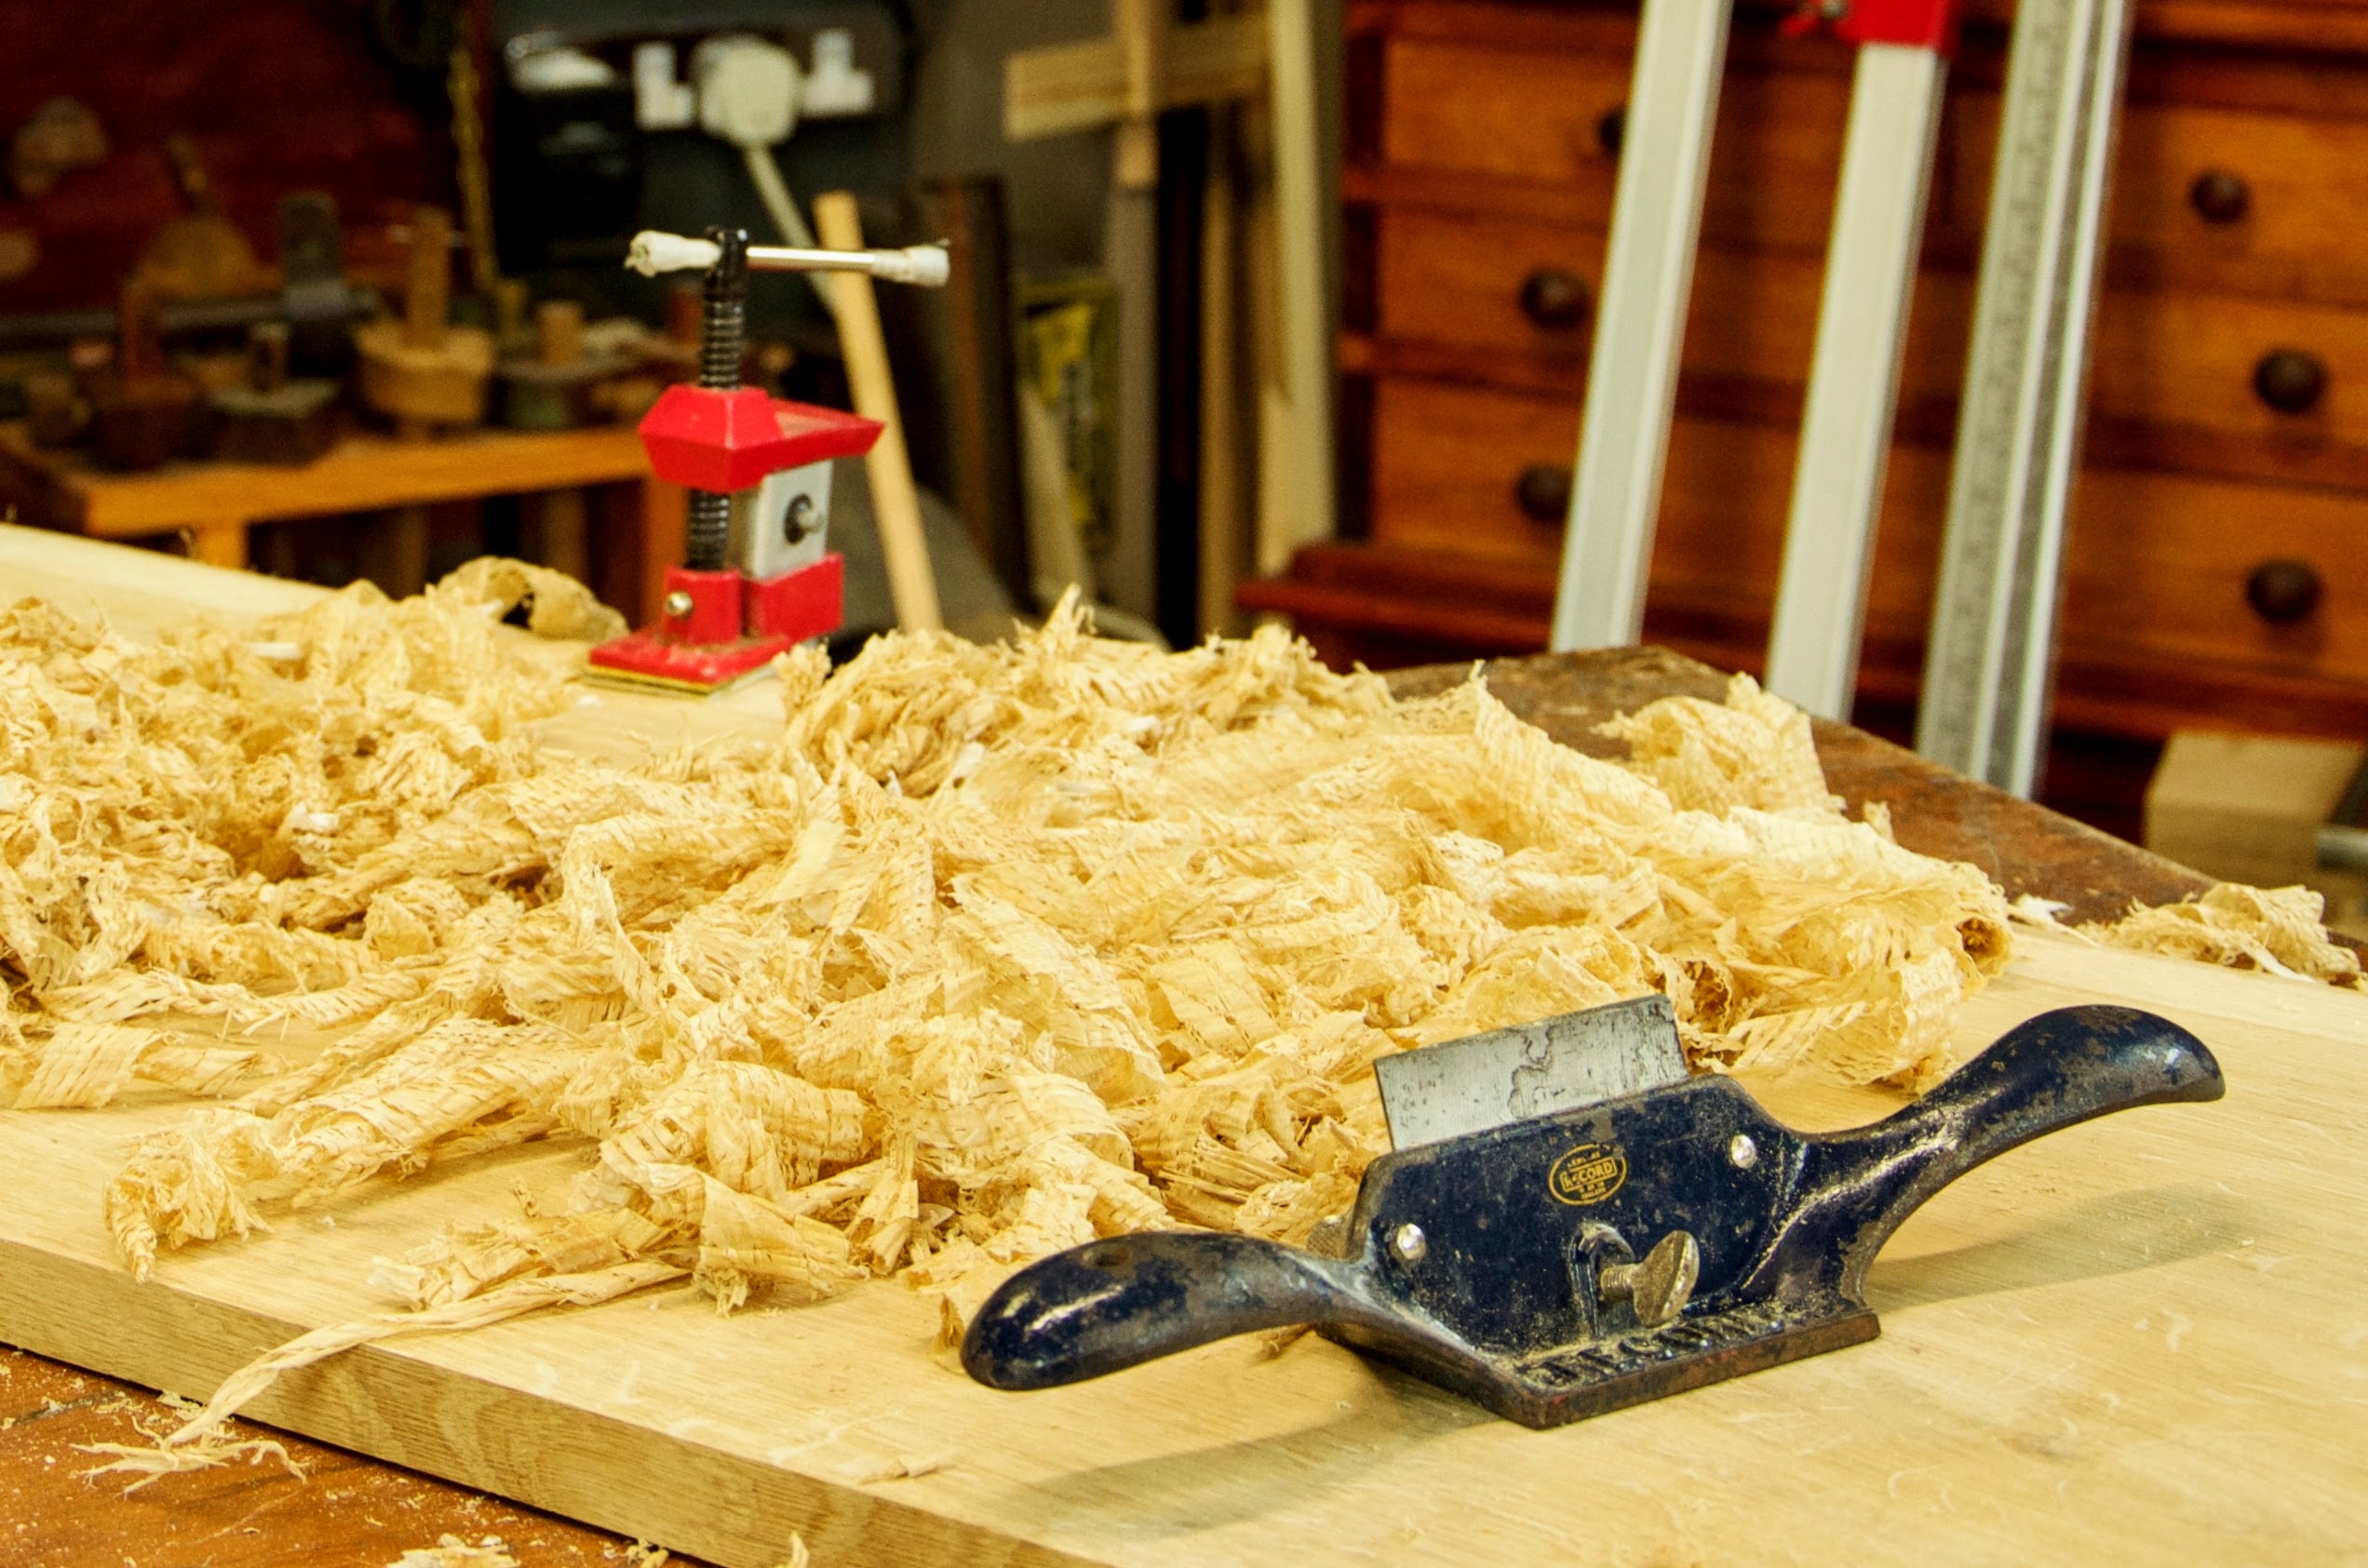
The cabinet scraper is one of the most indispensable hand tools in the arsenal of tools for finishing wood. It takes care of any and all awkward grain.
Card scraper
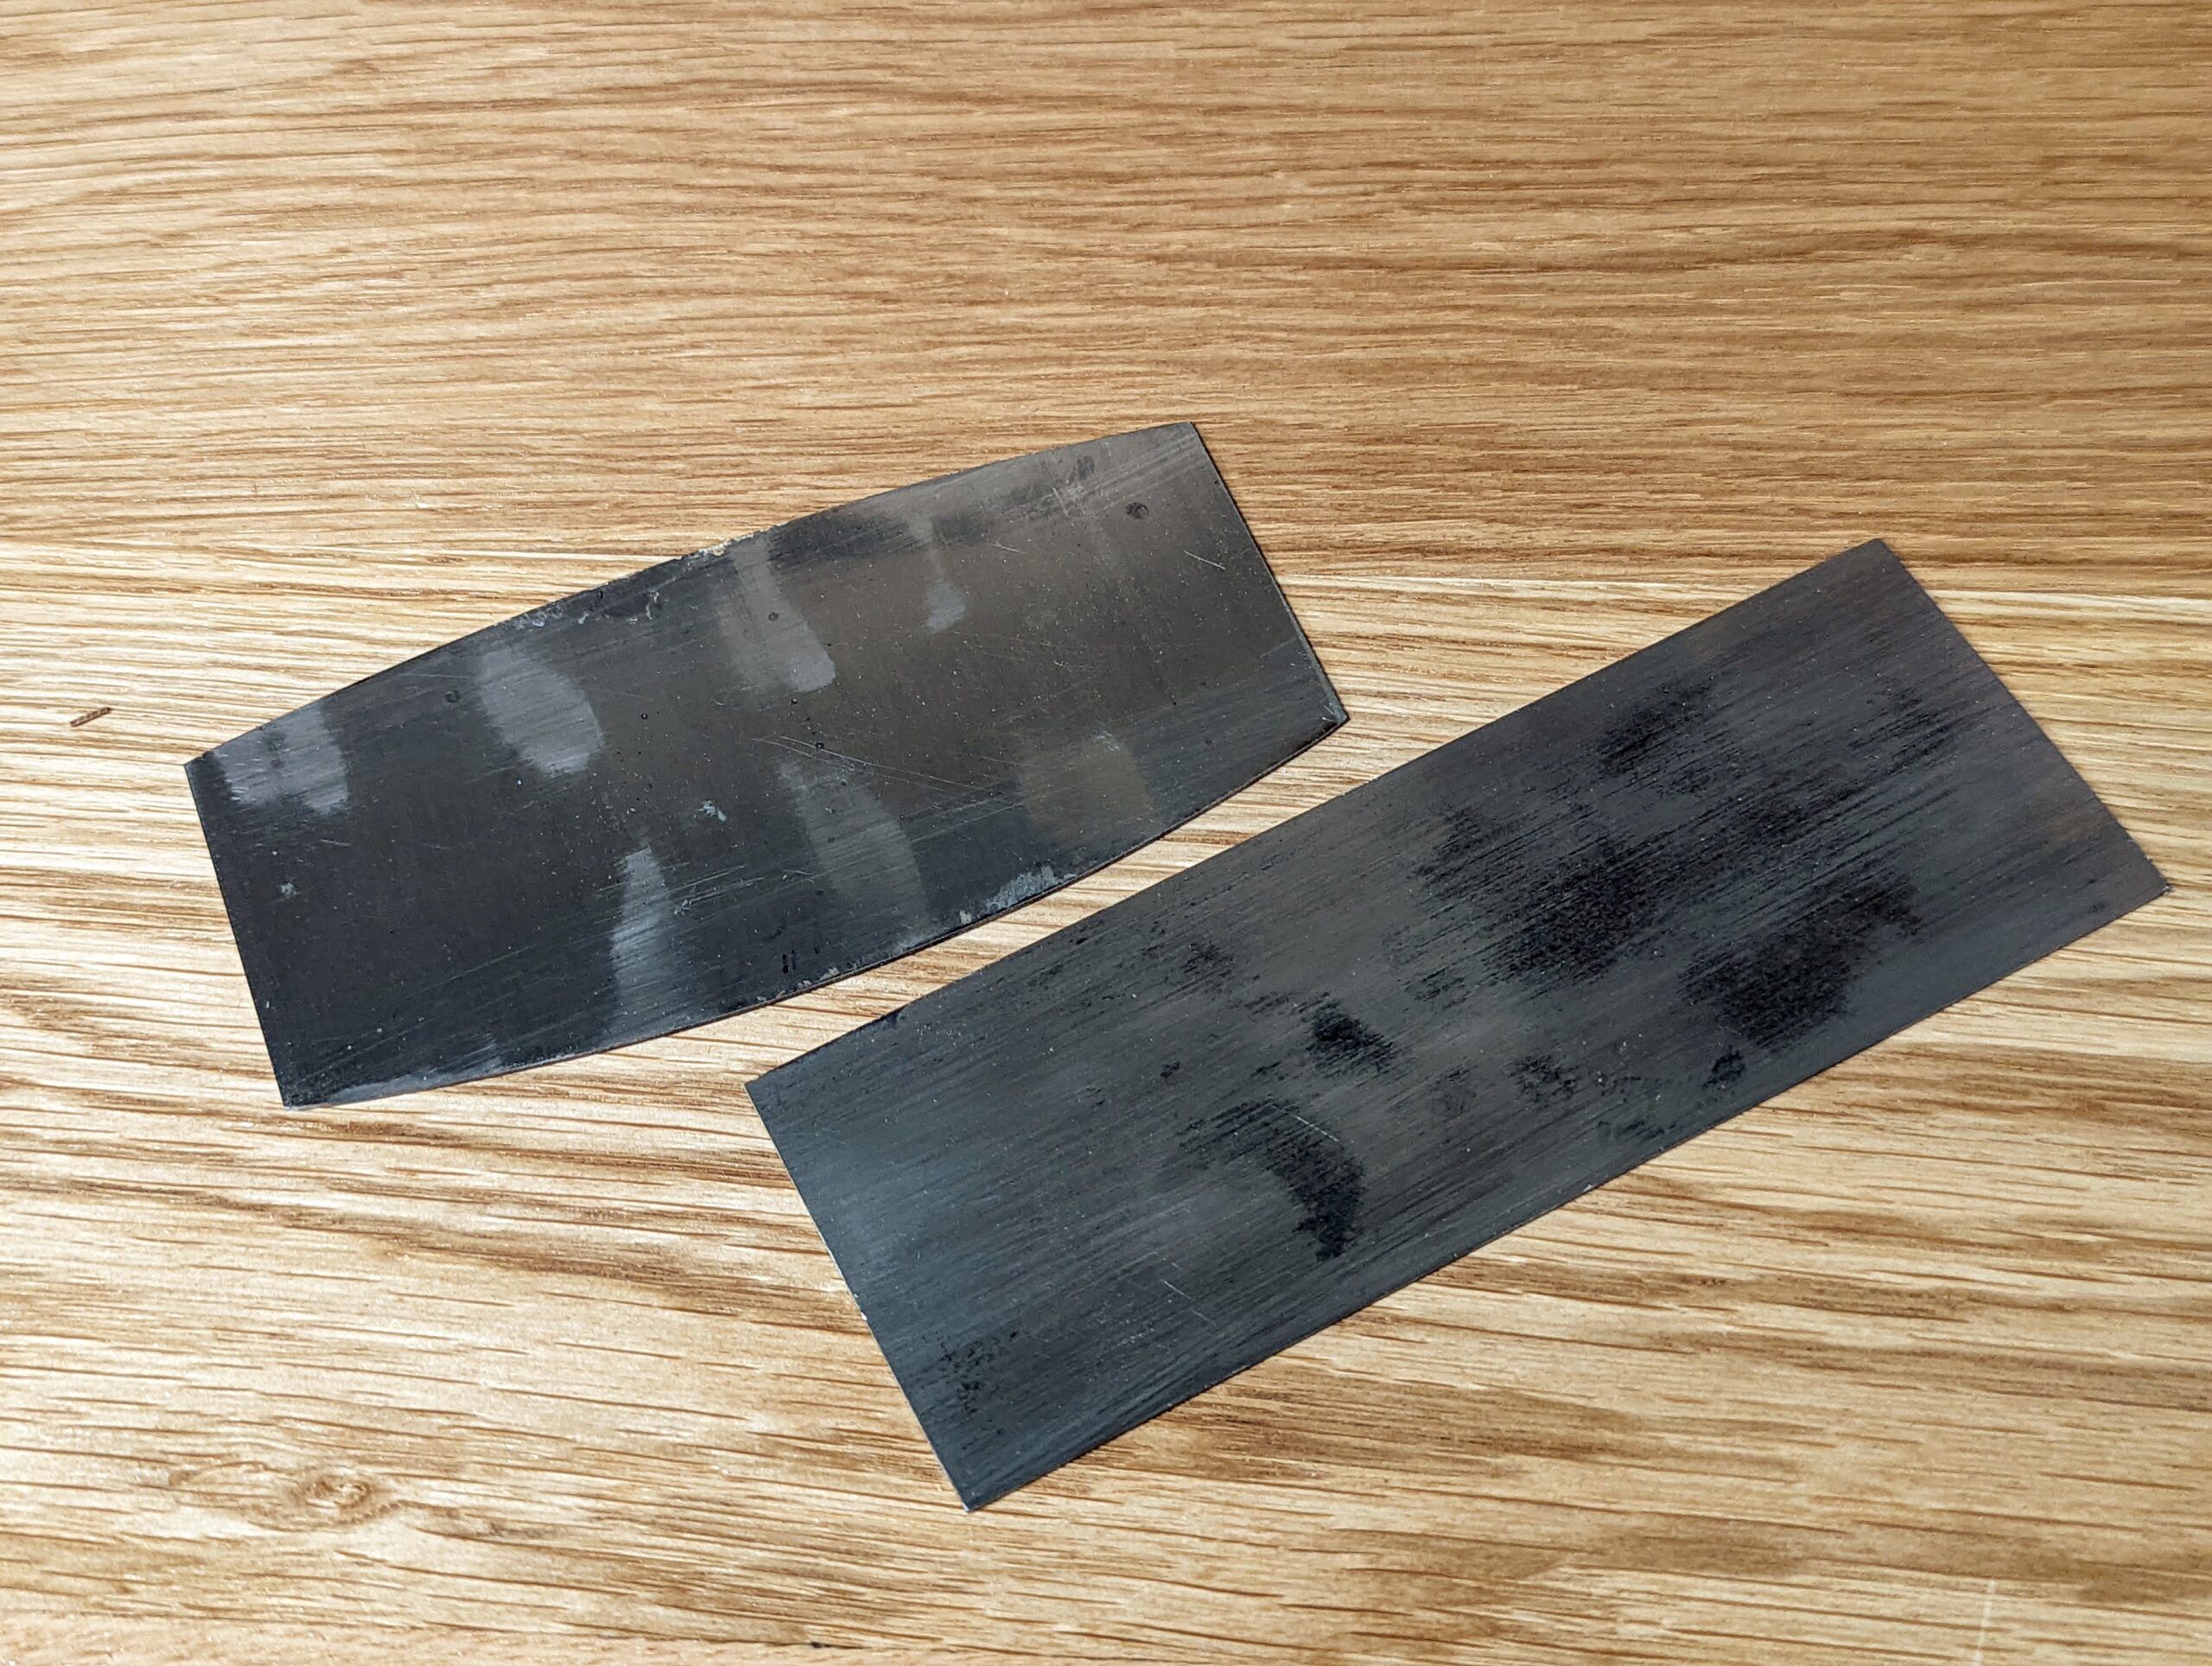
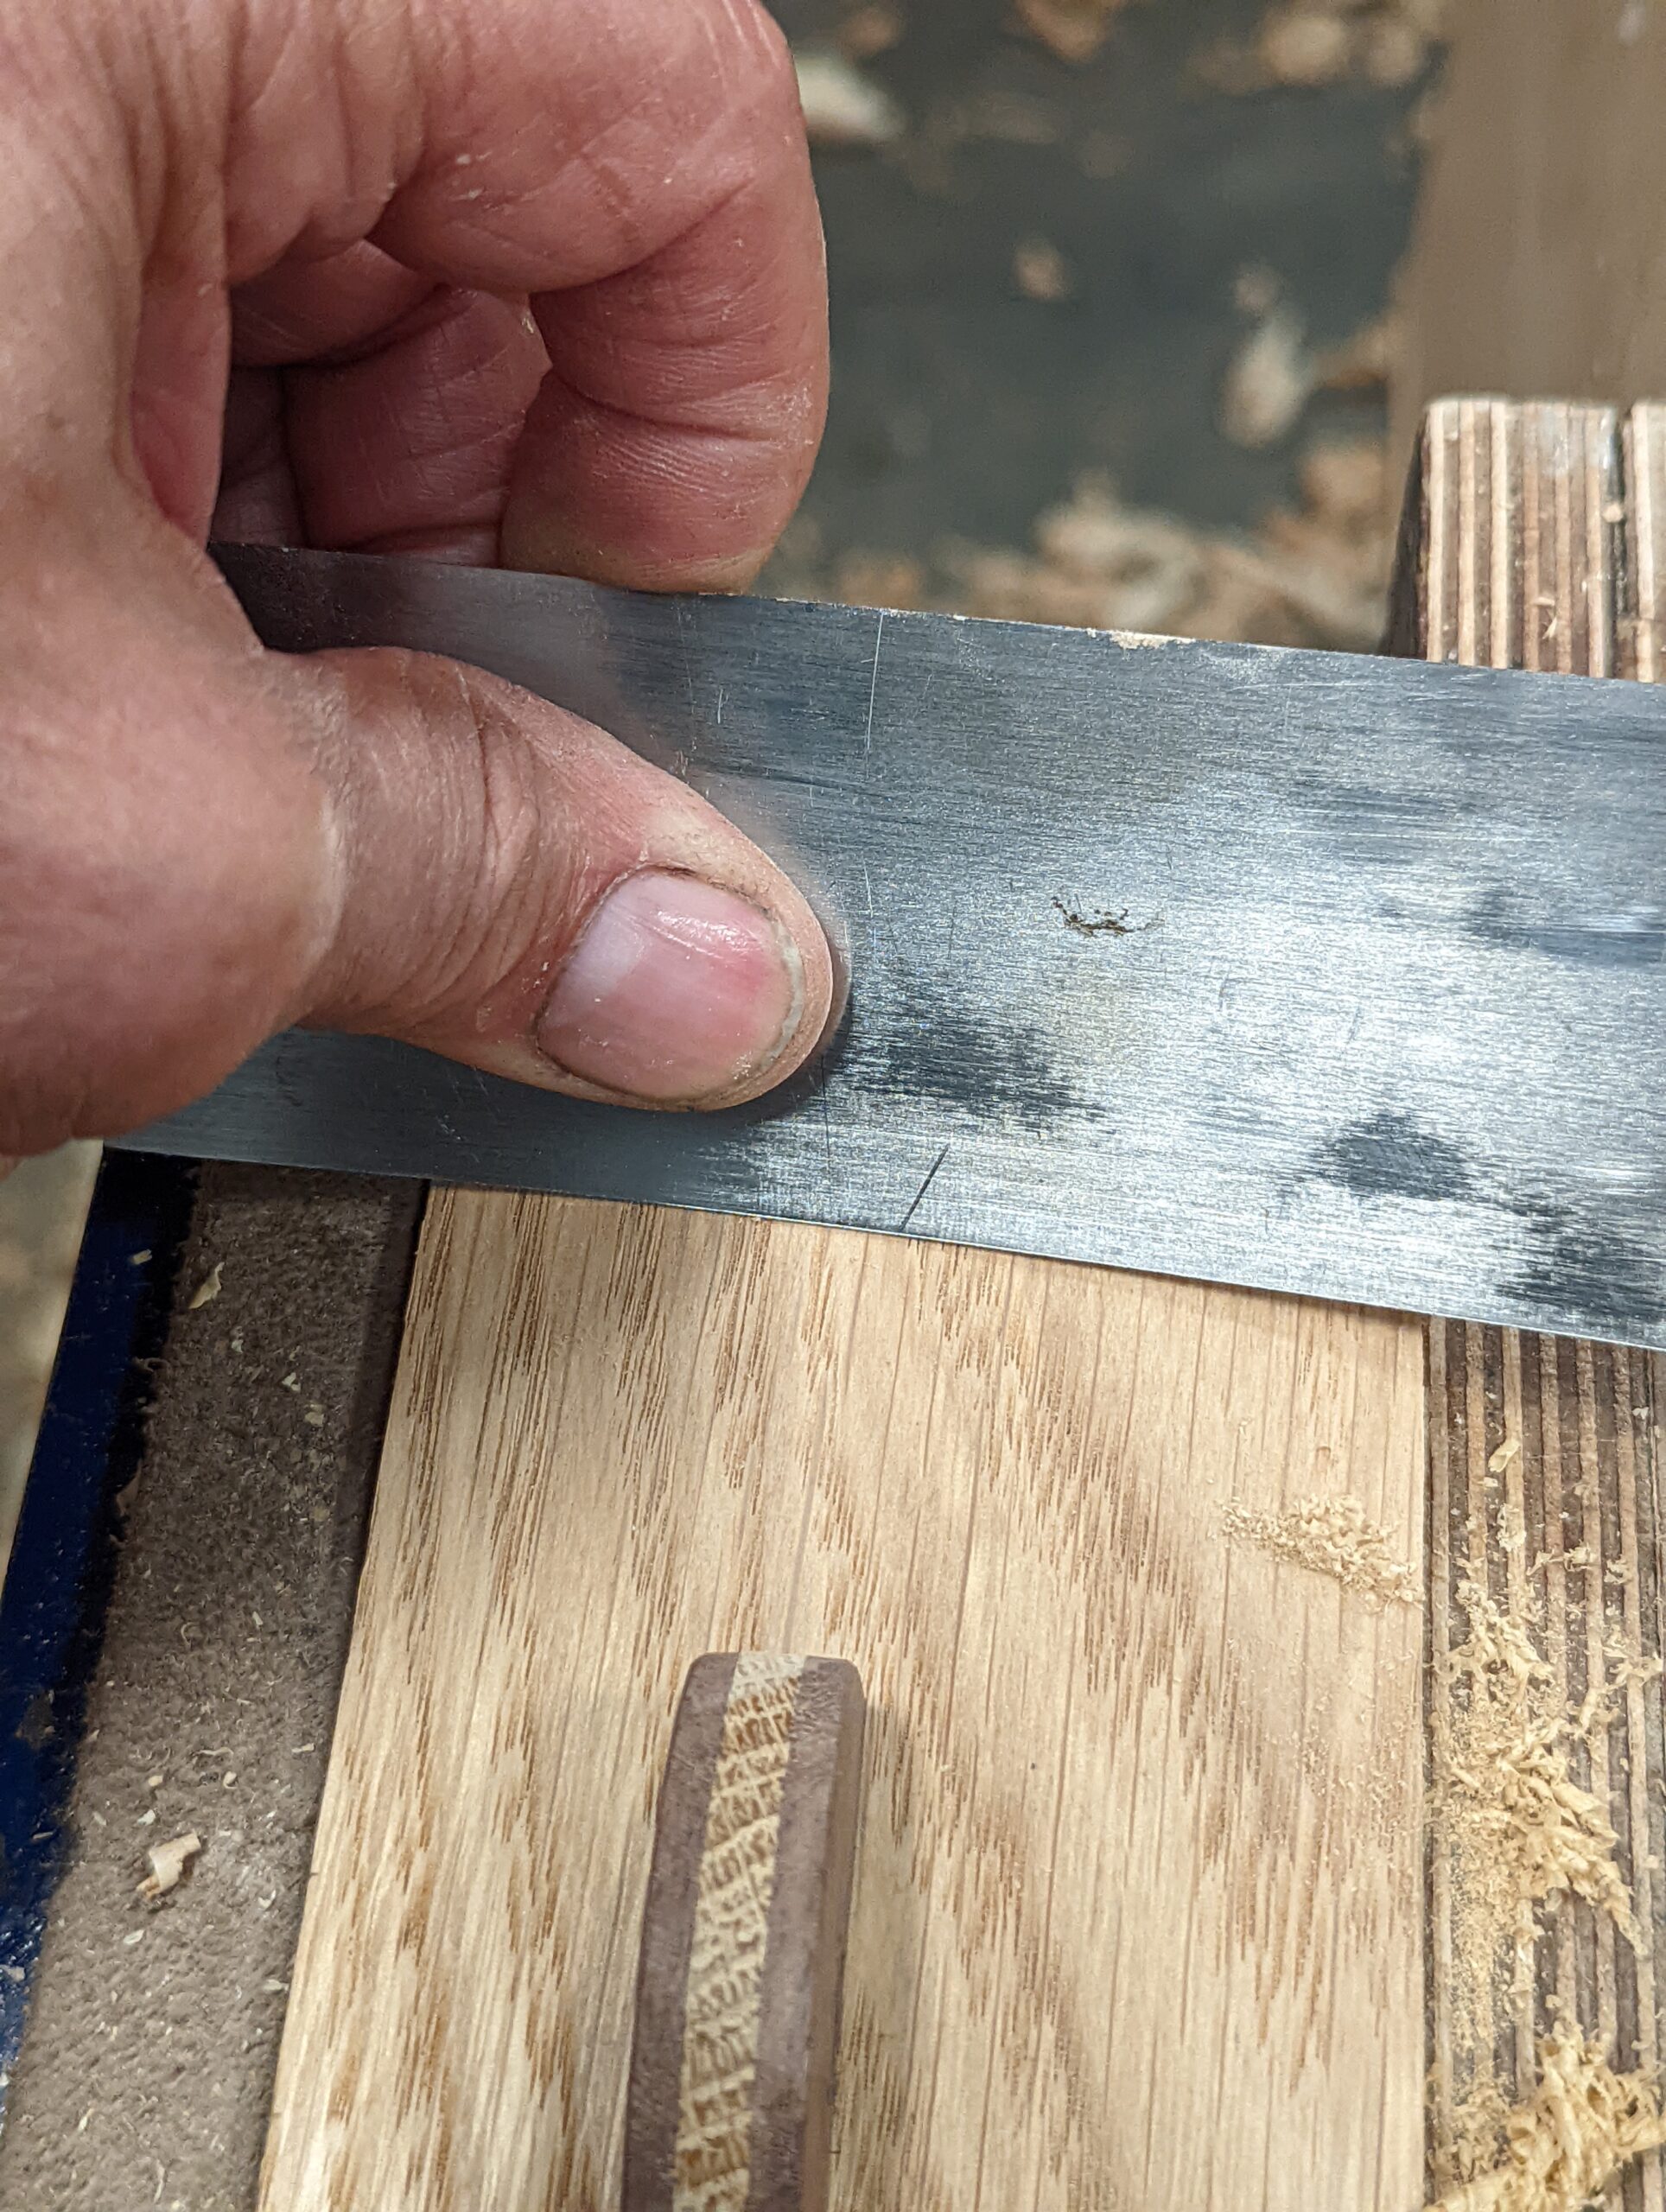
Card scrapers take up the slack for wherever a cabinet scraper just cannot or rarely works and that is in localised areas and on narrow edges or near to an inside corner. Basically, it is the most sophisticated of all cutting edges used in woodworking and for more information on creating this edge go to my video here for a quick lesson to see how this is done easily and efficiently.
Support equipment for planing work
Winding sticks
Funny thing to see woodworkers buy aluminium winding sticks when making your own from mixed woods seems to me so much a part of what we do. They are lifetime aids and absolutely essential for us to own and use for truing our wood. Join the 300,000 who have watched my video on making them here. You won't regret it.

Straightedge (metal or wood)
Metal or wood, straightedges keep us in line when we are working on layout and such. They must be straight and you can buy commercially made ones in addition to making your own. A 24" metal one is very good for checking straightness and wooden versions can be made for longer ones for almost nothing. To check for straightness when made, and correcting if needed, check against the edge of a piece of plywood. Plywood, a decent grade, is almost always dead straight.
Layout Tools
Combination square 12"

My favourite workhorse of a square is the combination square designed by an engineer for engineers almost a century ago. I have been using mine since 1965 and it is important to buy a good one as almost every single woodworking joint relies on the accuracy of your square. Not only that, almost every tool you use takes its reference and use from the square. Buy secondhand or new but look for excessive wear if buying secondhand.
A new version of this type of square is made by Stanley but must be checked for square as they often come out of square.
Stanley Folding Pocket Knife
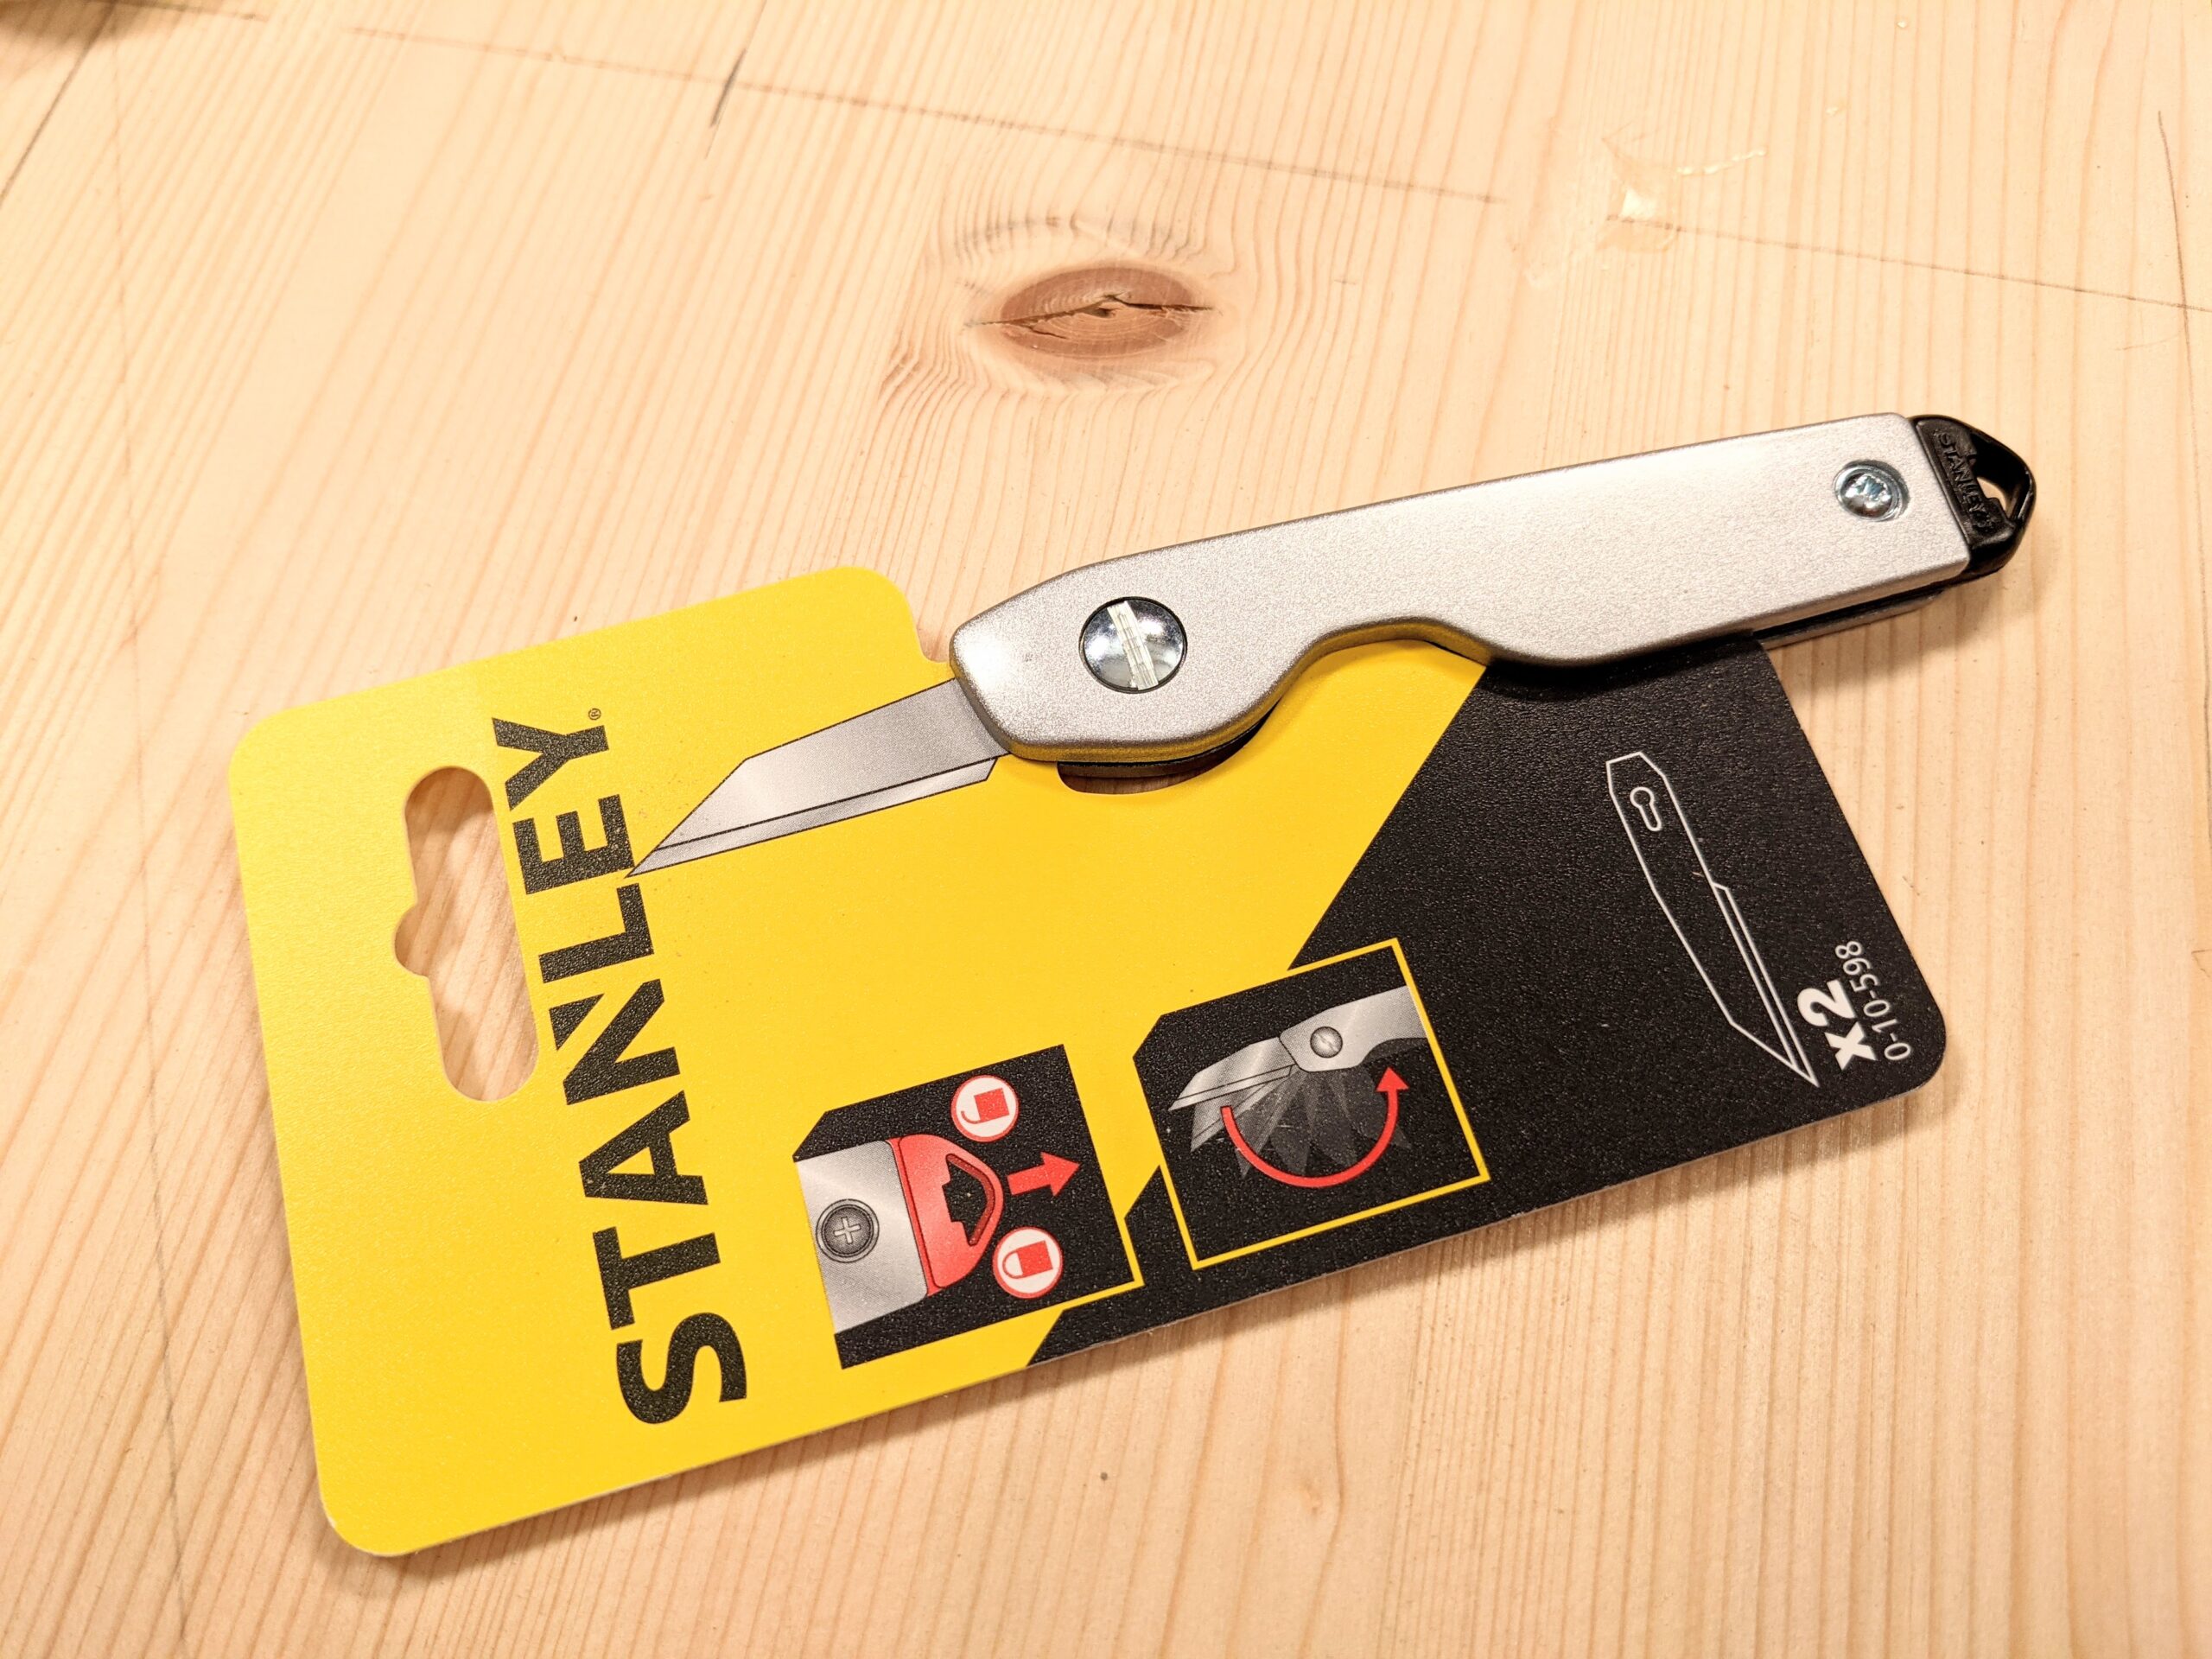
This has to be the very best layout knife for creating the knifewalls we depend on for perfect shoulder lines in joint making. I have never found a knife as versatile and the great thing is that it is resharpenable even though it takes replaceable blades too. The cost is the lowest ever too at just £6.50.
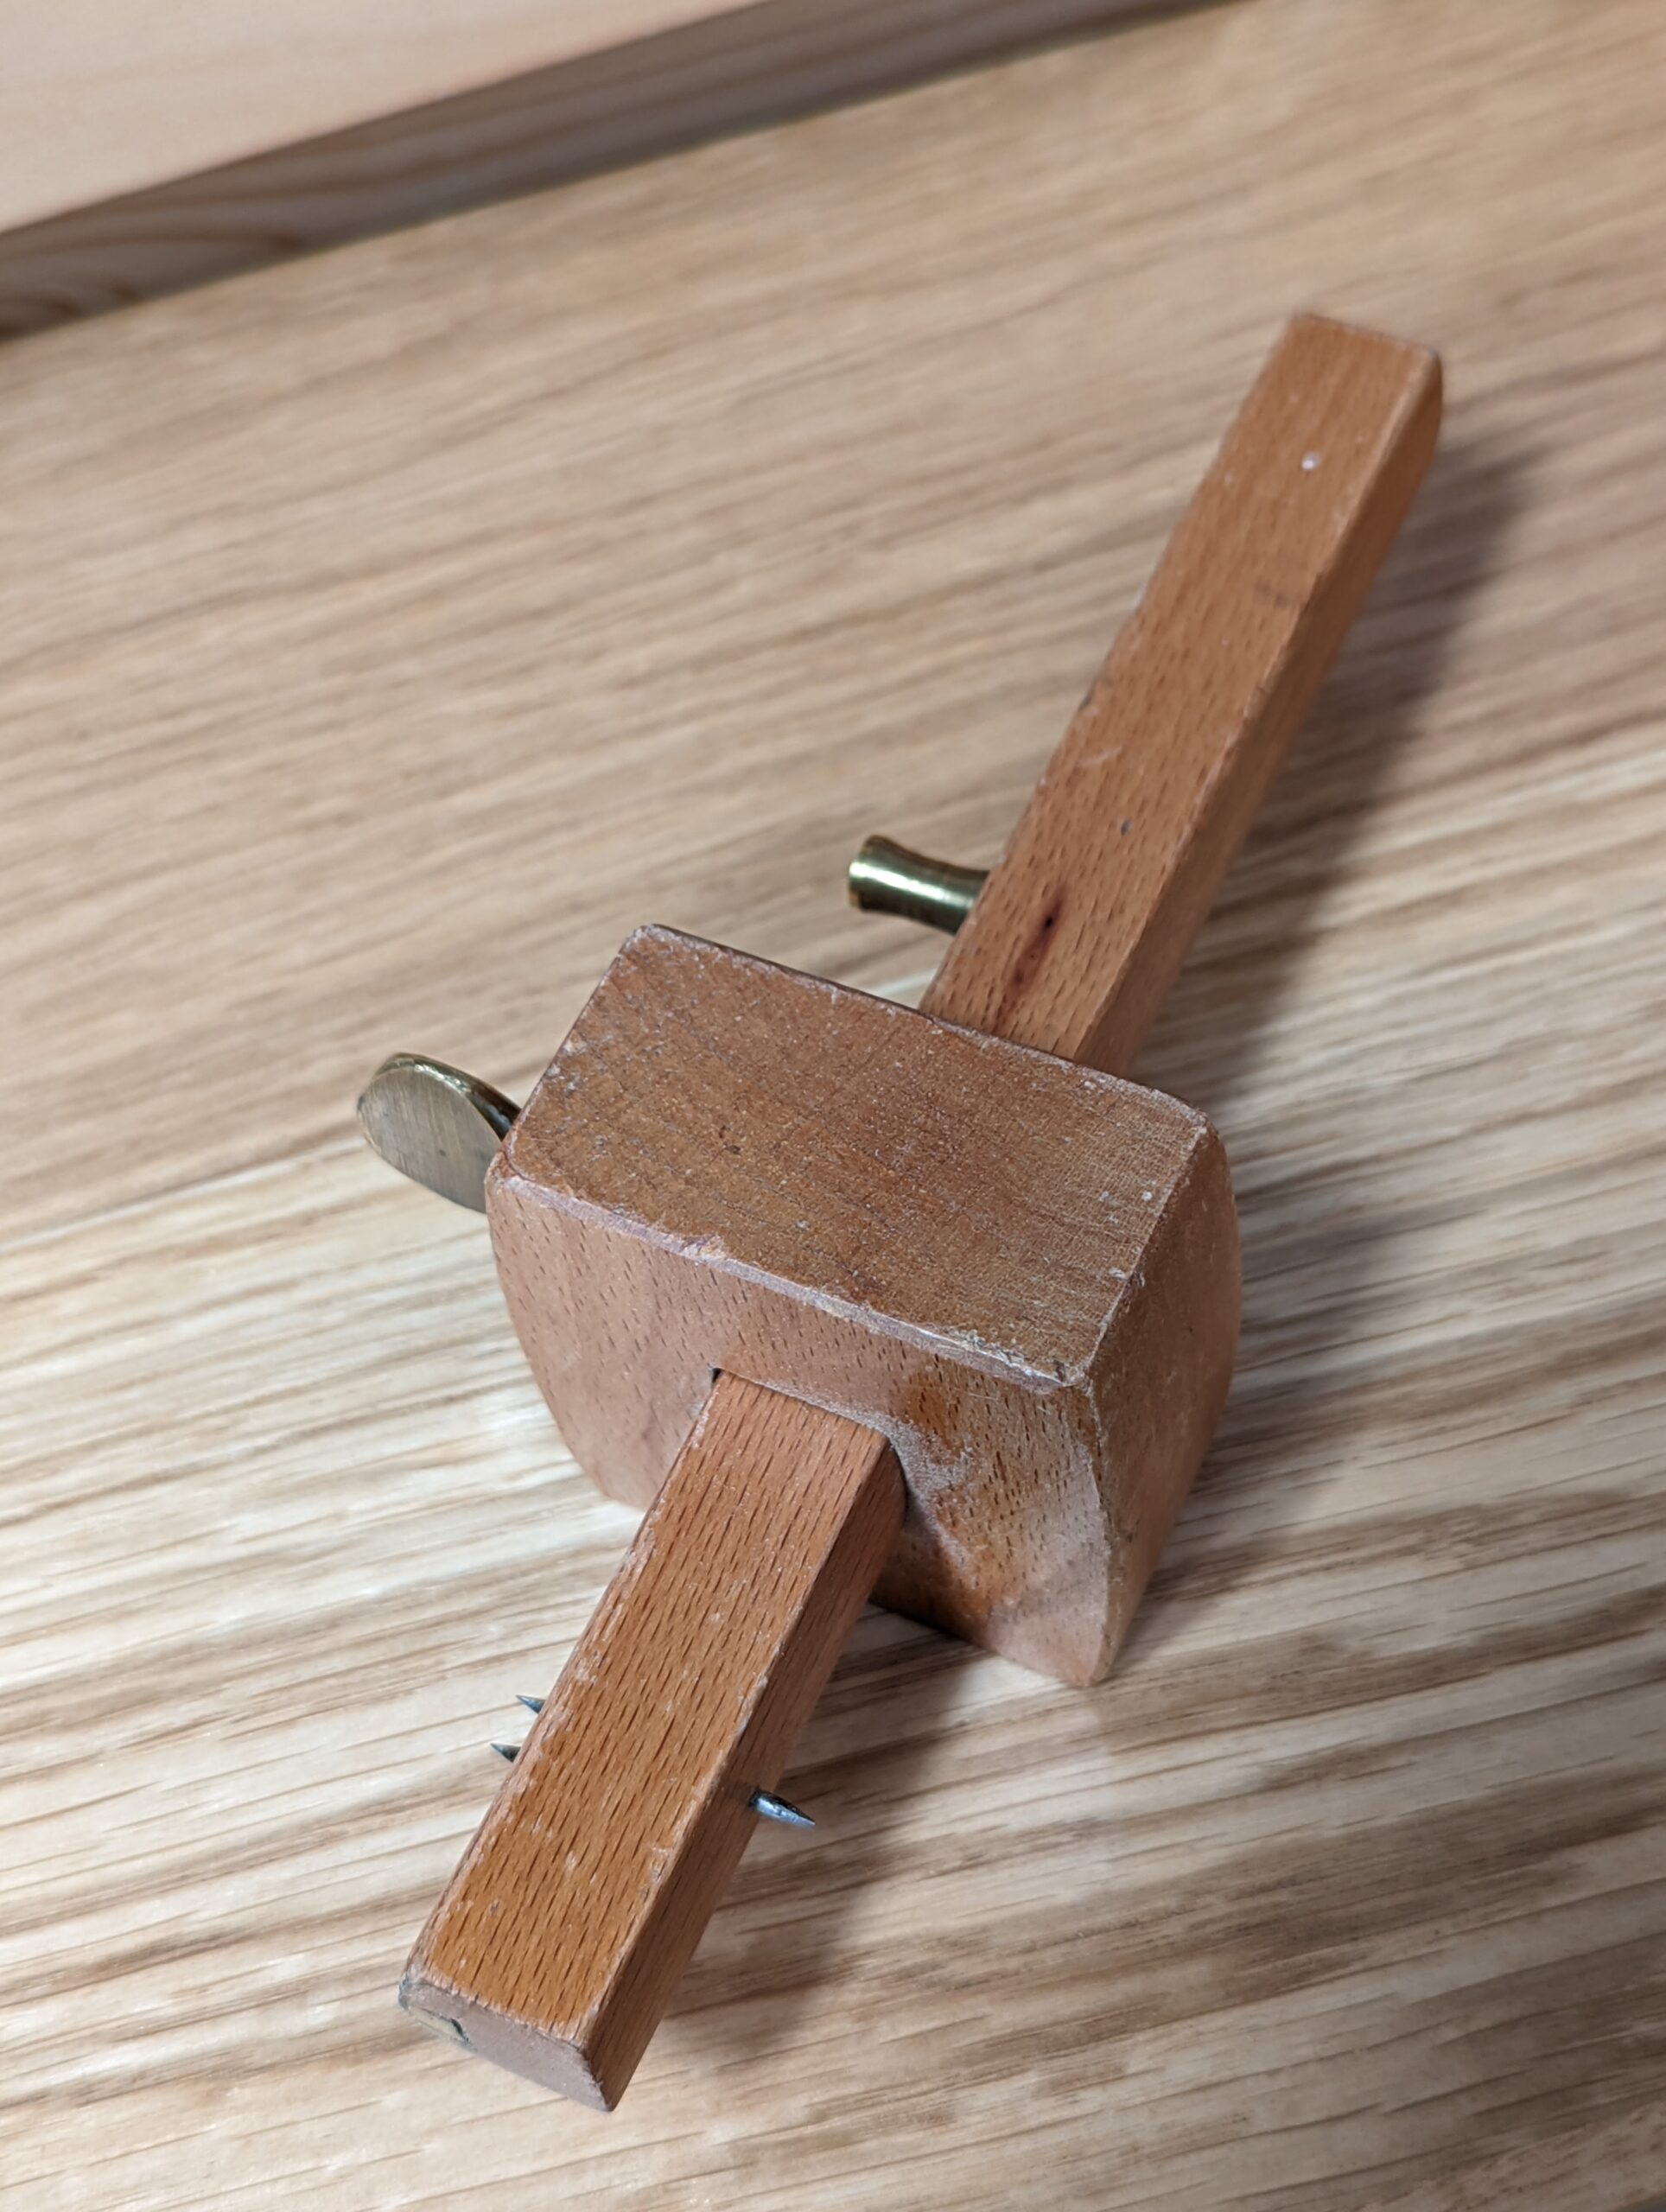
Marking Gauge
Marking gauges is a general term used for different marking gauges but we generally accept it as a single pin marking gauge like the first picture here. The combination gauges below that combine two gauges in one but it is good to have more than one gauge as we often use more than one at the same time in a project.

We use marking gauges for a wide range of tasks but always for marking lines parallel to the edge of a length of wood. It's quick and simple to set and use. Acquire them secondhand when you see them. They usually go for a few pence secondhand or at garage sales. I will often have three or four set up for different marking distances in a single project and it saves resetting each time you move from one section of work to another.
Marking/Mortise Combination Gauge
These gauge types are used 90% of the time for laying out twin parallel mortise and tenons lines for cutting to.

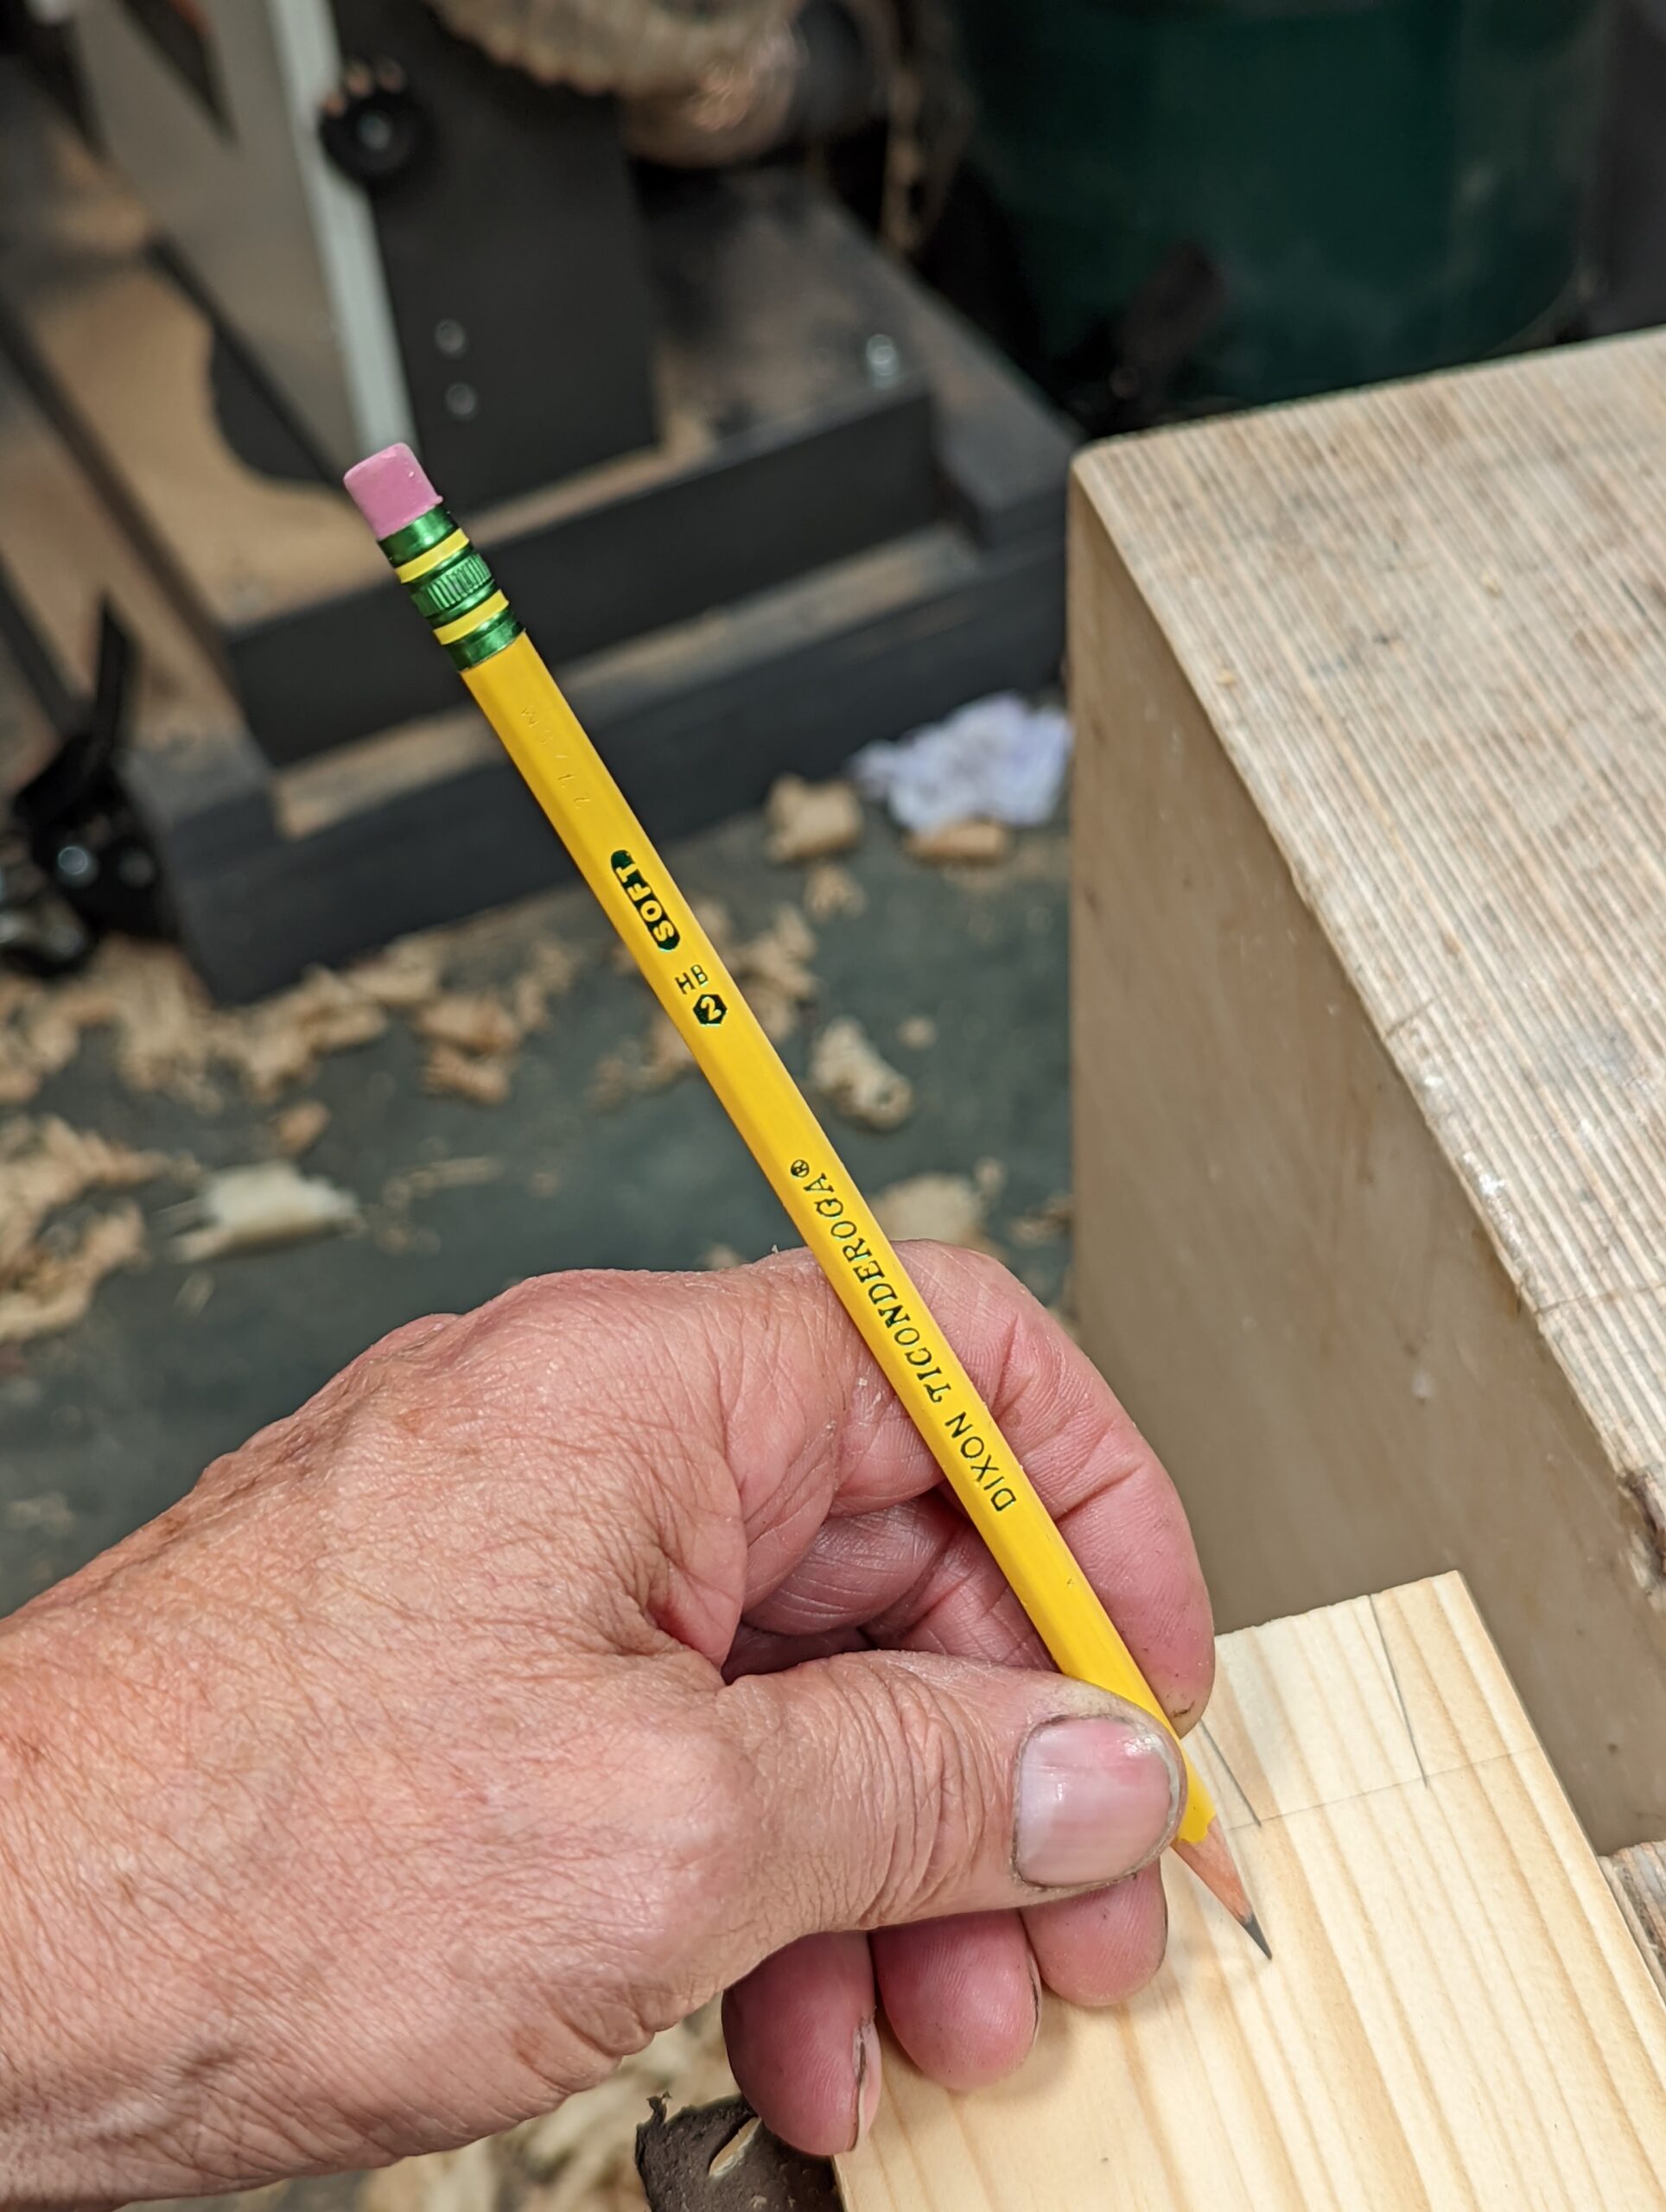
Pencil
Almost any pencil will do but softer ones crumble too easily. I use an HB (#2 USA) for general daily use on wood as well as initial sketching, technical drawing and such. Serious drawing takes several pencils.
Dovetail Template
I have used this dovetail template for over half a century and it never wears out. It's quick to have one in your drawer ready to go so a timesaver making your own. Here is a link for you to make your own.

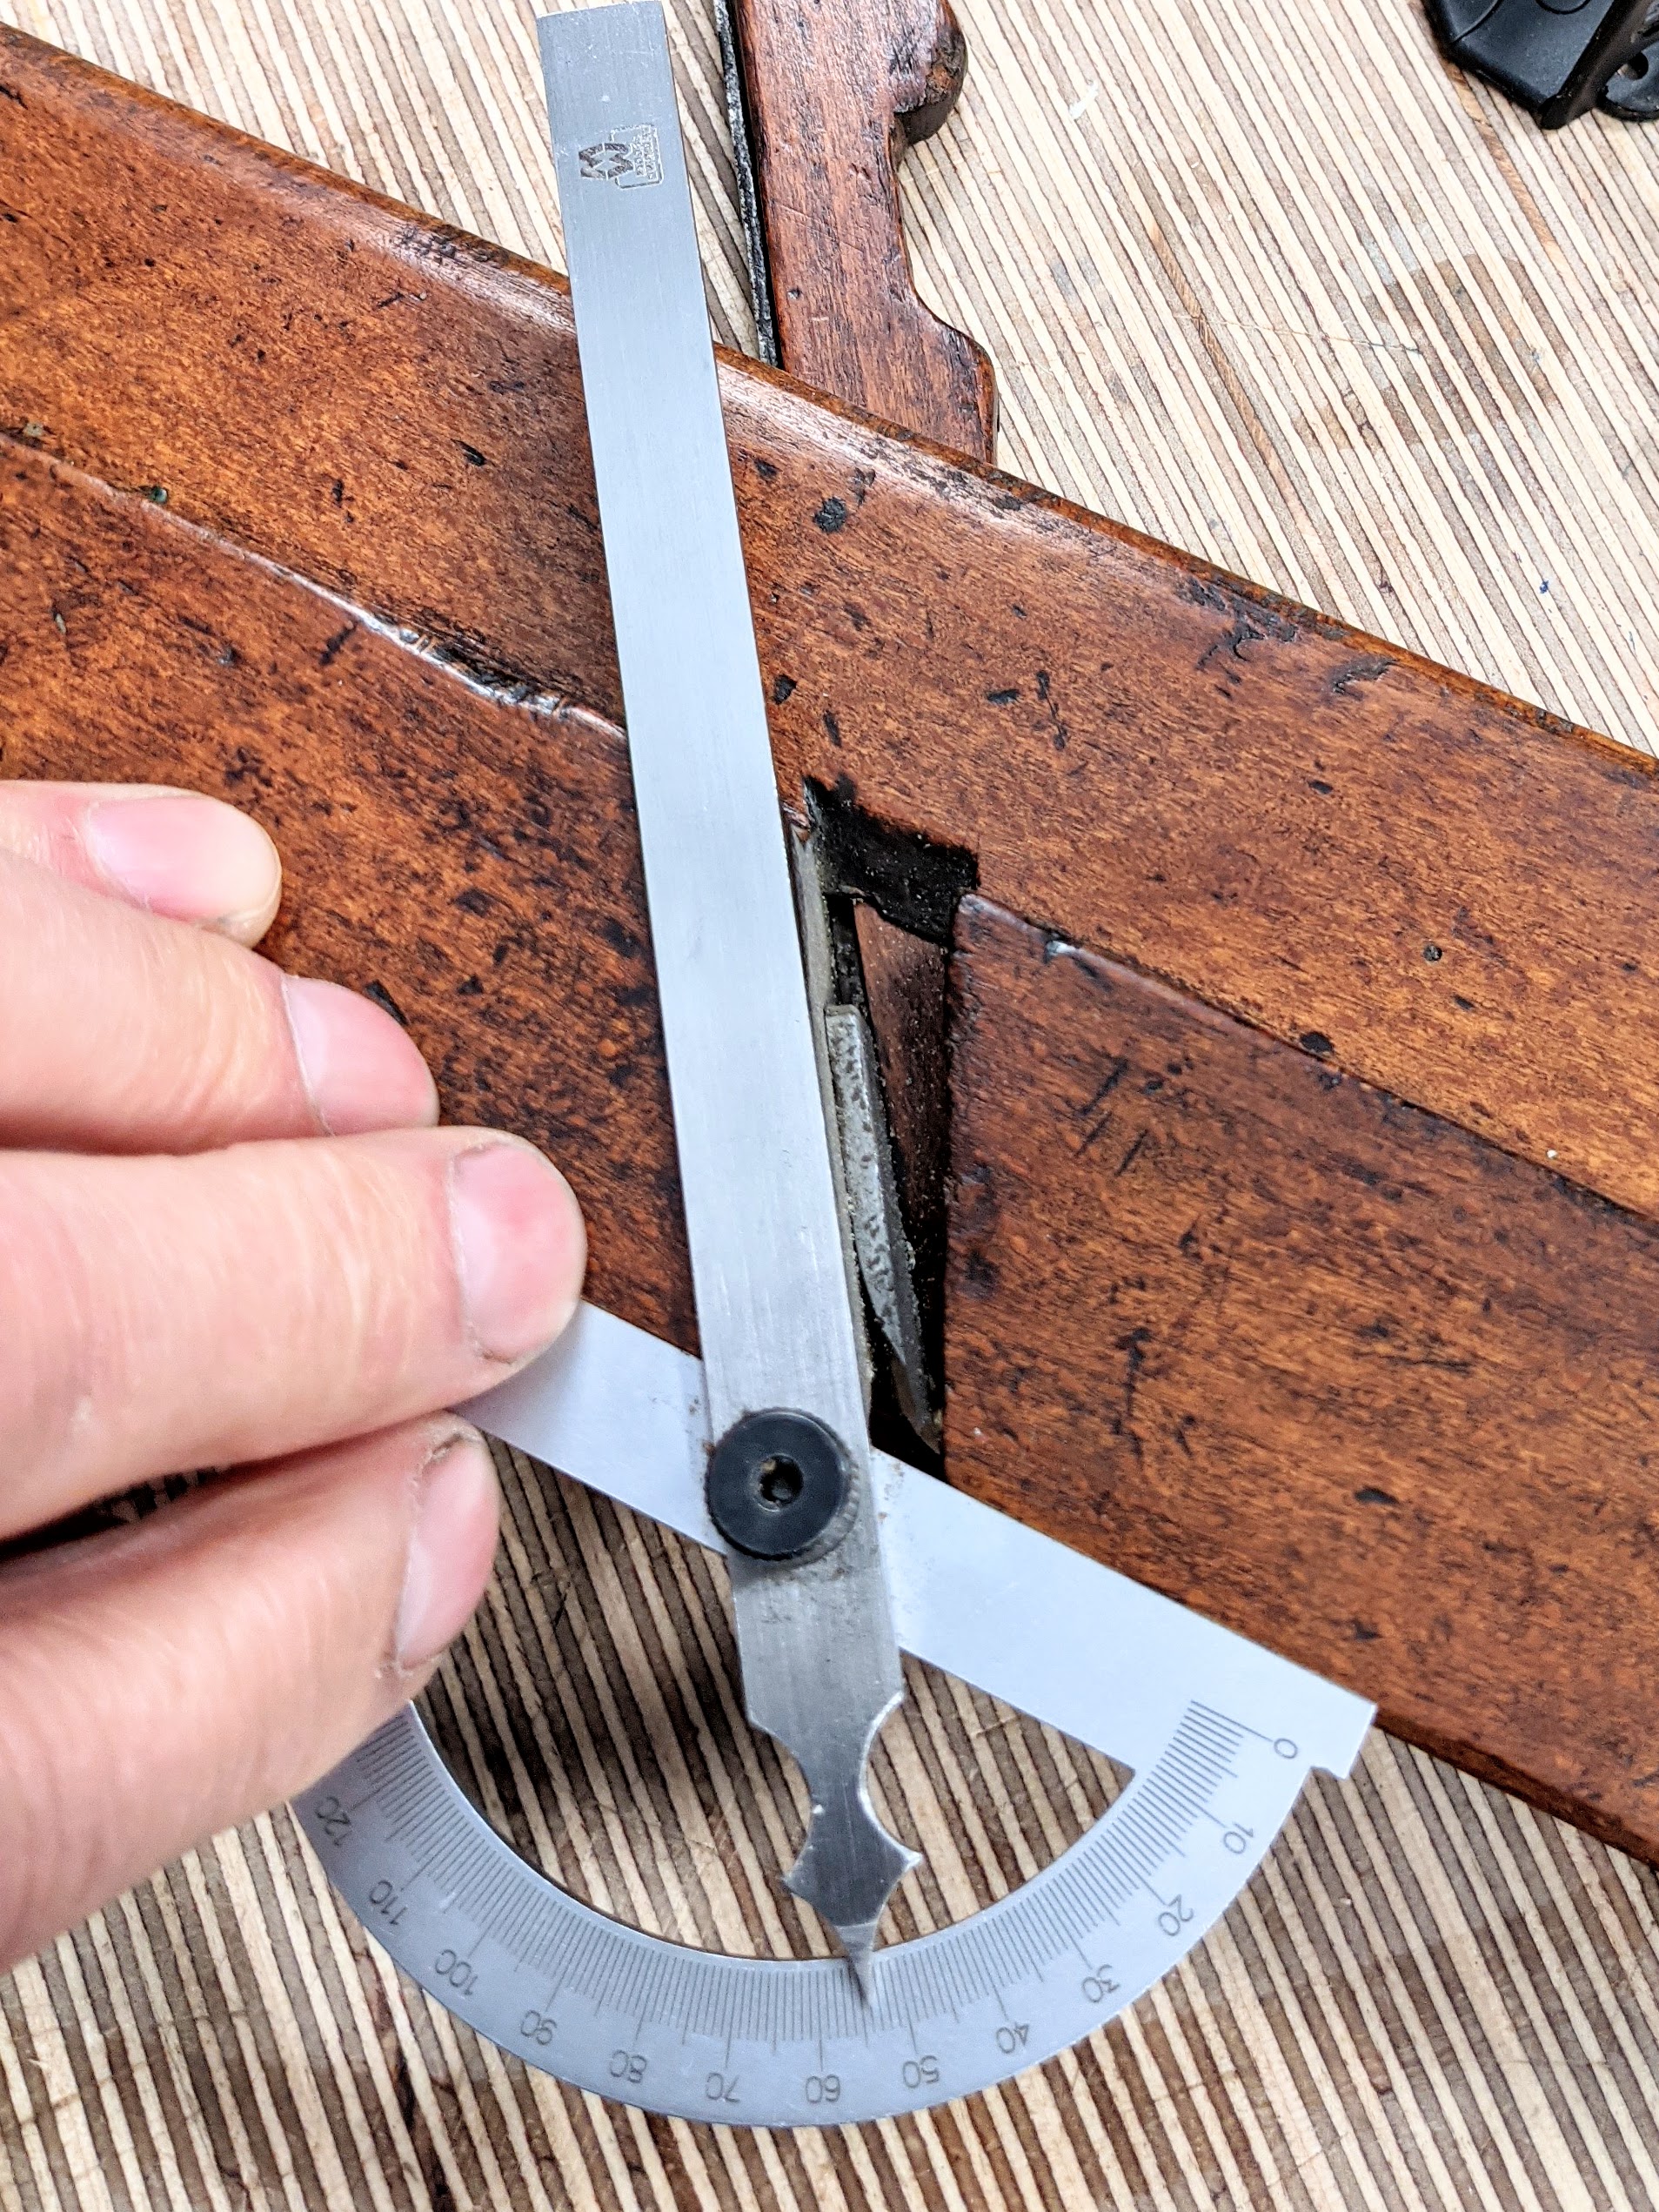
Sliding bevel
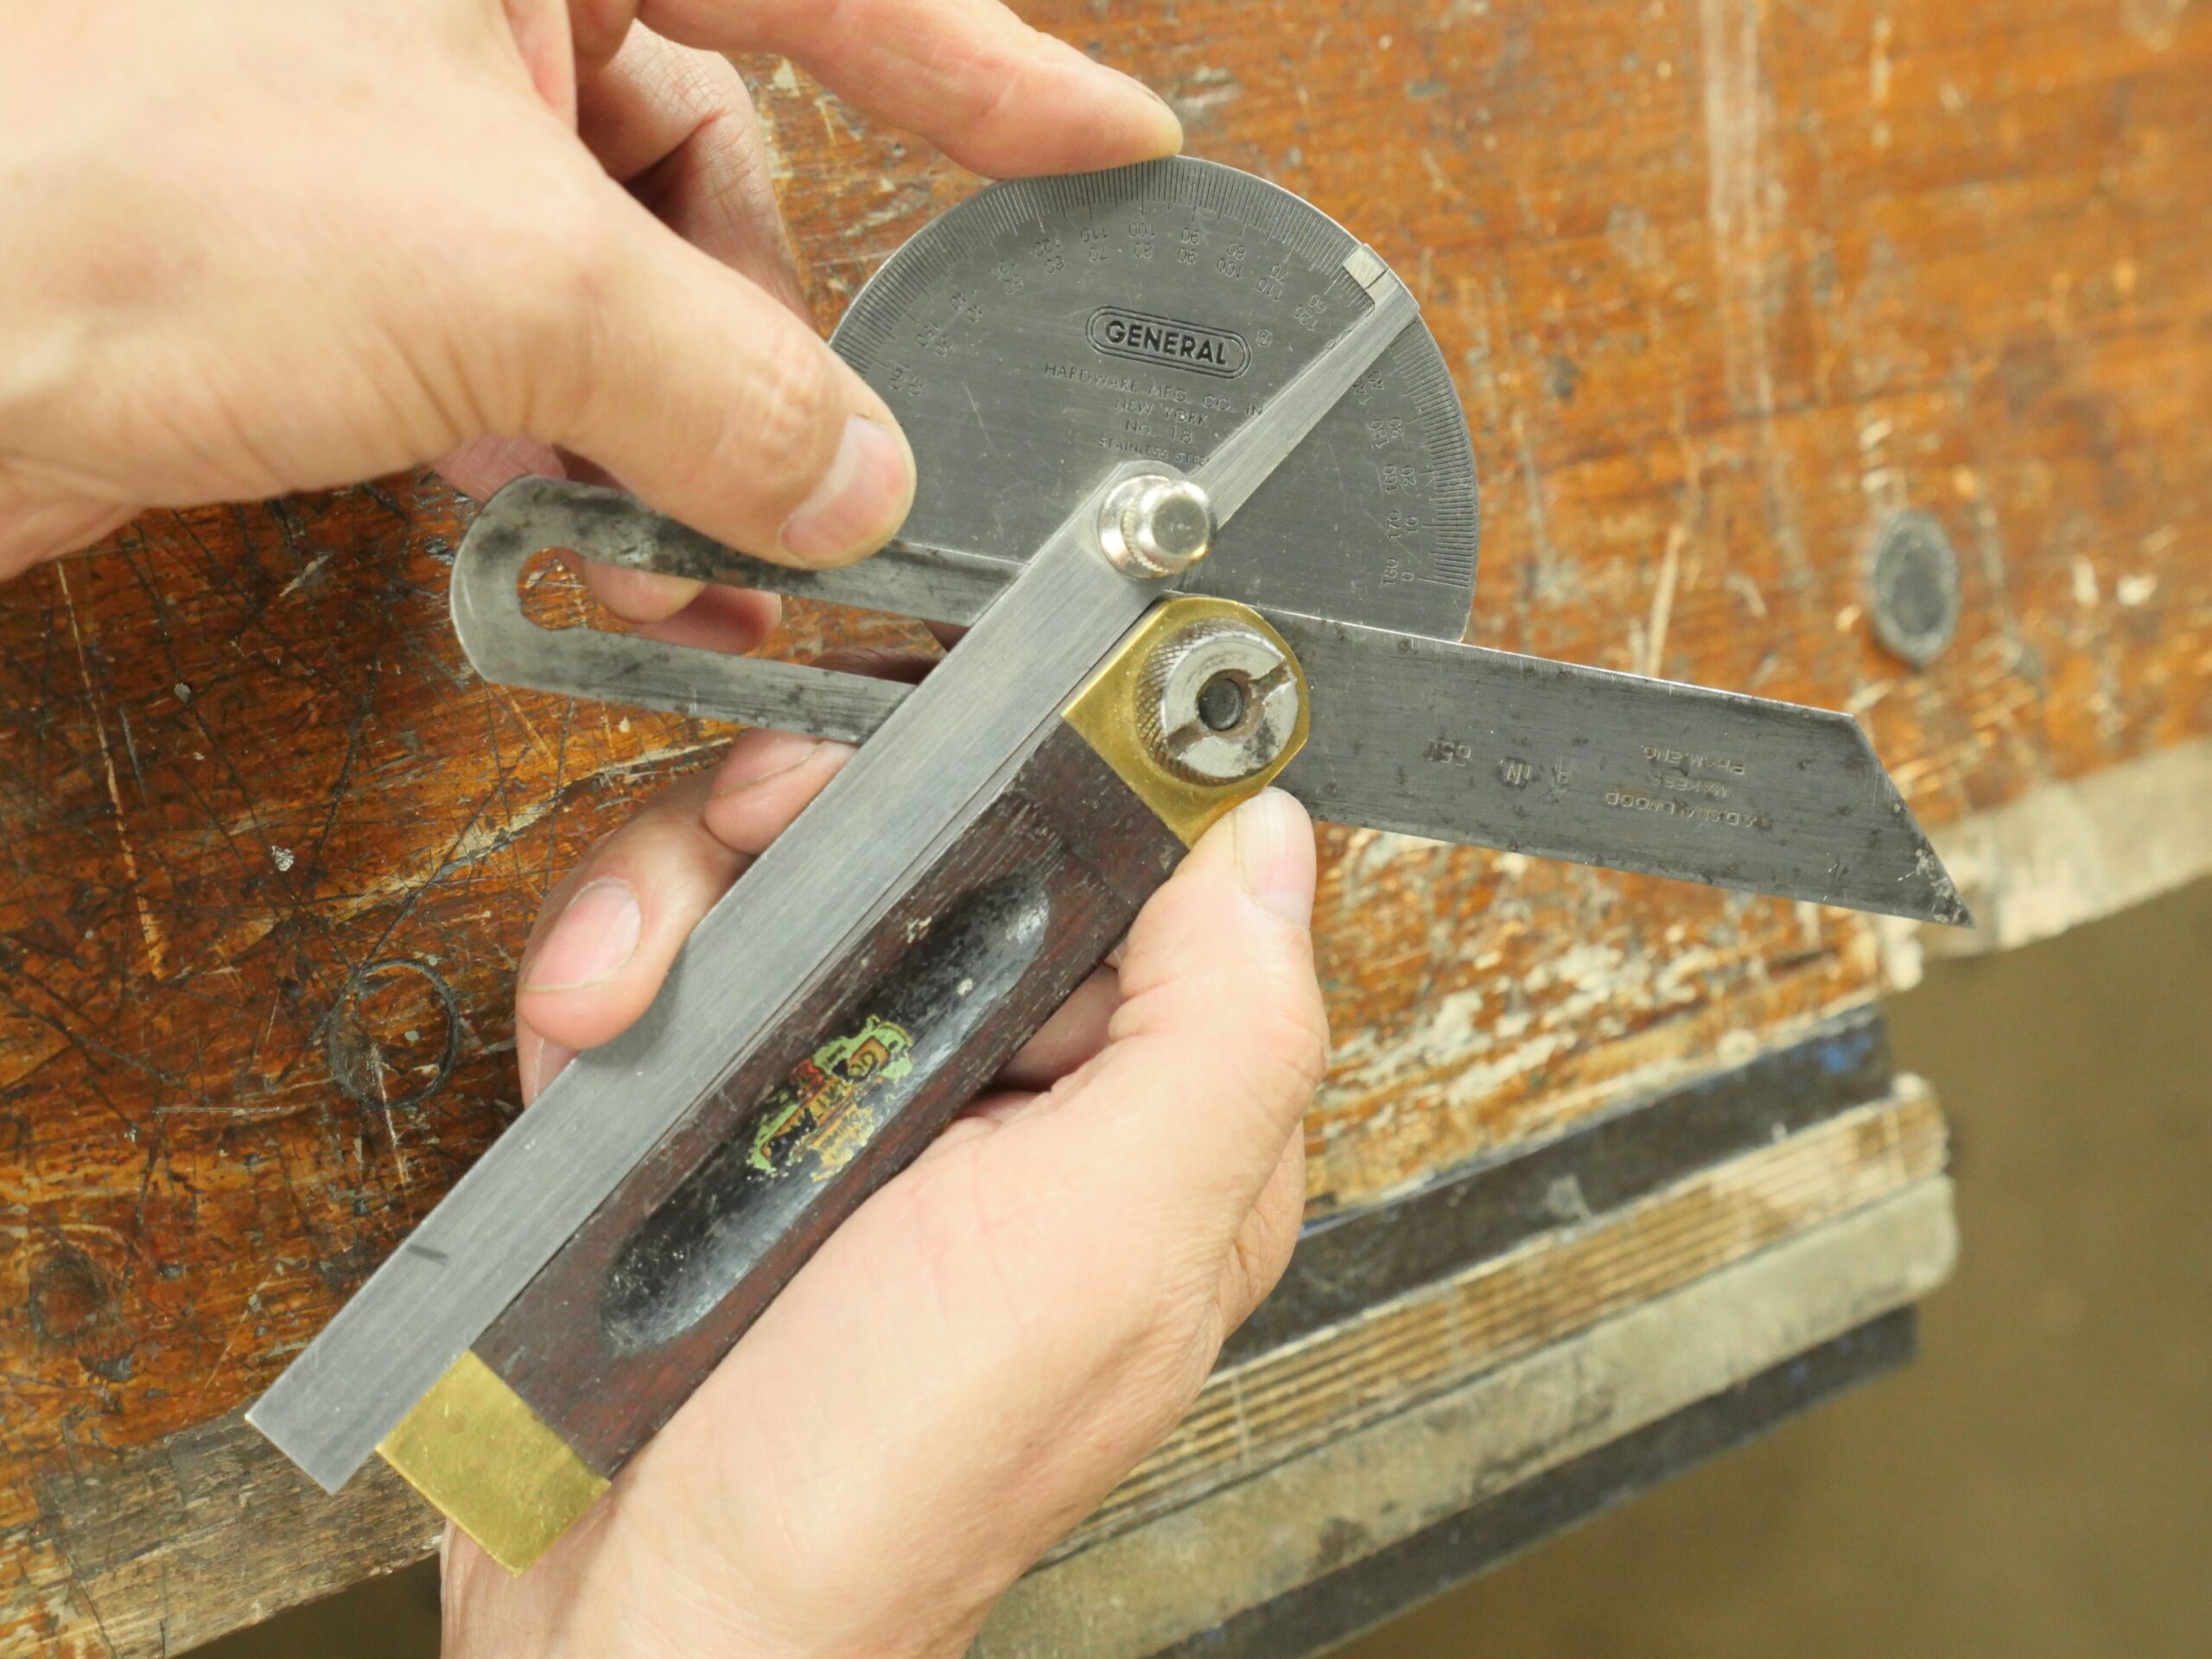
The sliding bevel is the tool we use to transfer angles from a protractor to a workpiece or to check the angle of a workpiece to find the exact degree. We also register it against a sawn or planed edge cut to an angle to test for accuracy. I usually have two or three because things like chair making may have several angles to work to and having them set keeps the accuracy we strive for and saves resetting mid-project.
Protractor/Angle finder
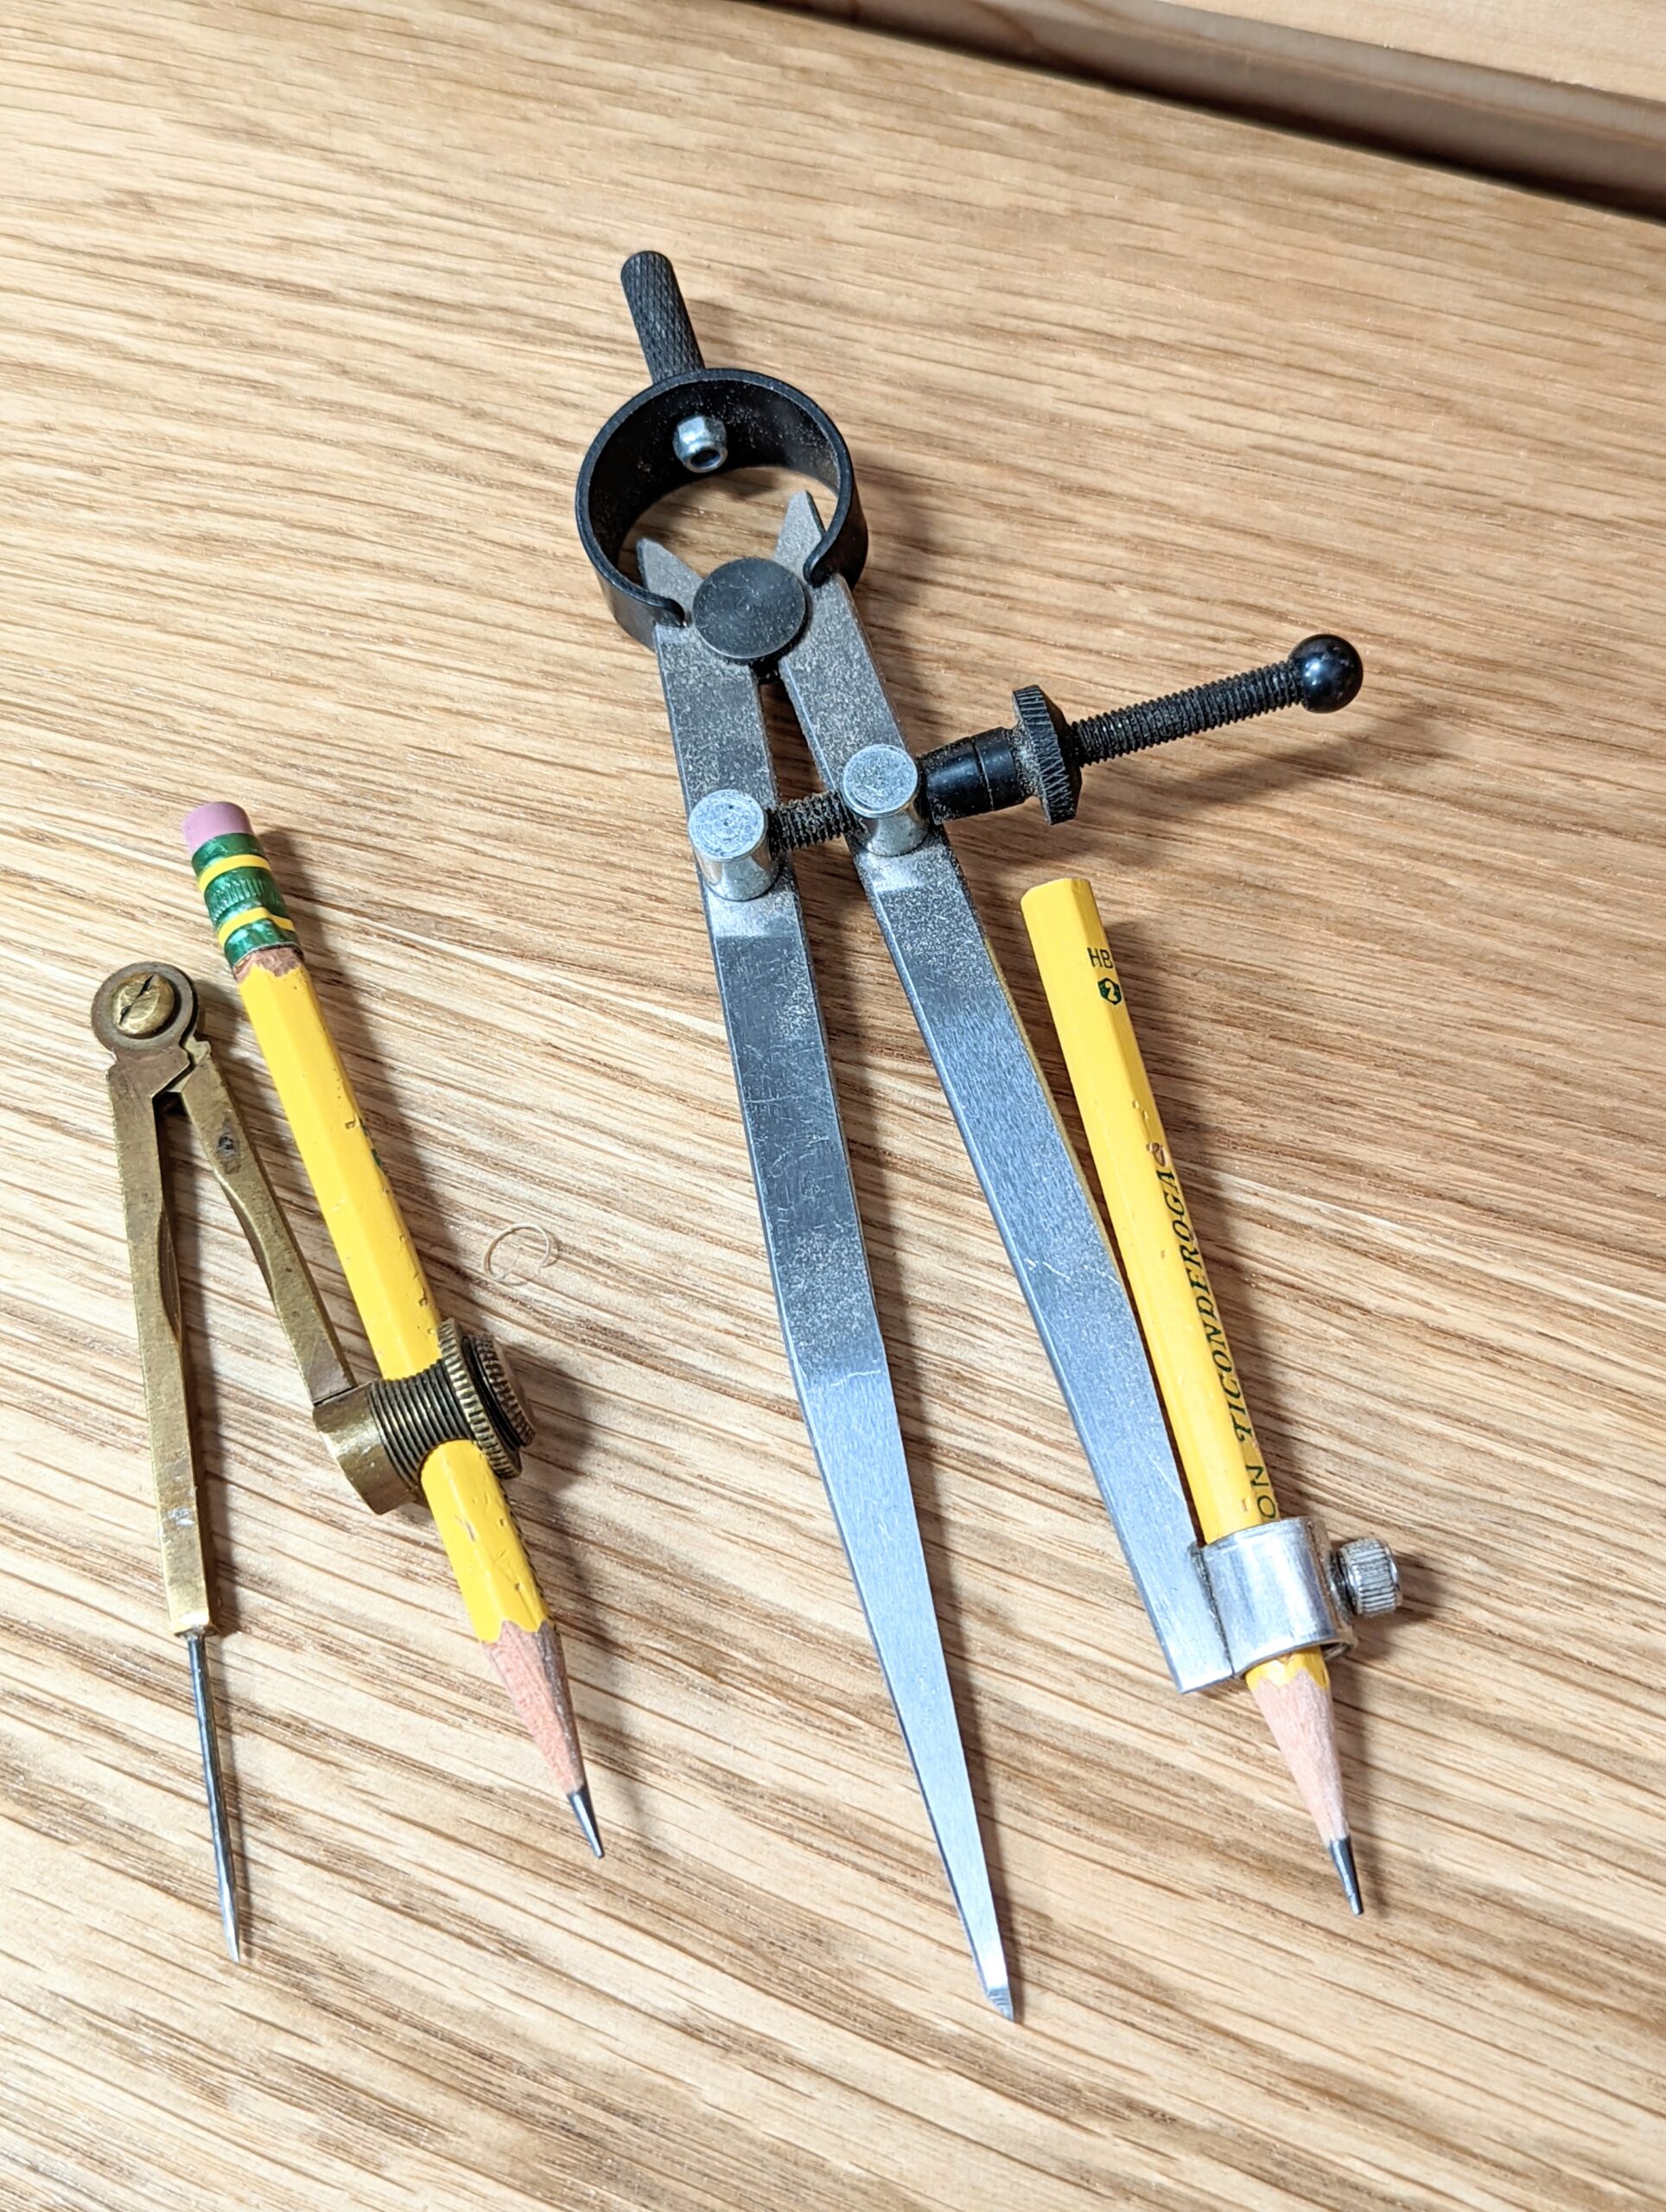
Compasses
My vintage pair has served me well through the decades but there are some well-made modern versions that are great too. The one with a winder adjuster (right) is highly controllable and easy to 'dial in' the exact setting that keeps the compasses set.

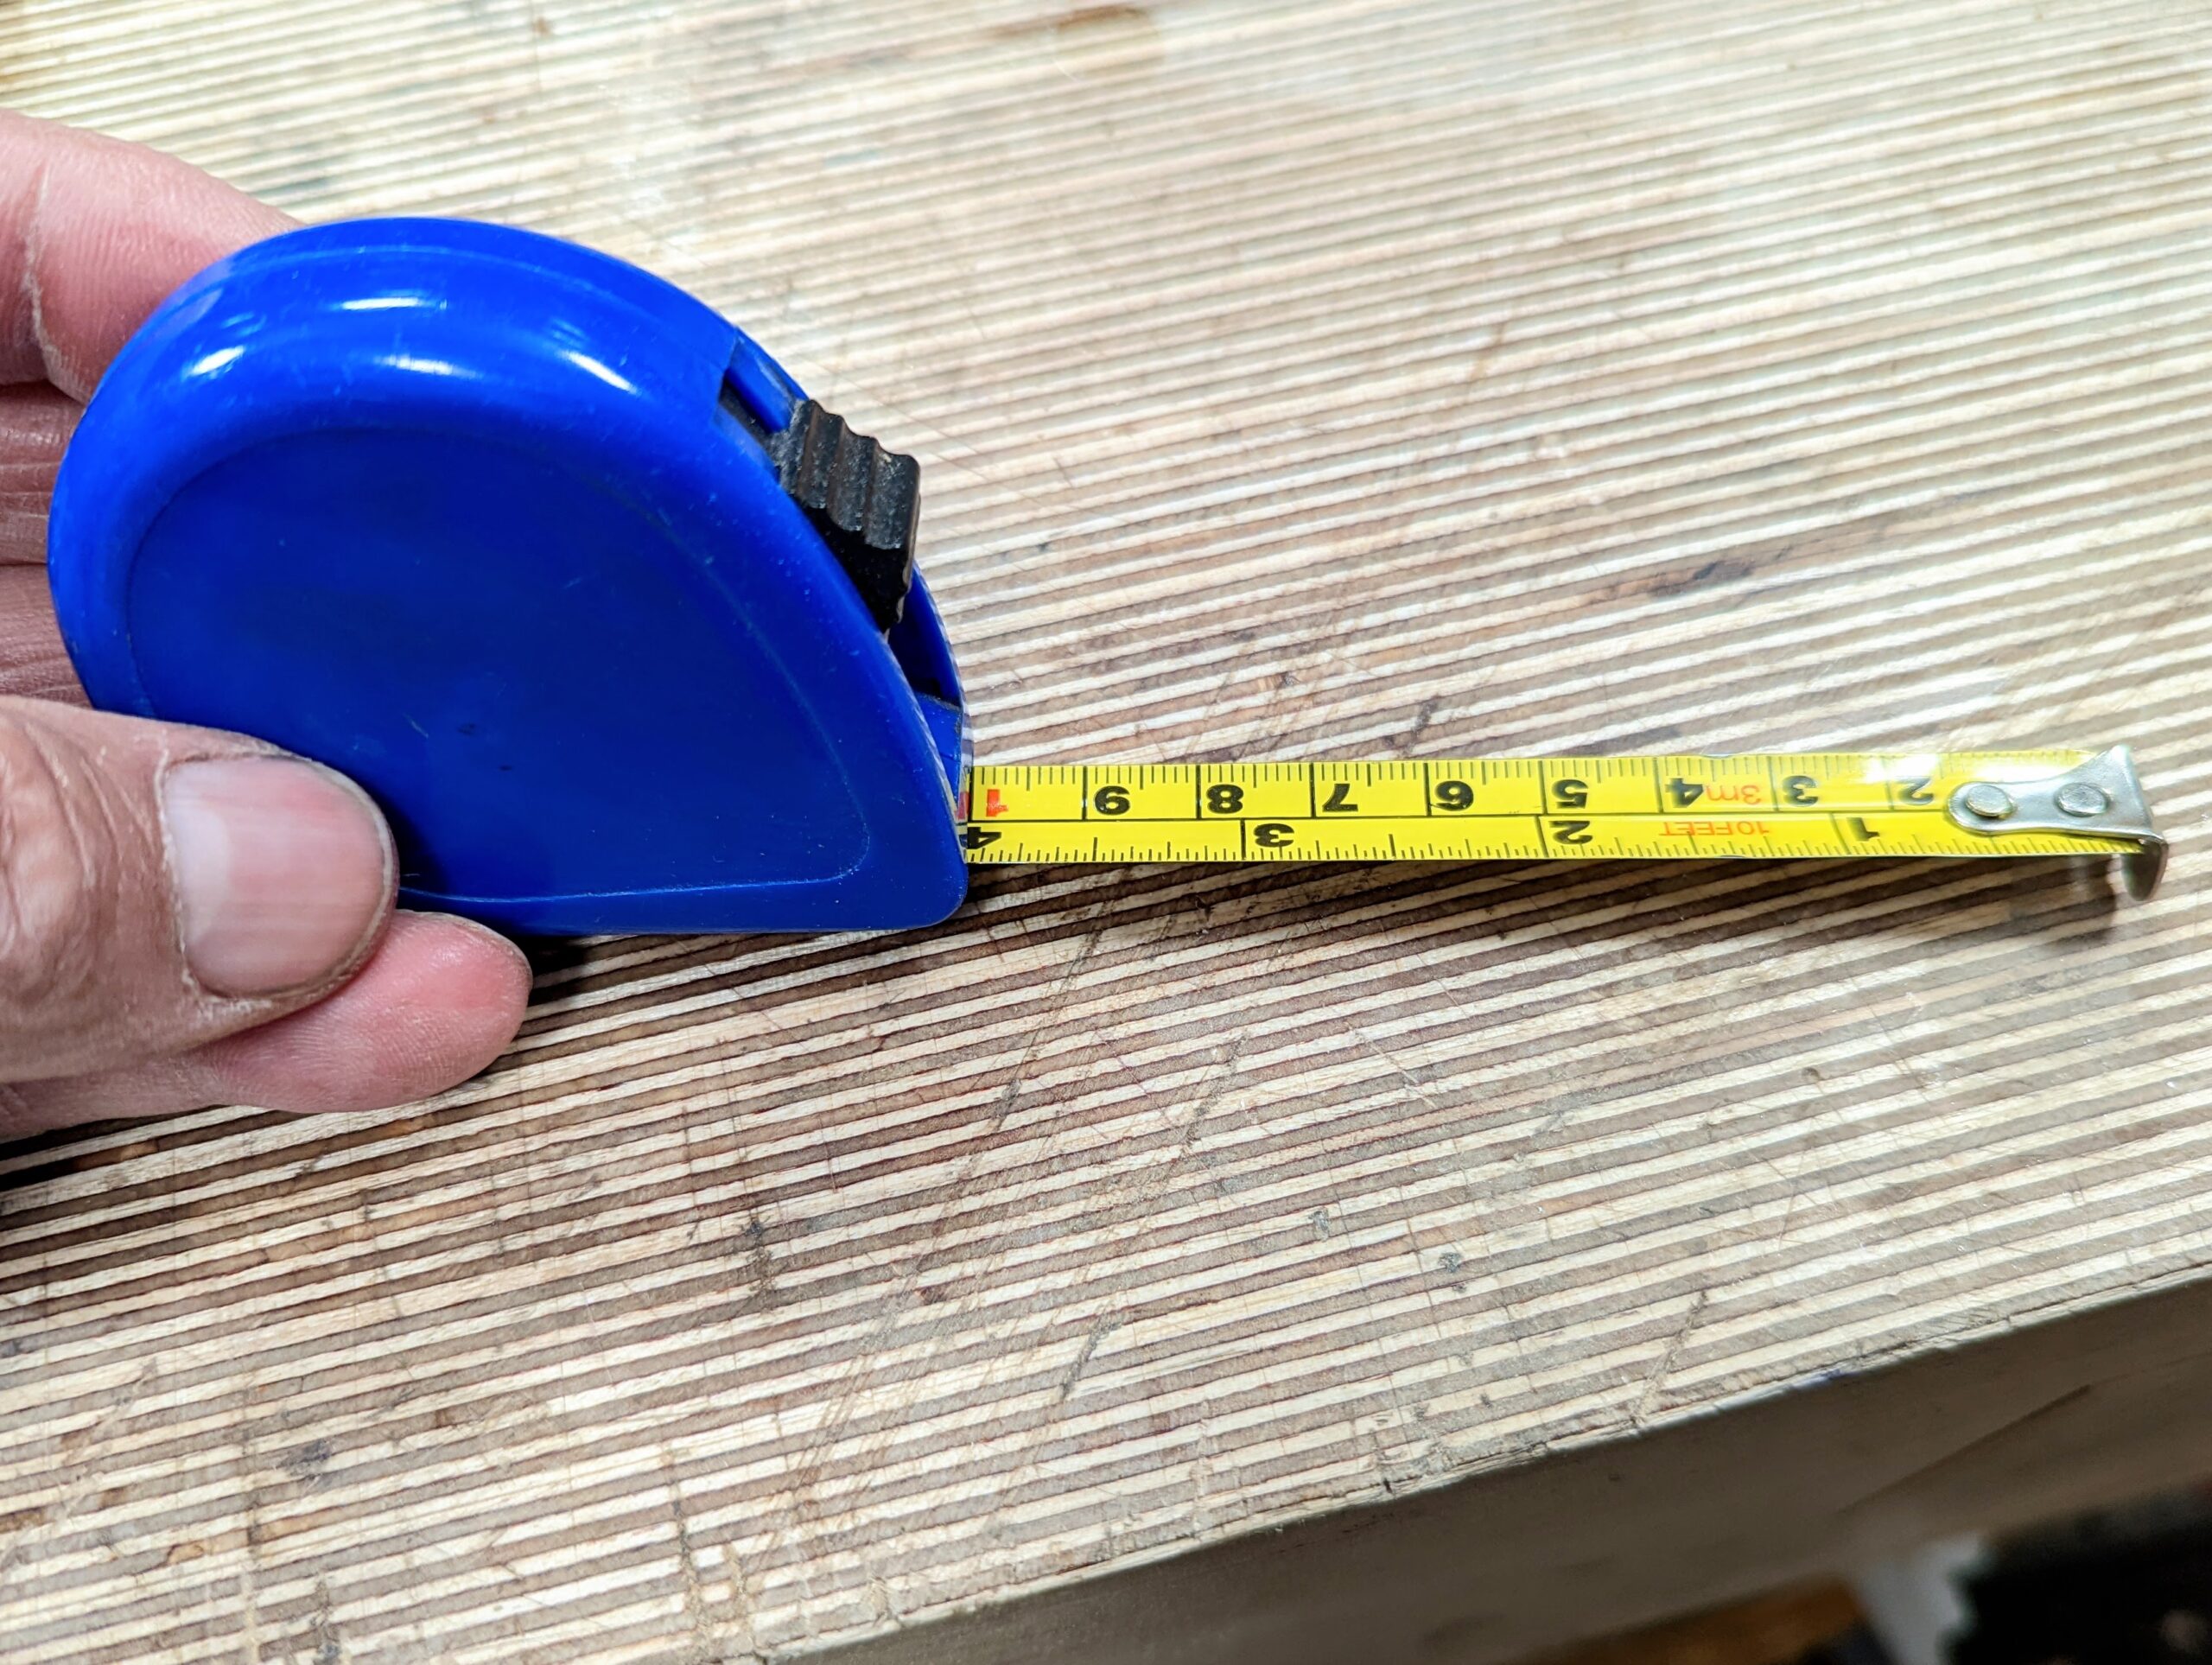
Tape measure
Many may contradict me but there isn't really too much to say about a tape measure. As it is very rare that any piece we make as furniture is longer than eight feet, a ten-foot tape is plenty long enough and can be had as lightweight items in your pocket. I have the least expensive plastic ones that are accurate and compact. I carry one in my pocket I bought for its size and then several (five) of the blue ones shown to identify as mine and I can leave them around the workshop and never have to go in search of one. I need one when I am out and about as my whole life revolves around measurements and angles and with a tape measure I can deal with both by developing a formula as I go. Oh, and make sure you have both metric and imperial in a single tape. If you are not used to converting in your head, especially here in the UK where both measurements are still being used, it can be a nuisance trying to work things out.

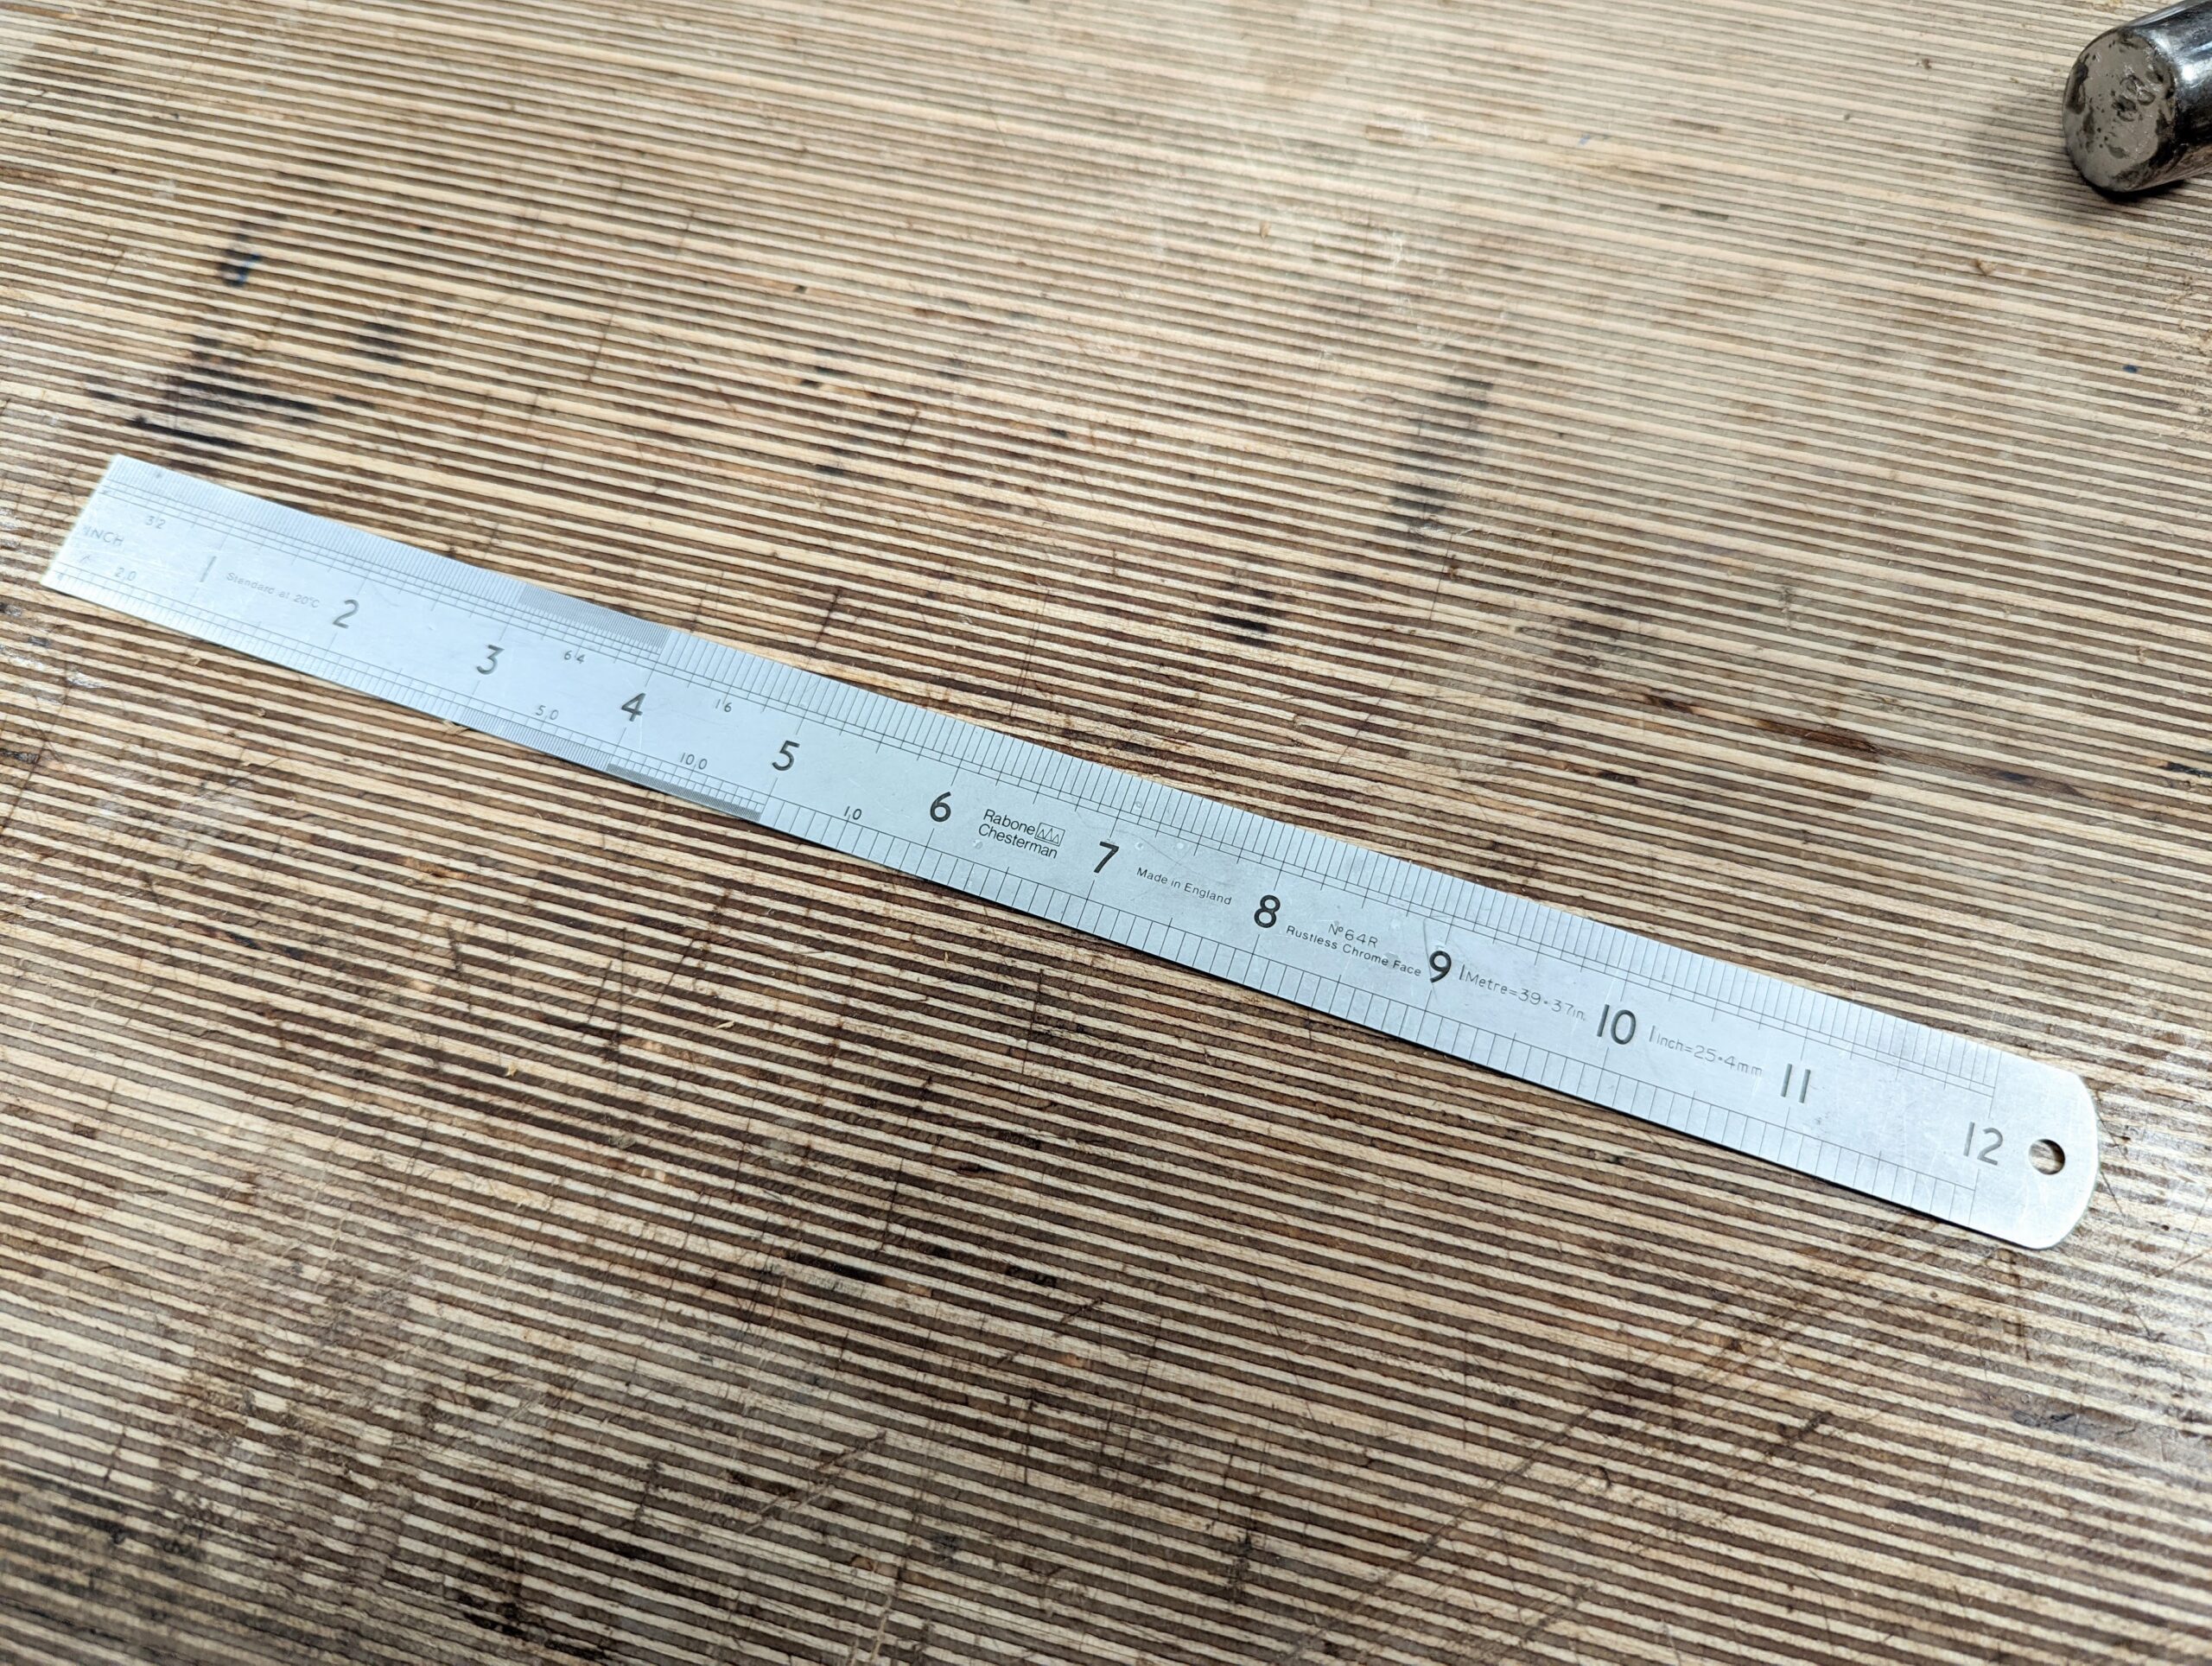
Steel rule
My steel rule is more a vintage version by a good and well-known maker and has imperial measurements one side and metric the other. It's fine but sometimes I prefer both to be on one side so I have a second one for that reason. The better quality ones are hardened and tempered and they hold up better than the stainless steel only ones, but they work well enough too.
Vernier Calipre
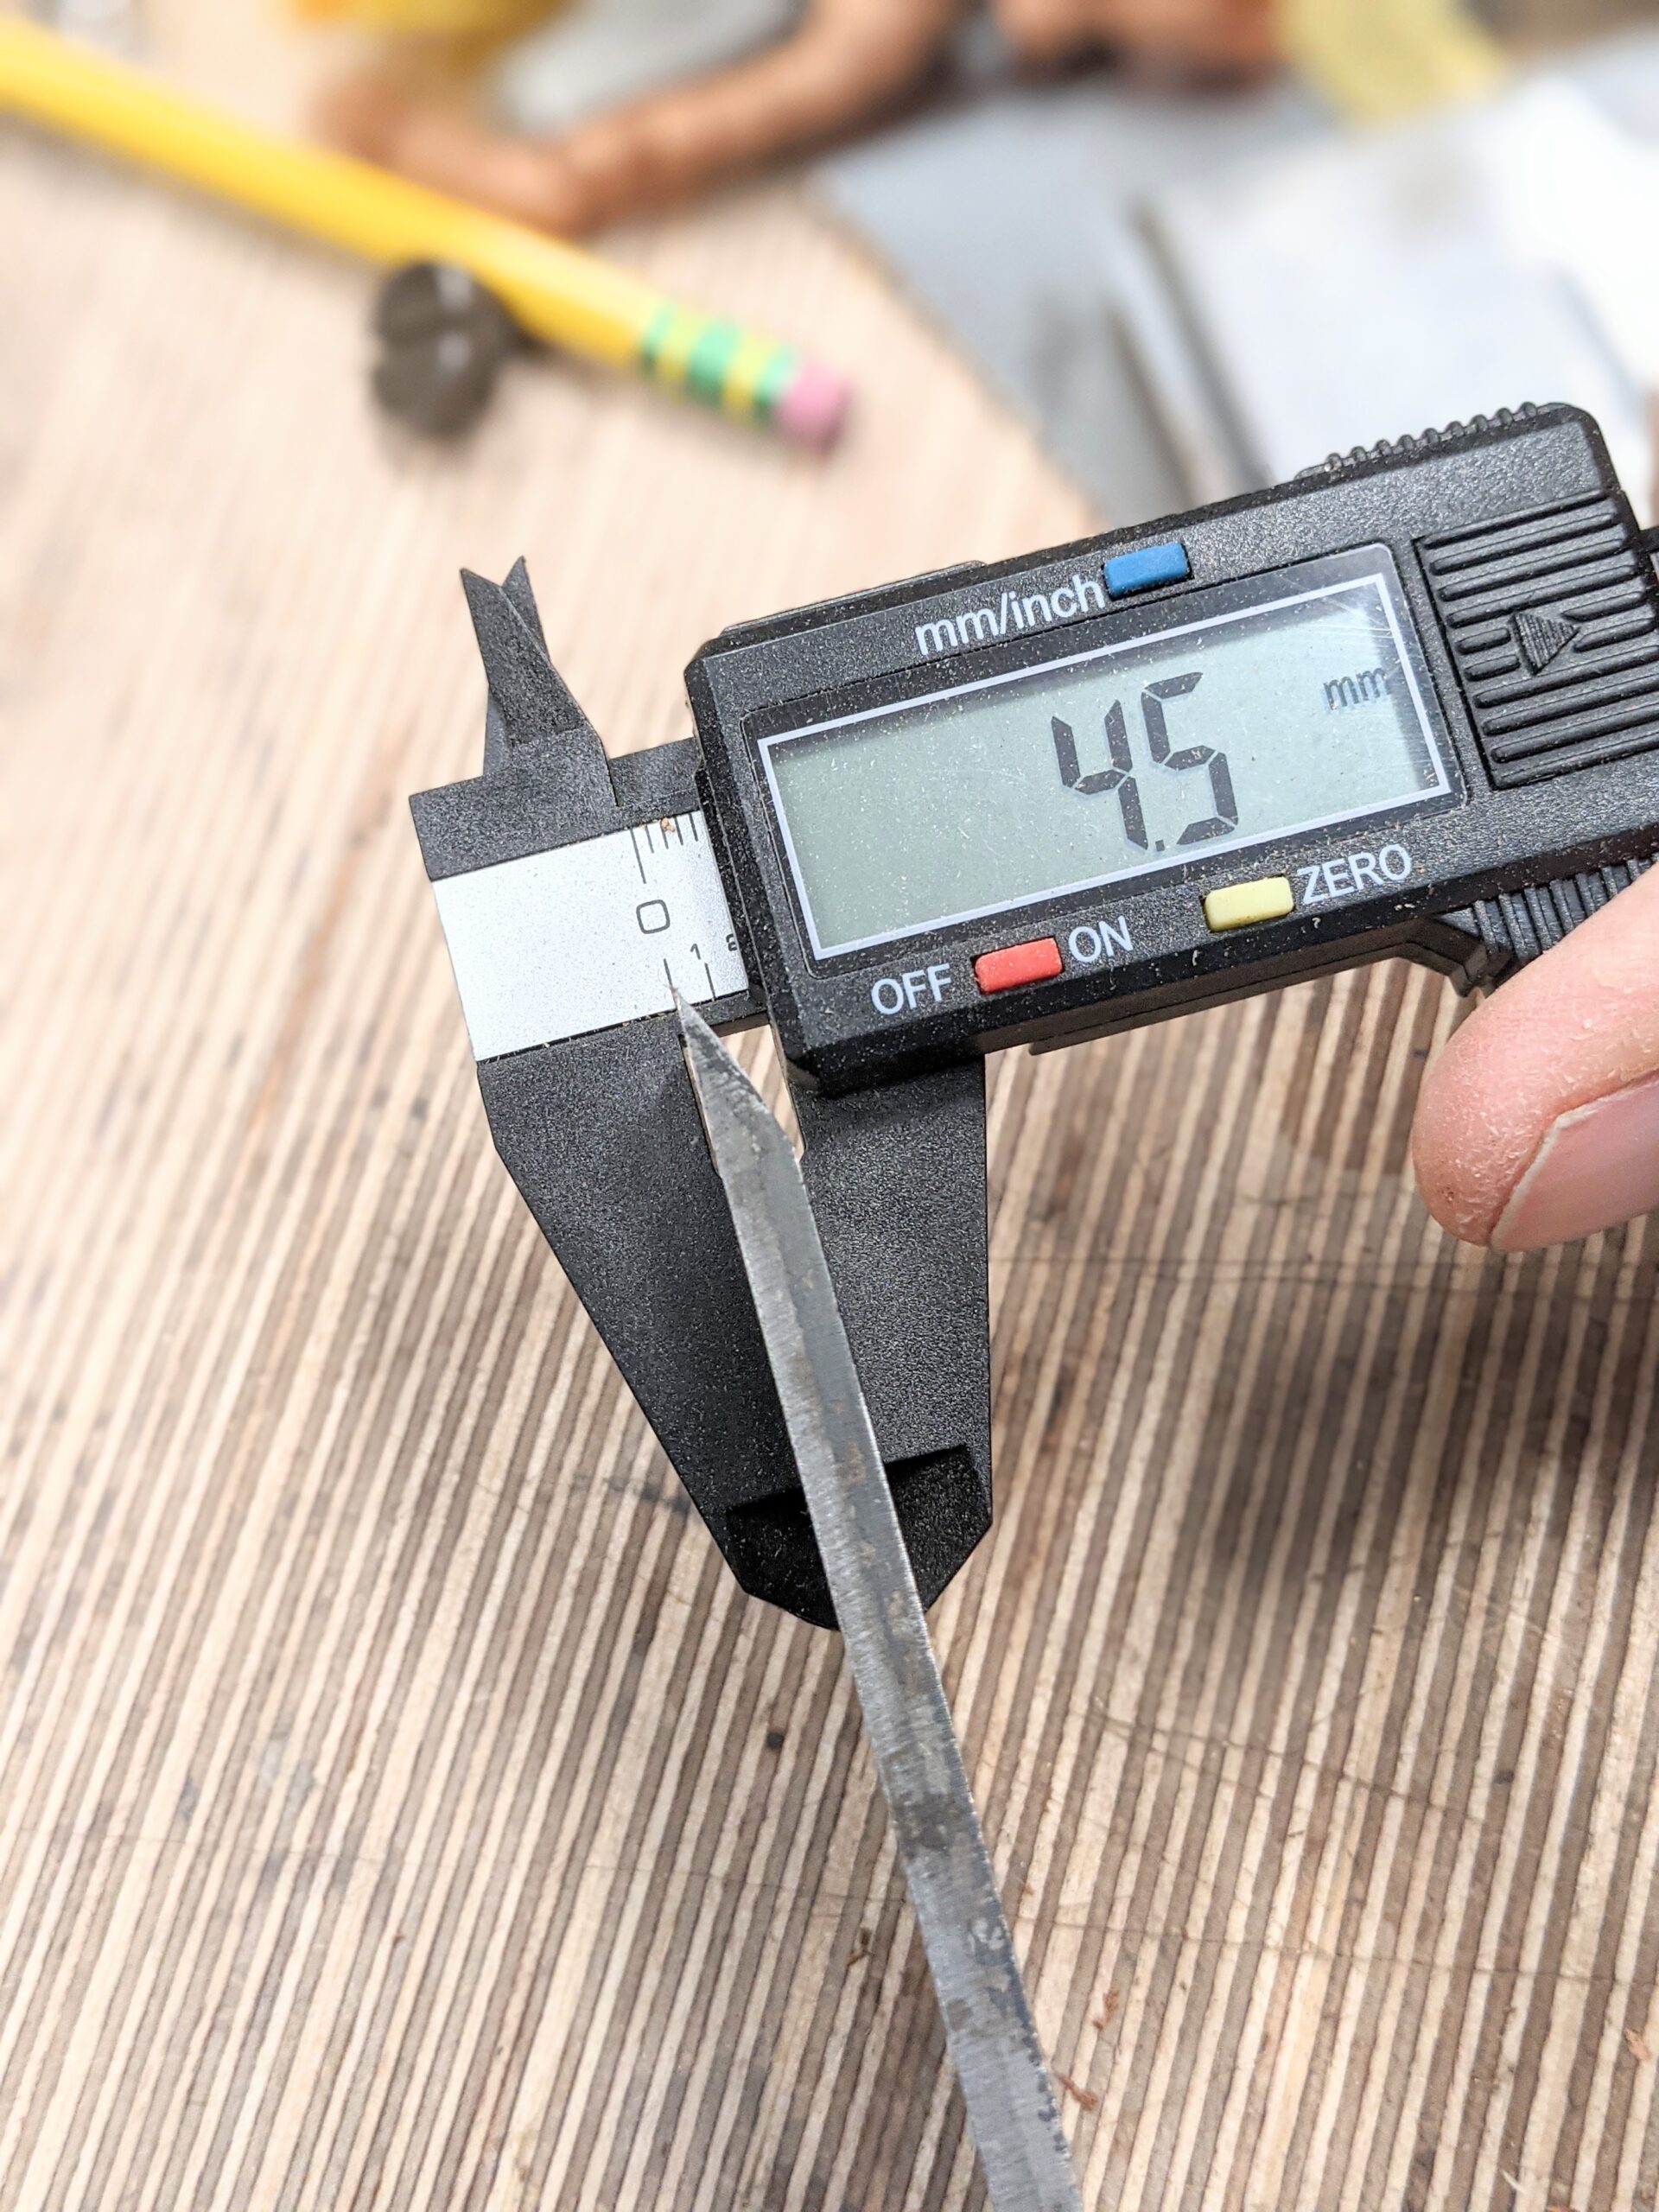
I never used one for the first two decades of my woodworking life and then began using one and now I cannot live without one. I use it all the time to check my planing accuracy in thicknessing particularly. Much of woodworking is about fitting and how better to check q tenon thickness than with a vernier. Woodworking often involved metalworking too, so again, I use mine extensively.
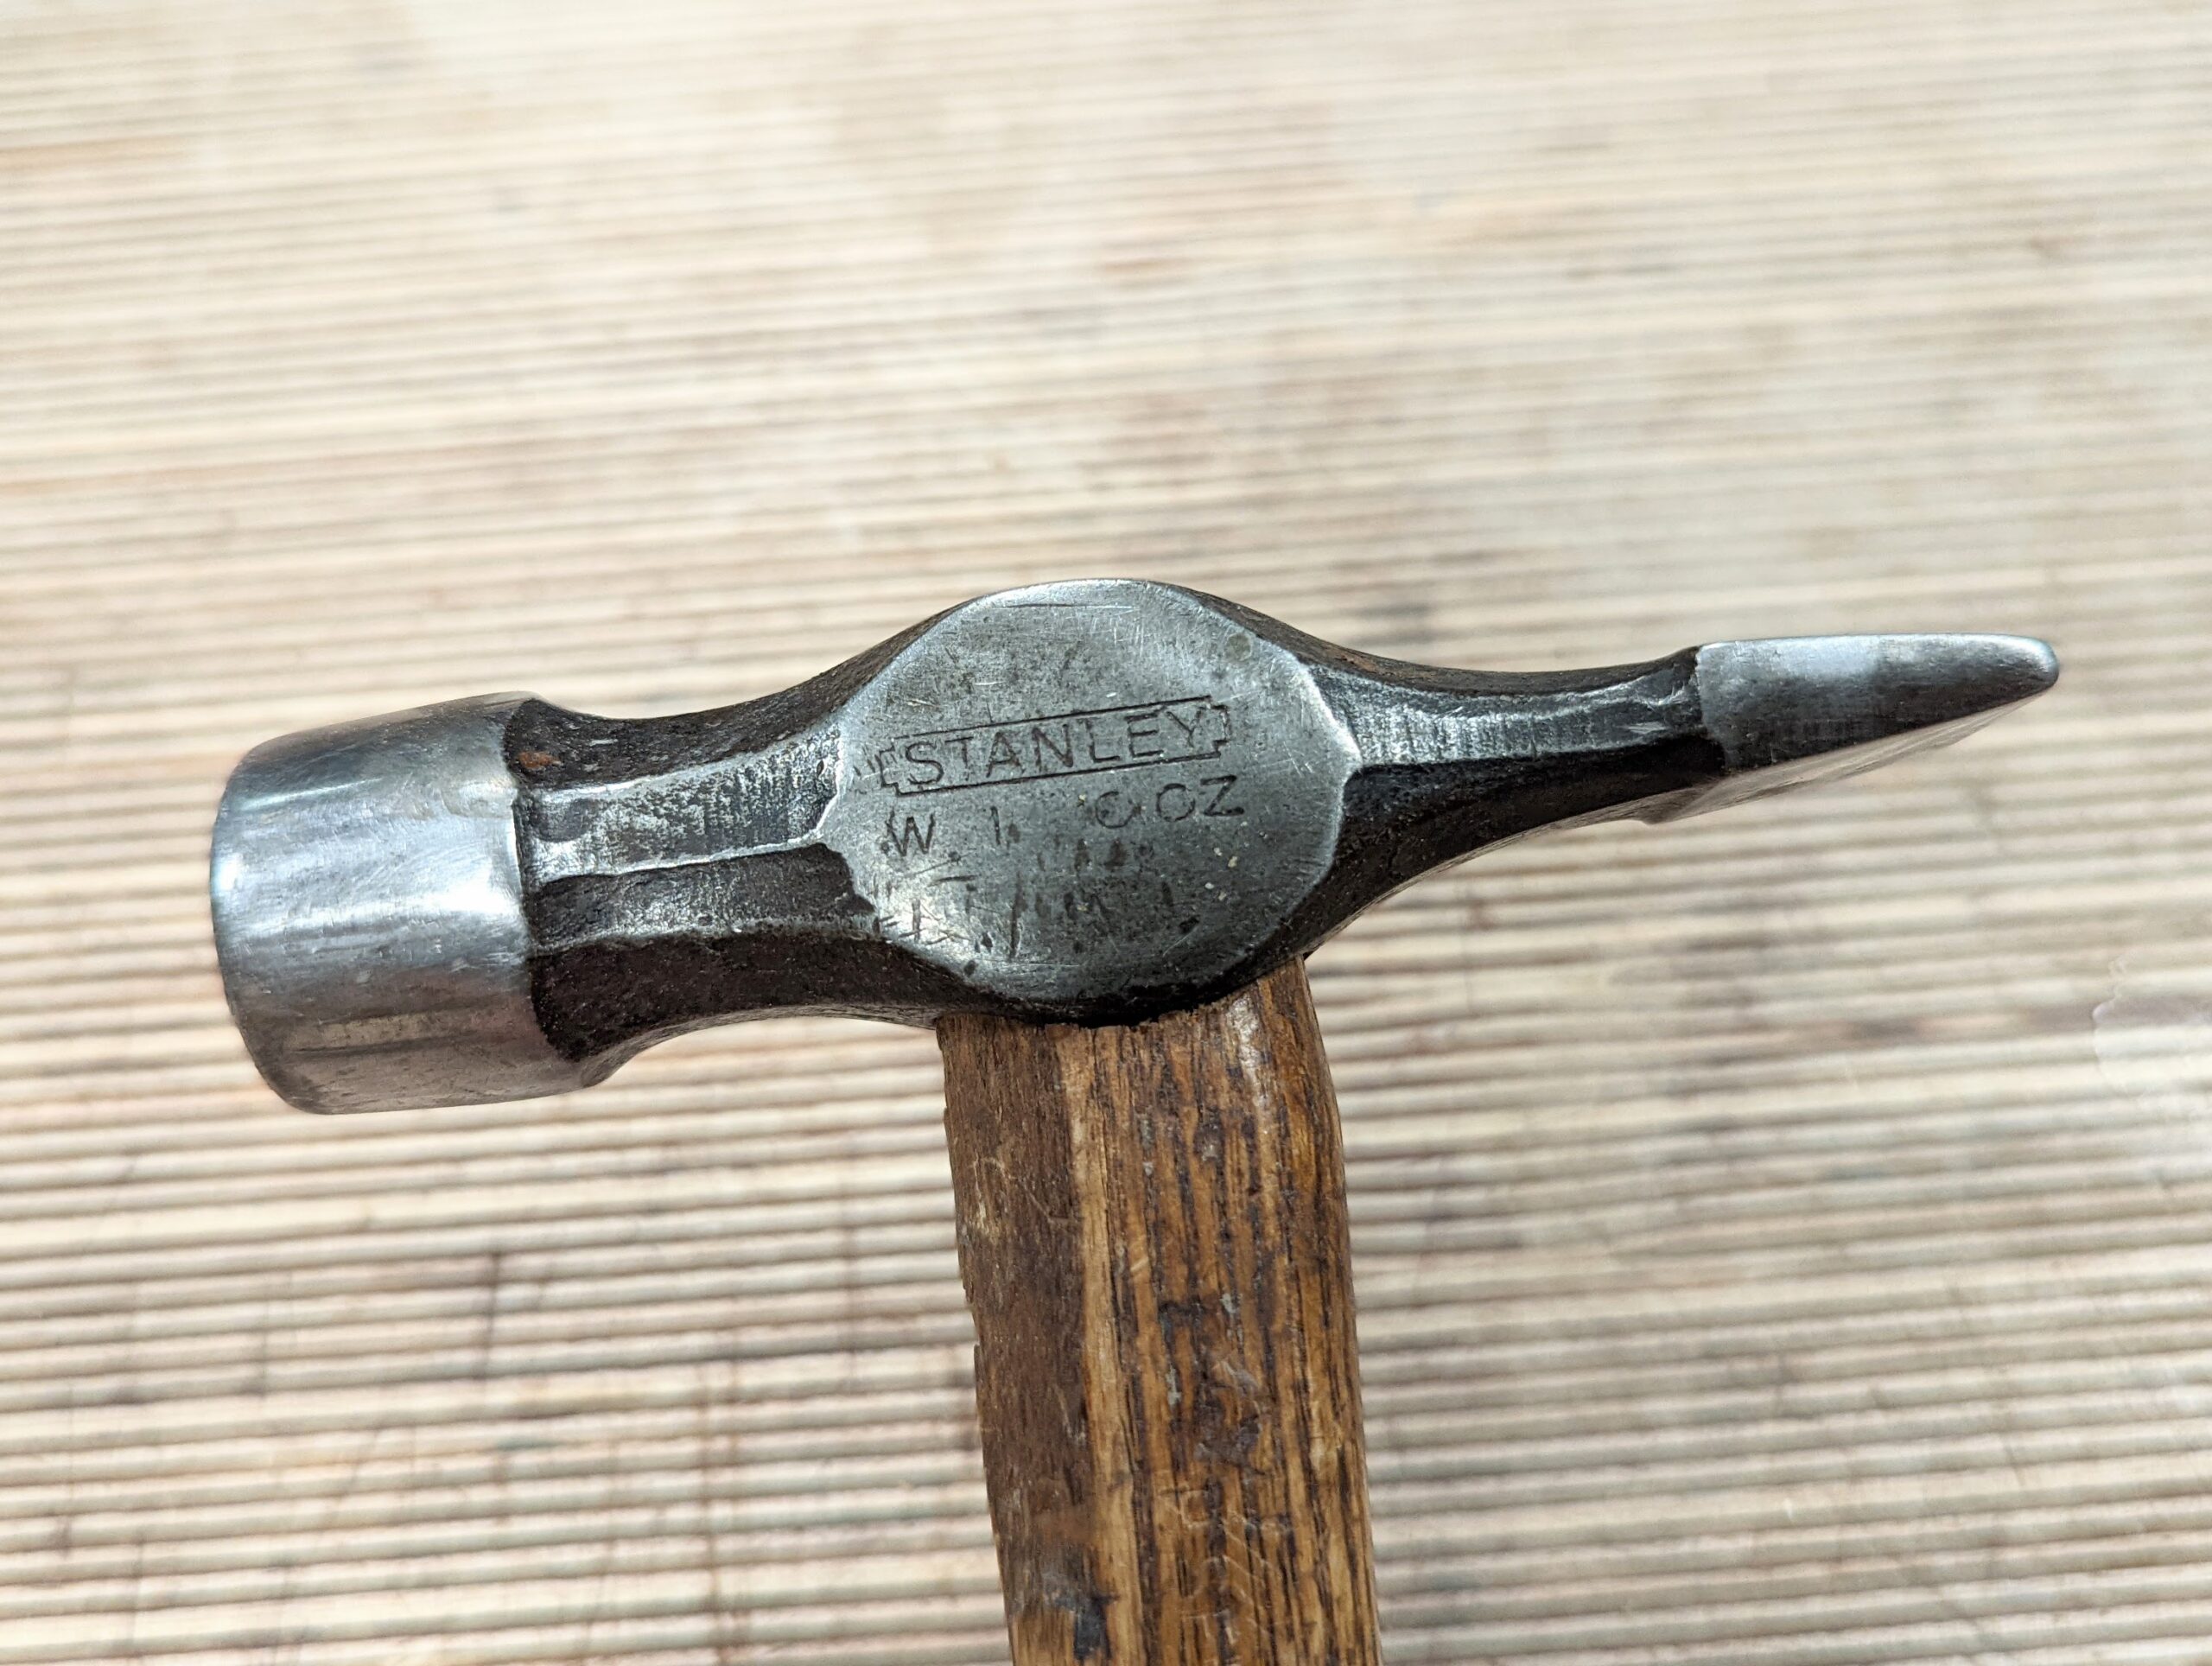
Hammers
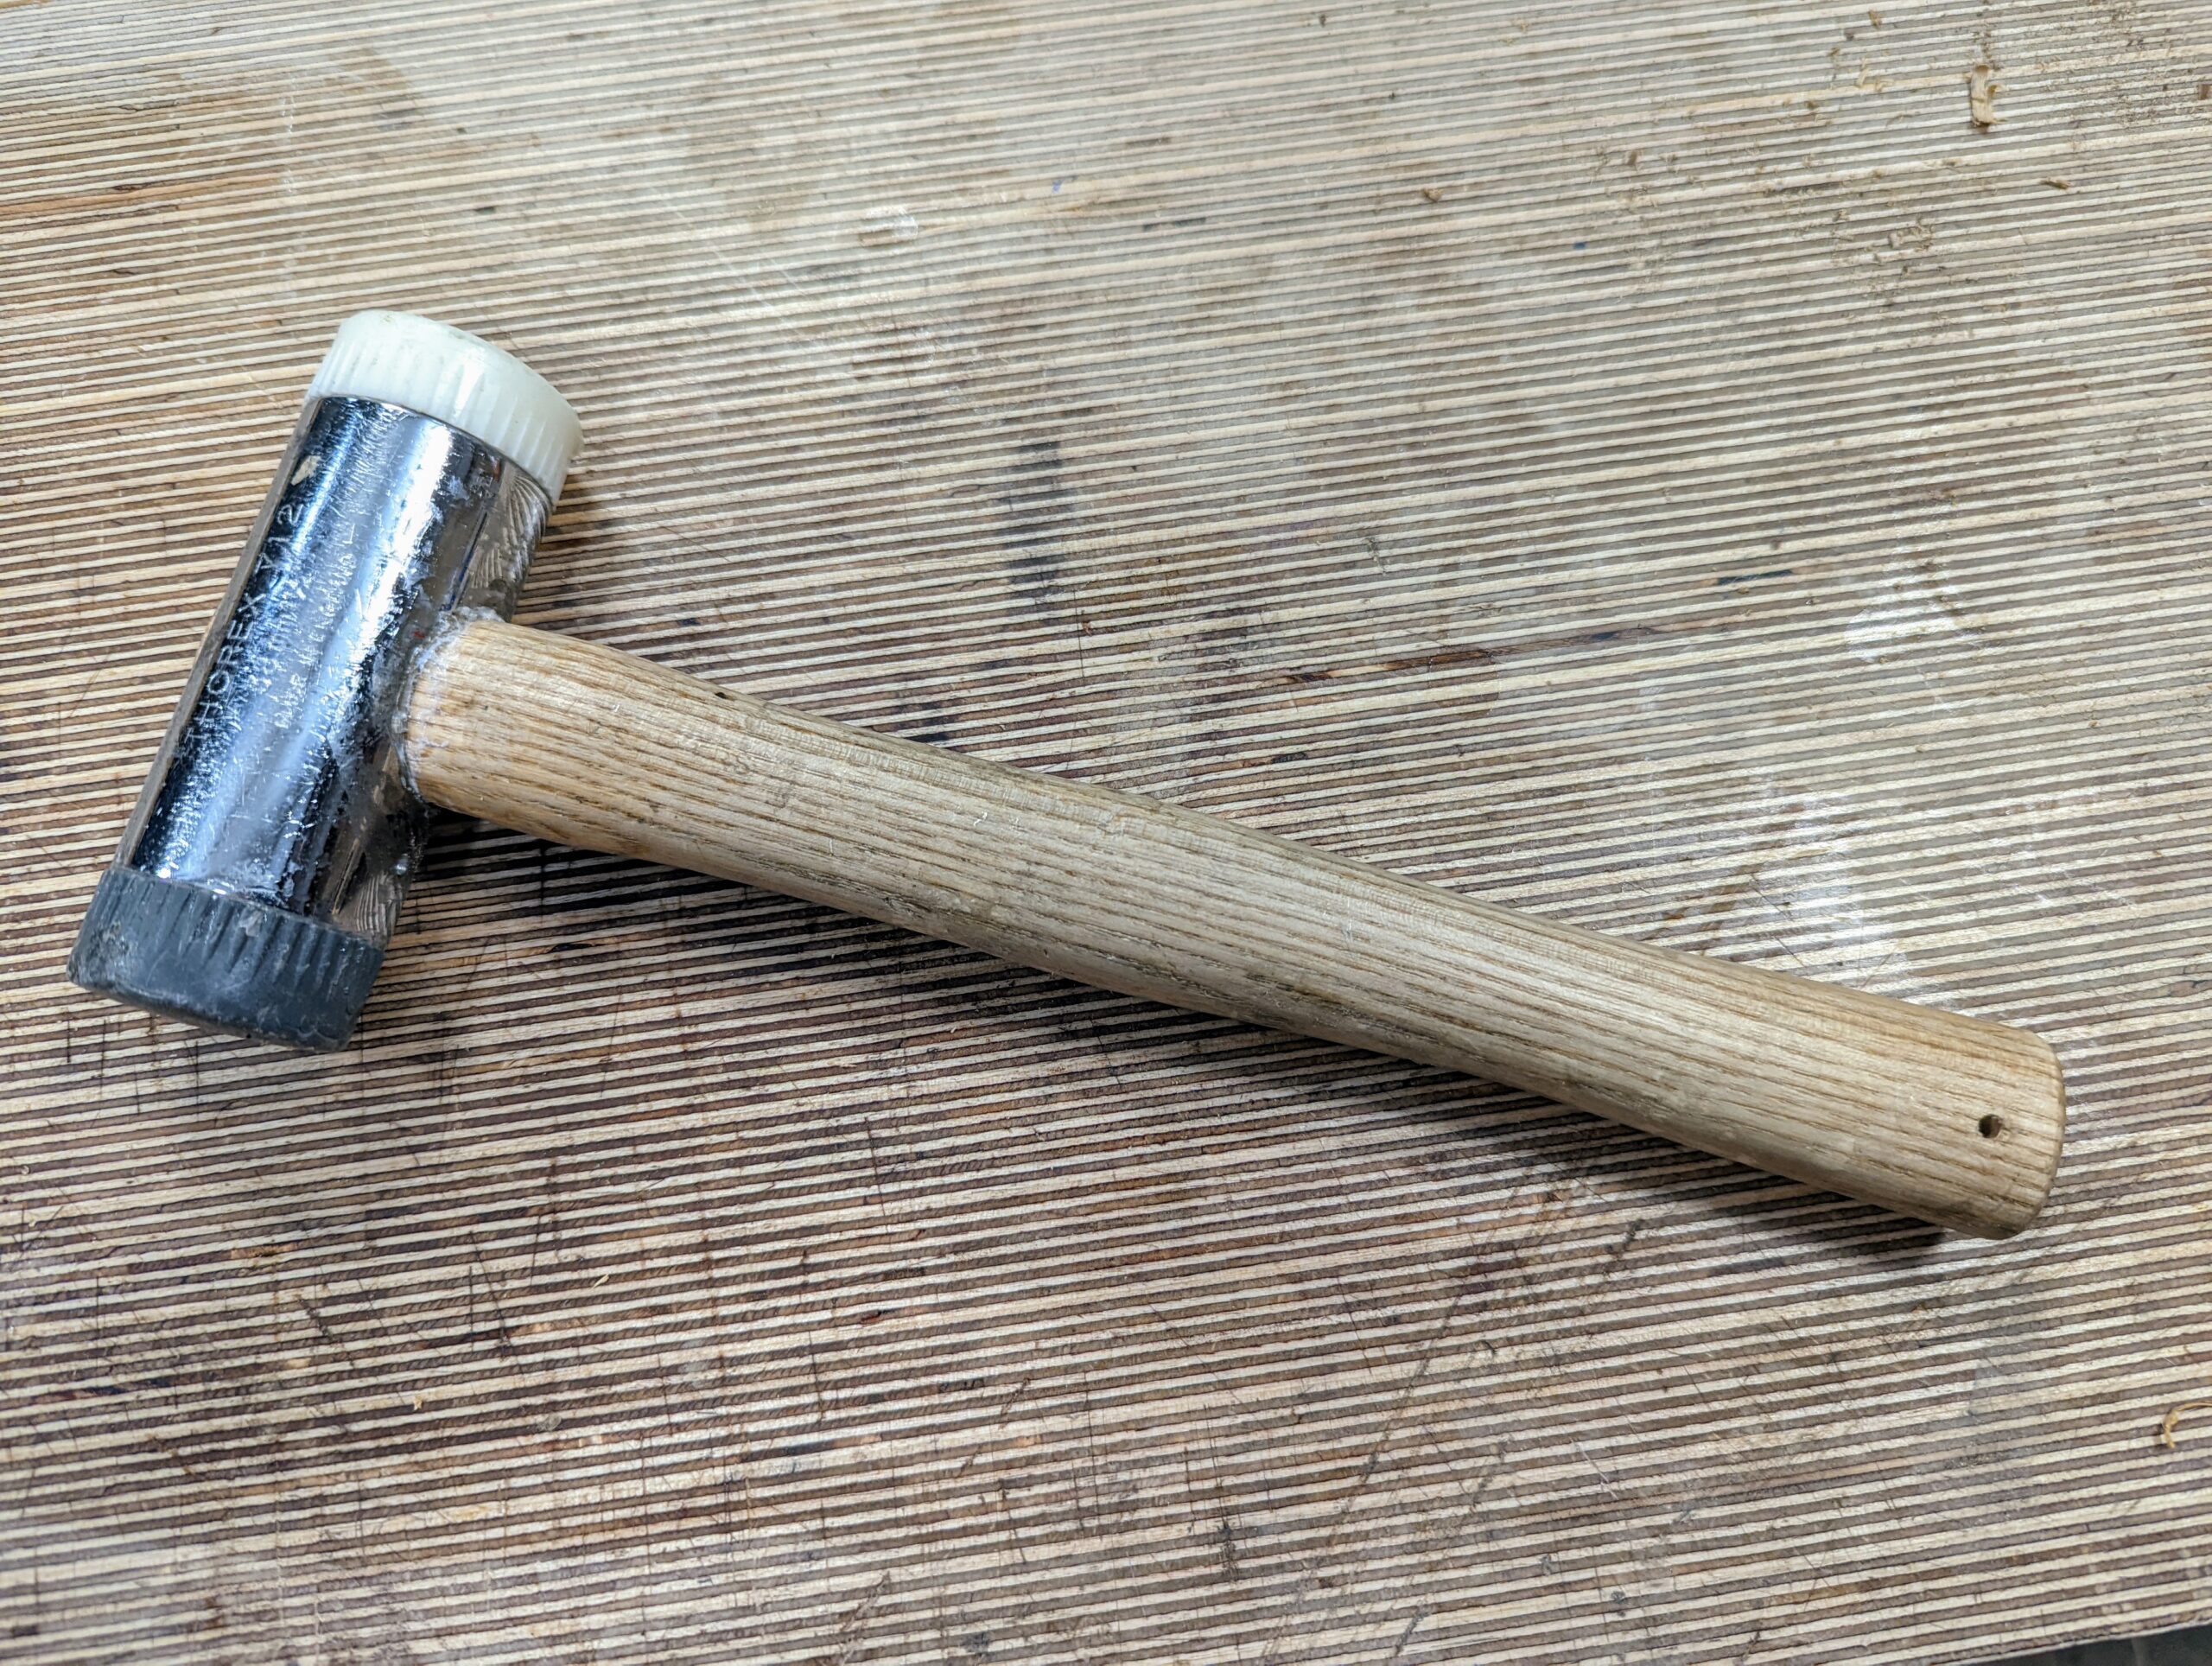
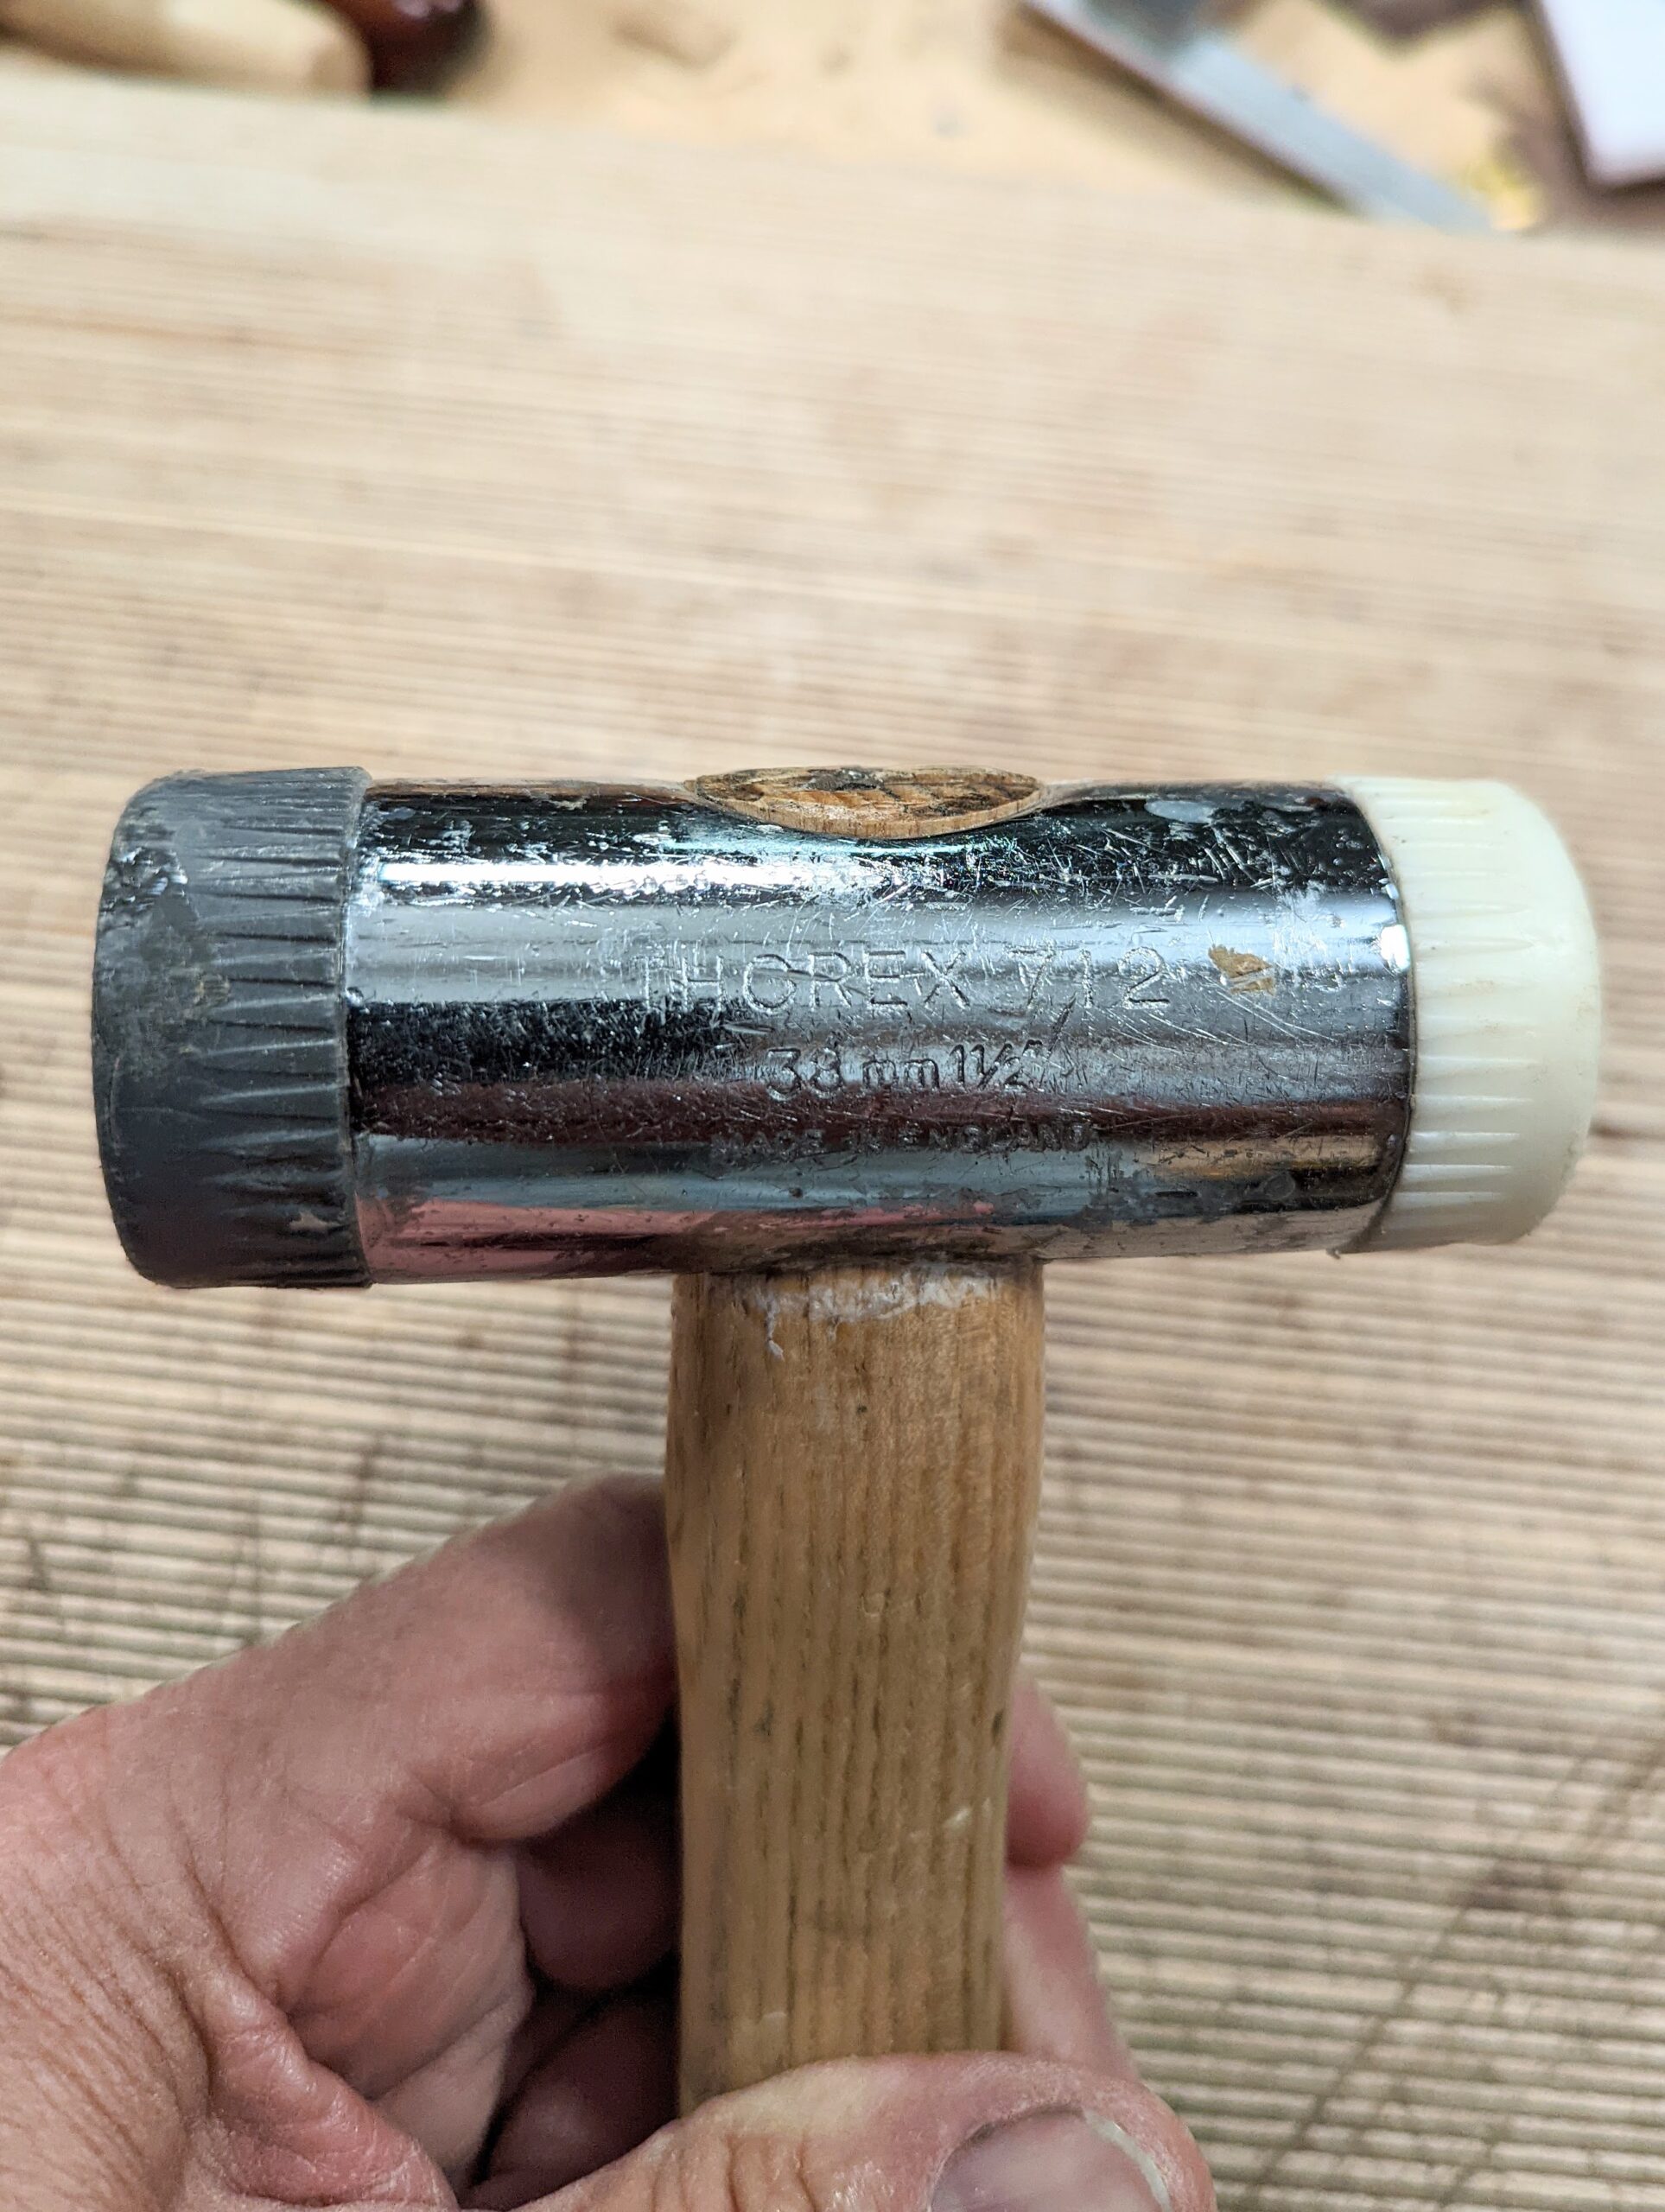
Chisel hammer
As an influencer, I have done more for this company than any user in the world. Why? Quite simply it's the best there is and I have used one for a long time. I did at one time advocate only wooden mallets and I still own one but this hammer satisfies me the most because I have zero wasted energy with it and it delivers the COP (centre of percussion or 'sweet spot') right on.
Warrington hammer
I use a couple of sizes of Warrington cross peins. 10oz and 12oz. For driving small nails and many other bench tasks they are perfectly balanced with enough weight and the cross pein comes in so useful for many tasks not the least of which is driving very small brads.

Brace and bits
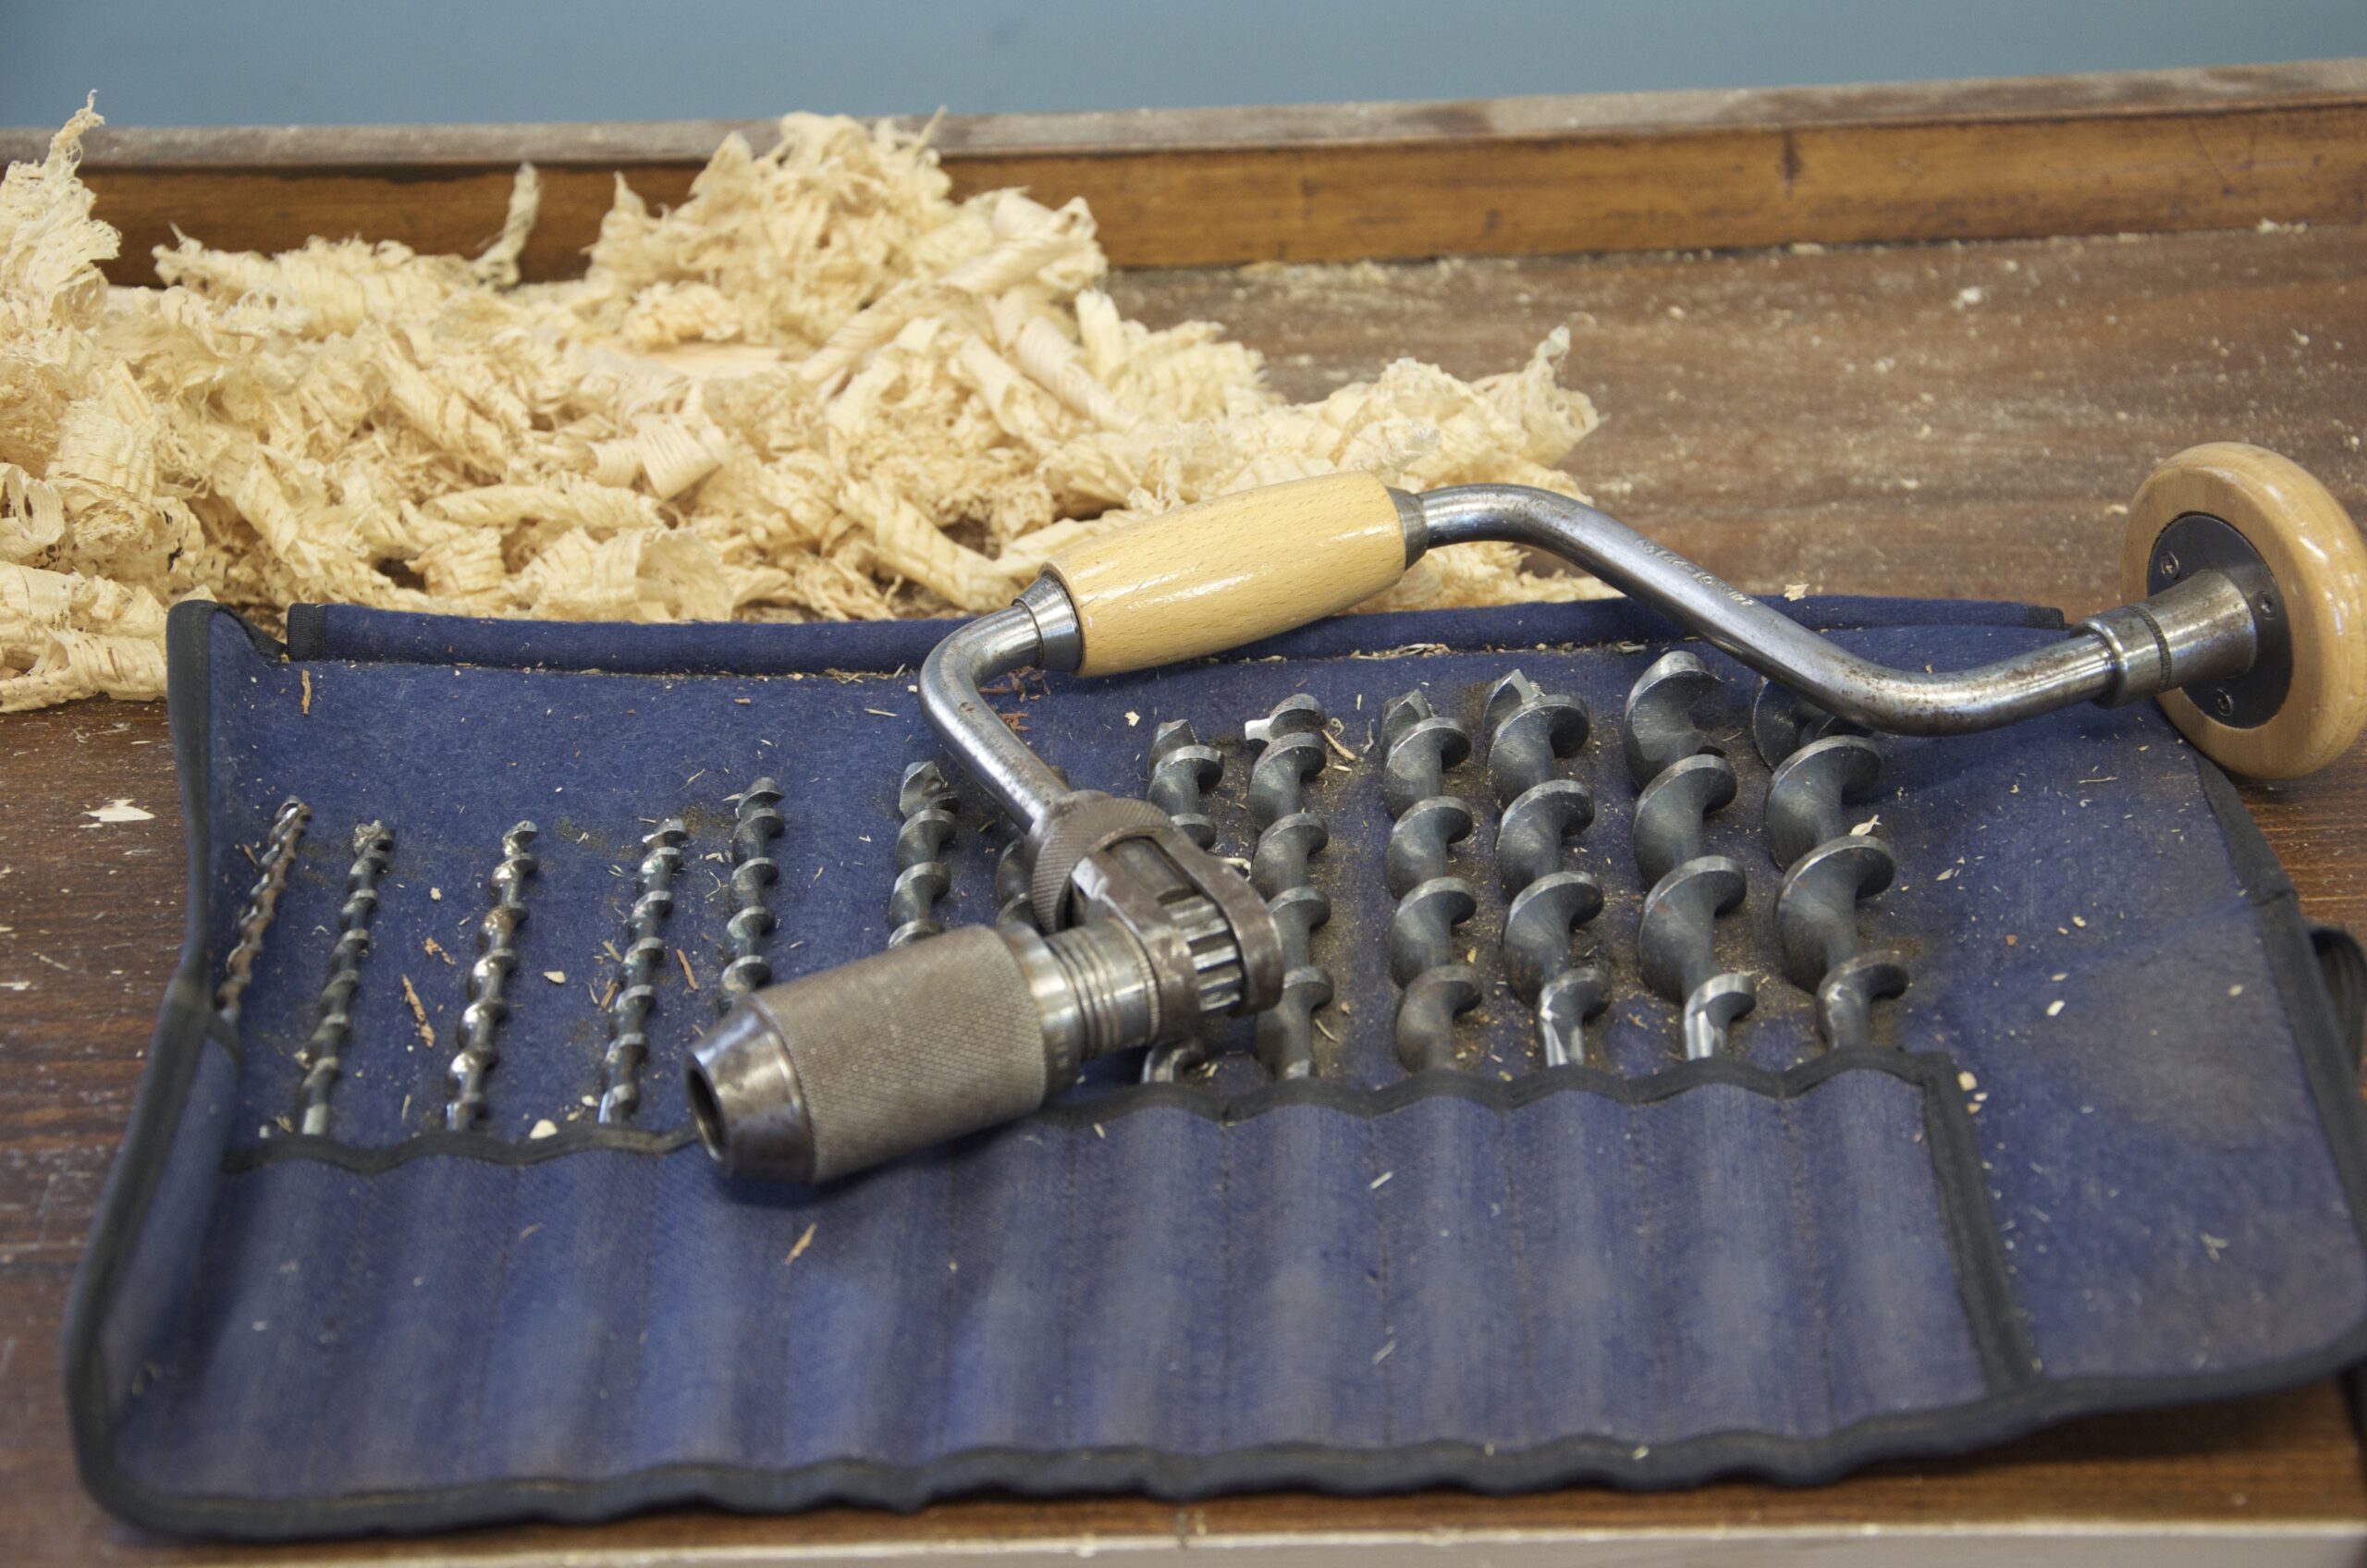
Swing or hand braces, often called bit braces, sell for almost nothing these days and that is simply because the ubiquitous drill drivers have replaced them. When a high torque with a slow and controlled speed is needed these tools are fit for purpose. The bits as shown too can be had as a set (vintage only nowadays) or bought individually which will cost you much less. the bits can be sharpened like chisel edges with general saw files and narrow diamond hones. If you take care of them and never hit nails or screws they will last for a lifetime of woodworking.
Twist drills
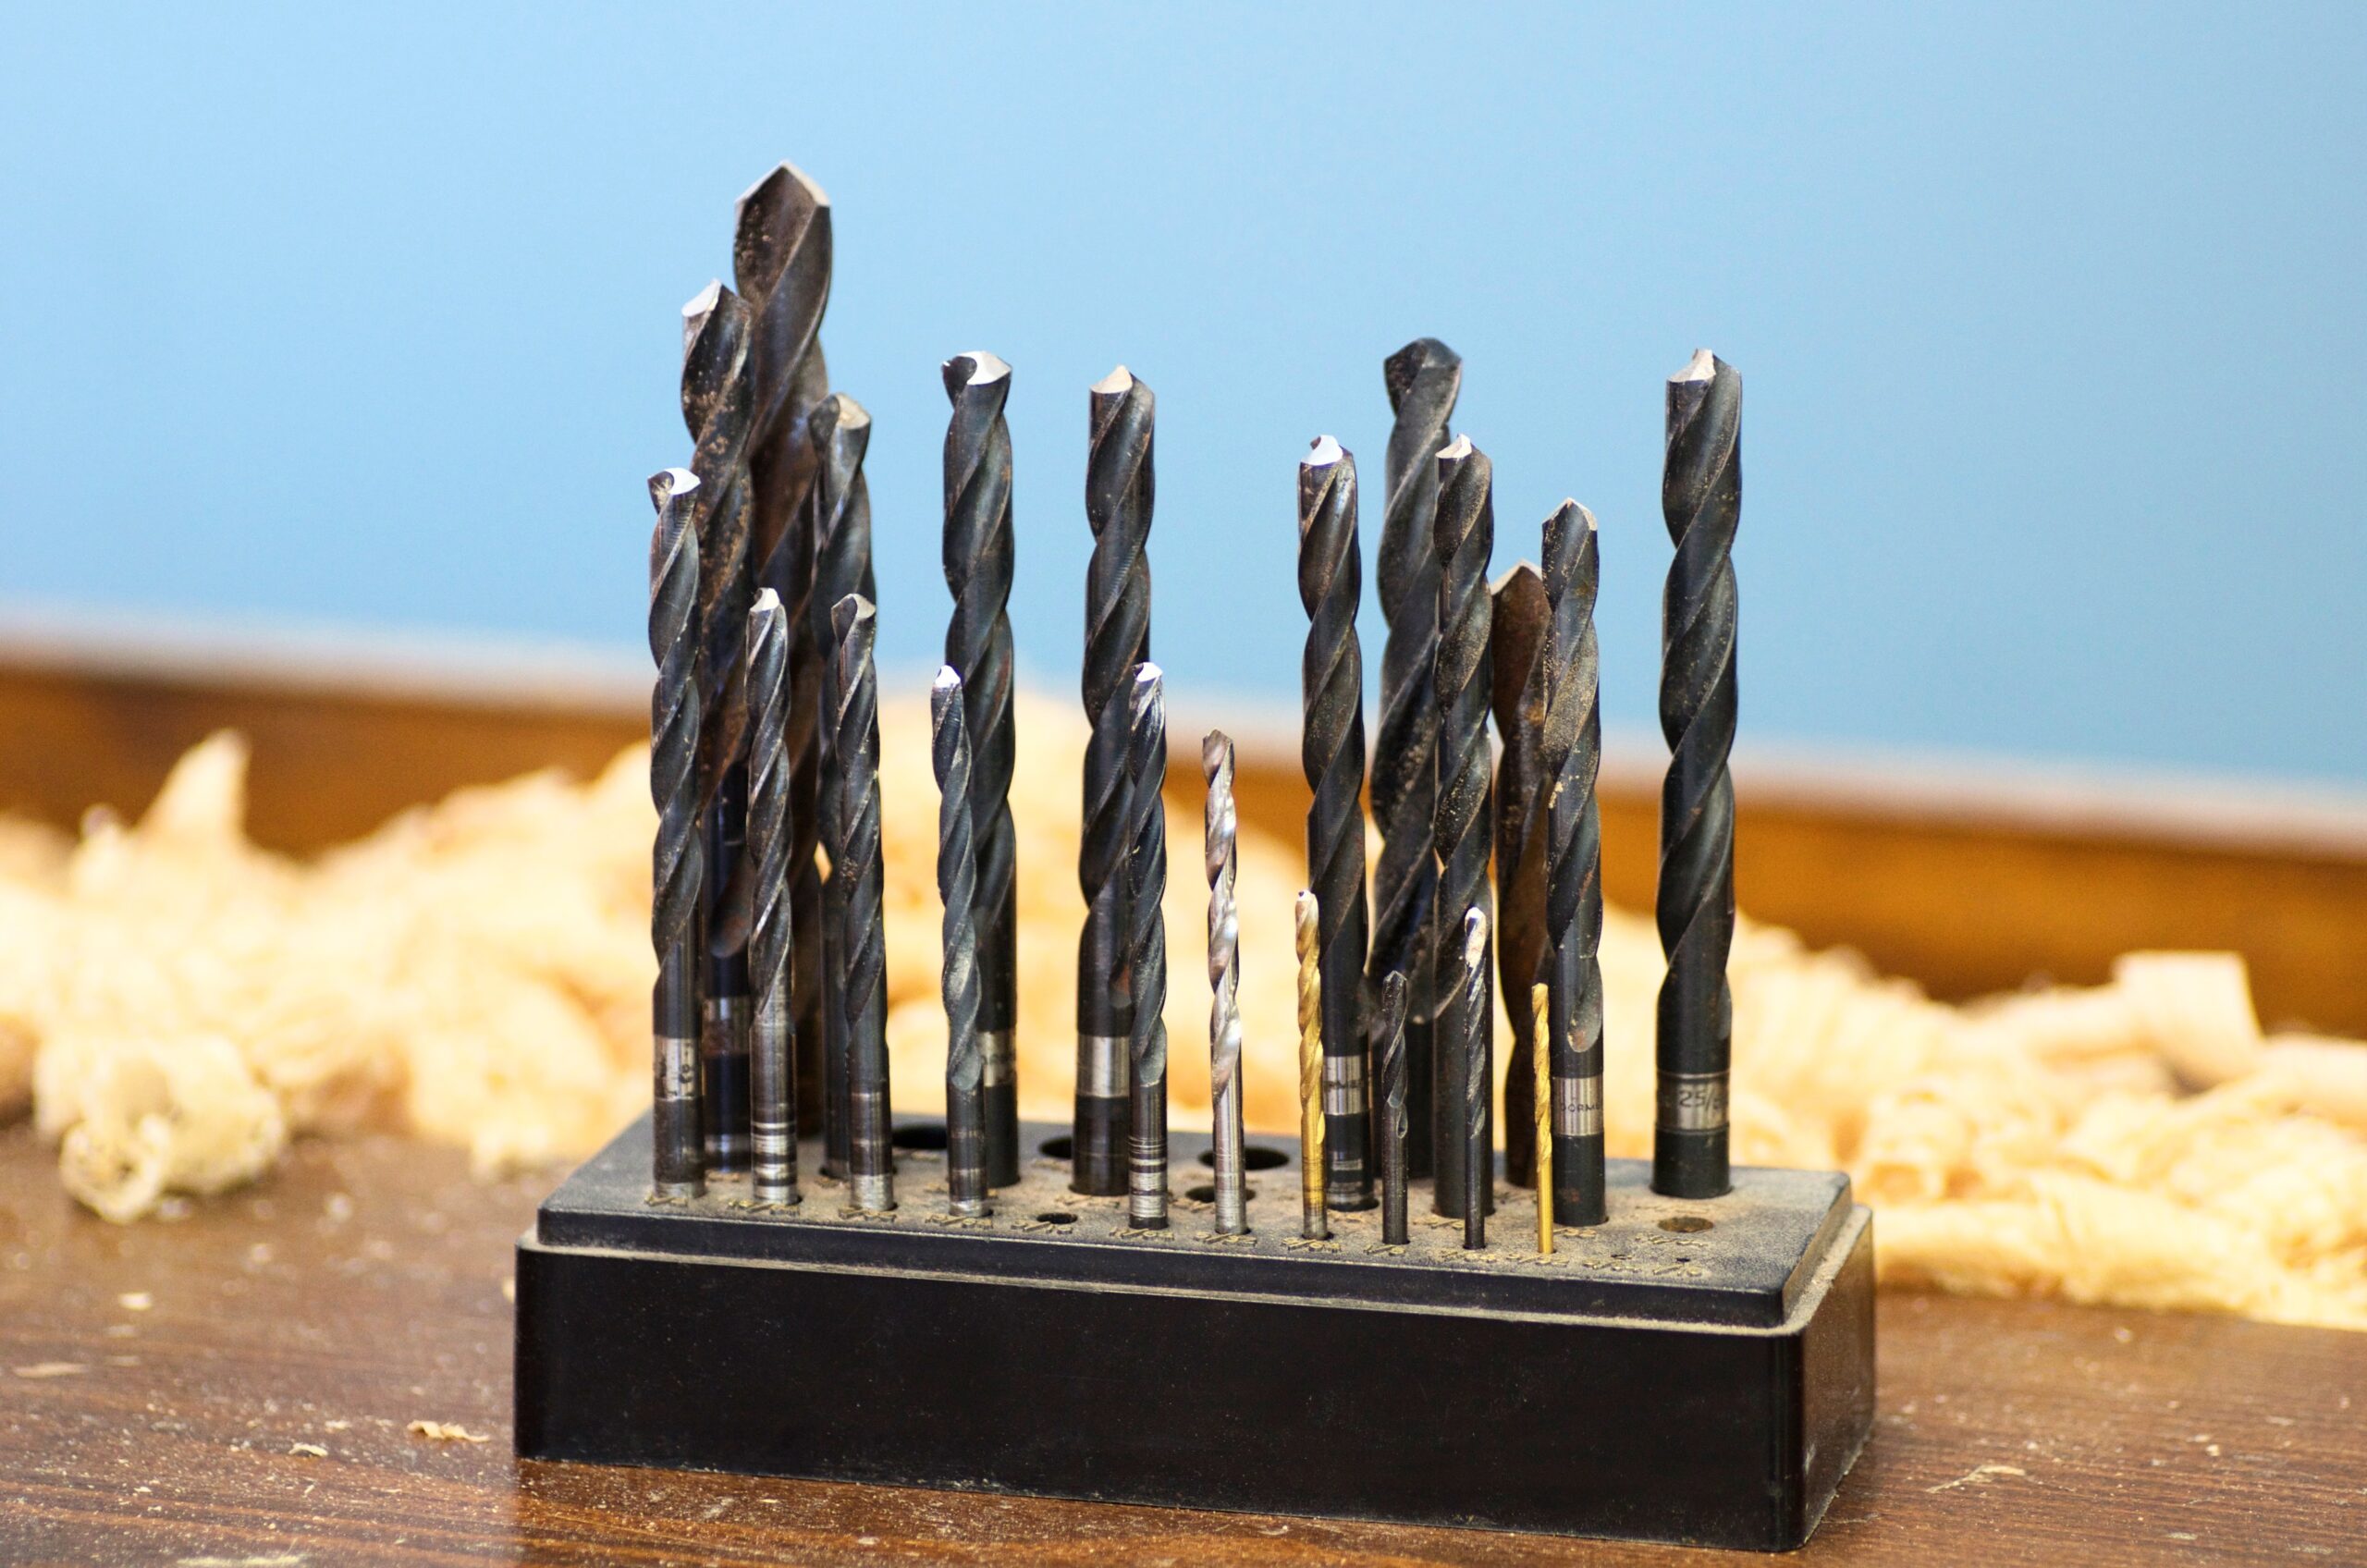
Twist drills come in every size and a set will cost very little considered the lifetime use they give. metalworking twist drills will drill all materials including most metals, wood and plastic. They are resharpenable on a grinding wheel or with special bit sharpeners but I just eyeball sharpening with a grinding wheel, always have. The nice thing about that is I can go for a more resistant bevel for cutting metals of all kinds or a more aggressive cut for high speed in wood.
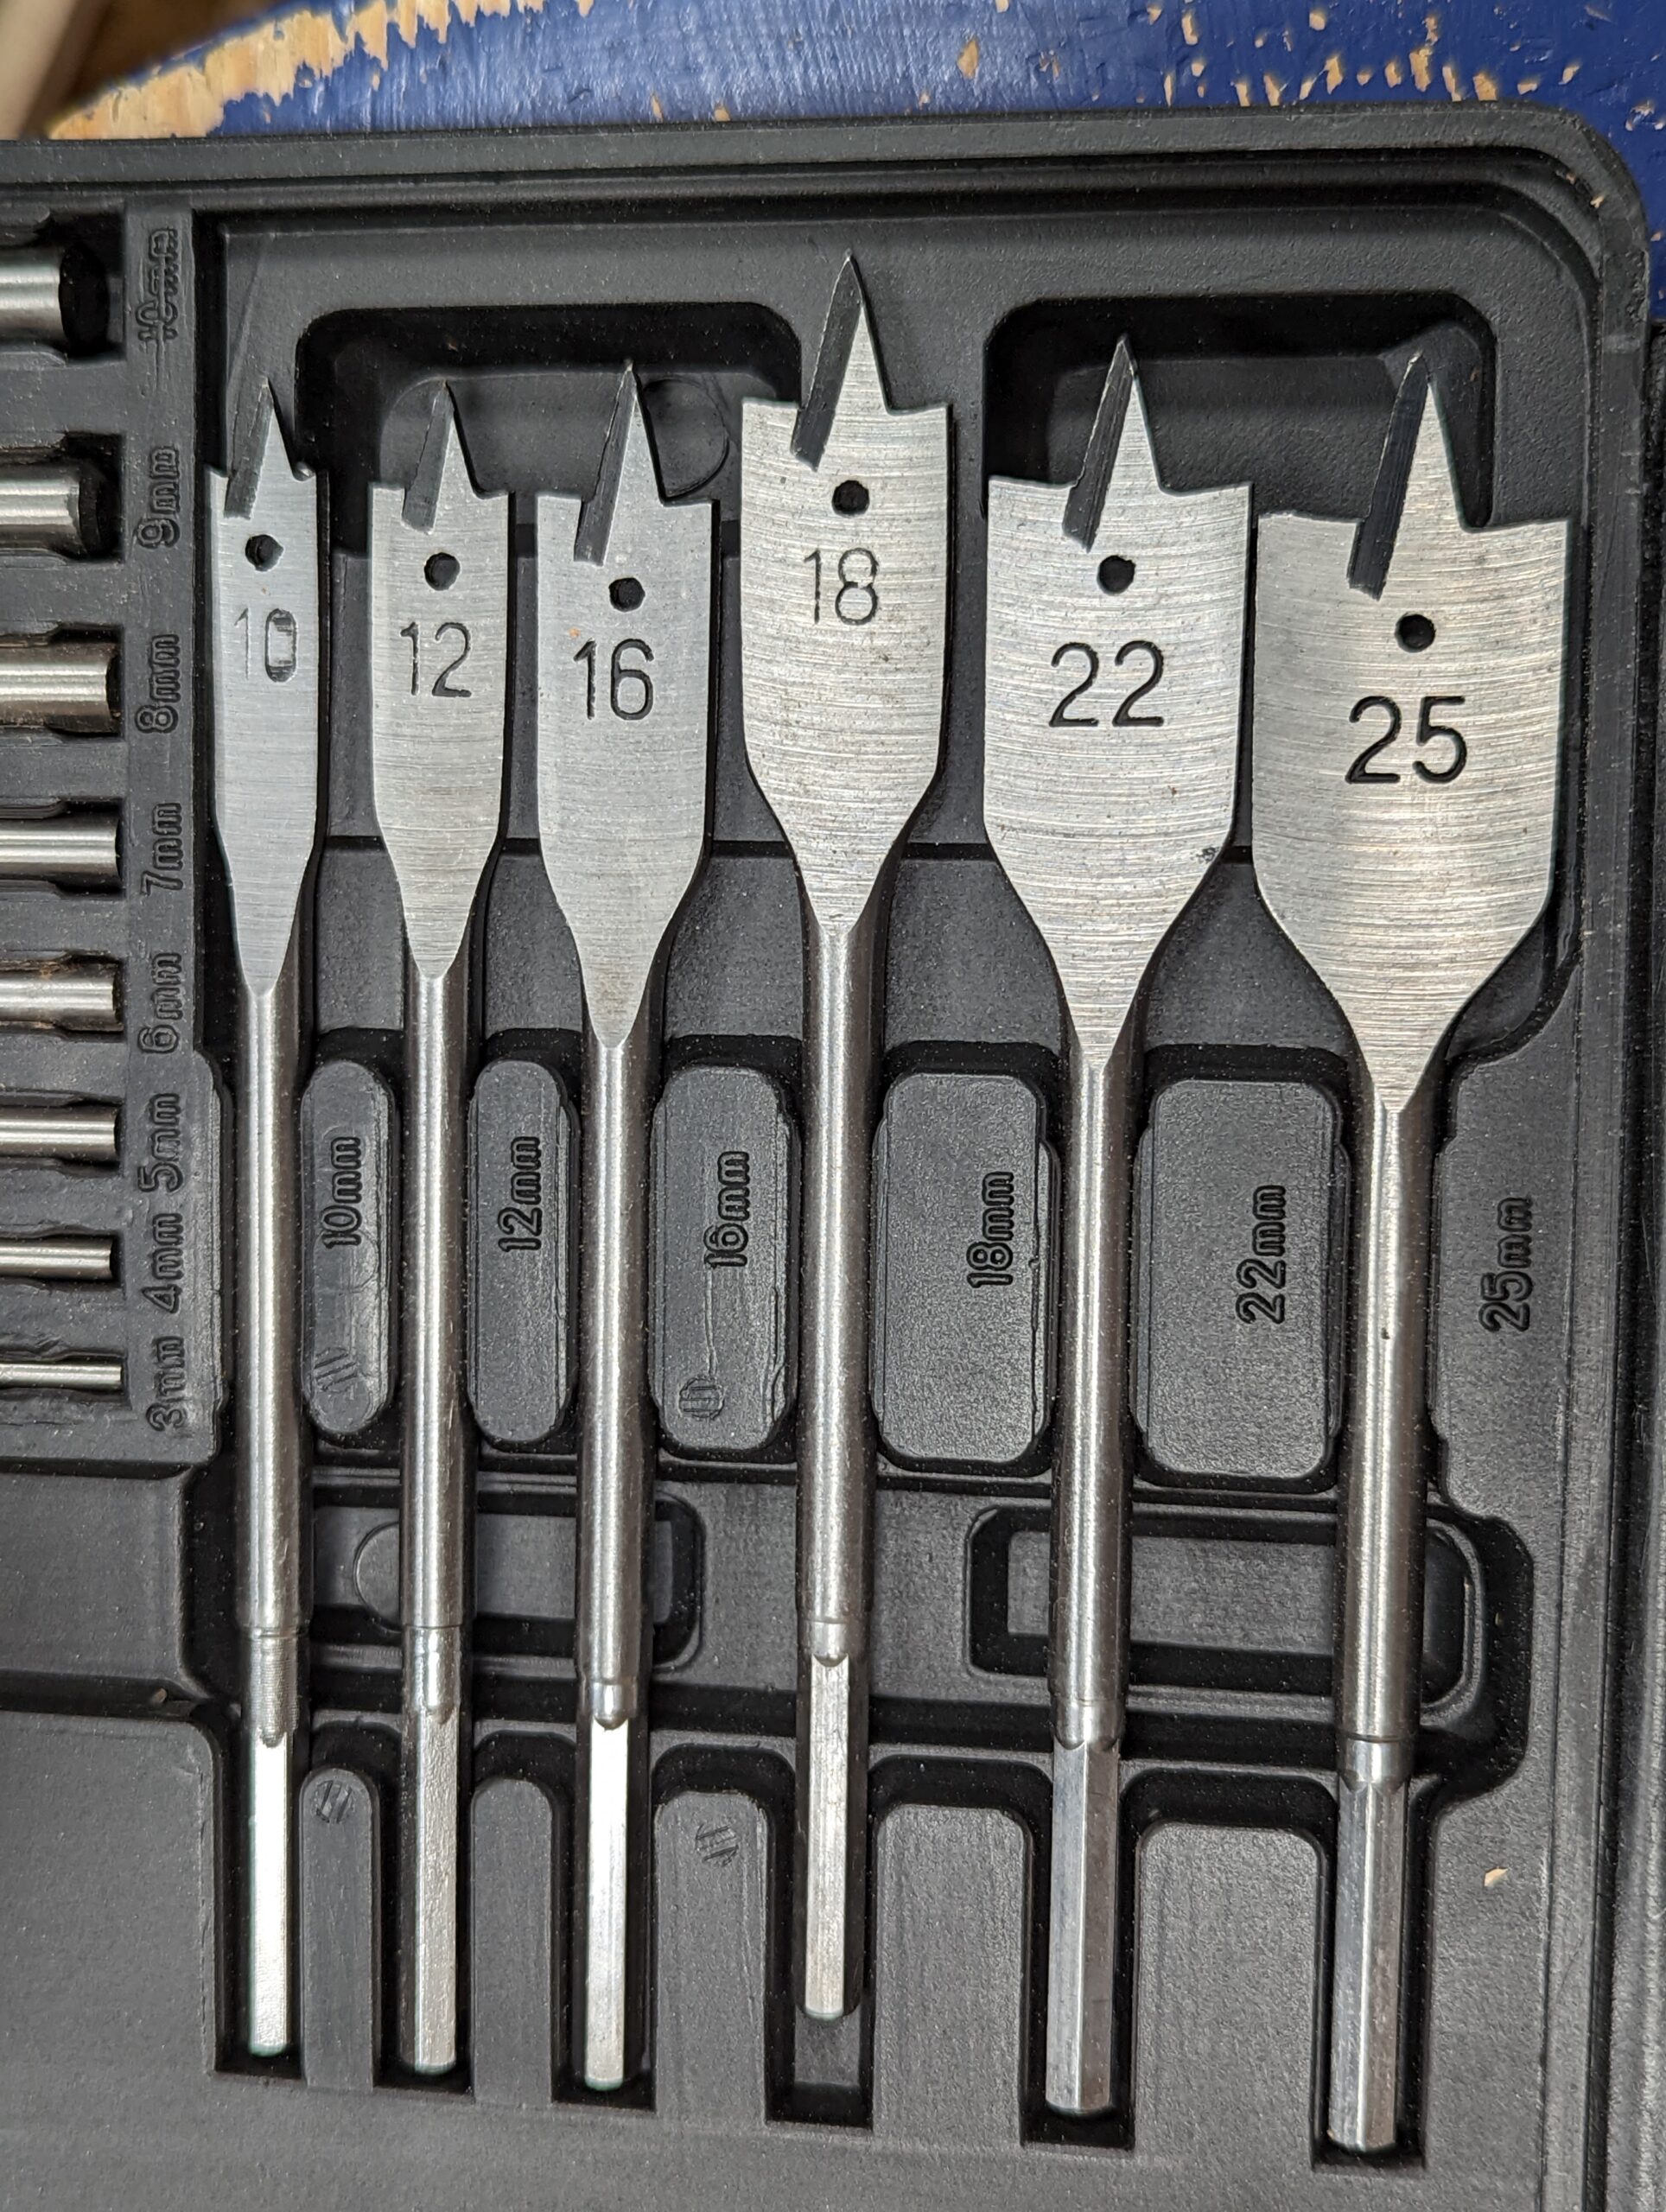
Paddle Bits
Paddle bits are not made for use with a hand (swing) brace as they rely on high speed to cut efficiently. Thankfully, they are resharpenable and need it from time to time for a clean cut. These bits are not too sophisticated and that is what makes them very easy to sharpen with just a flat file. They rely on shear-cutting both along the sides of the bit that establish the walls of the hole and then the actual cutting faces either side of the spear point. In other words, unlike the augre bits, twist drill bits and Forstner bits, which all have raker cutting faces and side cutters for the walls of the holes, these bits have no such cutting edges but high speed helps them to more 'scrape' the wood for deepening penetration.
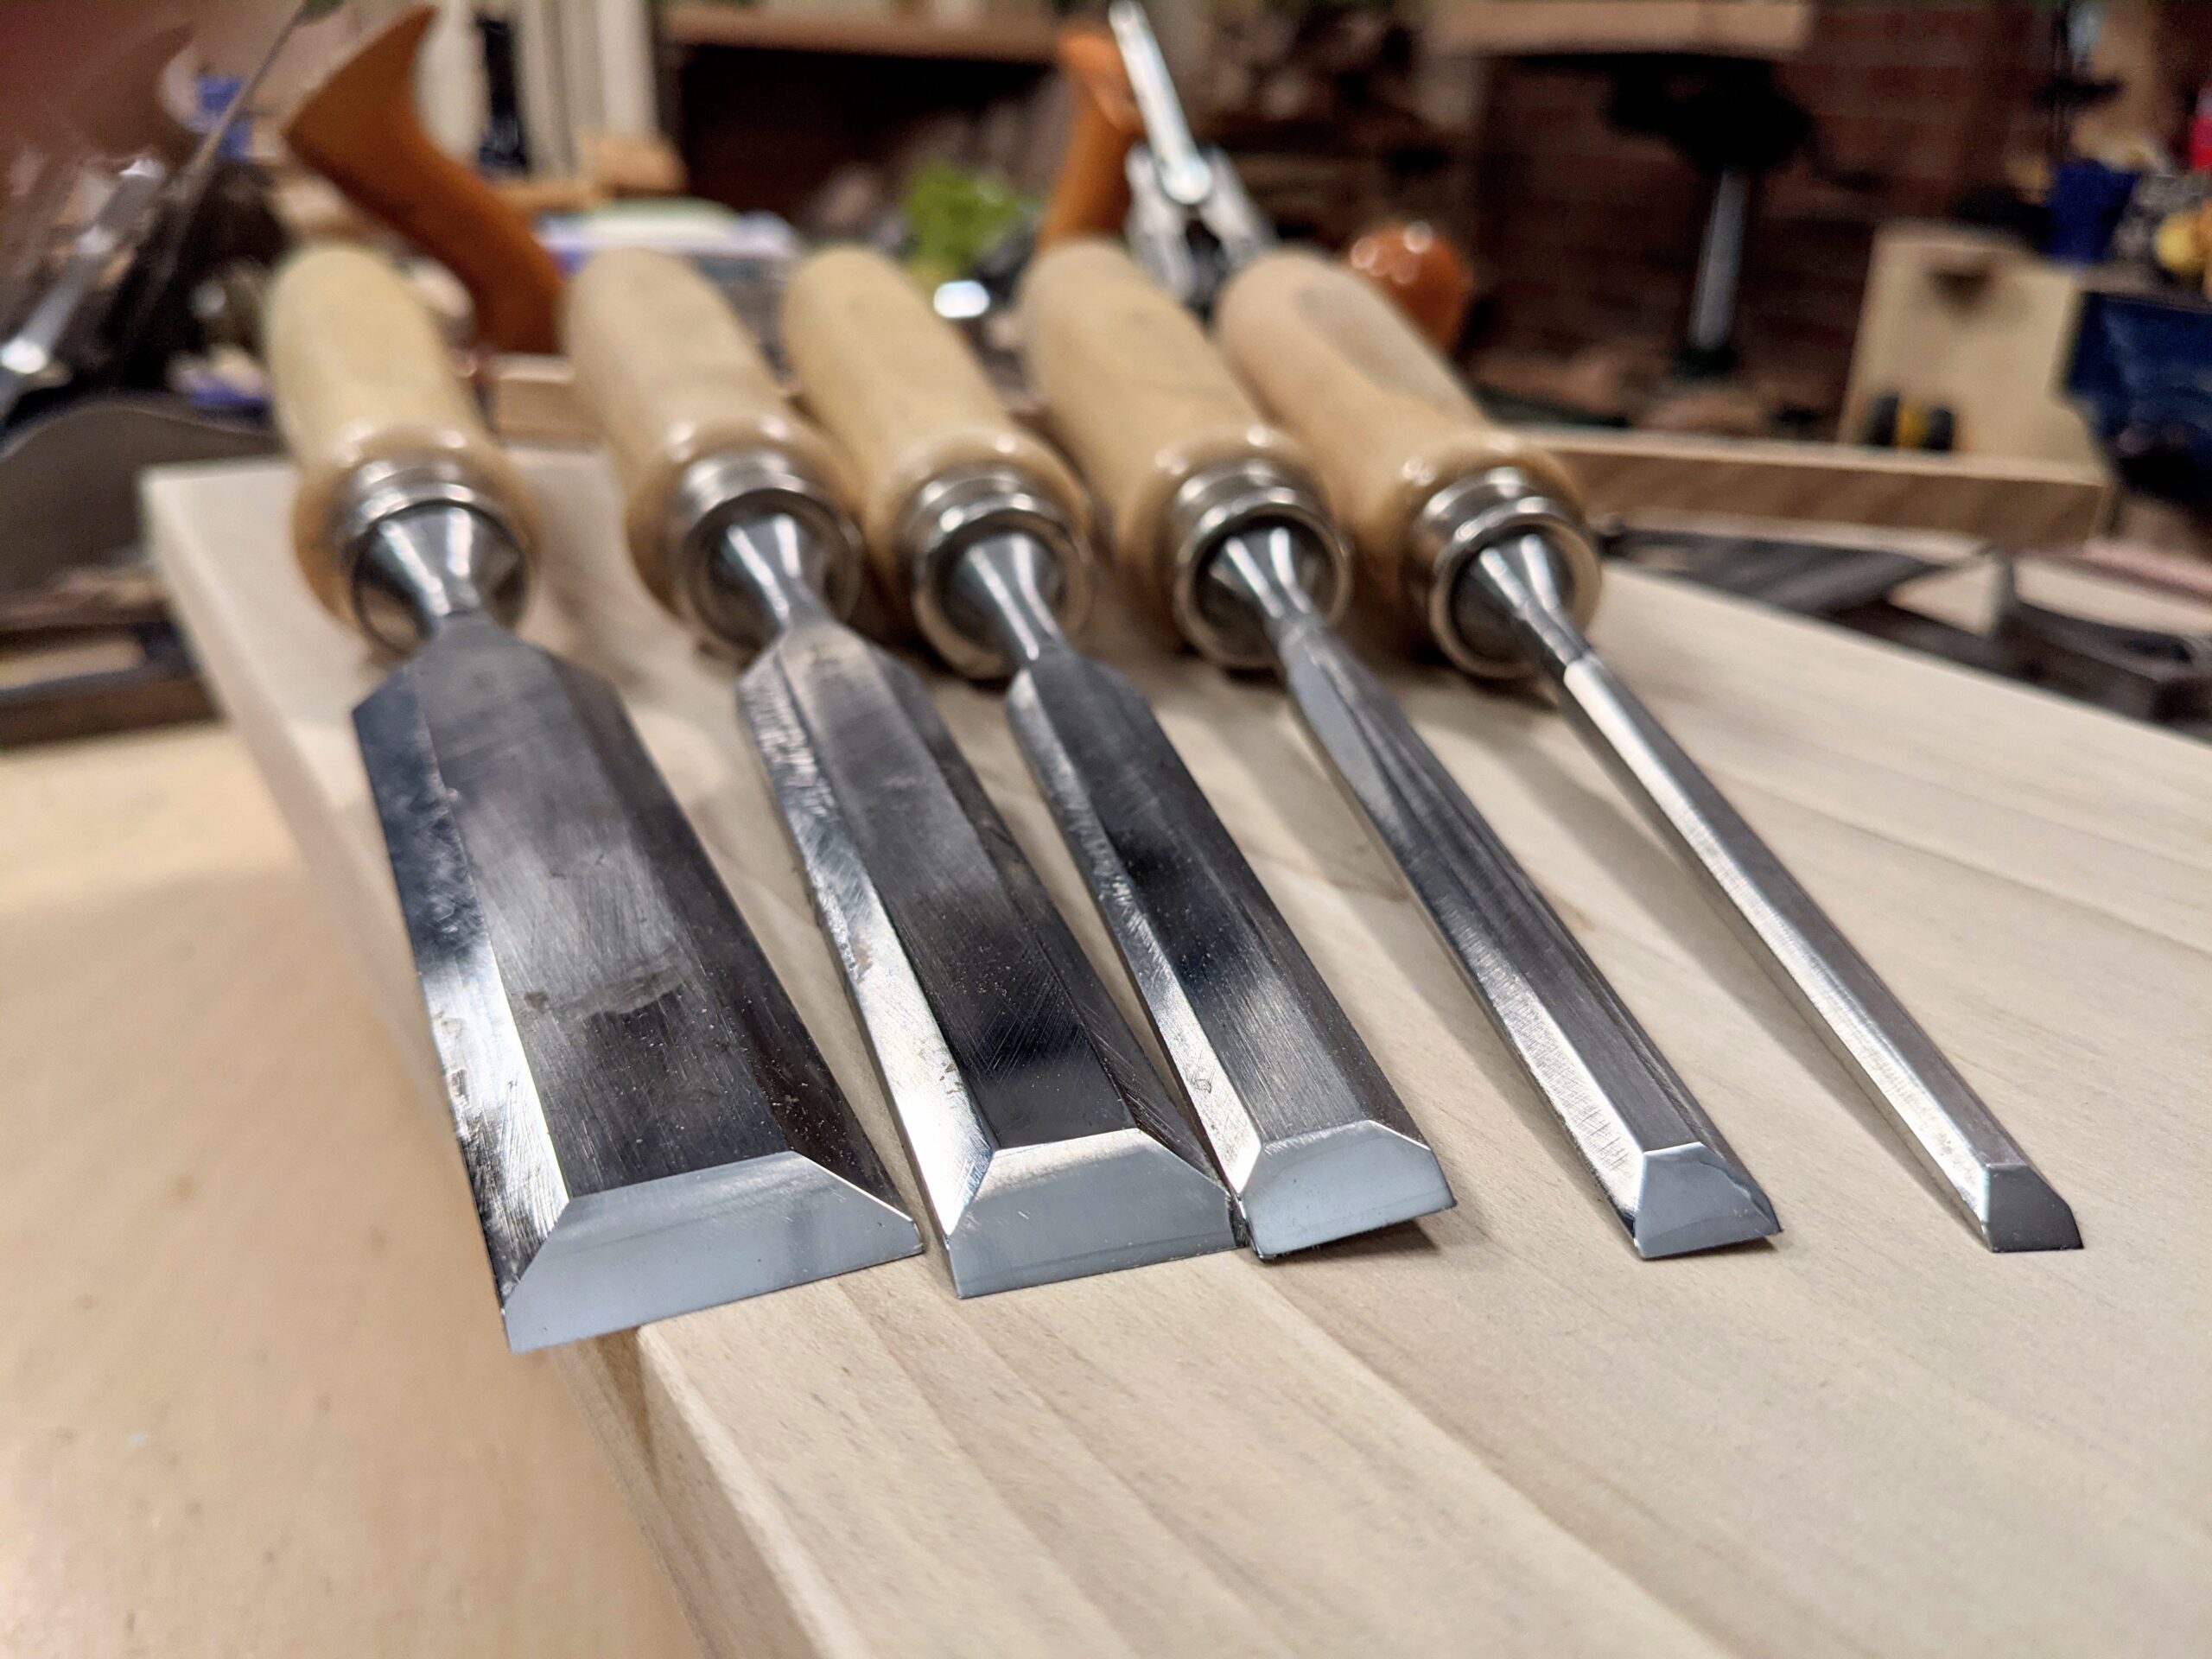
Chisels
You don't really need much by way of chisels. Bevel-edged chisels really are the best for the widest range of tasks including mortising, paring and chopping for dovetails, trimming, recessing and much more. In fact, I cannot see anything that other chisel types do that these chisels shown below don't do equally well. I use a simple set of five basic bevel-edged chisels in the everyday of my working wood. I do not keep special chisels for the finer work. These do it all. There is really no need to pay more than £10-15 per chisel but you can get some sets for much less than that. People will tell you that thin-edge, refined chisels with super-thin sides are necessary for fine work like dovetailing but that's not the case and not true at all. I think that the main reason for thinner-edged versions is that they just look nice and thereby seem better balanced and that's as good a reason as any of you want to spend more. I will also say that when something looks nice and feels refined you might feel better about your work and your working so that is good enough. Most joiners I knew and worked alongside cut perfect dovetails for fifty years with square-edged firmer chisels with no issues. We've become more and more spoiled and of course, engineers have to keep inventing problems so that they can offer a solution with something more that they want to sell but there was no problem to start with. Take the thick-ironed clunkily-heavy plane to dispel plane-iron chatter as an example and then too the Bed Rock frog in planes to set your plane without taking out the cutting iron assembly. What not one of them tells you is that when you adjust the Bed Rock frog, which you need to do once in a few years possibly, you actually change the depth of cut automatically but there is no way of knowing by how much. Go ahead, try it! You adjust the frog to close up the throat for that really awkward grain and then you tear out the grain because you increased the depth of cut and ruined what you were trying to fix in the first place.
Rasp and File
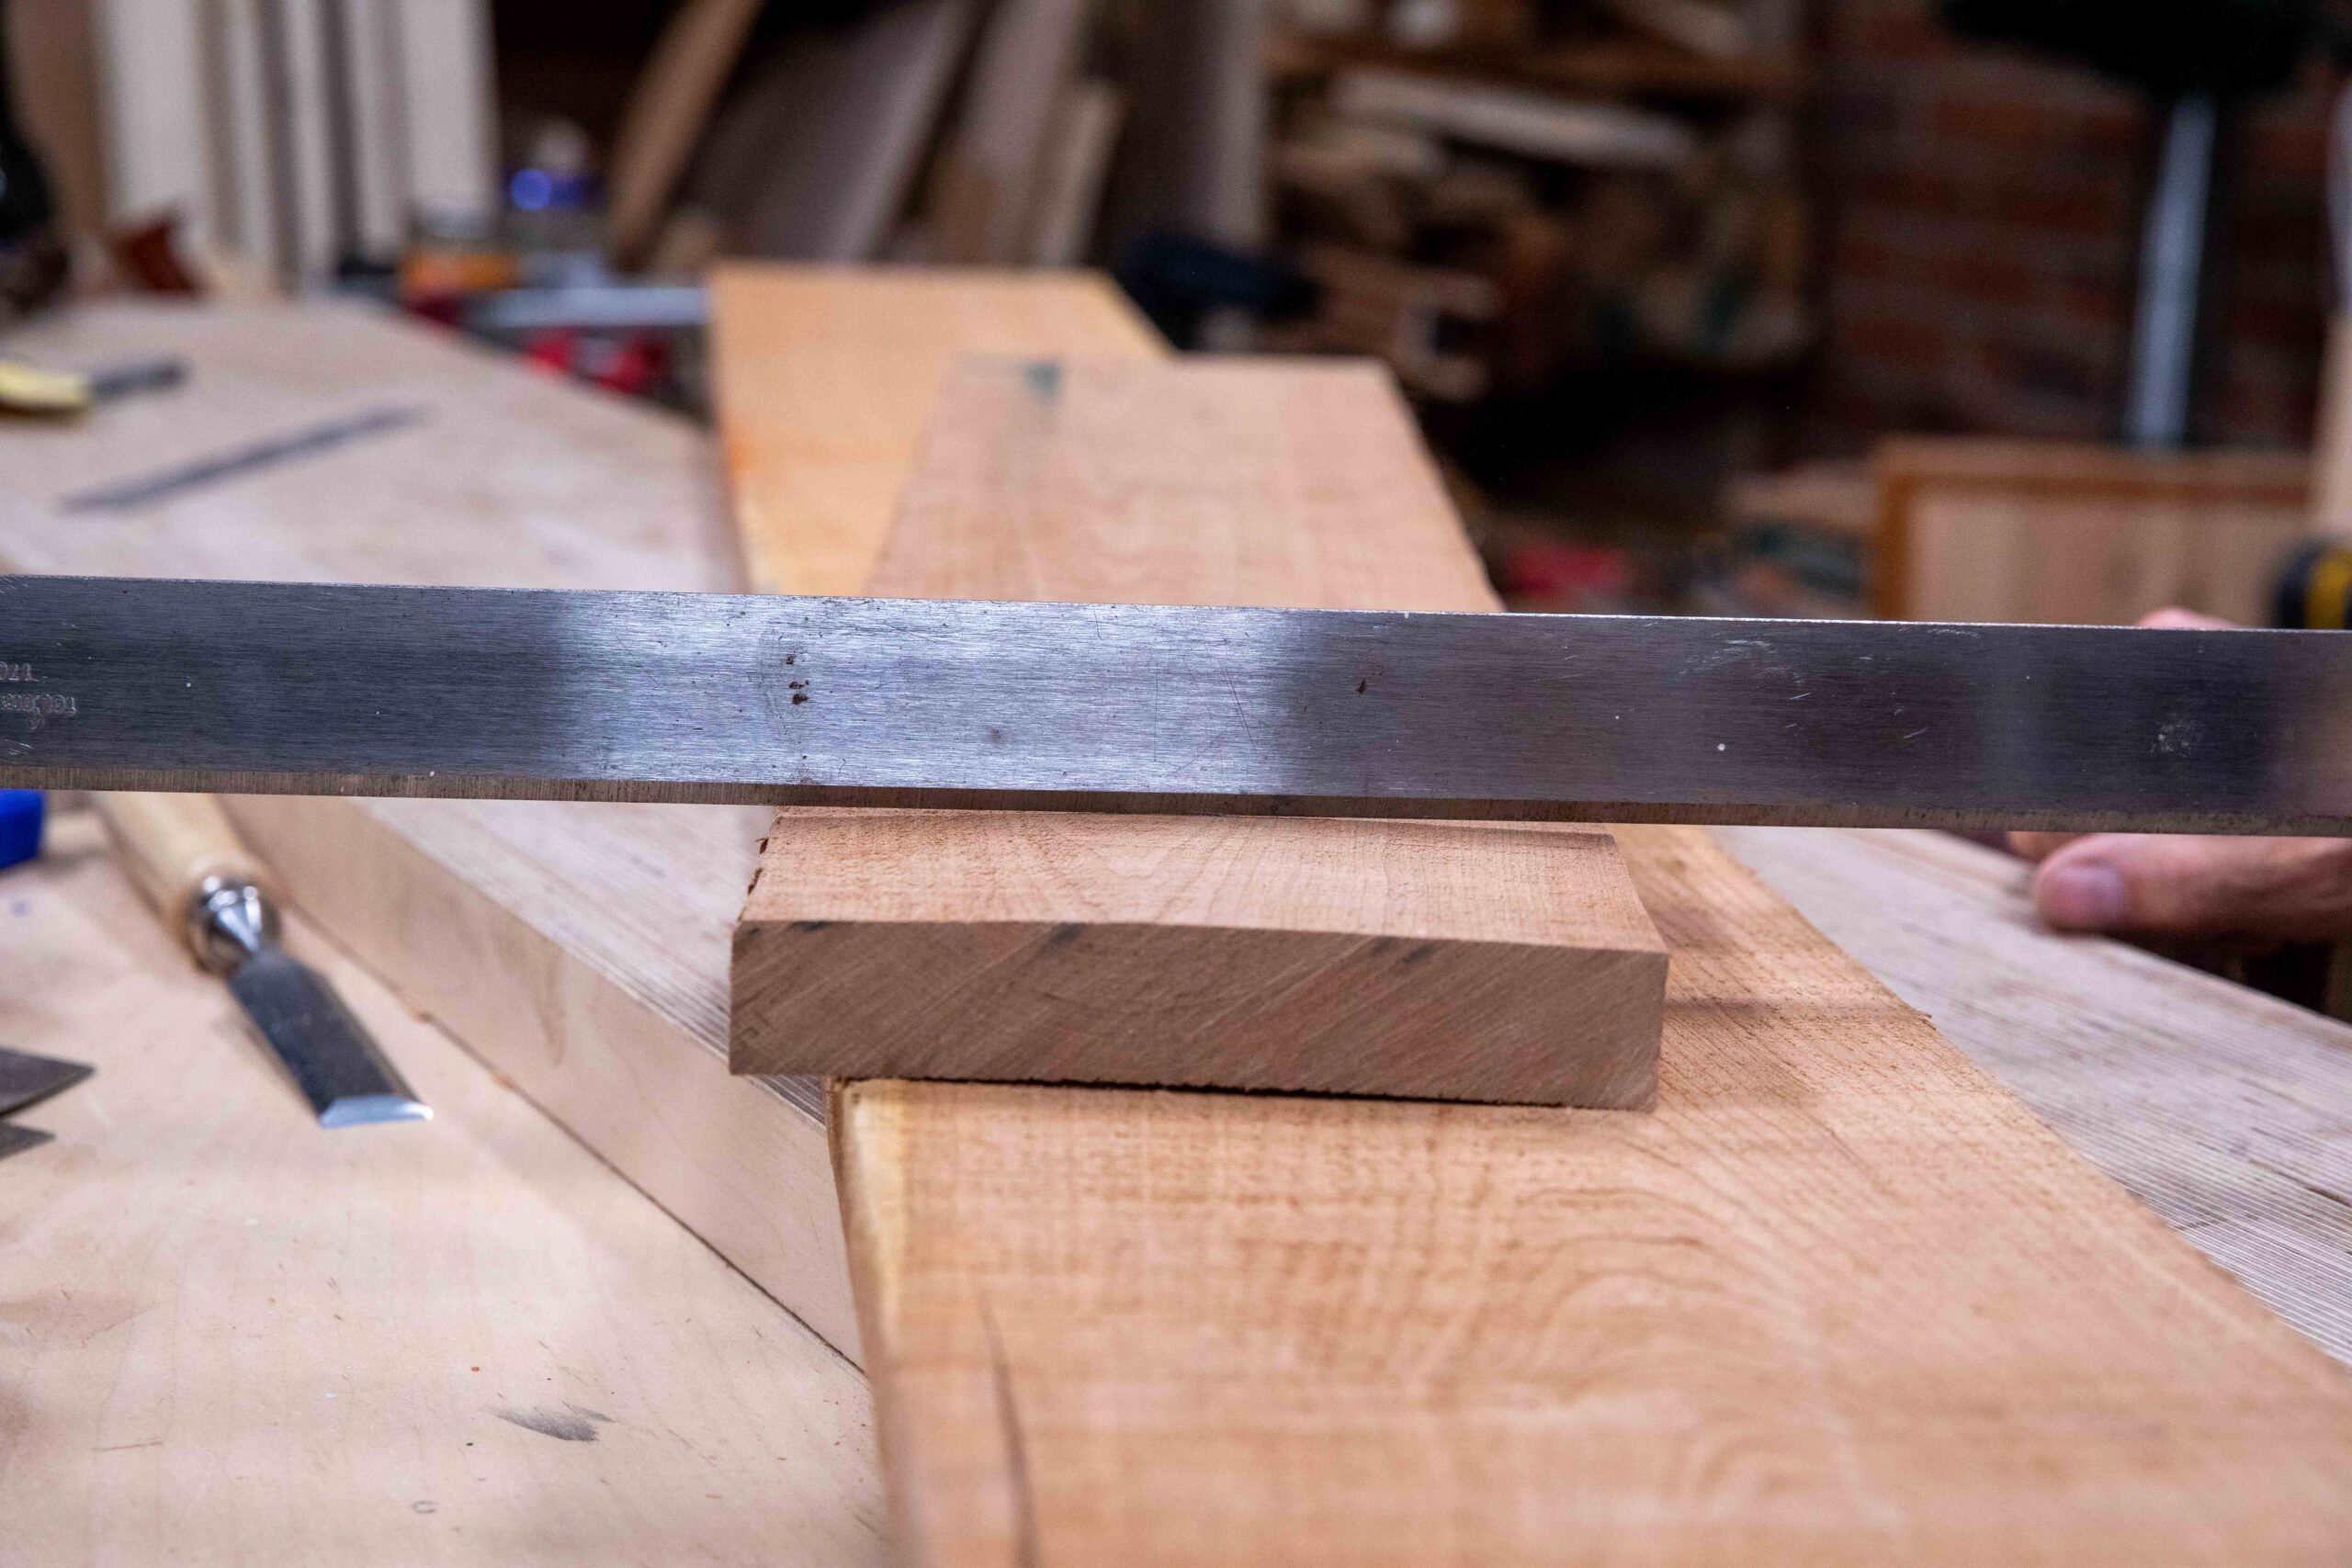
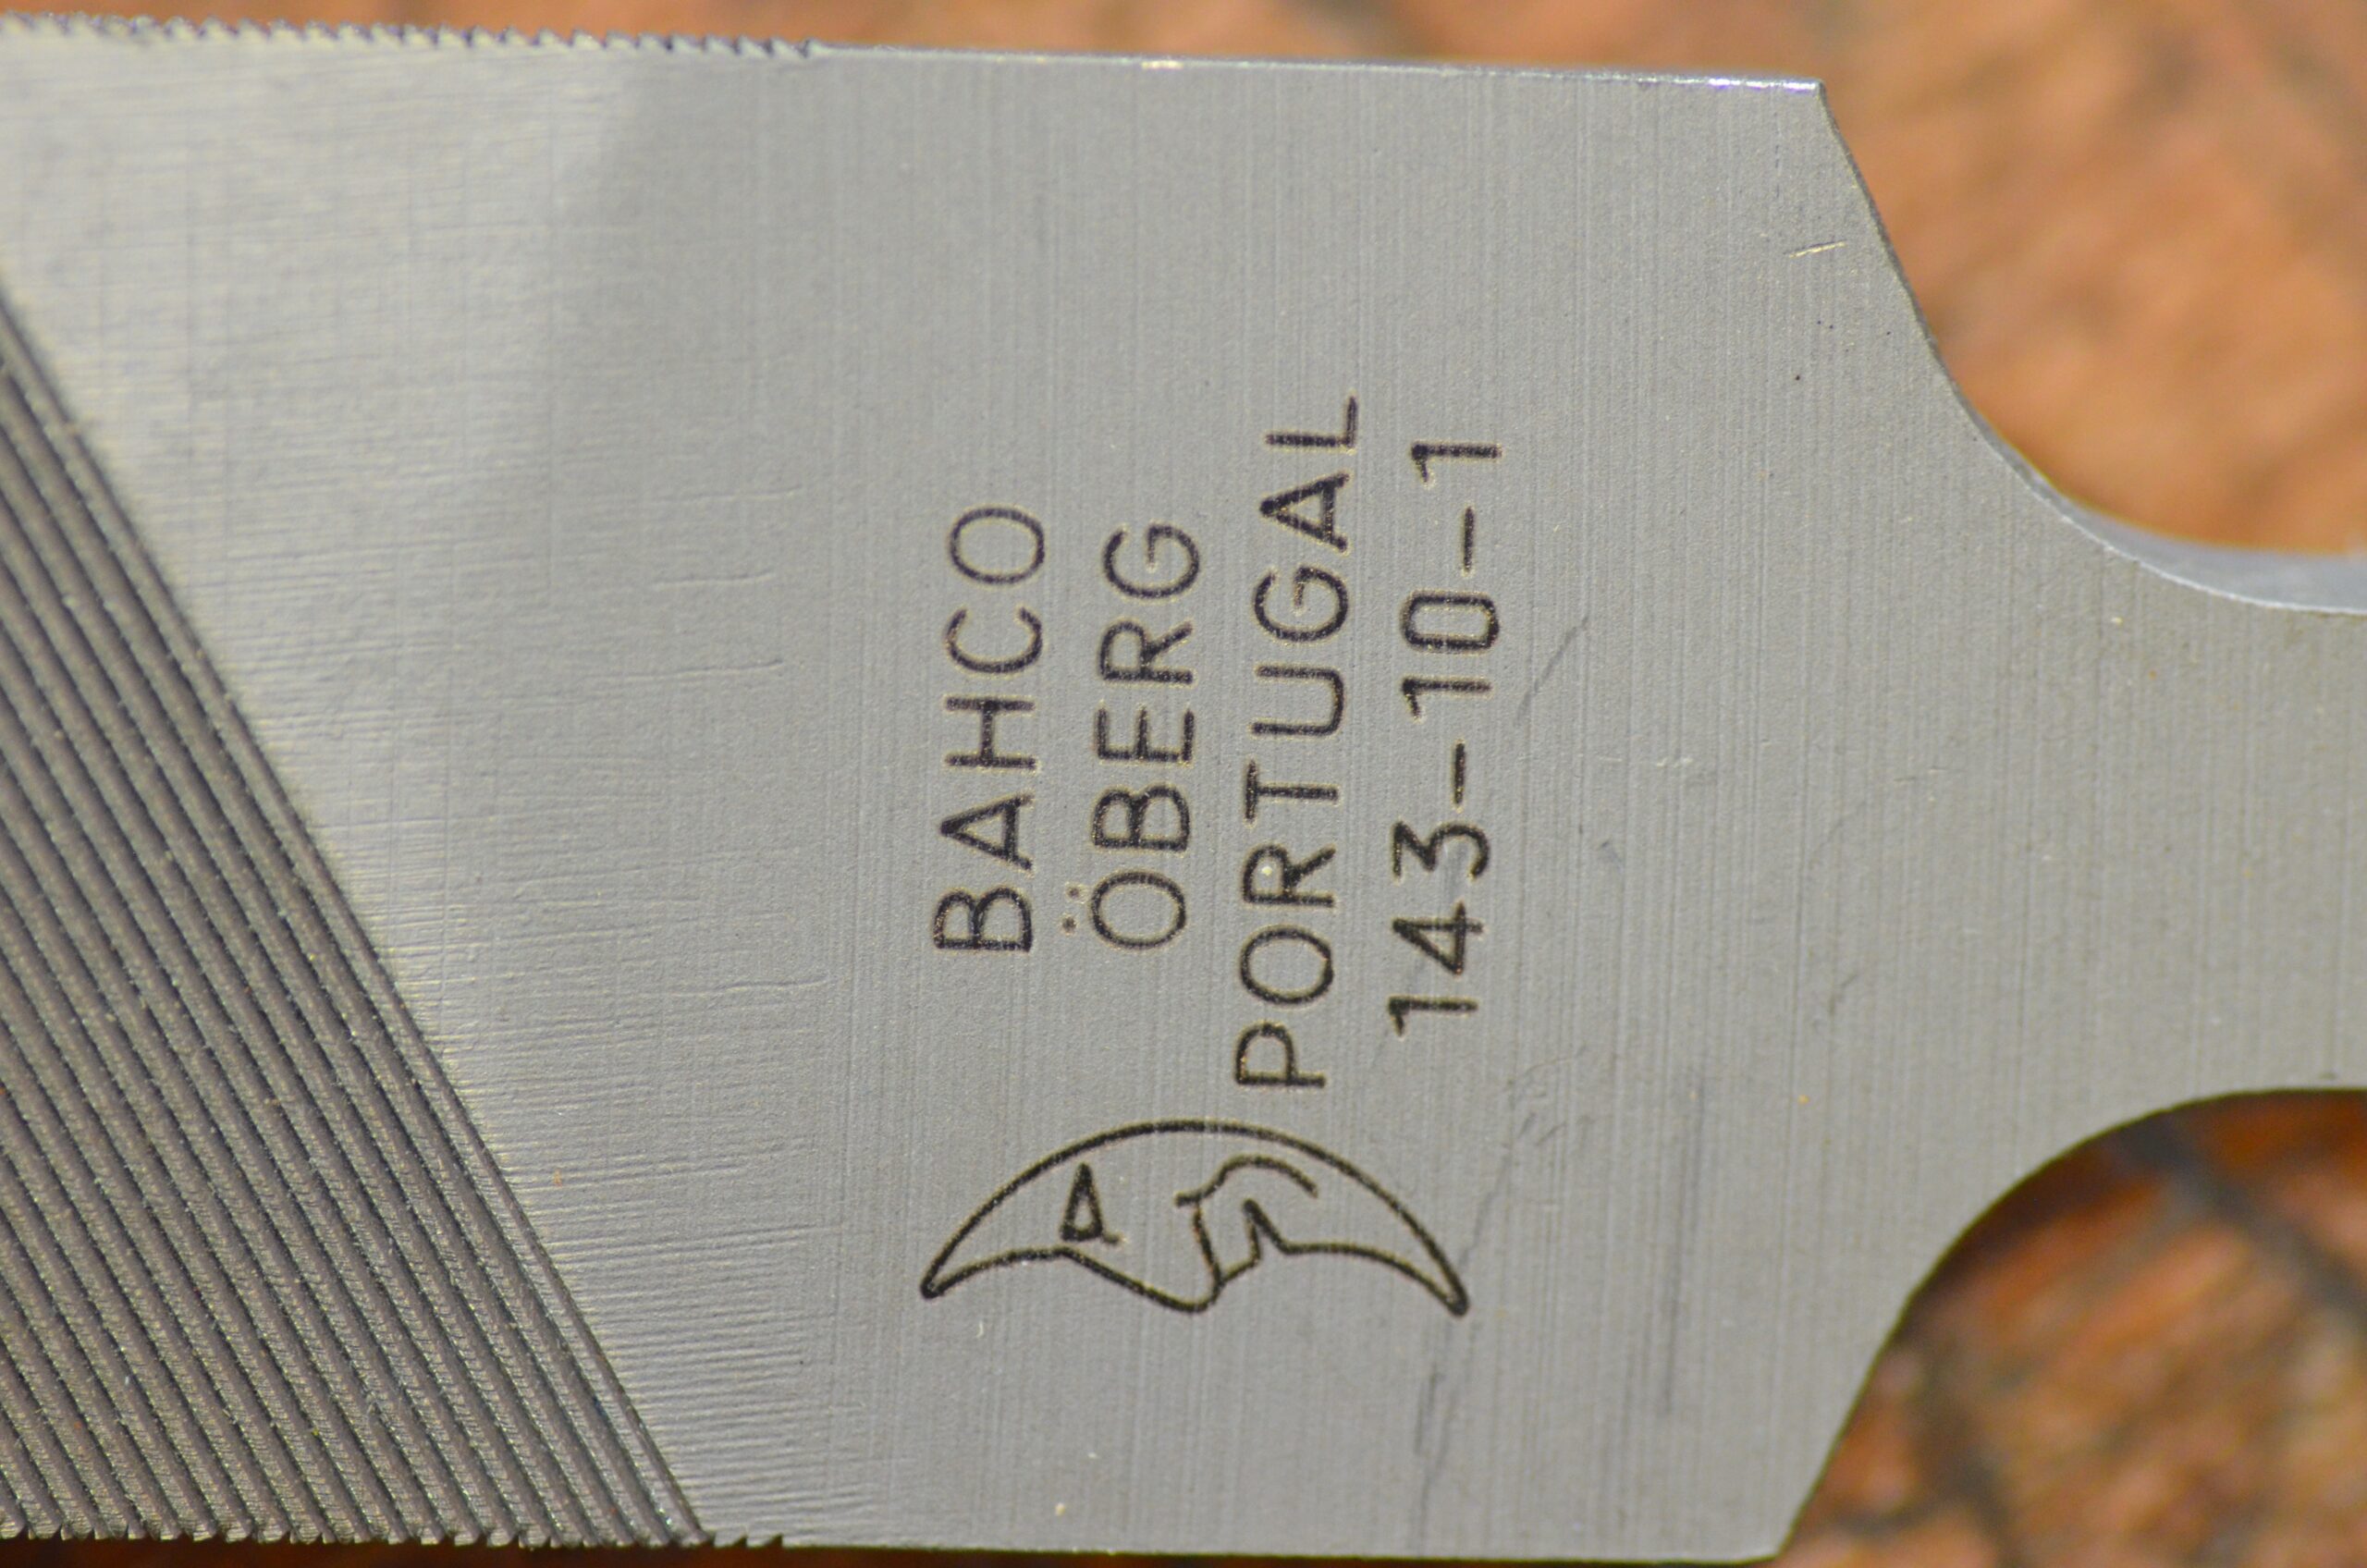
Basically, I rely on the two below but I have others too. These work very well for 90% of all I do and the rasp saw has both coarse and fine they both remove material very efficiently with the fine side giving a very acceptable surface ready for filing or and sanding. Both last a long time, several years, when used on wood be that hardwood or softwood. It's available in large and small versions which simply put is 11" and 9" and Amazon pricing seems to be between £20 and £24 respectively. The Bahco 10" code identifier is 4-138-10-1-0 Mill saw or a 4-143-10-1 File 10in and costs around £10-14 but as long as you use files carefully and do not use them on overtly hardened metals they will last you for many years and on wood, you will scarcely wear them out at all.

Saws
Handsaws
I have used a few handsaws on the projects but mostly I rely on my 22" panel saw for crosscutting and 24" panel saw for ripcutting. I can recommend the Spearb & Jackson versions new online via Amazon sellers. I have paid as little as £13 but generally, they go for around £22. They are a lifetime saw newly made for and by S&J. The only modification I have made has been to reshape the handle and that is a preference not at all a necessity. You can see the changes I made below. It takes me an hour to do this.. My panel saw has 10 points to the inch (PPI) and this saw will do most sawing for where larger effort is needed as in cutting panels and cross cutting boards and sections of solid wood A 24" version works well for rip cutting and has 7PPI.

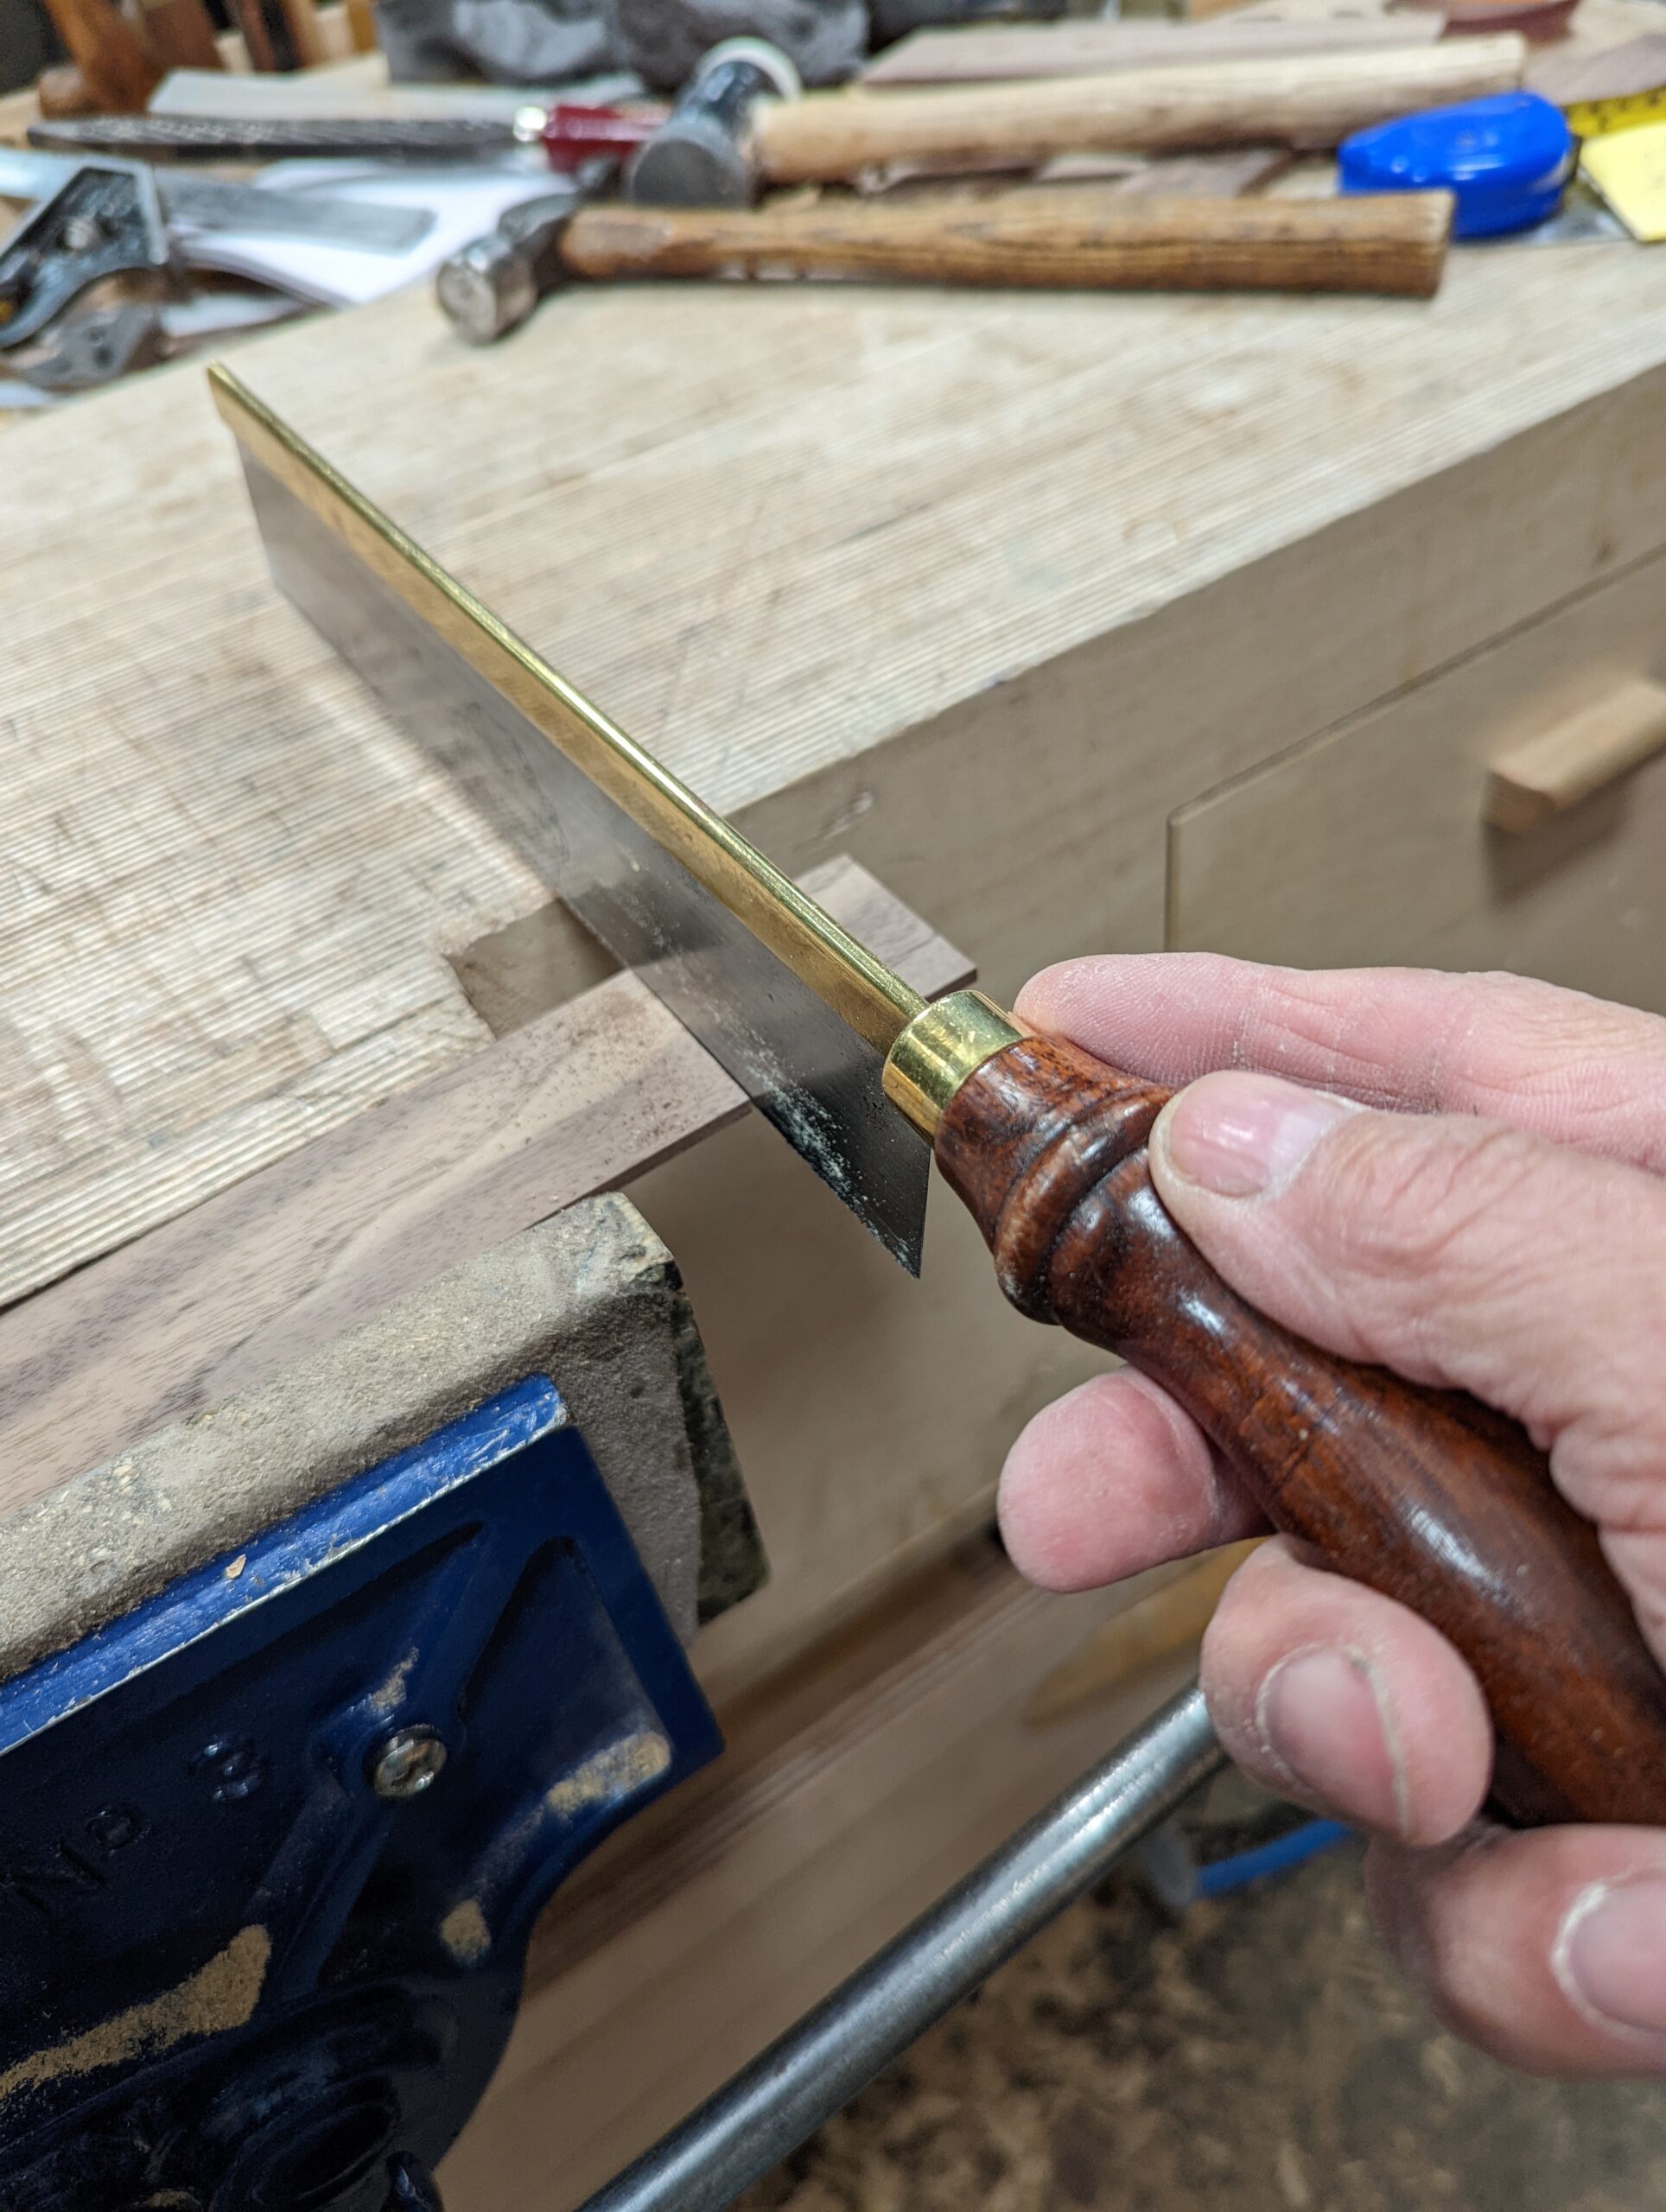
Tenon or Back Saws
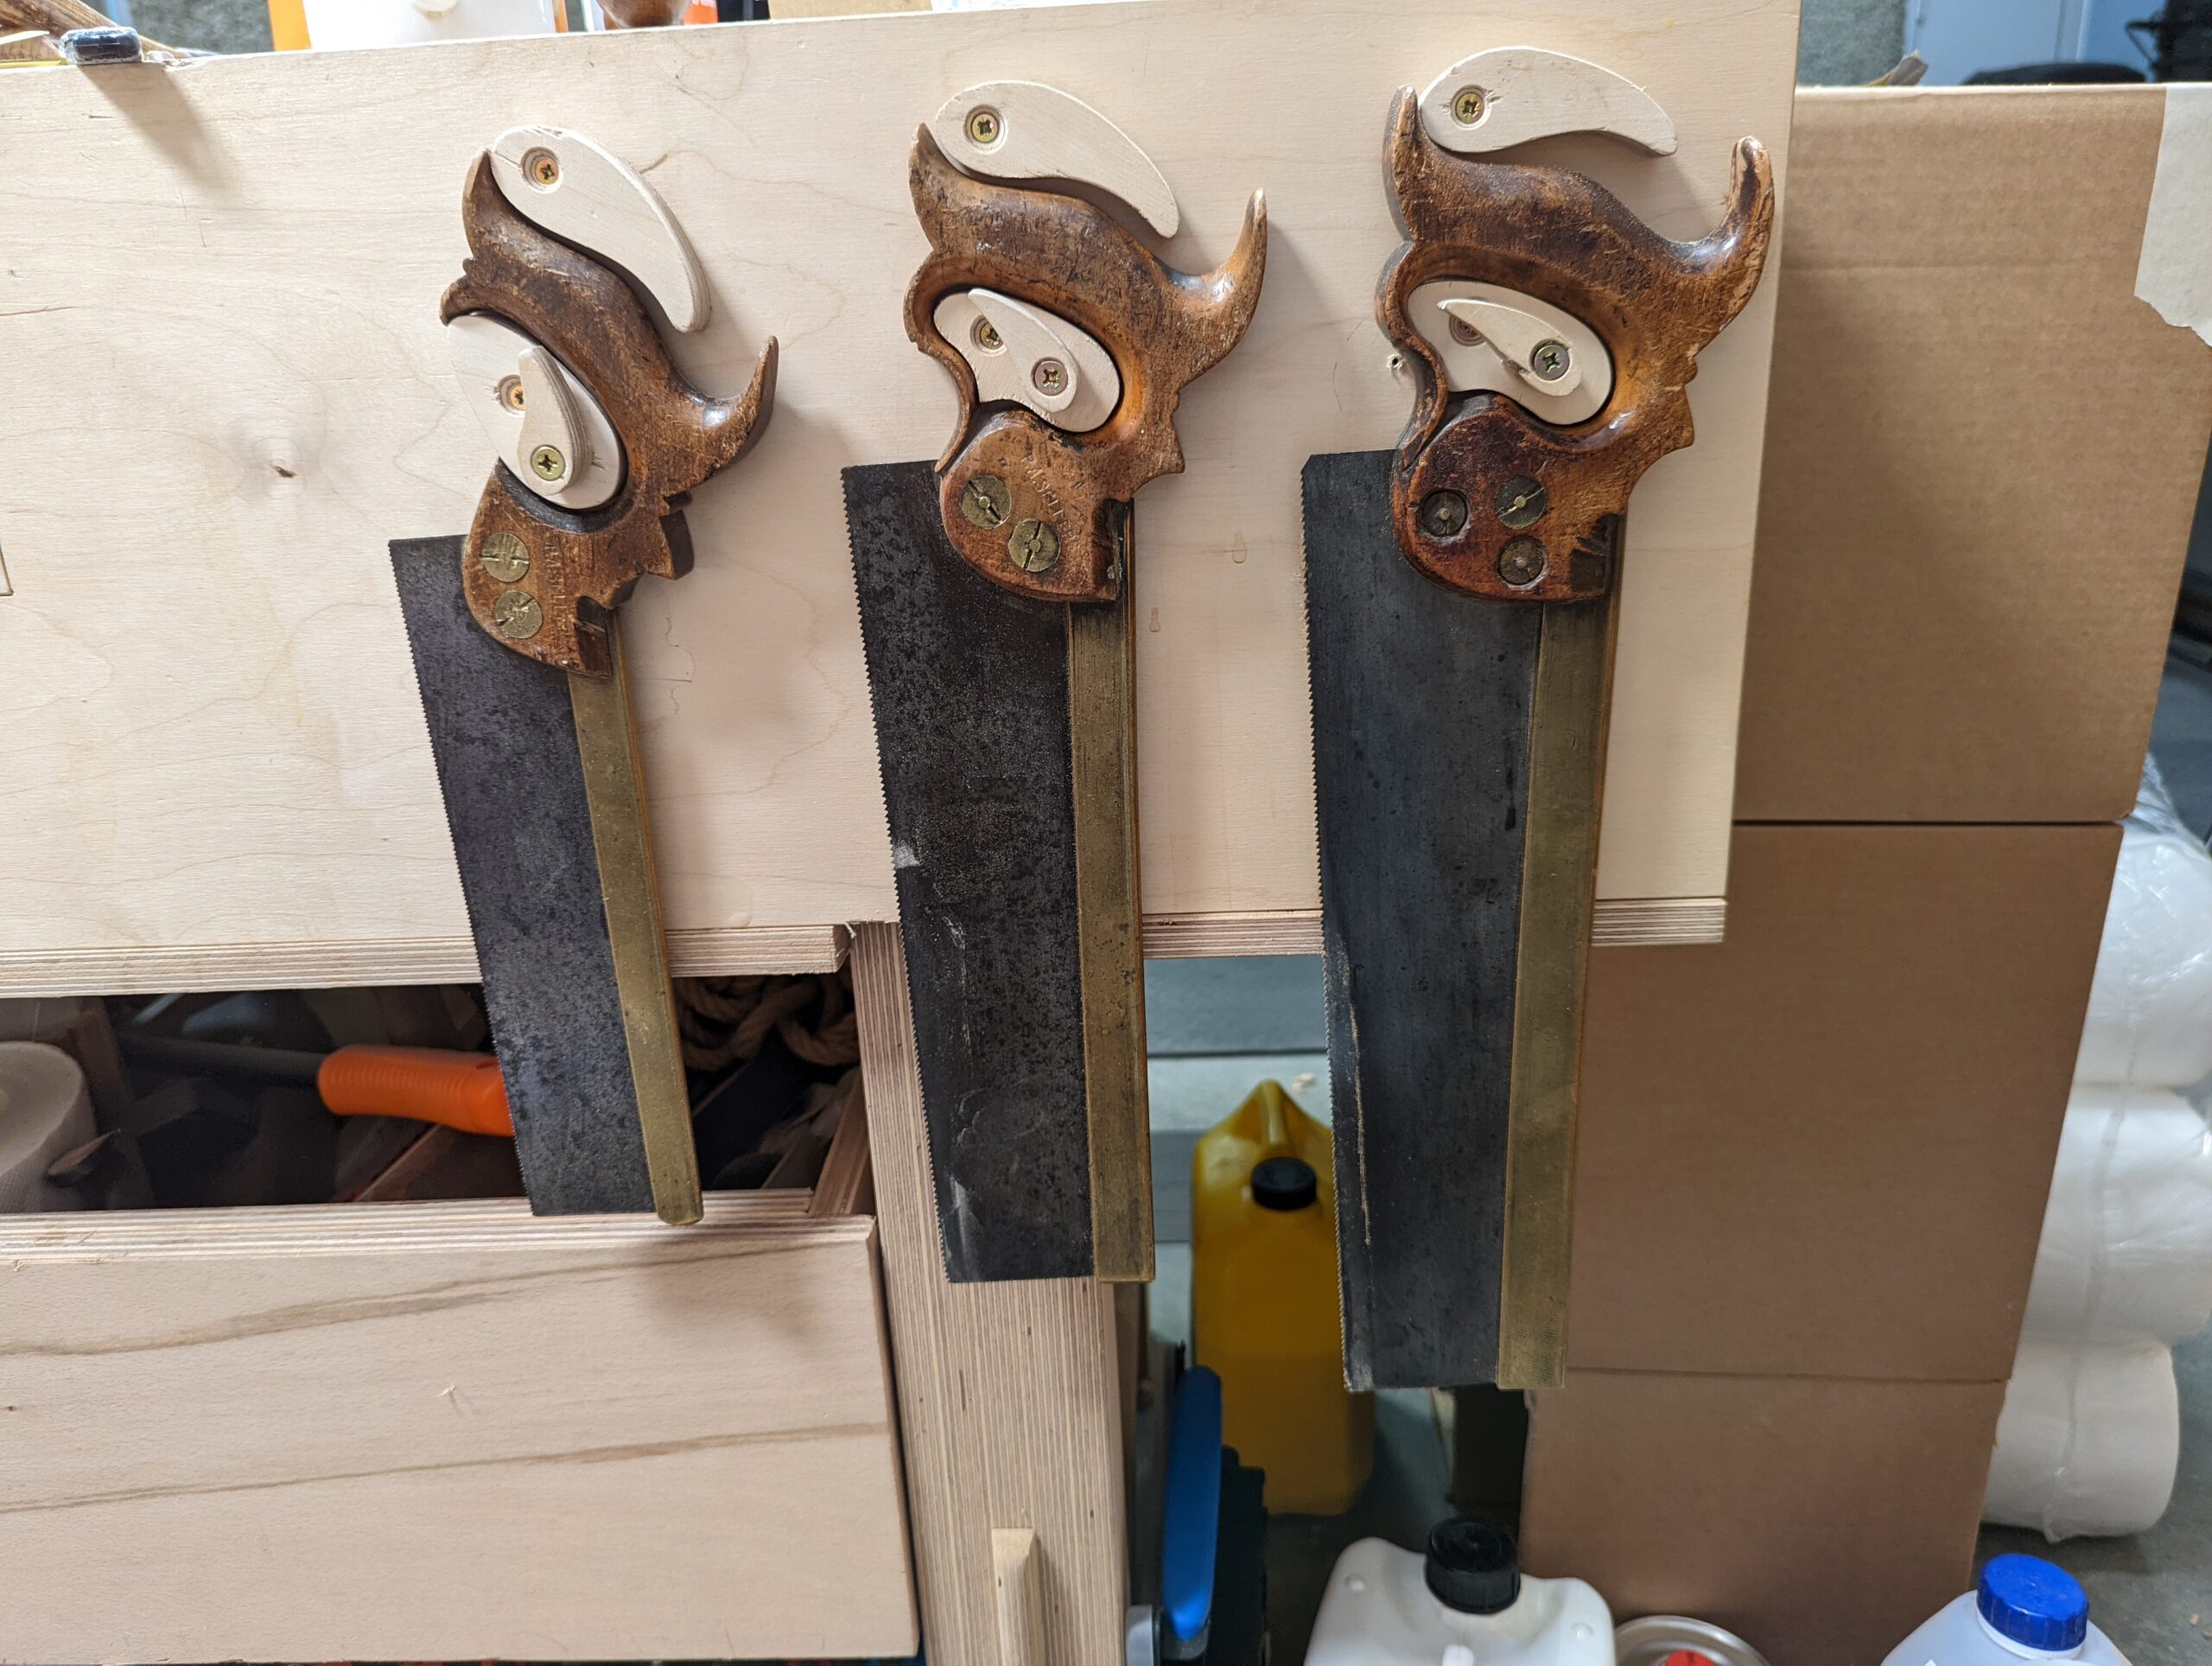
I use three tenon saws, ten-, twelve- and fourteen-inch, sand one Gent's saw in my day-to-day work. Of the four, the Gent's saw gets used the most. I use it for dovetailing and small work such as smaller tenons and crosscutting smaller sections of wood. the larger versions are mostly for cutting tenons alone.
Coping Saw

The coping saw copes with all things curved in cuts. Simple and effective and best used with the blade turned so it cuts on the push stroke and never the pull.
Comments ()