Retoothing any Saw
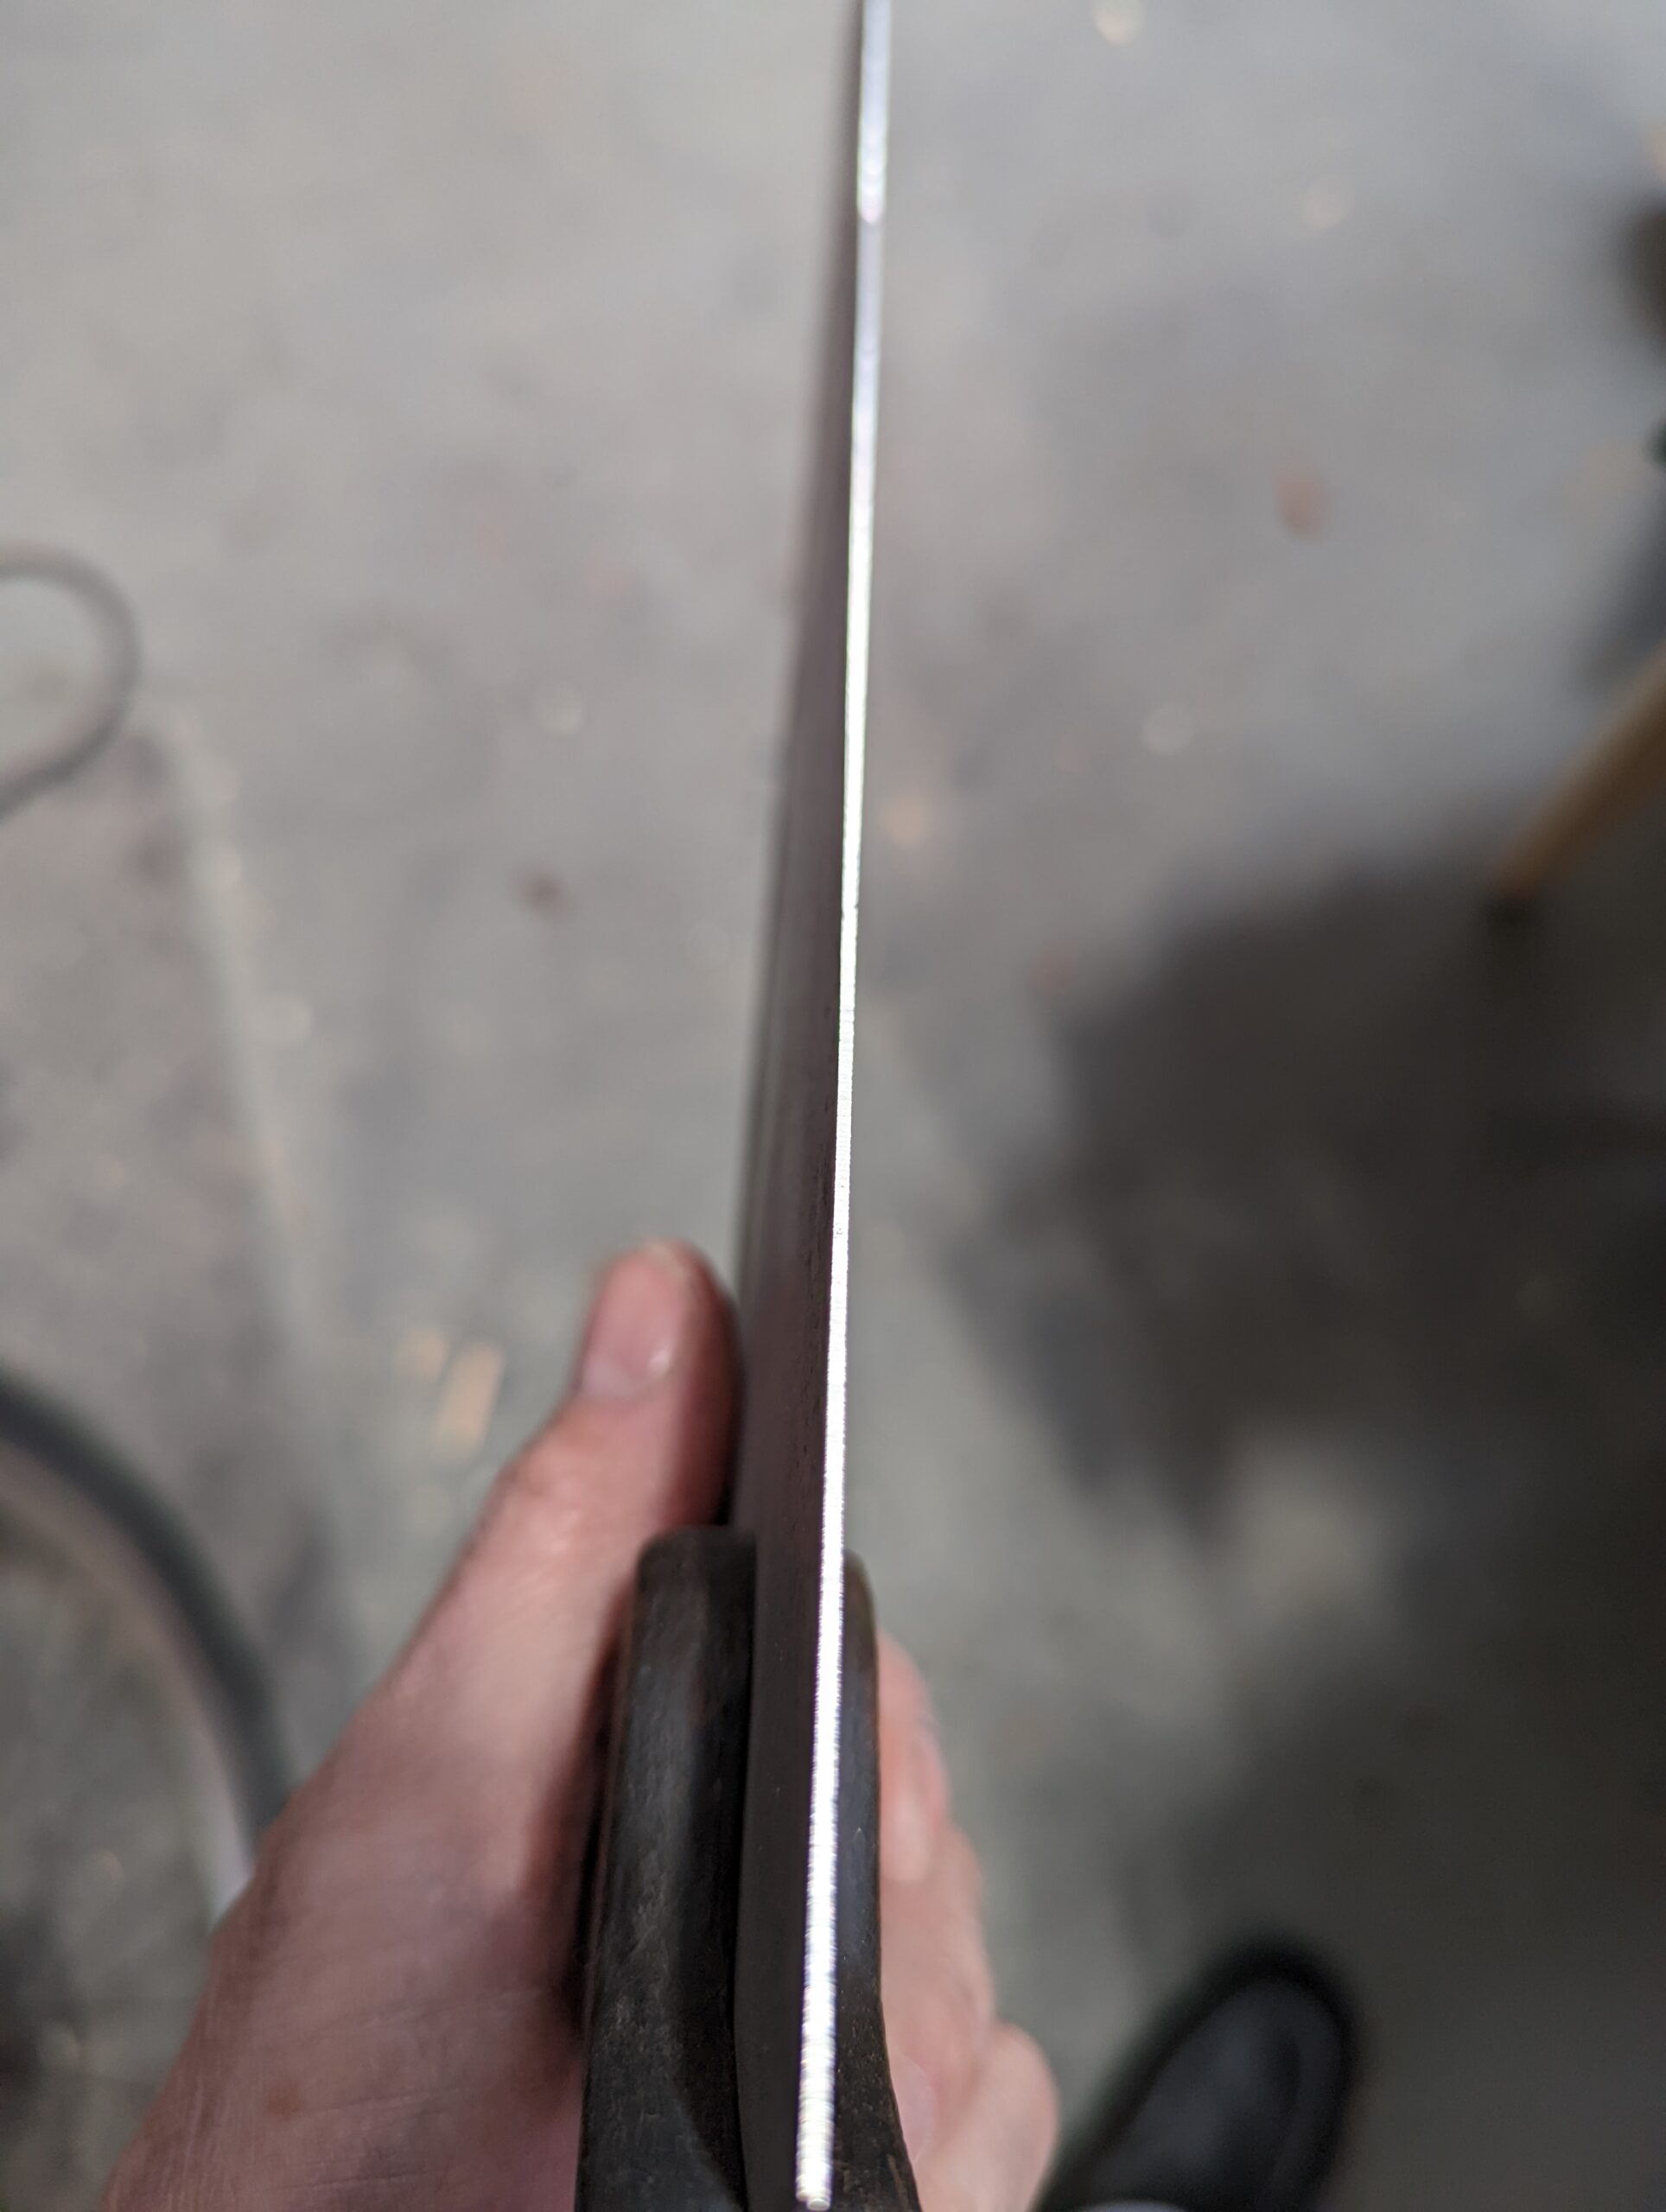
You can change the tooth size of any saw to suit the work you intend to use them for or, in my case here, remove them altogether and start over if after high levels of misuse, abuse or neglect, plain sharpening 'just won't cut it'. Looking at these teeth makes you wonder how things can go so badly wrong. This one has to be my worst sighting yet I must say, but seeing it on eBay I knew it would make a great saw and it has. The test for a new saw, to see if the steel is tempered correctly and not too thick in the plate, is to pass the saw tip into the handle hole. This is not really a good idea on exceptionally short saws like this one, but bending it was done to see if a new saw springs back and keeps its straightness when released.

I have always had a keen interest for short saw versions no matter the maker. Many children's saw versions were made of good steel with pistol grip handles. This is a longer version of the short saw range at 18" and I just bought a vintage Disston one that is 15" 10ppi so I am looking forward to that one coming in. This is a fun time for me as my granddaughter loves being in the shop with me and I gave her her toolbox last week so one of my short saws will join the tools she is starting to get together. She's just three.
I cleaned off the surface powdering of rust with a quick sanding with 1200 wet-and-dry abrasive but dry followed by a quick wipe with my rag-in-a-can oiler; it feels better in handling. Filing down to the bottoms of such deep gullets is too much so I used the grinder which took only a few steady passes to remove them completely. To then refine the line further I ran a file along and sighted to get ever such a slight camber or belly of 4mm or so. With a short reach, the bench handsaw benefits from a slight belly this way.
Use an engineer's ruler (rule US) with increments of 20 or 10 to the inch. And divide a half-inch by 3/4" stick of slim wood into marks of 1/10" with a knifewall for a few inches.
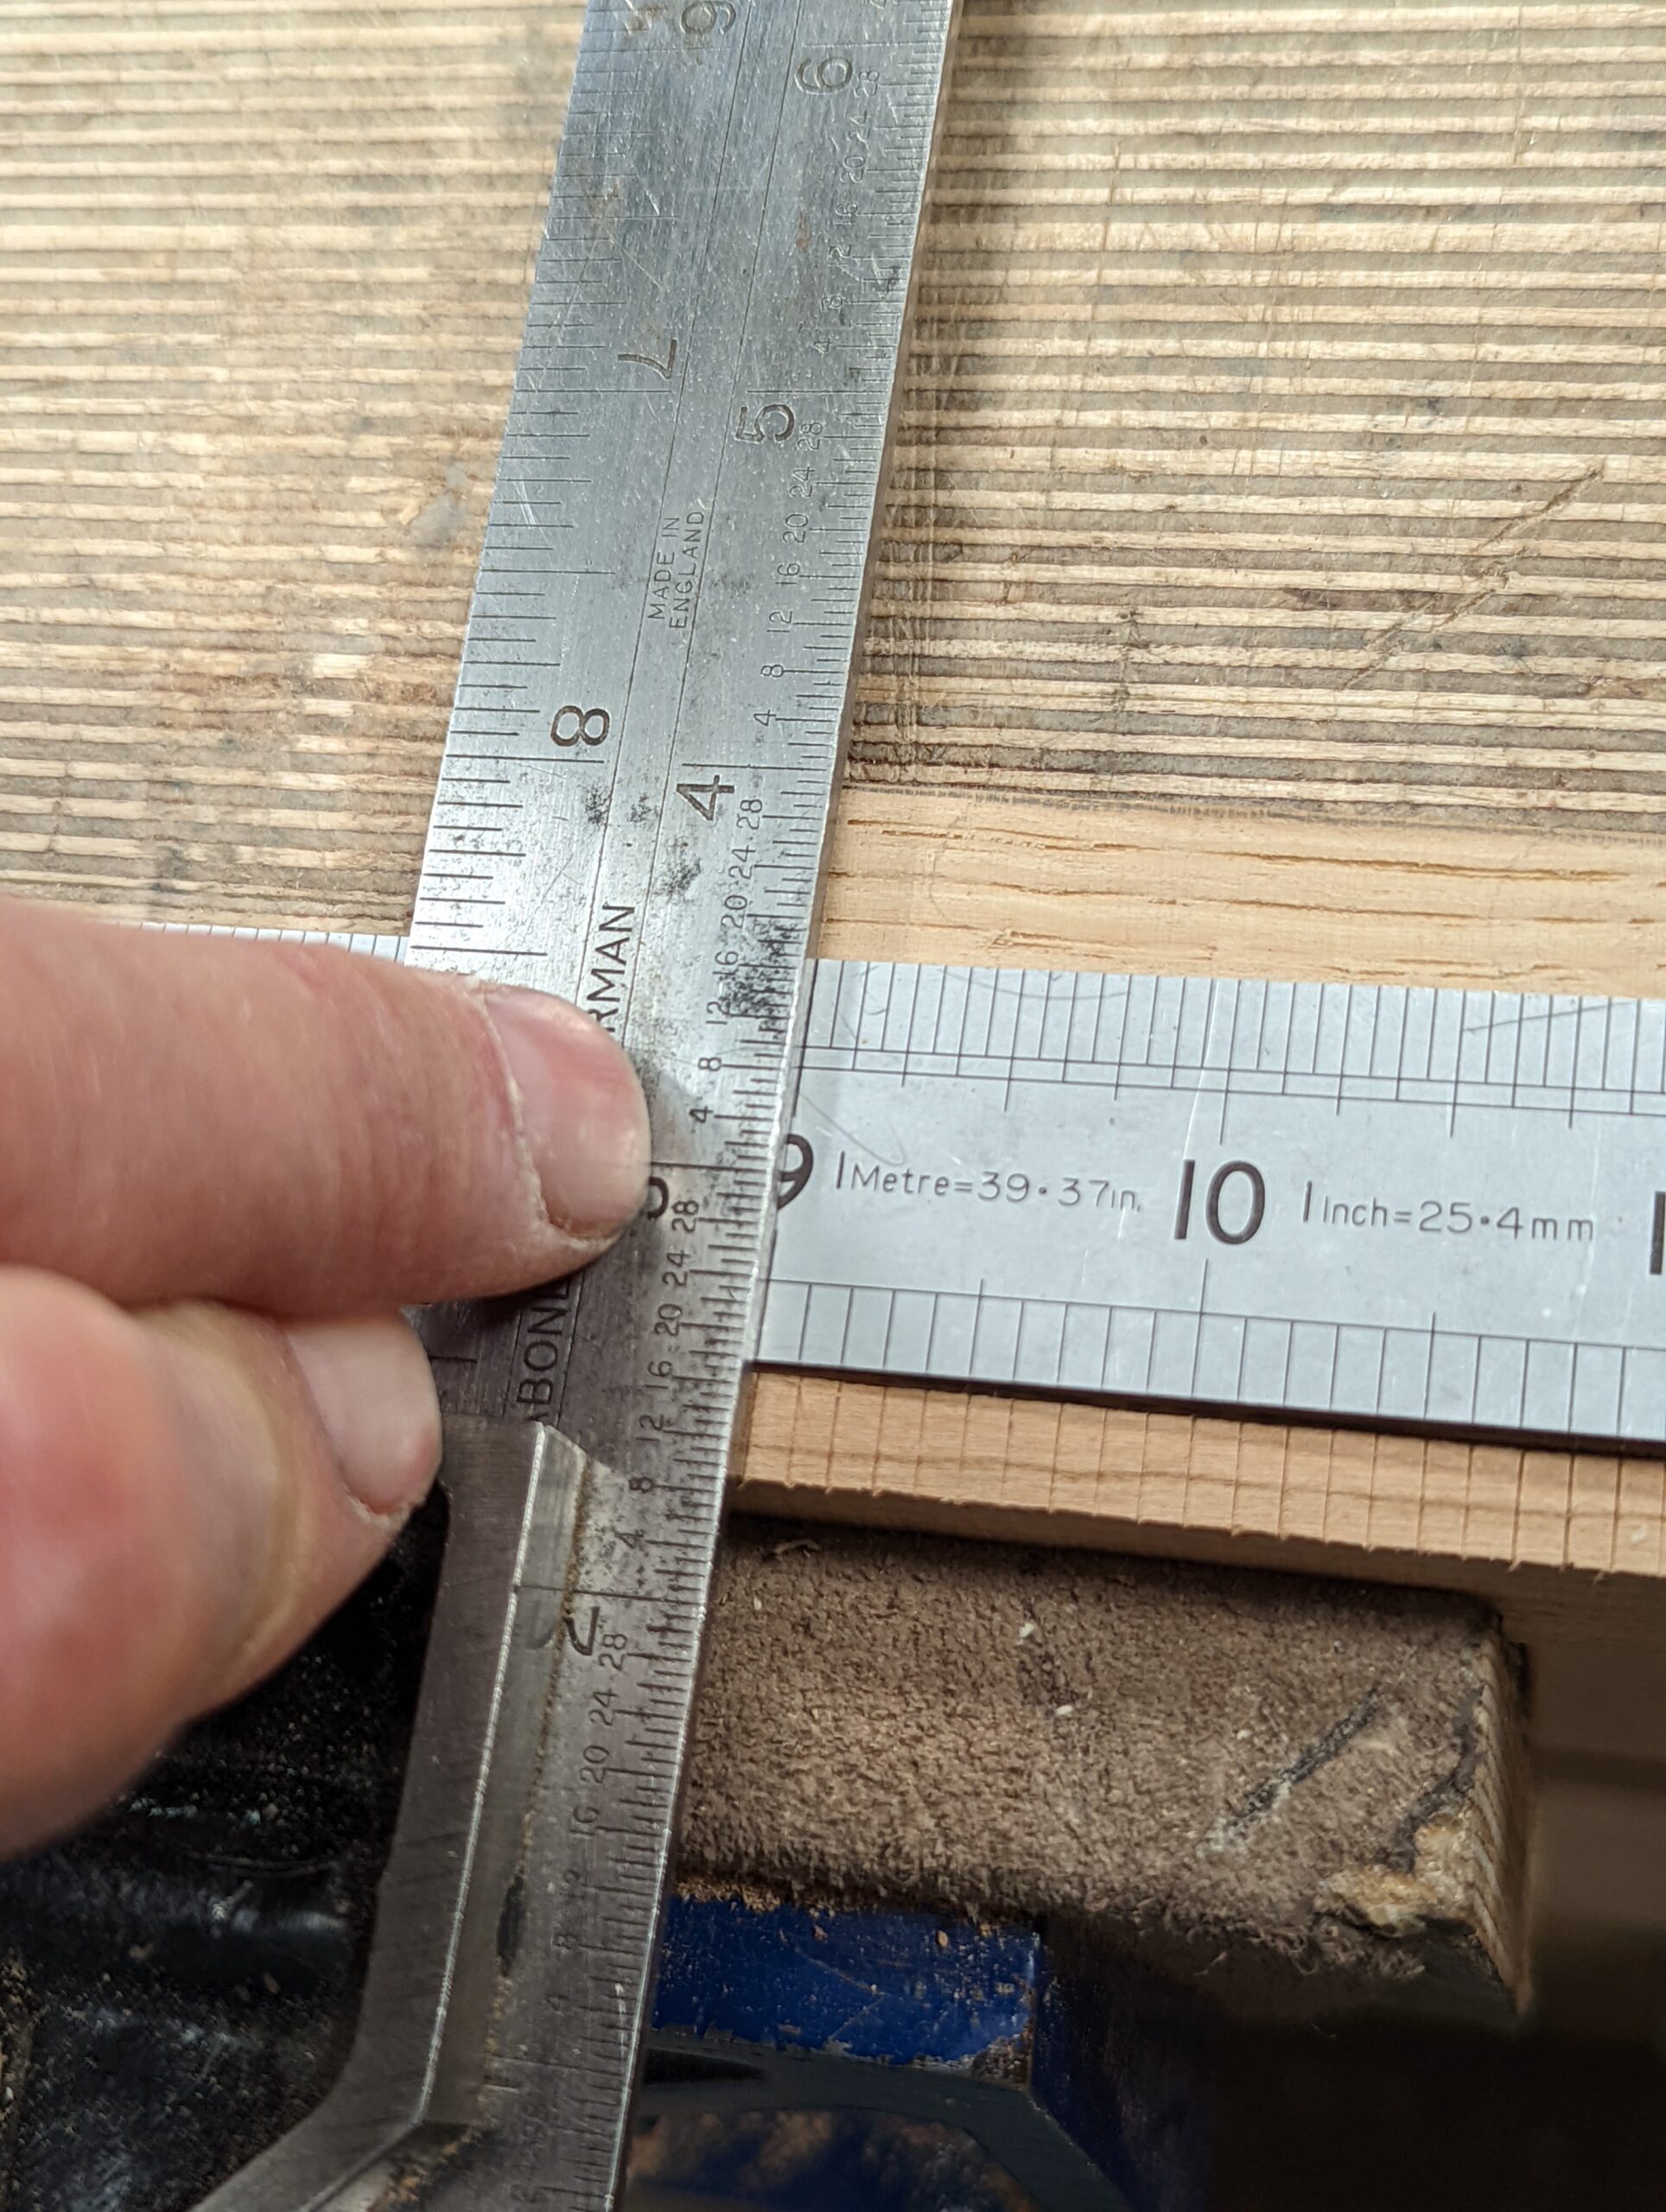
No need to do the whole length as you can simply move the stick along using the notch as an alignment registration. Run a small saw kerf alongside the knifewalls all on the same side of the knifewalls. A single stroke deep is enough of a depth.
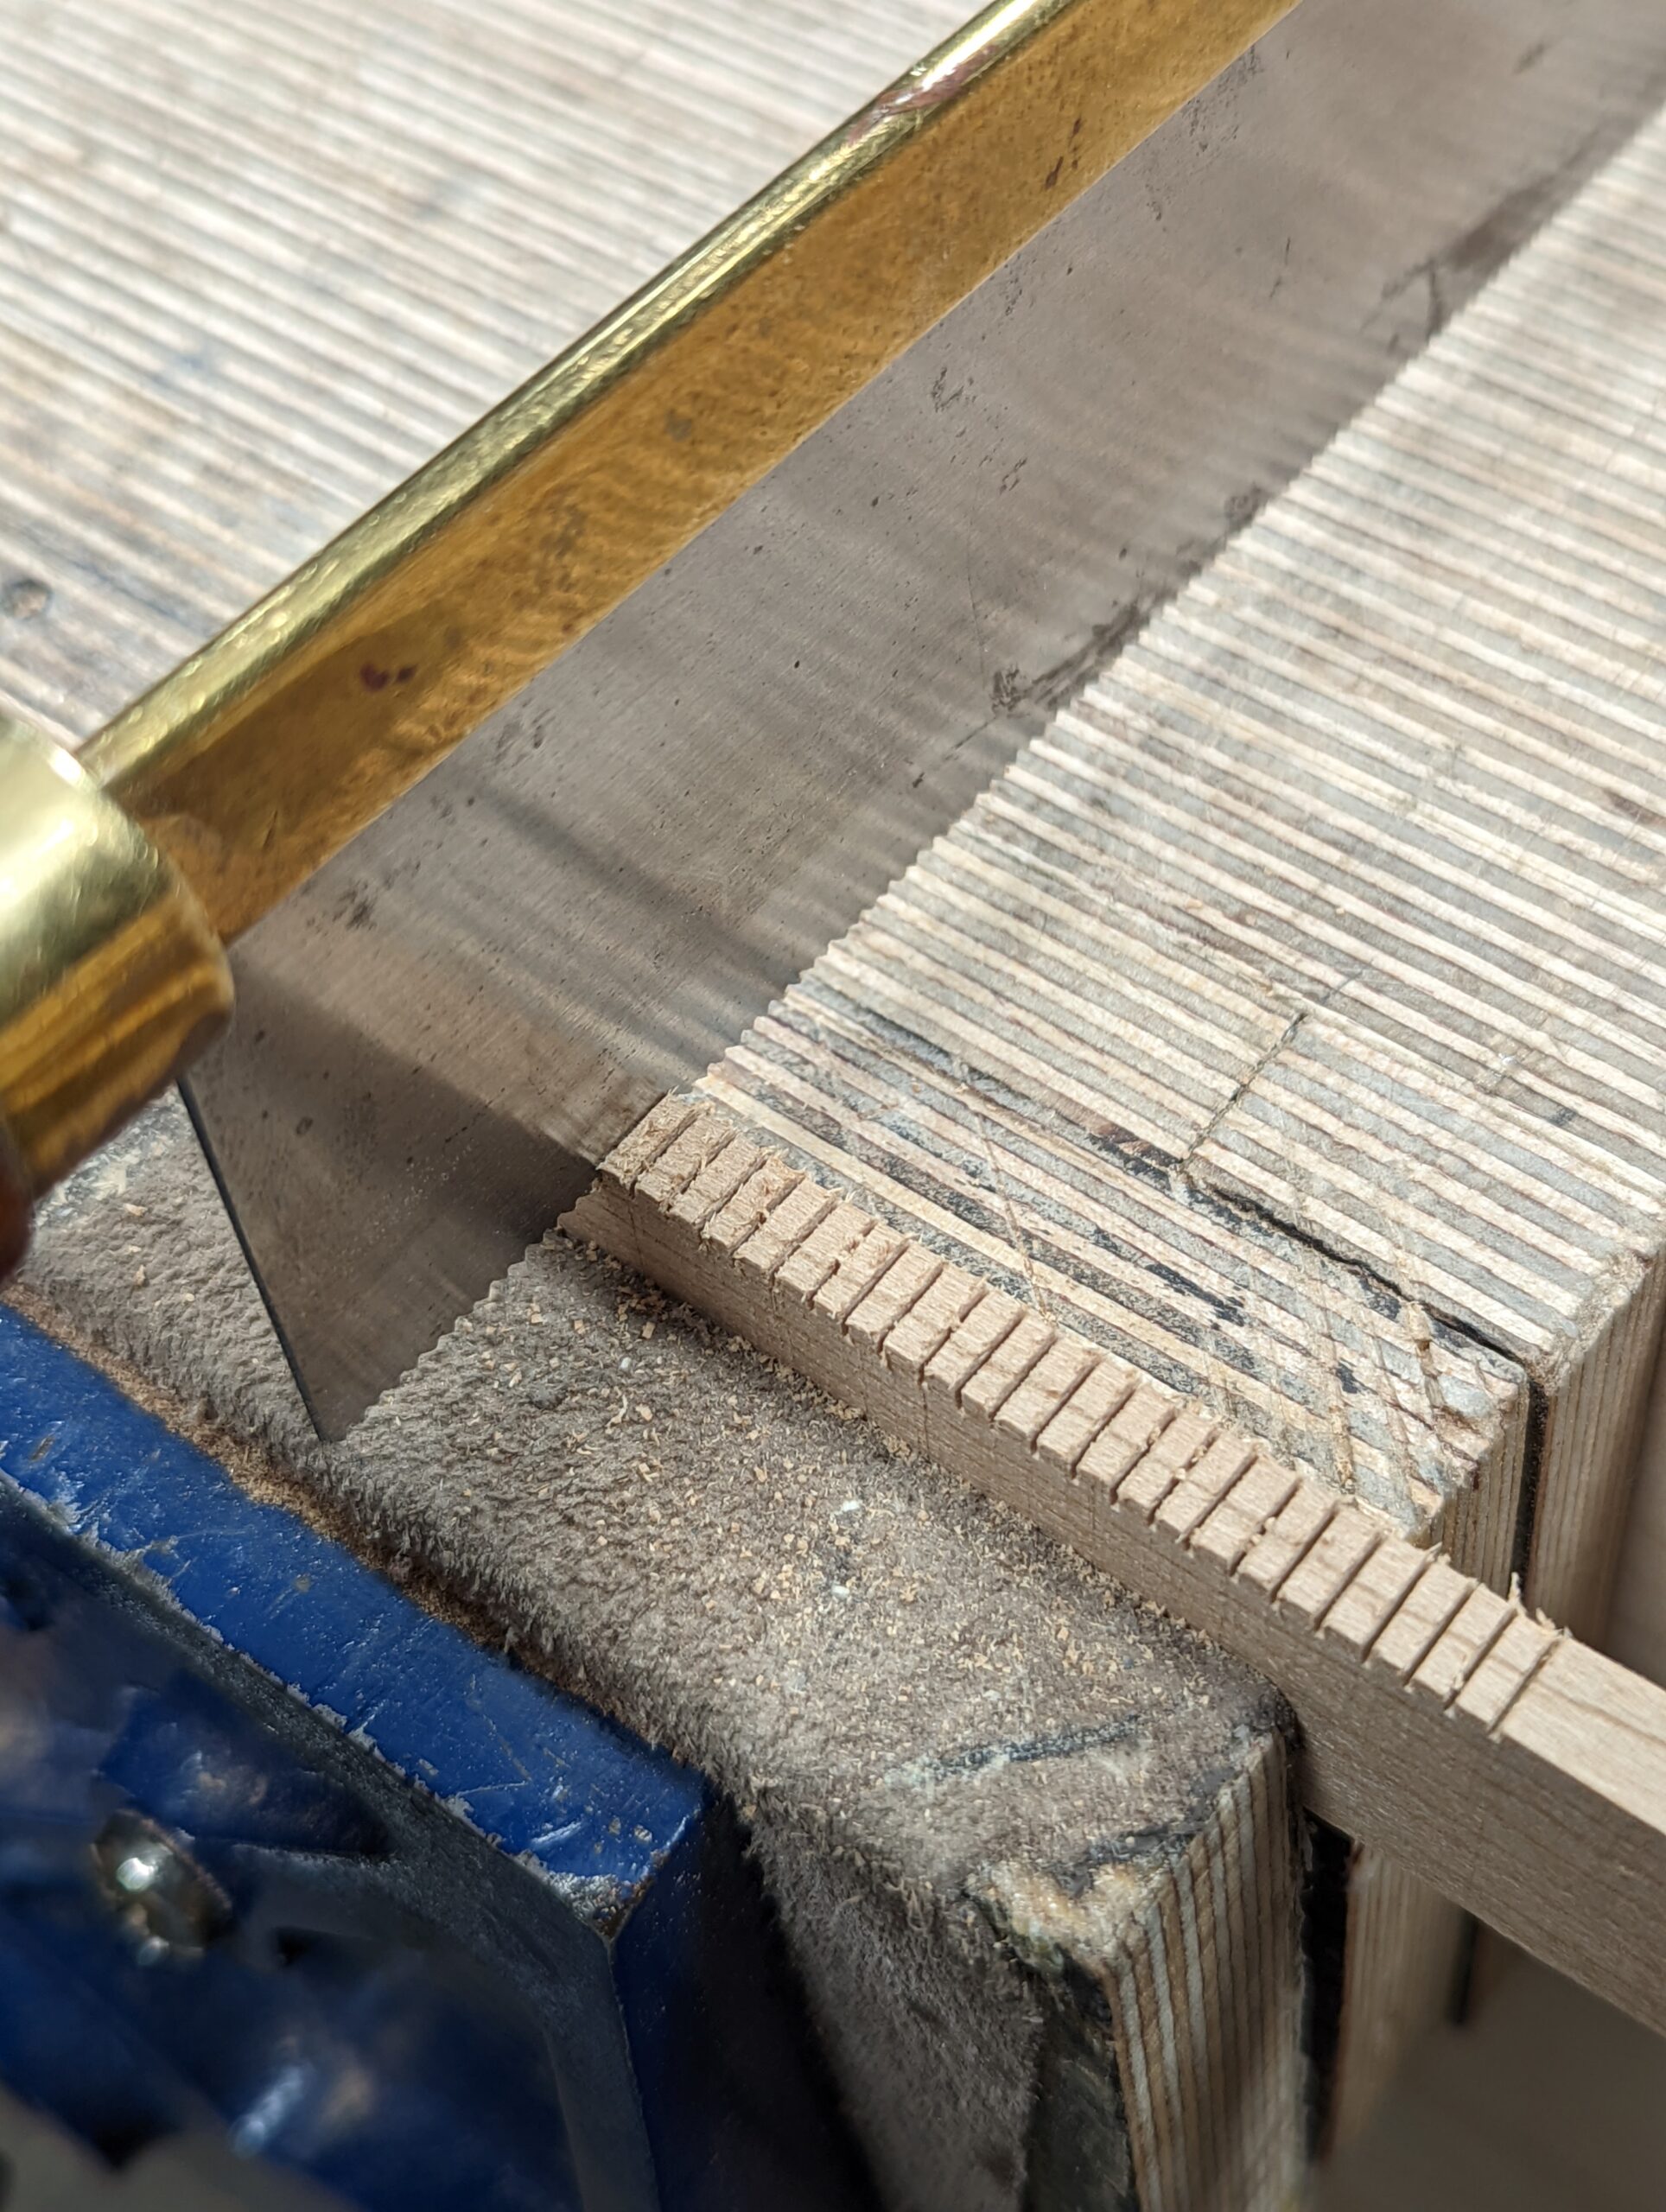
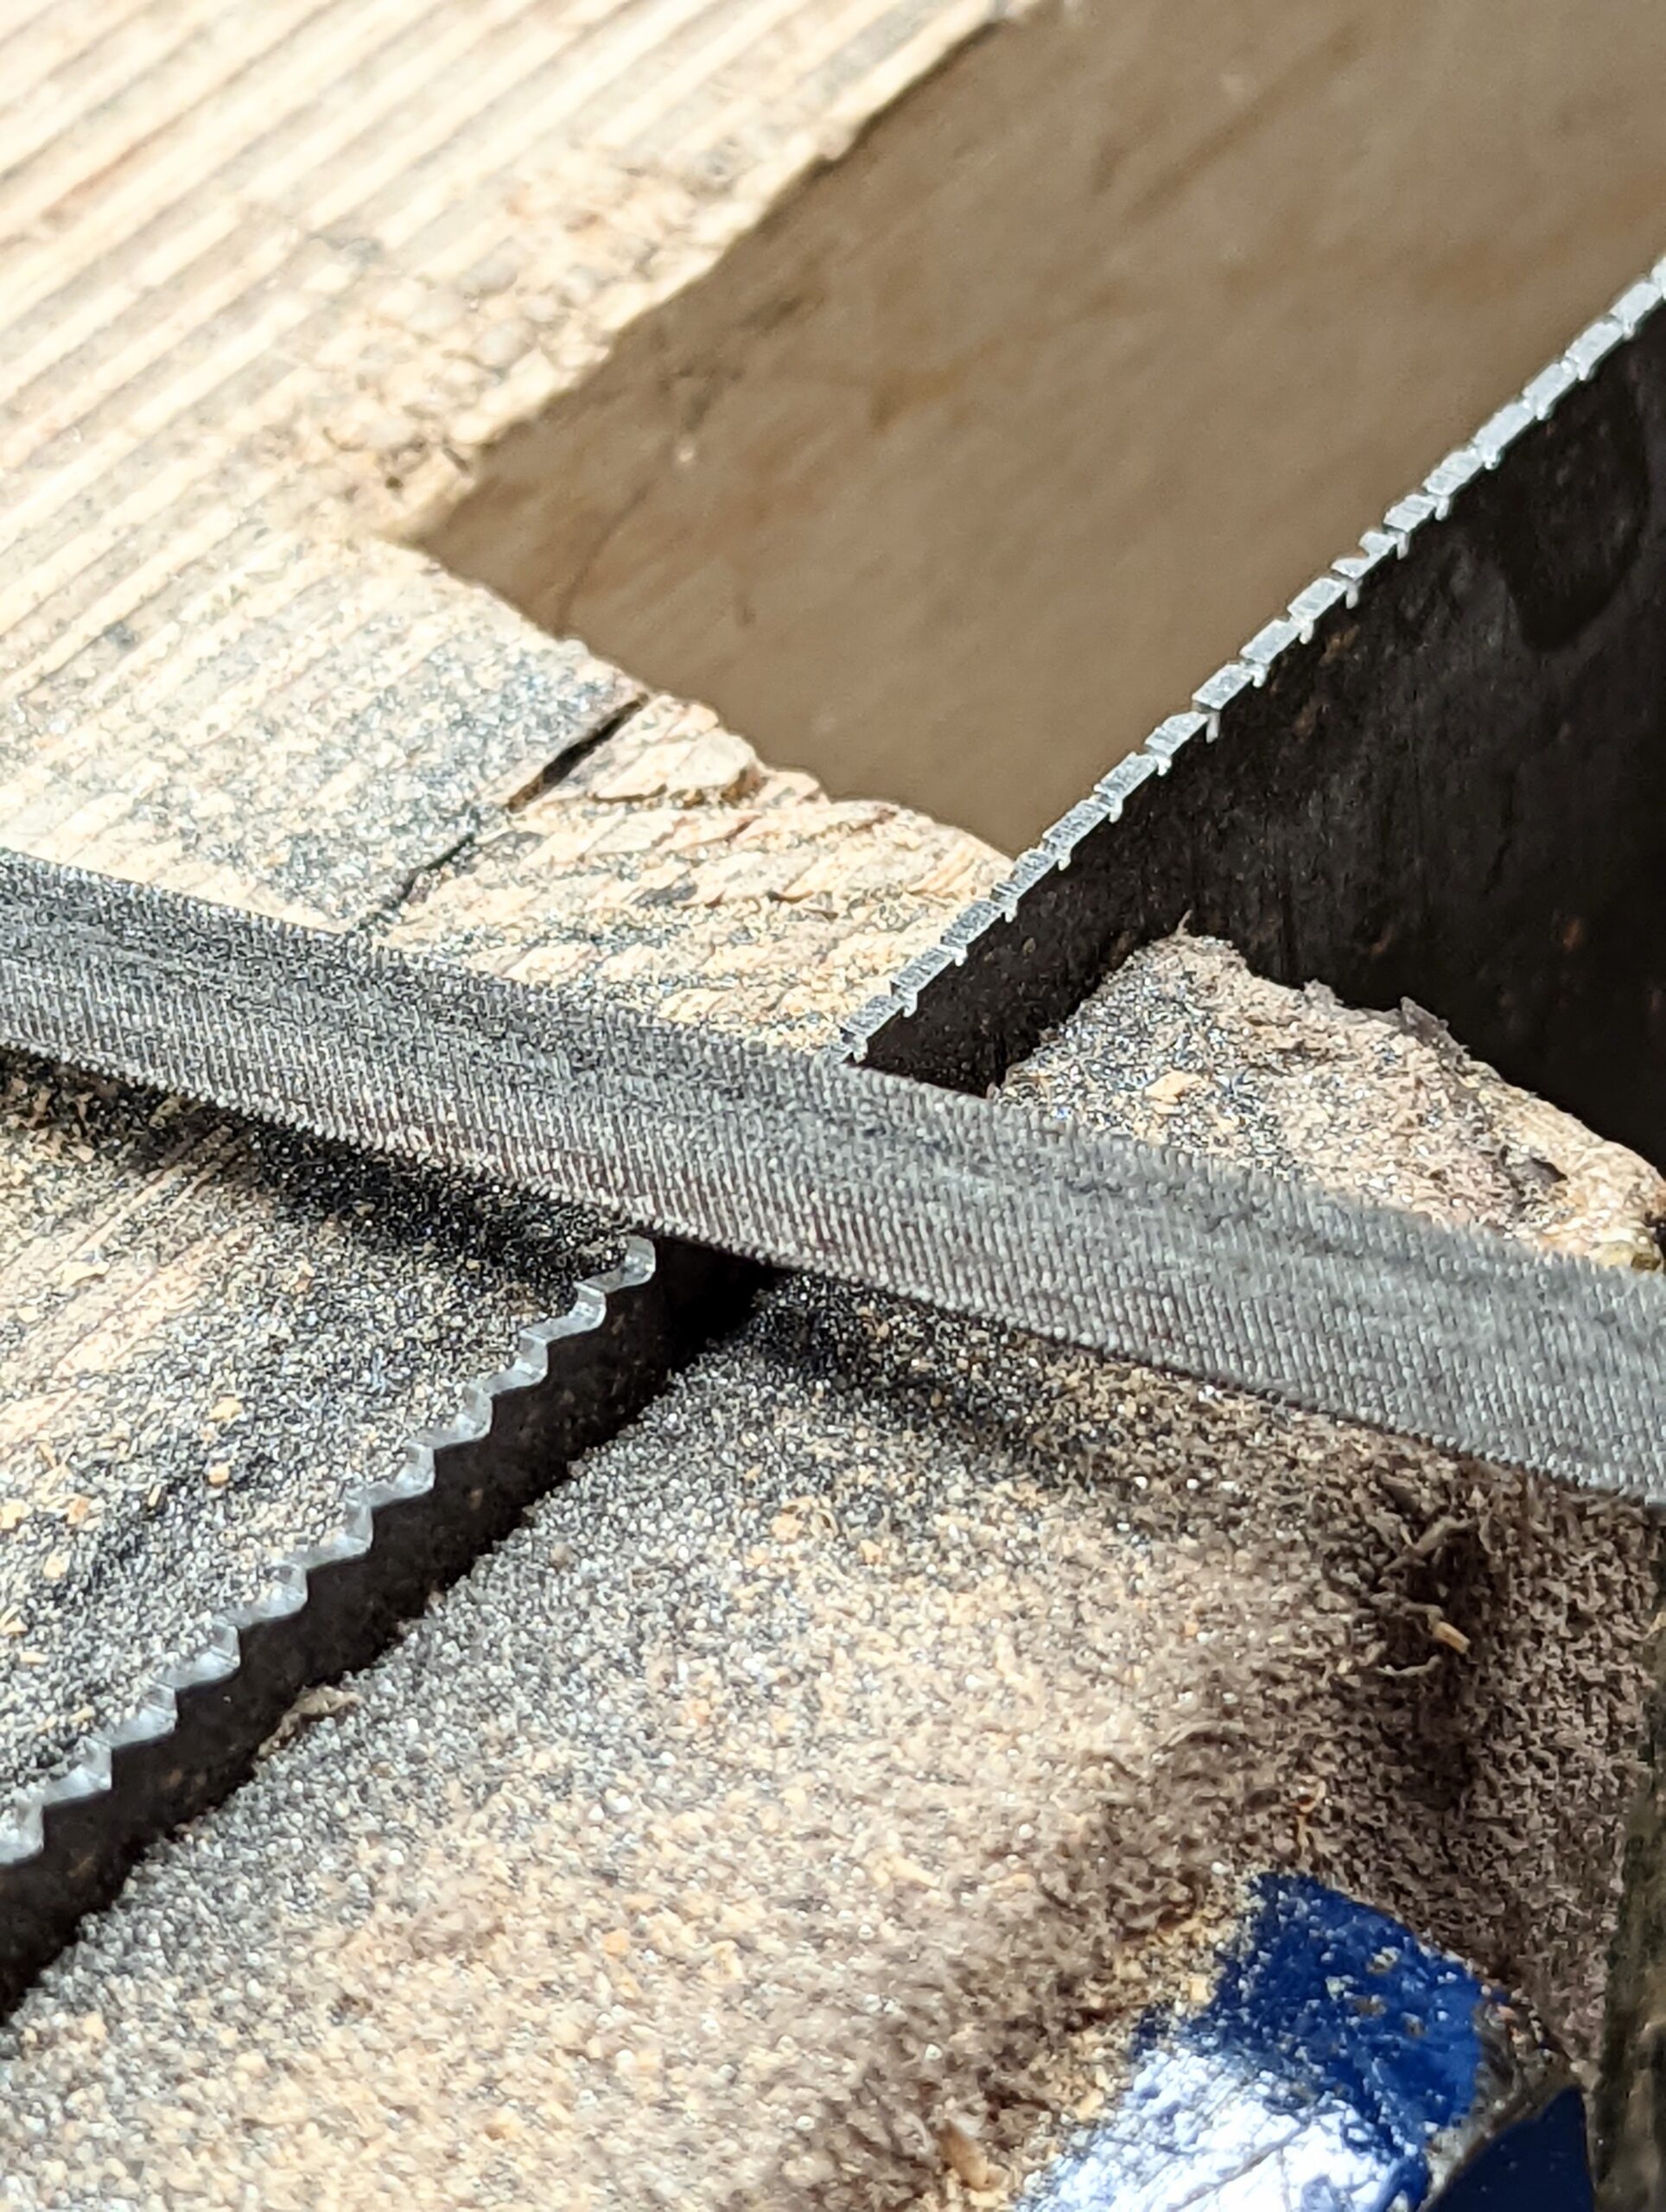
Clamp the guide alongside the saw plate so that the wood is a mil above the edge of the steel.
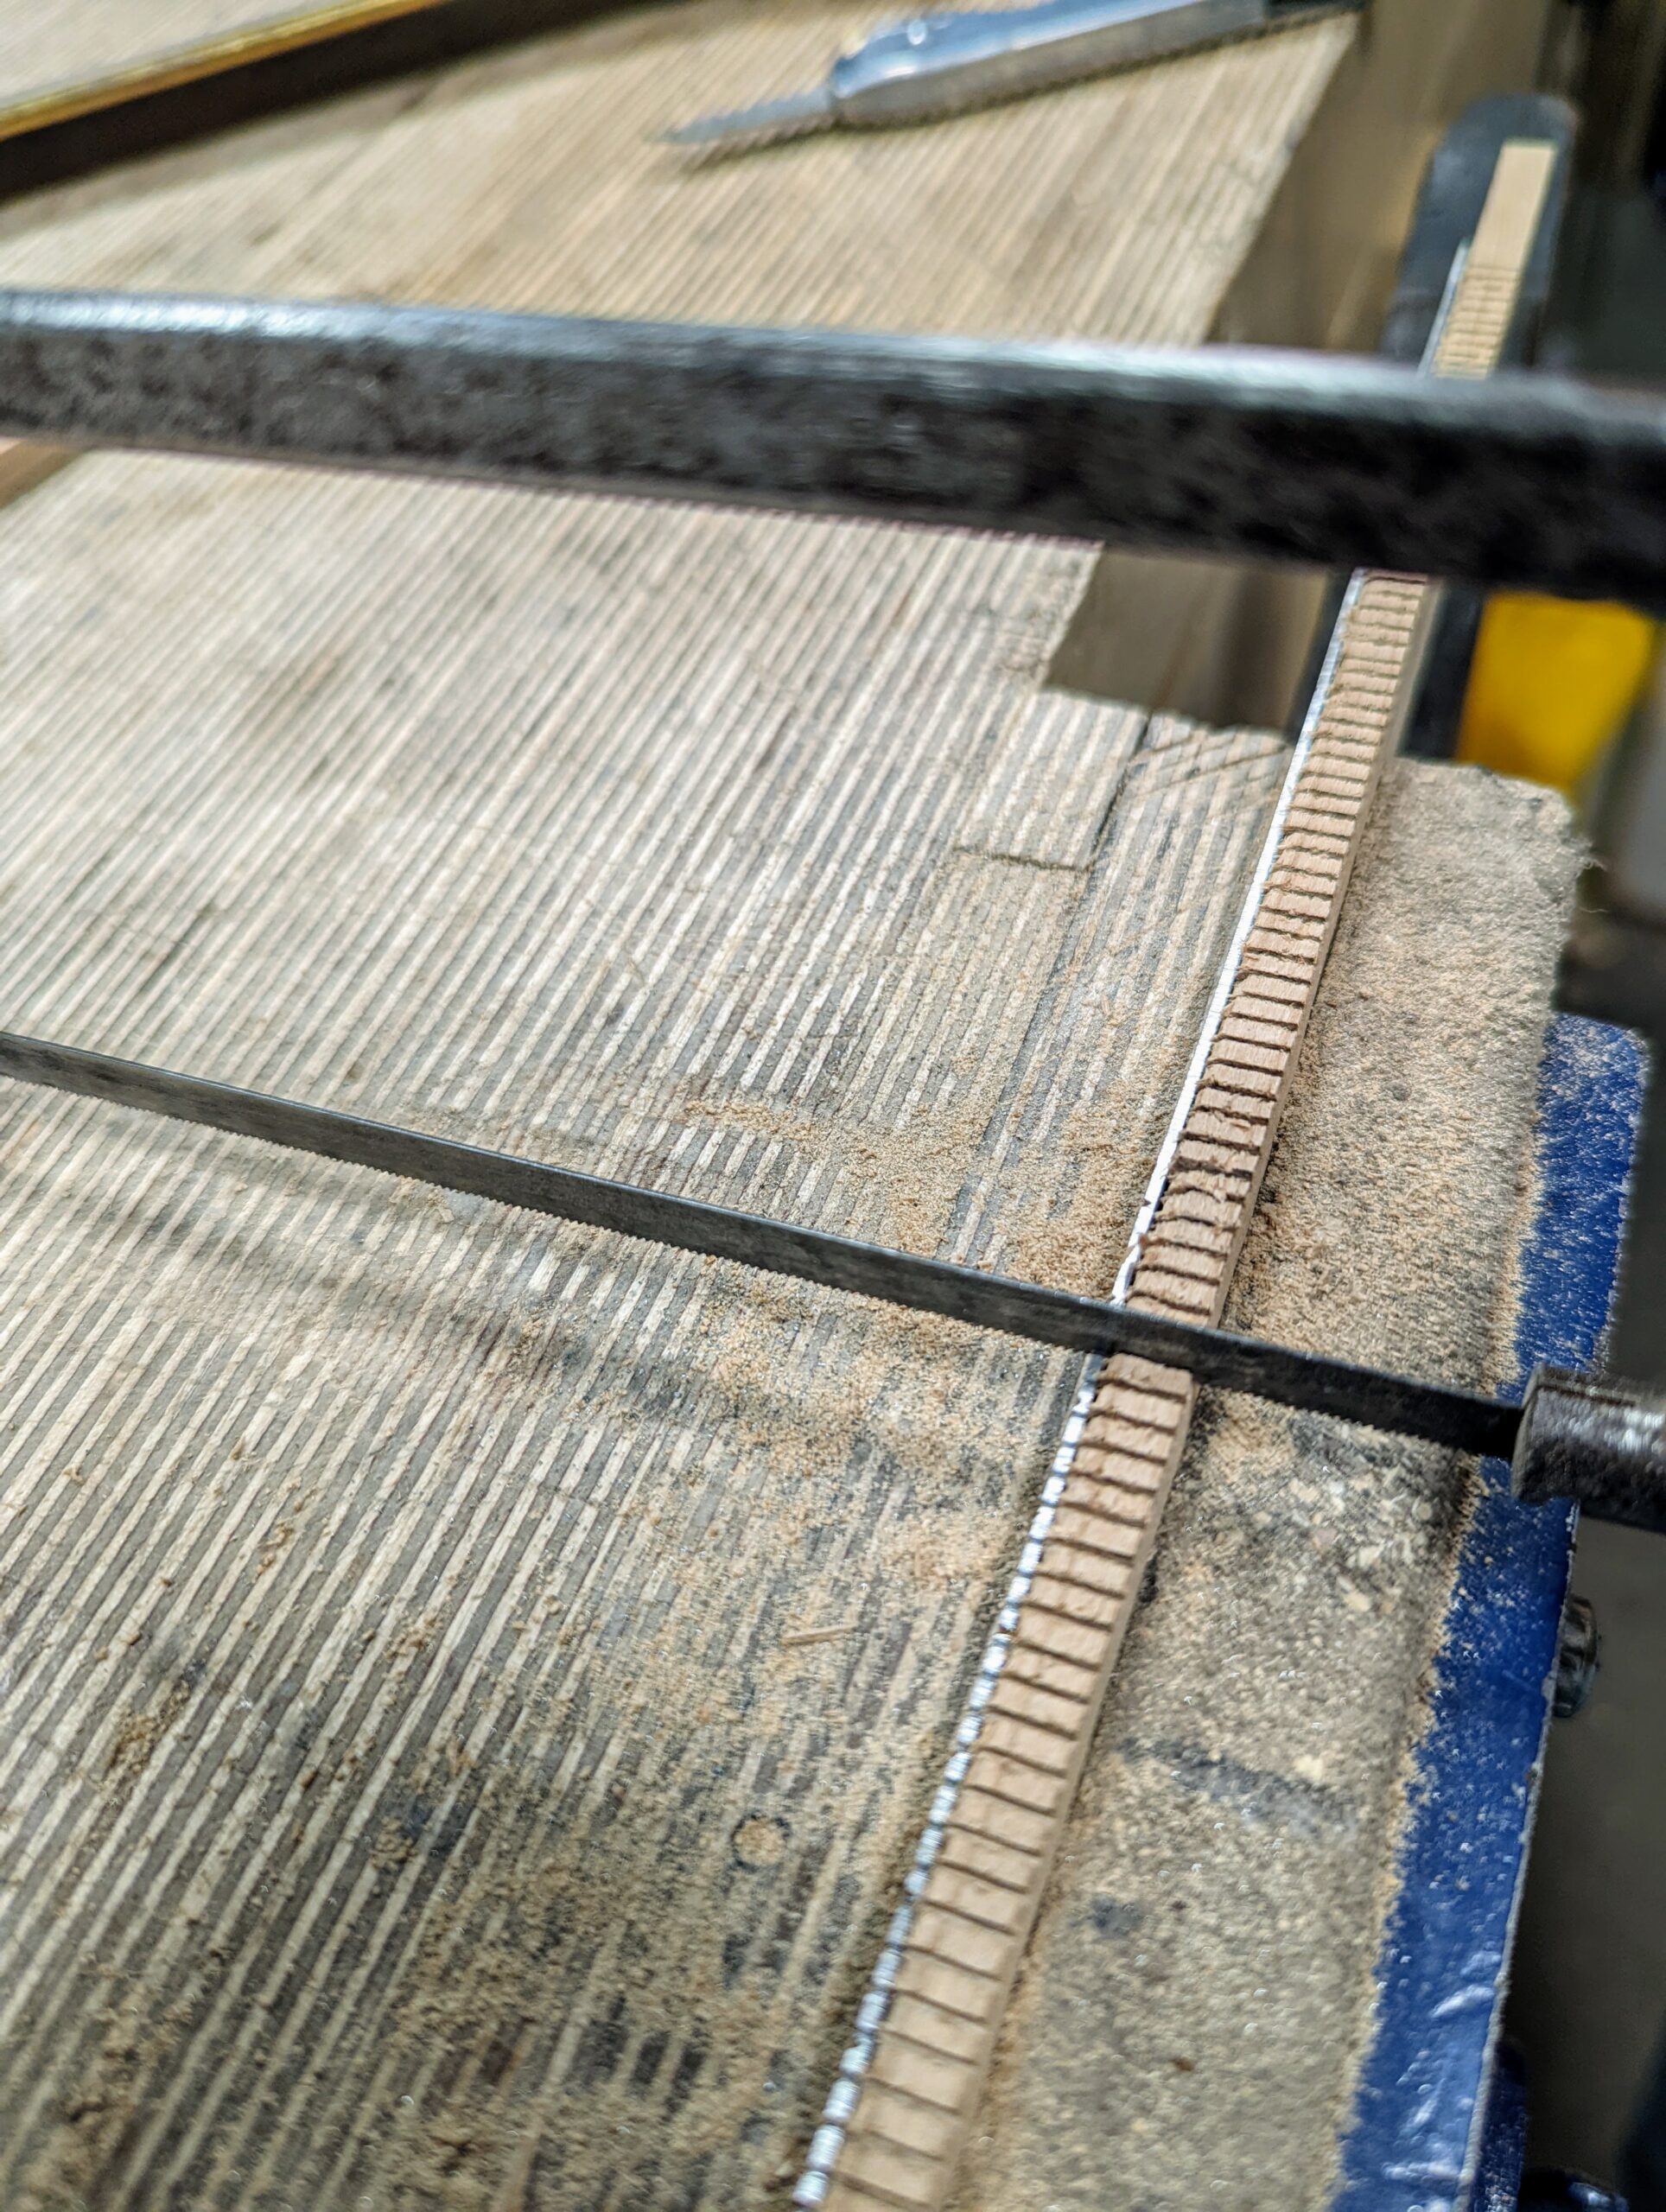
With a junior hacksaw, make a single pass into the kerf of the wooden guide and into the steel. The depth needs only be a small amount as this is purely to register the file at the precise start point in the steel.
Move the guide along the saw from one end to the other until all of the notches are in place.
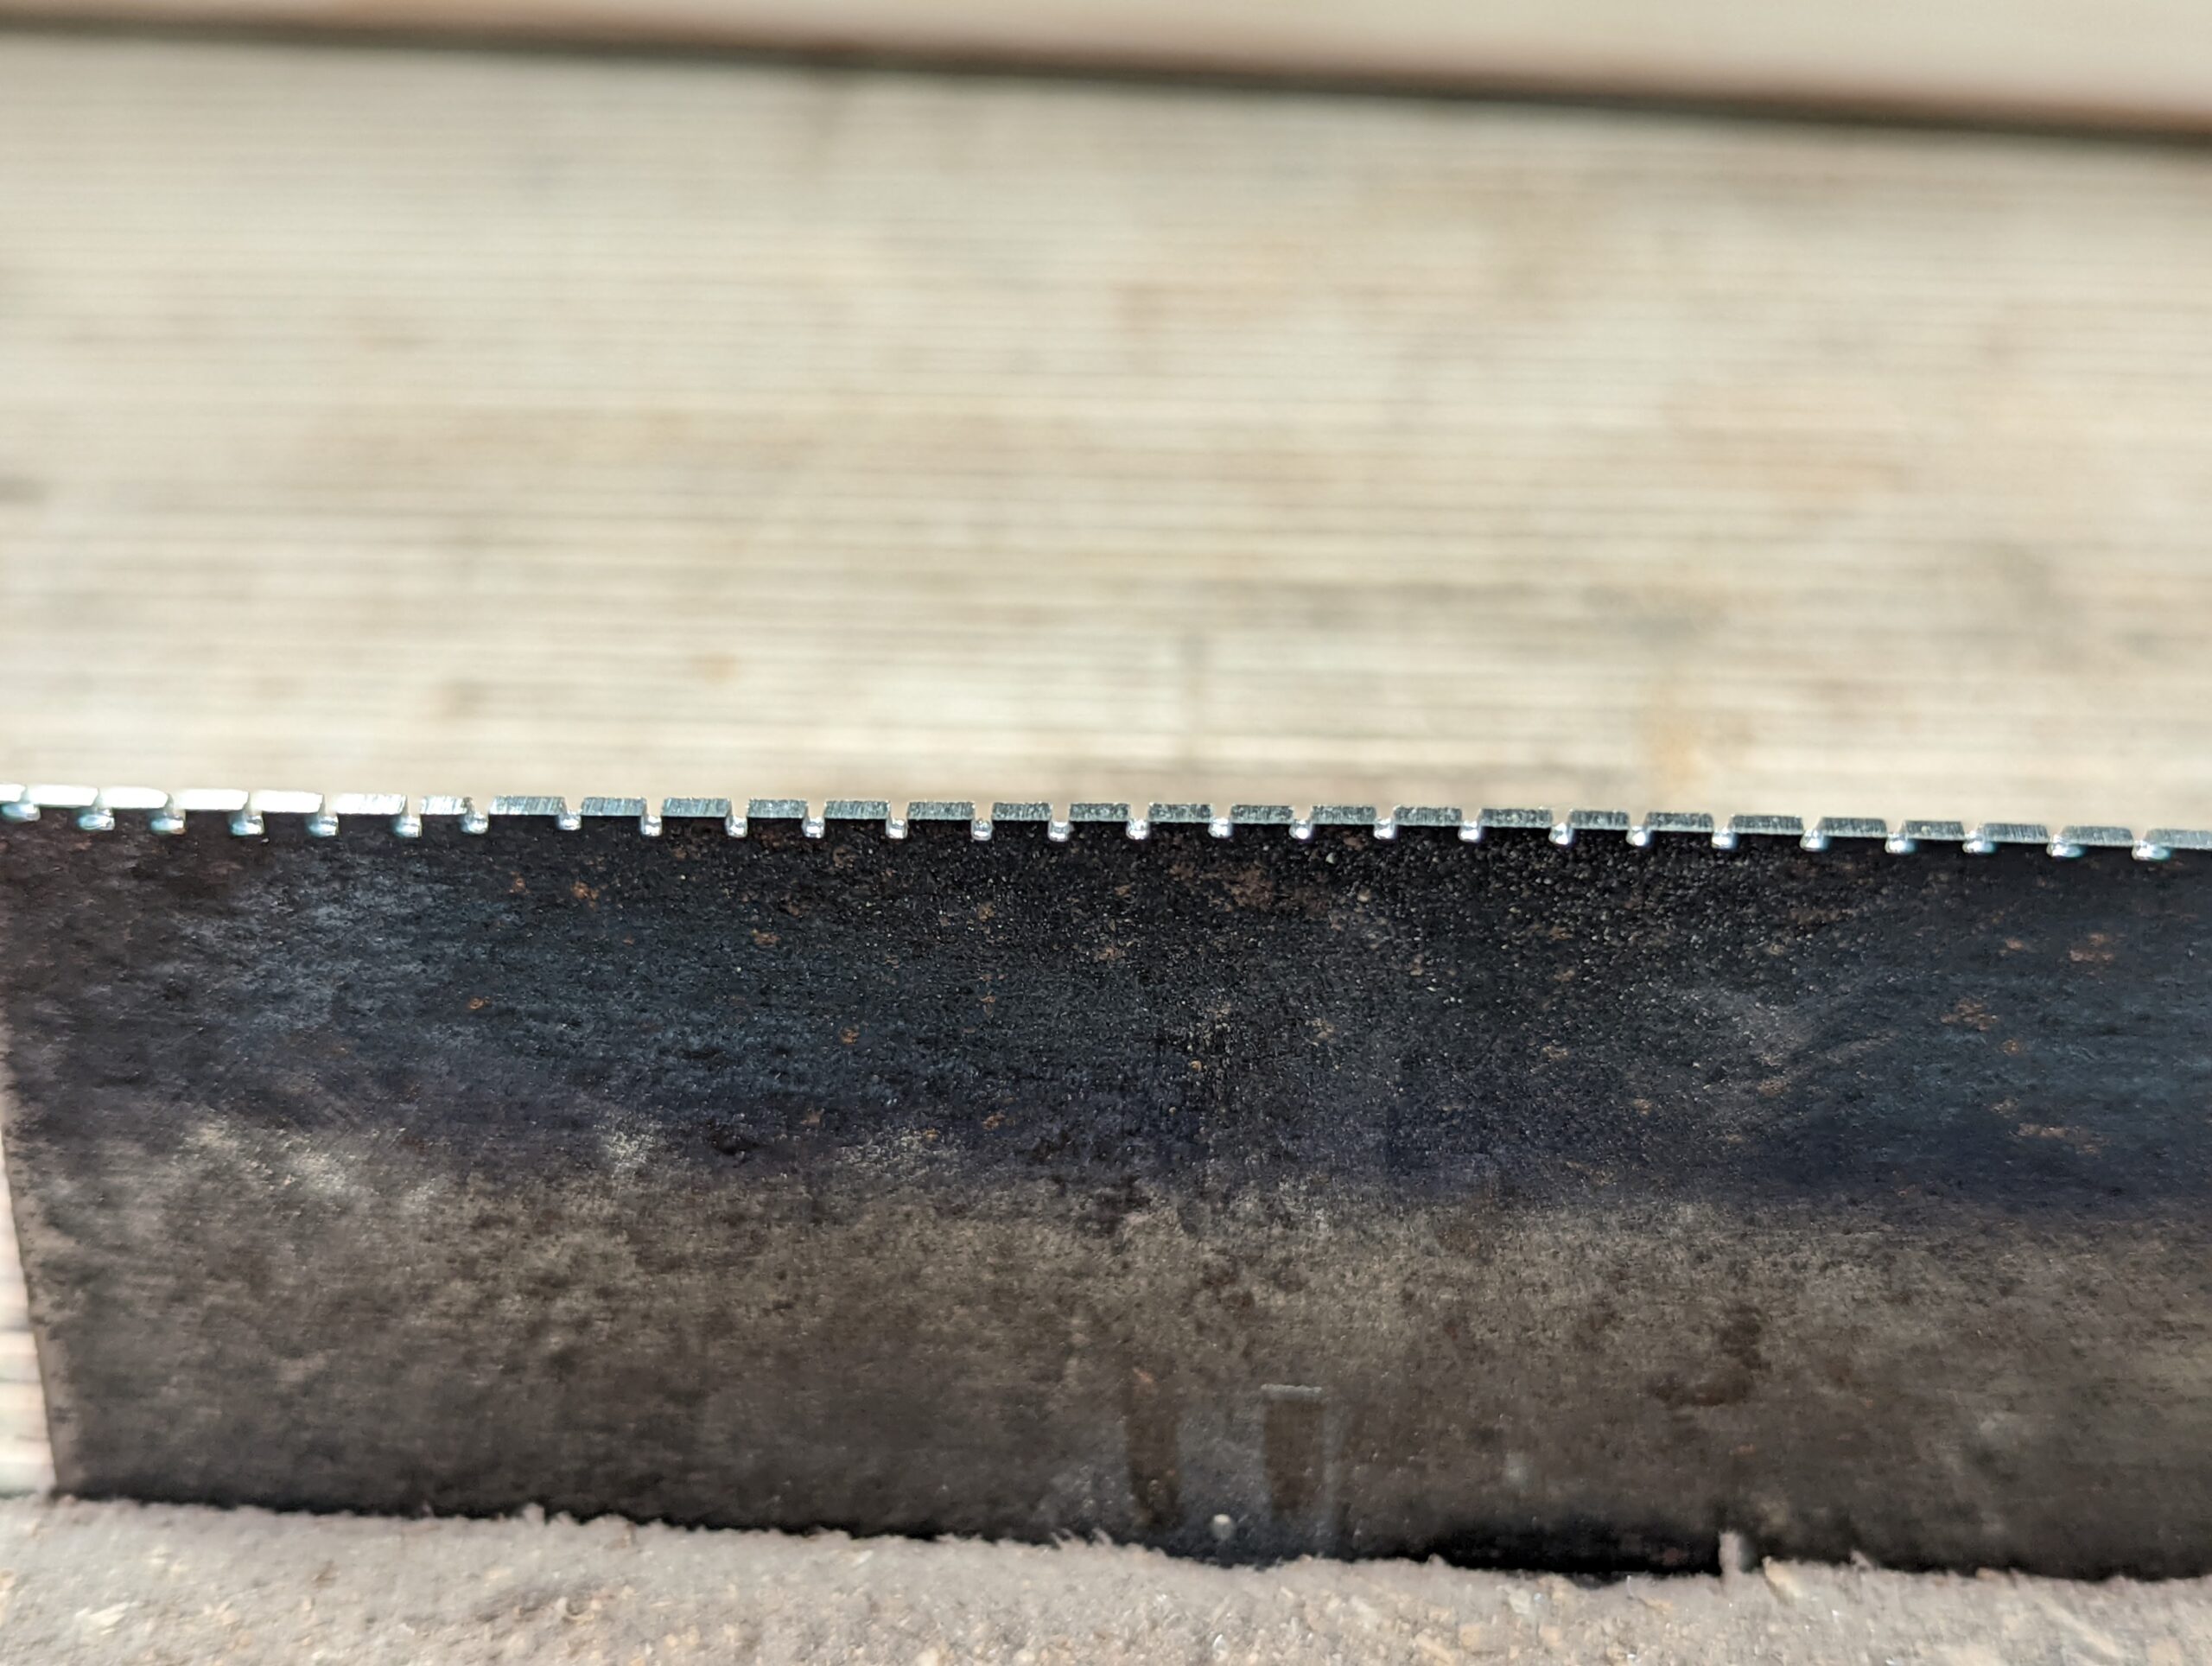
Once done, you are ready to deliver the file strokes needed to add depth to the notches and develop new saw gullets. Niow, it takes a little time to get the rhythm of filing together. Three things count. One, the amount of pressure applied will become more confident stroke on stroke so five strokes at the beginning of the first few teeth might need only four once you get going. You will gauge this by how soon the file cuts take to reach the tip to create the new tooth. Two, the length of stroke may well change with confidence levels of growth and general positivity too. What you will aim for is the established number of strokes, the length of the strokes and the amount of pressure you are applying. Strive for consistency throughout and you will not go far wrong. The next and final issue will be the angle you present the file to the steel. Remember that practice does make perfect, it also makes permanent so bad habits are hard to break. Take your time, check ther flow and the shape and everything else as you go. We will sharpen this for a standard western saw rip cut as that is a popular way to go for smaller saws. No matter, even if you want a crosscut, you sharpen first to a ripcut to define the tooth profile exactly as you would for a rip cut. Then, once the defining is done, you sharpen for a crosscut profile by filing every alternative tooth at an angle, but that is not what this is about.

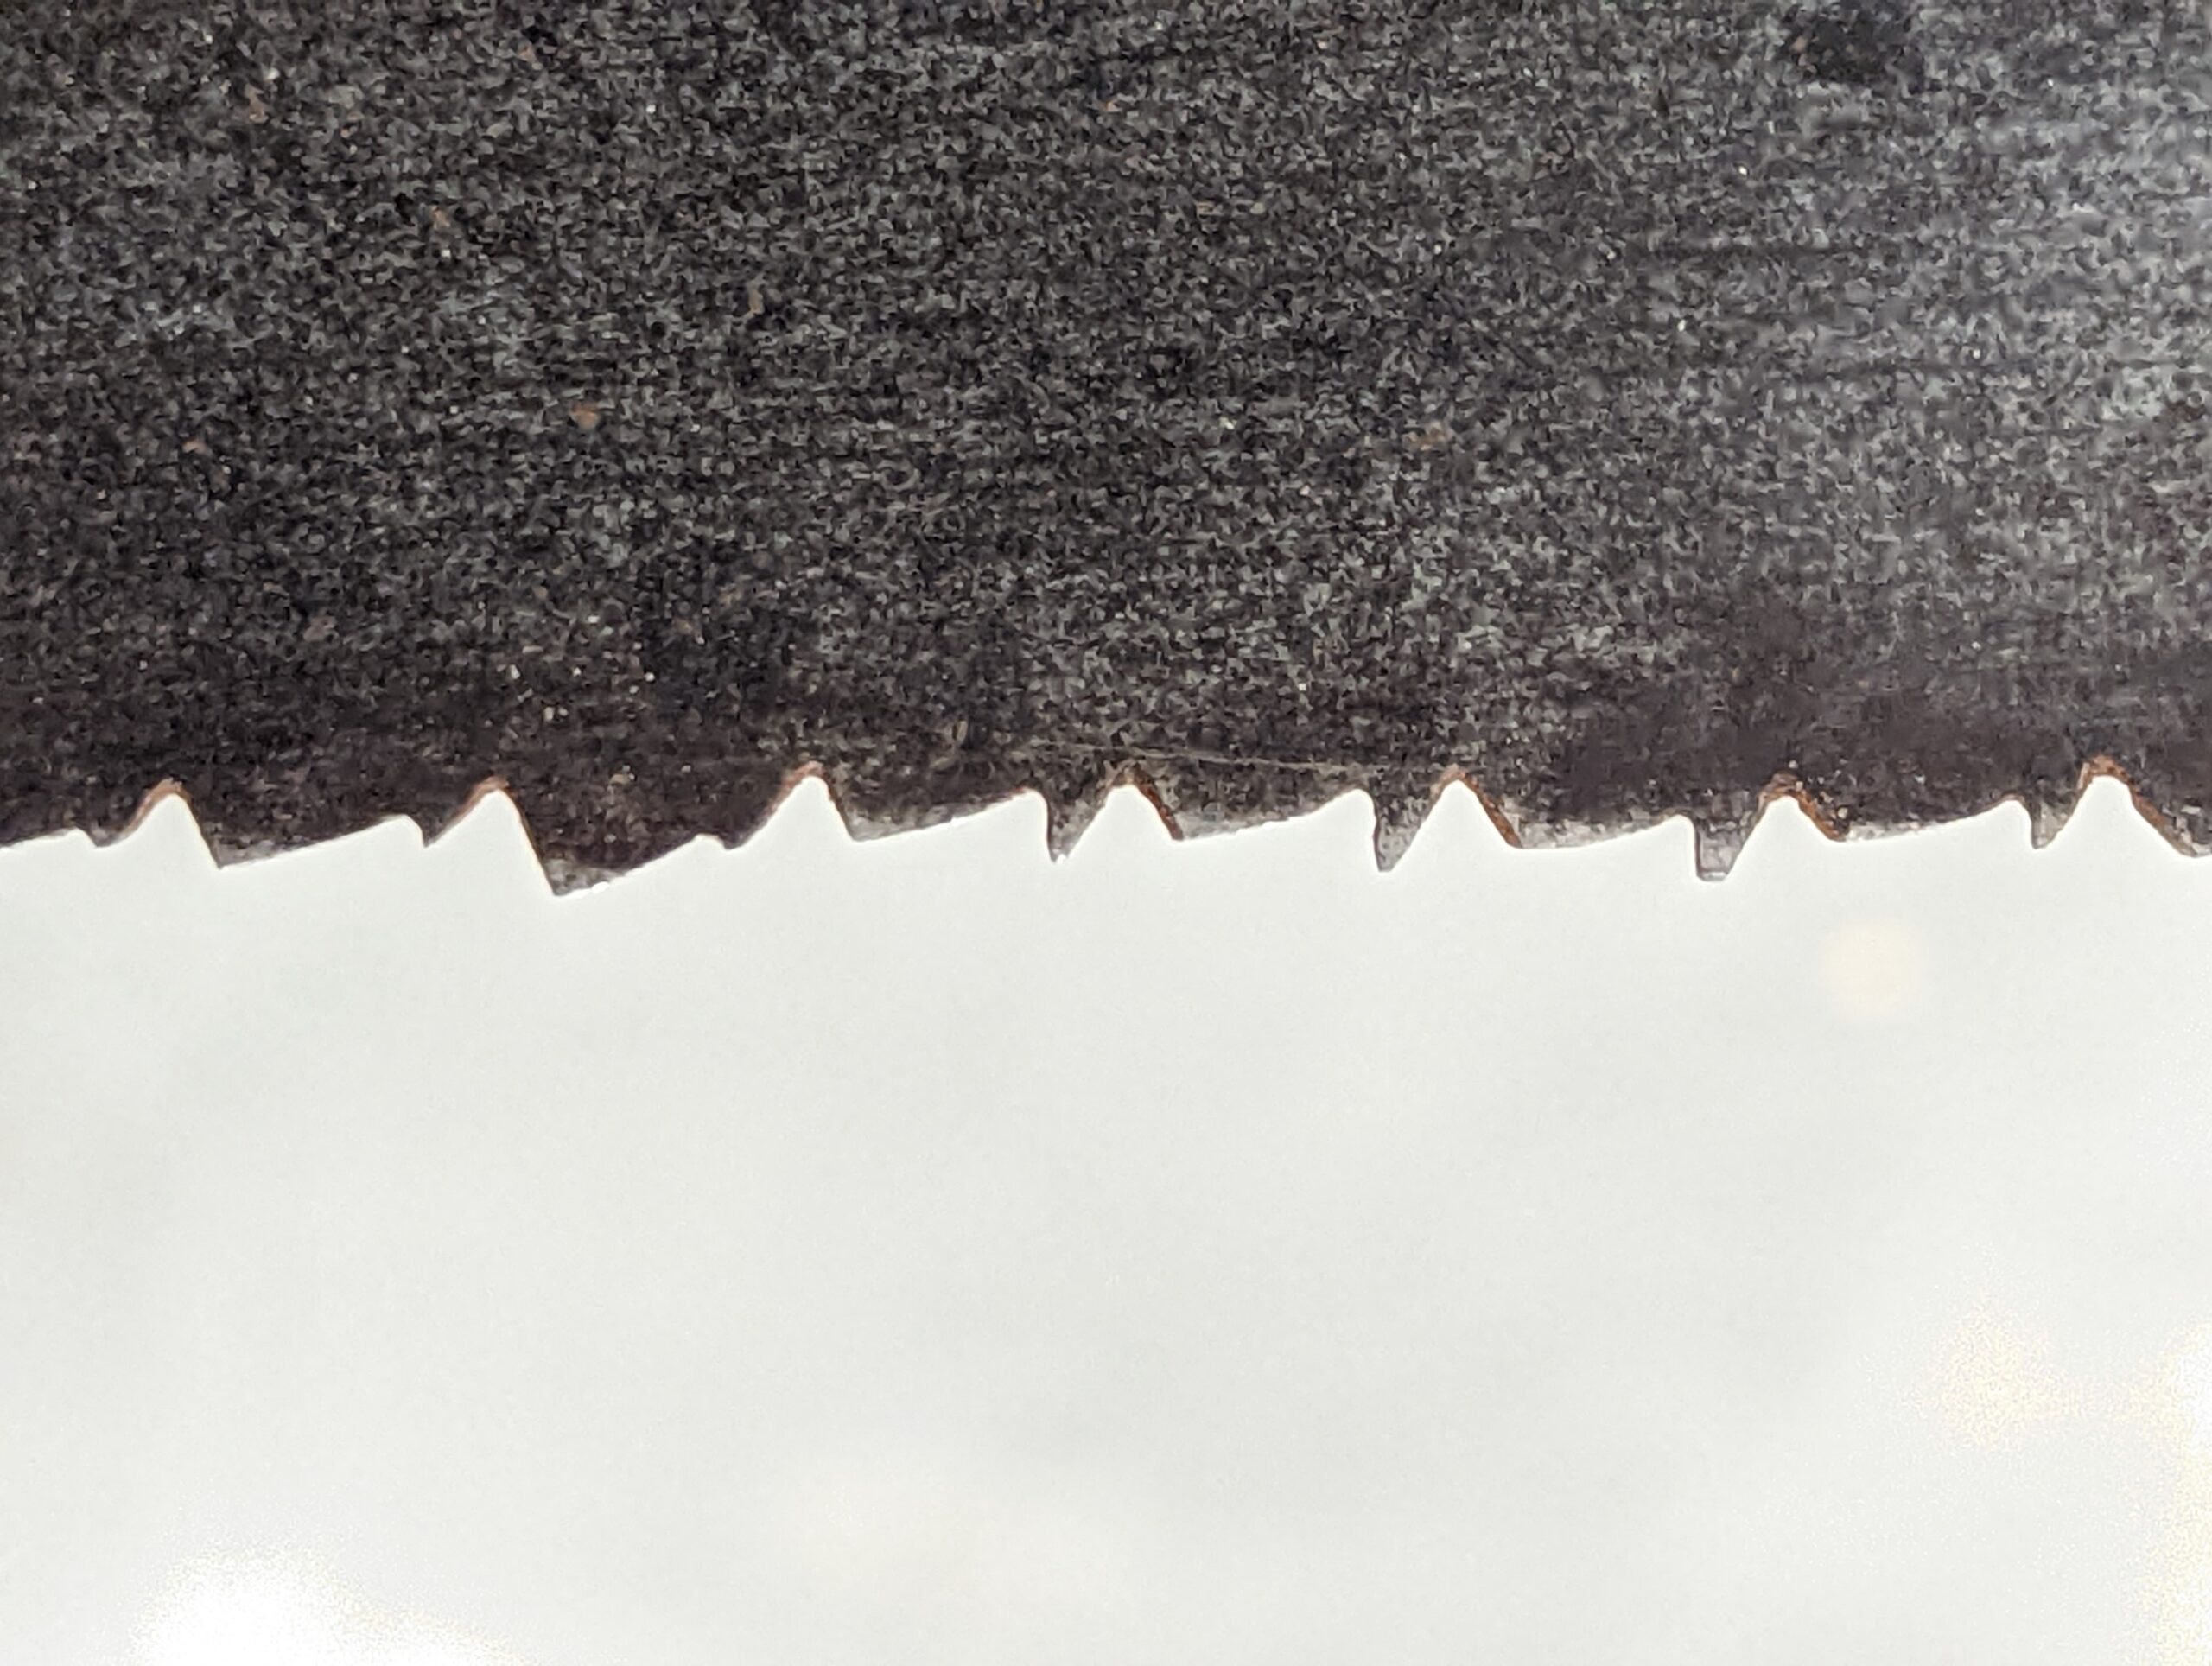
Once you have a certain rhythm, count the number of strokes you are taking and file the strokes as regularly as possible. I found in my plate the file strokes numbered four. That took out the last entity of flat spot to give me a cutting edge. The number of strokes will vary according to the pressure, length of stroke, thickness of steel plate, file type and so on. Too many variables to tackle beyond just doing it. The important detail in these file strokes is the angle of presentation. Because the notch has nothing to do with the angle we must rely on two things, establishing the angle we present at and then keeping the angle as we progress through each notch. Look at the drawing and aim to pitch your saw file at the same or similar angle. The more verticle the front of the tooth, the more aggressive the saw will cut. The more level the top face of the file is, the more passive the cut. Somewhere between the two works great. So ore a slight lean forward if you will. And remember you can always change this in future sharpenings or correct it if you feel you are too aggressive or too passive.
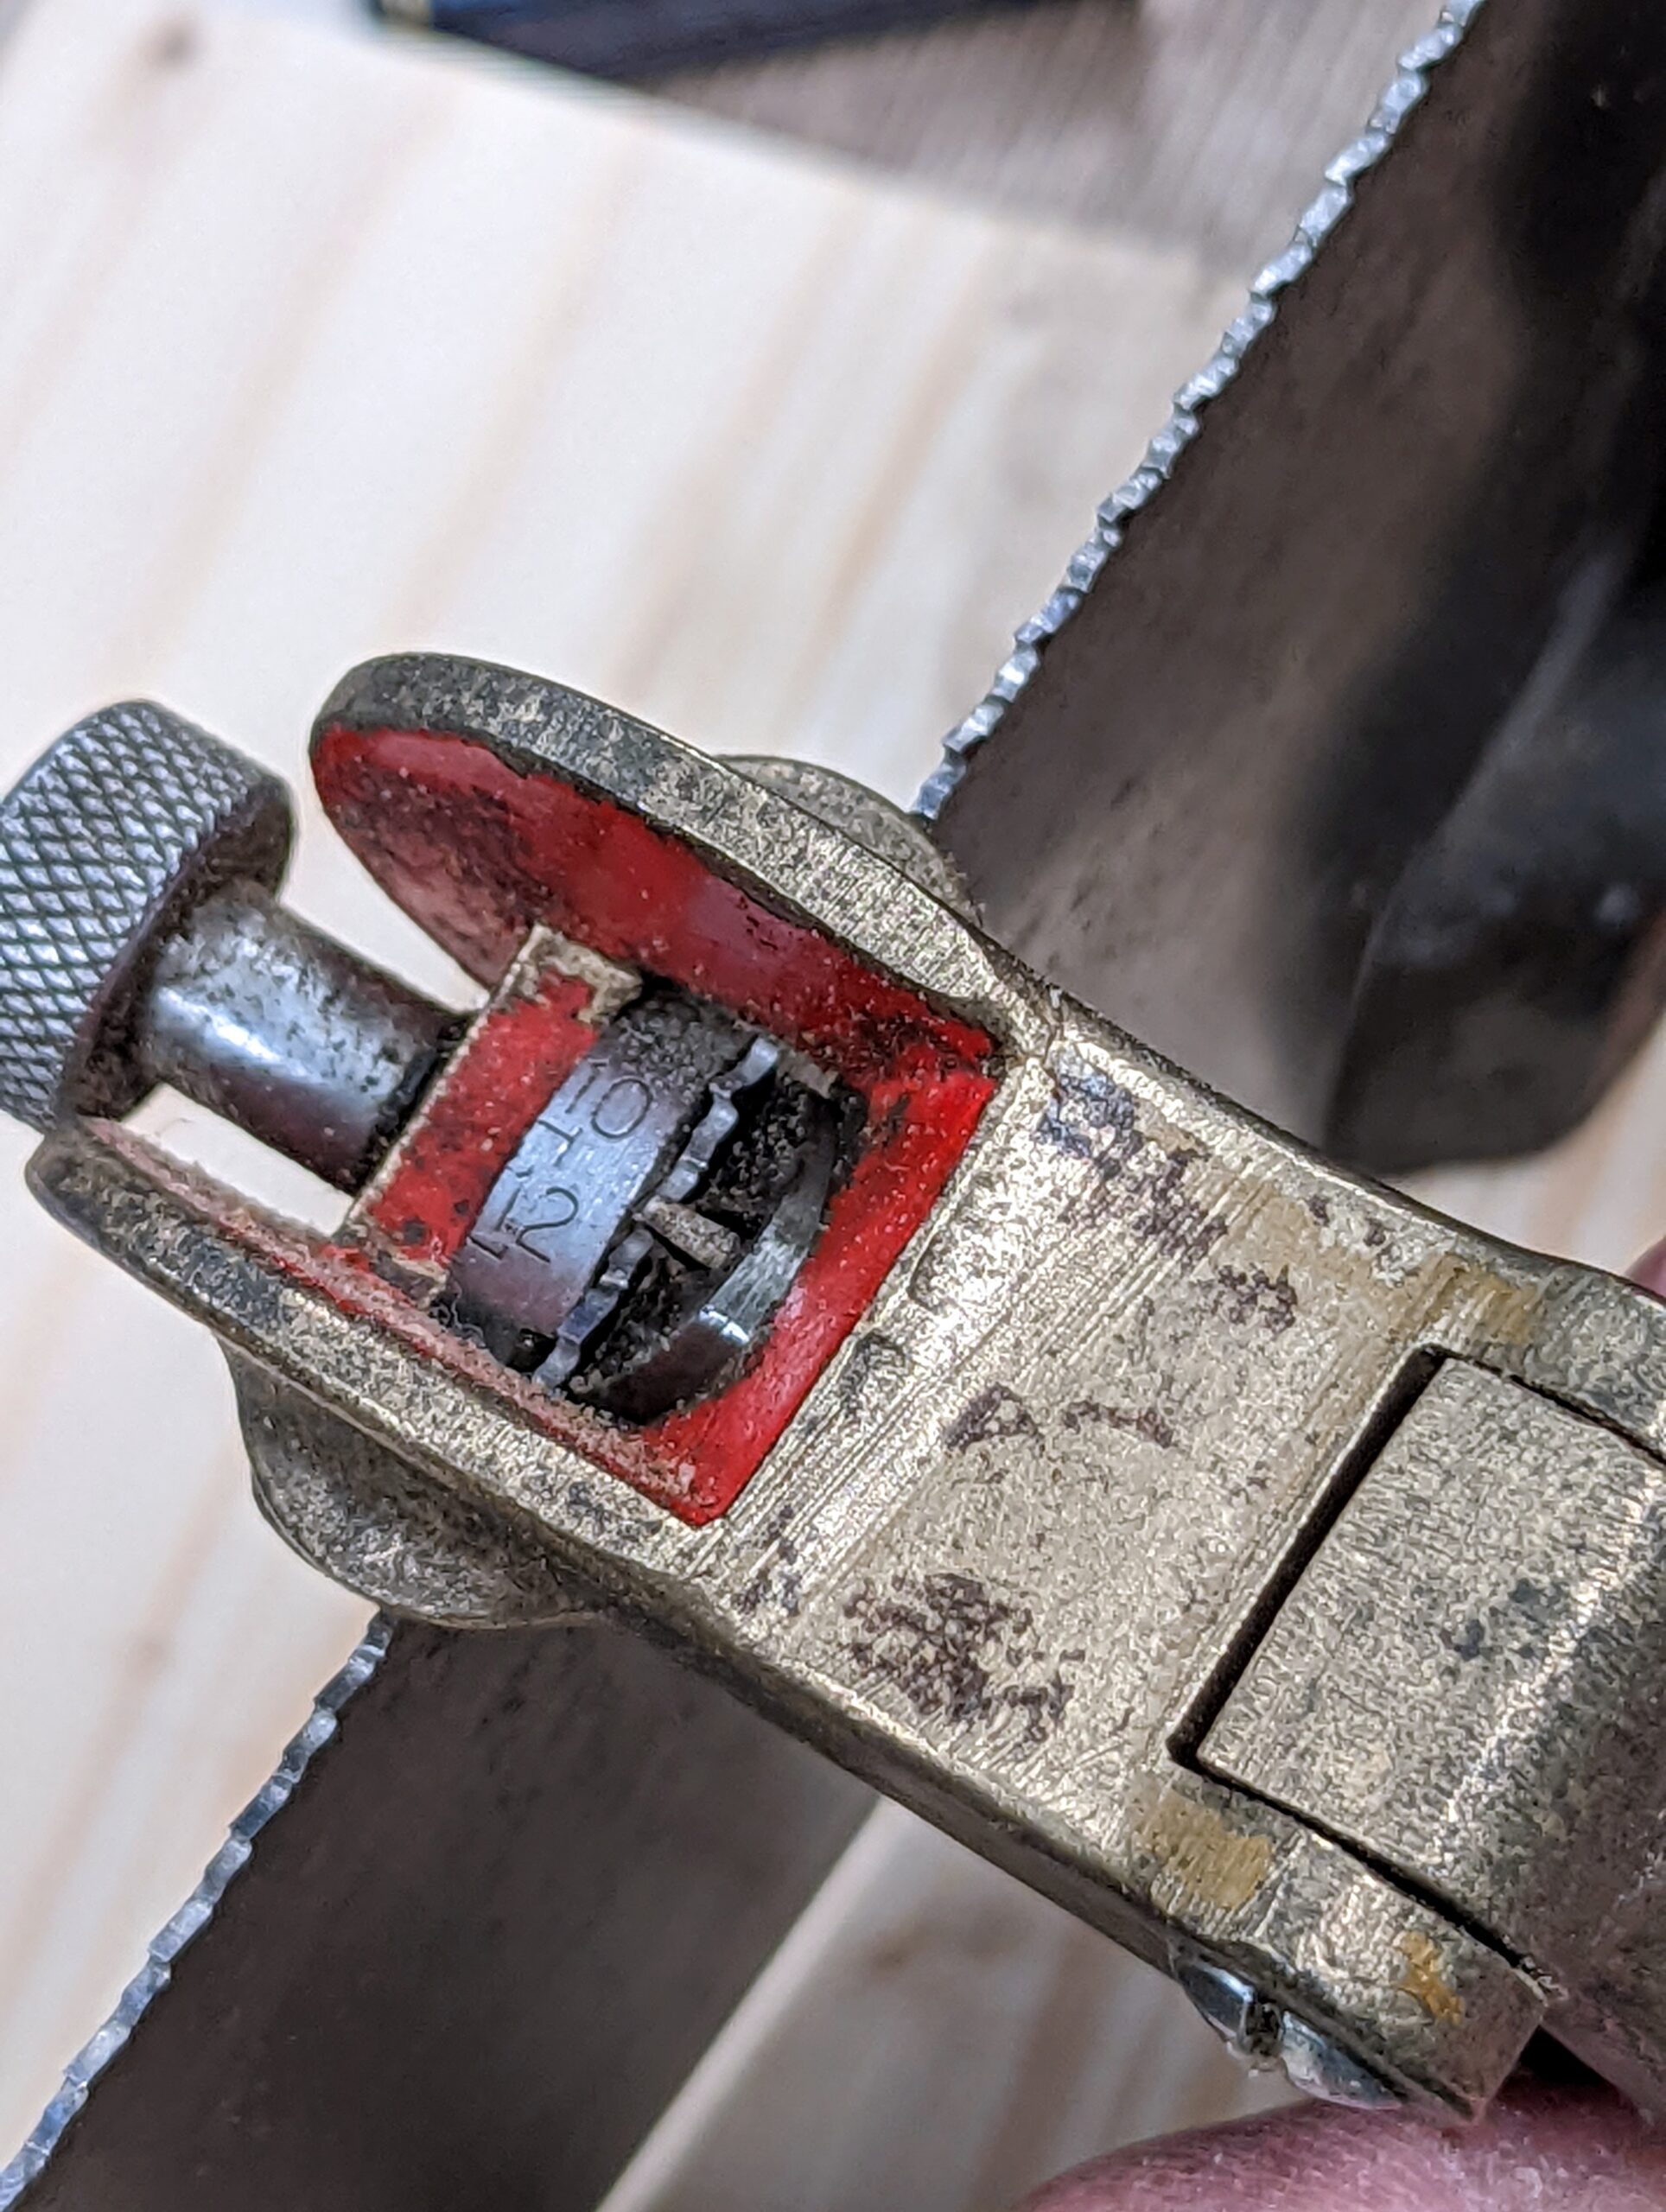
After filing comes setting which must happen because the saw will bind no matter how much muscle you have.
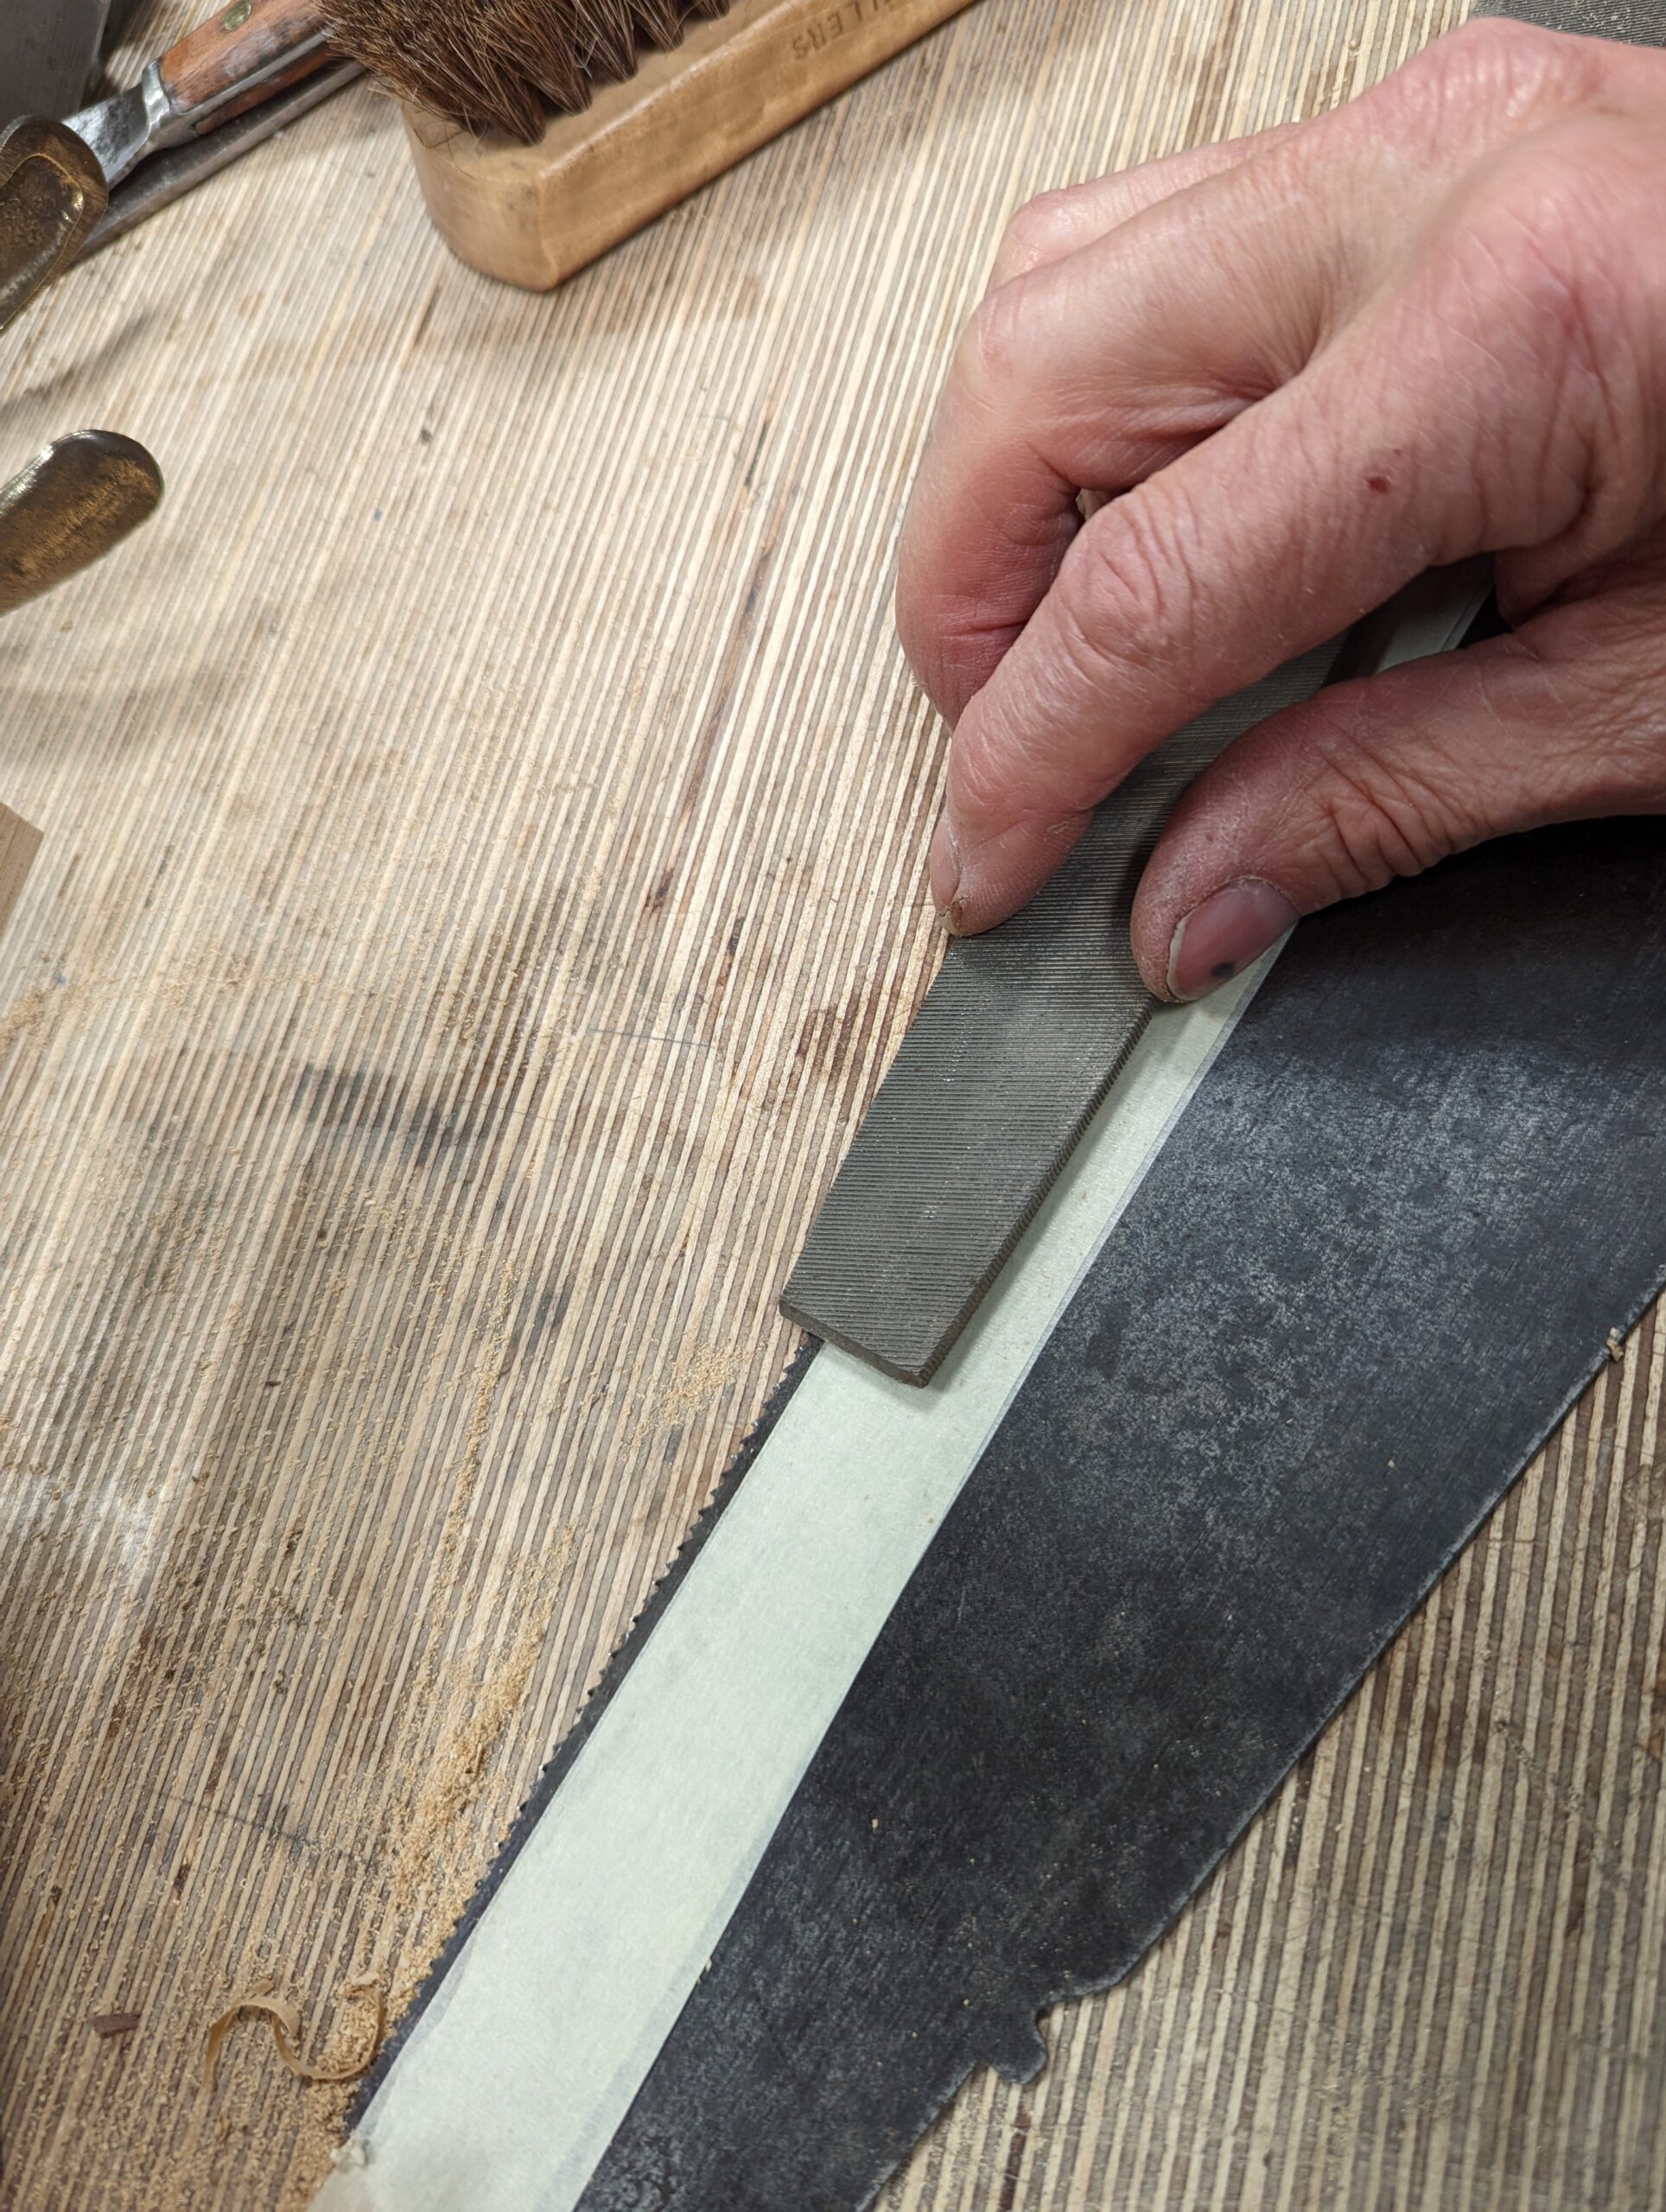
Once set I put two strips of masking tape, one on top of the other, and skim off the sides of the teeth with a flat file. The unifies all of the teeth at one level perfectly.
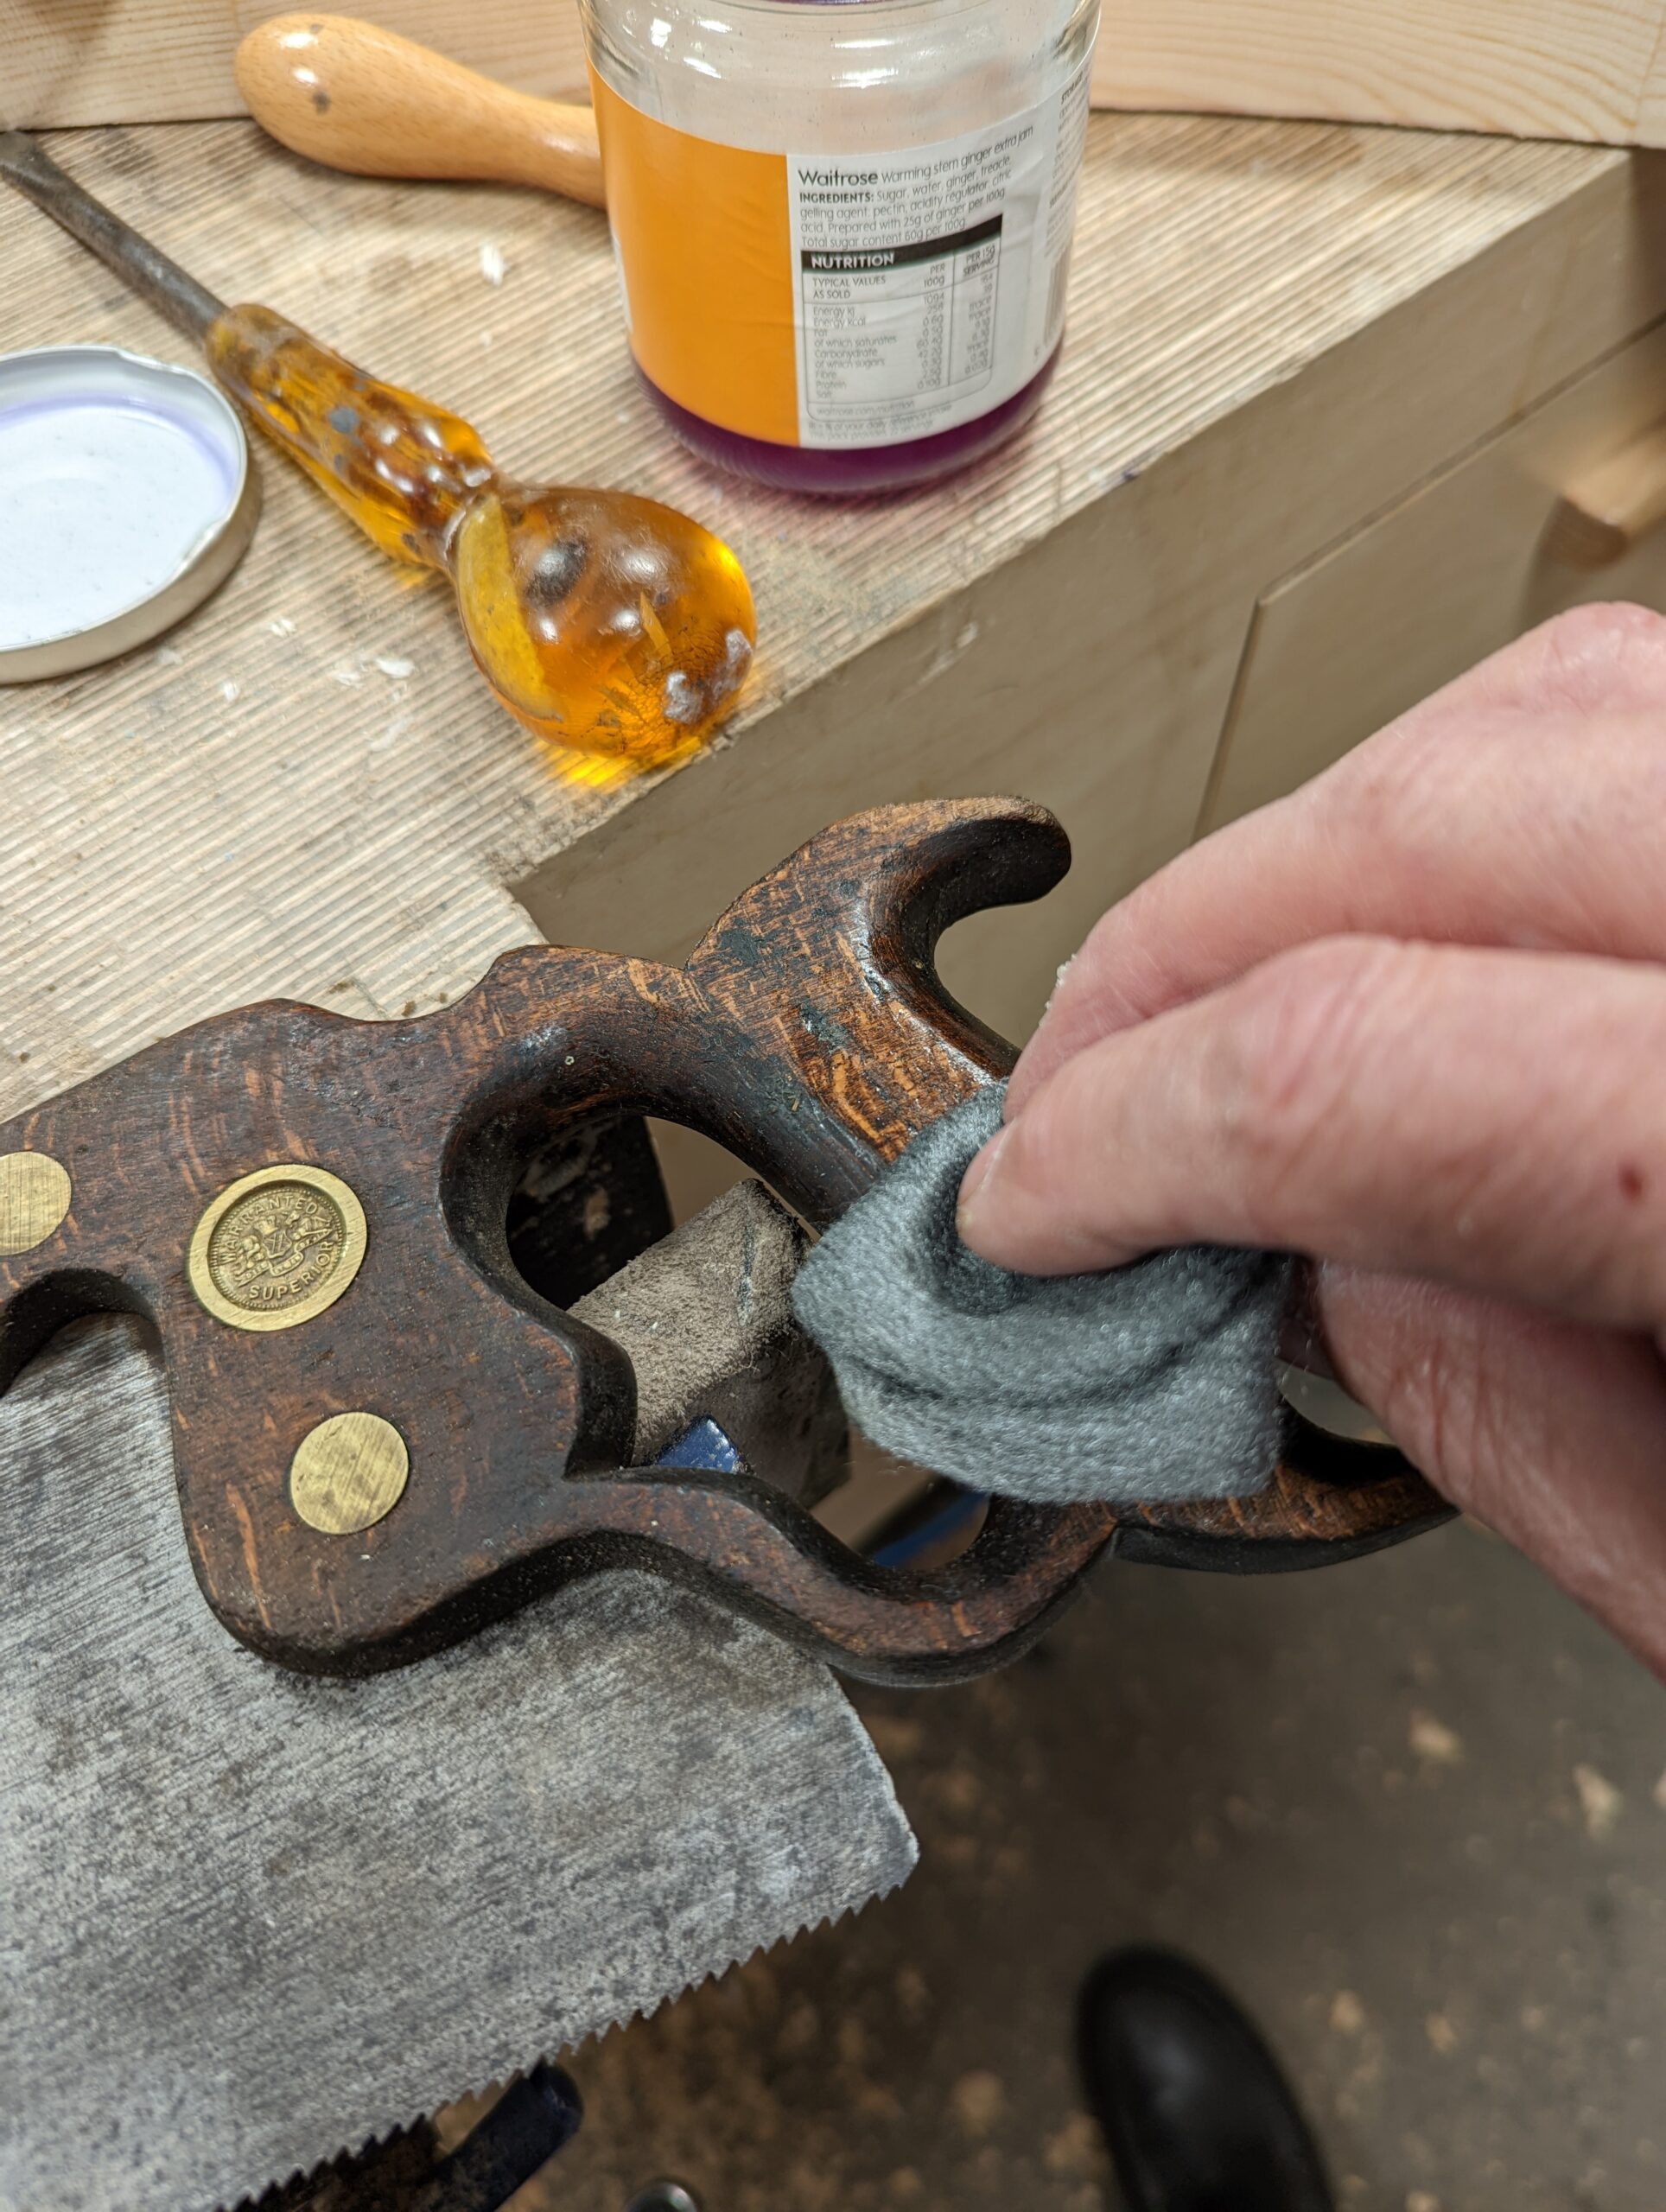
Once that is done the saw is ready for use. I did improve the handle by degunging it with solvent and steel wool. I then waxed it with furniture polish.
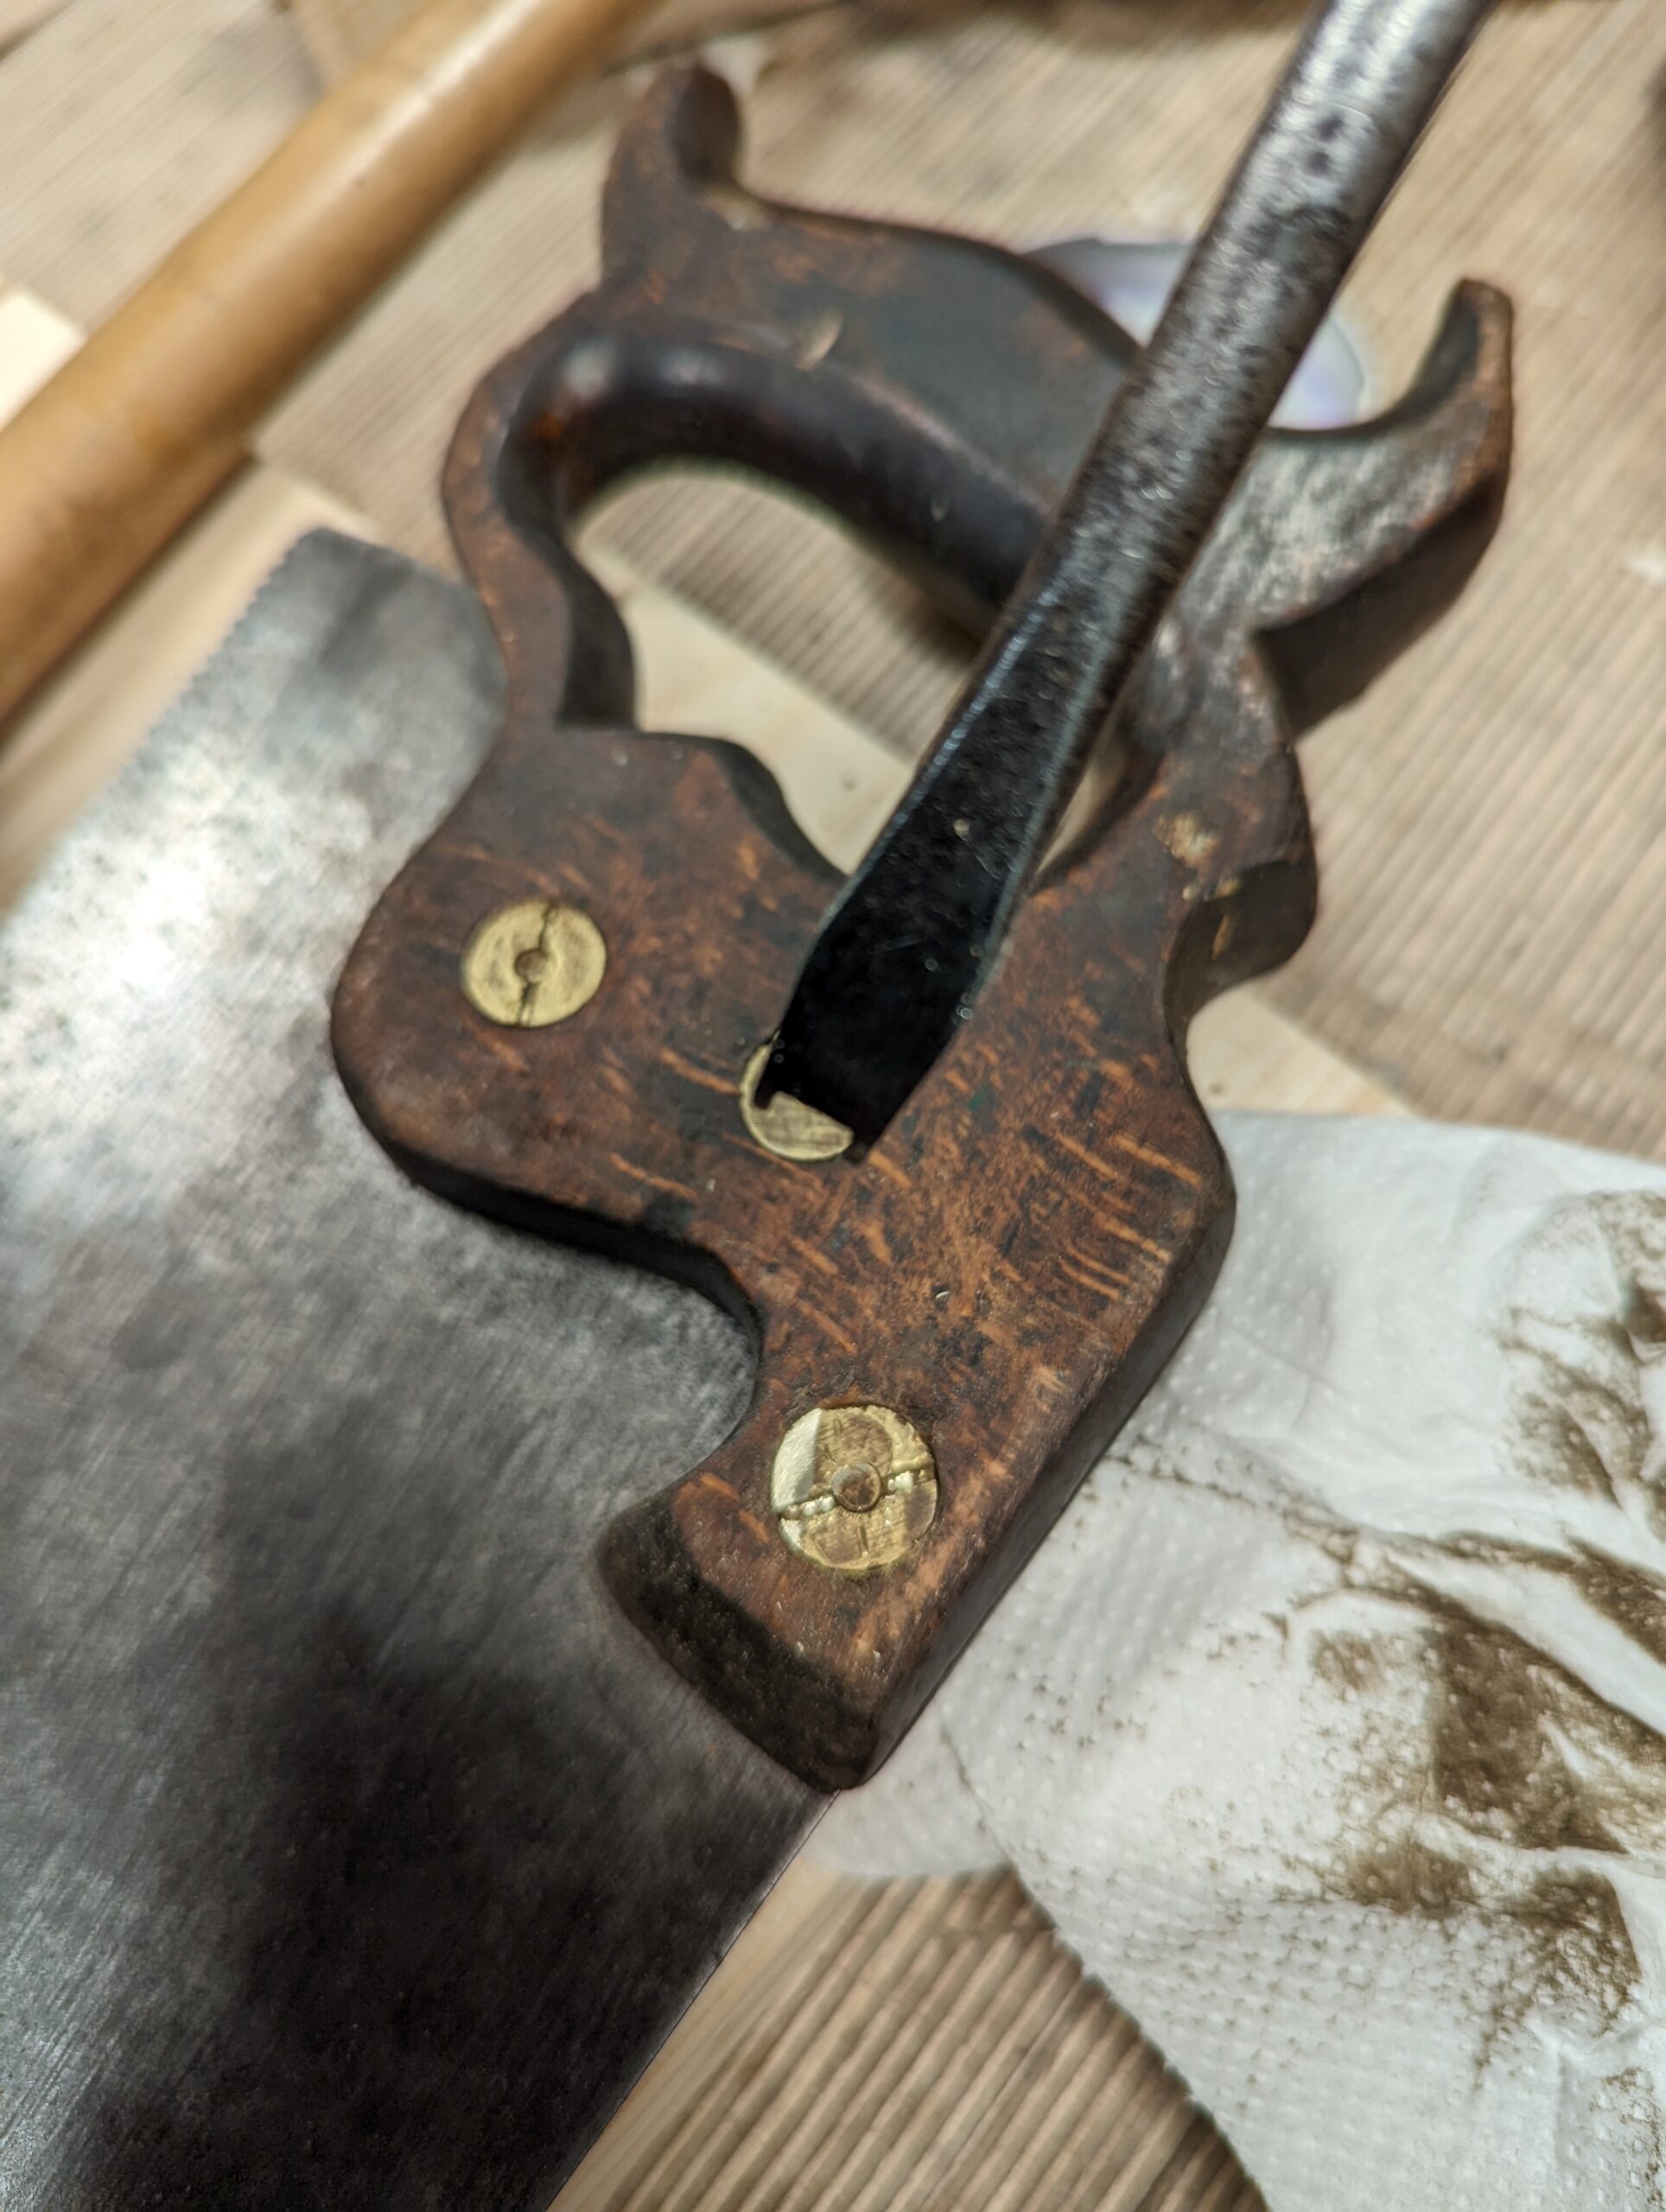
Tightening all of the split nuts secured the handle to the plate nicely.
The whole process was under one hour.
Comments ()