Prepping Wood VI
In my covering going to the wood suppliers and the need for planning and observance, I have been able to obviate the attempt we must make to minimise wasting our precious time, money, and then too wasting that sense of positivity our searching for wood seems always to begin with. Disappointment of any kind is always draining and our future pieces usually build on our anticipation of creating something that was inspired excitingly deep inside us. Mostly, for me at least, working revolves around my efficiency. My time and the amount that I do in a day relies on my ability to economise and prioritise the order of steps. My whole day is cohesive and by every move I make I disallow most interruptions if they are just interesting-poor distractions. I suppose what I am saying is, I usually try to clear the decks for picking my wood. But now I am back at the shop. My wood is unloaded and stacked ready for the conversion to smaller sections and components.
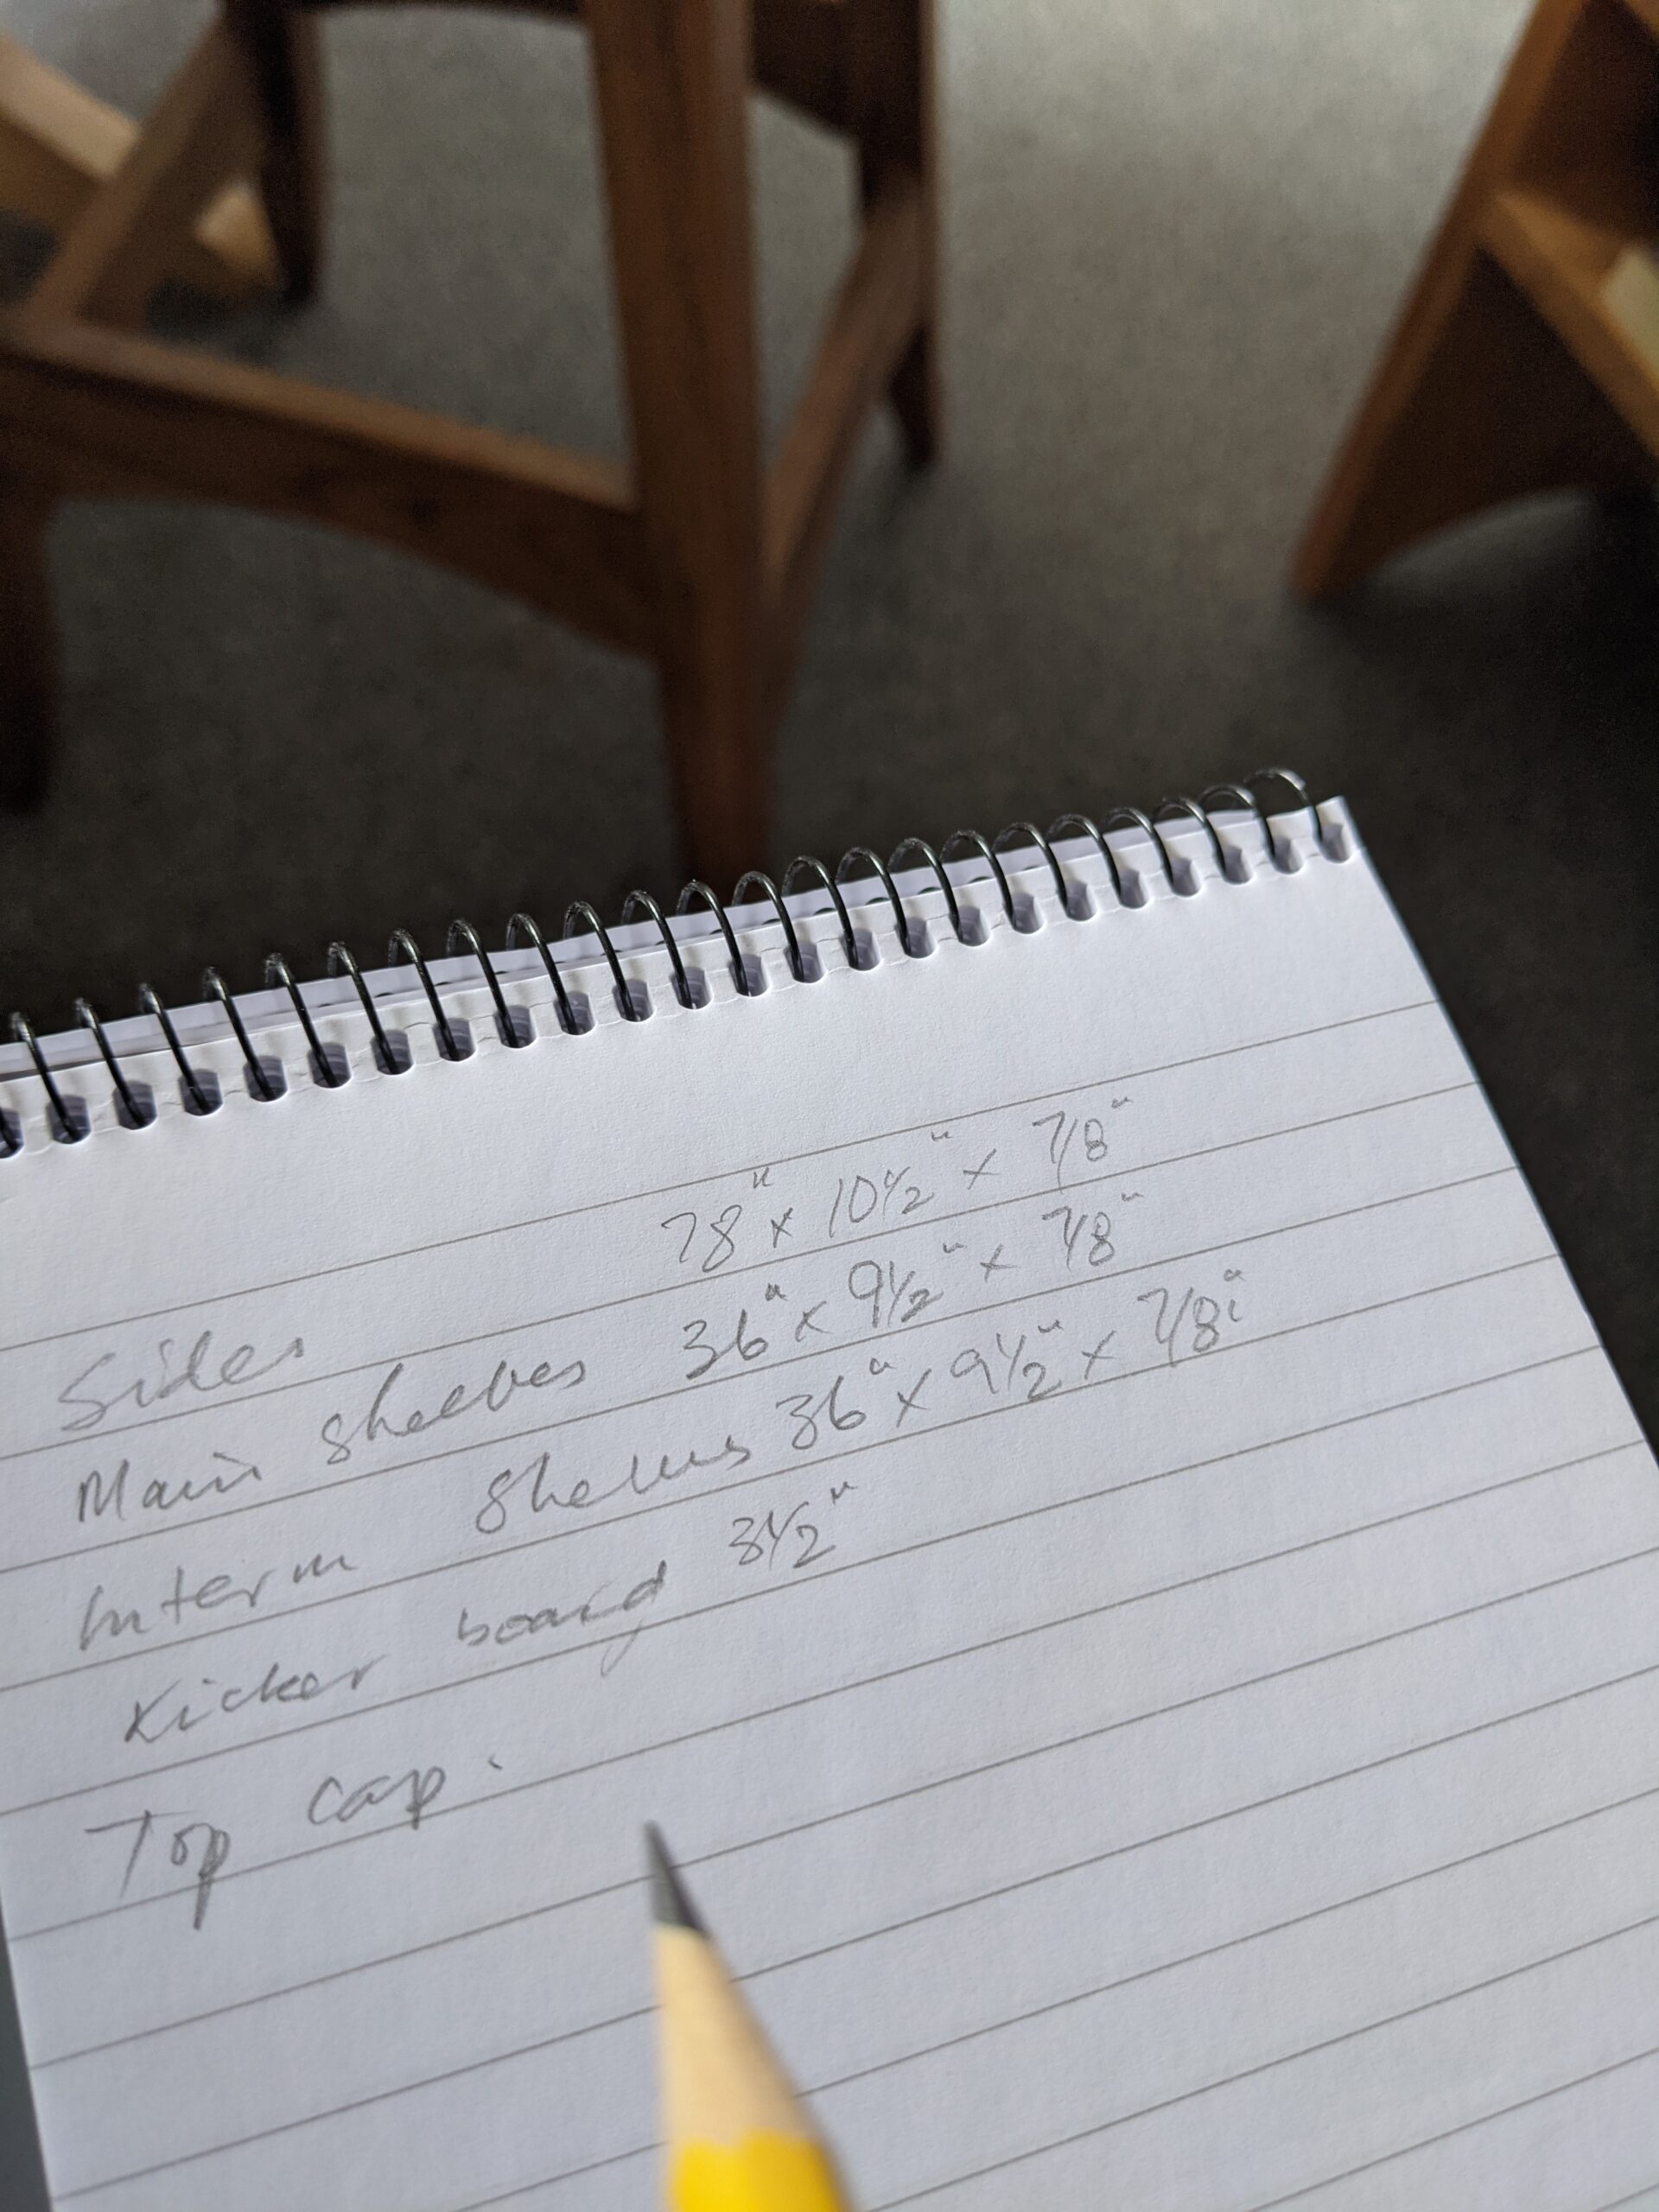
The anticipation of making can crowd in on the need for careful choices. The steps I take save me time all the time. My cutting list comes from the drawings, no matter how rough and incomplete my drawings are. In general, I cut my pieces a little long, by an inch or so, but always judiciously because cutting less generously might just give me two lengths rather than only one.
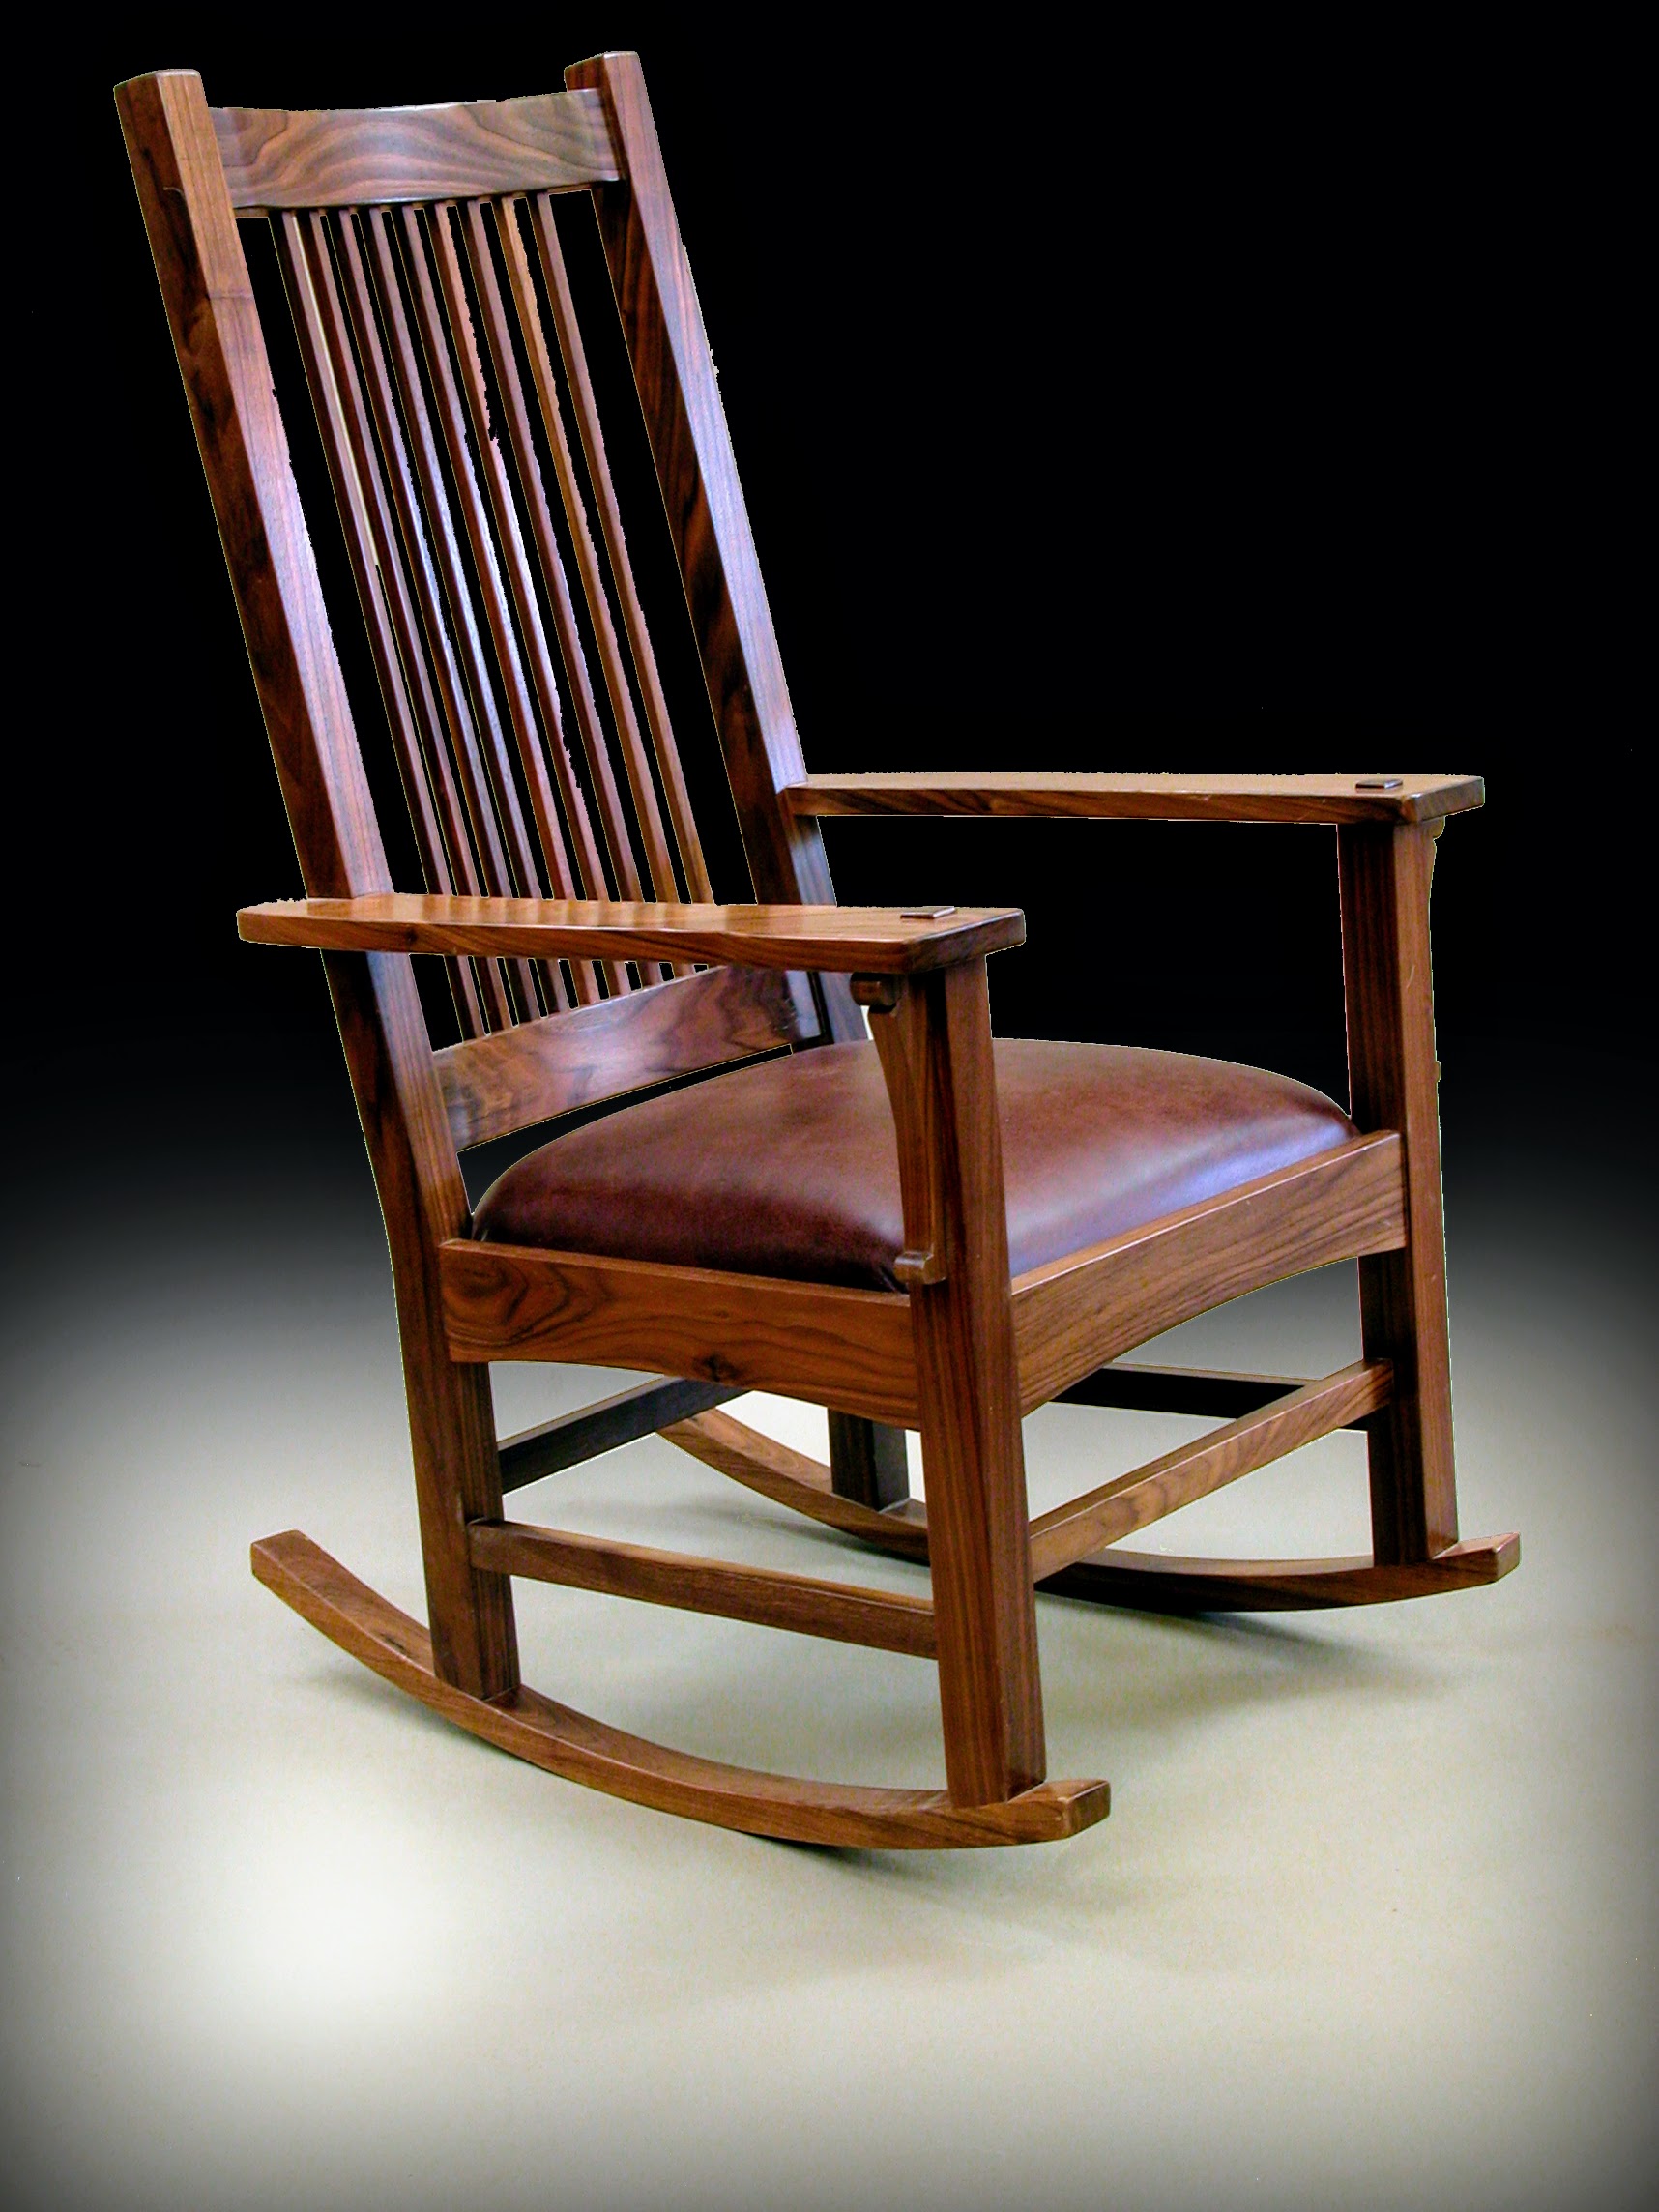
It's hard to generalise or suggest that every cut to every board can be planned before the cuts take place, but in essence that is mostly what I do so as not to waste wood and at the same time cut down on wasting energy and time. Considering the different projects we make governs our decisions because some projects can be made from thinner and narrower stock, where others need wide boards and panels. It may not be obvious, but chairs in general, for instance, are made from short and small-sectioned components with the longest being the back posts no more than say 48" long. Everything else will usually be less than 20" long, no wider than 4" and less than an inch or so thick, with leg stock coming from 1 3/4" stock. Because of this, chairs are just about the easiest furniture pieces to cater to with regards to wood. The wood for chairs is the least demanding because of this too. Imagine, a whole rocking chair like this can come from no more than a single 8-foot length of 2" stock, 8 inches wide and an 8 footer of 1" thick stock, 8 inches wide.
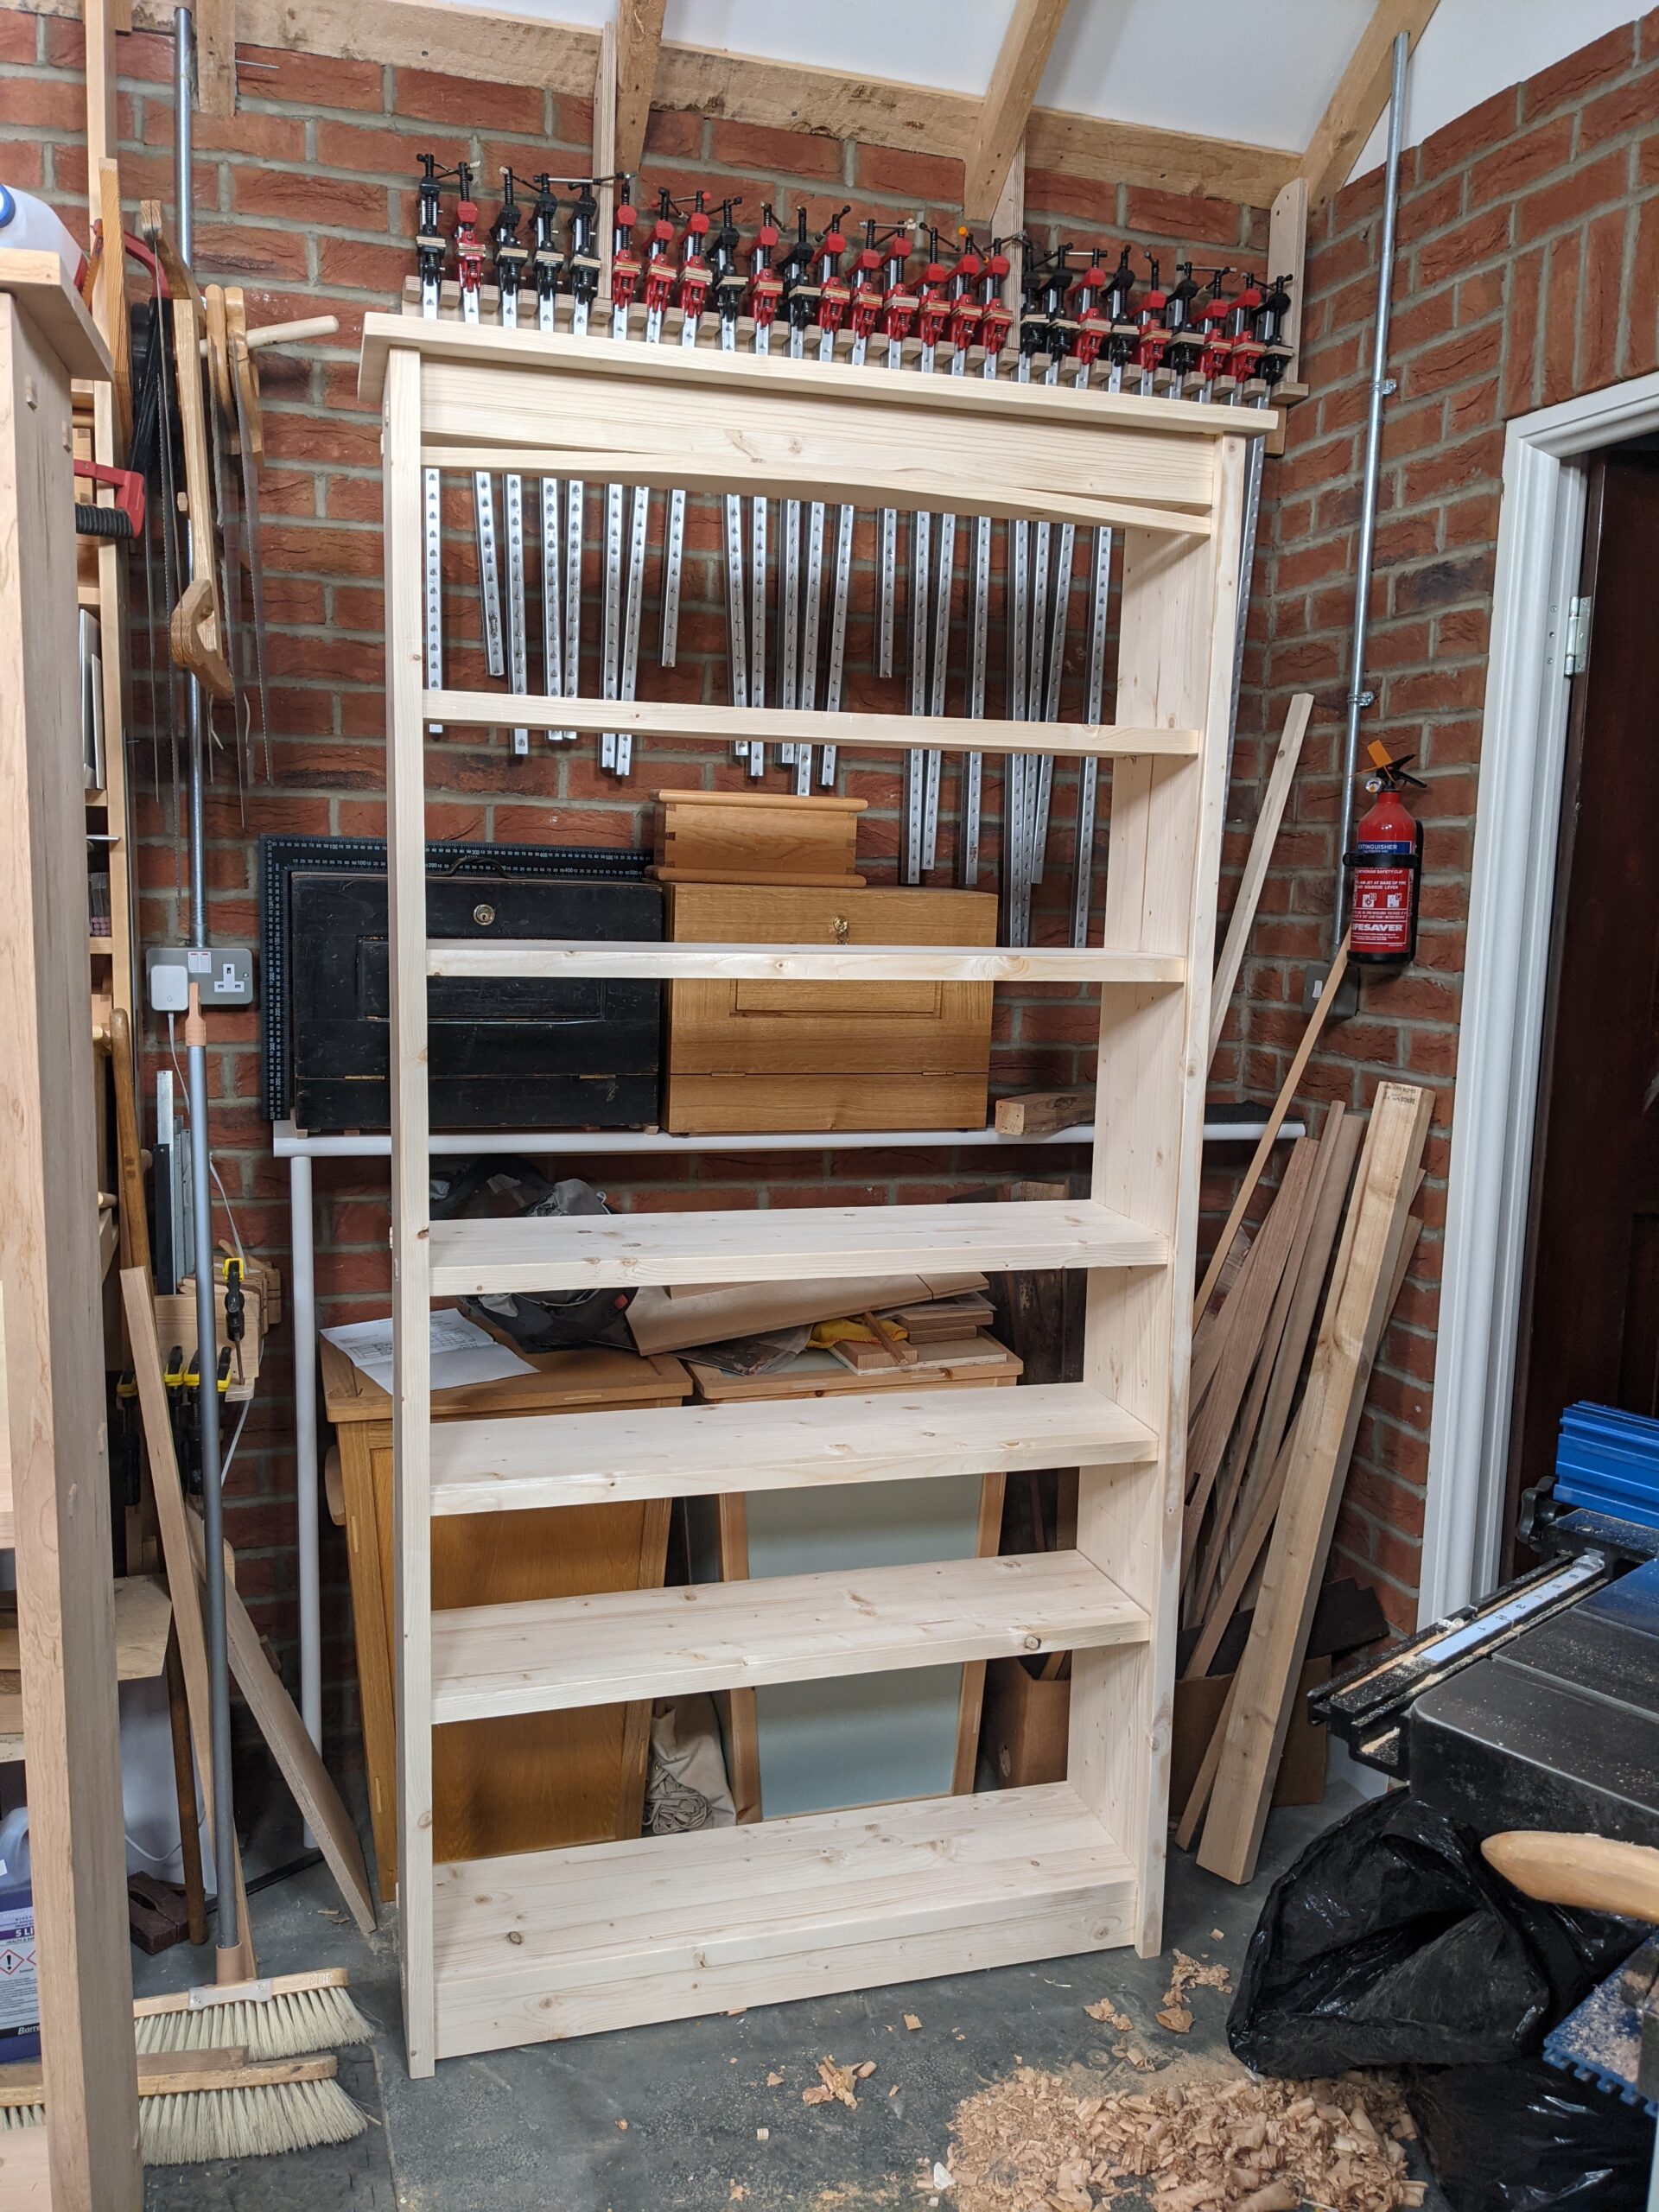
A bookcase and a dining table or bed, on the other hand, takes four times as much stock and wide panels must have the grain carefully selected for colour, grain configuration and much more before we can set too on the joinery. Comparing the two, frame construction and carcass work, we begin to see differences in our choices and our decision-making. Some carcass construction, much of it, will be made up from a series of frames. This means cutting wider boards down to narrow stock to make the frames and then within those frames the housing of our wider panels. The frames take time to make whereas widened boards, as in my bookcase here, come readily from glue-ups and long-grain edging. Most tables are a combination of wide panels such as for a tabletop and frames as in legs and aprons. These considerations affect our decision-making. Why? Ask any maker what concerns them most in the delivery of a piece of furniture and the likely answer will be splitting or separation as a result of shrinkage, twisting as a result of atmospheric changes surrounding the finished work and perhaps swelling due to a more humid environment occurring, be that permanent or seasonal. To minimise these possibilities we must do all that we can before the joinery work commences.
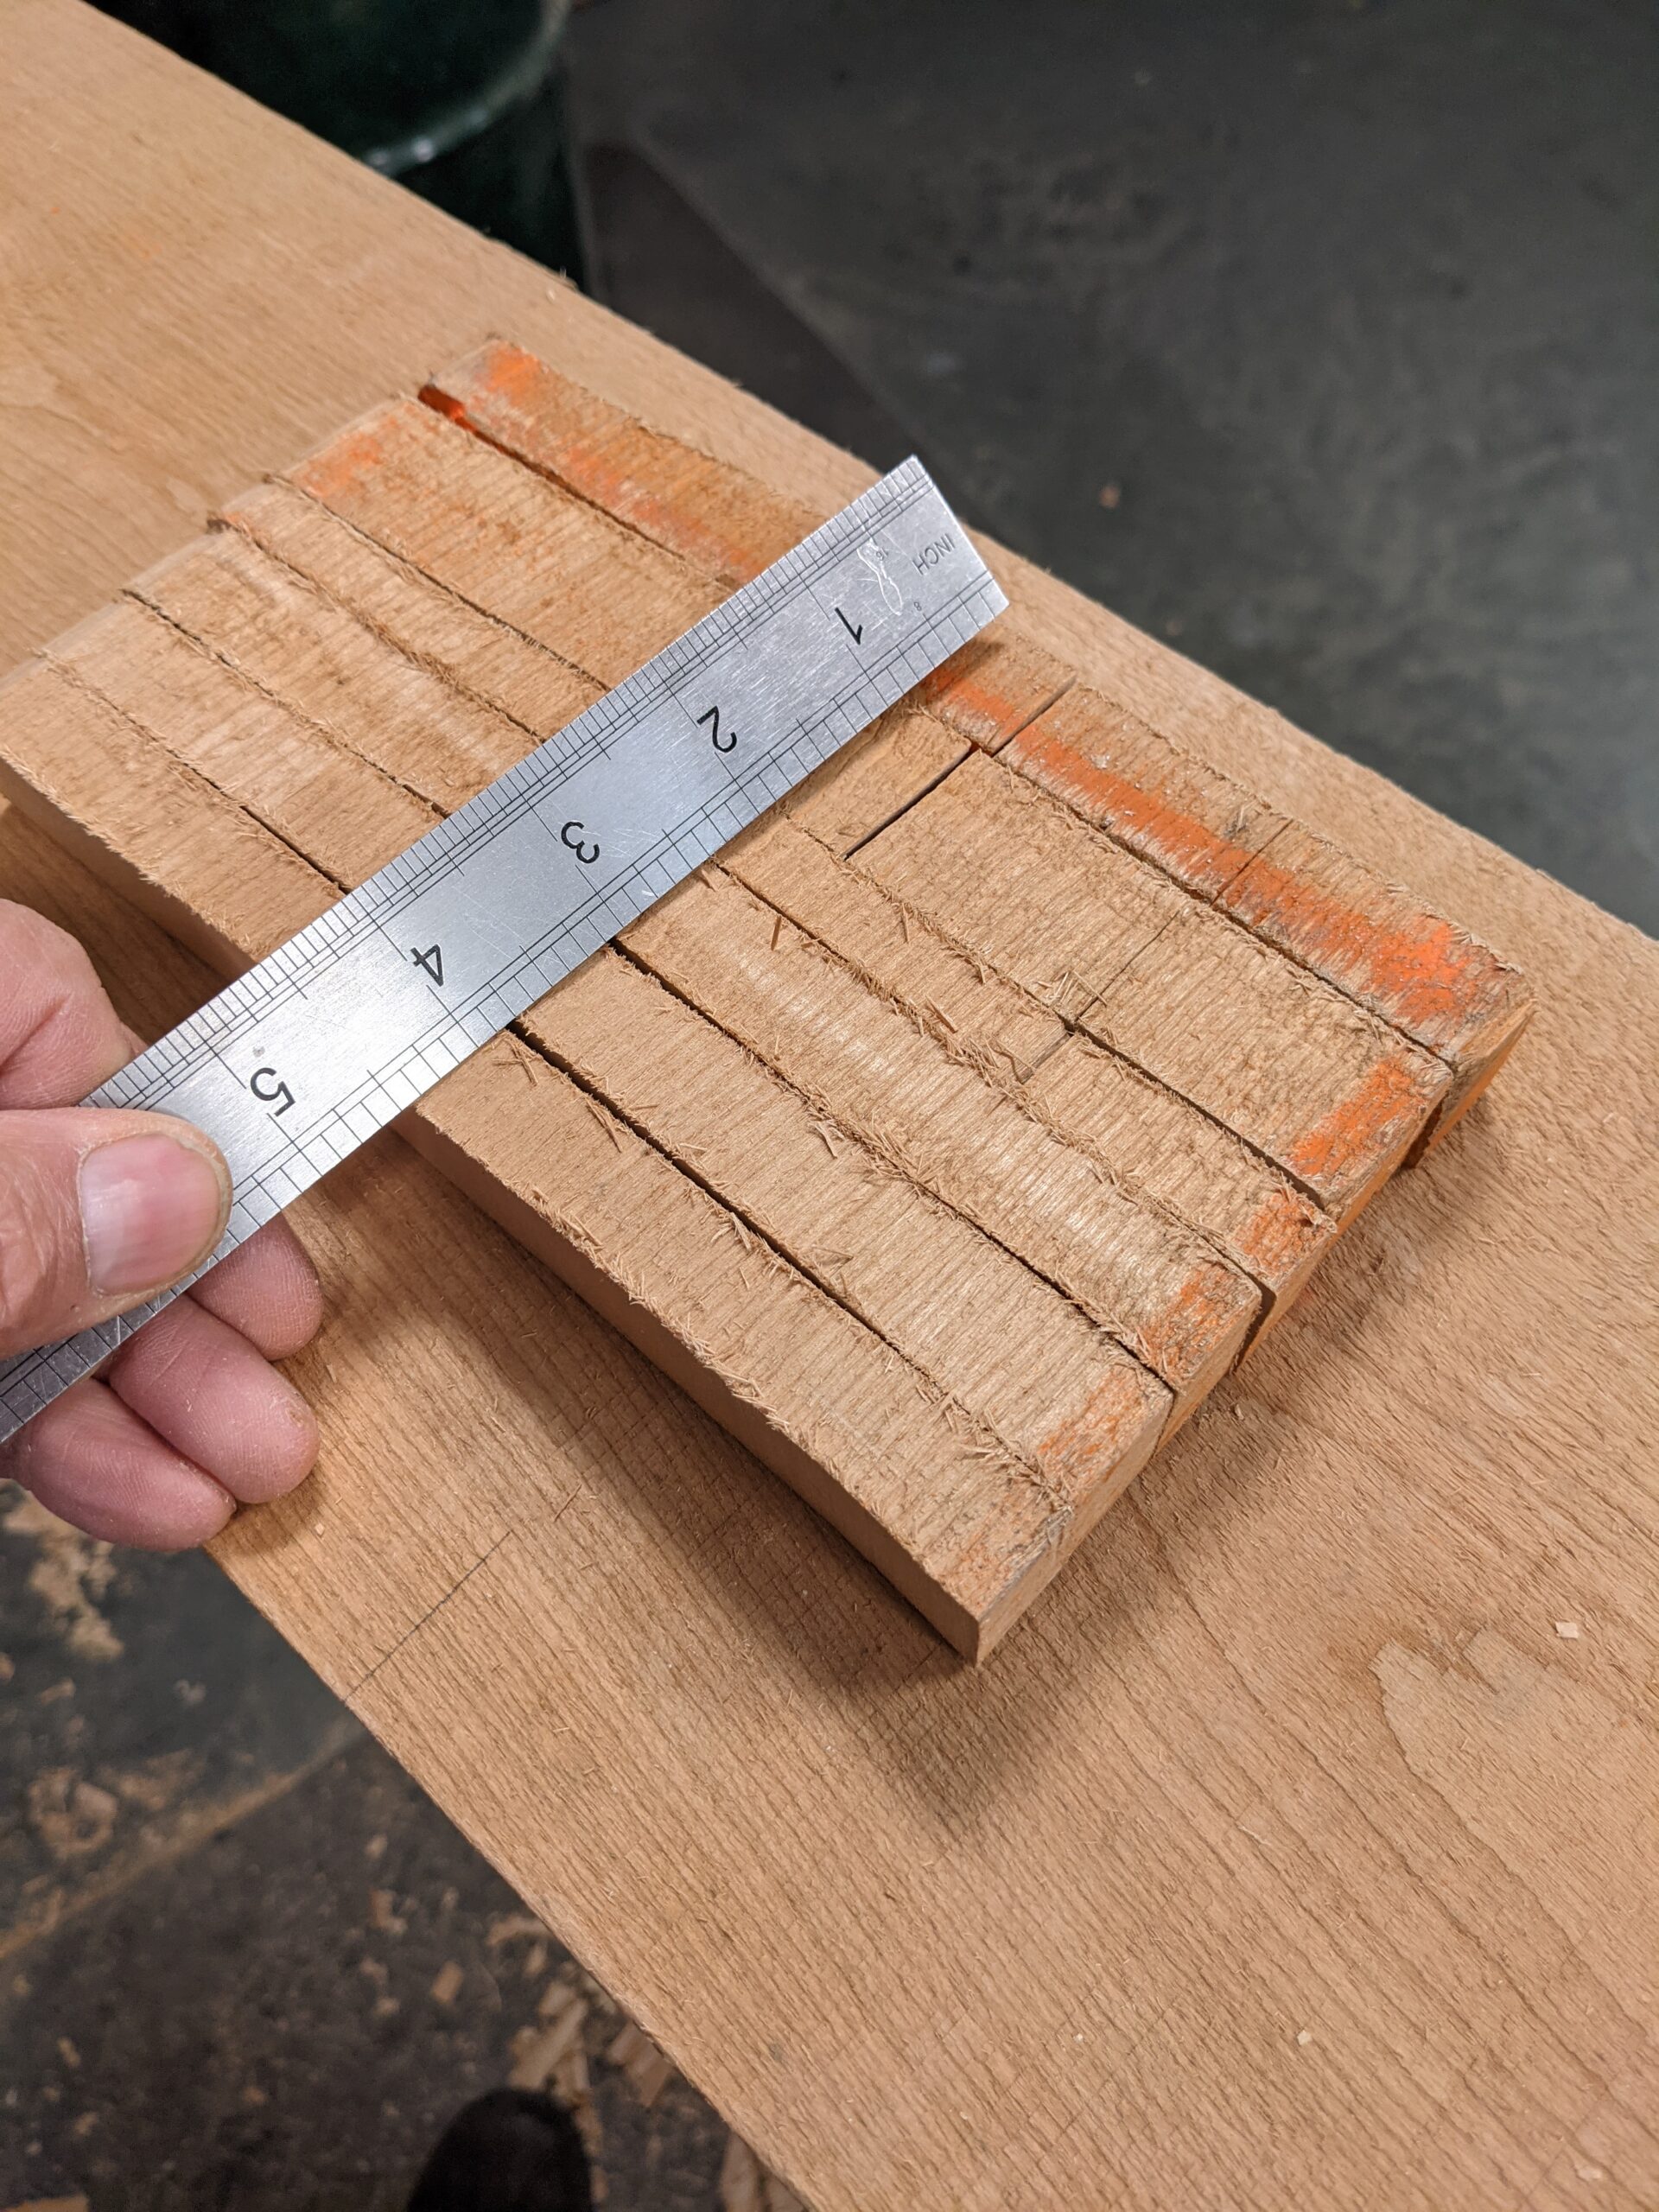
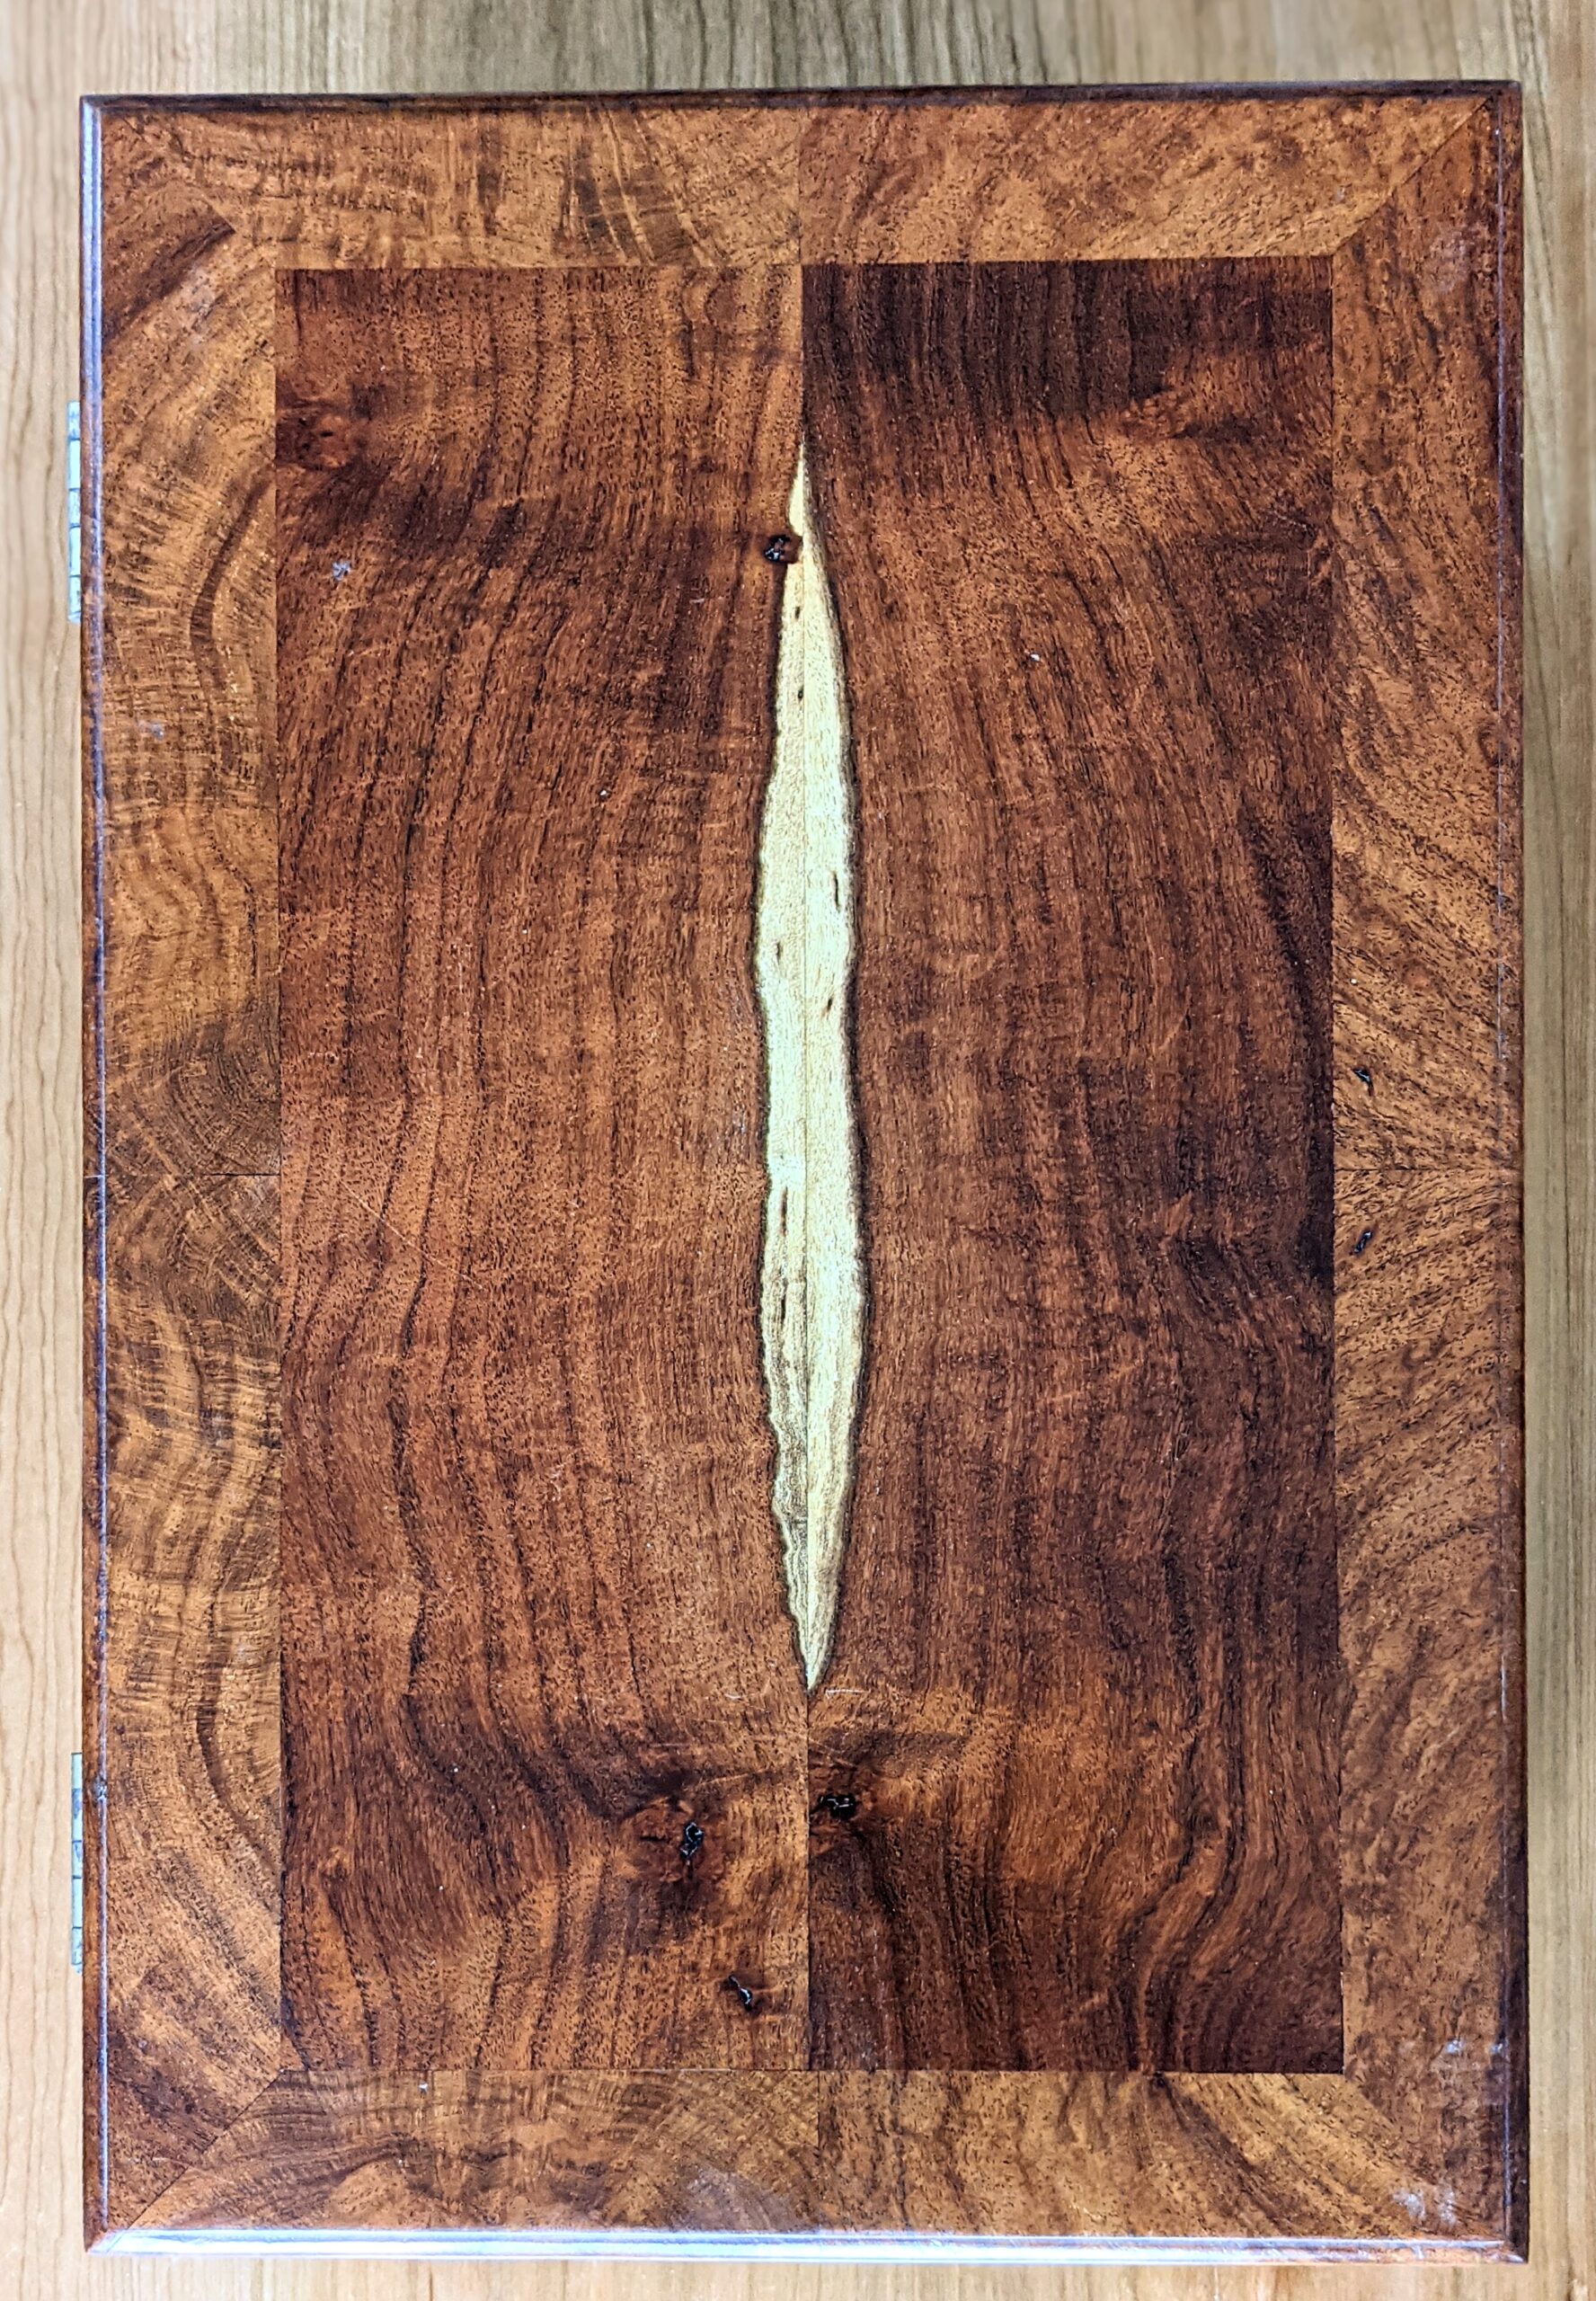
So here we arrive at the workbench with two sawhorses and a handsaw, a drawing and our cutting list. I flip, twist and turn my boards end for end and consider the longest and biggest pieces in the project first. Once cut to length, I cannot change my mind whereas wrong cuts in width can always be added to. No such luxury exists for length cuts and as George, my mentoring craftsman once said, you cannot plait sawdust. 8" wide boards always seem the most convenient size in width to me. Wider boards are harder to interface with using hand planes and usually I end up cutting them down in width anyway. My first cuts begin with crosscutting near to the ends of my boards with the obvious one removing any evidential cracks or checking. Oftentimes, nothing is showing, but flexing the 1" long cut-off can reveal a weak point resulting in splits after a project is completed. Below is an example in this cherry board where as soon as the board is cut from the main piece the offcut sample separates without any pressure. I take off another section and the wood does the same. In this case, I make six cuts before I reach solid wood and I lose 4 1/2" of material. On many occasions, what seemed to be a clear and solid board, where I planned to get two sections from a length, I have found weaknesses near the ends that meant I got only one that I could use.
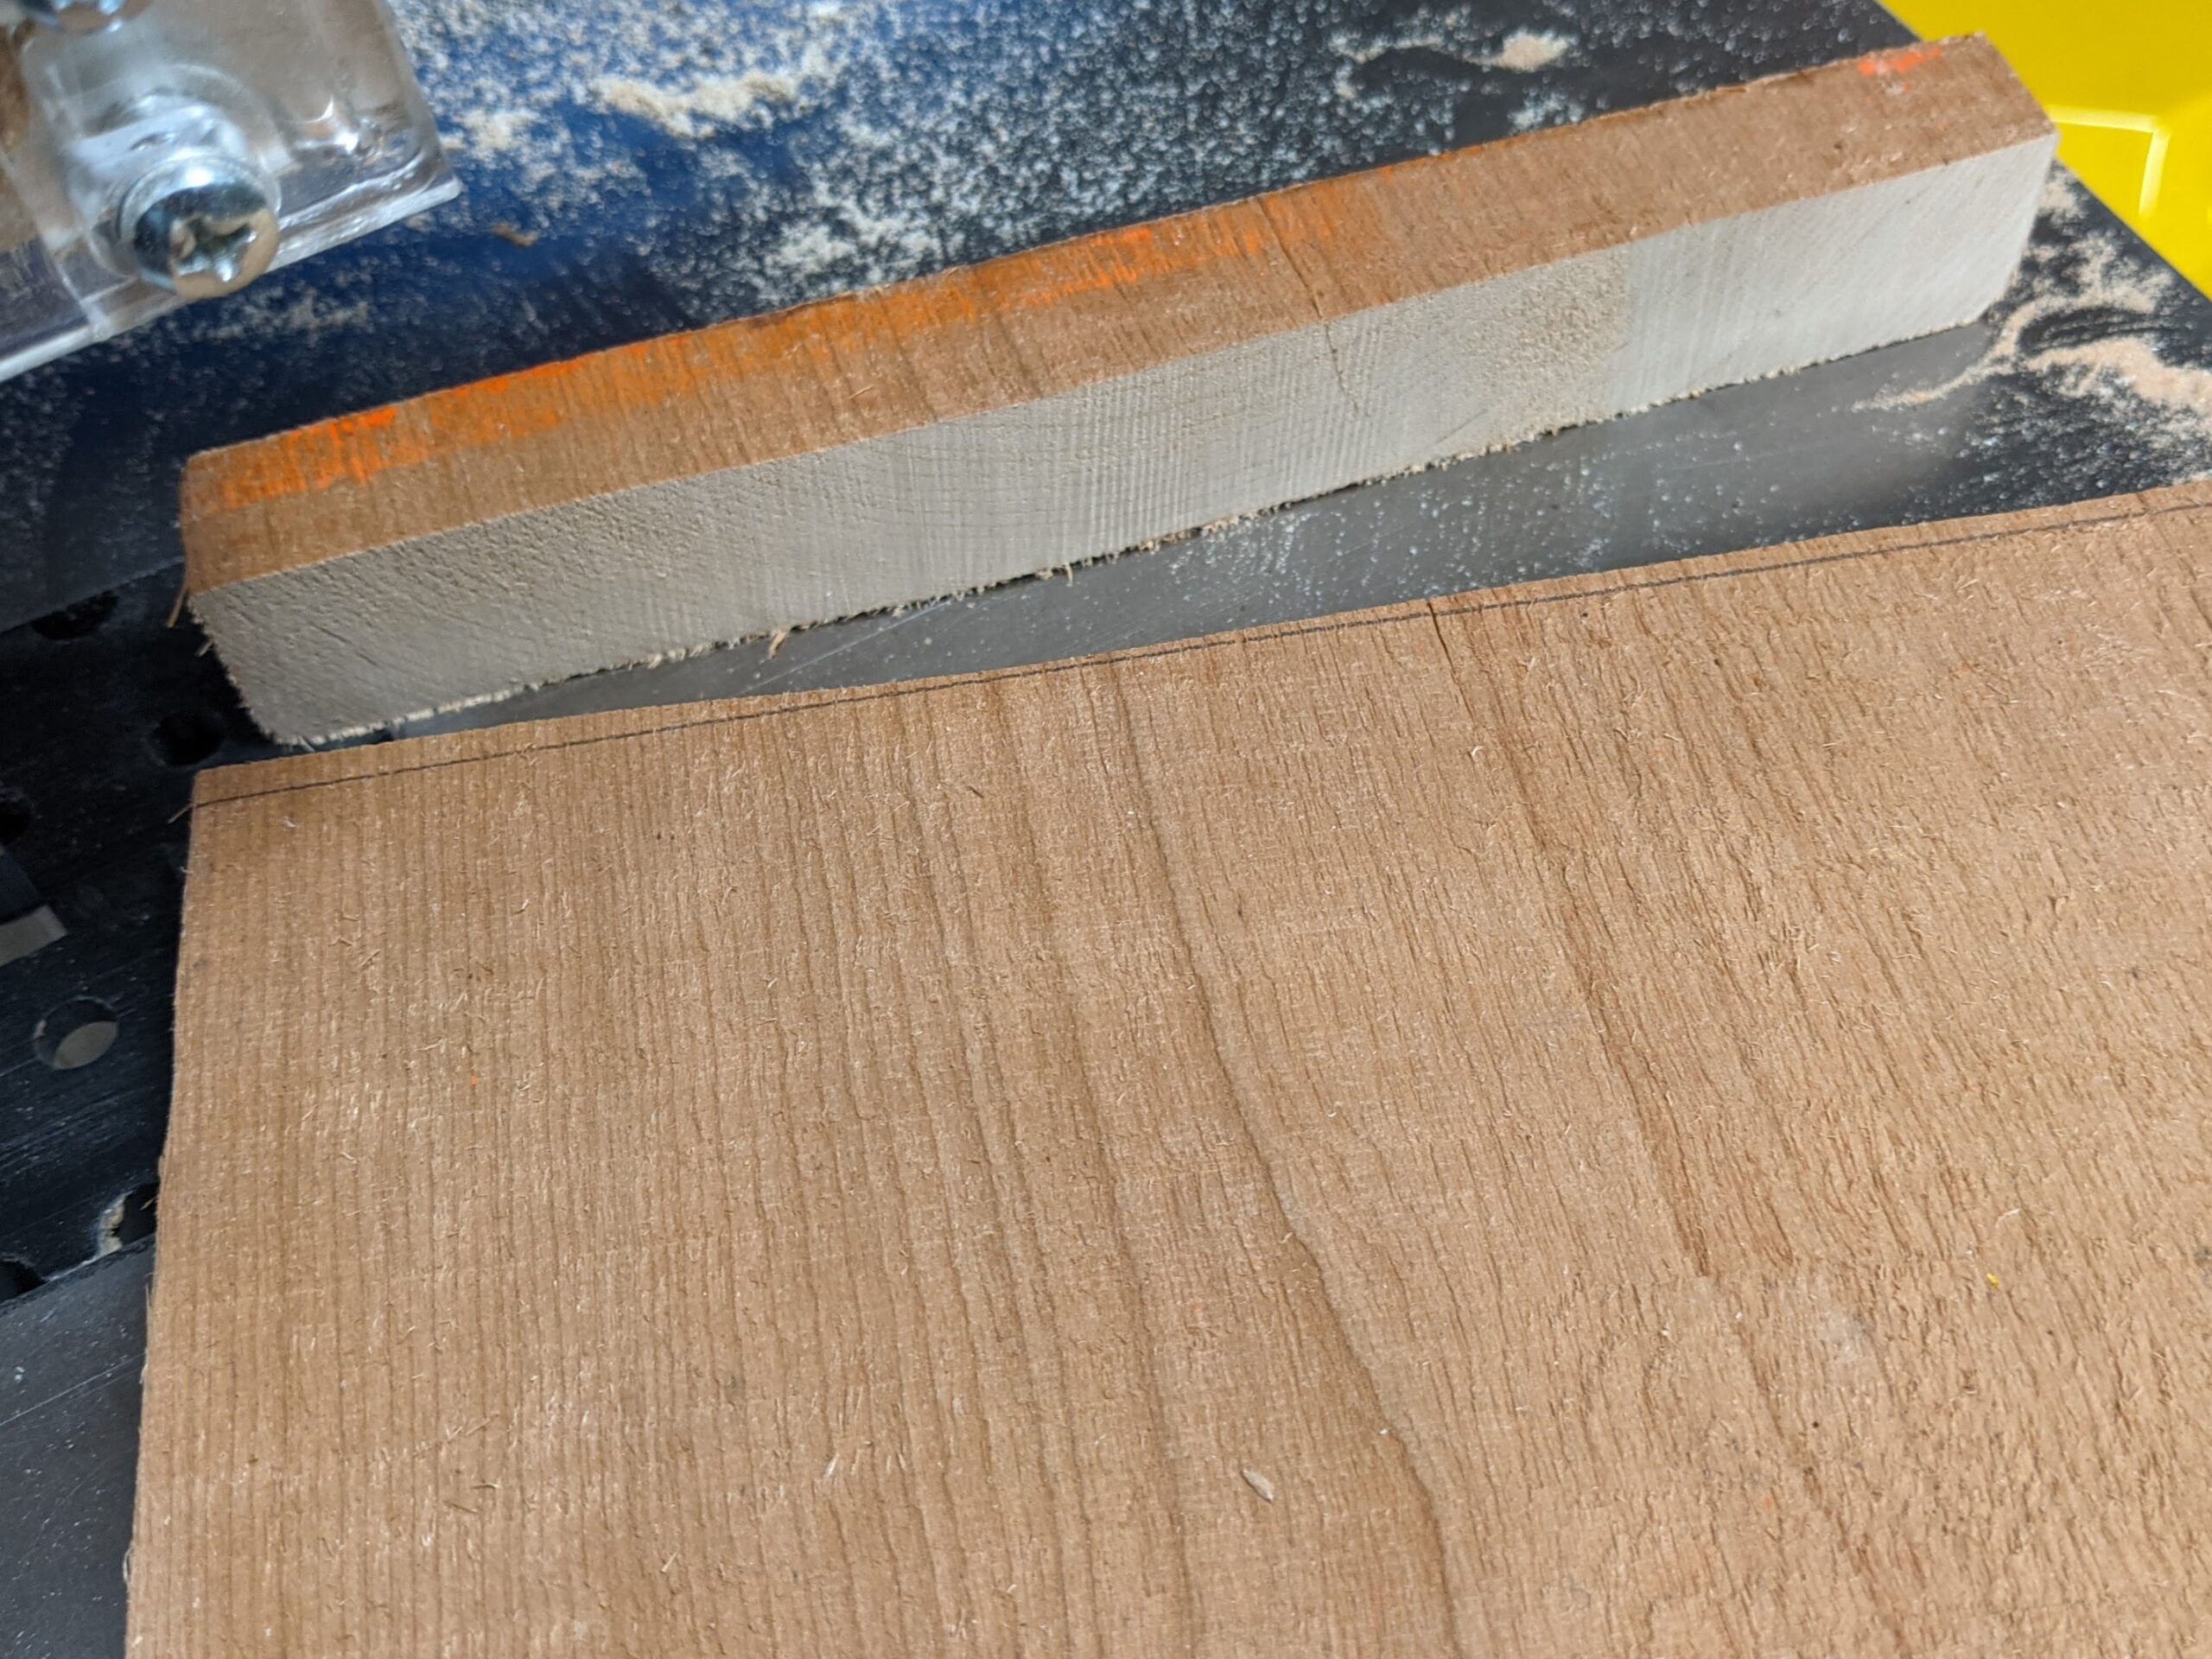
The lottery of picking out our precious wood becomes less chancey as we mature in our knowledge - such knowledge that can only truly be acquired and stored in the brain by the experience we gain in actually going to the timberyard. Even at the suppliers, I still take wood that I know has small checking at the ends because it is more the rarity to find wood without them. Even a major crack does not mean rejection either, often we can cut around cracks and have good wood to work with. With the wood back at the shop, I must begin the selection and test my choices. In this case, the wood literally self-parted at two points as shown.
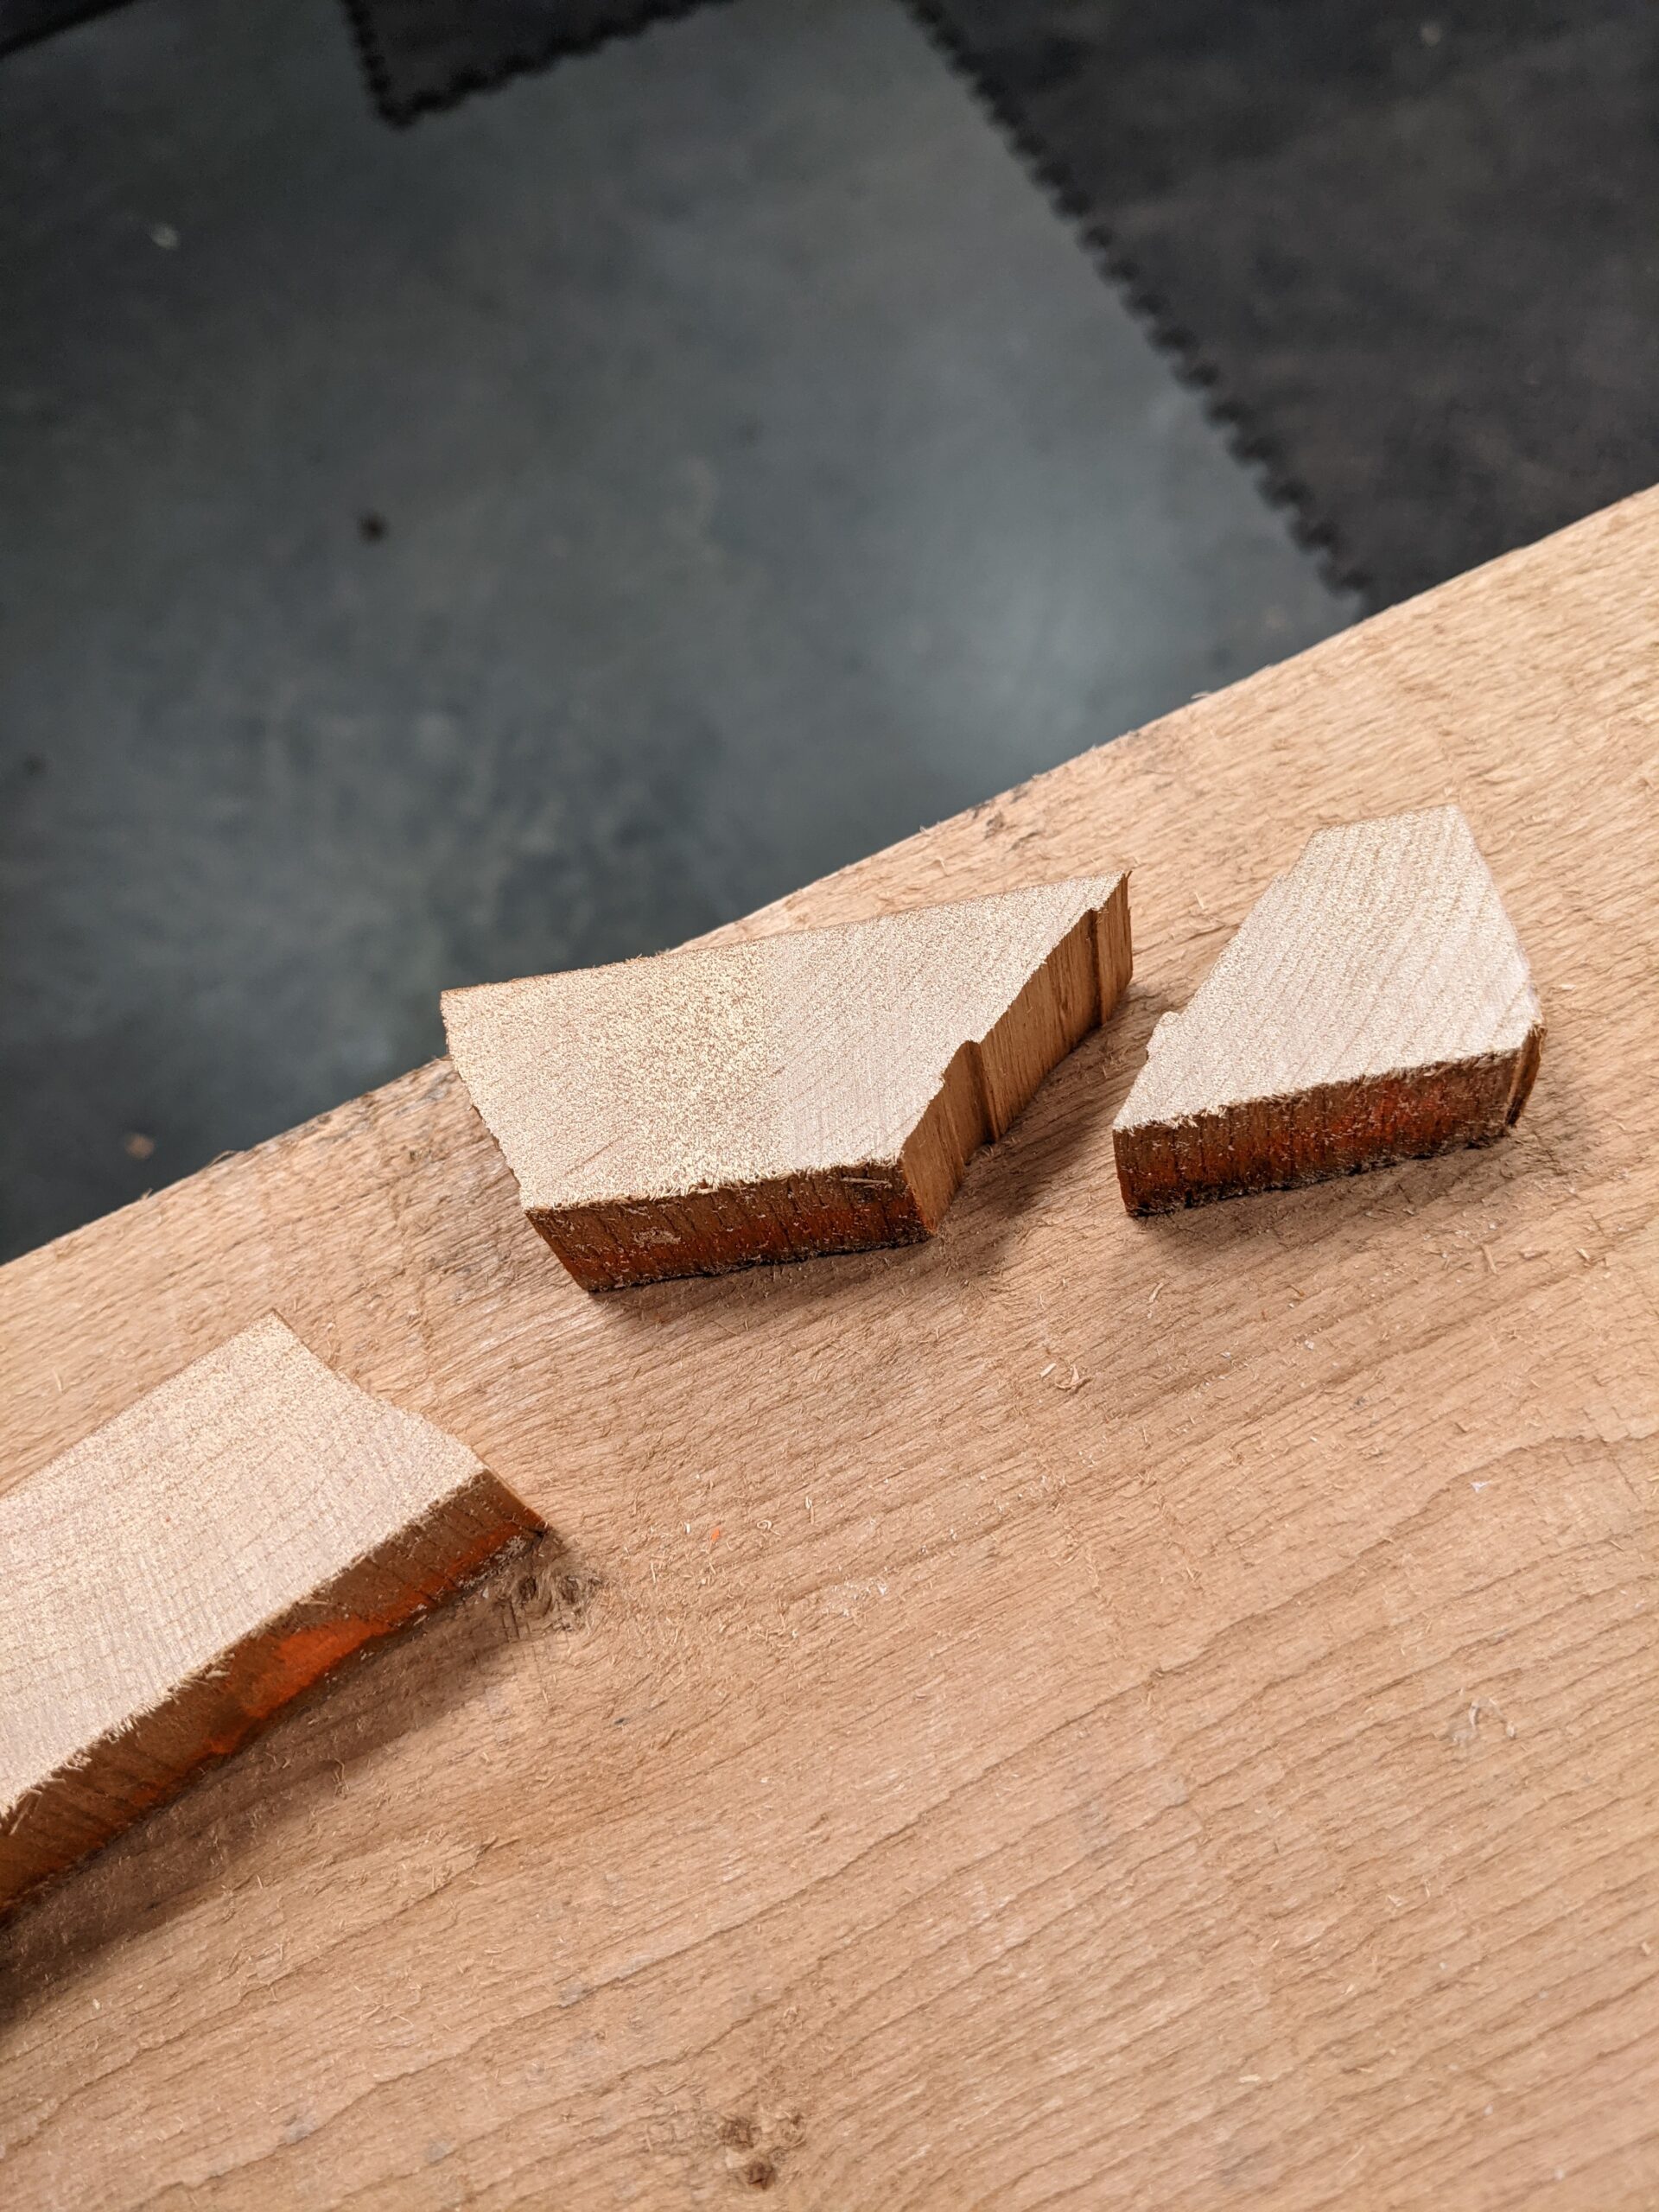
After the first crosscut, I take off further incremental cuts until I get to solid and clear wood, but by then I have lost more and more wood. Only that sixth section is free from any splittability.
My next cut, midlength, is the really important one. It is here that I can take a more accurate meter reading to get nearer to what will be the real moisture levels.
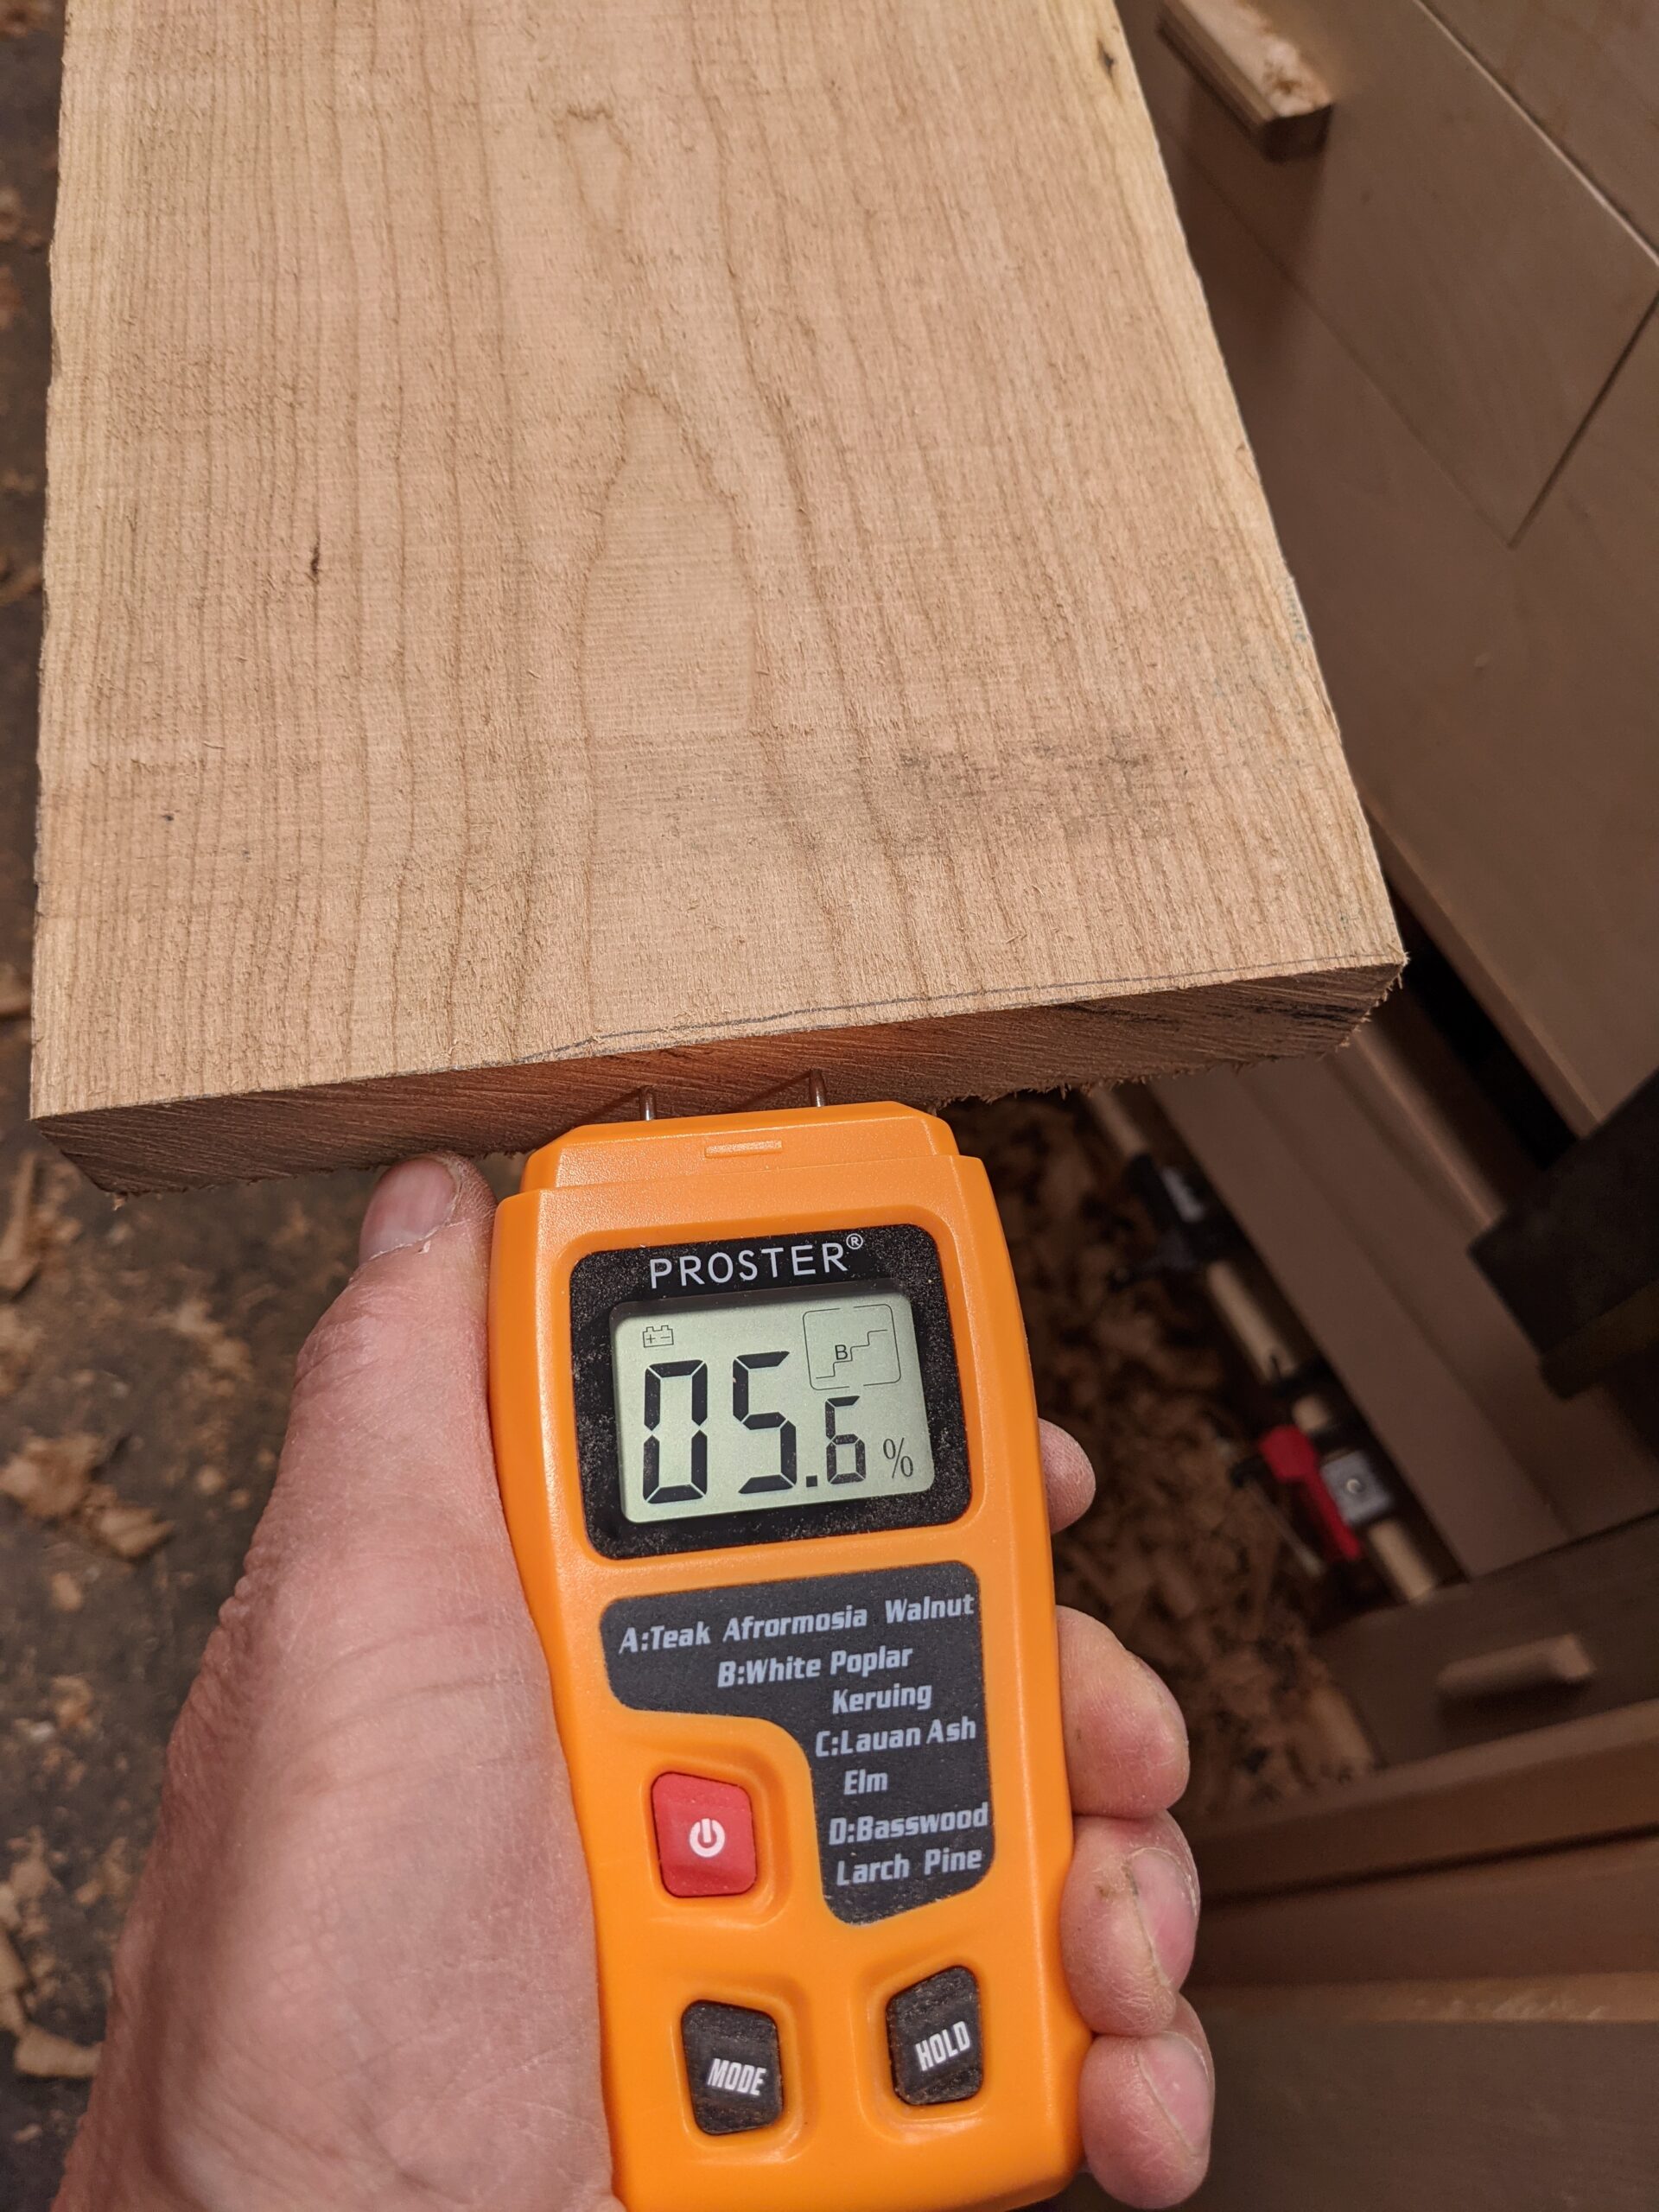
The meter reading here tells me I can forge ahead with impunity knowing I am safe in my choice because the wood I am about to use is dried down to this level. Wood under 10%, is usually unlikely to distort in any way.
The confidence I feel means my next step is safe, but even if the MC (moisture content) is higher I can still continue to cut my wood to the sizes I need, but leave them thicker and wider so as to allow for shrinkage when it happens. The length does not shrink by any noticeable amount in comparison with width, of course, but I generally leave my lengths longer by at least half an inch until I have trued up the lengths close to or right at their finished sizes. Wood for furniture is not generally like wood for construction trade use, even if they are softwoods.
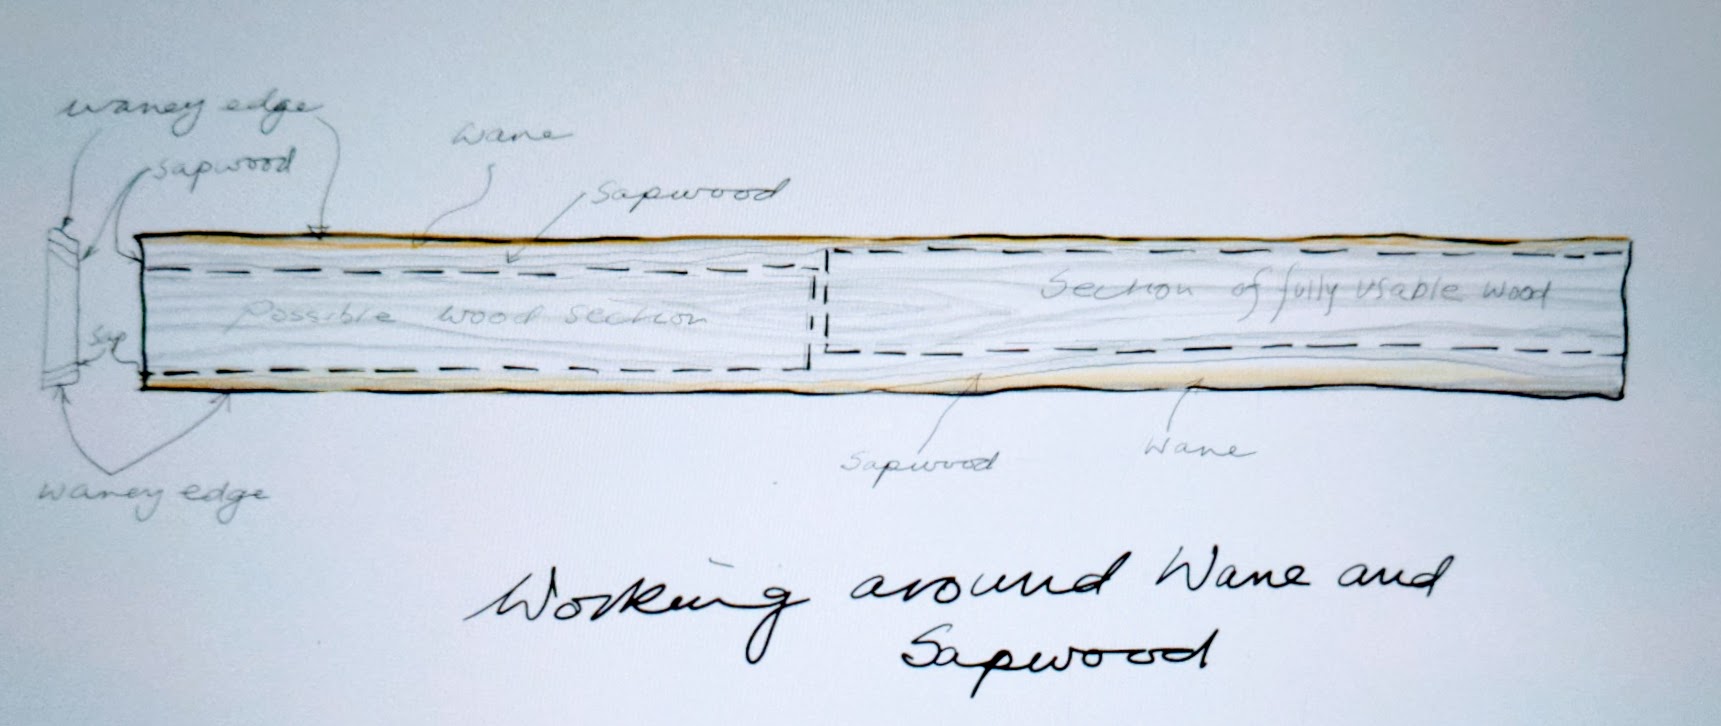
The wood I buy often has a solid square edge with no sapwood showing on that edge. My supplier buys it in that way. The opposite side of the width may well have a narrow band of sapwood I will need to work with and often I can put this to an unseen part of the projects, the underside of a shelf, for instance. In most cases, though, I try to remove all sapwood. In some species, woods like oak, the sapwood texture and workability is different than the heartwood; I can usually always work out my cuts accordingly, if I give it some thought.
Rough-cutting my wood means that I cut wider by 1/4" and thicker too but this is mostly based on my experiential knowledge of the actual species of wood. For the sections I need that are less than 1" thick, I buy 1" material knowing that it will usually not yield a nominal 1" thick piece, though some times it could and does. Generally, I do expect to end up with 7/8" thick pieces, whereas commercial enterprises will expect no more than about 3/4".
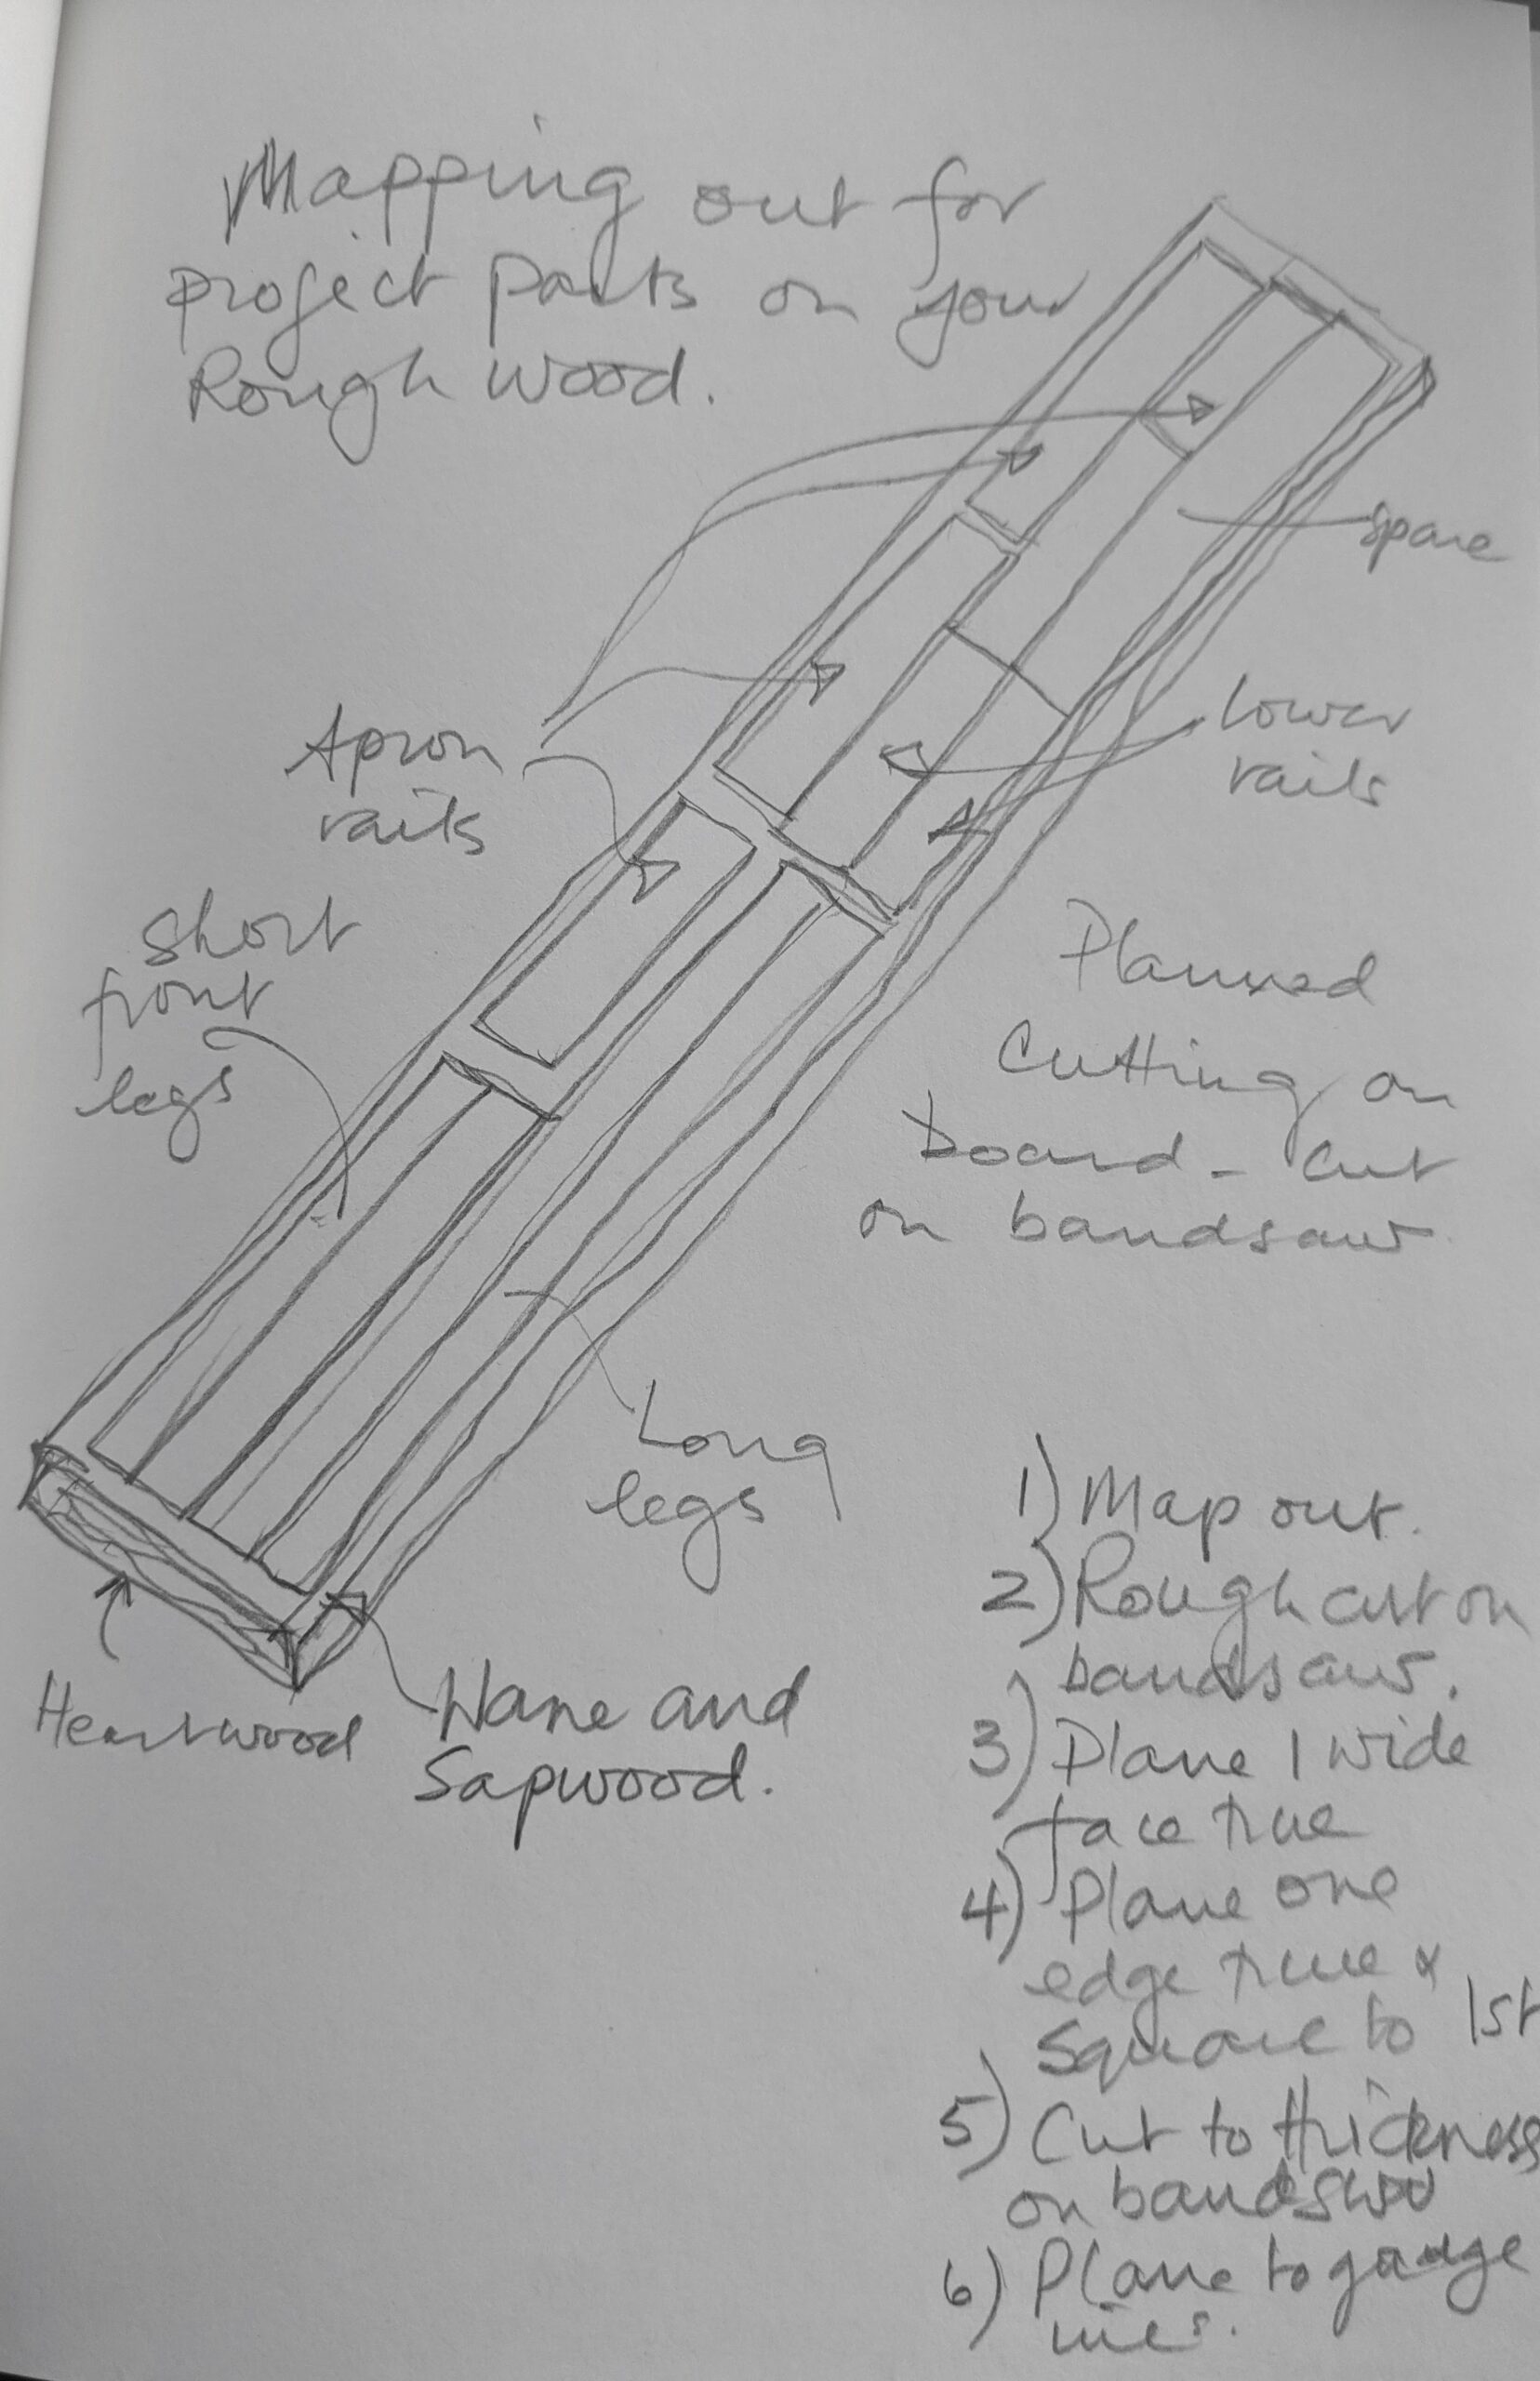
My reason for the fuller thickness? I plot and plan on my board and cut widths down to suit my cutting list.
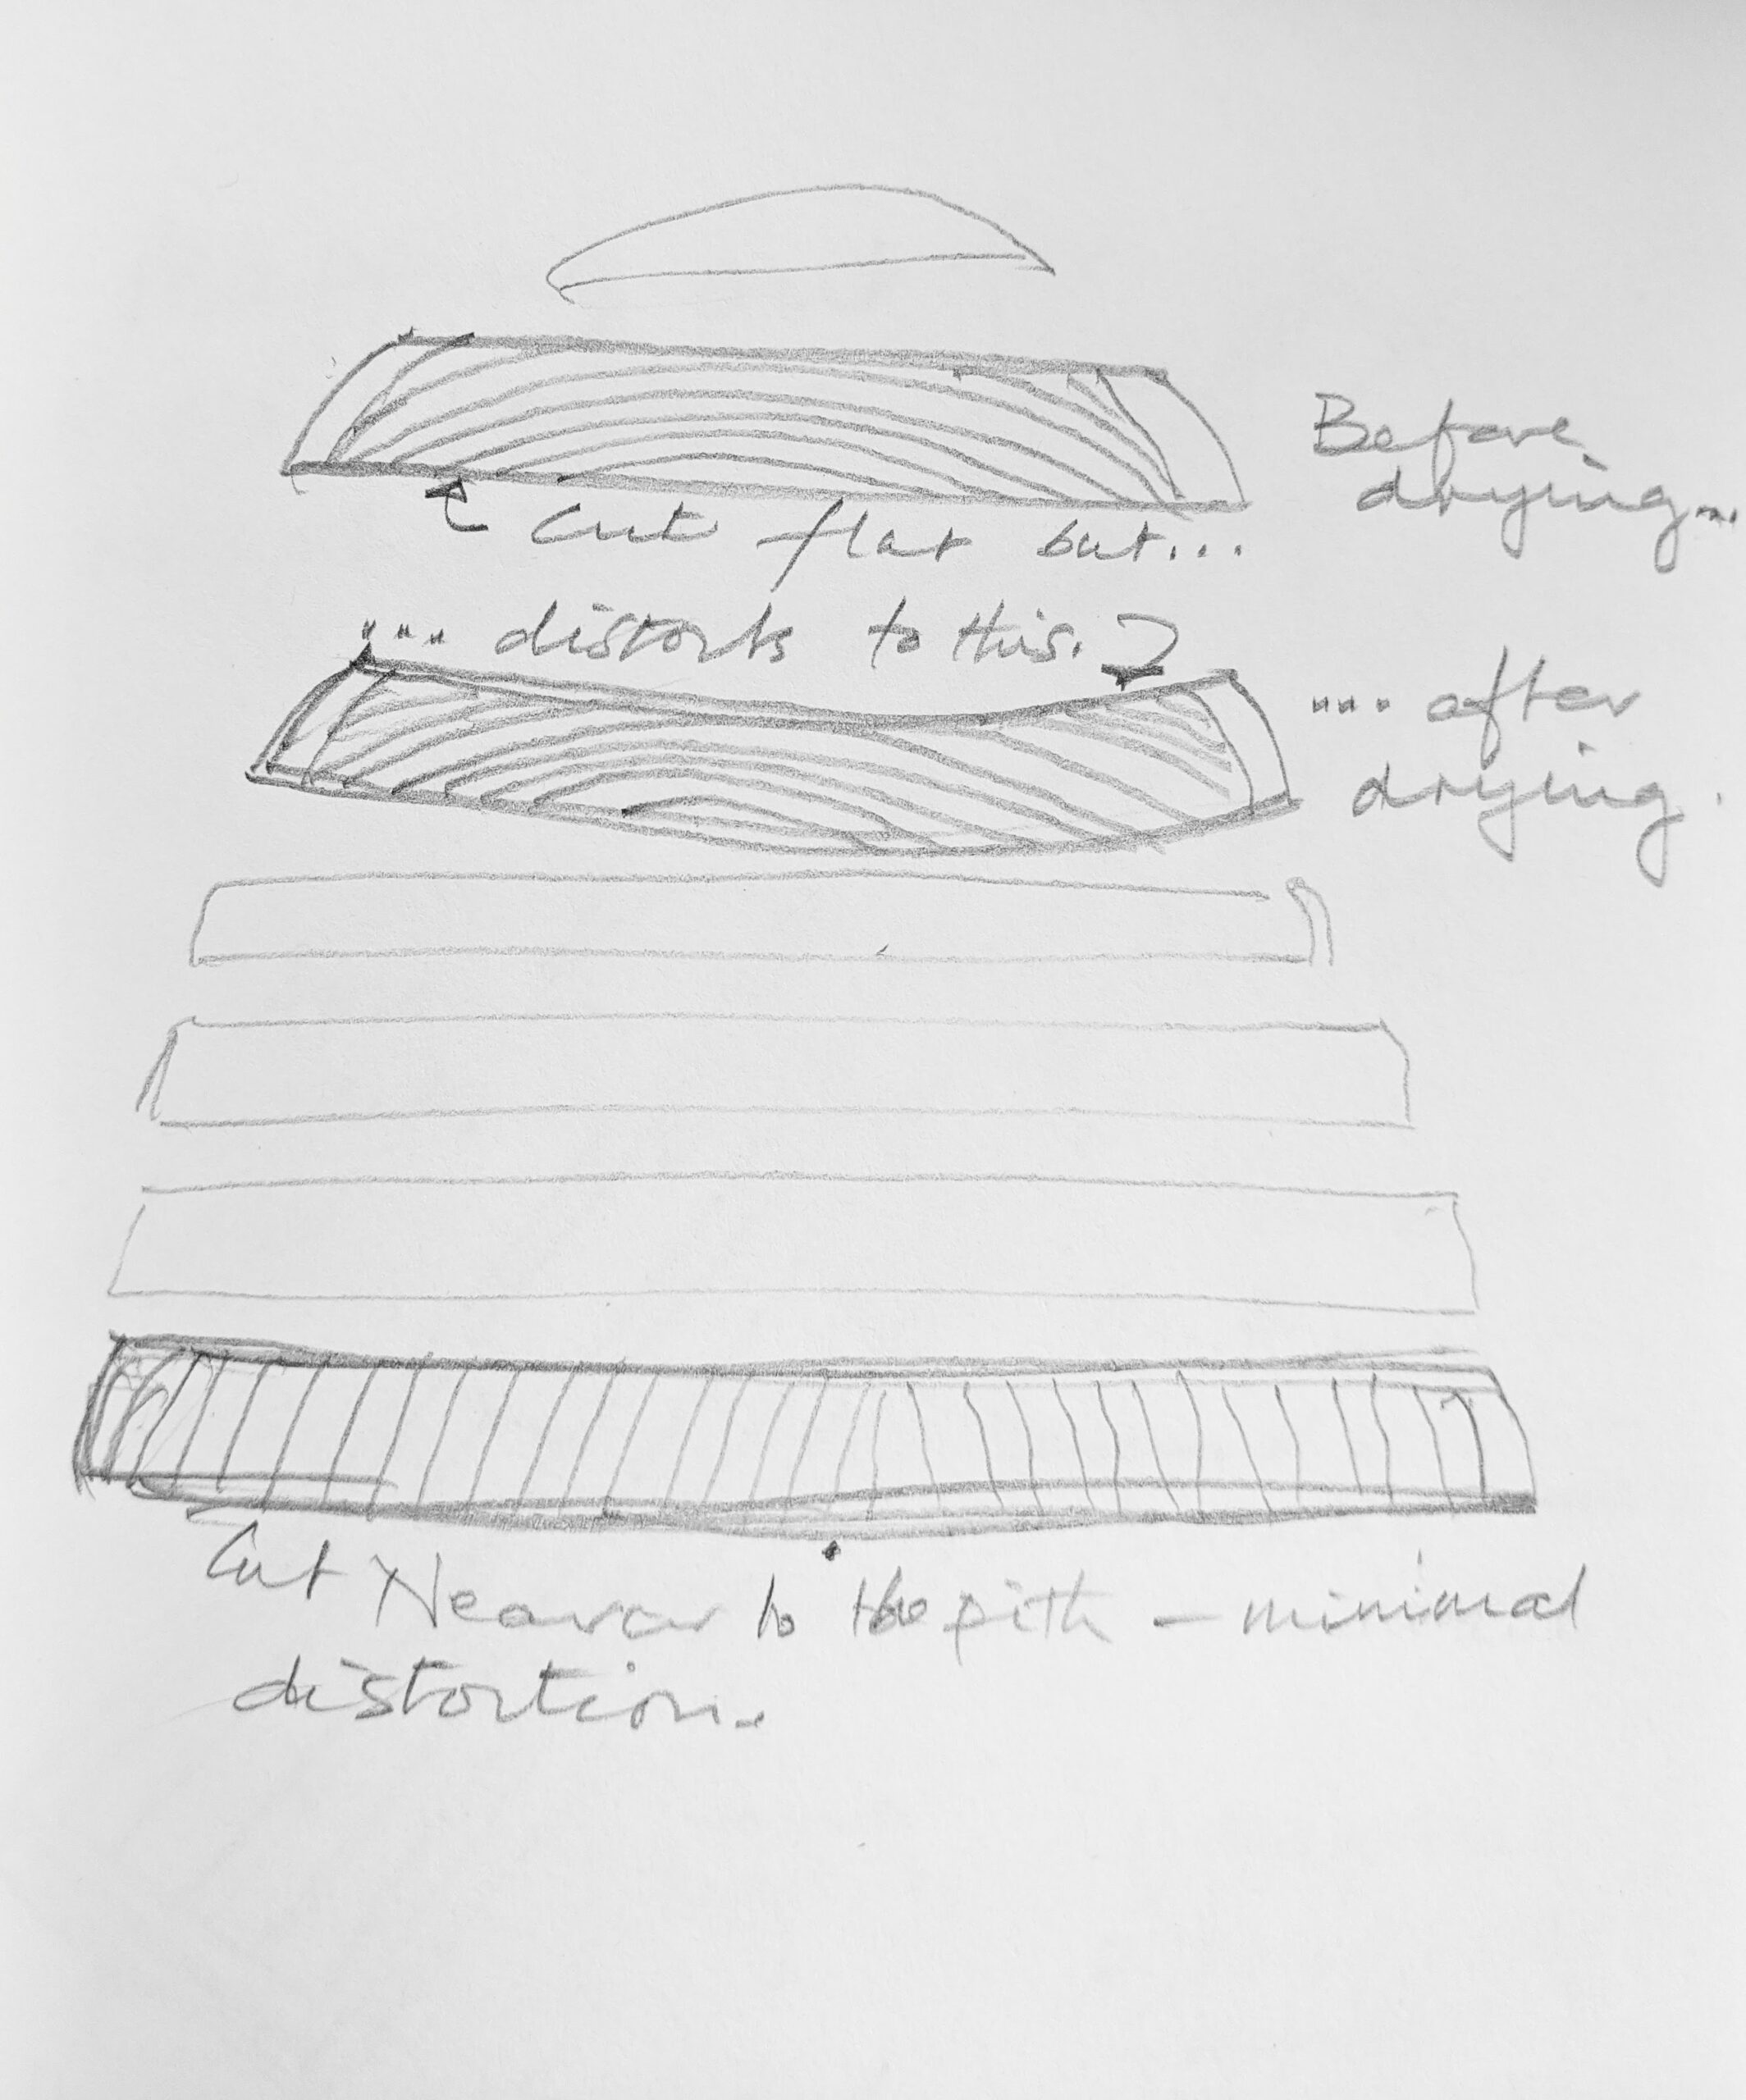
Cupped boards will yield economic cuts if you rough-cut to width and length first. Even better if a board is cupped considerably and you are prepared to rip cut and reglue the two parts back together after planing and truing. I am always happy to do this as it takes so little effort with a guaranteed outcome.
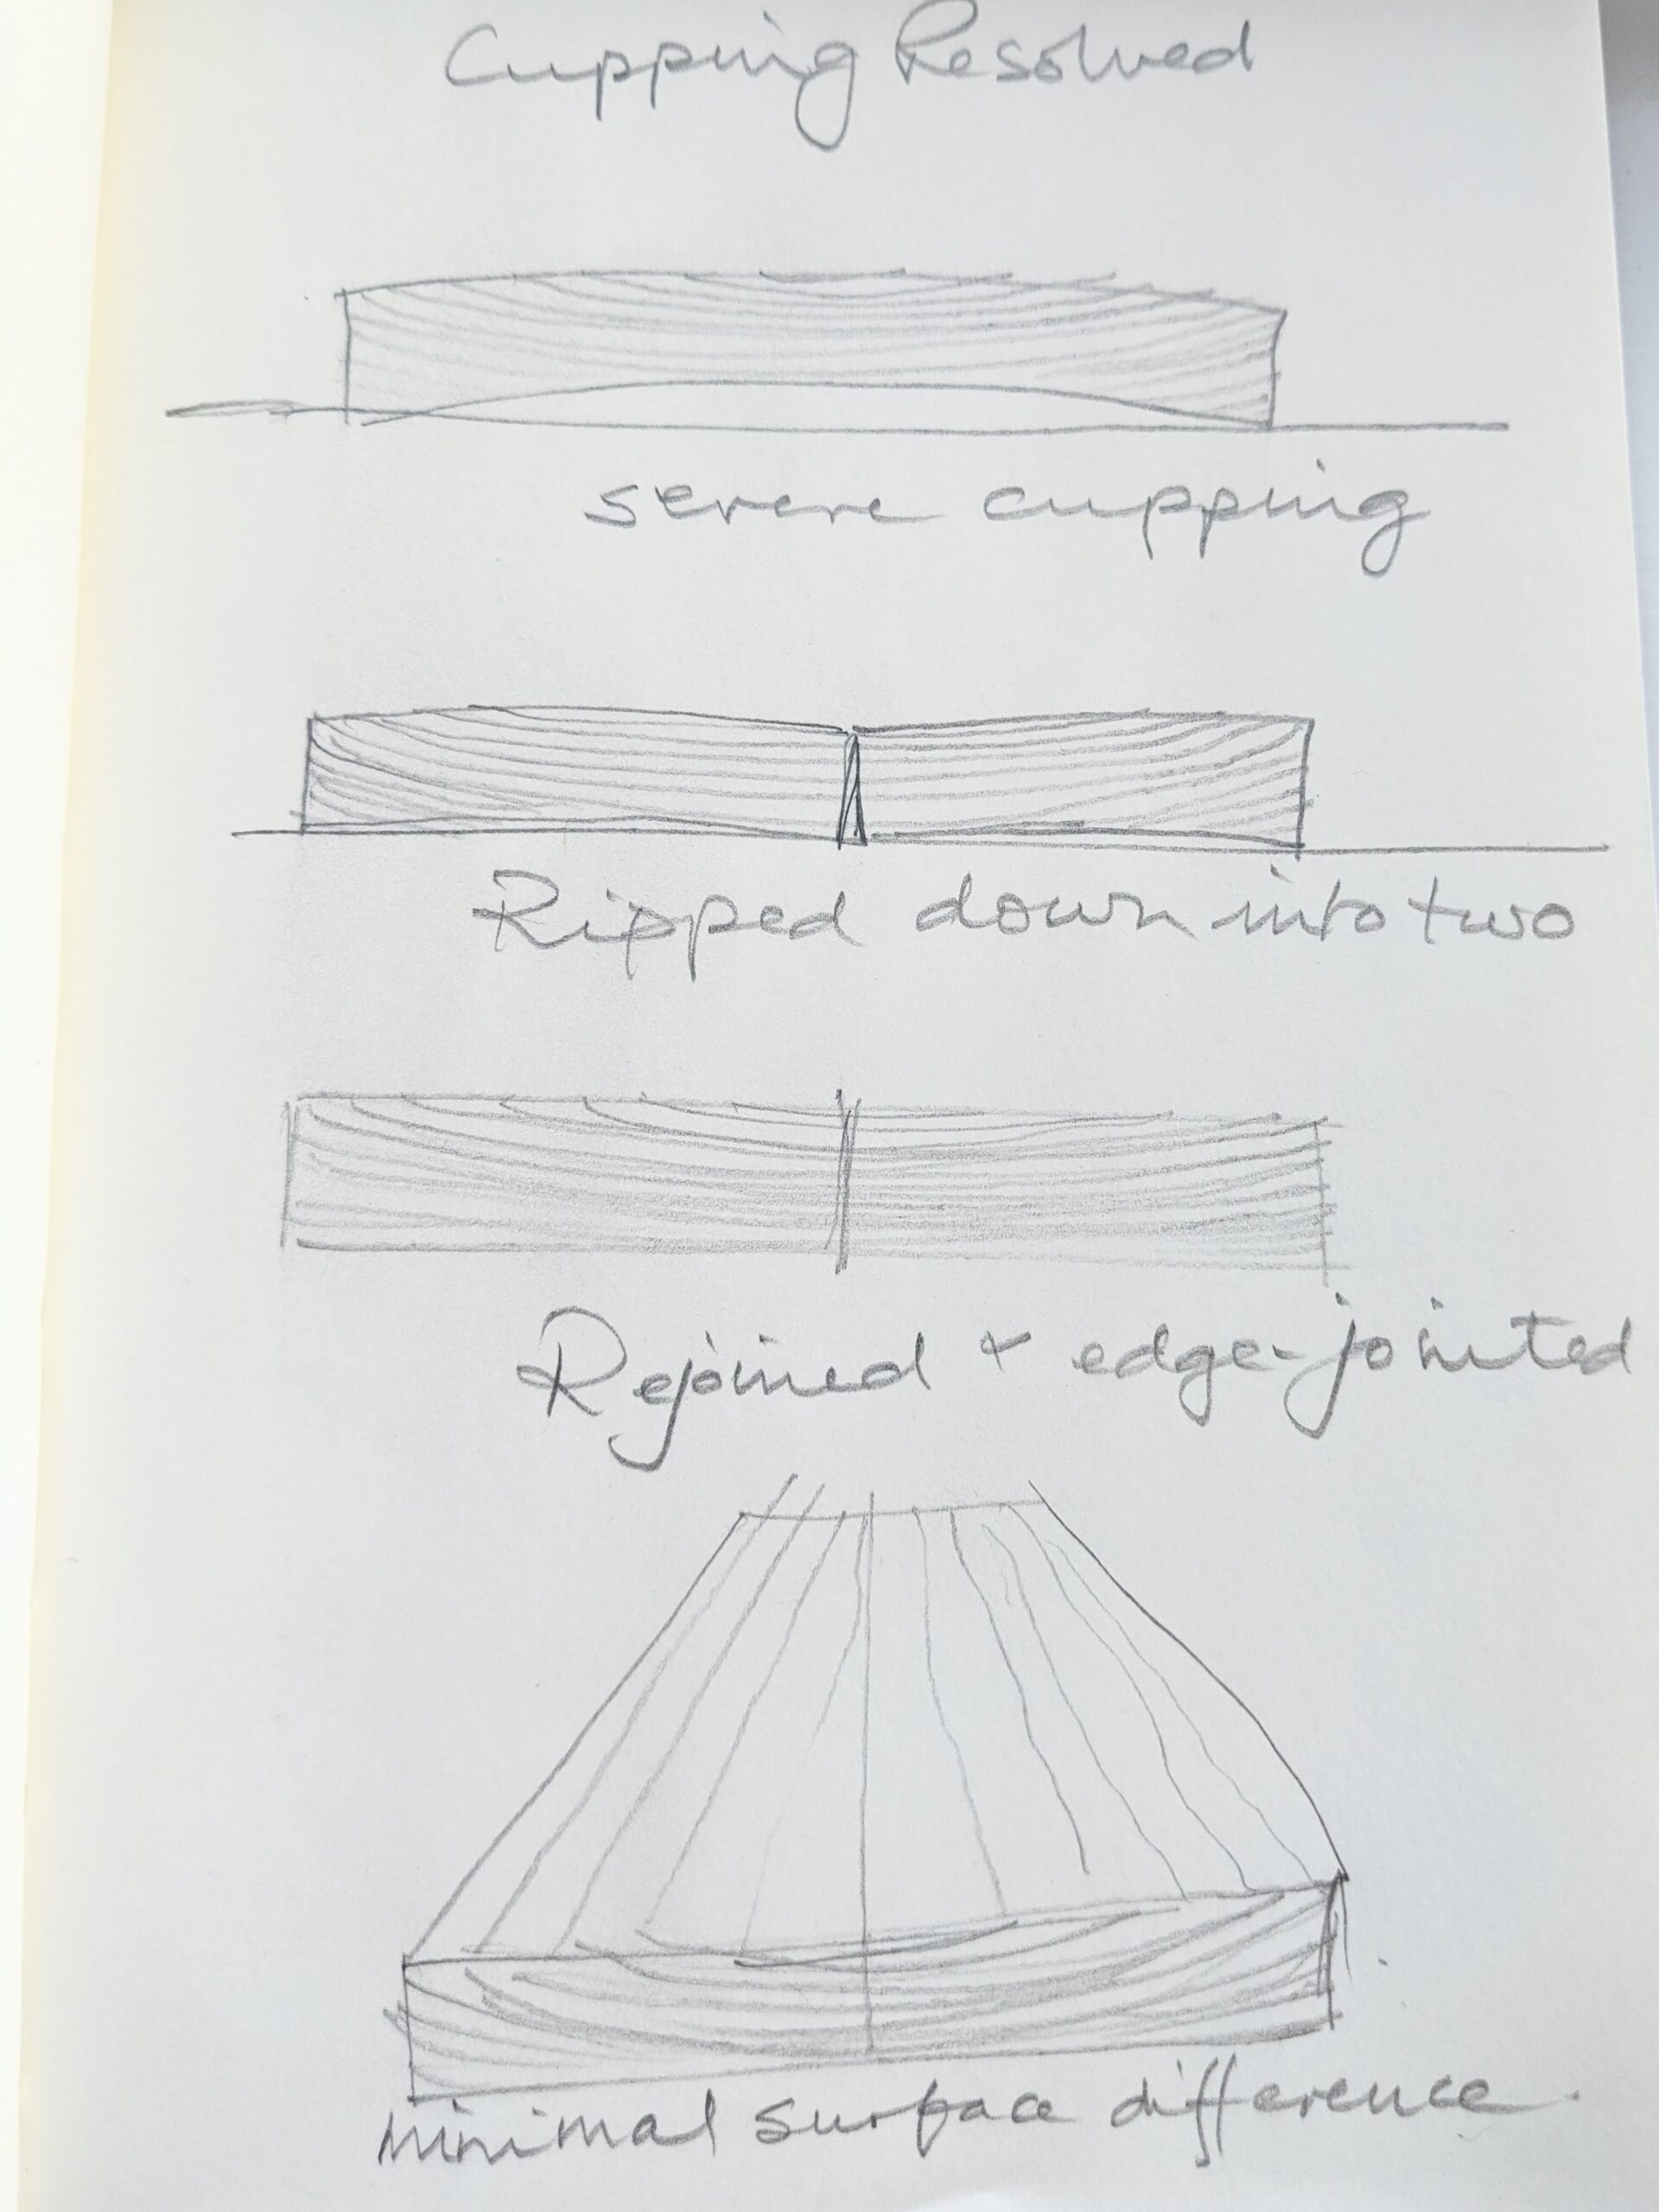
Put simply, wider boards often cup less because they are cut from nearer to the centre of the stem of the tree, which cups the least. Narrower boards taken from the outer circumference of the tree cup the most but they are narrower because of the limitation of the width of the tree at this point. Usually, a single centre rip-cut means only two sections that can be trued and reglued for a flat board and minimal wastage.
I have explained economising strategies in previous blogs in this series. Arm yourself with a thick felt tip pen or carpenter's pencil and a straightedge to layout sizes on your plank. The bandsaw really lends itself to cut out sizes roughly that might follow edge-wane or grain direction rather than a squared edge to a board. The bandsaw also removes less material than say a tablesaw, up to a third less wood is lost and of course, a bandsaw lends itself to following drawn non-parallel lines rather than the fence parallelity you almost always must follow using a tablesaw. A 1" finished size will almost always need to come from thicker stock and so too other thicknesses. Hardwoods usually come in rough-cut sawn thicknesses of 1", 1 1/4", 1 1/2" and 2". Beyond that, they usually go up in 1/2" or 1" increments. Though there are industry standards in the upper sizes too, there can be variance, and using small millers with a mobile bandsaw mill often turns up alternative and non-standard sizes that can be useful though and it can depend on individual mills. For book-matched tabletops and panels, use stock a little over the finished thickness you are shooting for. A 2" thick section of plank should give a 7/8" thick book-matched tabletop or panel if that is what you need. Door panels need only be 1/2" to 3/4" as a finished thickness but you will likely still need 2"stock to achieve this.
Yet more to come!
Comments ()