How it Begins
It started with a few lines of graphite on the first page of a plain drawing pad. I never use graph paper to draw on. Too many little squares and lines. I don't need scale at this point, just my own lines and shapes. The shapeless moved from straight lines to curves and square angles of butt joints that are not joints just yet to carefully cut joints that created a perfect and permanent union to every intersecting part as above. This is not always how my designs begin, but some do! No matter. At some point they become drawings roughed out on paper. Mostly though, they actually begin in my head where none can see and I move the shapes in the way described without moving a muscle. I let my brain have sway and when the shape comes to me I pencil in the growing details of what I feel on the pad page. This alone is the genesis of my rocking chair design. It's the point at which I reach for some wood and begin to lay out the concept. The rest is easy. I make!
For this design, I began from scratch. I did not consciously refer to any chair for a measurement but I did refer to my brain for a couple of things, stretch a tape measure into the air to look for measurement mark that jumped out of nowhere at me, and measured distances from elbow to a plank I sat on, things like that. What I am saying is I did not copy any shape or take a measurement from what already existed but from what did not yet exist I conjured up the swirls and twists until, after an hour or two, I can't remember, I began to make my opening cuts into my wood.
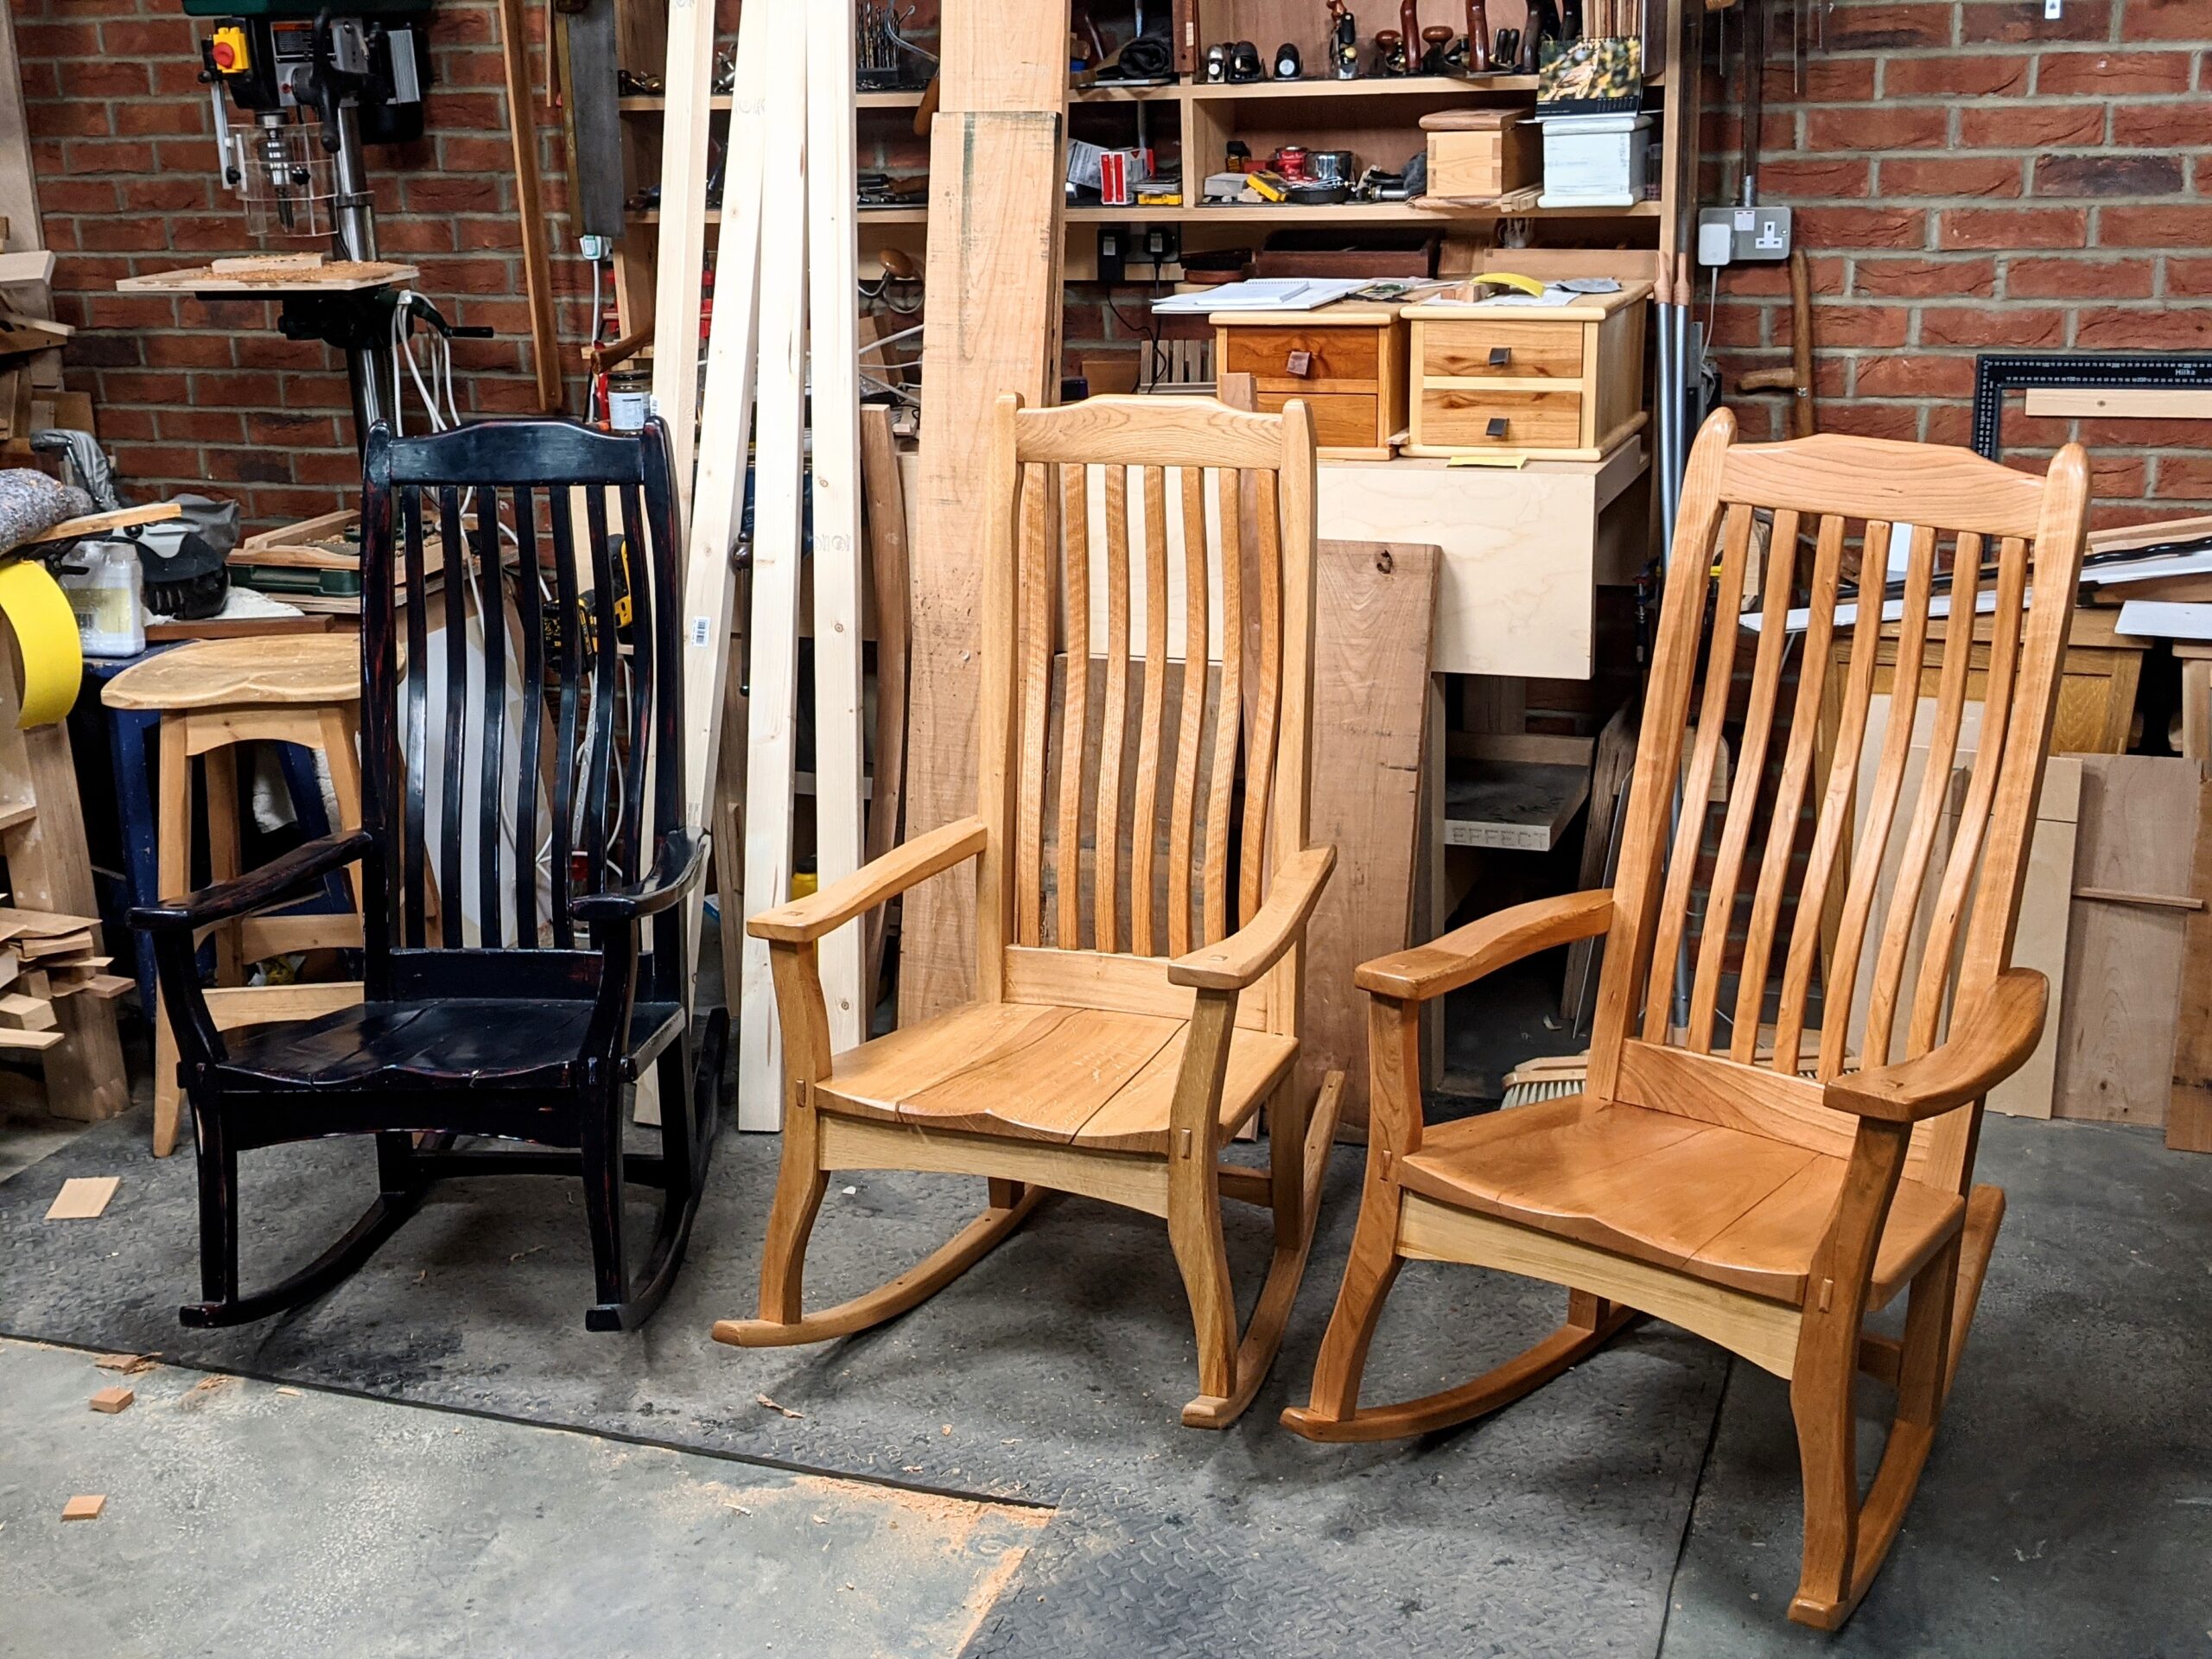
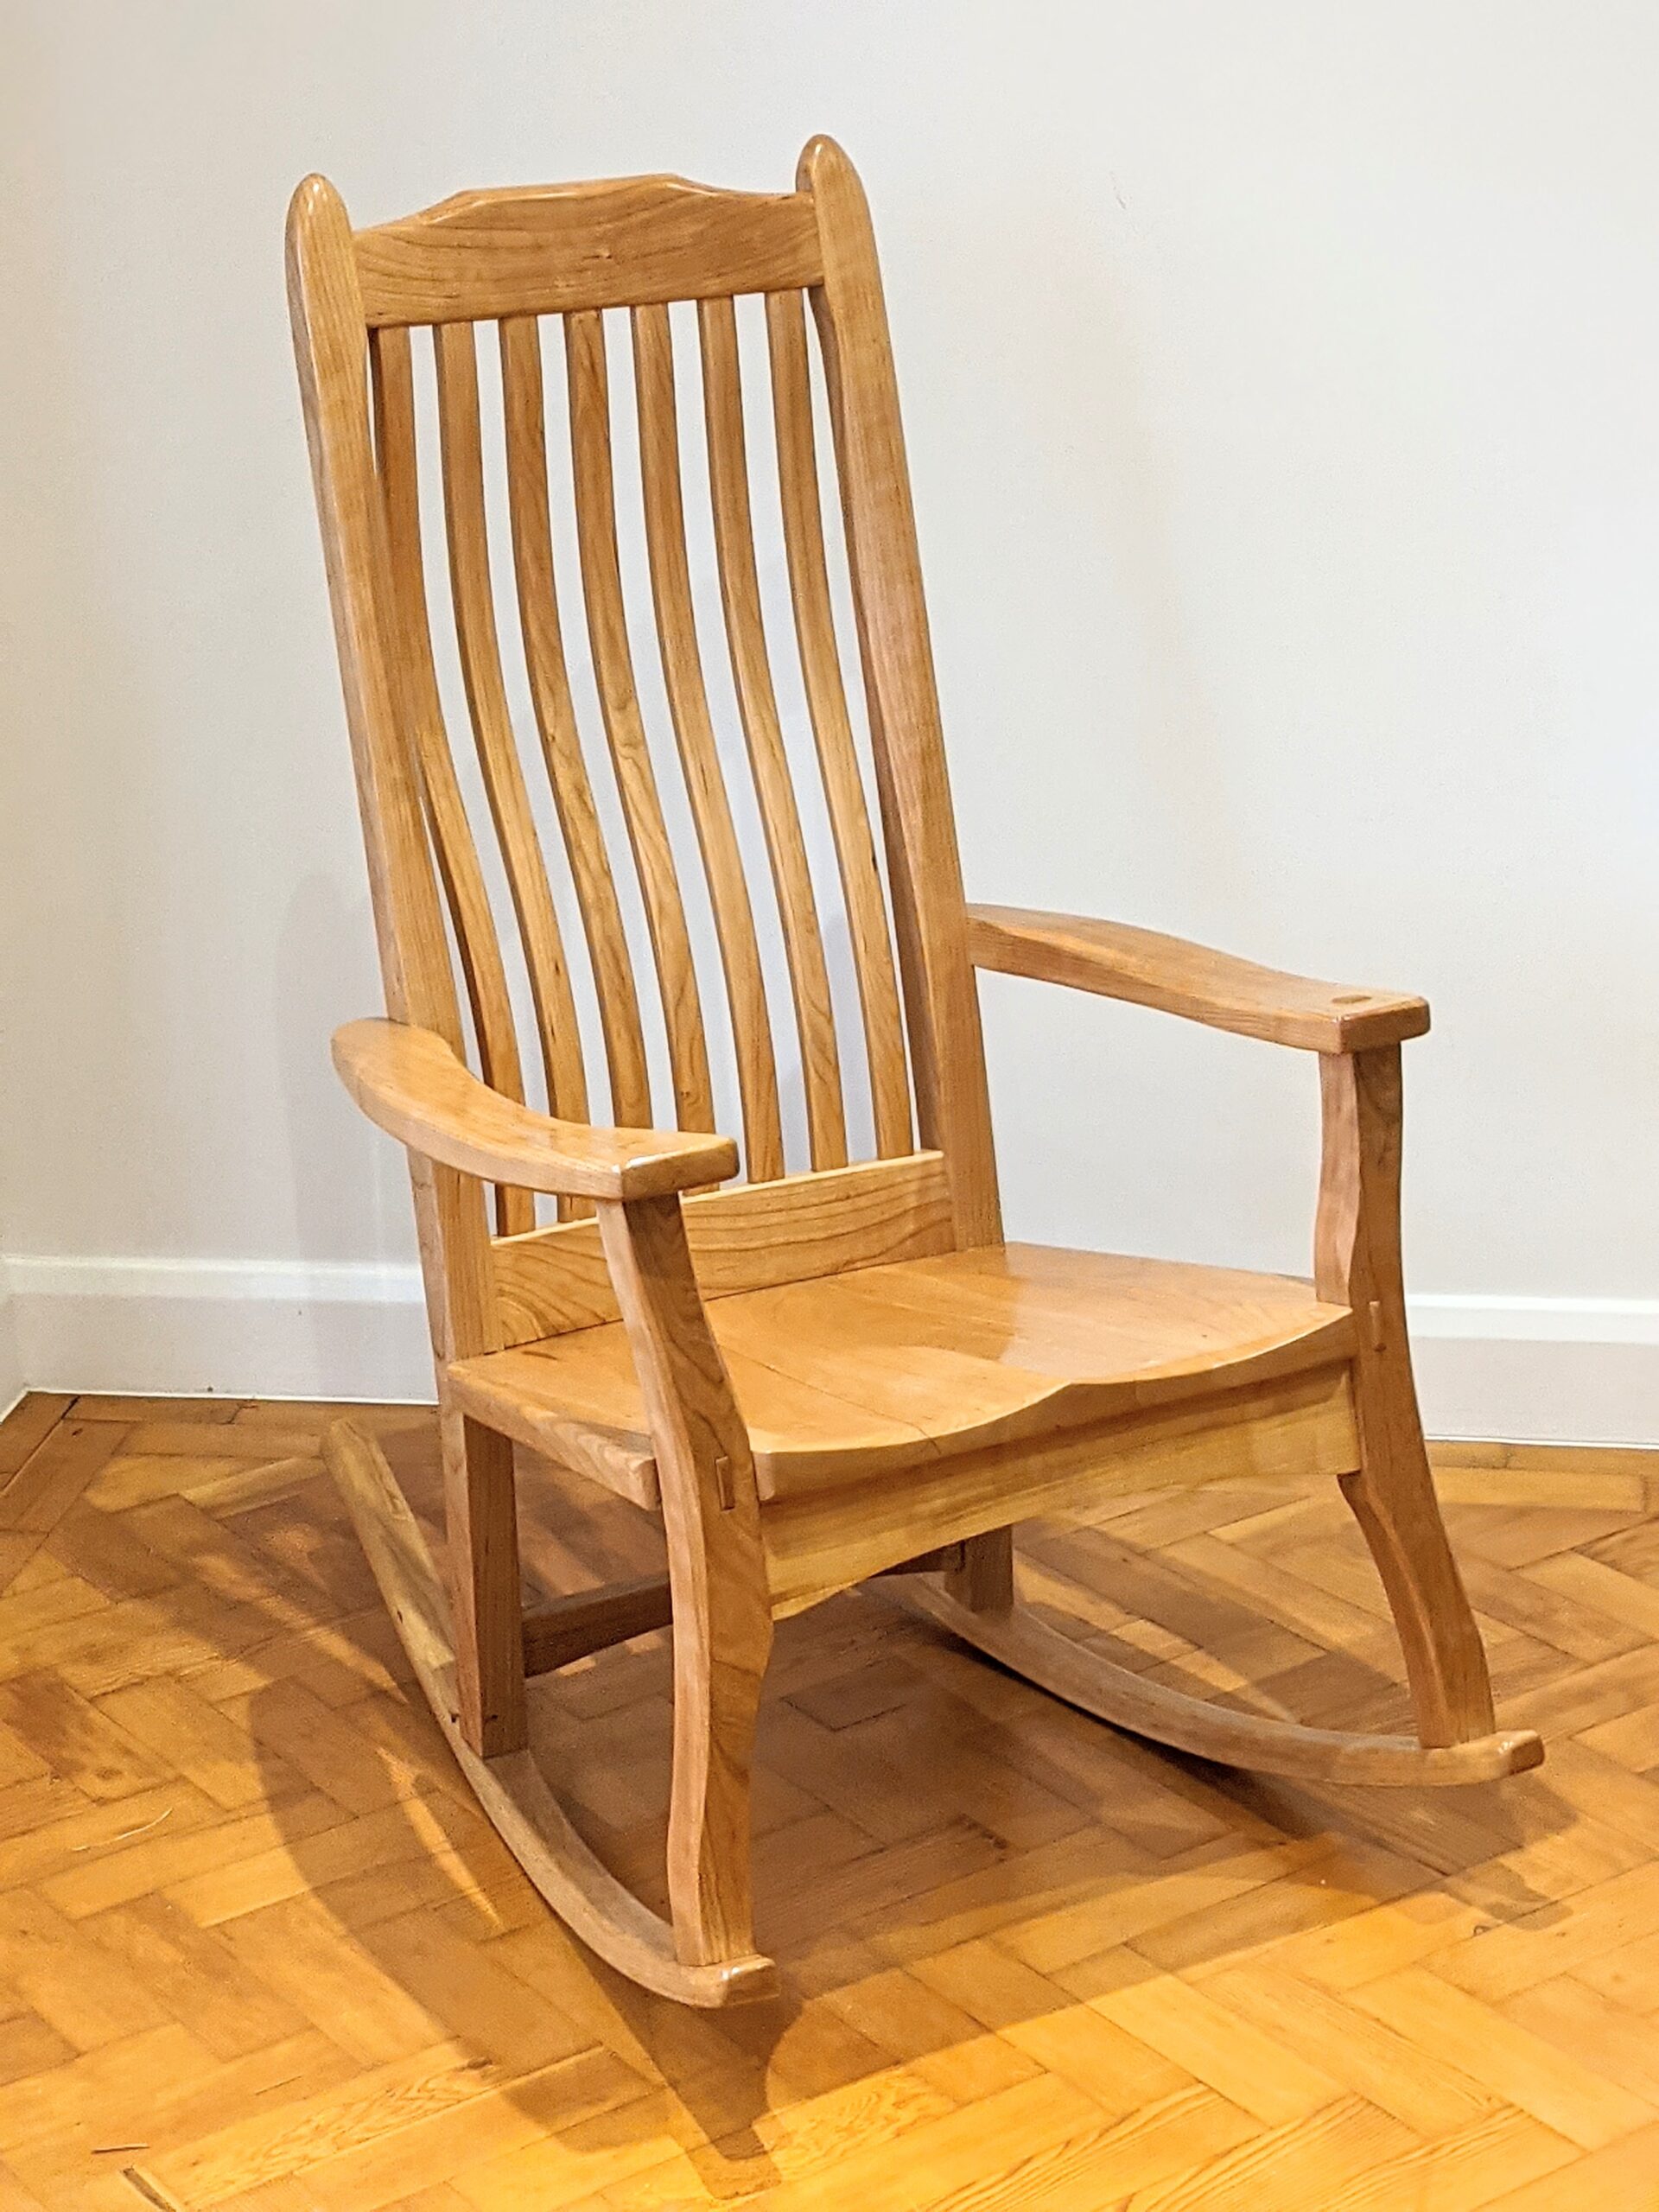
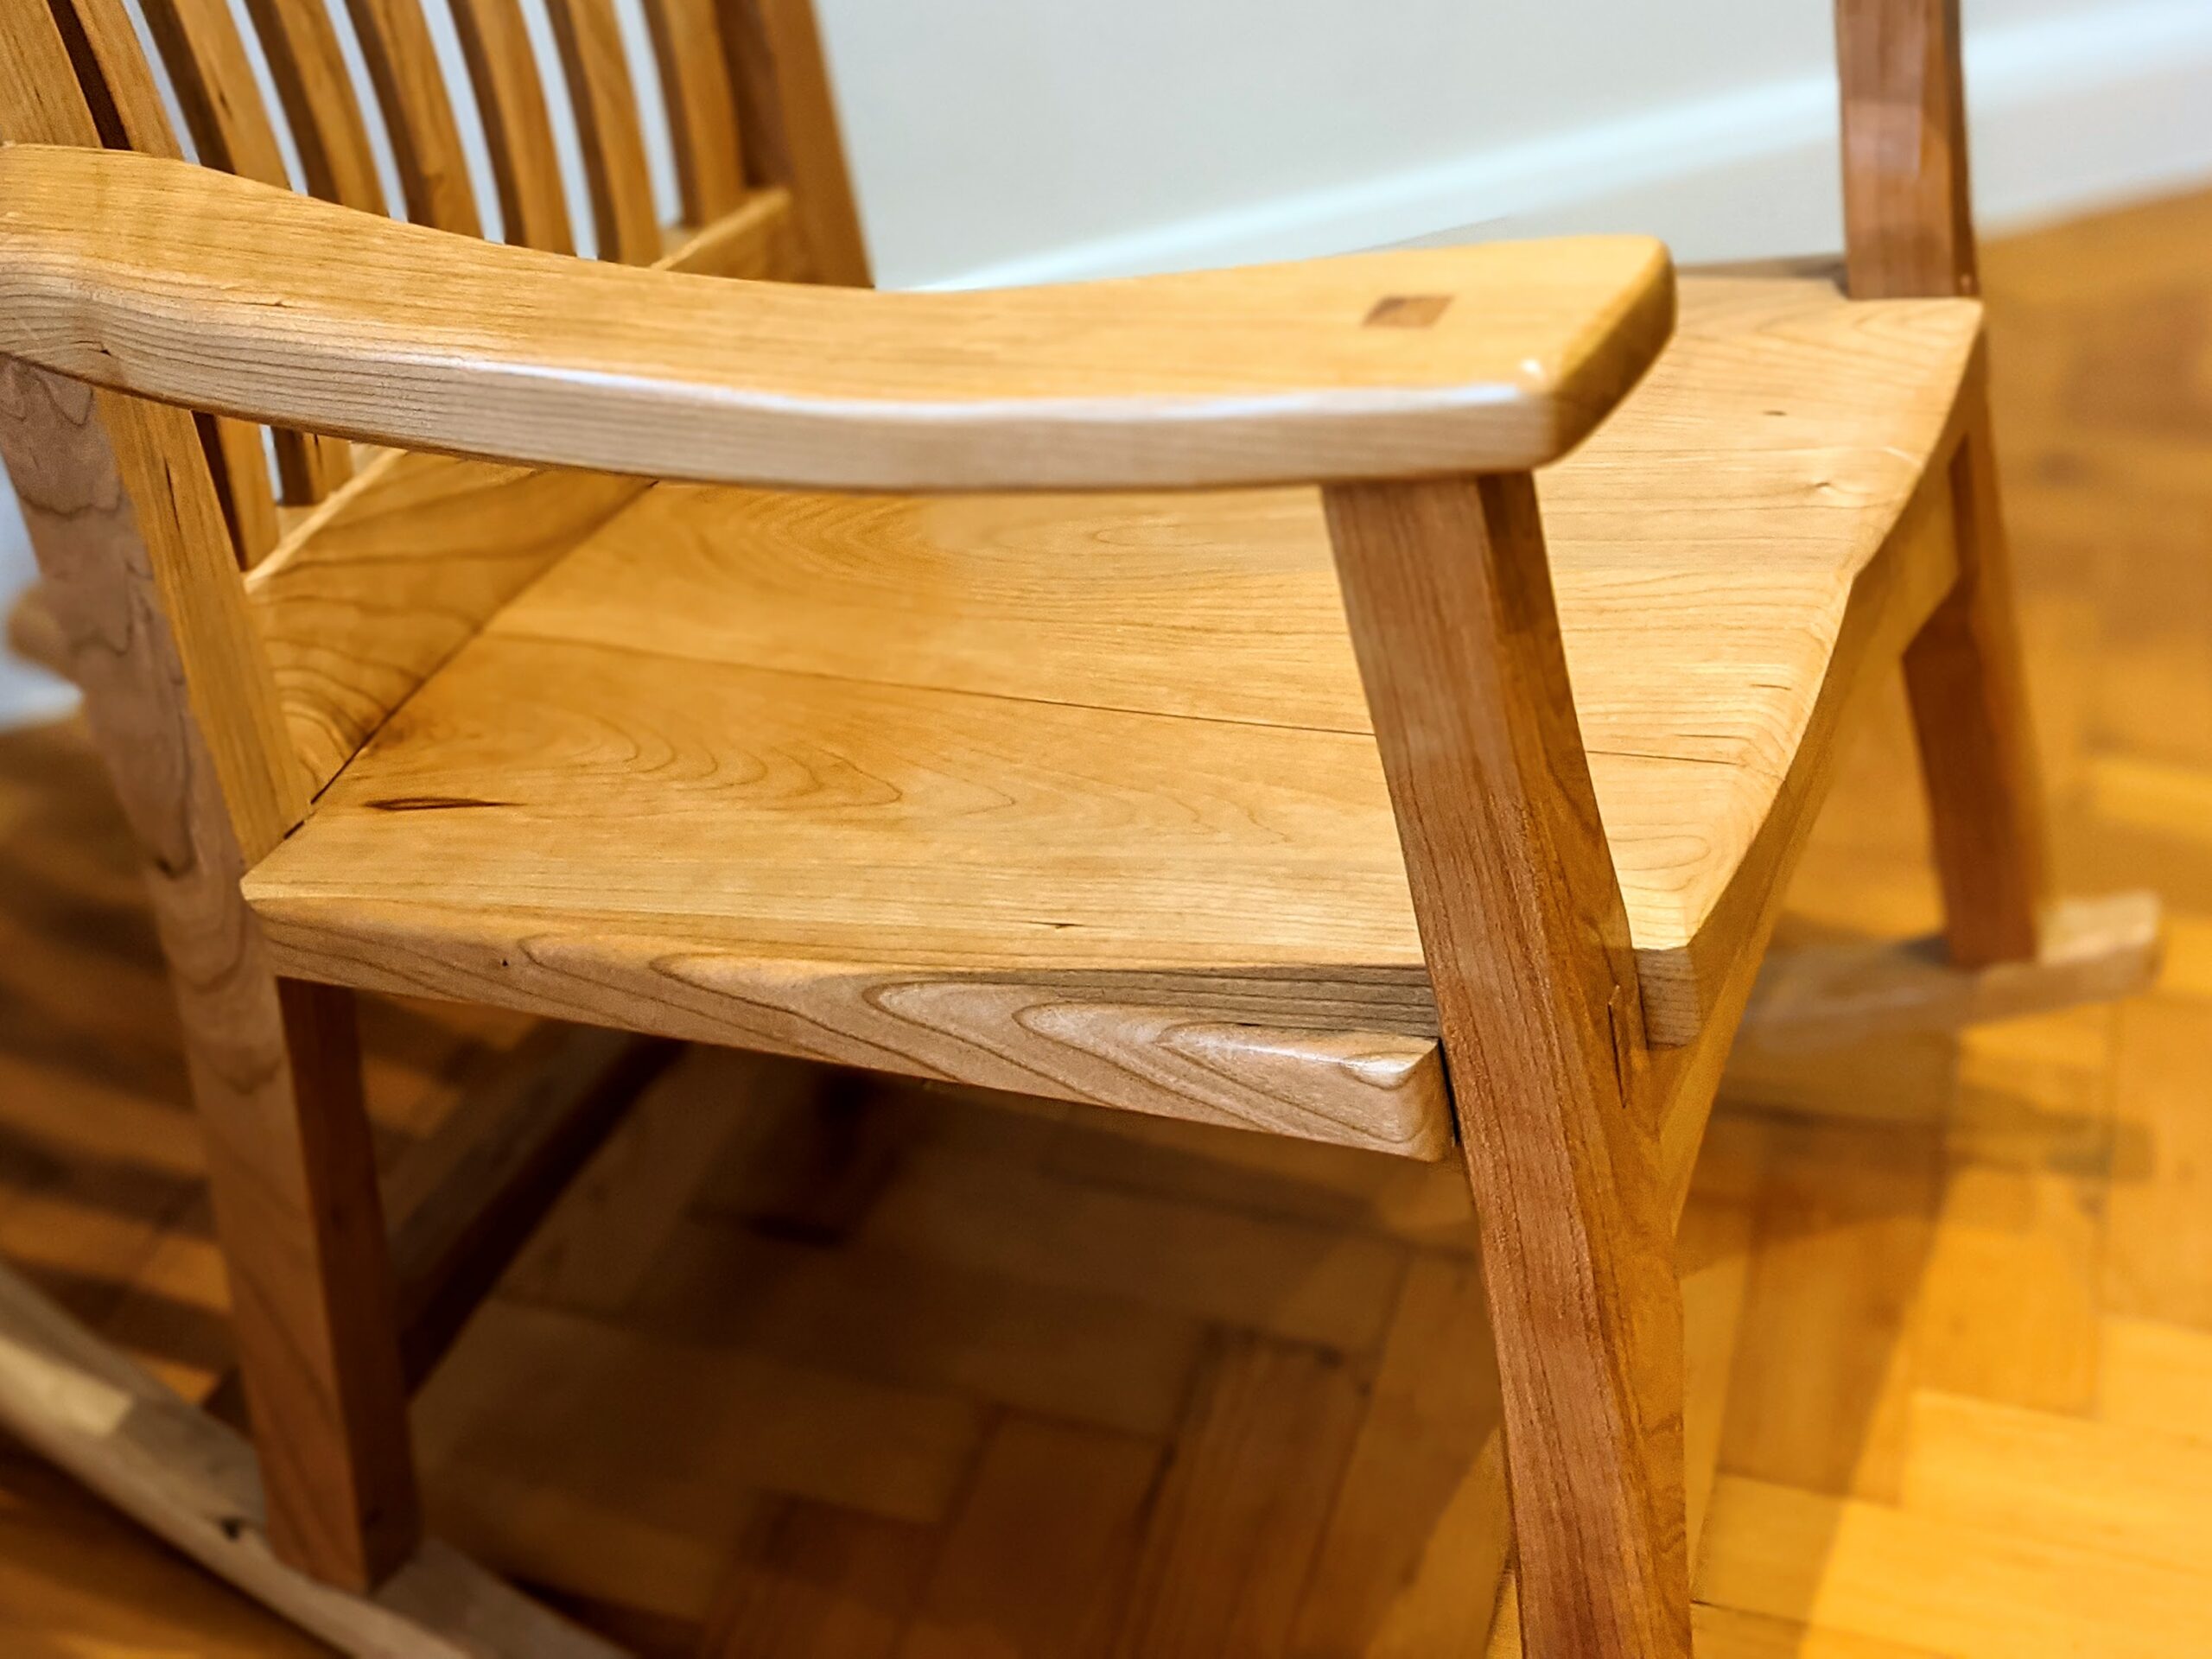
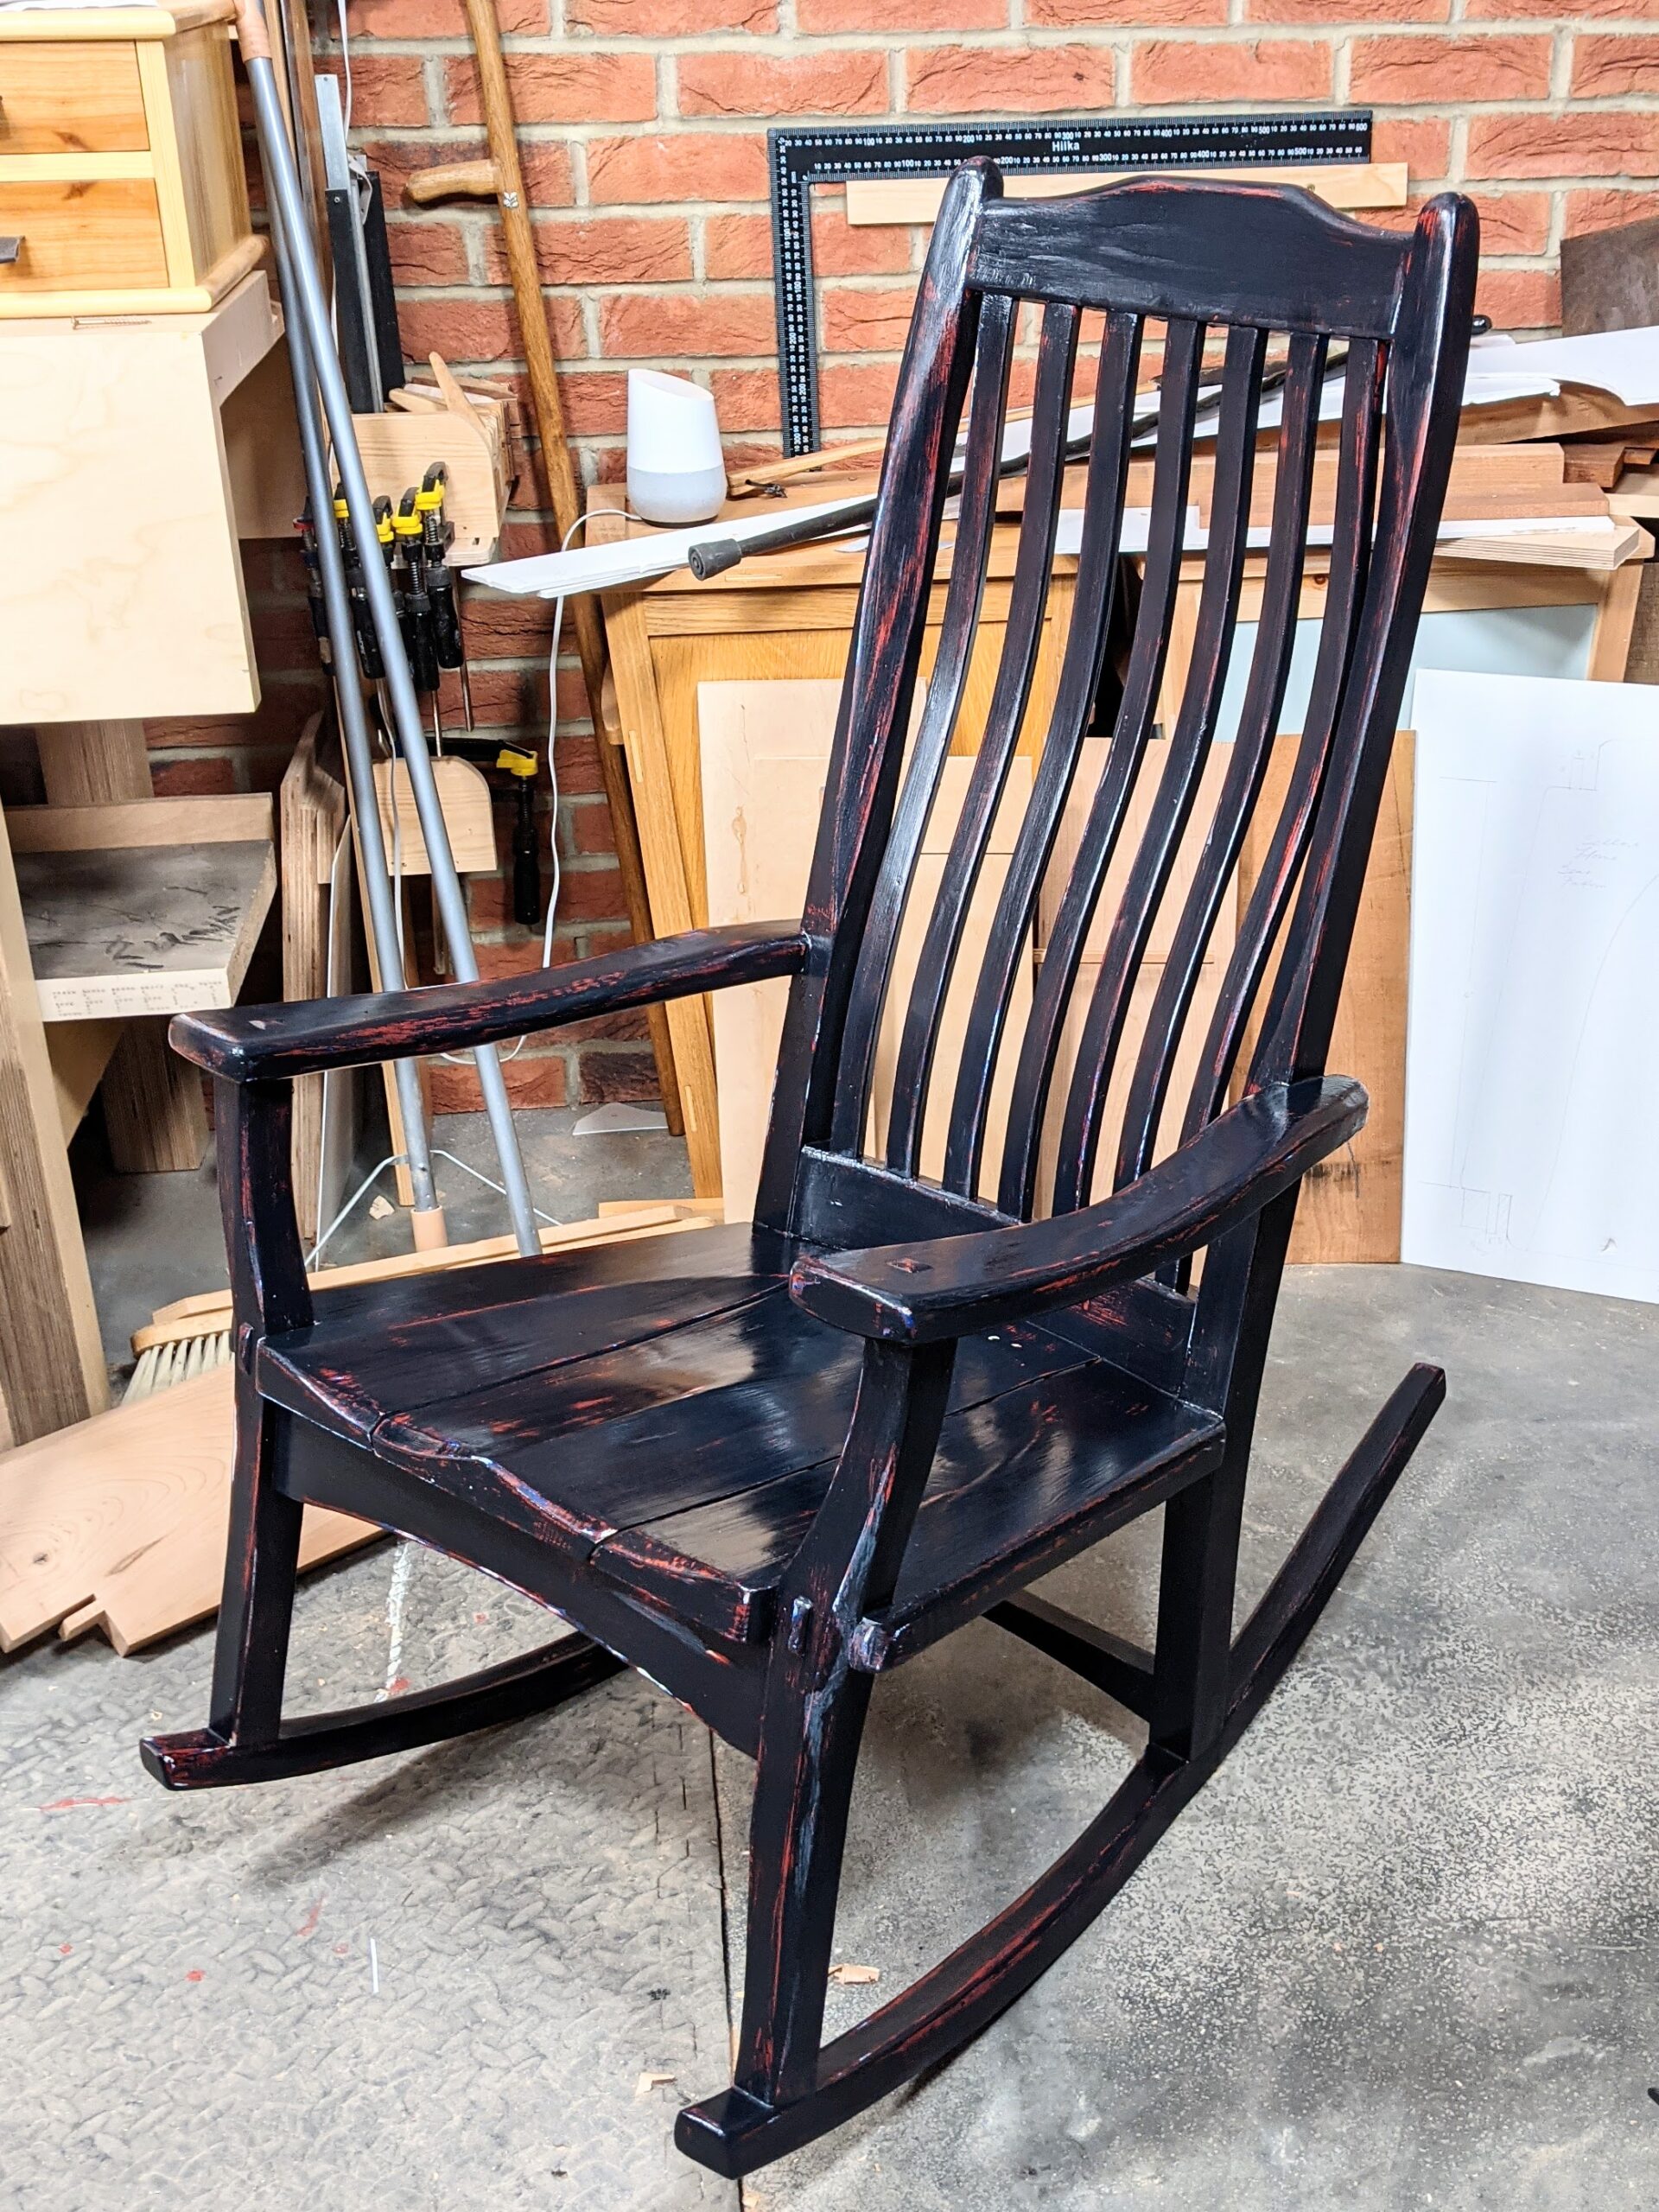
Placing my final version in place in the living room actually took two months and three versions to complete. If I tried to make a living from that then I would likely die from starvation. Now that I have the completed design fleshed out into a completed, fully tested version, I could start to make a profit. This chair would likely take me 60 hours to conclude from rough-sawn planks and boards to buffing out the finish now that I have finalised every facet of the design and made the prototype. The actual prototype is my third one, the one made from cherry. This, the final-cut version, represents the full concept of my design with the first two holding within their frames the steps it took to get here. The actual prototype is the one created for others to follow.
Prototype (n): An original version formed in shape as a model from which others follow, original or primitive, from Greek, prototypon, from protos, first, and typos, impression, mold, pattern.
This final design becomes the standard by which others that follow can be made according to the pattern and plan. The efficacy of the design concept in the trials of versions is one part of the reason for a prototype. This engineering process tests out what is at first only the possibility of the design concept. By establishing a physical example, the shape can be created and tested for comfort, sizing and visual appearance. Other elements of the design concepts can then be fleshed out to prepare for the methods of construction, techniques for making and so on. This highlights other considerations leading to possible difficulties and perhaps problems that must be addressed ahead of time to prevent or reduce any risk of failure.
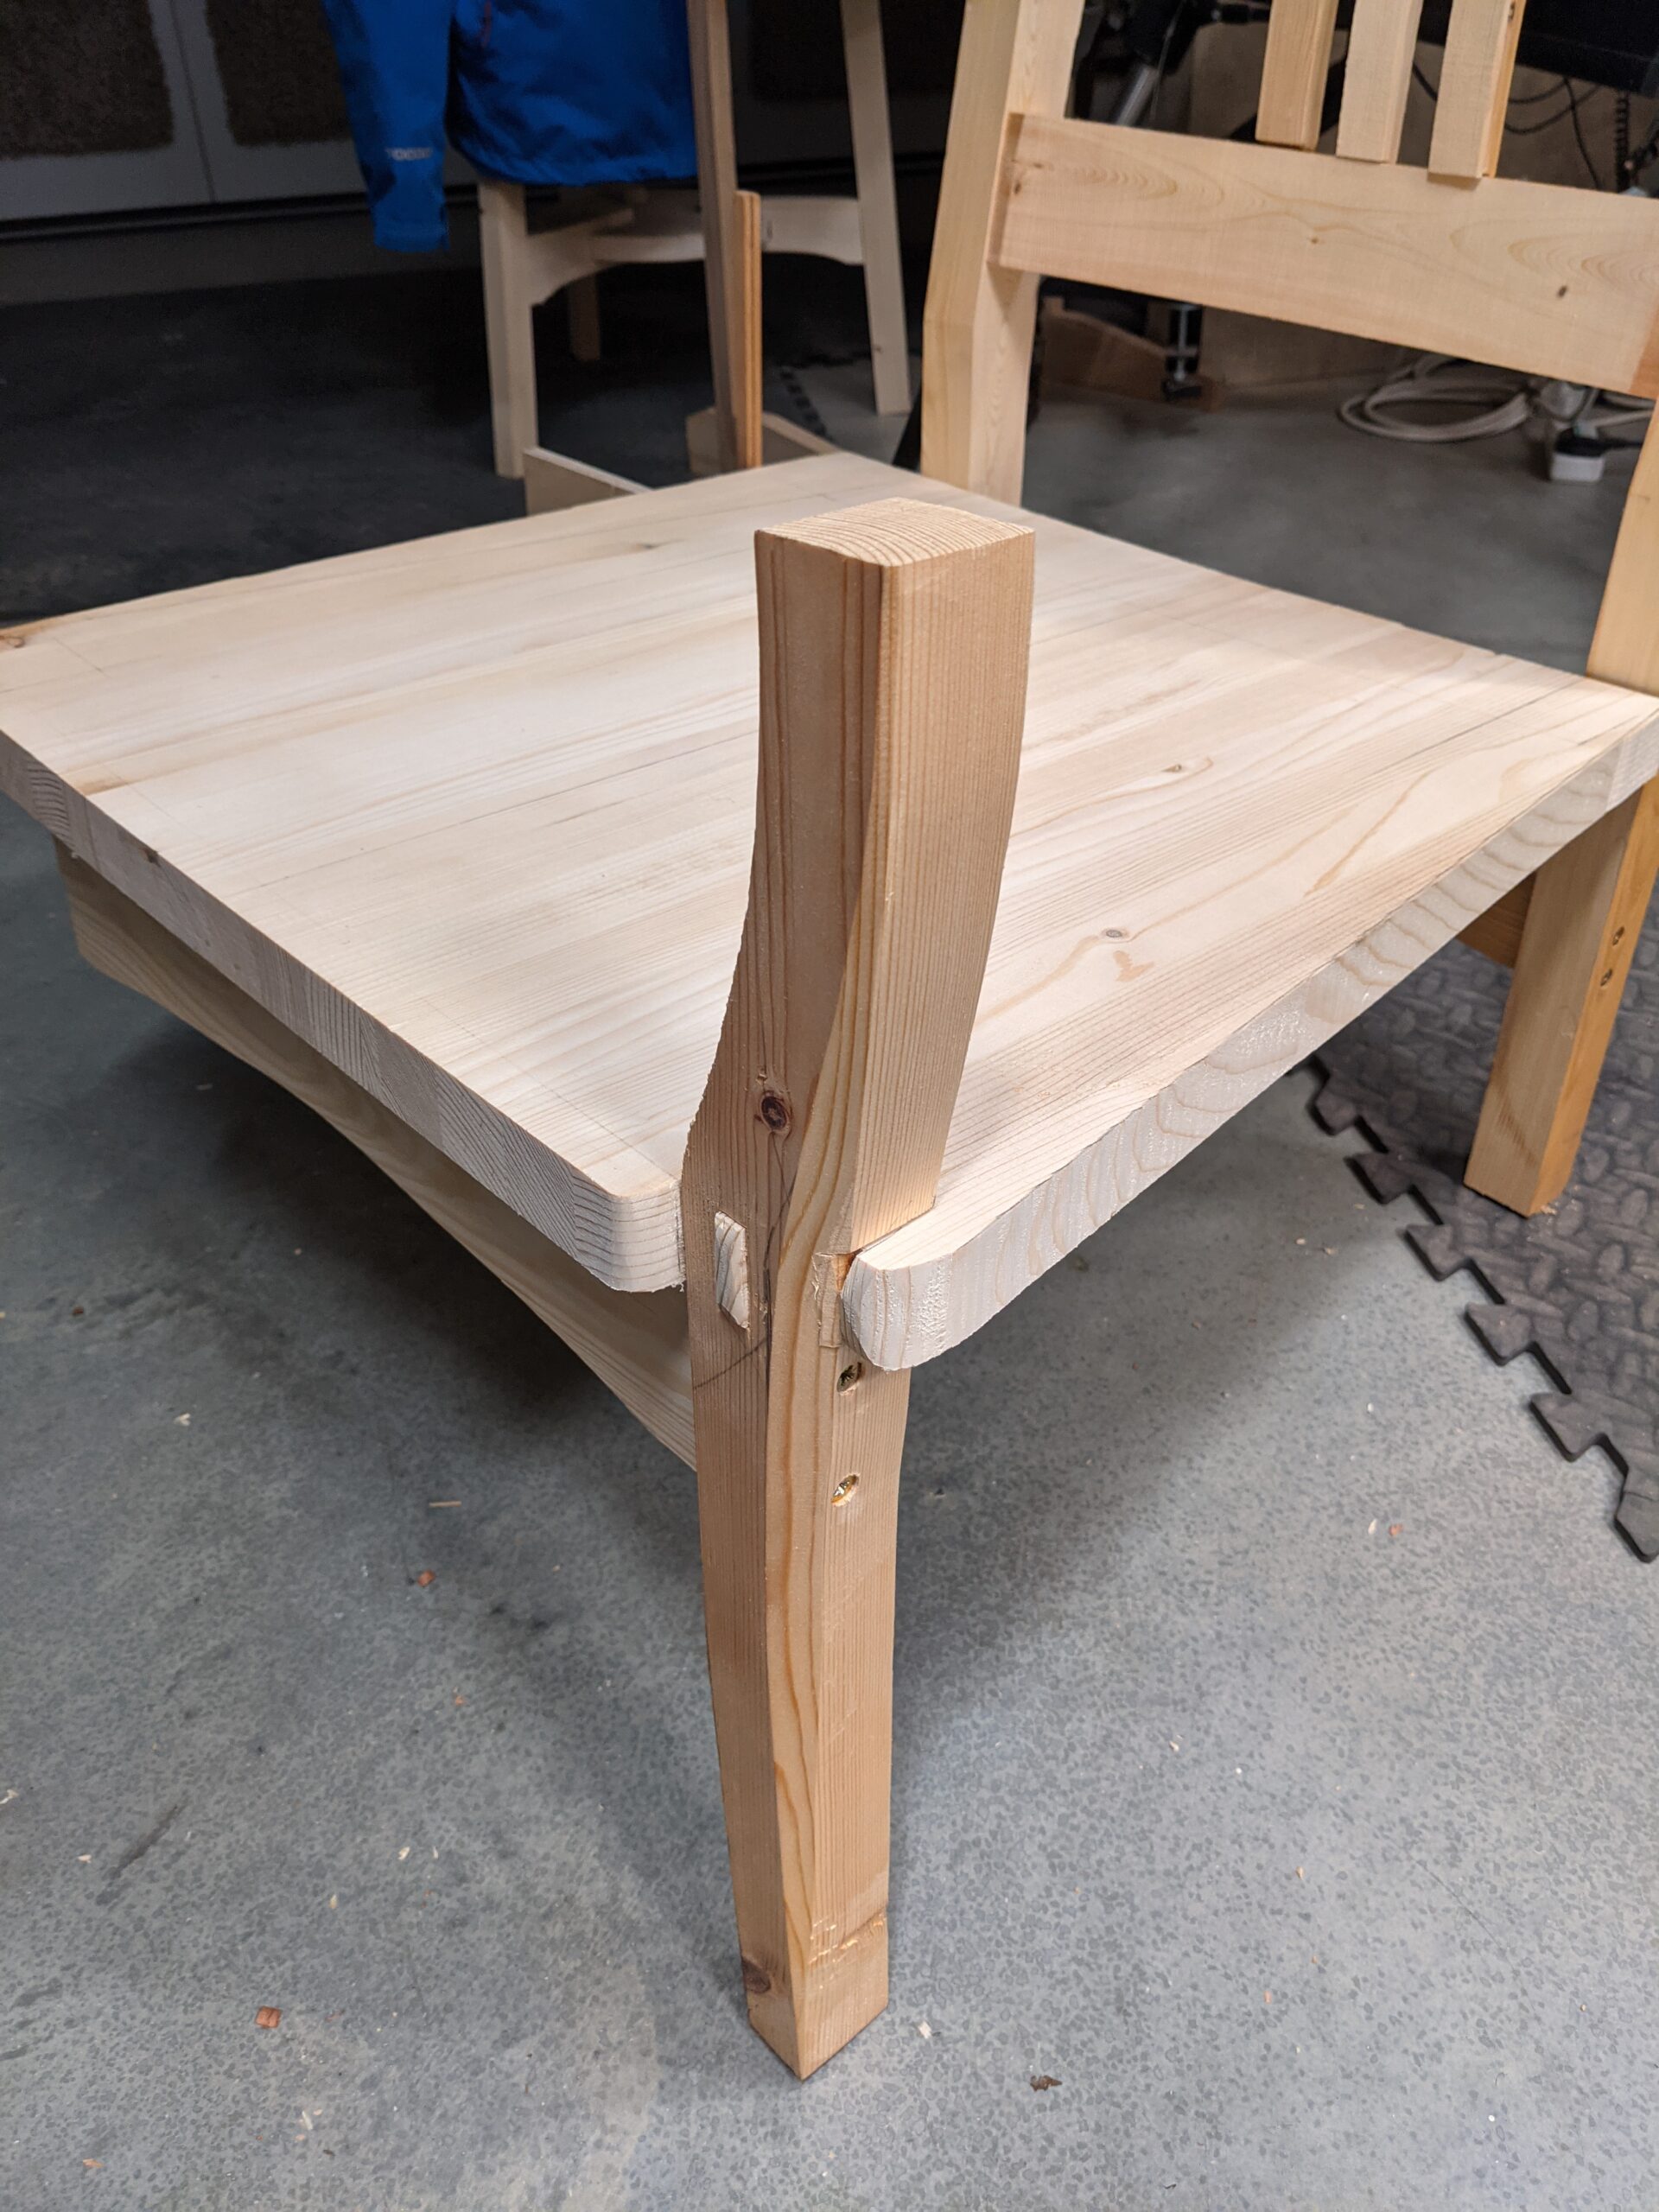
My first model came from 40mm by 68mm construction studs laminated together to get my sizes. The angles were from how I visualised they would look and feel from my experience as a maker-designer. This is the most difficult part to teach and pass on. There are those who design plans and those that make according to plans. My experience is that some people, not all, perhaps not many at all, can indeed design by visualisation--visionaries if you will, and those that cannot envision as in picturing something in their head. I have known many who can make with a drawing but cannot make according to the more nebulous mind's eye. This is by no means any kind of criticism. It's not different than some people being able to write music and compose and others being more limited to playing according to the score that was written for them to follow but no less gifted in their ability to play.
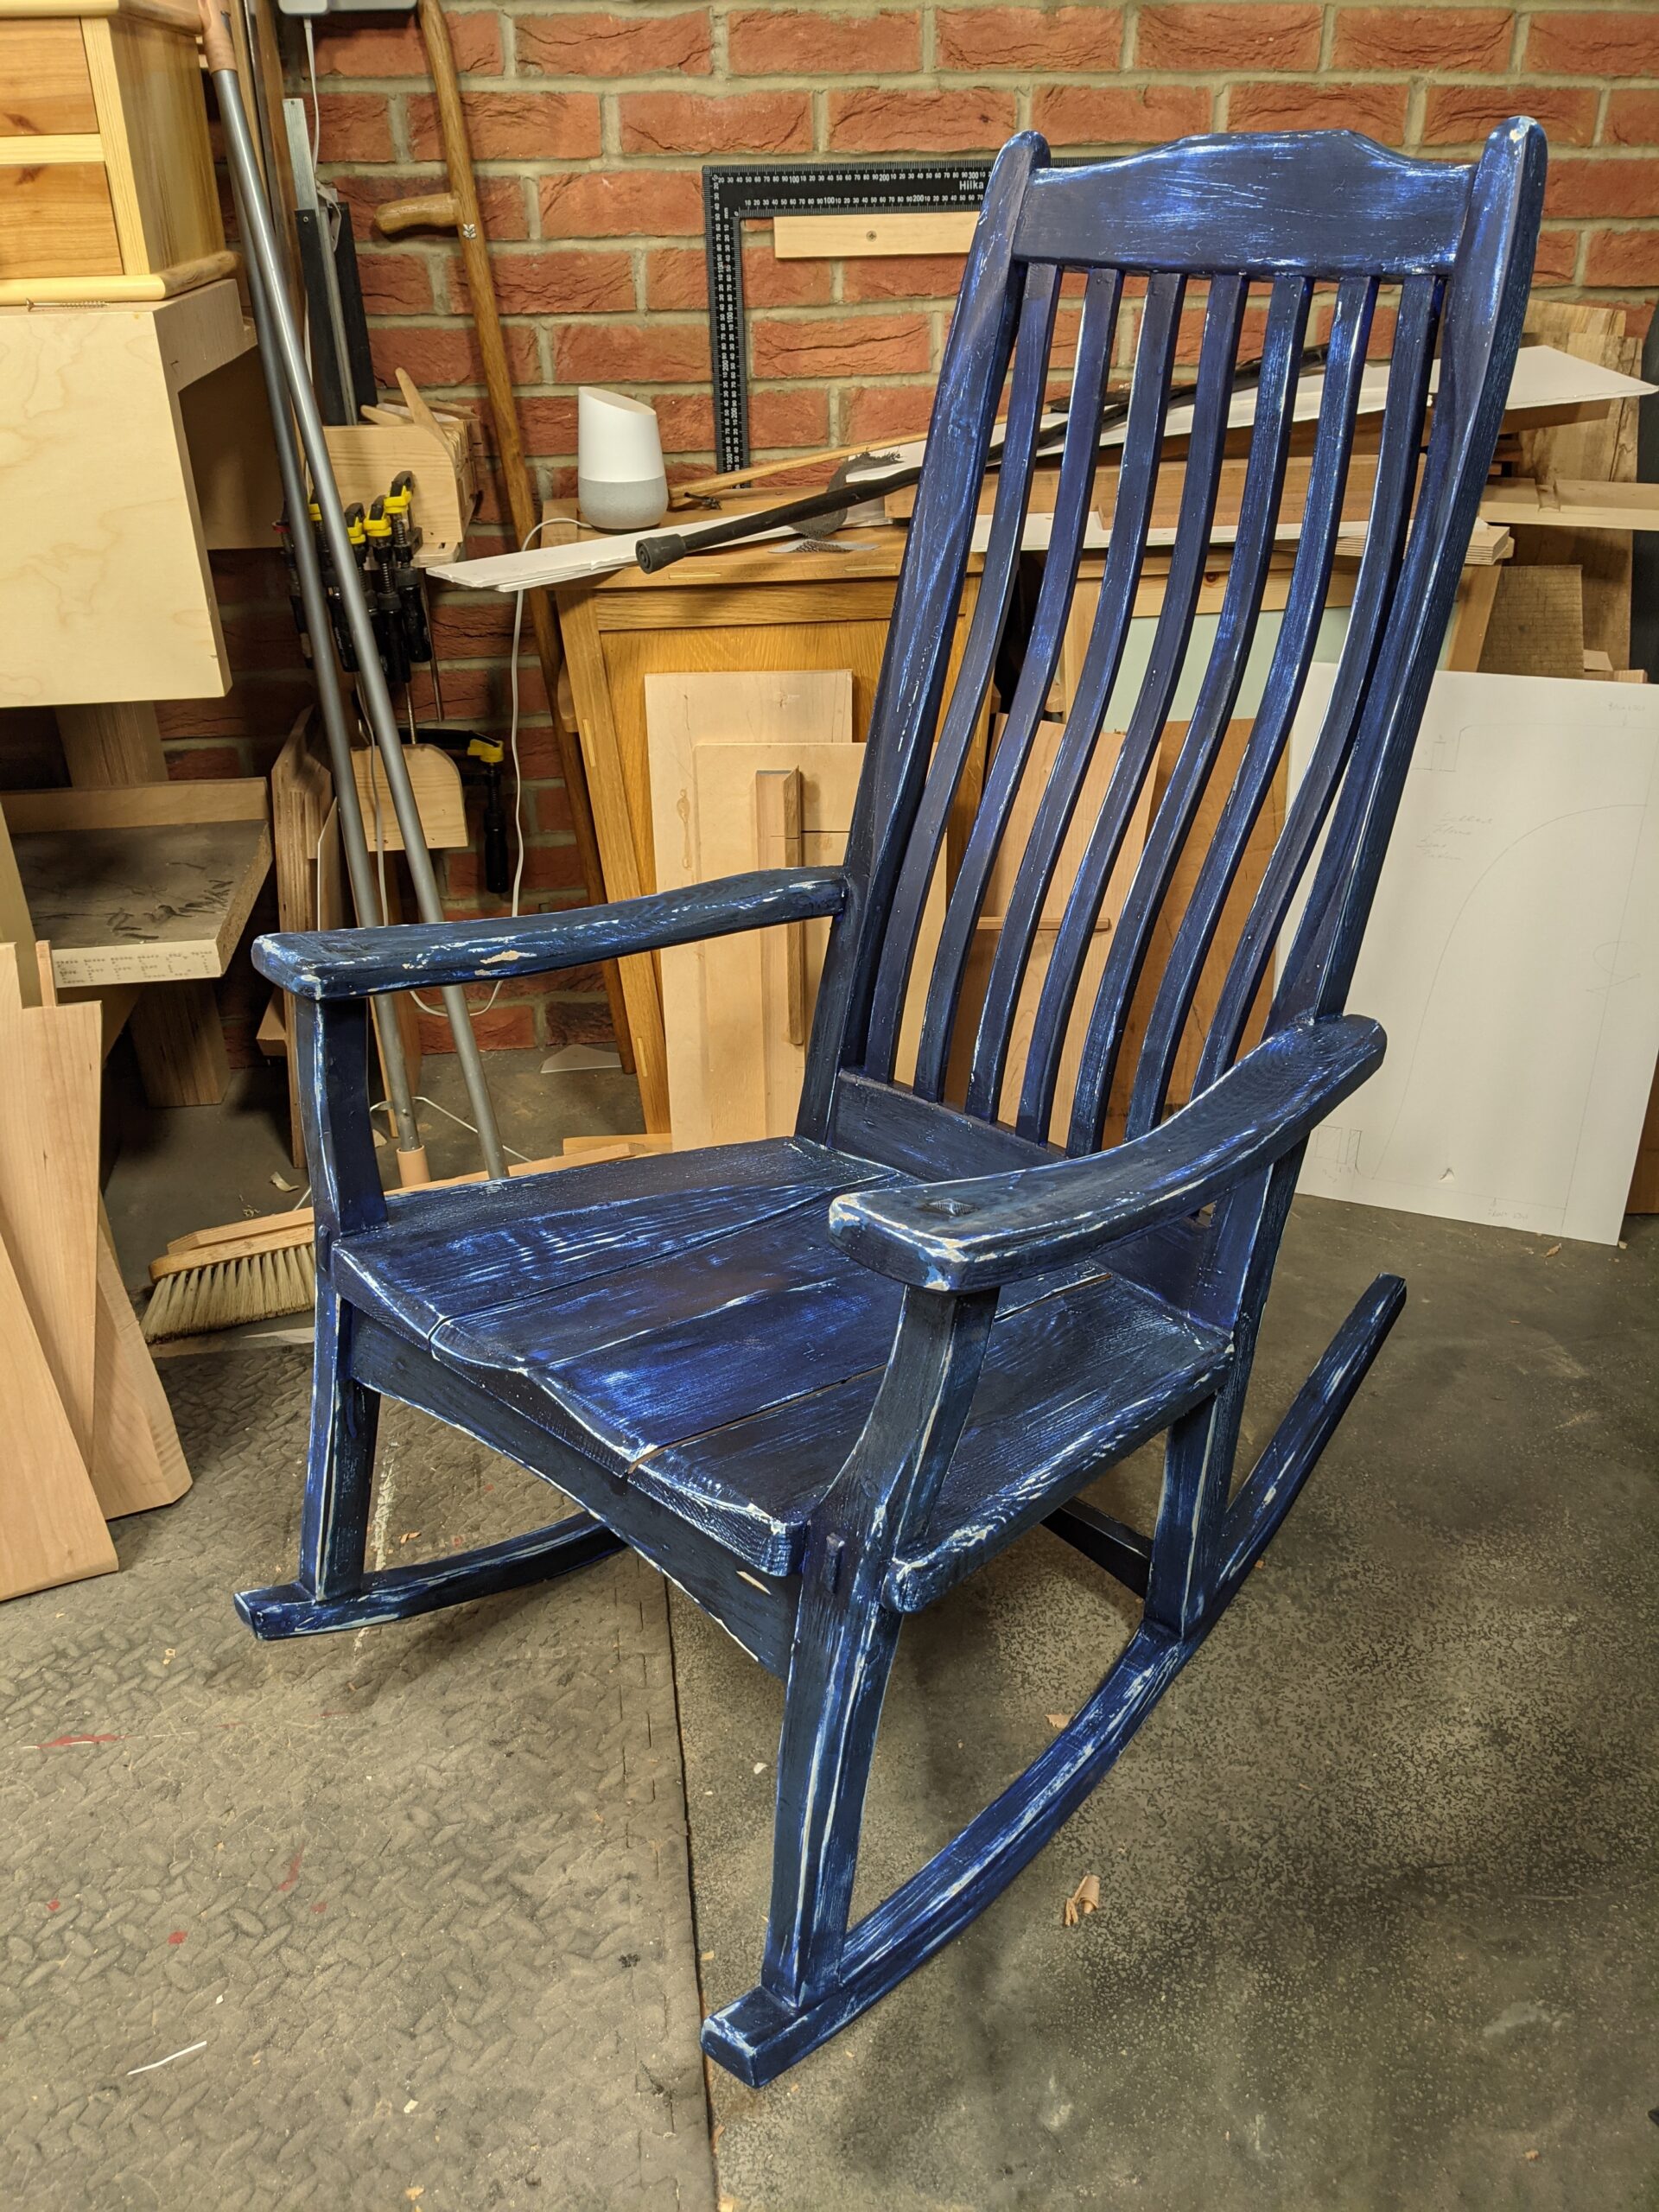
My first chair in designing the sellershome.com rocking chair for the house began with components screwed together but unglued. To say it was crude would be kind. Bent shapes in the mind are less easy to pull together at the bench and free-handing an arc, though much faster and very valid, can then be hard define in an actual drawing for others to follow. In rectangular blocks it is easy to align the components but gradually all components lose their angularity and become organically formed in a series of as yet undefined curves. Commitment becomes everything but it doesn't really happen with accuracy on paper. In my own life perhaps I no longer need a paper version for me to make by. Perhaps I can make every one of them slightly or wildly different. Give them their own unique individuality, but that does not create the possibility of others making their way to making their own beautiful rocking chair.
Though that first chair was more a throwaway version intended as a stepping stone, by the time I had shaped it and shaved it to represent the final version it became a working rocker I had sat in it on and off for two months before the final cherry version was pulled together. It did necessitate making many joints within its framework to test out whether this or that joint would actually work. The screws in some cases represented and replaced the glue so that I could take things apart, tweak, shape, shave and put back together for trialing. It can be wearying.
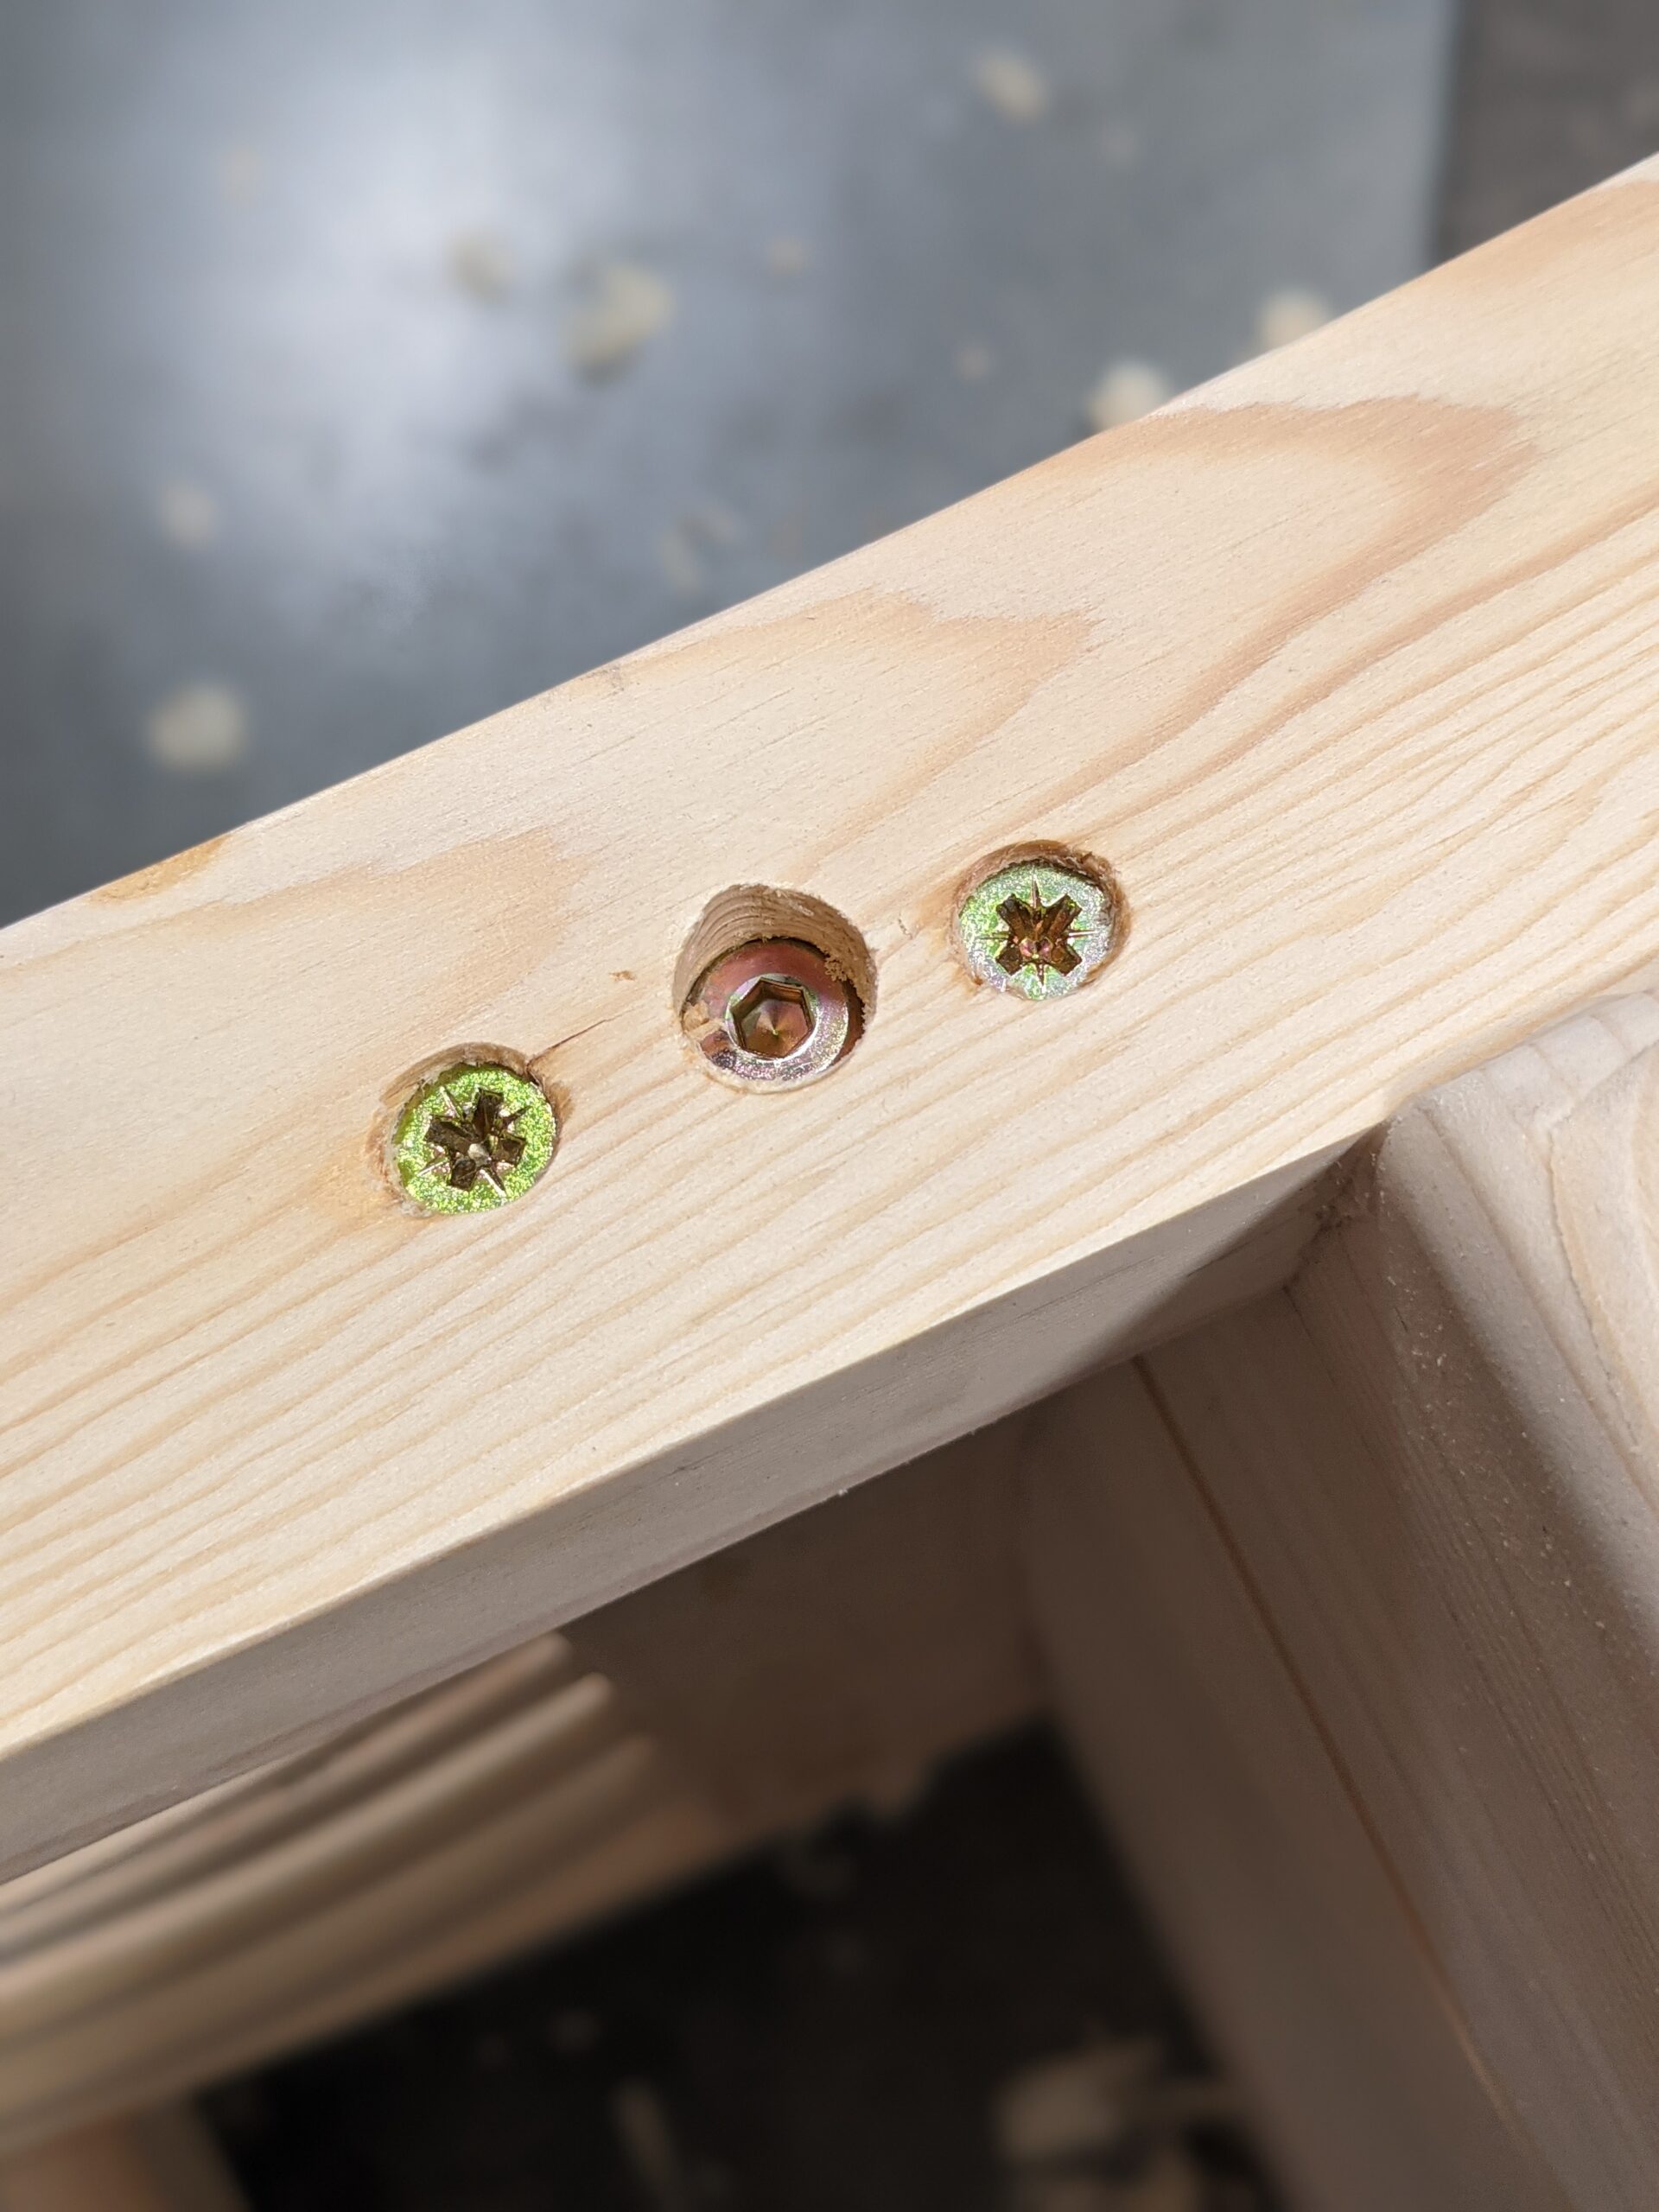
Butt joints with screws will ultimately result in joint breakdown and especially is this so in chair construction where the rigours of daily use soon takes their toll. For testing out, this is fine. I decided to finish out the chair for use and replaced or added fastenings where I could not change the butt joint to a full M&T joint, hence my decision to paint the rocker midnight blue with shine-through to reds and lighter blues. When I made my first workbench stool design I did the same. I am still using the glued-together-and-screwed version even though I never used bolt fastenings of any kind. I am surprised that it is still totally functioning with no degrade at all. All I really needed this version for was to get the shoulder-line angles together. I sit at it most days to sharpen my saws. I am not a sit-down-at-the-bench woodworker. Not yet anyway-
So came the time to make the oak version which I did tweak further. This was the one I made in a few short days of 10 hours per day. Now I am testing out the joints, giving radii to my arches and laminations and such. Here, the design becomes definitive and uncompromising. Here, the design becomes ultimately and more intimately but not exclusively mine in that it is customised to fit the human form. I want my design to be shared with others. I don't want others to buy my design, I want them to make it! It's my first piece for sellershome.com. It is very, very special to me!
For making this rocking chair and hundreds of other pieces designed by me for teaching the craft go to woodworkingmasterclasses.com. We'll train you and teach you as we have many a thousand everything you need to know to become a first-class hand tool furniture maker and woodworker!
Comments ()