Replacing Screws and Caps...
...things to consider

It's strange, really, when you think about it. Whenever you start any kind of retrofit, replacement of components, and especially something fitting into wood, you suddenly see that all things are not quite created equal. A half-inch becomes a little less and a little more. 12mm becomes 11.41 and the drill bit sizes are equally a more-or-less, give-or-take optional non-option. It surely has to be a constant compromise to get as close as possible to a half-decent but rarely ever exact fit. And please don't tell me you get what you pay for. I have been there too, paid tops for the best and what have you. In our highly 'respected' and sort of 'accepted' fait accompli of global factory production that are always elsewhere but no one knows quite where, we often find ourselves in unbelief that accuracy has slipped quite this far. I think too that simplified information can be misleading too. In the description the seller says, "Requires a 1/4" (5.5mm) hole between 13/16" and 1" deep (21-25.5mm)," Following this information I would have been in deep trouble. In reality, your stud sizing will best be determined by your actual saw and in reality, again, you will actually need at least three drills bits to make these fit in 95% of saws.

If you follow the guidance of a 1/4" hole and press-fit the serrated component into the hole of any hardwood saw handle the chances are you will most likely end up splitting the handle. If the saw requires four studs, then watch out, chances are you will have four splits in one! Also, the information says requires a 13/16" to 1" deep hole. Well, if the saw handle is the very standard 7/8" thick, I can tell you that the studs will not fit without a decent recessing of both screw and cap and not, "...the heads can be recessed slightly for thicker handles." For my 7/8" thick handle I had to recess 3mm each side as the components would not connect, never mind tighten. I doubt that you will find a wooden saw handle thicker than 1". If you do, then the recesses will need to be 4mm deep each side to work. that's about 3/16".
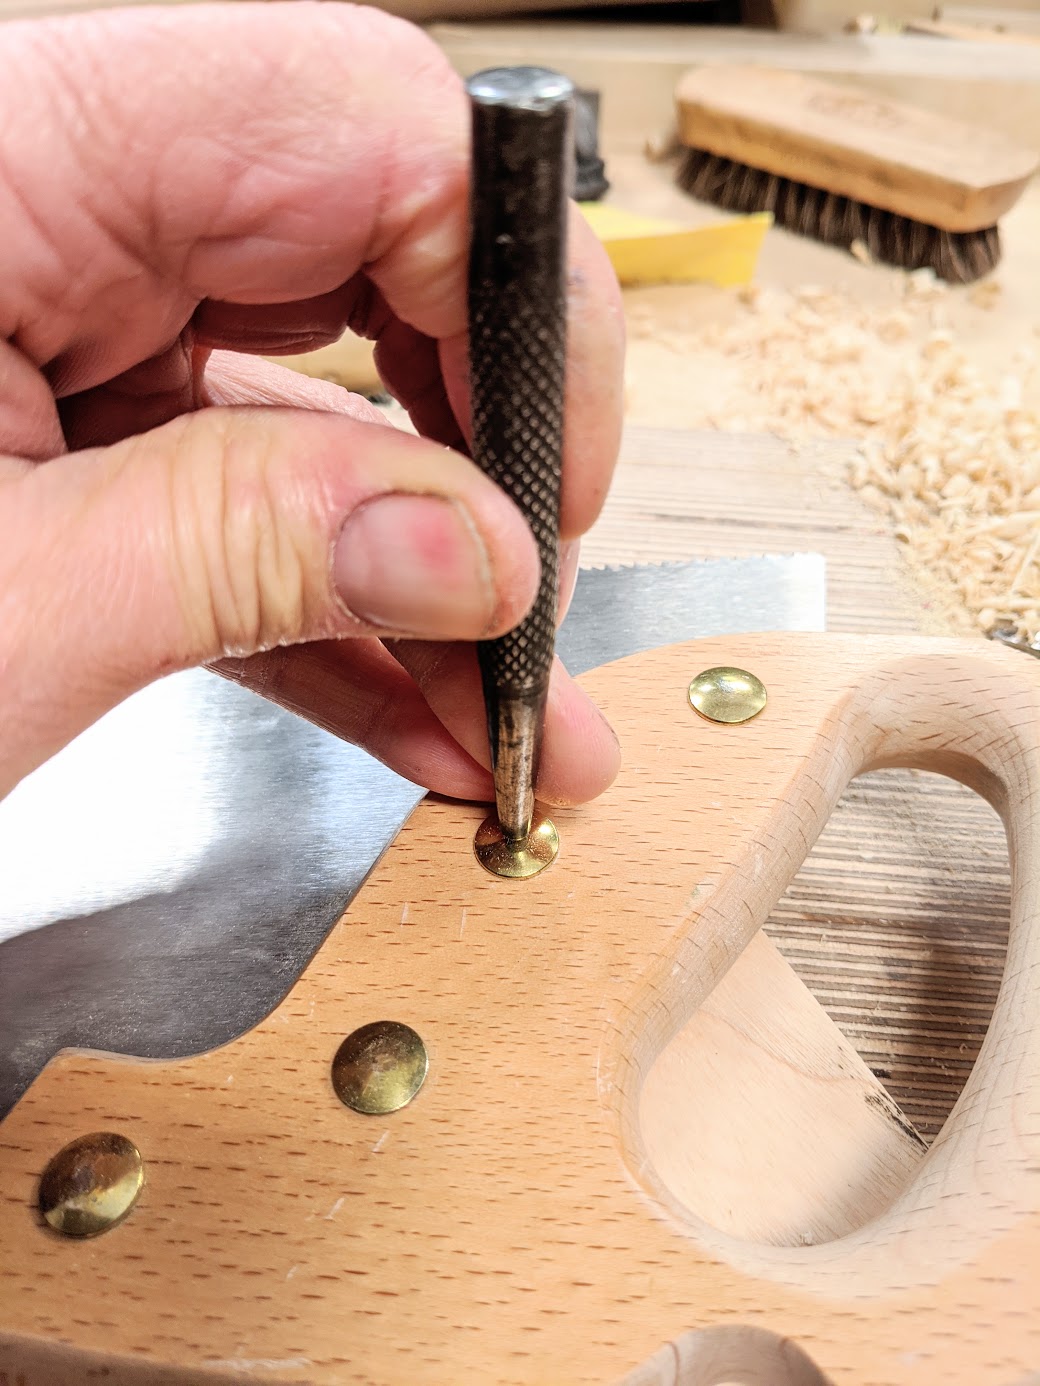
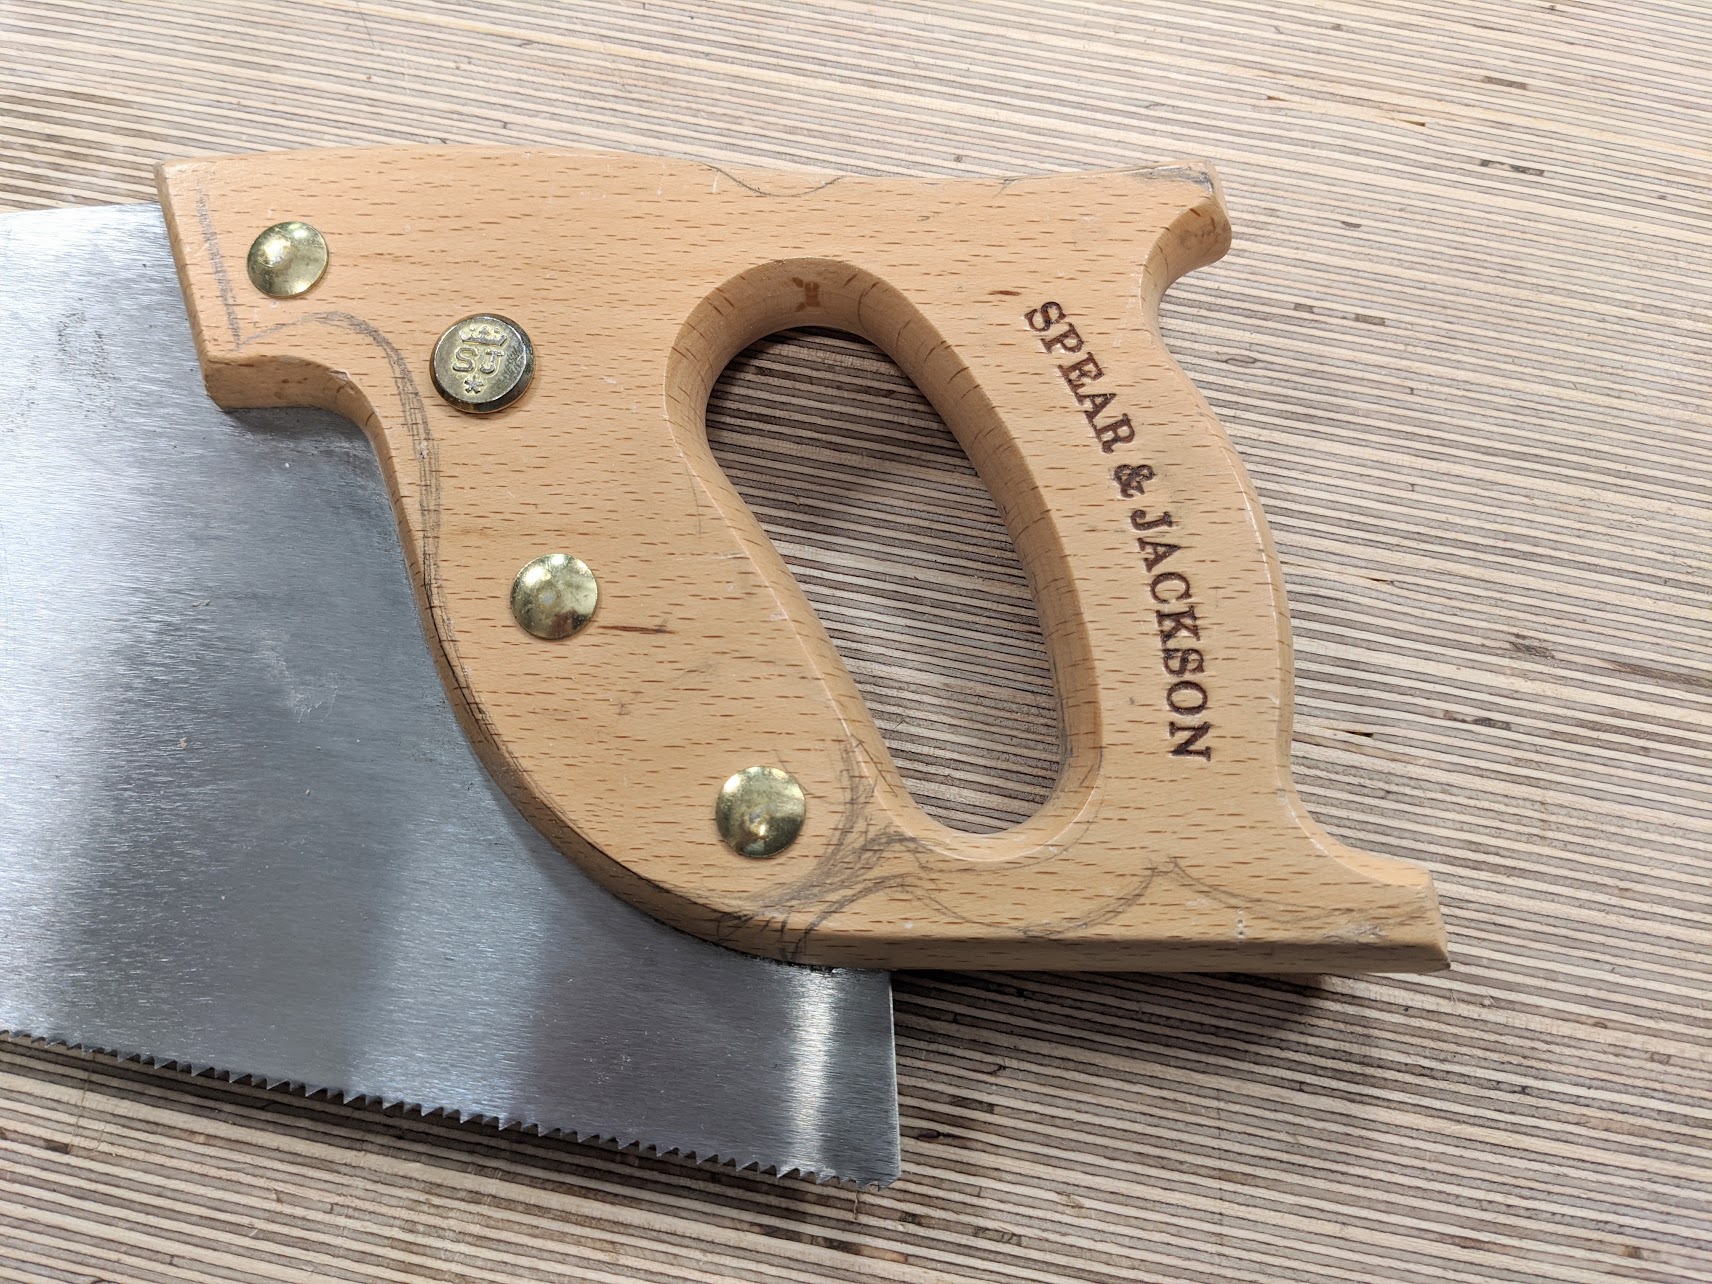
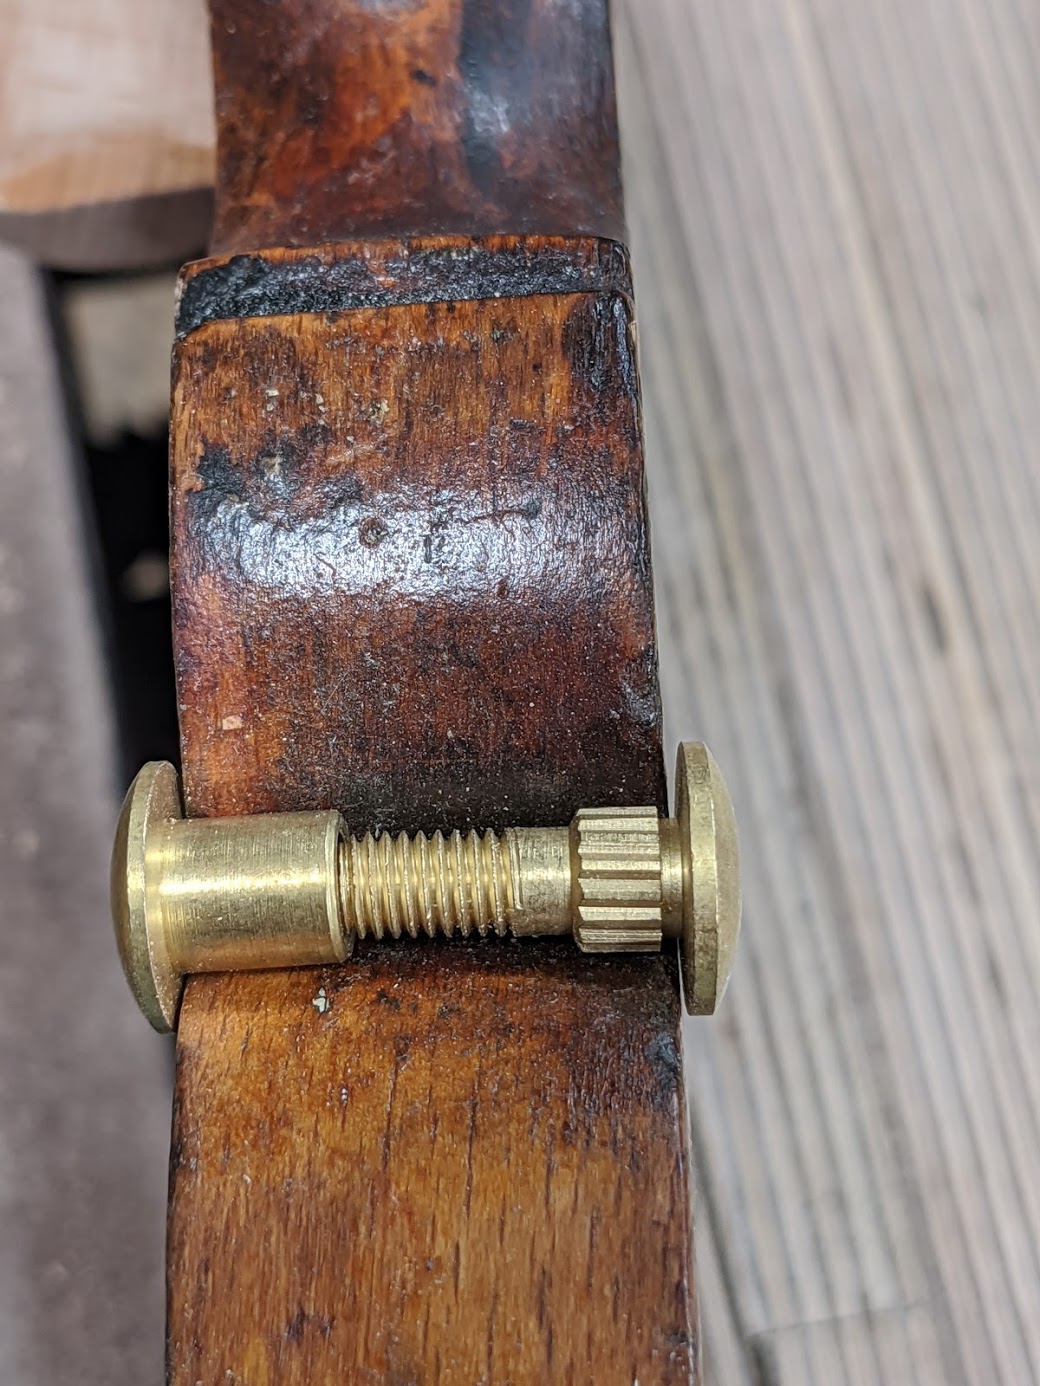
In redefining the shape of the handle of my now much-loved Spear & Jackson handsaw, I realised that I couldn't remove the handle for the maximum refinement I wanted without drilling out the core of the existing press-fit screws and caps. Now as far as functionality goes these screws and caps work just fine; if or when the handle shrinks, you simply place the studs on a hard surface and hammer-tap the stud. This pinch of the cap tightens on the circumference and length of the stem and secures the handle further. Surprisingly, they work well. Simple, but I must say that they are less attractive and they look a little cheapish because, well, that's what they are, cheap.

Whereas I could replace them with some vintage studs and nuts I already have, I feel that that would seem pretentious, and it wouldn't help others if they wanted to change theirs out too. Foolishly, instead of ordering one set to try a set out first I ordered two sets of four because I would need two sets, one for the first effort in developing and creating the methodology, to check the sizing, work needed, and then to get the design right. I can then use that to create a matched partner in the video I make.
I ordered my replacement sets wondering if one-size-fits-all works because the suppliers I sought to buy from sell only the one size. The information provided was minimally simplistic though, so it can appear that there really wasn't much to it whereas there actually is. When the first sets arrived I felt strongly that the screws and caps looked too short. Fact is that the only way for them to work would be to substantially recess the heads into both sides of the handle.
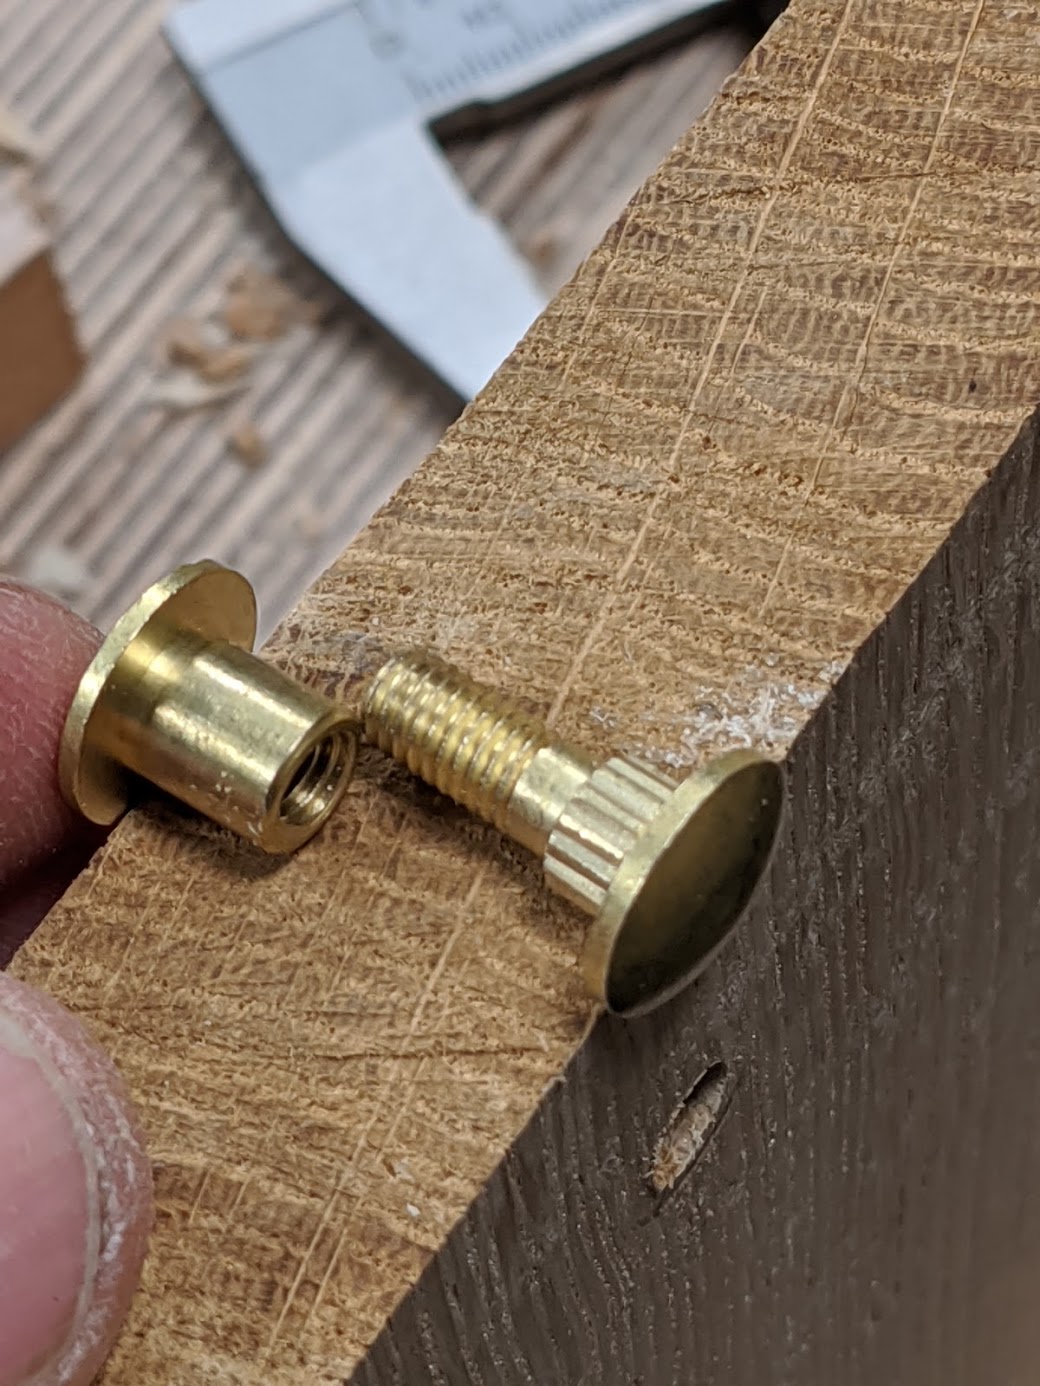
Whereas the supplier did say that you can drill them out deeper for thicker handles, so that the screws and/or caps could be recessed that way, the problem was I didn't want recessed caps sub-surface; not what I wanted at all. Too, for the recess to gain the purchase and then retain a good appearance meant I would only recess by 2mm; the gain meant that the threads would only engage by at most 2 threads.
Certainly, I could recess more but to get what I would consider a decent thread gain would mean a deep recess. The connection must be enough for a confident tight cinching. But by then, in my view, I have compromised the 'appearance' of the saw--something saw makers of old saw as critically essential and therefore really sought to perfect because they felt appearance was the heart to any saw made and that it maximised functionality. It was only after the Second World War when the real compromise became the established standard of utilitarianism that the industry would adopt as normal. The war brought many ugly looking tools, together with low expectation levels in tool making. This was so short-sighted because, as is the case with Spear & Jackson and many others, and even so-called premium makers, all they really had to do was spend ten minutes more on the handle to increase their price by £100 and more per saw. It takes hardly anything to make a really good saw. Mostly they require very basic engineering achieved by programming milling machines and such. Arrogance took over when the founders lost their grip in these once remarkable companies and their juniors, knowing nothing of the trade, took over and the juniors thought that they as the tail wagged the dog.
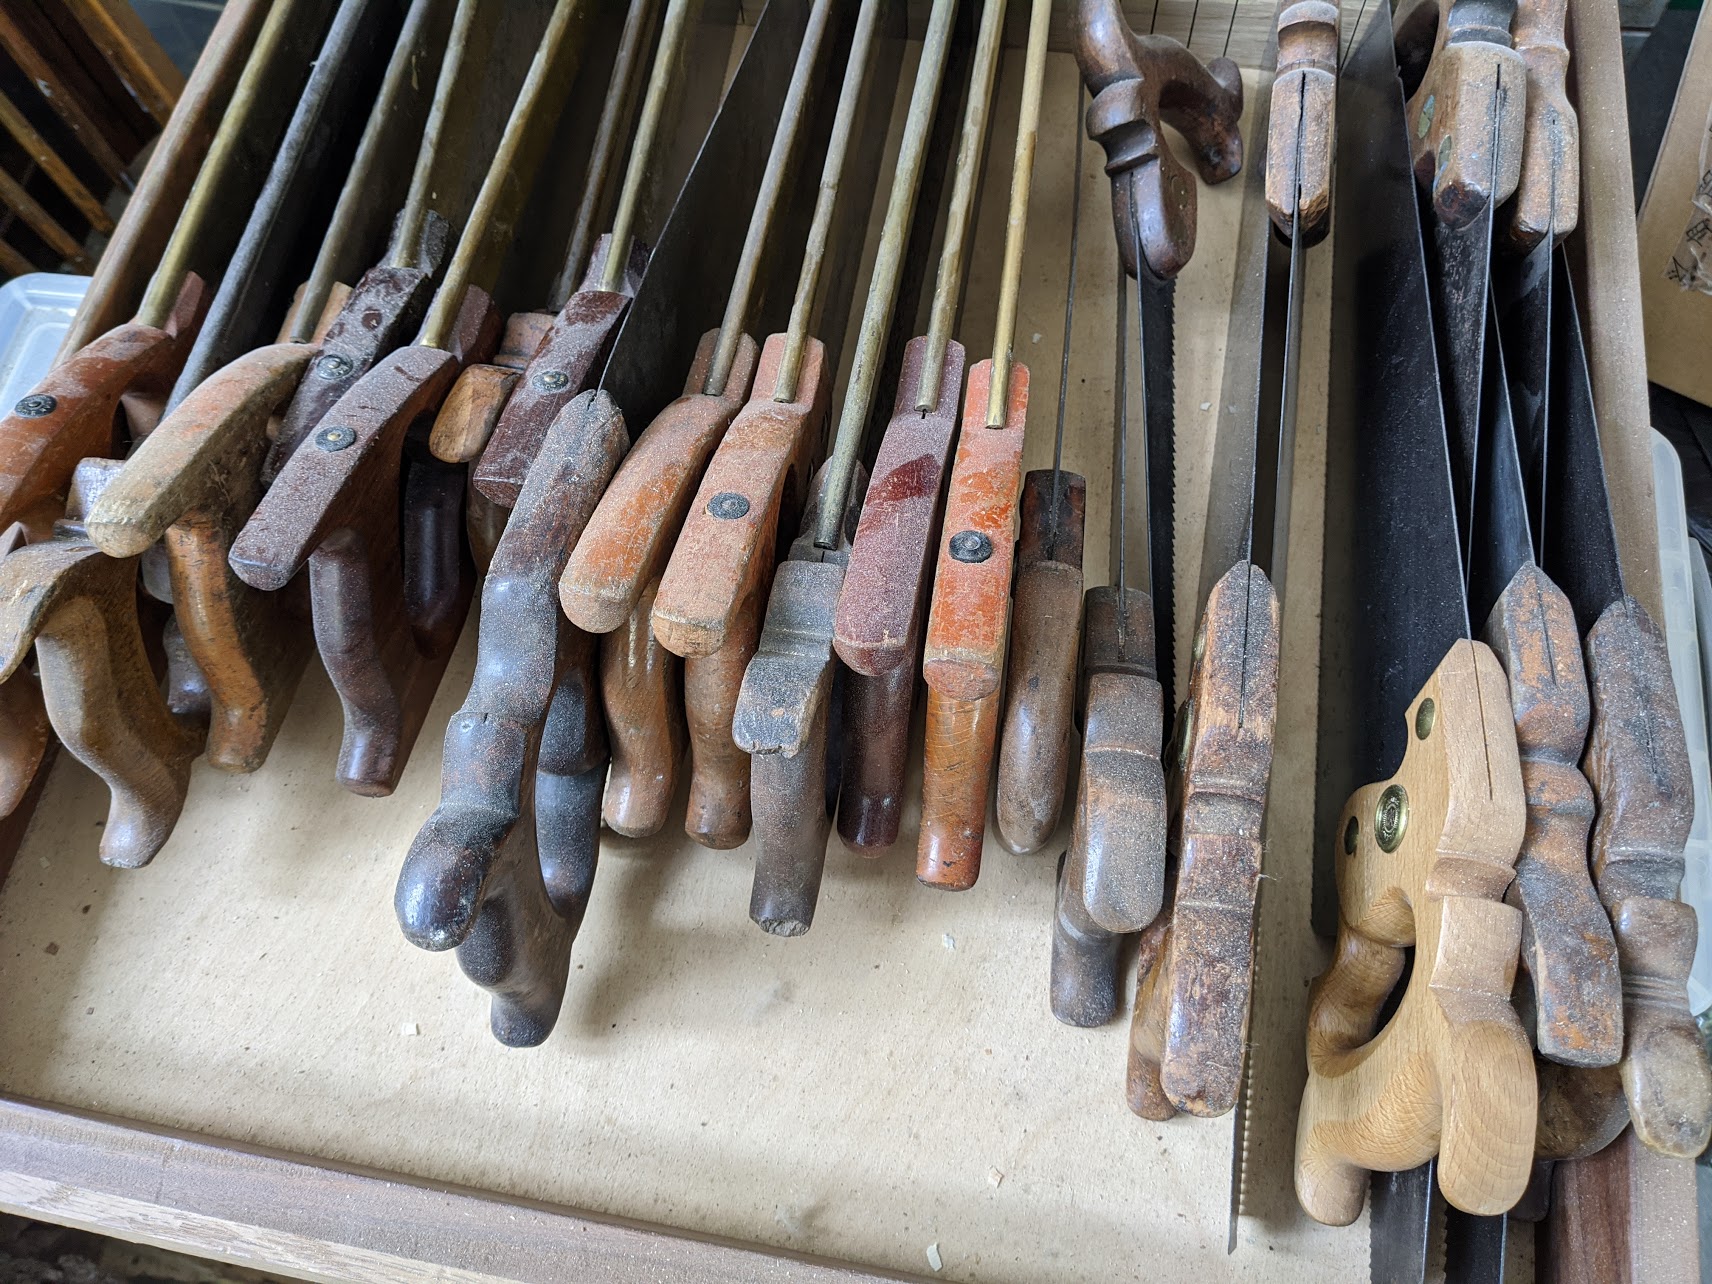
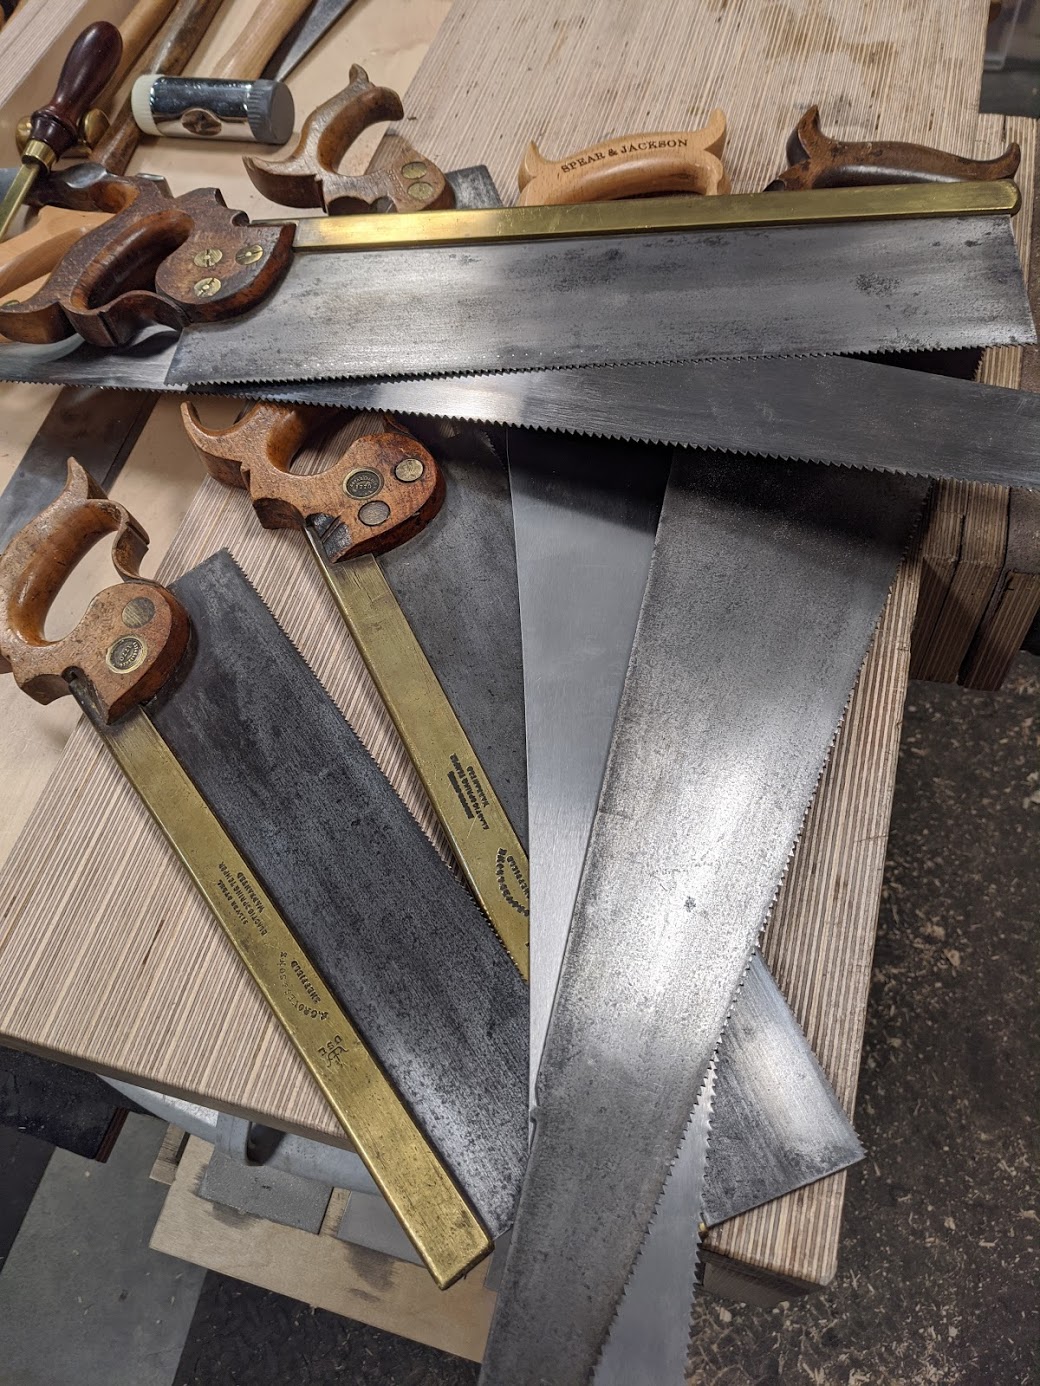
I checked the size on forty different makes or and sizes of hand and tenon saws to see which ones they might fit. It might surprise everyone to know that they all measured within half a millimeter of 22mm thick. That tells us that through two centuries a standard sizing was established and a one-size does indeed fit all. Not one of the saws would benefit from these new studs. New, vintage, and those in between, all of my saws, which are quite standard, were indeed too thick to work well using these screws and caps as is because indeed the threads would not even connect.
A simple solution
Checking precisely with calipers, it looks to me that the makers could simply make the barrel part of the caps 2-4mm longer to resolve the issue. By doing that, both the bolt (screw) and barrel (cap) components would fully engage with a thread count of four to six threads rather than one or two. The barrel or bolt could be filed shorter to suit should that then be necessary (but that would be the very rarity and not the norm) and just about any saw handle could be retrofitted without needing a variety of sizes: problem solved.
I did consider reducing the thickness of the S&J saw handles by 2mm each side, but felt that that would make the saw handle just too thin.
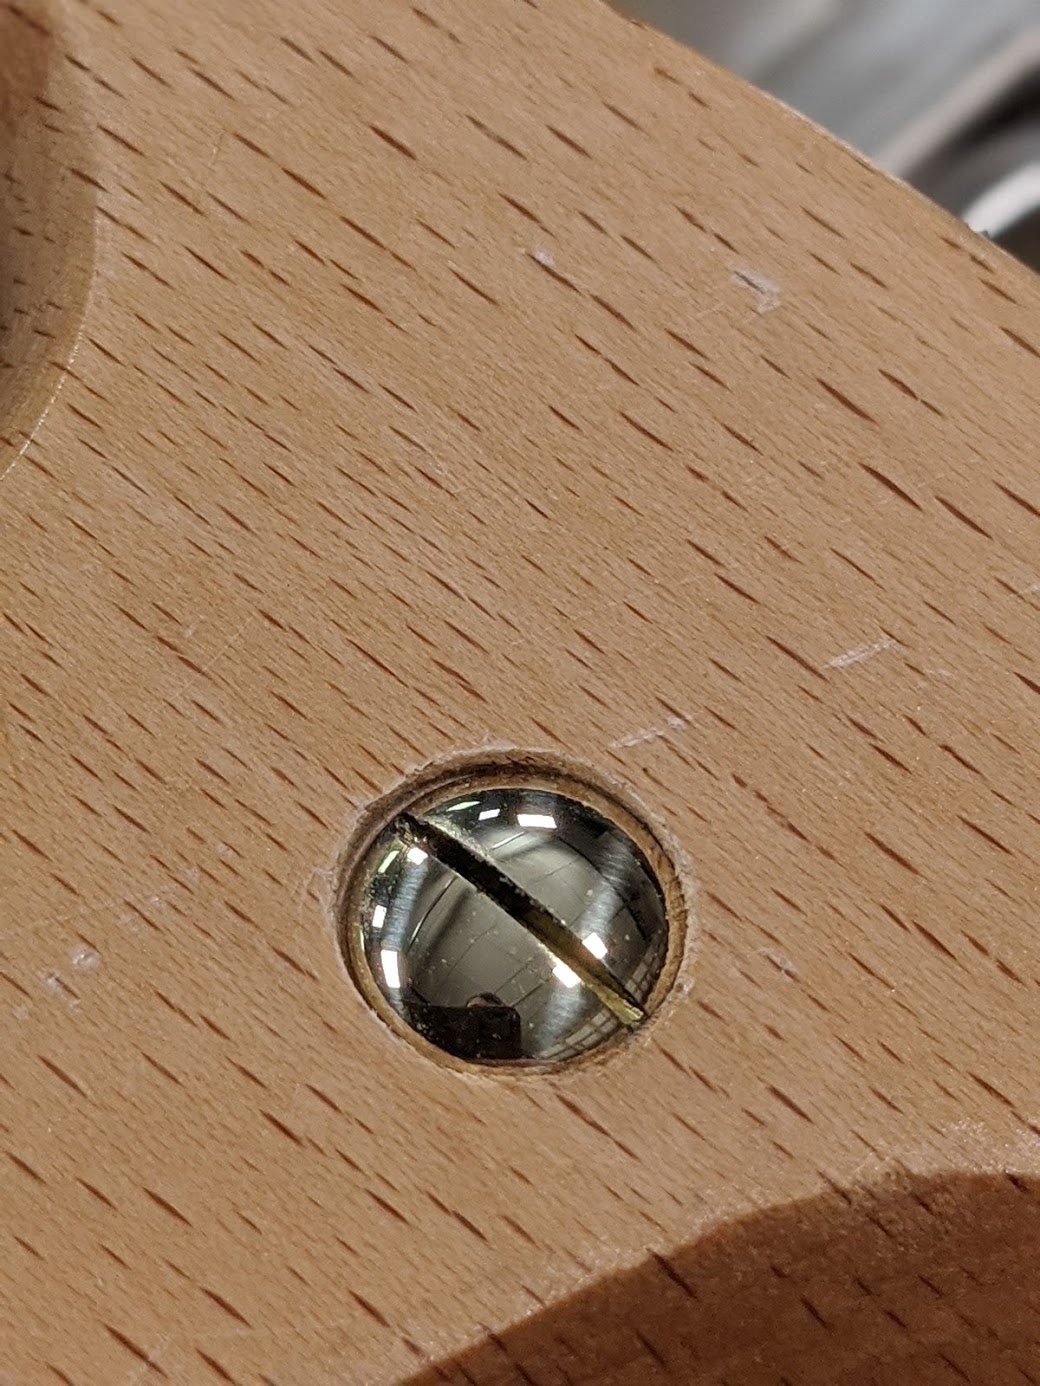
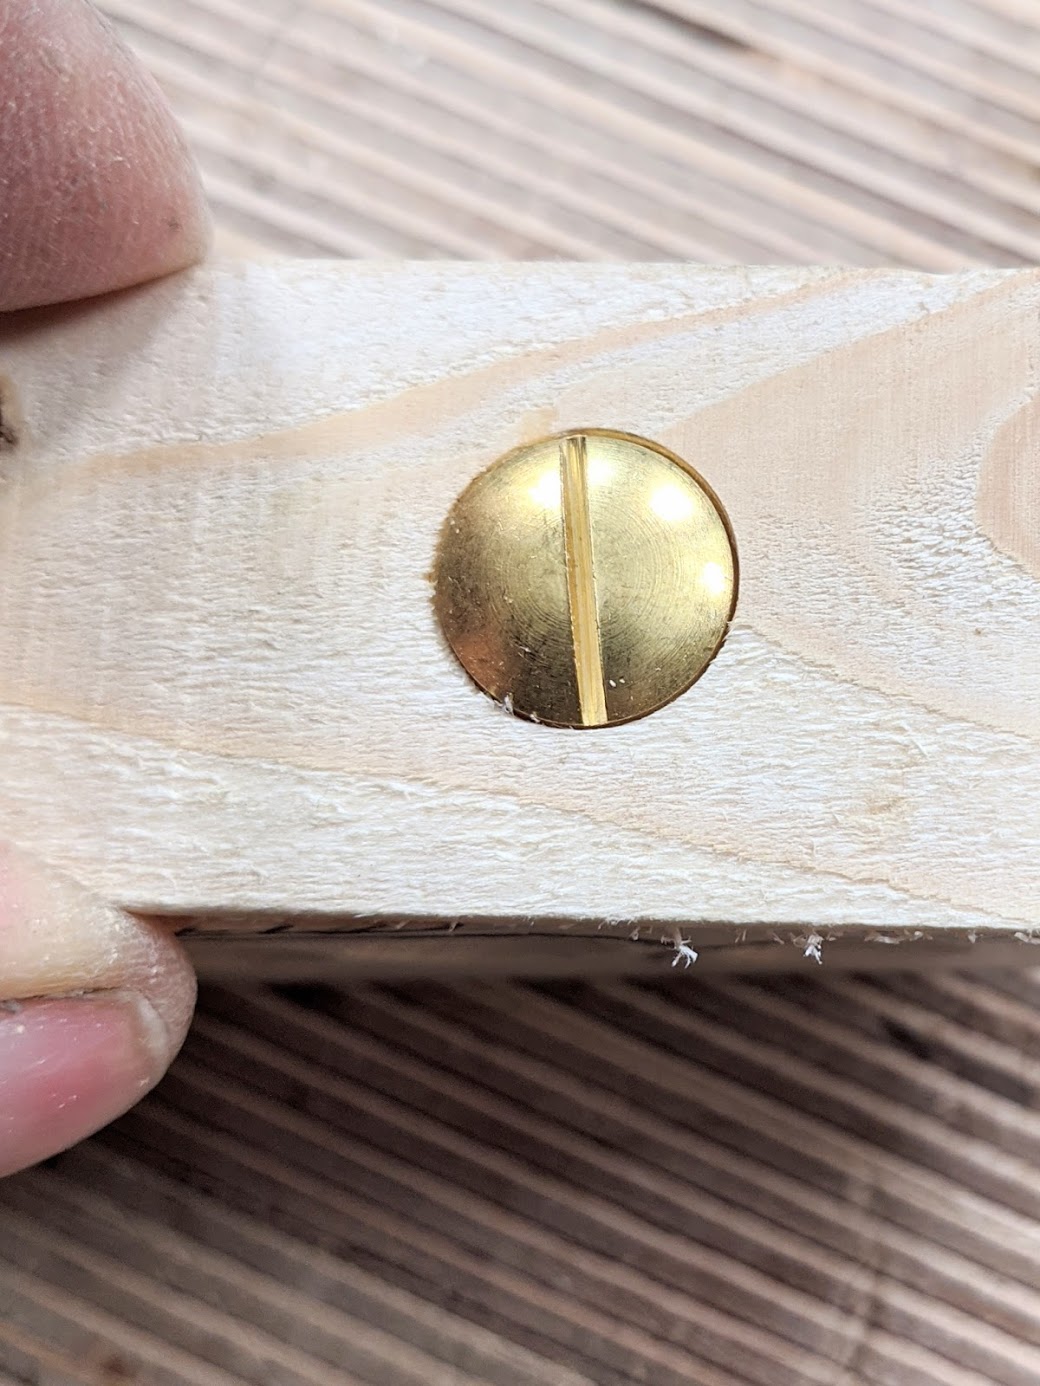
Below pic shows the cap recessed 1mm which would be my preference for domed screws and caps, but still not enough to engage the thread in the very standard 7/8" thick handle.
I decided to try another UK supplier. Their studs would apparently fit any saw up to 1" (25mm) thick without recessing the heads. Few handles are ever that thick, and their price was fair for such a specialised item too. I ordered a set of their regular brass screws and caps with the slotted head and then a set with split nuts. Indeed I was right. These studs can be readily cut to fit simply by filing the barrel and or the screw. With all of my handsaws, tenon saws and even my dovetail saws measuring 7/8" thick, ~22mm, my first set of screws and caps offered did meet at 20mm, but the threads did not actually engage until 18-19mm. Not near soon enough.
I am hoping that these things will help you determine what to do to make screws and caps work in your saw. Personally I would not spend £6 to £12 per set on studs. £10 per set of four works fine for me and they look fine too. My complaint is only minor and I made mine work for me. The sizes you are given online to work with and make decisions by may not be that helpful if the engineering isn't altogether thought through to align with your expectations. For instance, if the inner lip inside the barrel part of the cap, the part receiving the threaded screw, is beveled or recessed, the chances are that the screw cannot actually engage in the receiving thread before entering the barrel for the first one to two millimeters. Of course, there is nothing deceitful going on with the suppliers or the makers. There's just more to this than meets the eye that's all.
The problem is you cannot access the proper and detailed information until you've bought the screw and cap set and hold it in your hand. Now don't think that this inner bevel is bad engineering. It's common practice to 'guide' the 'bolt' in a centered presentation to the hole. Combined with a similar chamfer to the screw (bolt) it pretty much guarantees there is no cross-threading to the threads in either part as they first engage. But in our case, it is unhelpful because it compromises thread engagement by several thread counts.

Drilling the holes, fitting the screws and caps
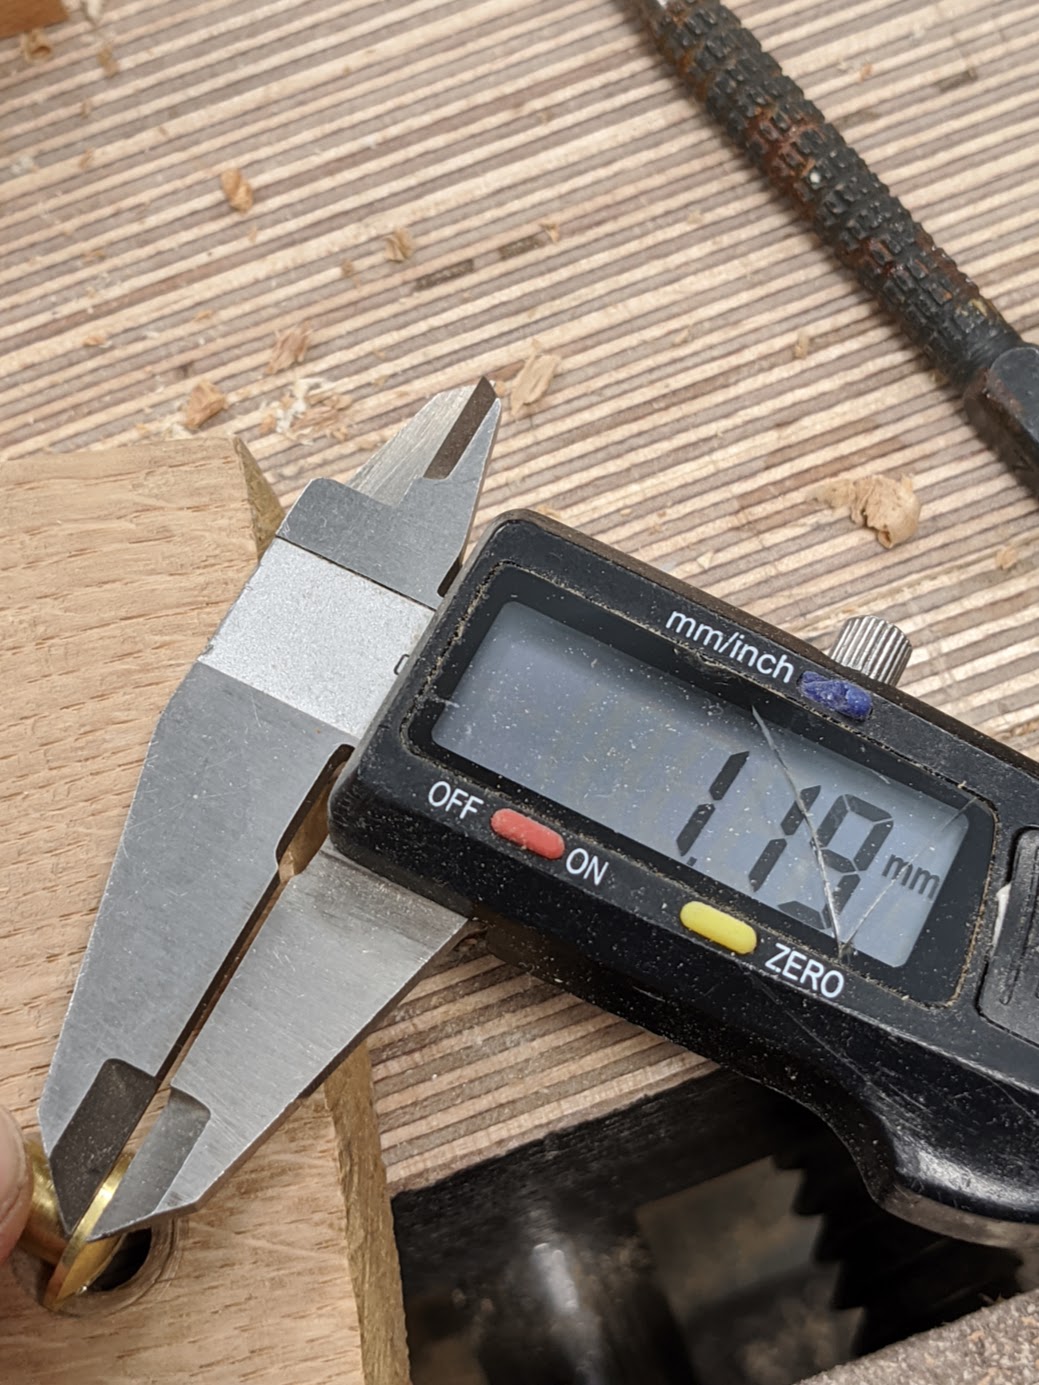
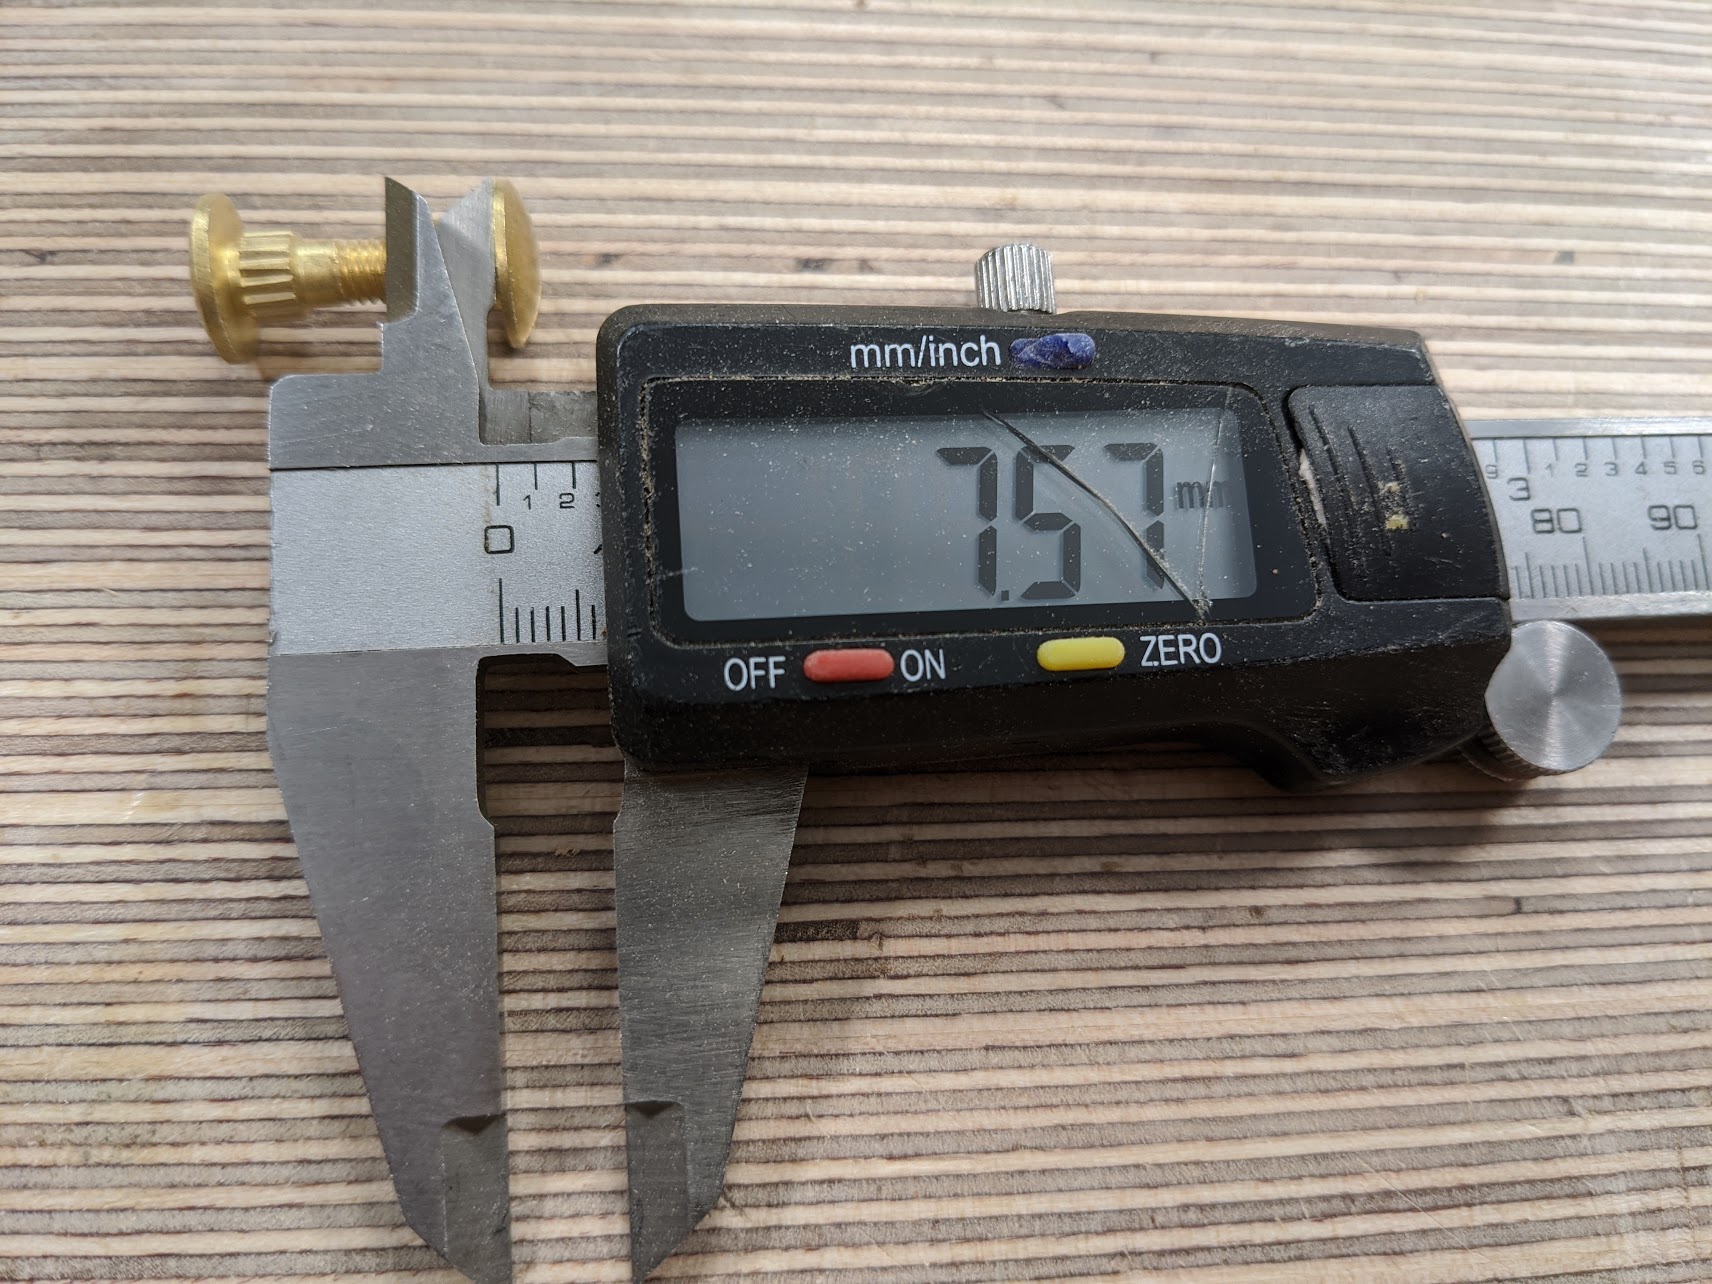
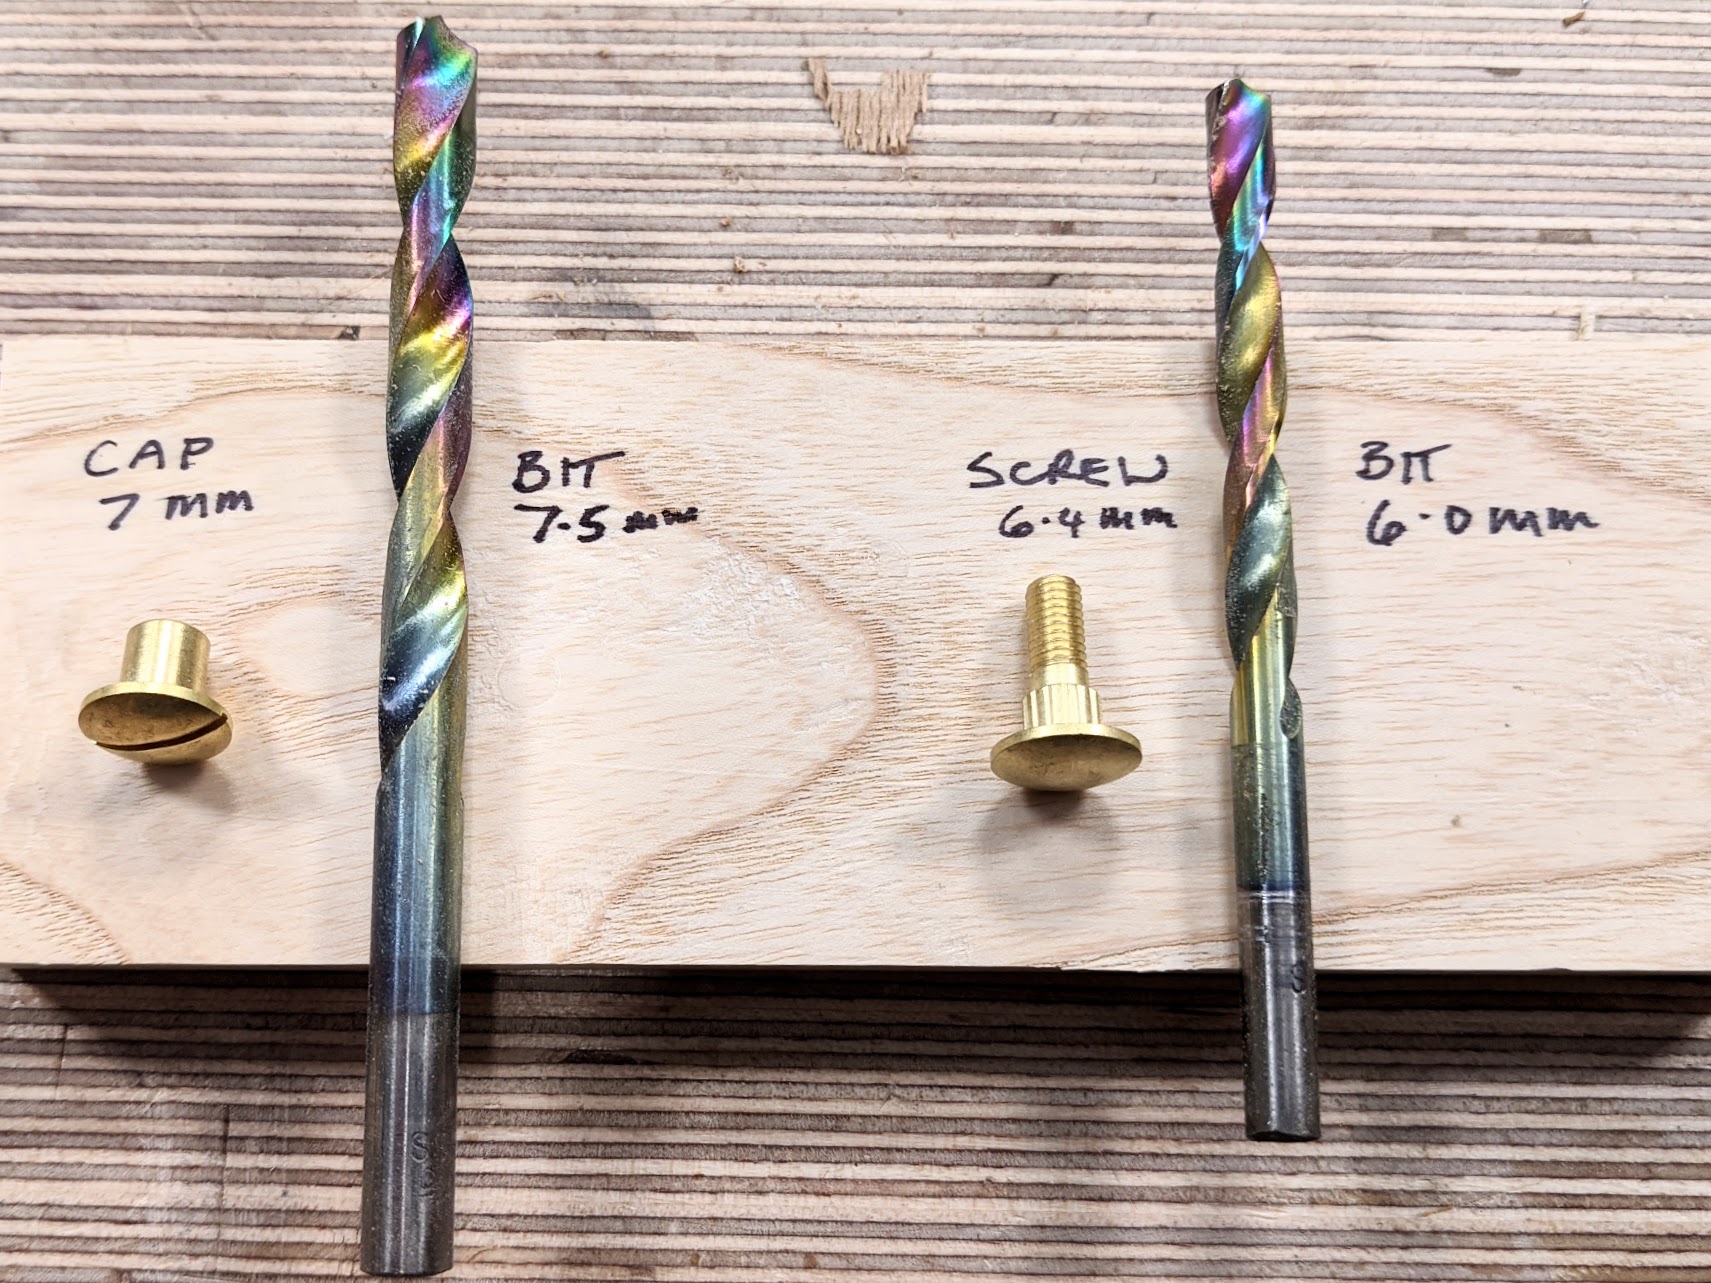
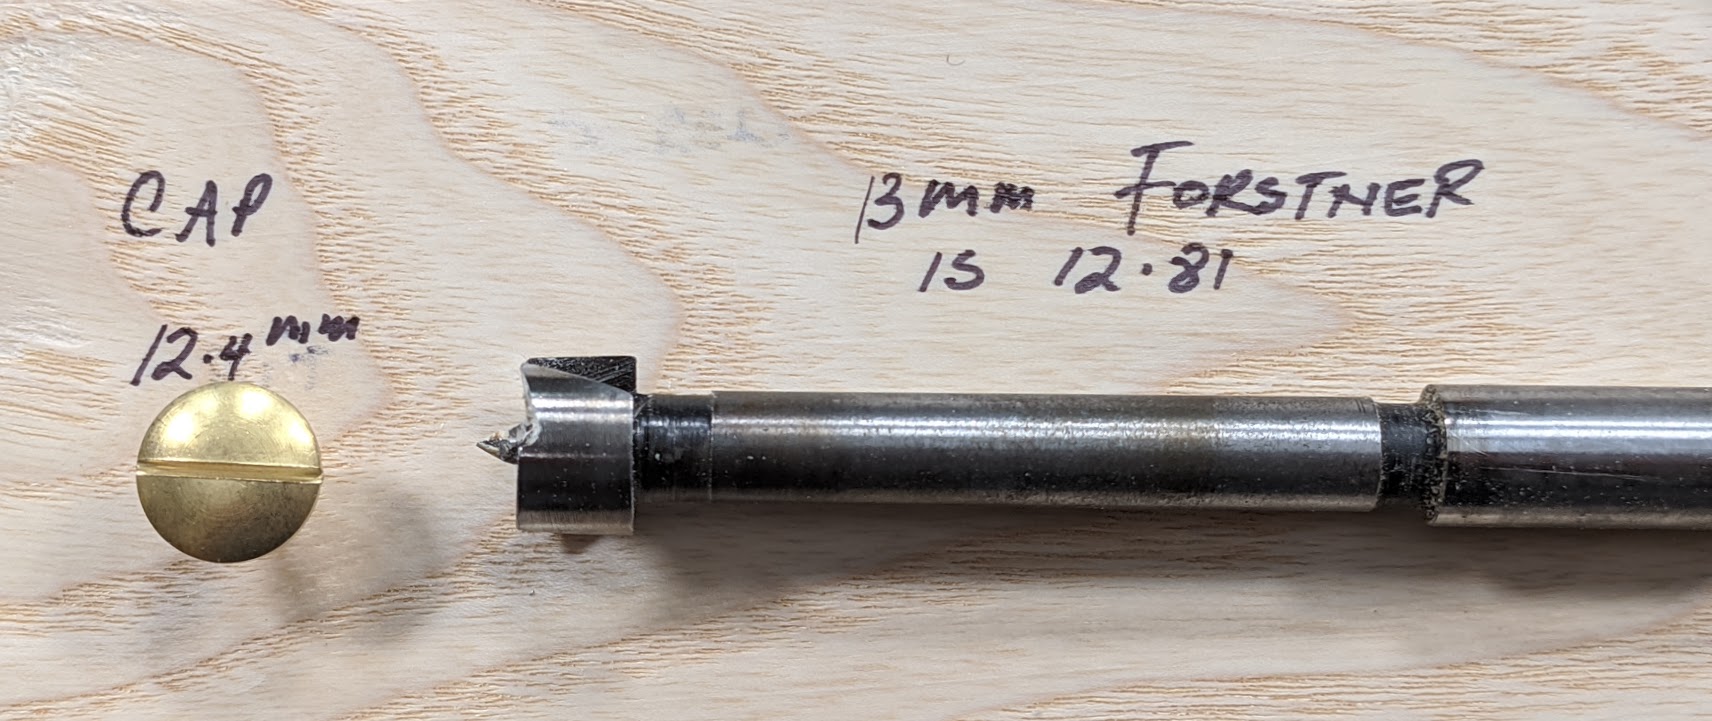
For the first sets of studs to fit, you will need three drill bits to make these studs work in your saw, not the single 1/4" suggested: Two twist drills 7.5 and 6.5 and a rim bit like a Forstner 13mm. As you will see in the images below what the variations were in sizing. What was stated on the bits was not the outcome under the eye of the vernier calipers. I felt, after a lot of consideration, that the studs worked okay. Unfortunately, the supplier did not give the diameter of the screw set heads. That would have been helpful but perhaps difficult as the diameter is far from standard at 12.4mm.
Usually, when stepping sizes to create steps, in new work we start with the larger and then use the centre-point of that hole to guide subsequent step sizing. With our saw, the hole is already in place and you have no centre to work with. In our case, it's not a problem as subsequent hole sizing is larger, not smaller, until we come to the rim hole that is.
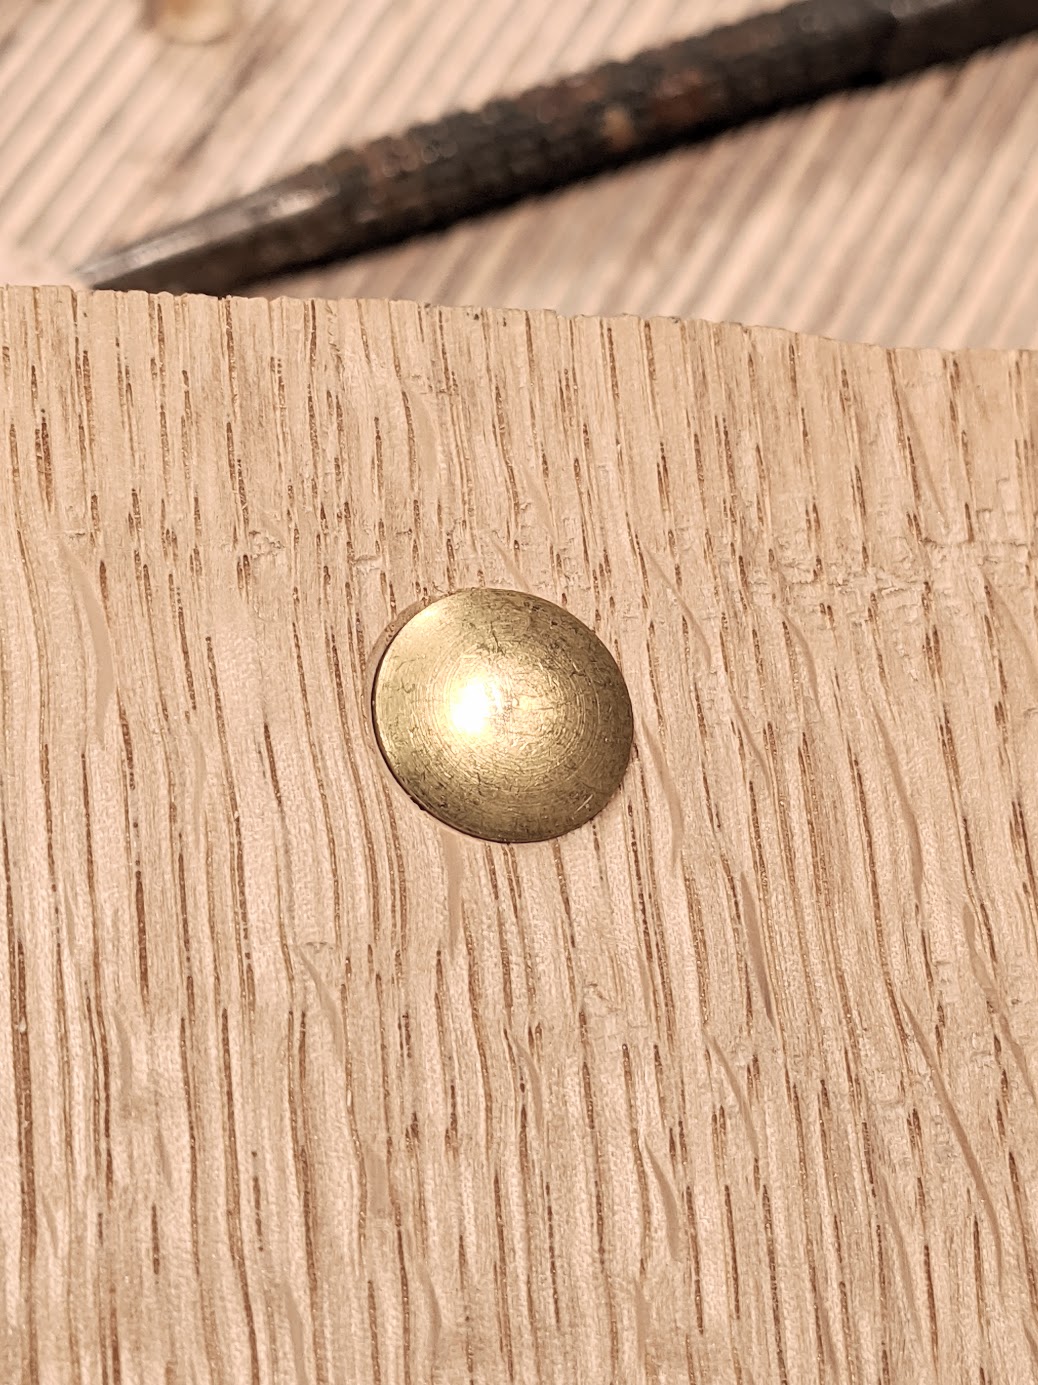
Drill through halfway with the 7.5mm bit. This size is slightly larger than the barrel of the cap because this cap needs to rotate to tighten the cap onto the stem and also, the fractional difference allows a little flex for alignment of one component to the other. From the other side drill the 6mm hole. This is larger than the screw part but smaller than the serrated part. That means that the serrations engage the wood but not so much as to crack the wood as you press the stud home in the vise.
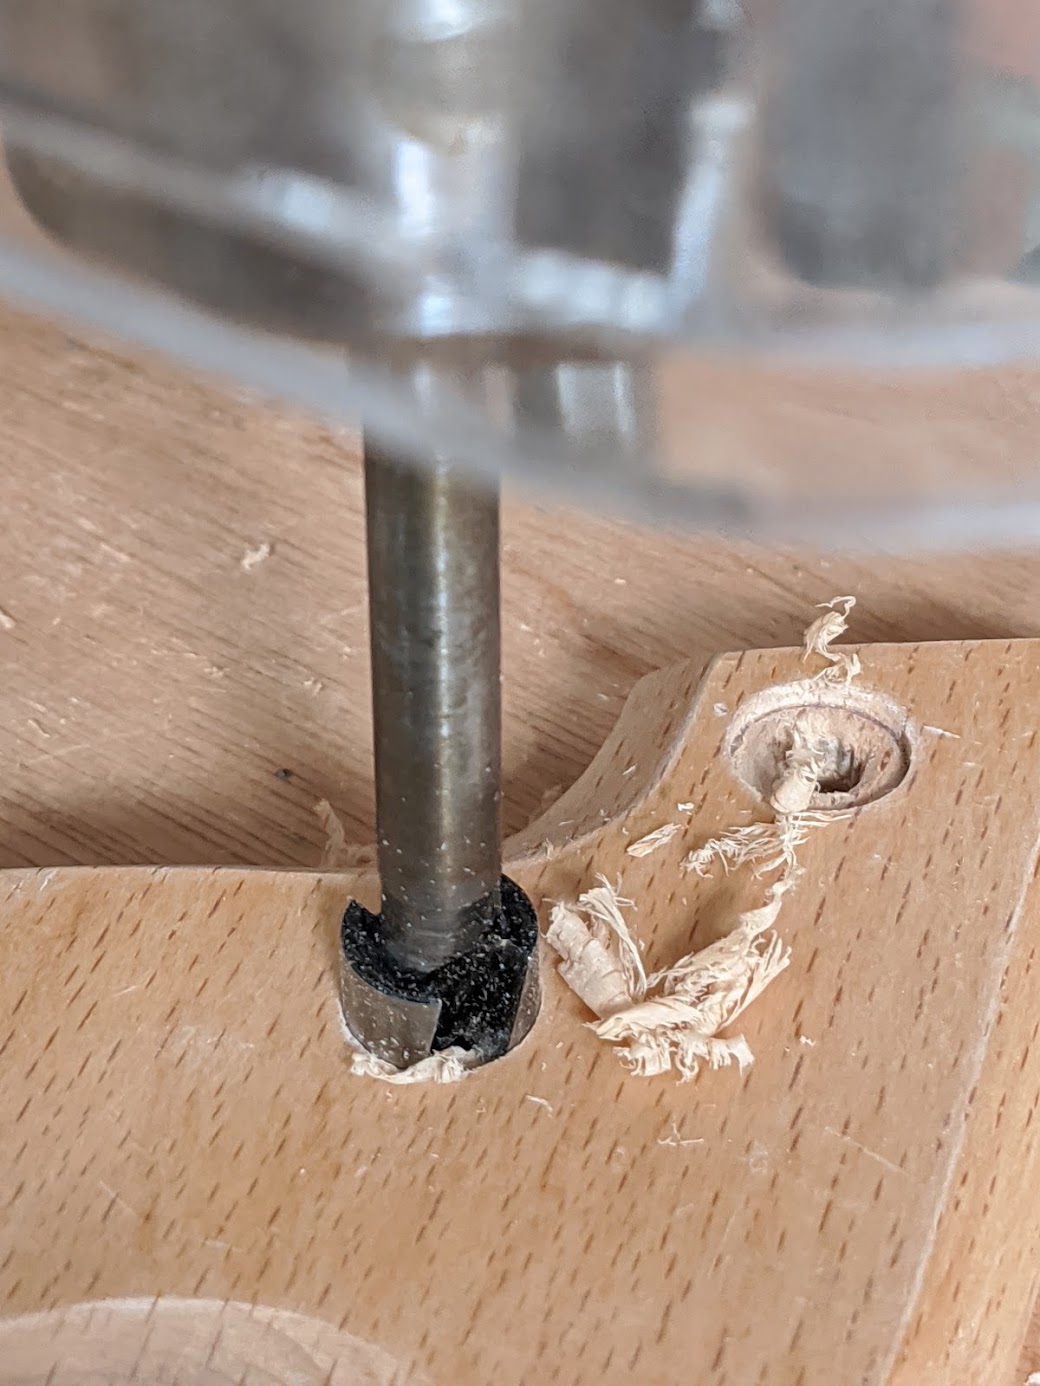
If your handle needs the recessing, set up in the drill press and drill only to a depth you determine beforehand in a scrap of wood.
Additionally, you may need to drill through the saw plate itself to enlarge the hole for either the cap or the screw stud. The plate can be extremely hard at this point as often it has not been annealed here. Just be prepared.
I will show results with alternative supplier's studs soon.
Comments ()