An Affordable Spokeshave For You
I bought a spokeshave you can afford and one I haven’t tested out before either. I liked the look of it and Draper UK has been a long established distributor of all kinds of tools, machines and equipment here in the UK for decades and whereas their quality is generally accepted as reasonable to well made, it's not necessarily high-end, so pricing is always within reach too. As with all distributors who distribute but don’t use, they can be the source of package misinformation, but I can live with that as long as the product works in the hands of the users. This standard pattern #151 spokeshave does. I tried to imagne what George would have said to me if I'd said pass me the spokeshave, George.
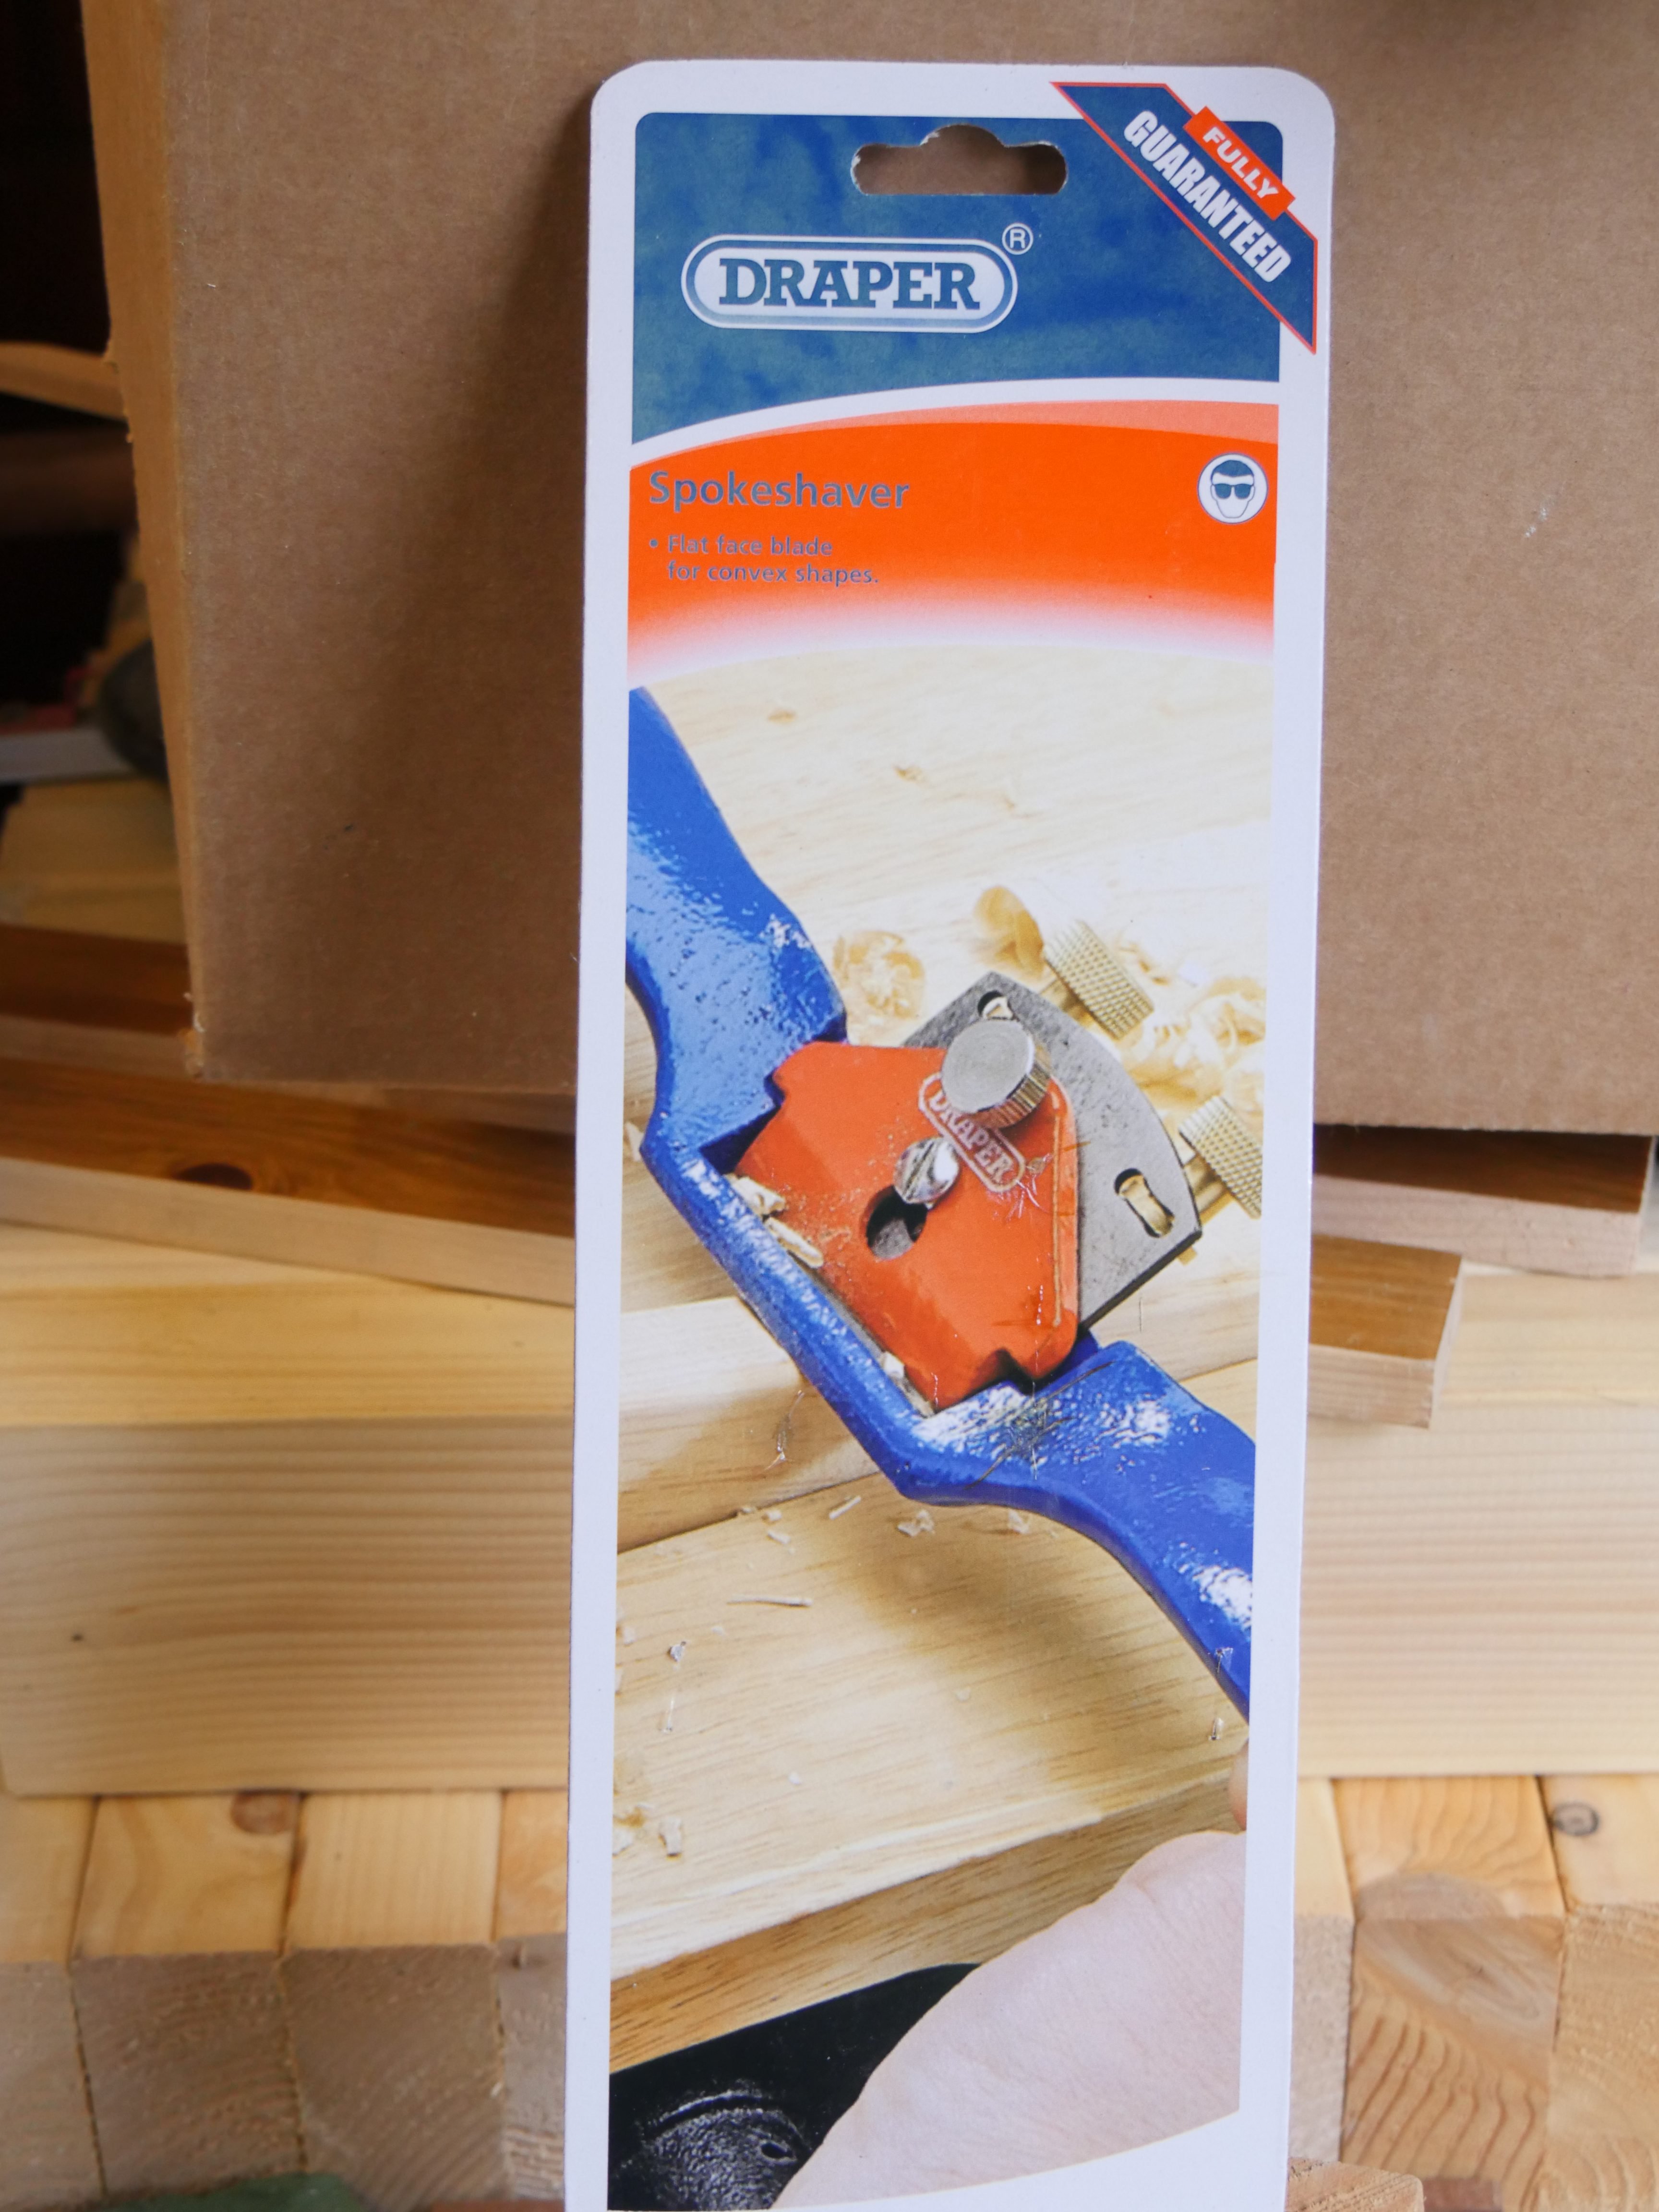
In this case the cardboard package backer says that, "the spokeshave is for convex surfaces" whereas it works equally well in convex surfaces too, just so long as the diameter doesn't exceed around 6”. Oh, and we don't call it a spokeshaver either. Someone somewhere sitting in a buyer's office, or perhaps a copywriter??? Even spellcheck got it right. Anyway, they got it right on the back of the package so we're OK with that. The funny thing is they show it being used on a concave surface and they actually got it right without knowing that it does work both both surfaces.
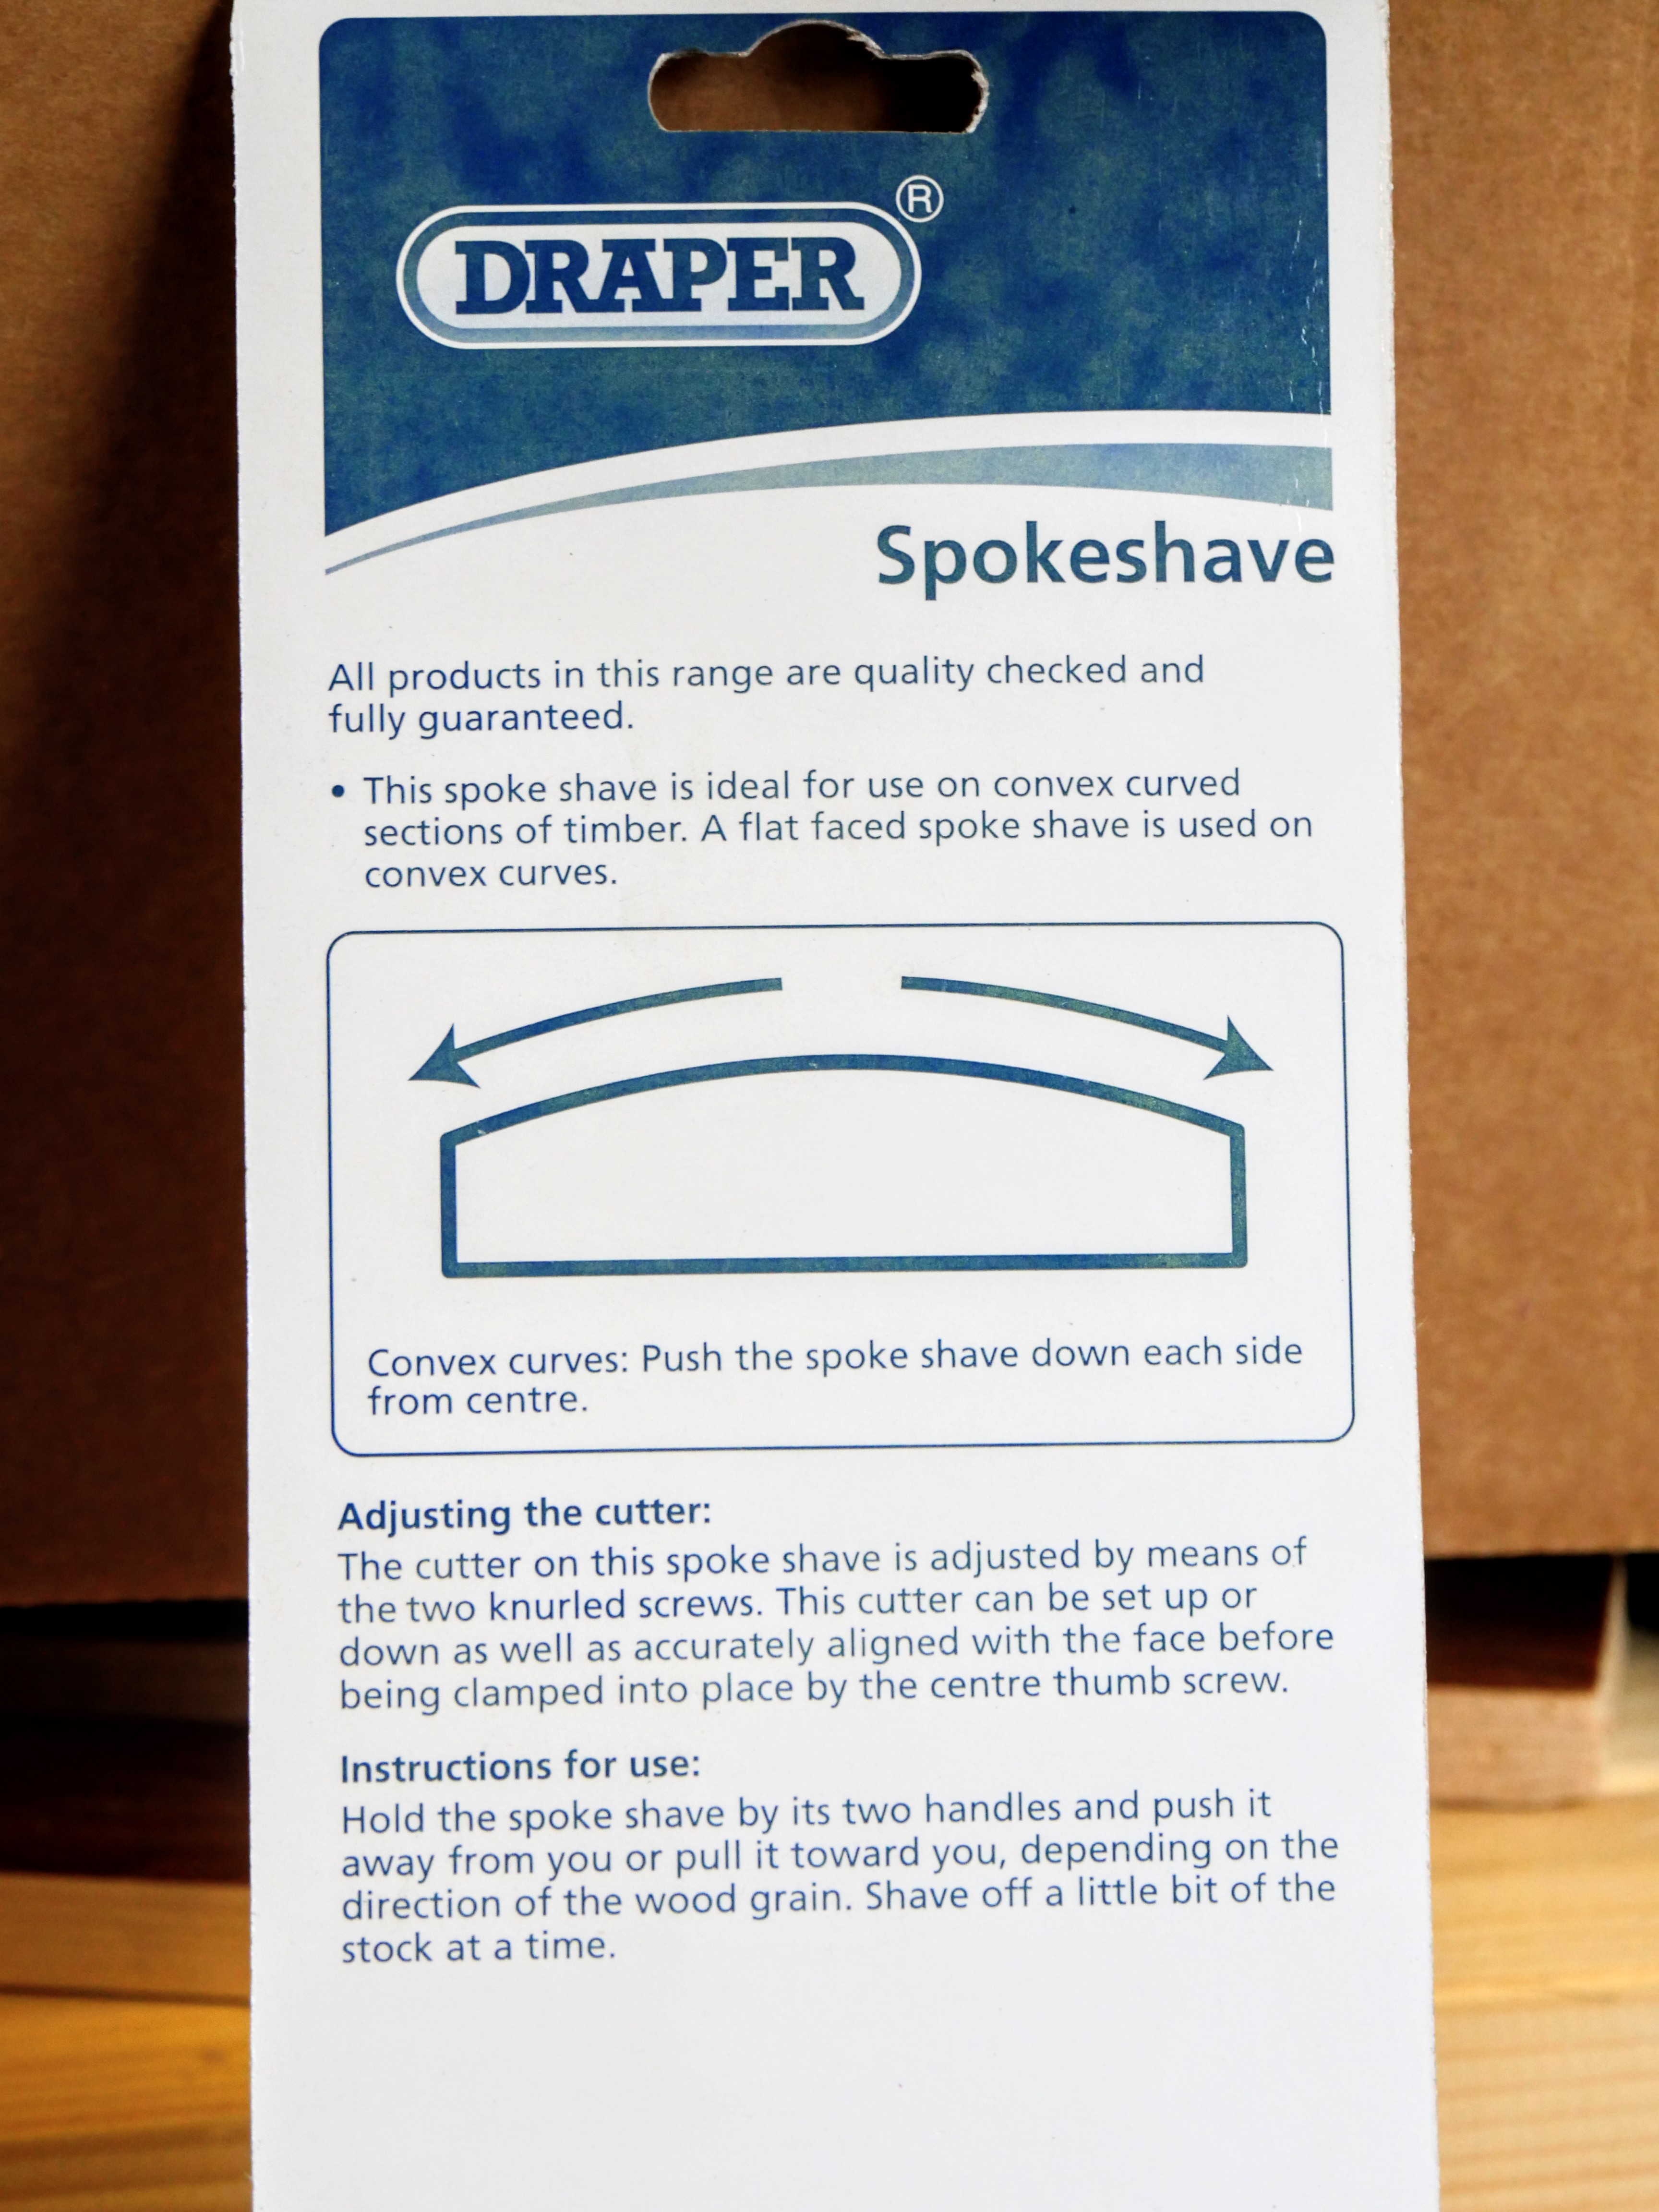
Do what you read on the package and you will encounter serious issues. In this case it says that, "this cutter can be set up or down". That's very far from true. This spokeshave MUST be used with the bevel down only. Bevel up will leave the surface of the wood looking like a corrugated roof or an old-timey washboard.
In most cases you need only a flat-bottomed version of the spokeshave and will rarely need or use a round-bottomed version.

The spokeshave did arrive very well packaged using some recycled boxing materials, which I liked. Double boxed and pillow-packed in airbags and brown paper–all recyclable, the tool arrived in perfect condition. Shipping was free—I have ordered six more —I was pleased with the price, the quality, and the functionality at the bench in oak, pine, cherry and sapele.
Price is always important. The nearest any other domestic maker can come to match currently is with a Stanley UK, which may vary but is usually twice as much. Now that vintage #151s are selling so high, the Draper is a good alternative.
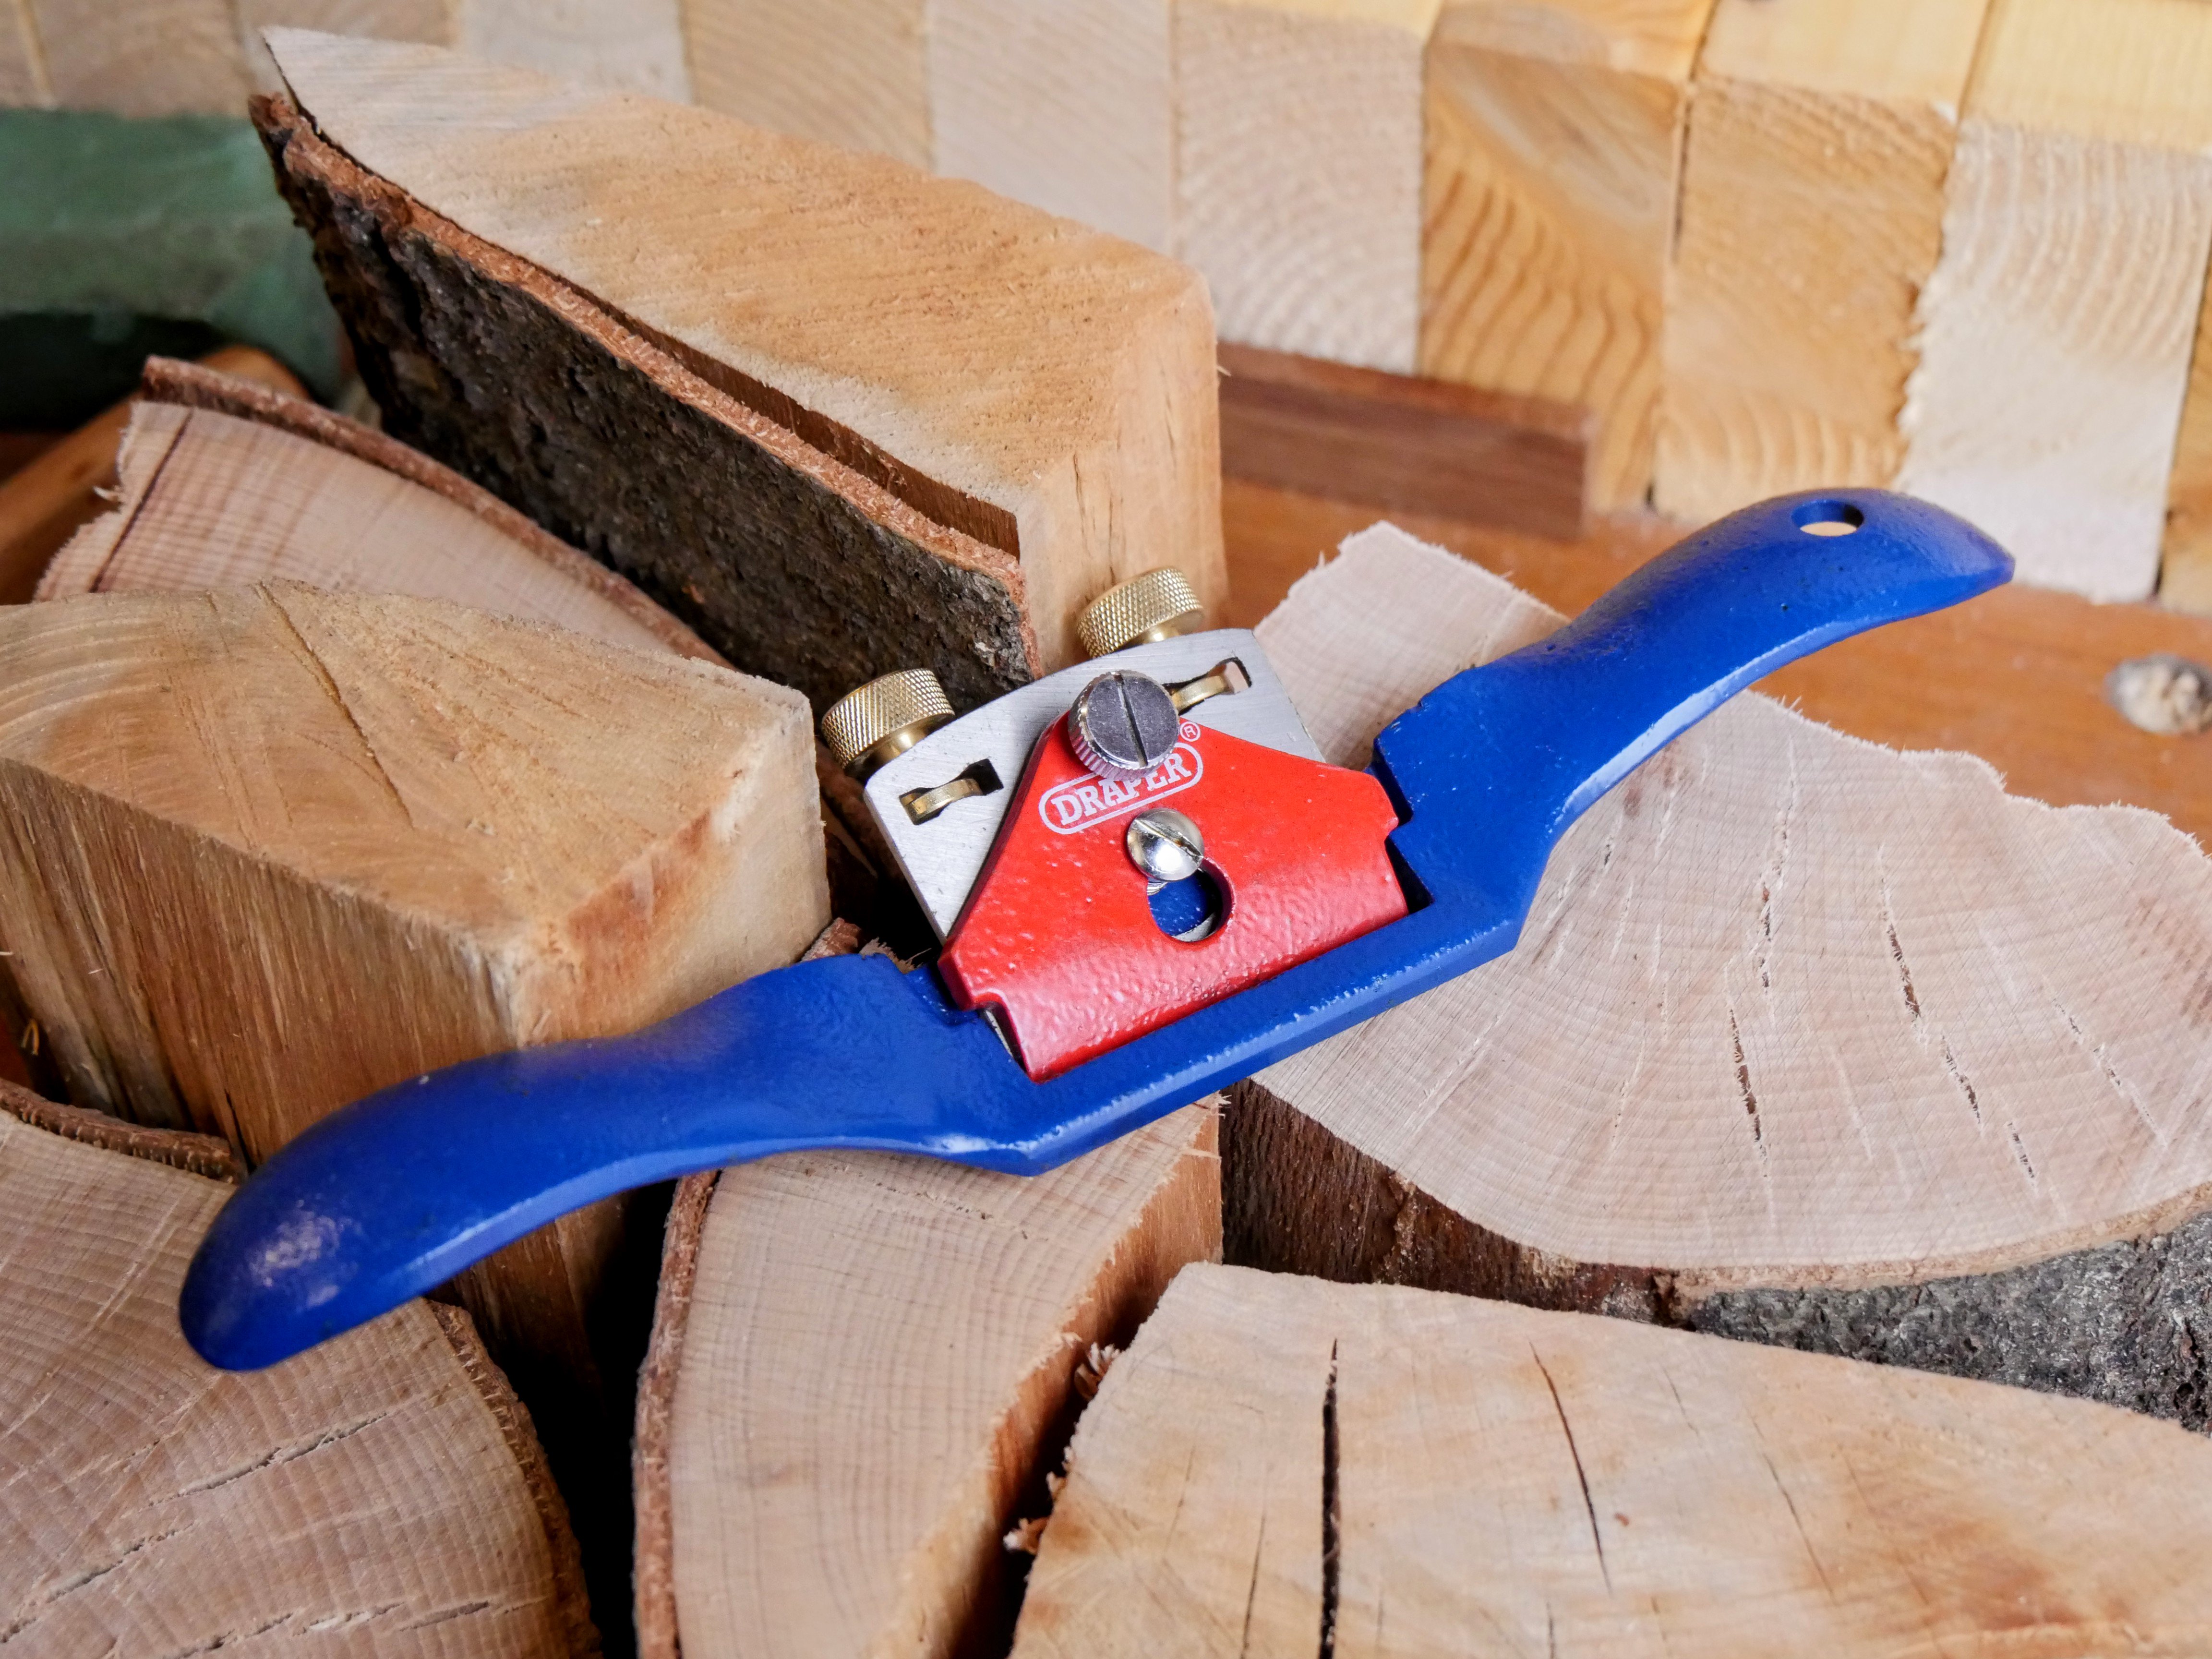
One thing in particular that worked well for me is the brass adjusters that operate very smoothly in both directions. The threads into the sand-cast body are good, with little play and none of the established makers, even high-end ones have zero play.
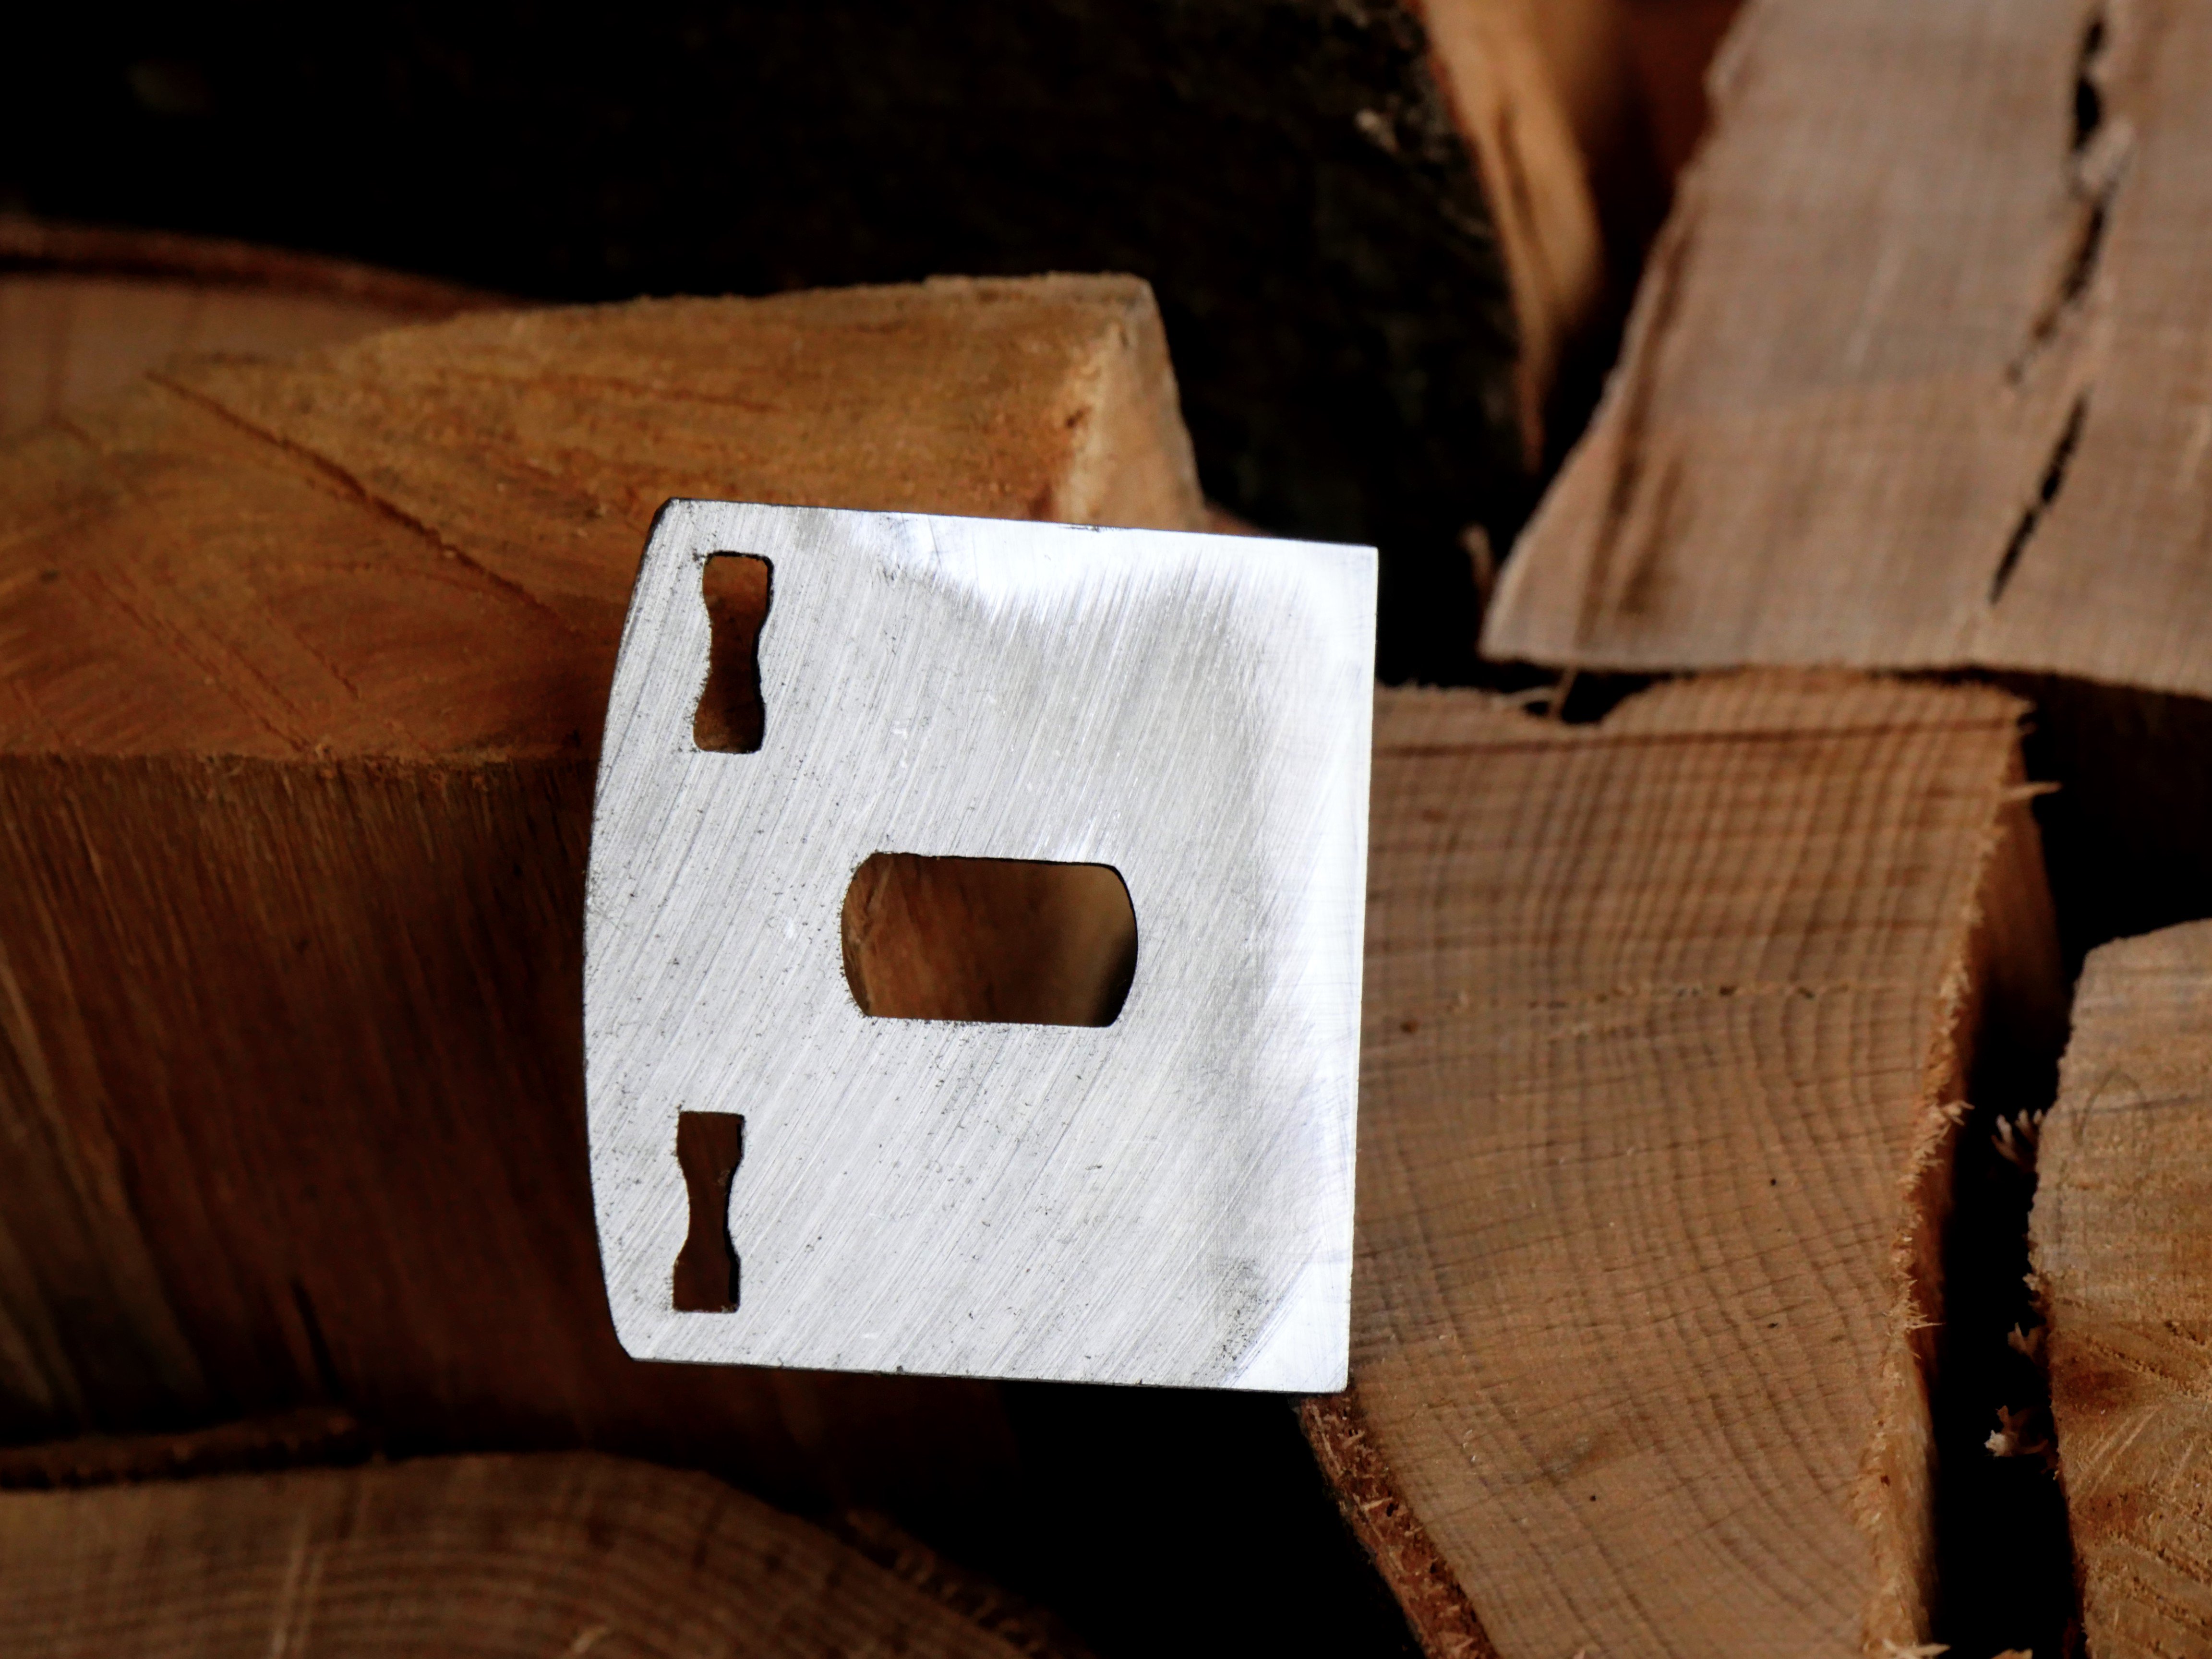
The blade was close enough to flat and as can be seen was ground ever so slightly concave. Whether intentional or not, the blade back honed out quickly enough because of it so sharpening was quick.
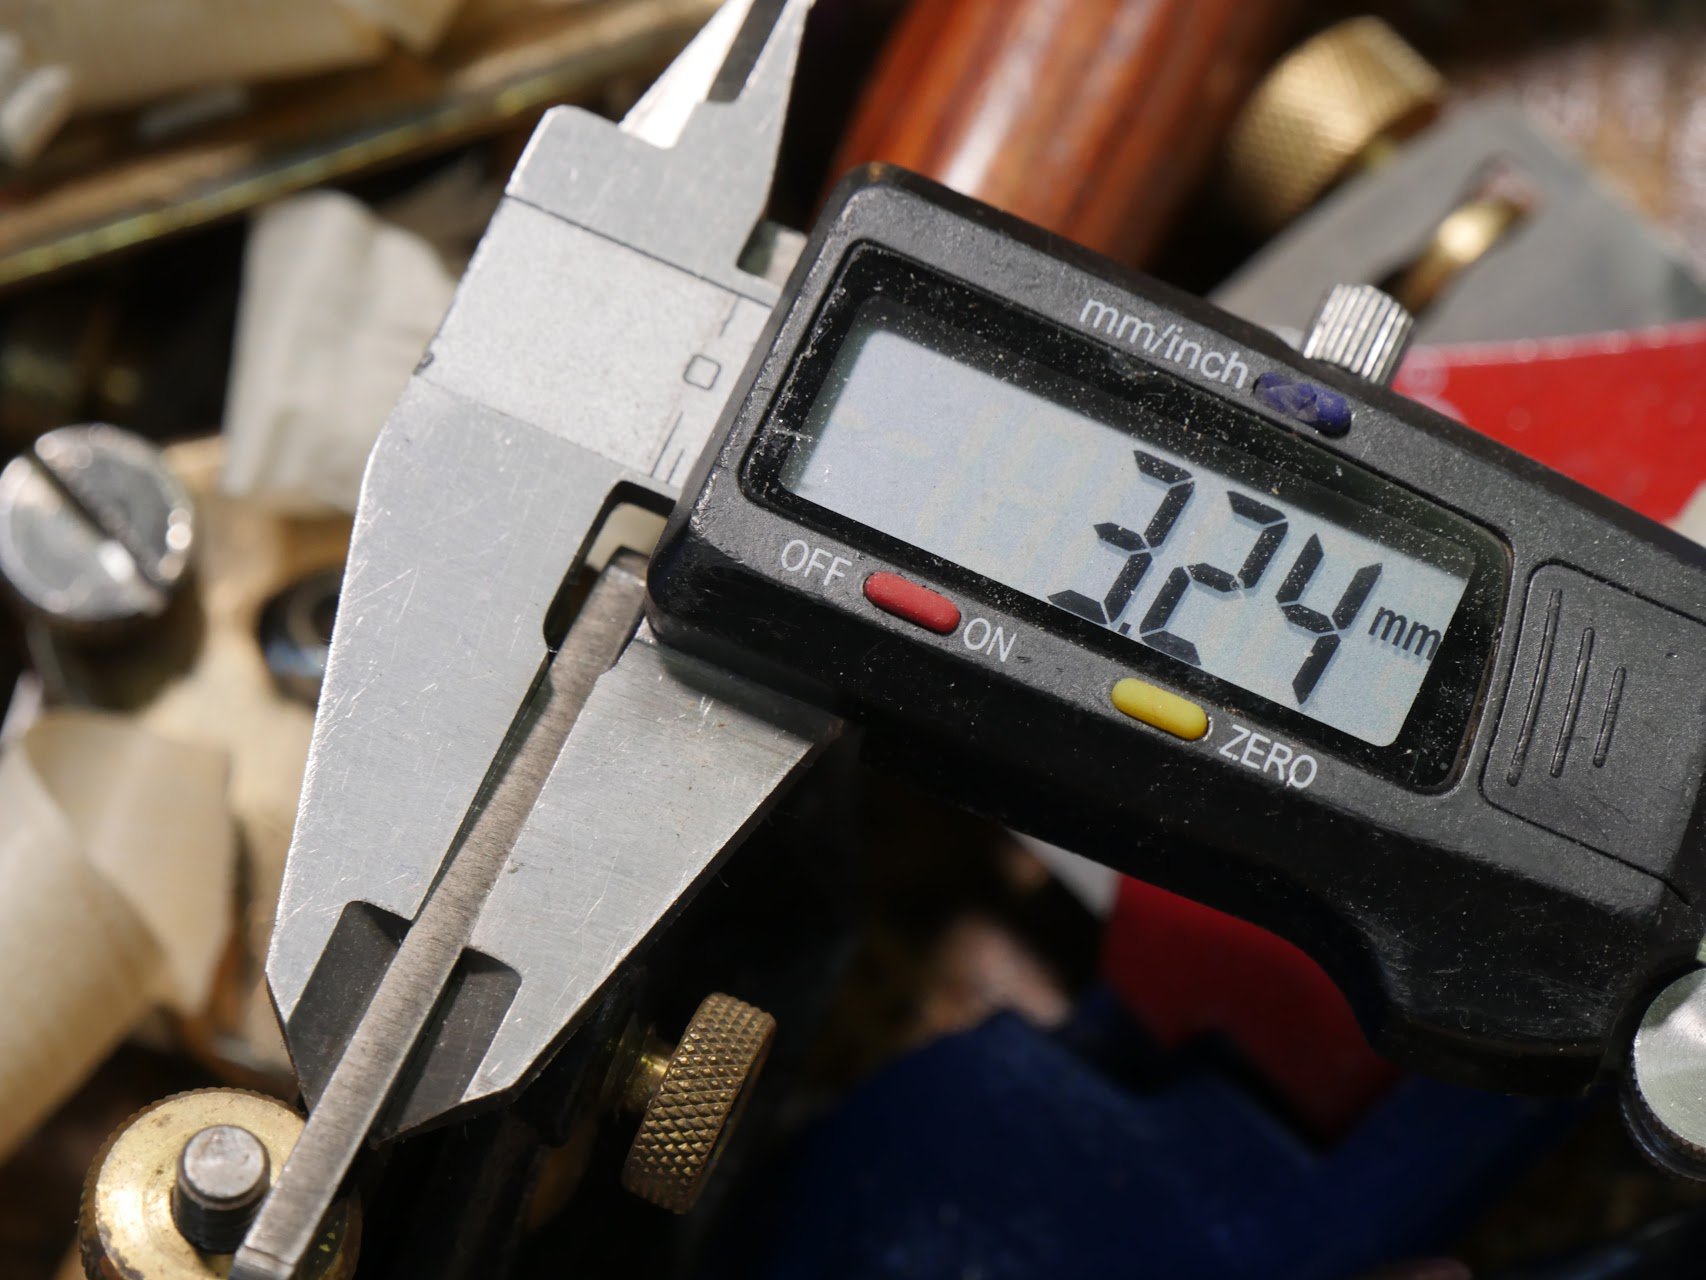
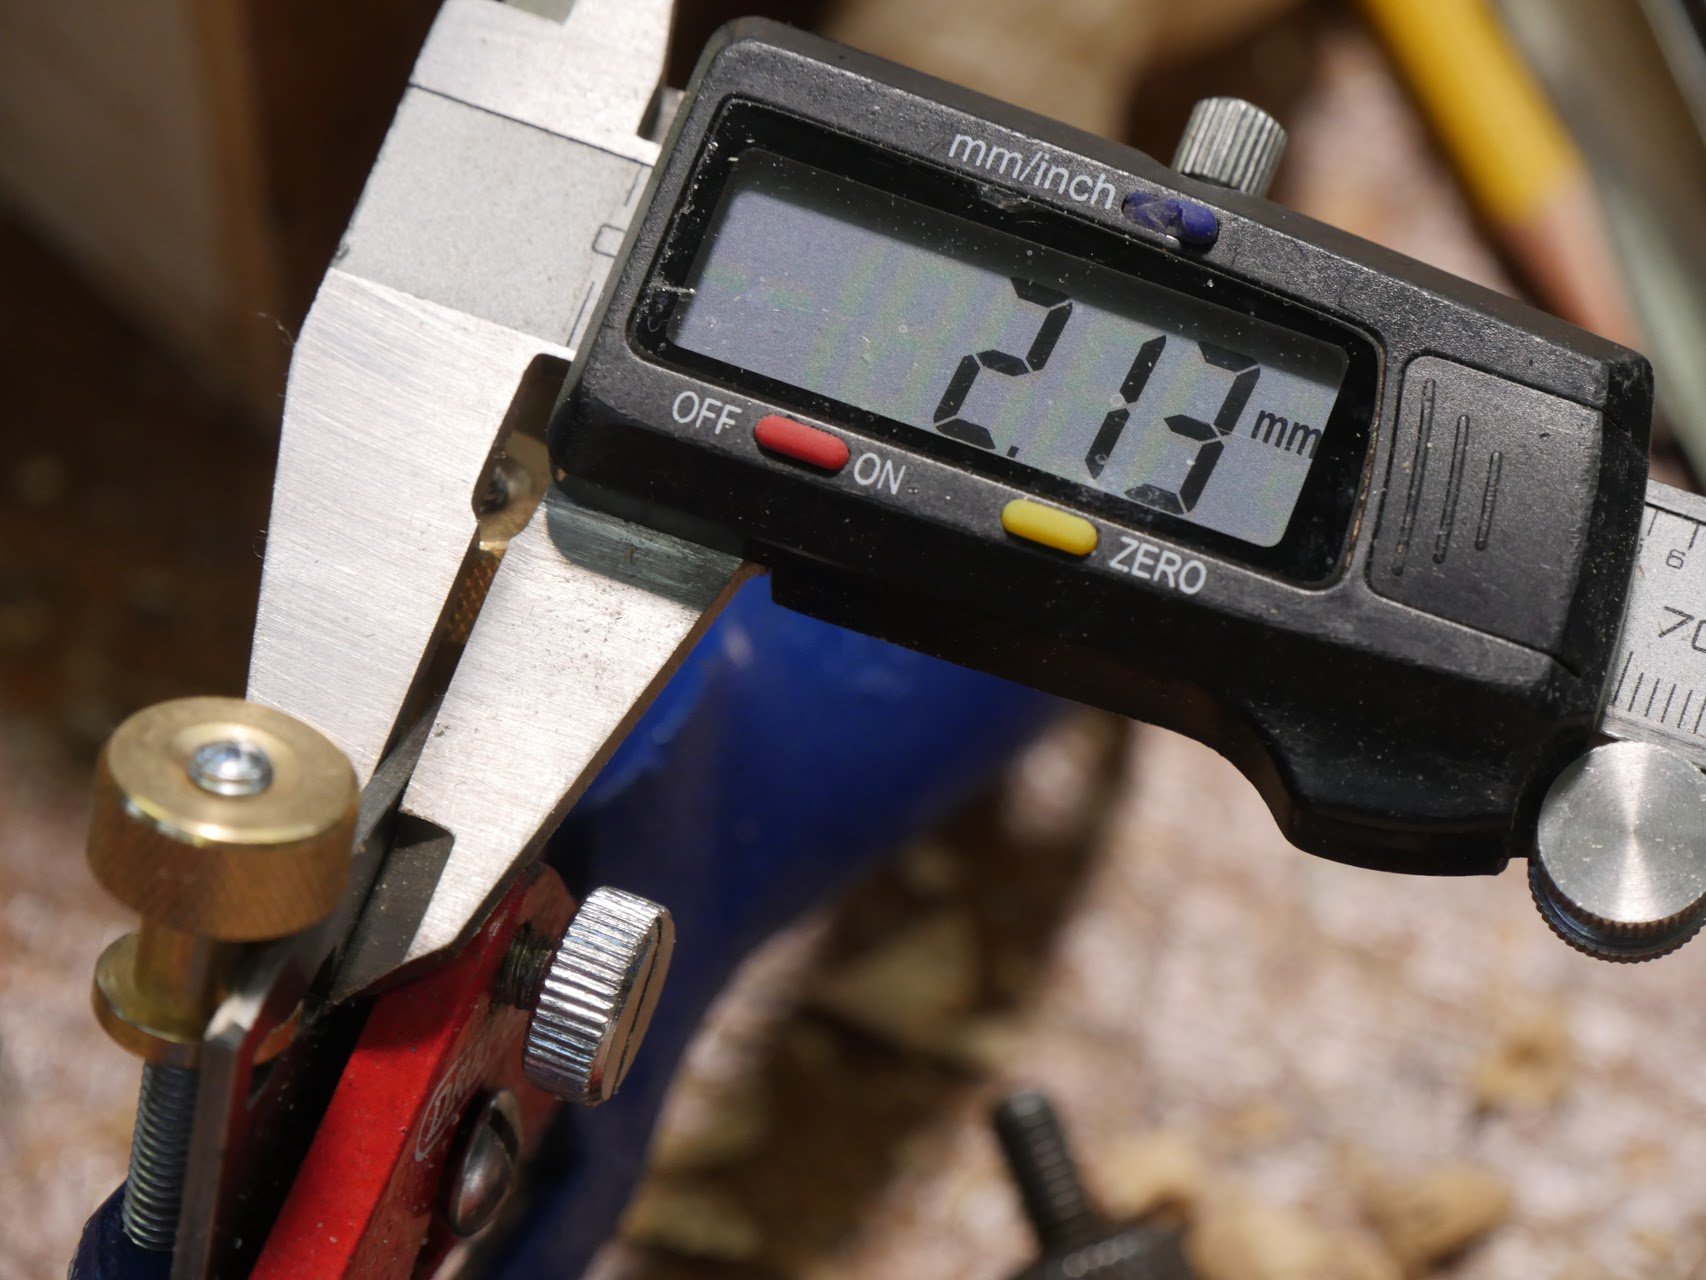
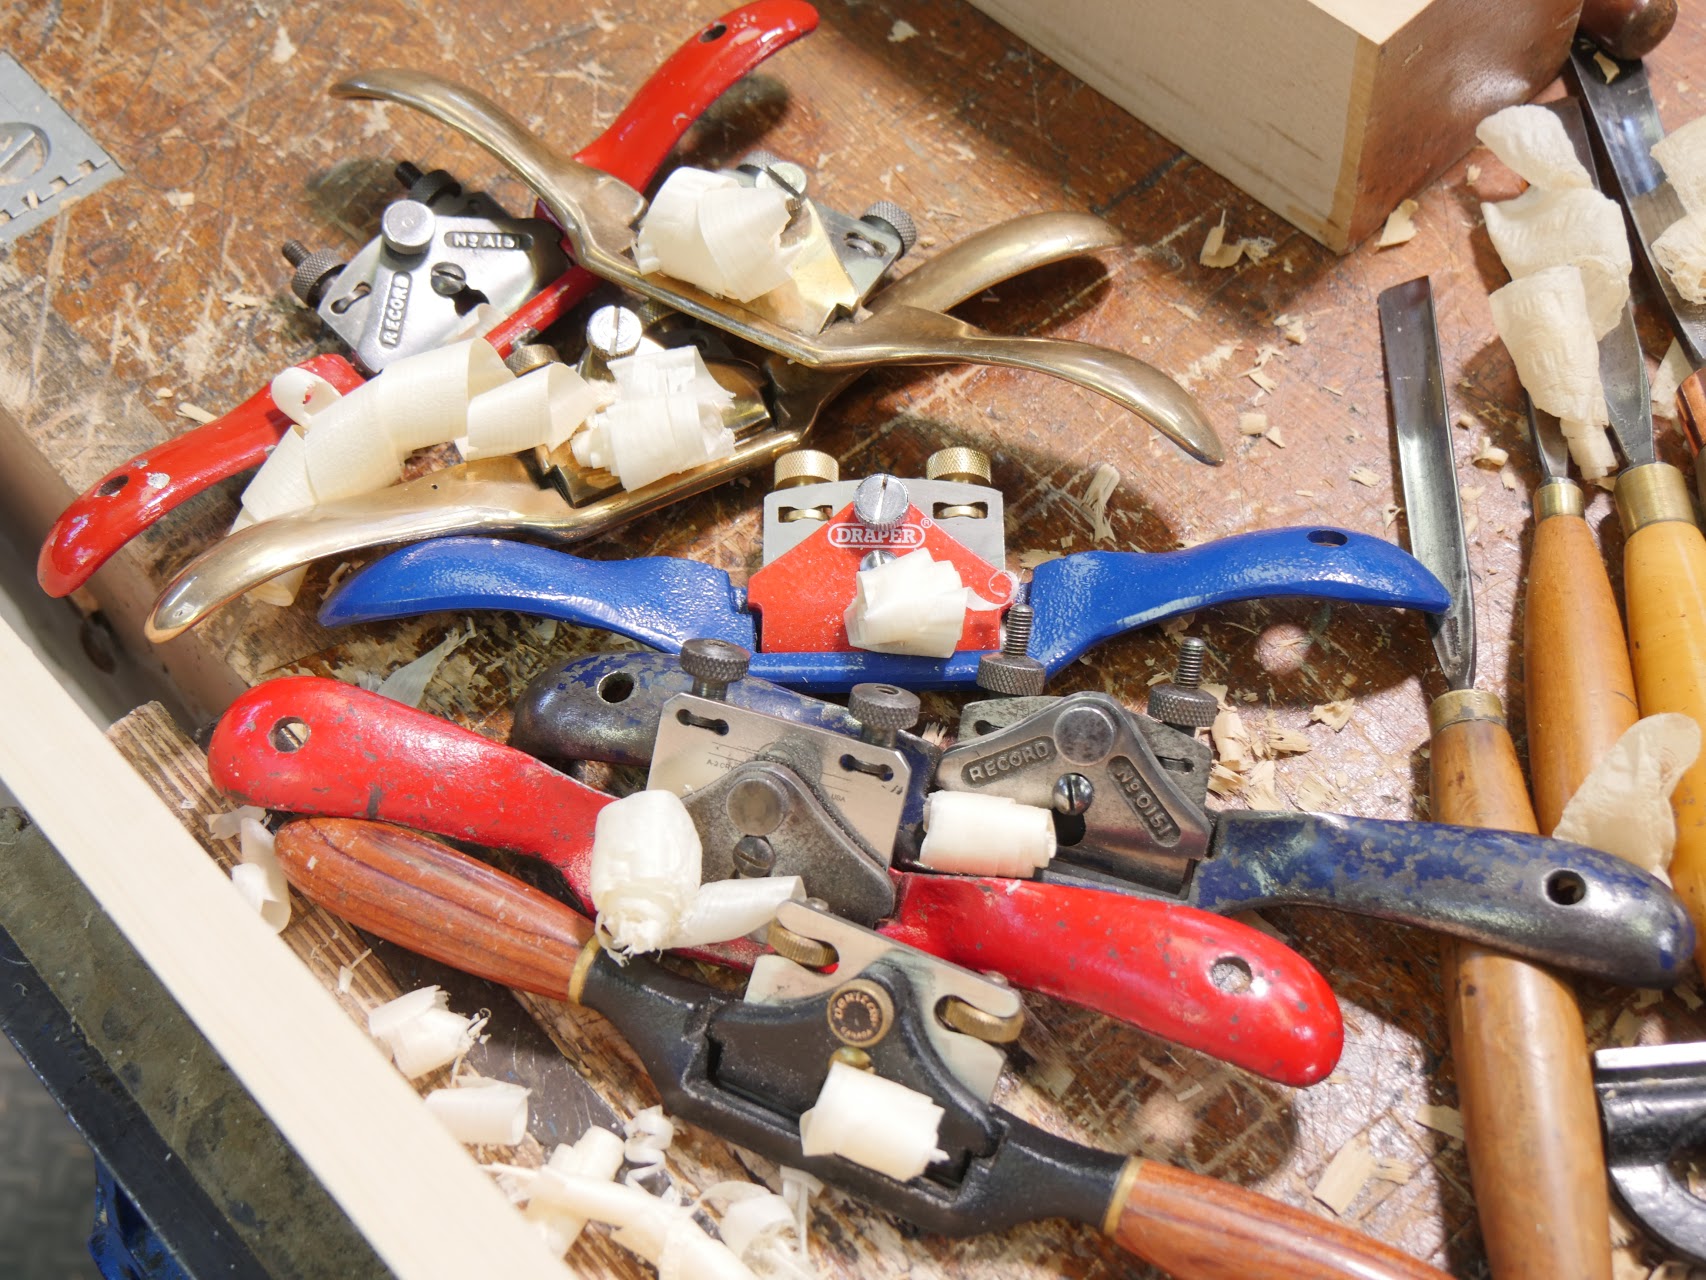
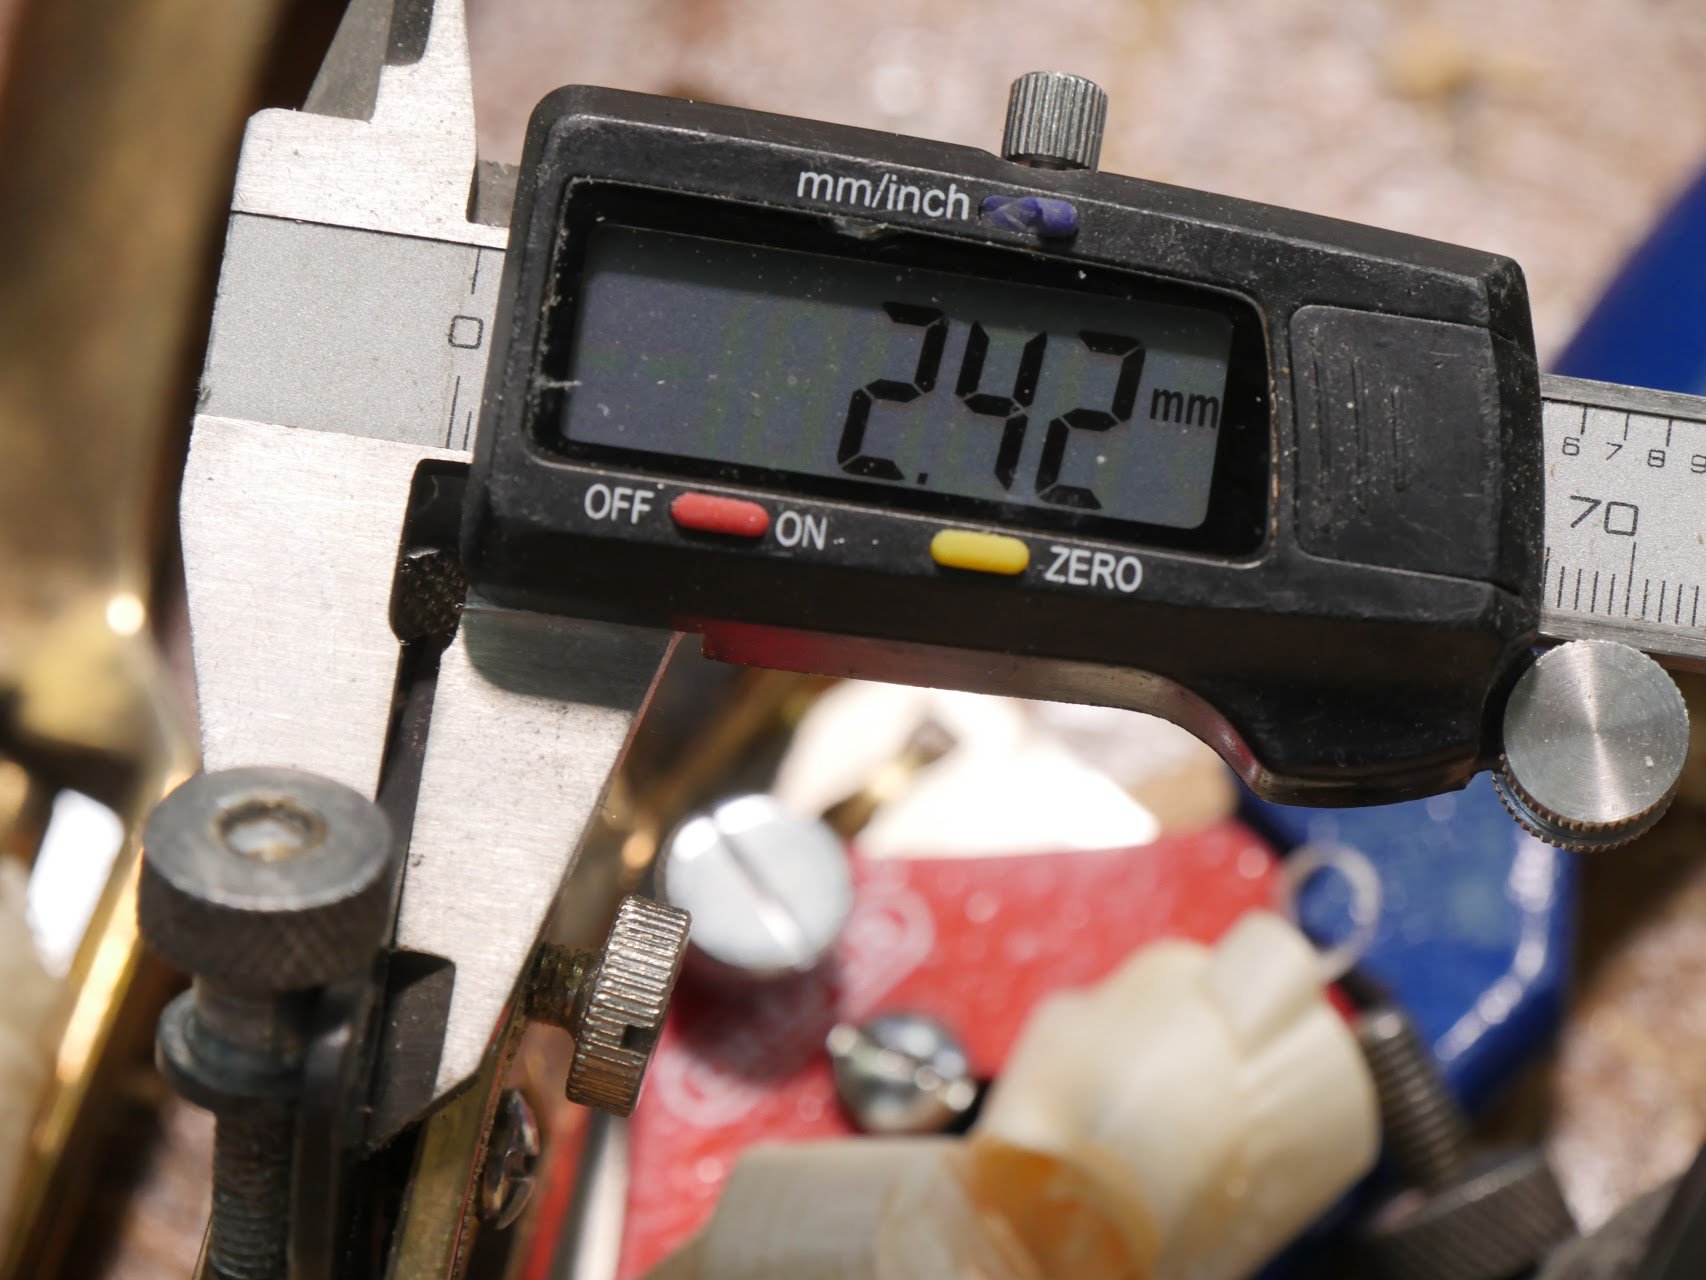
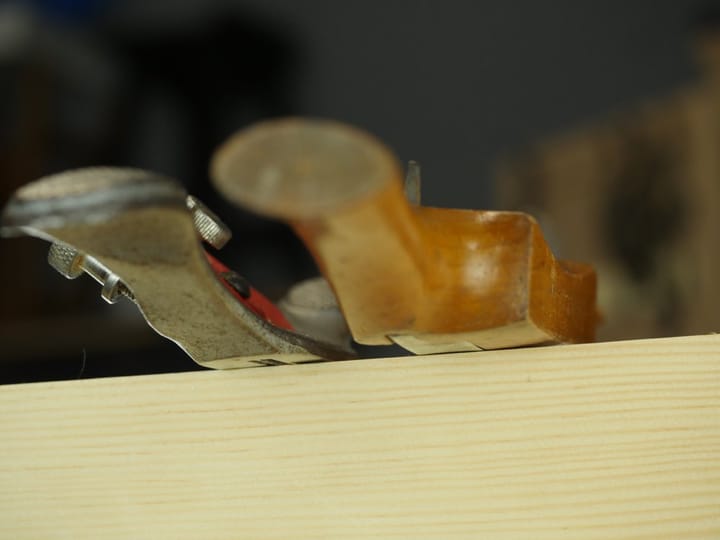
With a quick sharpen up the spokeshave needed no additional work at all and the shavings rose full width and full length from the throat. Another element with the spokeshave is the lack of rattle you often get from less expensive makes. The blade is 2.13 mm thick, whereas Stanley and Record versions measured in at between 1.41-1.71mm. Veritas is a massive 3.24mm thick and two Hock irons were 2.38mm and 2.42mm respectively.
I tested all of the spokeshaves alongside the Draper and being more esoteric than scientific my gut impression was that they all cut well and if there was any difference it was in the Veritas, which I think benefits from the added thickness and the wooden handles both of which serve to dampen any vibration.
Cost? Well, I did shop around after buying the first here and I bought six more with free shipping for £11.60 each. A second-hand one on e-Bay came in for for £8.50 with free shipping and the original one cost me £13.60 with free shipping.
Finally, as with many planes, and the #151 design spokeshave is indeed a plane-like tool in every way chiefly but with side handles instead of 'fore and 'aft', the blade and cap iron had been tightened down to the body of the shave to make it secure for shipping. This leads new woodworkers to think that the slot-headed screws through the cap iron are to set the blade for actual use.. This is not at all the case. A lack of information is the result and common enough these days.

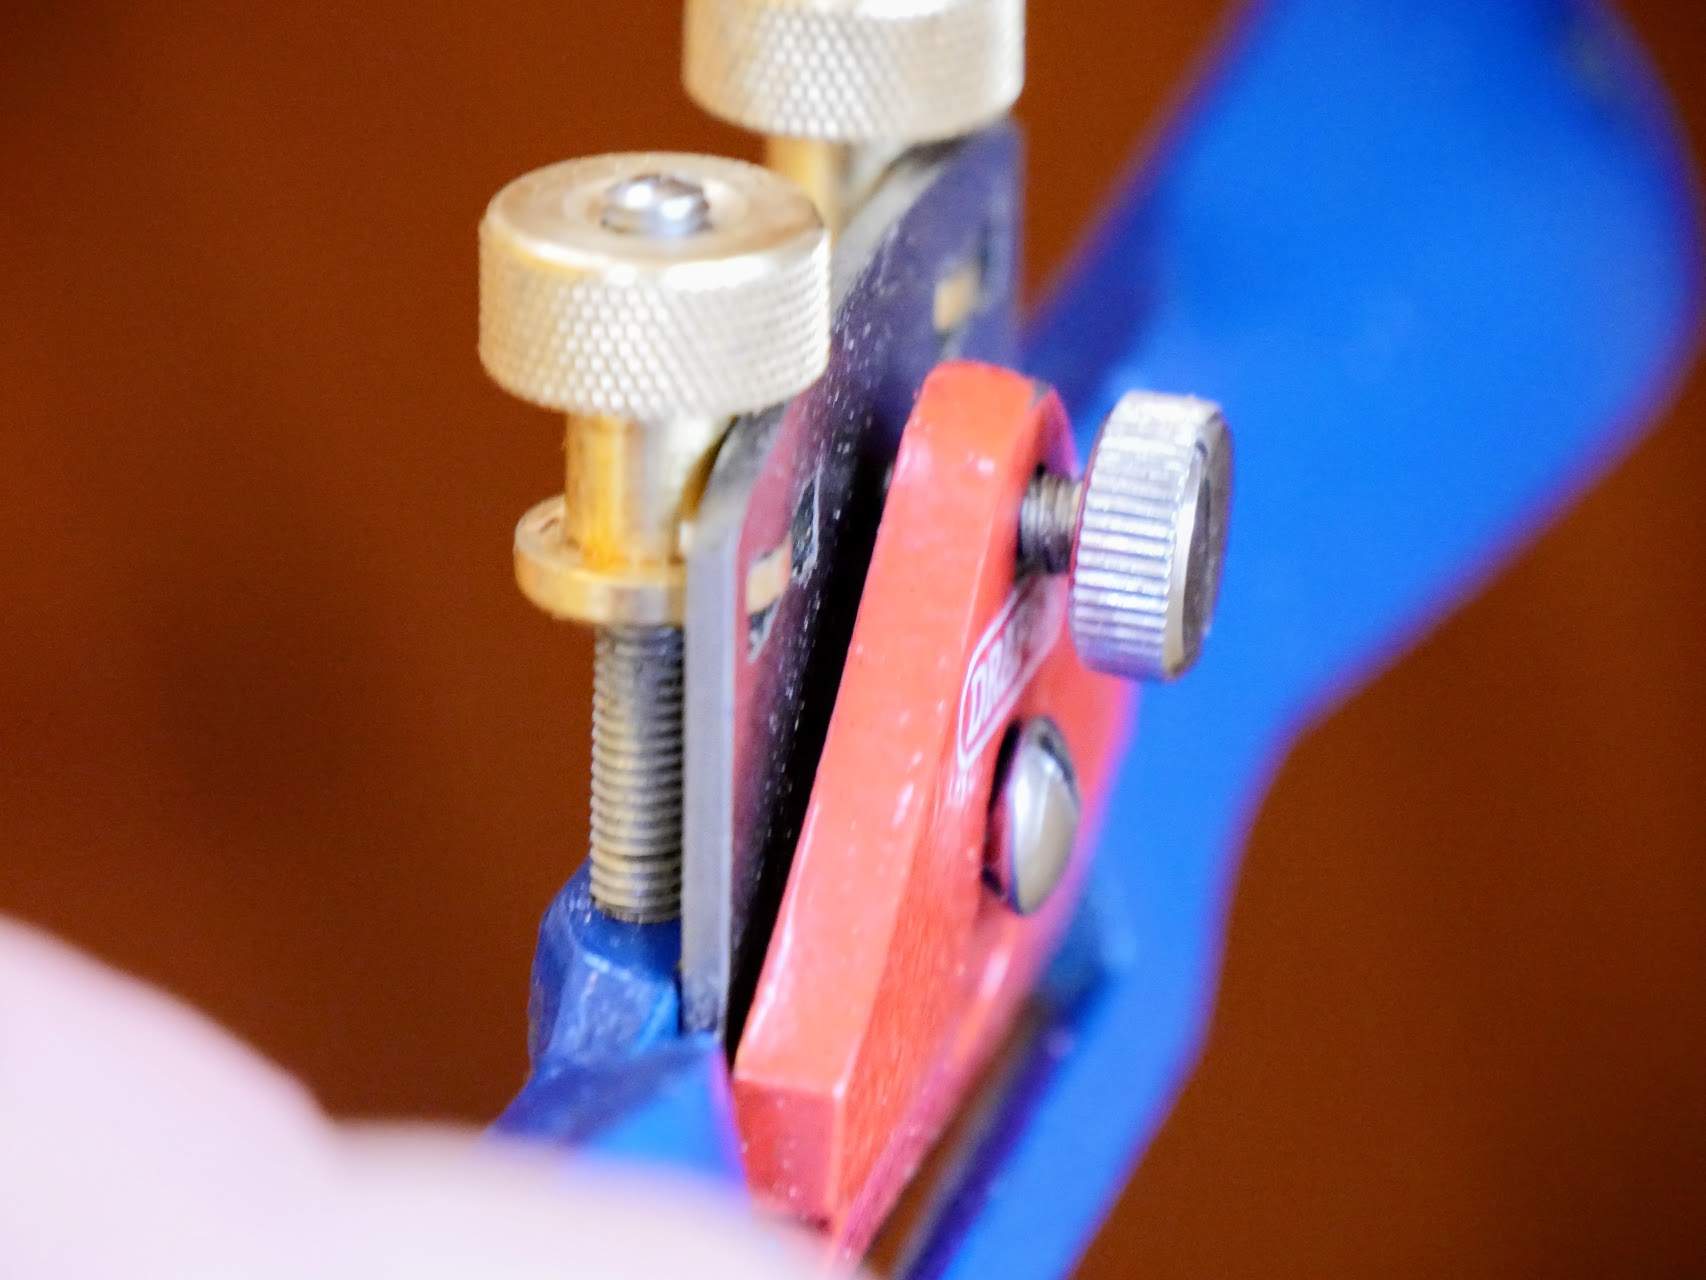
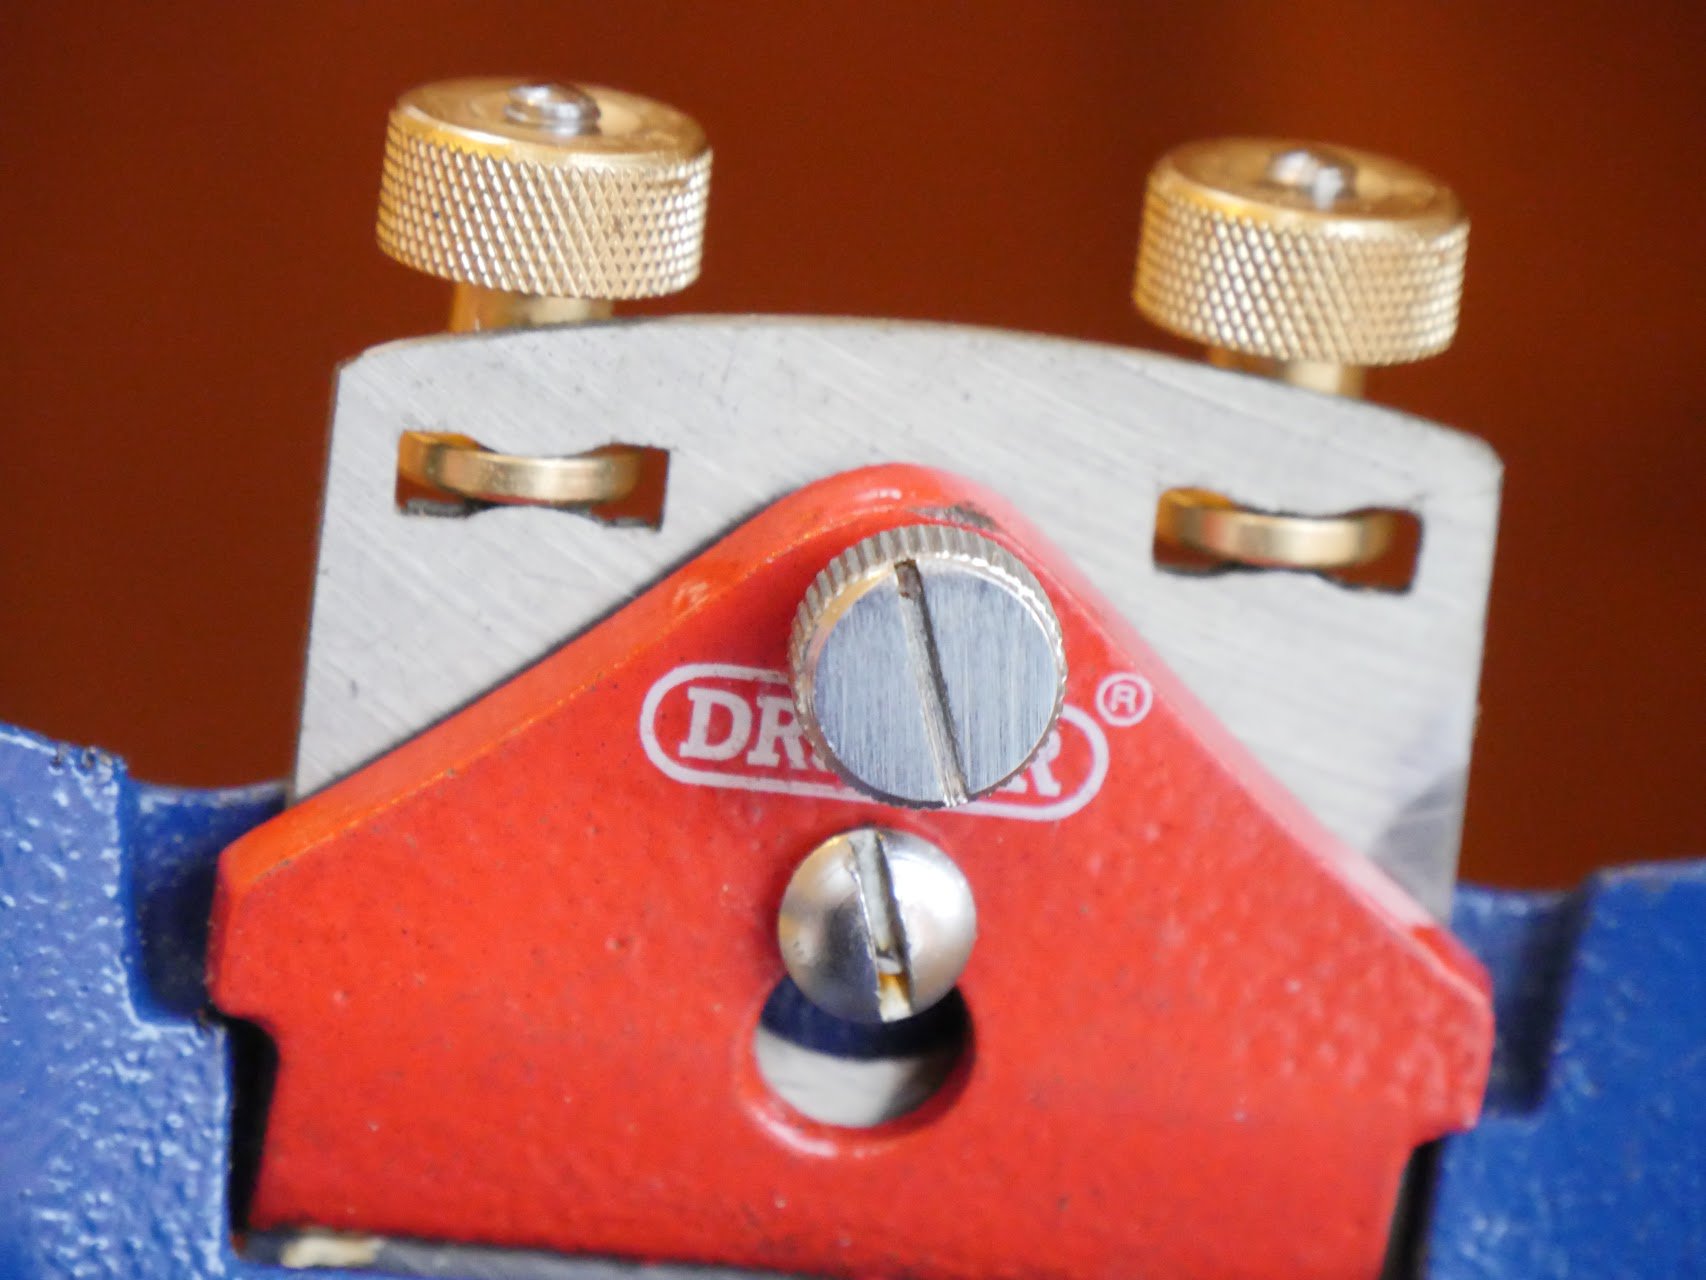
The setscrew in the lower centre of the cap iron should be adjusted to allow a gap to be established between the top edge of the cap and the top edge of the cutting iron. Turning the larger setscrew transfers pressure to the fore-edge of the cutting iron by using cantilevered leverage.
Once the central setscrew is distance-set it generally needs only occasional adjustment. To remove the cap iron and of course secure it in place over the blade we use the top setscrew only. Turn it counterclockwise to loosen the cap iron and the blade is freed. Turn it clockwise to tighten everything in place and centre all the components by eye and feel. Loosen slightly to align and distance the cutting iron for depth of cut and cinch tight to set the cutting edge as desired.
Those of you who have it, there is a lot more information on the #151 spokeshave in my latest book, Essential Woodworking Hand Tools. Just saying!
Comments ()