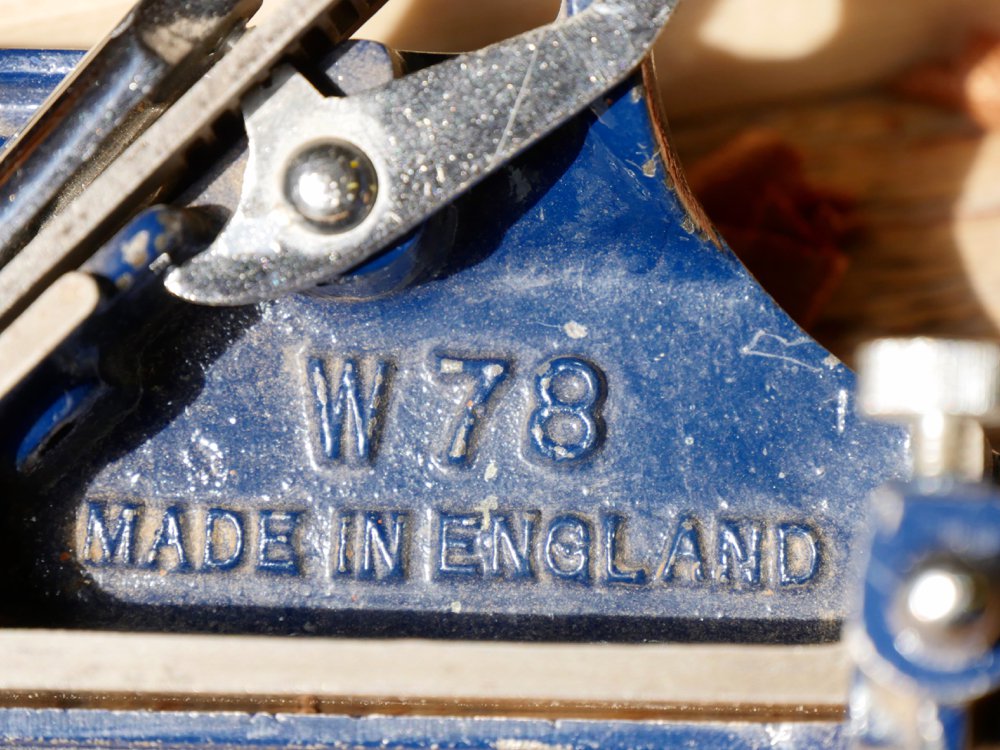
Rebate Plane No1—The #78 Filletster Plane
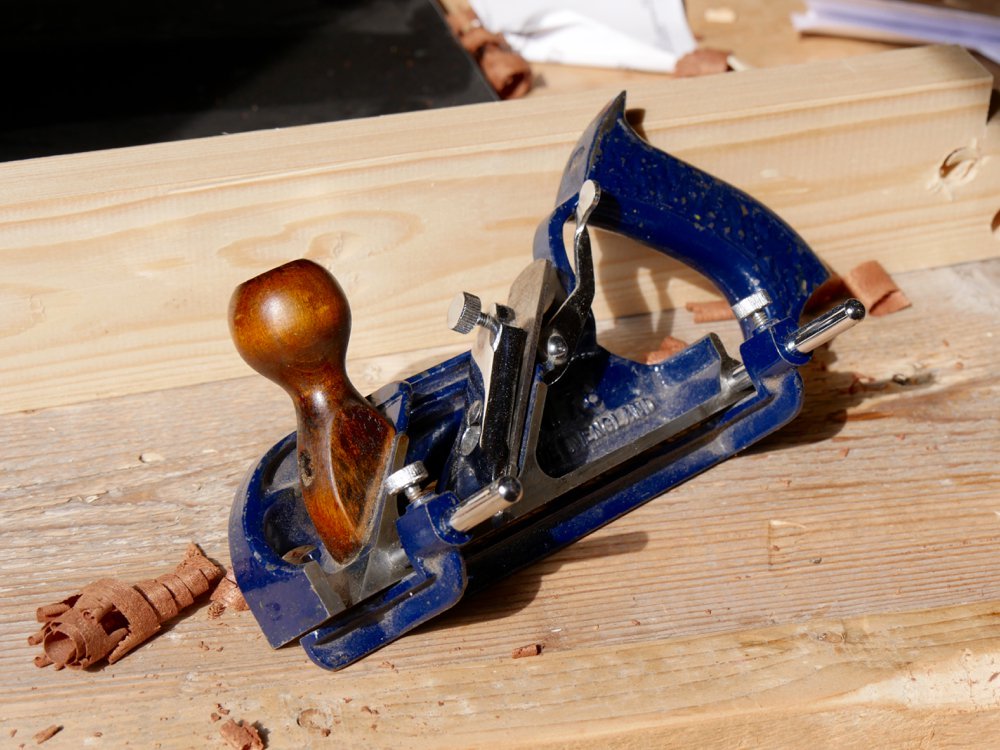
The Stanley #78 is a plane I have kept turning to for 50 years because of its versatility, compactness and reliable neatness. As with all planes it has unique nuances everyone should learn of but let’s discuss the plane in general first. The filletster plane is simply a rebate or rabbet plane and can be called such in the day to day of benchwork. The Stanley 78 pattern we are discussing has been made by many different makers over the years and all of them are just abut identical.As a bevel-down plane pattern type it is generally used by joiners and furniture makers for forming the occasional rebate and especially for cleaning up machine marks from spindle moulders before finish is applied. As a boy every rebate was cleaned up using one kind of rebate plane or another and this was the one I bought and used. It is not common practice to clean up machine work today. Looking at most surfaces in houses, even on architraves and skirting boards, I see the monotonous ripple left from machines as the light catches the high points exaggerating the rotary cuts. But rebate planes make short shrift of this task and more than that the task of sanding too. Once planed, a rebate can be sanded with 240-grit paper and a block in two strokes and you don’t need to wear a dust mask all day either as the dust falls to the benchtop and is not swirling for an hour in the atmosphere.
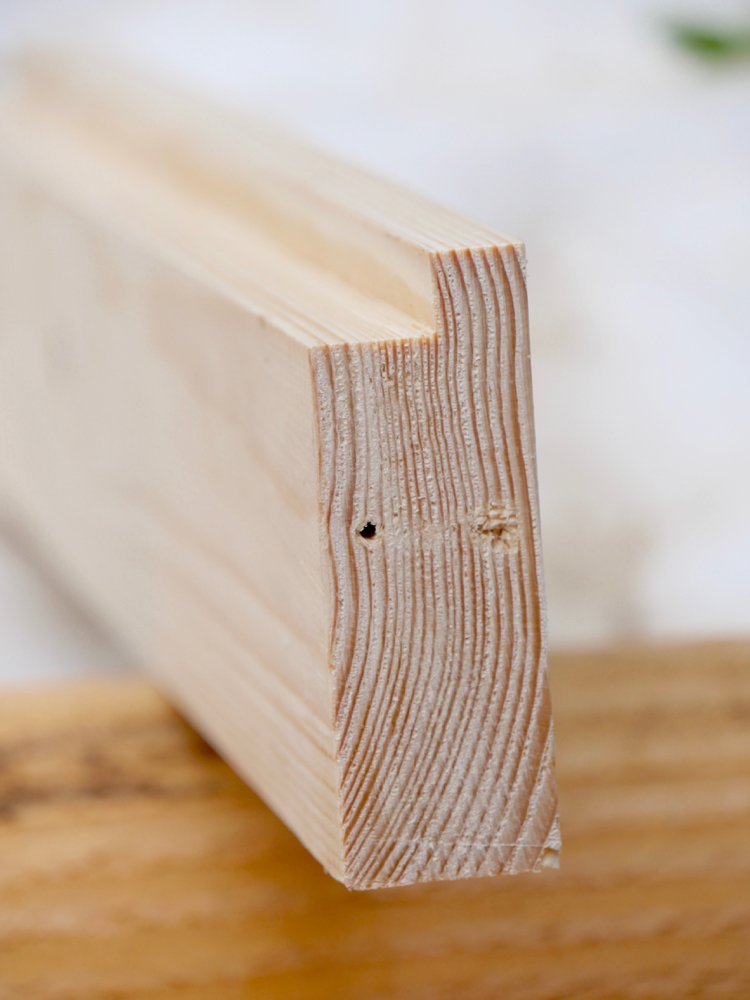
The Stanley 78 was one of Stanley’s most popular carpentry tools for those hanging and fitting doors and also for refitting sticking doors too. Stanley US and UK supplied almost every workman between 1900 and the mid 1960s with one of these core planes. Of course most woodworkers today see them as planes used to form rebates only and not for the tasks I have just described. I don’t know if this plane will ever be as popular as it once was because most people will form rebates using routers, spindle moulders (shapers US), tablesaws and jointers. In my view it is a highly functional plane that can often be bought secondhand for not too much and as you come across one you should consider buying one. Rebating a section of wood 12" long with a 1/2" x 3/4" rebate is literally 2 noiseless minutes work for me.
Which one to buy
Well, there is not too much difference between makers. Once you know the plane and are used to its set up it is indeed a low risk even belts-and-braces plane. Two makers I know have made this plane with only one difference and that is adding an extra bar to make twin bar rigidity to the fence. In actuality this makes little or no difference to functionality unless you are prone to overly bulldogging the plane to the wood and break the fence itself. This doesn’t happen if you are careful or if you own the twin bar Record or Woden models. Beyond that they are basically the same unless you buy a really early model without the adjustment feature of those made after the mid 1920s.
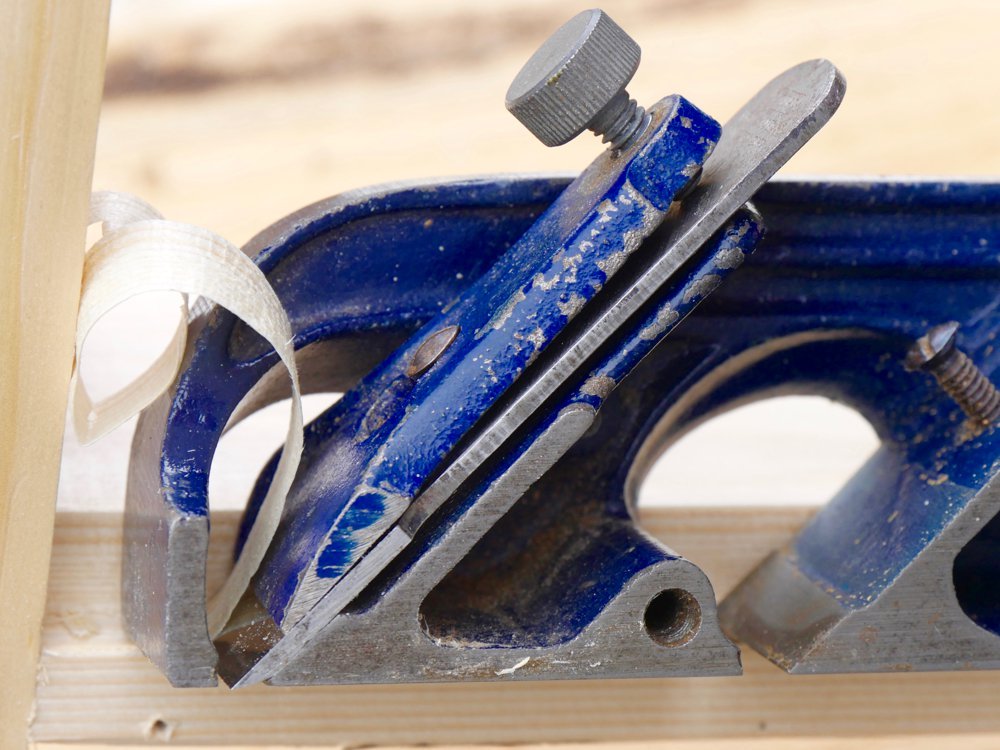
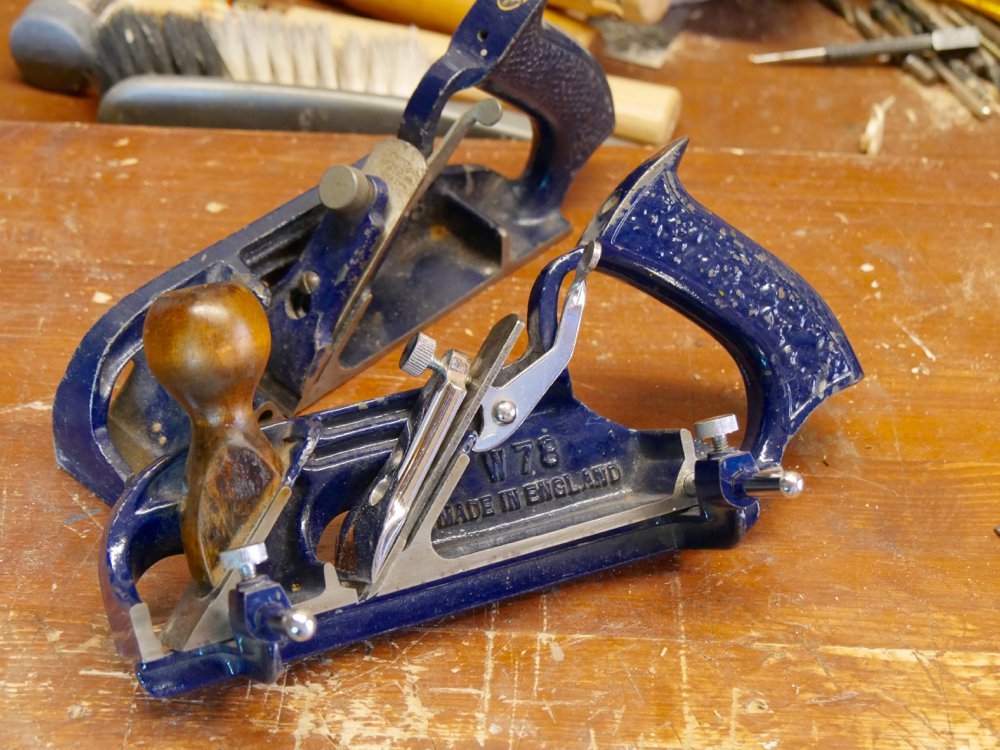
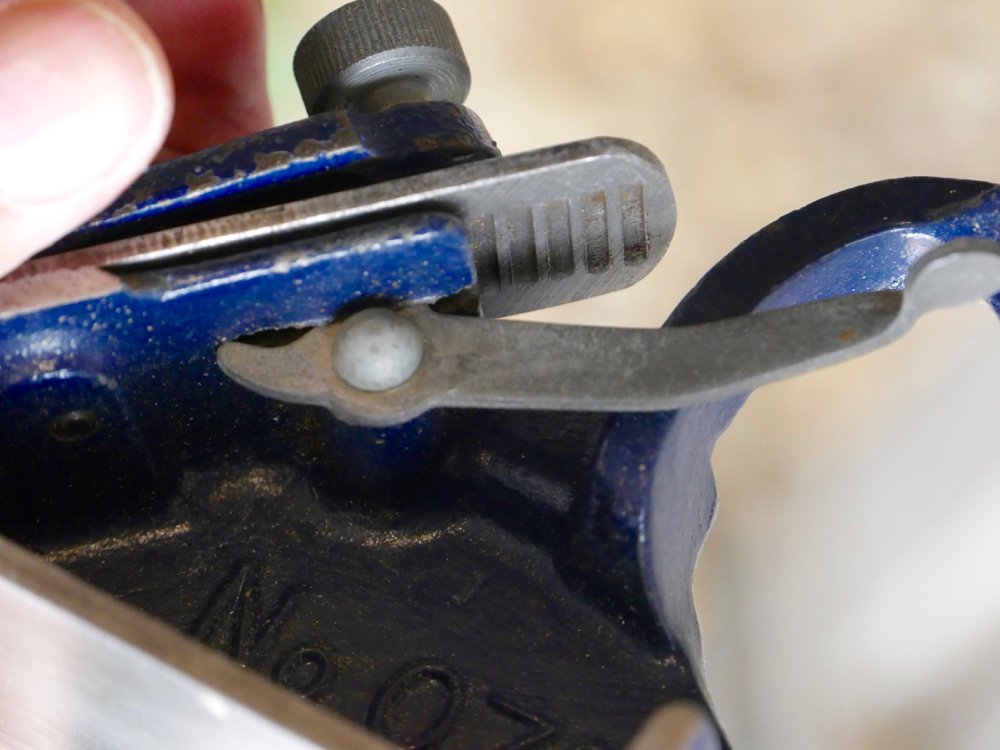
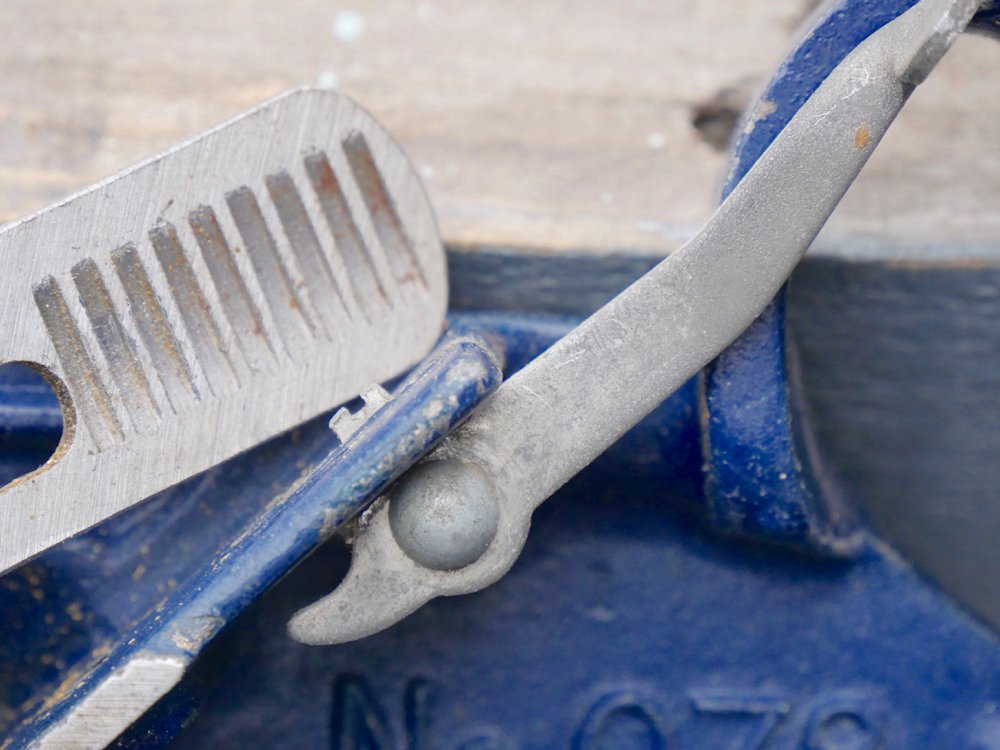
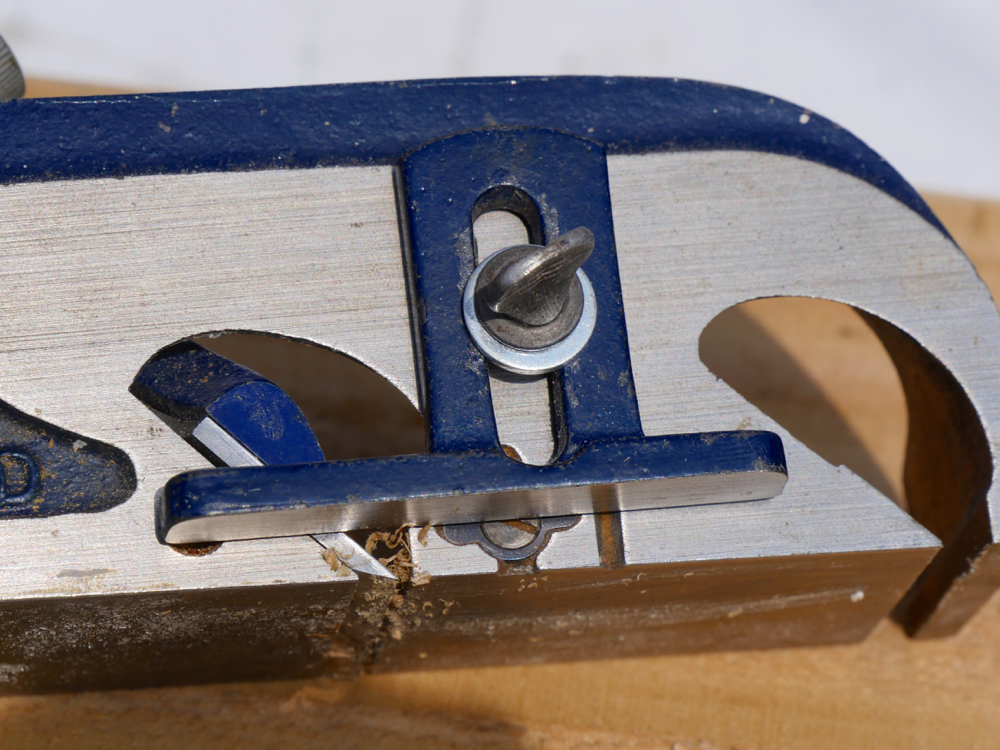
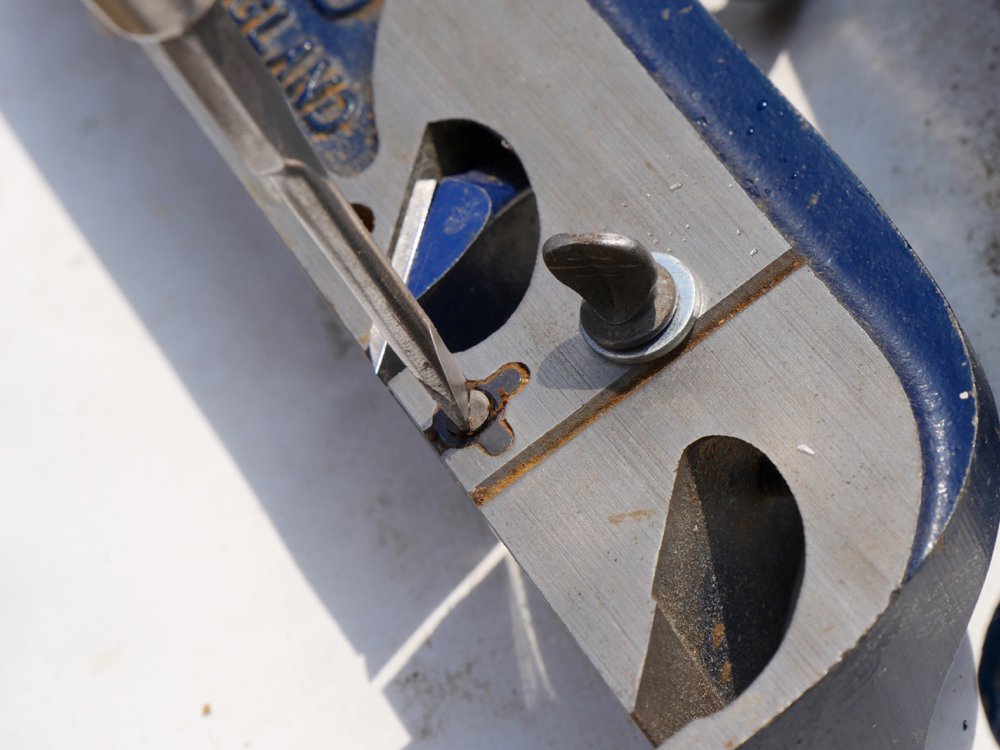
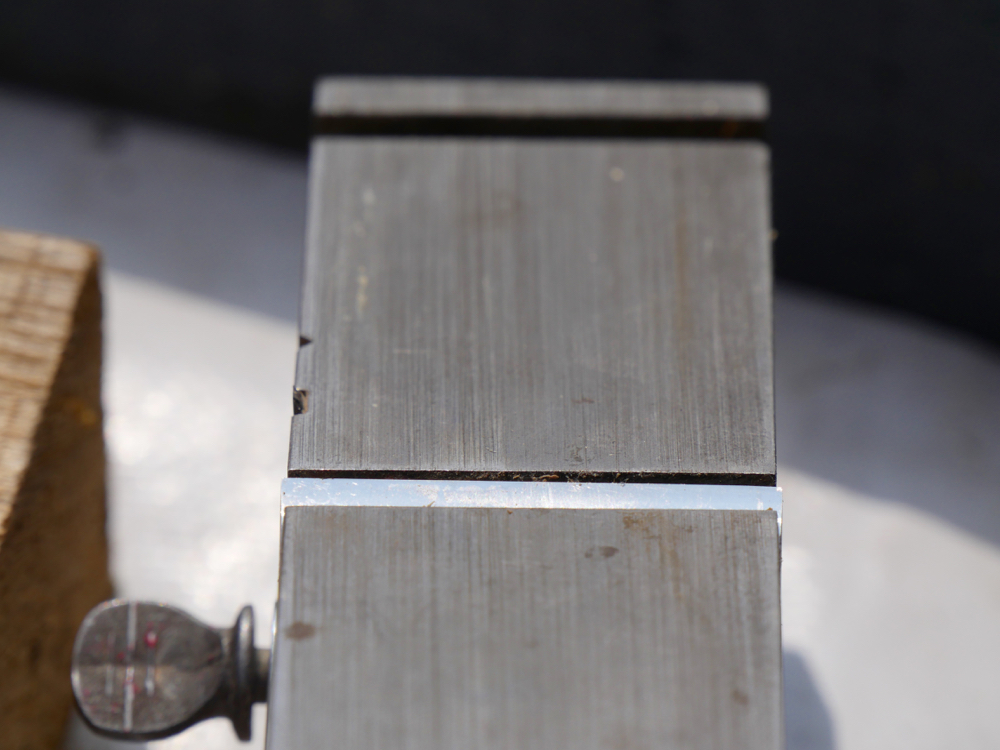
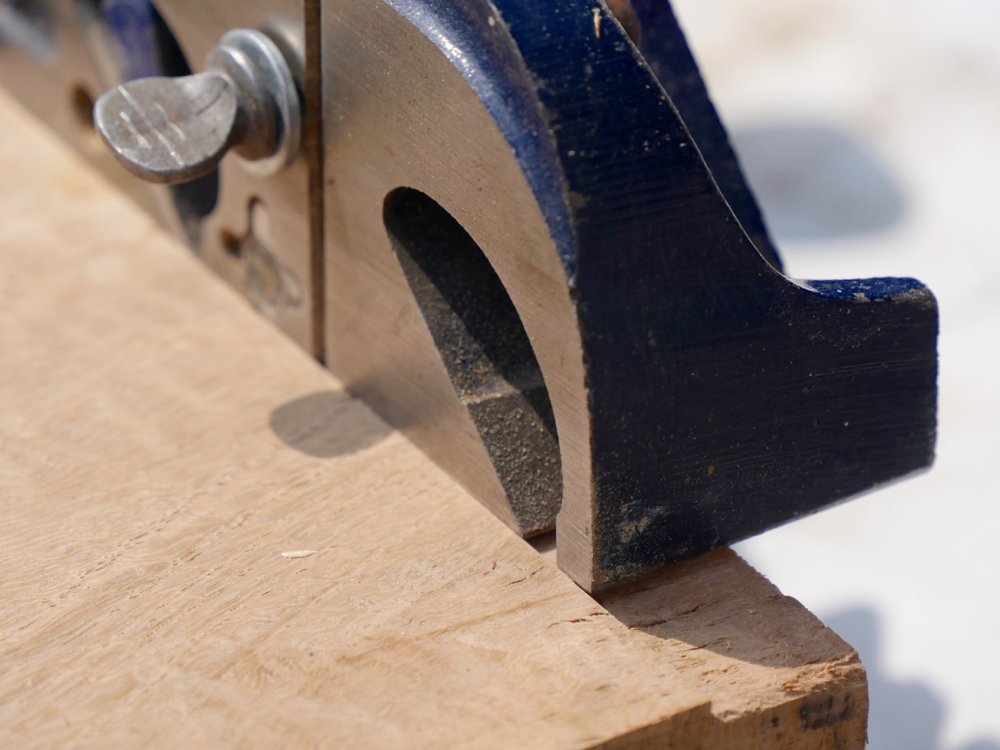
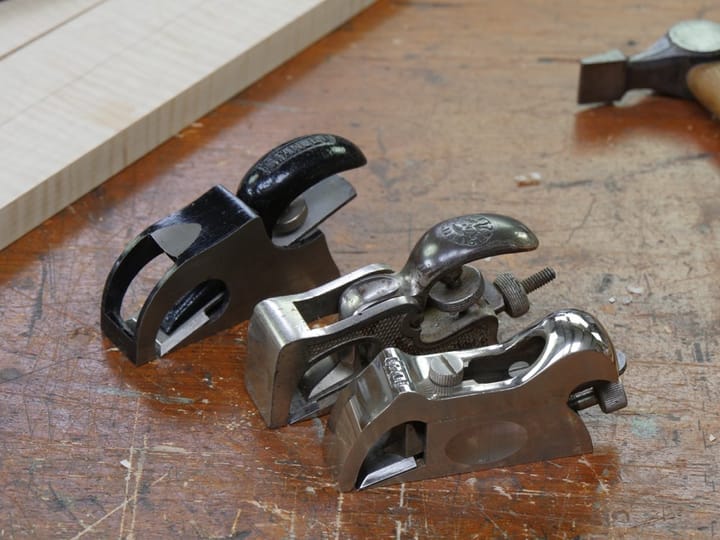
Most often you will see the plane with the cutting iron installed nearer to the centre of the plane (above). This is standard and also practical as this allows use of the depth adjustment lever for setting and adjusting depth of cut to the cutting iron in relation to the plane's sole. By now you will indeed see that the plane has a second bed in tandem with the first (right). This bed allows the plane to be used for internal corners in similar fashion but not so tightly as we might use the bullnose plane. The lever cap itself has two functions in that it holds the cutting iron securely and immovably in place and applies pressure directly behind the cutting edge in the throat of the plane. This plane does not have a cap iron as does the Stanley #10 and 10 1/2 as it doesn’t really benefit from one. The thumb screw applies pressure to the cutting iron by a reverse cantilever. Turning the thumbscrew sets the lever cap. Setting the depth is simply a question of moving the lever behind the iron up or down according to need. Grooves machined into the back or underside of the cutting iron engage in notches at the end of the lever adjuster. Usually it is best to loosen the thumbscrew on the lever cap half a turn or so, tweak the depth adjusted for depth and then retighten the thumbscrew before use. You soon get used to this.
Fence guide
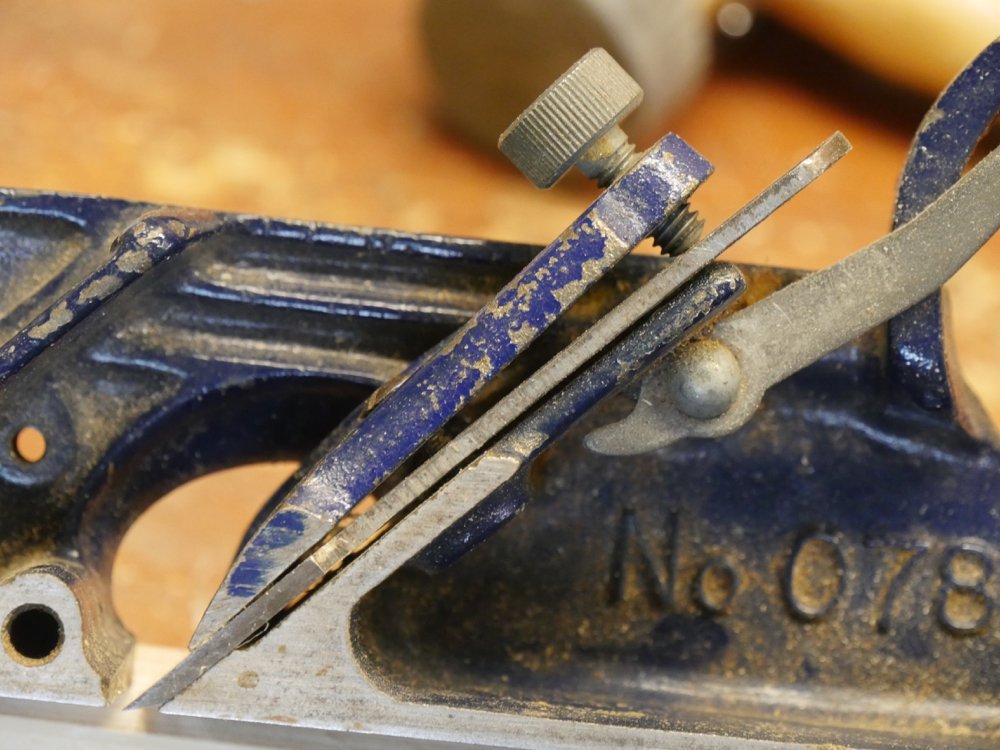
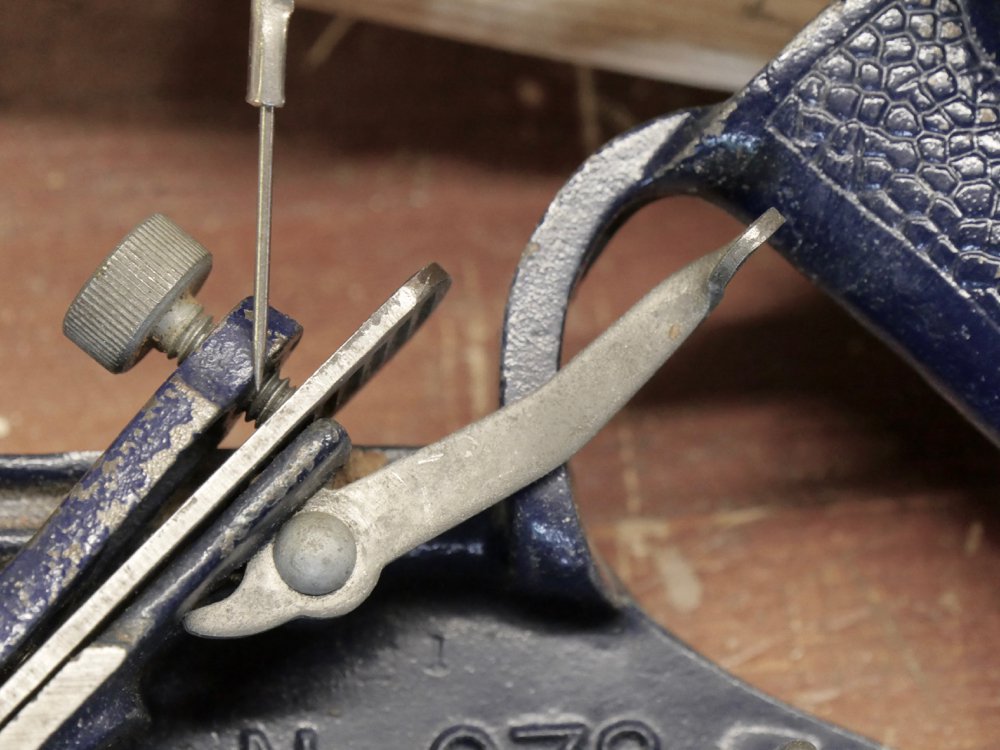
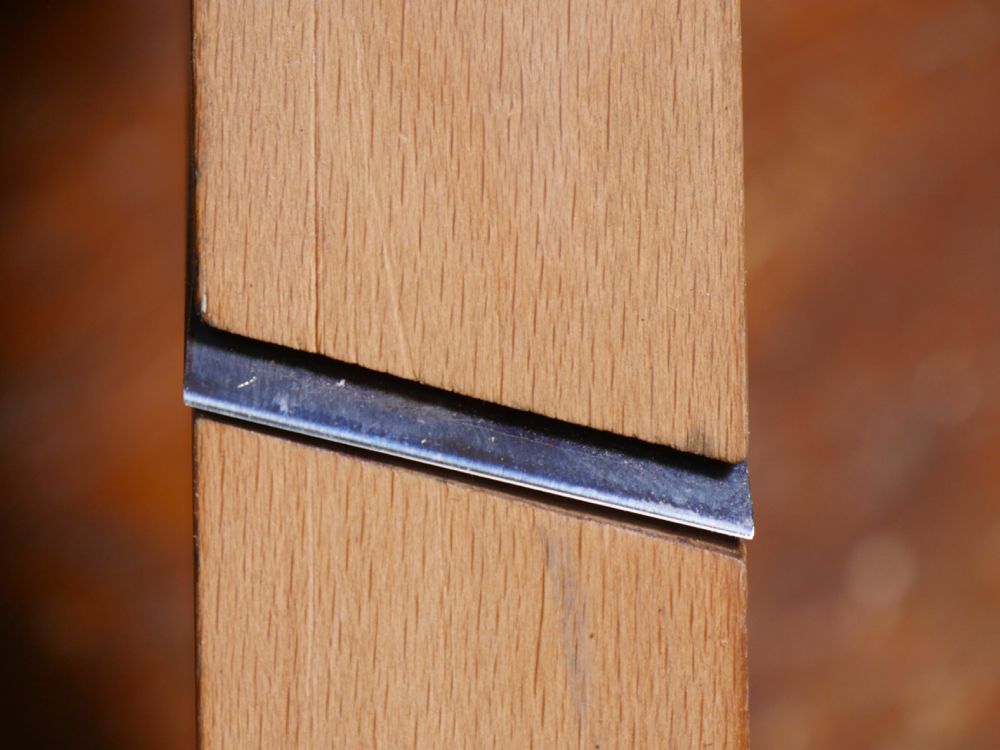
As with wooden planes, the #78 is kept parallel to the corner of the wood being rebated by a fence beneath the plane. A partially threaded rod we call the arm (some planes by the British makers Record and Woden have two parallel rods. The Record version with twin arms is numbered 778 whereas the single arm version is numbered 078 The Woden twin arm version is numbered 78 as per Stanley) is inserted into a tapped hole on the side of the plane body and tightened to the plane. The fence is secured to the arm by a thumbscrew or similar in the fence casting. The fence guide can be used on both sides of the plane as needed because the rod or rods that holds the fence can be unscrewed and installed into the other side of the plane also. This feature helps us to negotiate problem grain that regularly occurs in rebating and indeed most planing work. Notice also the hole drilled through the arm at the end of the arm which is used to insert the point of a nail set for use as a tommy bar to tighten and loosen the bar from the body of the plane.
If the fence is missing from the plane you can clamp a fence to the stock and use that to guide the plane.
Simple enough and very clean. You can also use screws for securing the fence if you cut the stock you need a little longer so you can cut out the marred wood..
Depth stop
We control the final depth of the rebate by way of an adjustable depth stop on the outside of the plane. This stop is secured by a simple thumb screw generally but some planes use a slotted head and this gives extra leverage for good securement. To keep the depth shoe in vertical alignment and then again parallel to the longitudinal line of the wood being rebated, a groove in the side face of the plane on the right side where the depth stop is located receives a protruding upstand on the inside vertical aspect of the depth shoe. Once slid into the groove the shoe is very solid and will not shift out of alignment. I should point out that there is no proper provision for using the depth shoe on the opposite face of the plane as for left-handed users or left-handed needs to reverse the plane for dealing with rising grain. You can however use the plane left handedly by removing the depth stop and working to a gauge line.
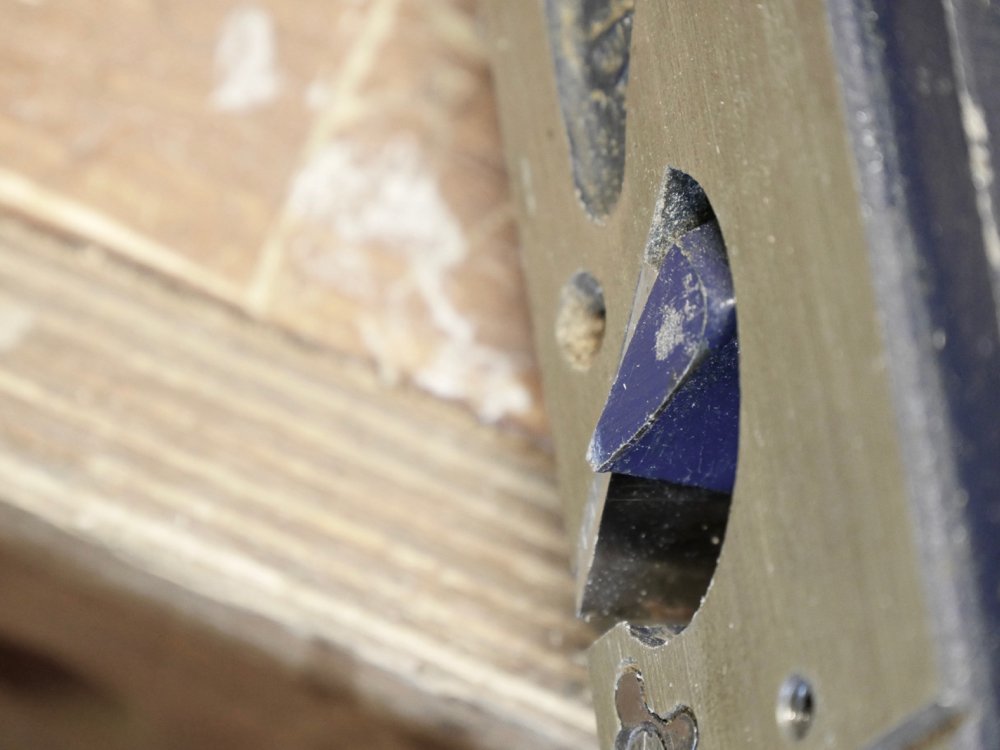
Snicker or spurred cutters
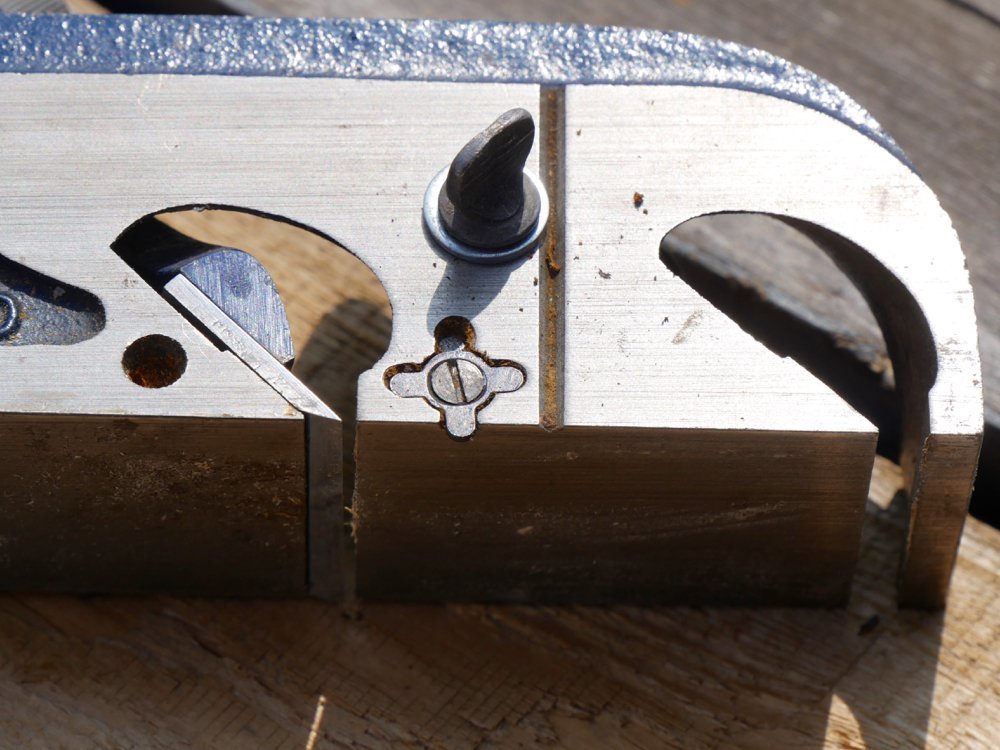
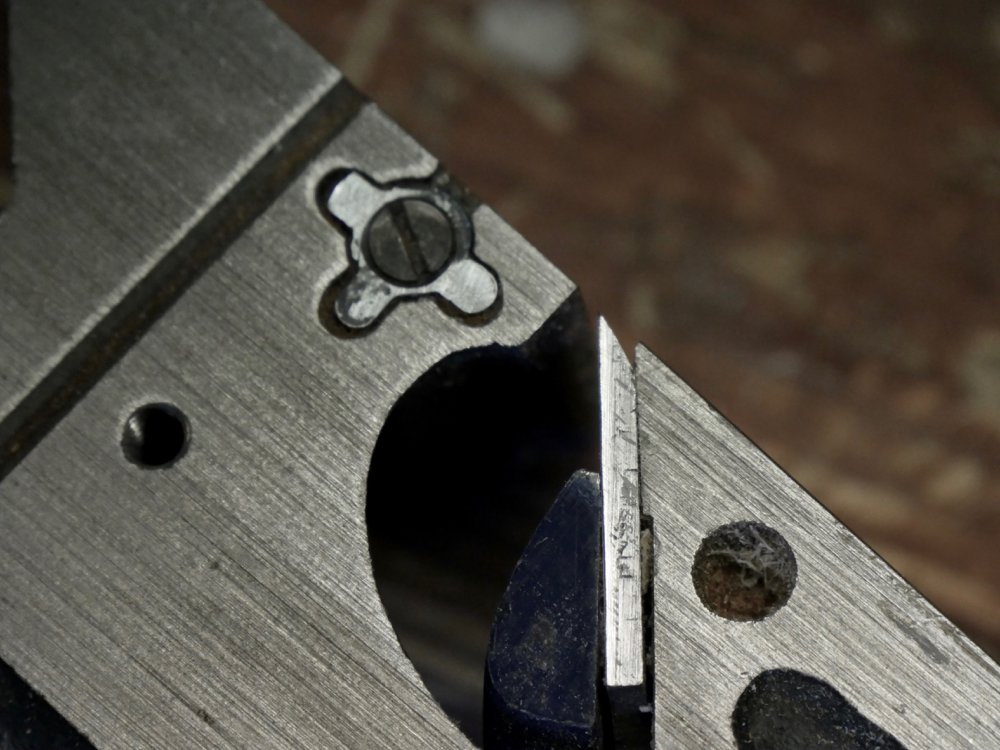
Directly beside or below the depth stop (seen above) you will find a cutting spur that on old wooden planes was called a snicker. This spur cuts cross grain fibres for rebating across the grain. Without this the wood would be ripped and torn out uncontrollably. If this is missing a crossgrain cut can be made with a tenon saw or knife and square using successive alternating passes.between the knife and the rebate plane. It takes a little longer but the end result is the same. On Stanley and Record models this cutter is engineered as a three-pronged spur. No rebate plane cuts neatly without these spur cutters because they score a knifewall prior to or just ahead of the main cutting iron reaching the surface wood. The clever addition sits flush with the side of the plane. By rotating the cutter to neutral the plane can be used for regular long grain cutting, which generally requires no spur cut unless the grain is wild in some way such as around knotted areas and such. There is no spur on the left of the plane so there is no left and right hand version of the plane as such for left handed users wanting to work with their dominant hand in sync with the spur cutter. You can as mentioned above use the plane generally as a left or right handed plane without the depth shoe in place.
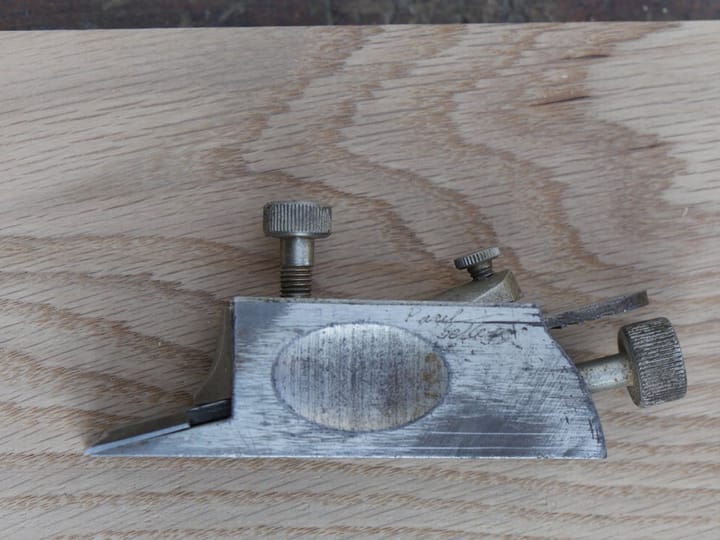
Blade width
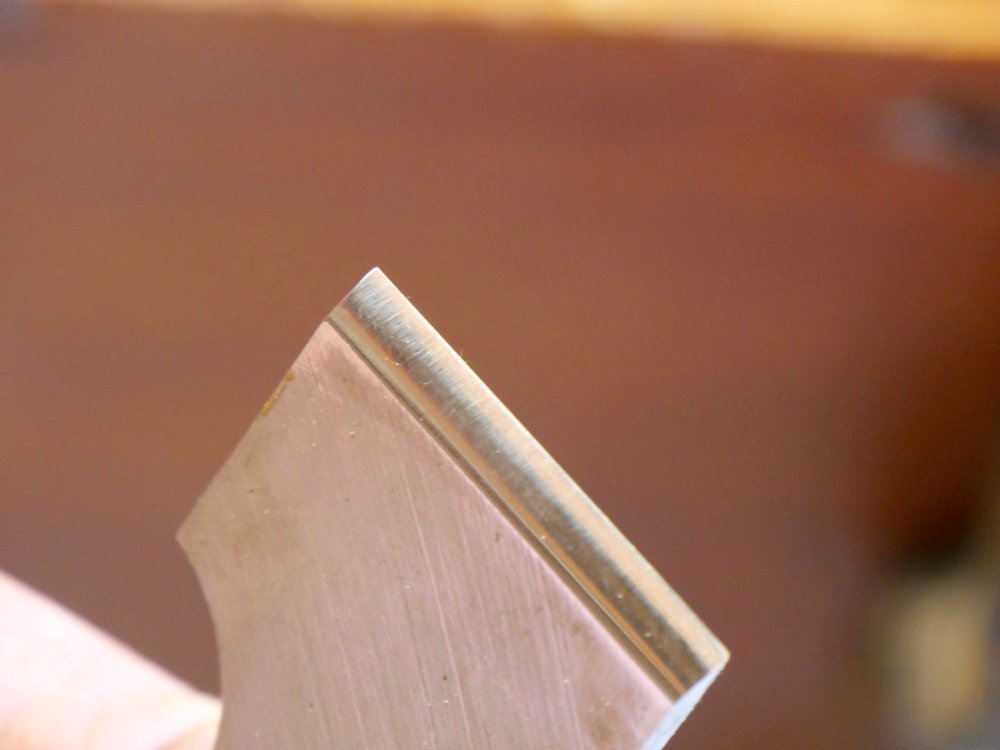
It’s not uncommon for people to feel the overly wide blade width to almost all planes made for rebating was down to shoddy workmanship when that is not the case at all. The 2mm of extra width beyond the width of the plane itself creates a relief between the side edge of the cutting iron and the plane body without which the plane stair-steps away from the intended cut line with each and every subsequent cut or stroke of the plane. The weakest points on any cutting iron cutting edge are the outer corners. These corner often break right from the start but are usually too small to see with the naked eye. Combining this corner fracture with the fact that the sides of the iron itself have no cutting edge and you begin to understand that there must be relief that allows the cutter to cut. So when we set up the plane for cutting we allow a millimetre of cutting iron to overhang the side of the plane forming the inside corner of the rebate. As I said, without this micro adjustment the rebate becomes stepped even by very small amounts and the side of the rebate becomes apparently sloped from the original cut line. By the time the rebate reaches a depth of say 10mm, and depending on the depth of cut, the slope can be as much as 4mm or so. Now this is the same for all rebate planes regardless of their names. So, don't do as others have done and start grinding the iron narrower to match the width of the plane's sole. It's not necessary even though you can still move the iron to outside the width of the plane's side.
Fettling the cutting iron
Sharpening all plane irons follows the same procedure and if you are like me a freehand sharpener you will automatically create a beautiful cambered bevel that starts around 30 degree and drops off to anywhere you want it to as long as it’s less than 30. No, the cutting irons for all the rebate planes do not have the corners radiused as with the bench plane range of planes. Square across and as square to the long side edges is very best unless of course the plane bed is for a skewed iron which on the 78s is not. Compound or skewed beds is the scarcity and not the norm on metal planes
I find it a good practise to put a 2-3 degree bevel on the sides of the cutting iron using a flat file this give the right relief to the sides of the iron and gives a good clean edge to the rebate. If the iron is to hard to file use a diamond file.
Fettling the spur cutter
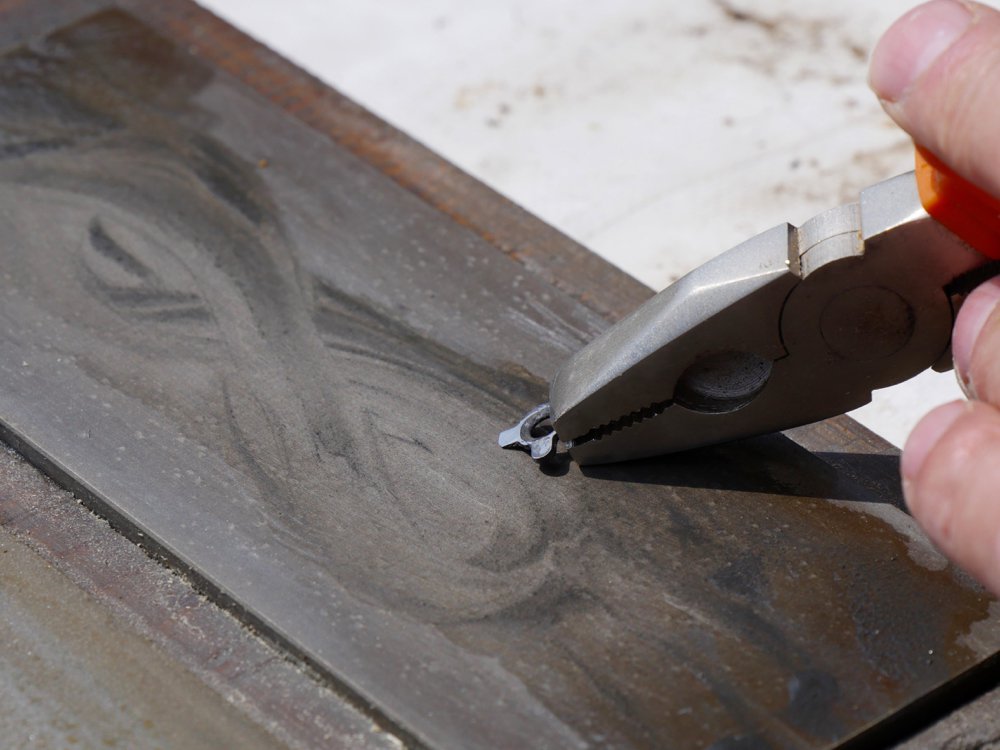
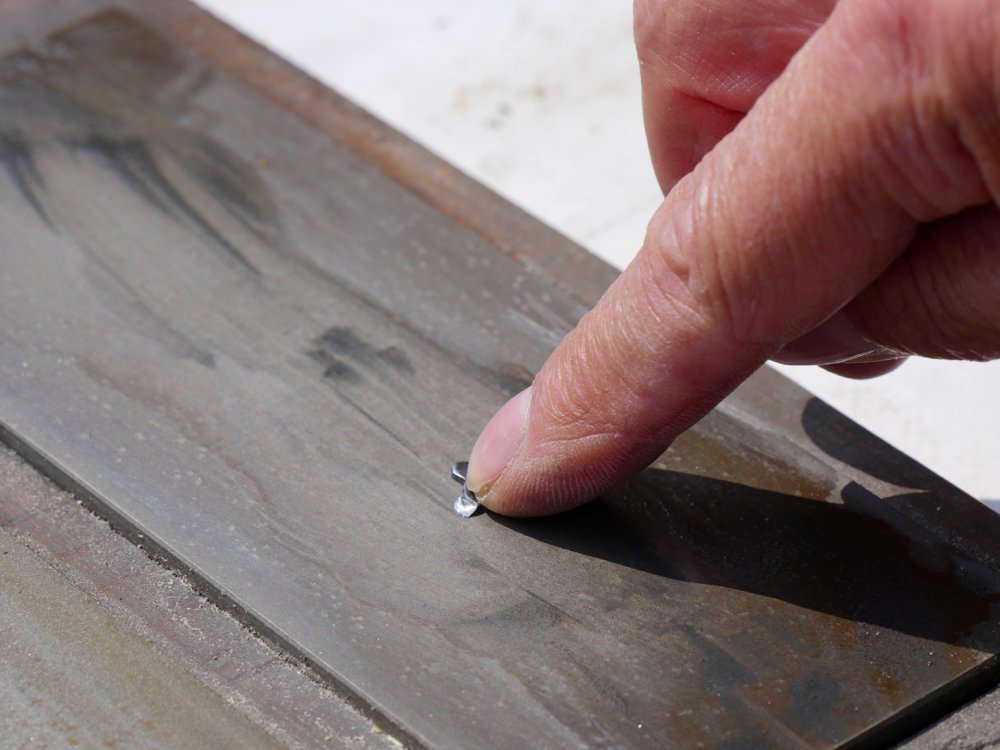
The spur cutters need sharpening. There are three cutters on them mostly but then there are round cutters on some too. Either way they should last a lifetime and can be replaced or made. Sharpening is simple enough using pliers to hold the cutter and a figure of eight system as you would for other crowned or radiused cutters and gouges. Once sharpened and polished out, place the flat face on the plate and polish out on the finest grit of 1200 only. This is enough for a small cutter like this and no buffing with abrasive compound is needed. Remember also that this can be done on abrasive wet 'n' dry and even sandpaper too.
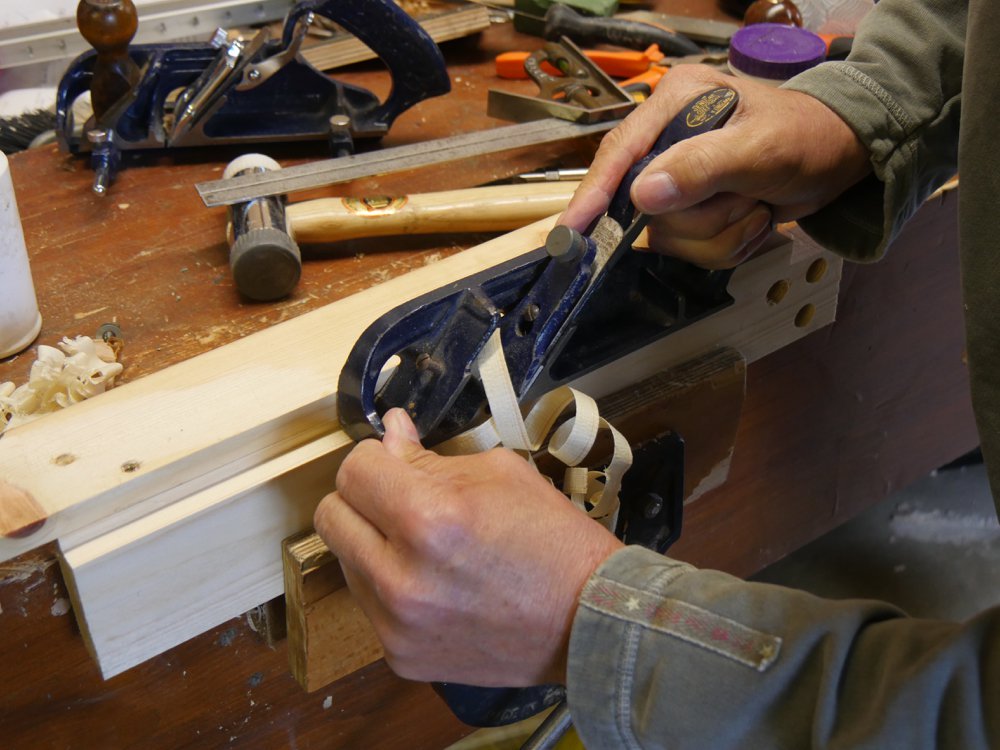
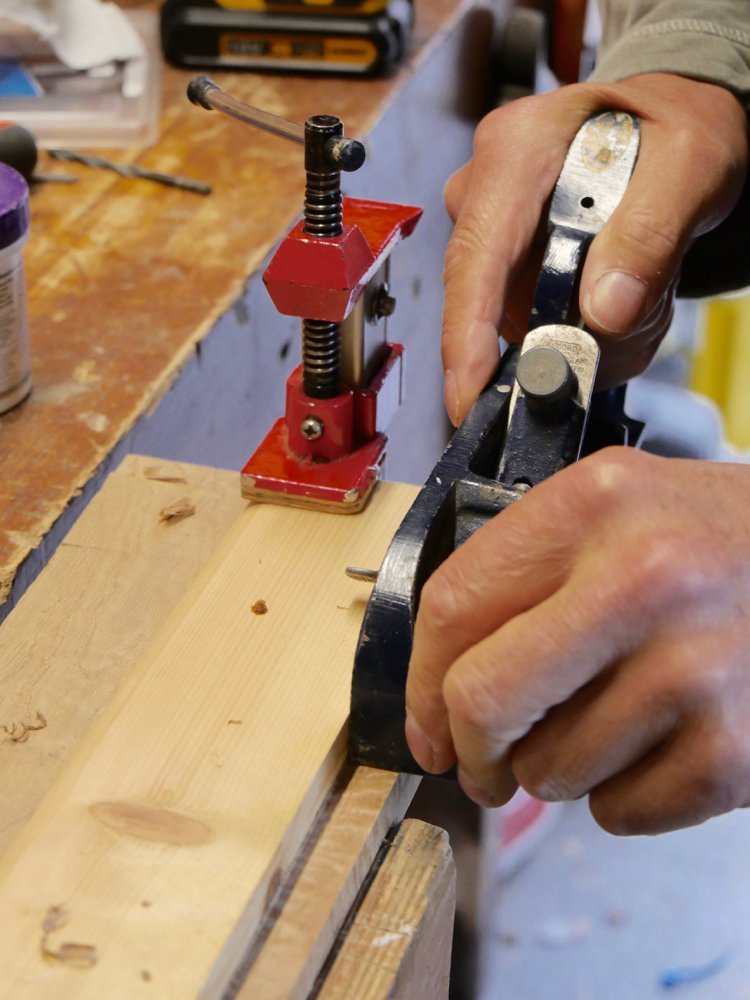
The plane in use
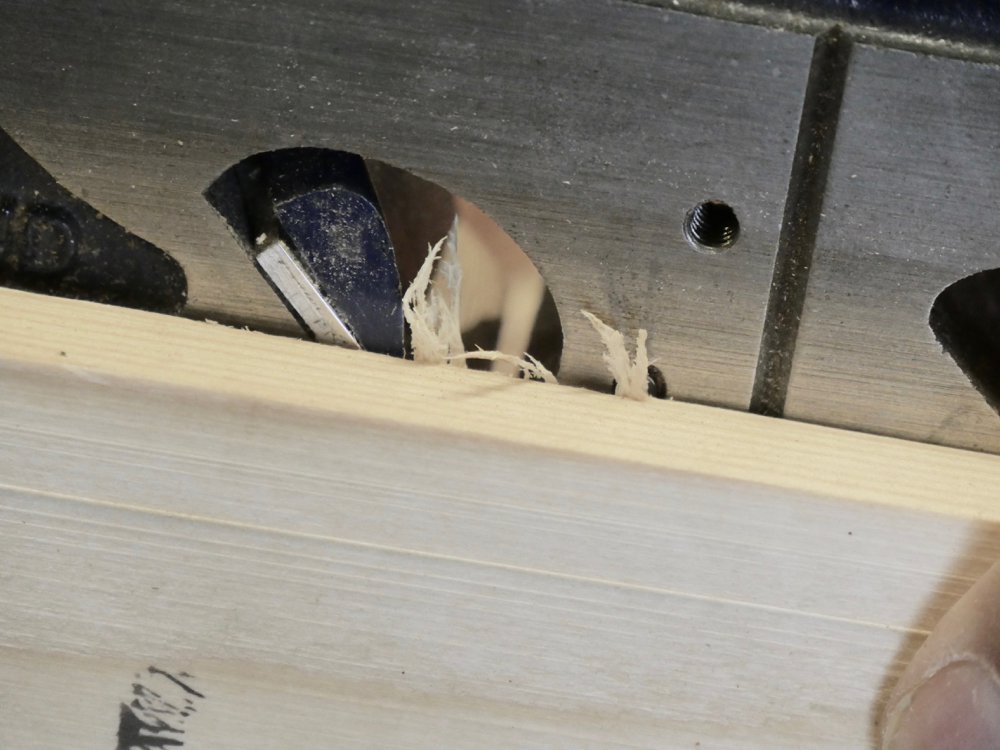
The first passes with the rebate plane should always start at the beginning of the wood and worked backwards. This standard practice leads to indistinguishable levelling and the cleanest edges possible to the side of the rebate. Start with shallow cuts and then deepen the cutting depth once you have descended 3-4mm. You can take quite heavy cuts with the #78 but still be considerate that the heavier the cut passes the more likely you are to tear the grain fibres, which is never the way of the craftsman.
Cutting square
There is a tendency to unwittingly tilt the plane to the side and so create a bevelled or tilted angle to the rebate being formed. After two or three strokes check yourself by sighting at the start and end of the workpiece or checking with the square and make corrective strokes as you progress. This is the way we develop skill leading to good muscle memory and not bad muscle memory and and habits. Eventually you will create rebates perfectly with only minor need for self checking and correction.
Watch for fence and depth shoe movement as you work. Sometimes these can shift without noticing and it’s always sickening to discover this too late.
Setting the plane for crossgrain rebating
Here’s a funny thing and it’s never been written so listen closely. Setting the iron for rebating is different when aligning the blade to the plane side. Remember earlier where I said that the spur aligns to the edge corner or outer face of the plane? If you were to align the bevel outboard to the side of the pane so that it protrudes as for long grain cutting by the 1-2mm it would not align with the cut made by the spur and so the face edge corner of the blade will undercut and the edge of the cut would indeed be very ragged. This makes the setting need slightly different. When we use the plane for crosscutting and so too the spur, we can set the blade either dead on to the corner or indeed slightly in from the corner. This is to do with the grain more than the plane. When crosscutting, the grain splits the remaining distance into the corner so, even if you set the blade as much as 4 mil in from the corner, the plane will still cut the rebate quite neatly. I suggest the iron be set 1-2mm in from the corner edge of the plane this time. That should work well for you.
Warning!
Sometimes we forget the lever cap securing the cutting iron and it protrudes past the side of the plane. As the rebate deepens the front bottom corner of the lever cap starts to intrude into the corner of the rebate and damages the corner. Make sure that the lever cap is not in a position to cause such damage.
Additional tidbits
The plane is simple enough to adjust. Sometimes though it will reset itself if the cap securing the iron to the bed is not tightened down enough or you hit some really wiry grain. If you see the grain before you plane you can reduce the set for a couple of strokes and this helps to redirect rising grain and reverse it just enough to reset and continue planing even against the grain.
Cold weather
Of course we all like wooden handles over plastic and then especially over metal ones. The #78s are all made as a single piece casting—handle and all. In cold weather, where the tools are left in subzero temperatures at different times, the cast metal can be very uncomfortable until warmed up. Sometimes the handle can indeed freeze to your hand if your hands are slightly damp or sweaty and you are not careful. This once happened to me in Salt Lake city in January. Anyway, an old man I worked under as a boy wrapped his handle very neatly and tightly with cotton twine (thin) and then coated the finished wrap with three coats of shellac. It increased the diameter of the handle a little but it still felt well sized and it did make the plane very comfortable in the freezing winter months.

Comments ()