Sharpening Your First Crosscut Saw–Part 1
Introduction
I have written this blog post for those who have crosscut saws that need sharpening. It is not about restoring a crosscut saw (even though sharpening is a restorative process), but for those who bought a crosscut-pattern saw and dulled it through normal use. Restorative work for neglected and abused saws is a more advanced level of saw sharpening I may present later. Along with this blog we have created a new video which is in the edit phase now and will be posted on woodworkingmasteclasses.com for free shortly. In the mean time you may want to sign up either for the free subscription or paid membership. I suggest the free subscription as this also gives you access to a mass of tools and techniques videos as well as methods of work and more. Here is the link. Once you are signed in as a free subscriber you can always upgrade for the project videos when you feel you are ready to tackle any of the projects that match your skill level.
Sharpening crosscut saws
It's not complicated to sharpen crosscuts but effectively it becomes a little more complex for a couple of reasons, so I think I can explain why here and then follow up by showing the video we just filmed which should be ready sometime in the near future.
The difference with crosscuts
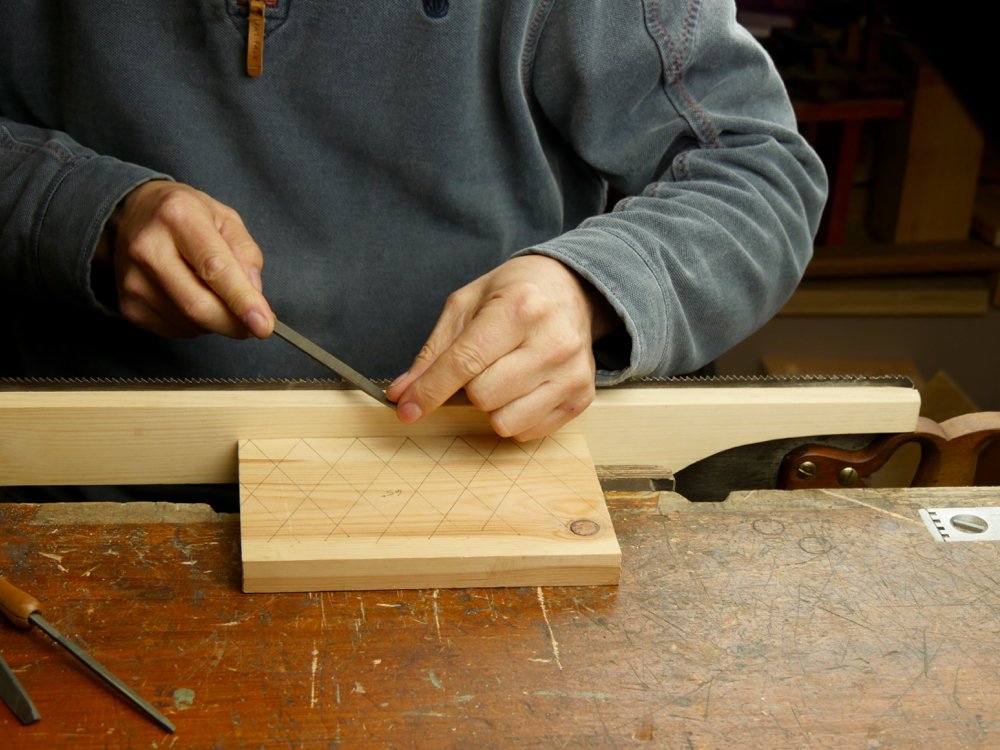
Crosscut saws must be sharpened from two angles on the insides of the teeth instead of just the one angle square across we use for ripsaws. In other words the ripsaw tooth or teeth are sharpened with the file held at 90-degrees in both directions, which is holding the saw file square to the plate along the line of the teeth and then square to the verticality of the saw plate when held vertically in a clamp or vise.
That means the file is level and square as the file stroke passes across the teeth. Because of this required bevelling profile to the crosscut teeth, when we file teeth, we must create a bevel to each side of the individual teeth, effectively creating the pinnacle or fleam tooth . By angling the file to an angle in relation to the back and front edges of the adjacent teeth, and because two of the three facets of the file cut the steel with the same file pass, we effectively develop two bevels to two separate but adjacent teeth at the same time.
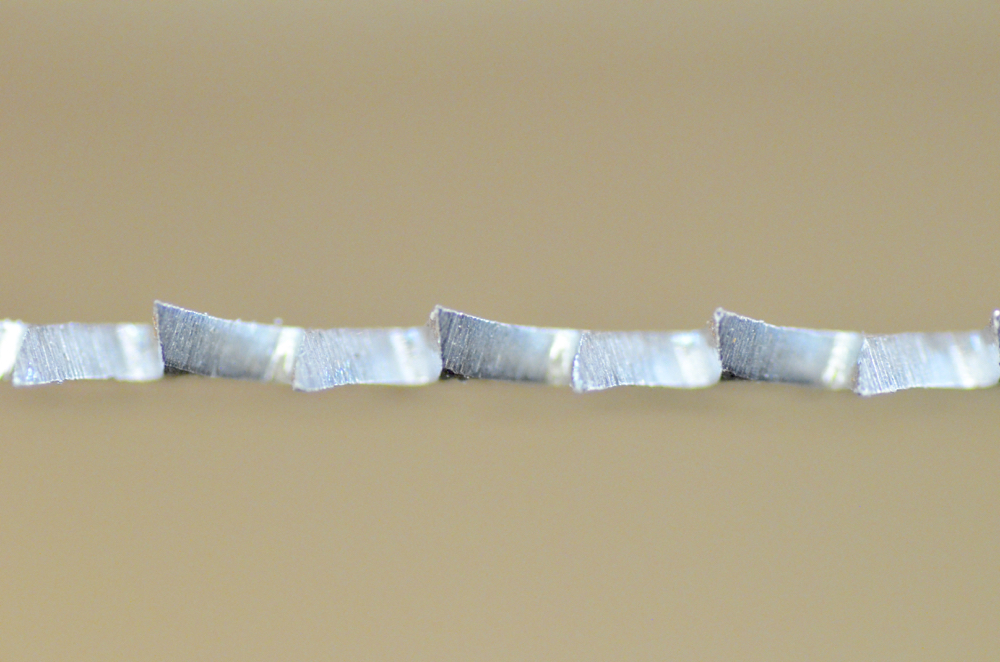
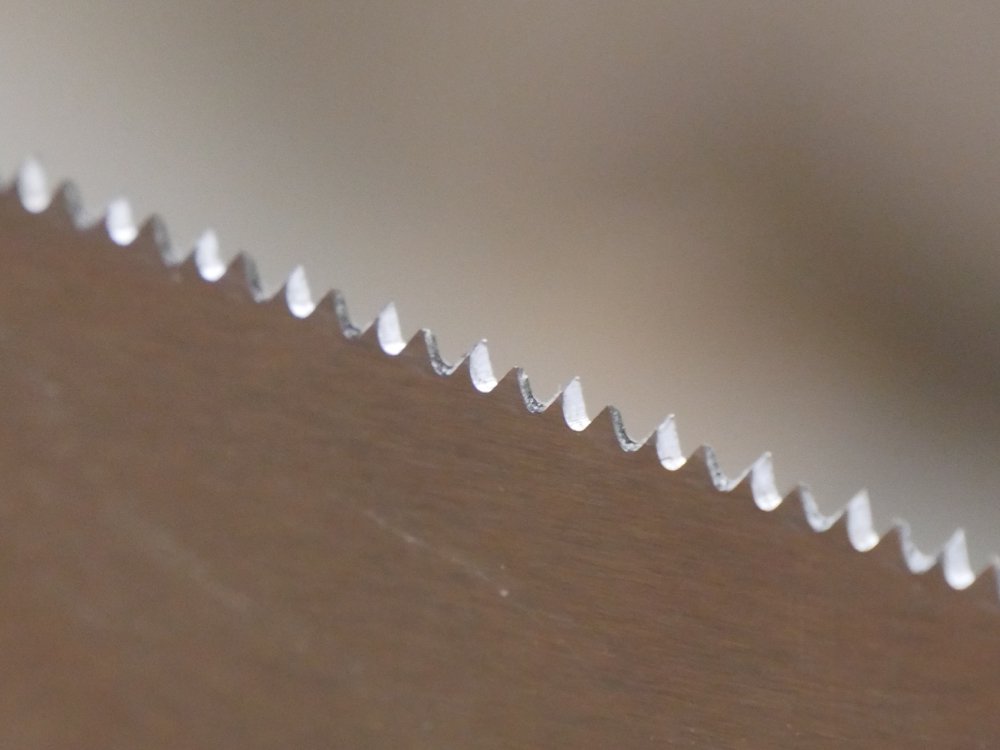
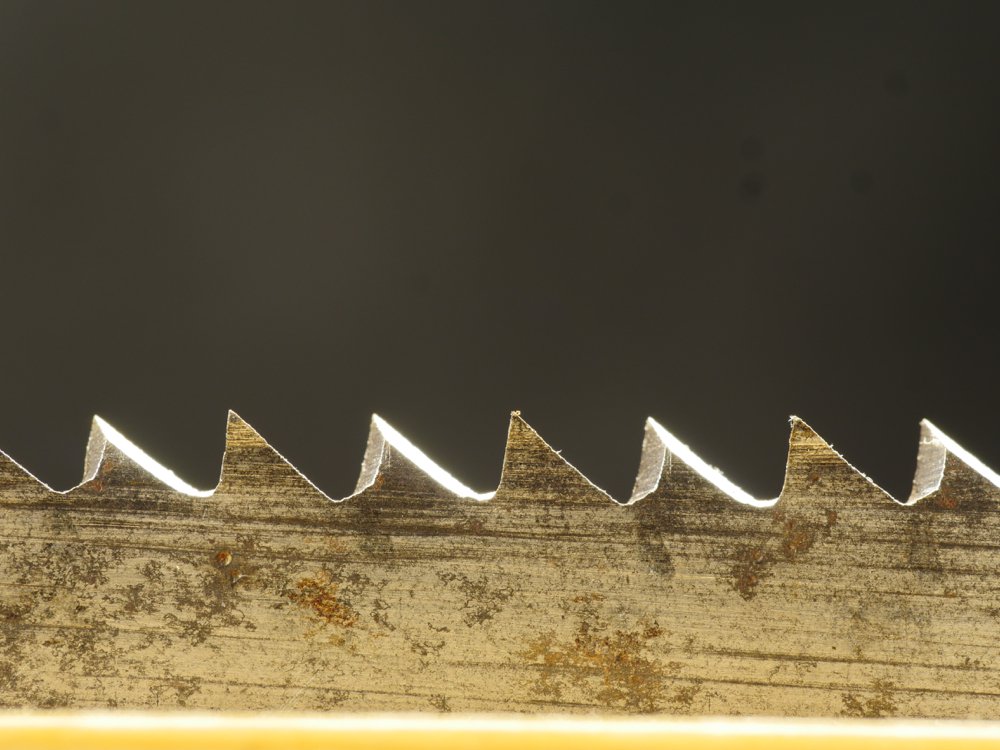
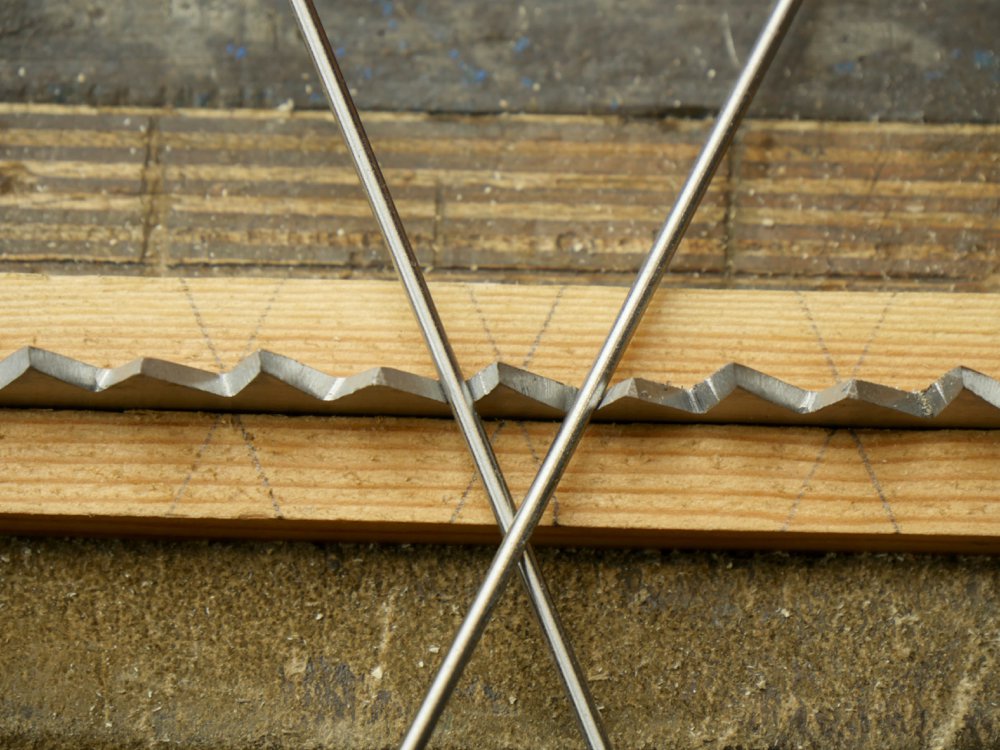
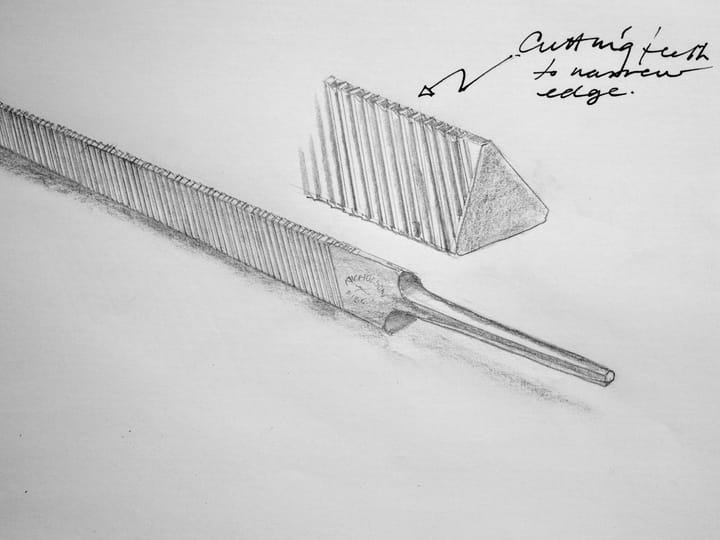
That means that we sharpen the front of one tooth and the back of the other. By skipping every other tooth we develop sharpness to half of each tooth as we pass along the length of the saw, sharpening every alternate tooth. Turning the saw end for end we begin the same procedure, skipping the tooth gullets we have already filed and also offering the file at a counter angle equal to the angle we filed the previous teeth to. This angle is commonly 65-degrees across the tooth line, but it can be more or less. Usually, for edge strength and retention, and on western saws generally, we generally aim for around 65-degrees or less. What you see in the image above is the fleam pattern to a crosscut tooth. Below you see the 65-degree angle it takes to file half the tooth bevel to two adjacent teeth and then below that you see a counter angle that completes the tooth bevelling that creates the crosscut tooth.
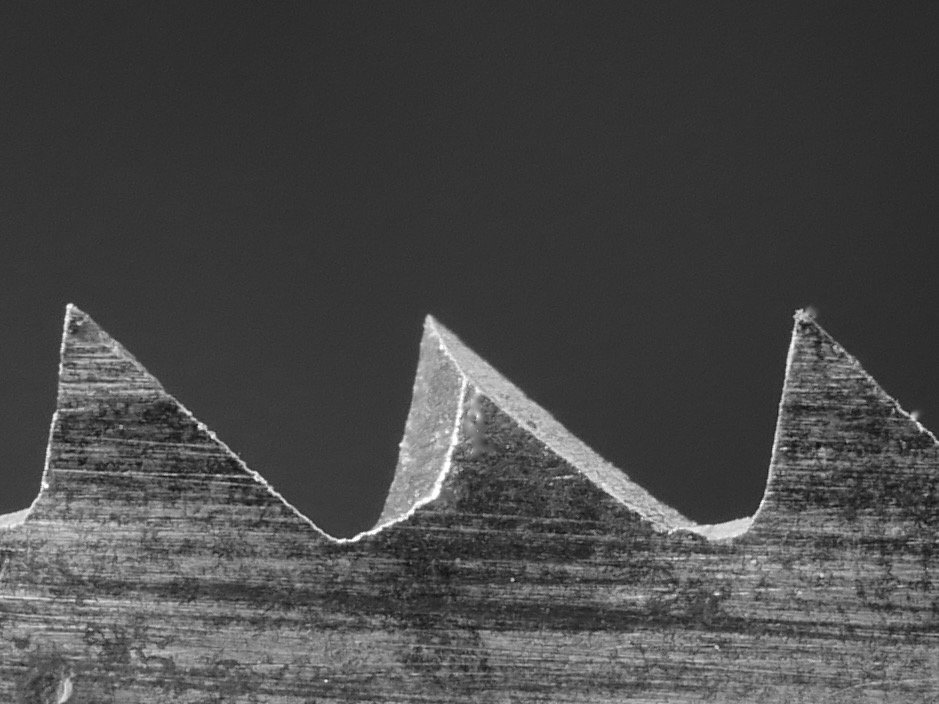
The second dynamic that makes crosscut sharpening more complex is that, though the tooth size can be the same as say a ripcut saw tooth, the amount of steel left in the tooth or teeth after fleam-cut profiling of the teeth is significantly less. Because of the bevelled angle we are developing, when the tooth is completed, we have effectively removed a significant amount of steel from the tooth; without doing the maths, perhaps as much as half. It’s here then that we meet one problem head on. On smaller toothed saws such as back saws of different sizes, once established as a crosscut, it is all too easy to file out a whole tooth with a single stroke. This happens all the more the thinner the saw plate. That’s why, in the reality of daily life using saws of different sizes, it is very practical to determine which saws you will use for what and sharpen to task. Any saw with teeth smaller than say 10 points per inch of saw length is best sharpened for a ripcut pattern. With very small teeth and especially in thin plate stock it is very easy to file out a whole tooth even with a light and partial pass. Let’s look at the reason for sharpening backsaws primarily to a ripcut pattern now. Just to add clarity for the reasoning.
Rip or crosscut pattern––Which to choose?
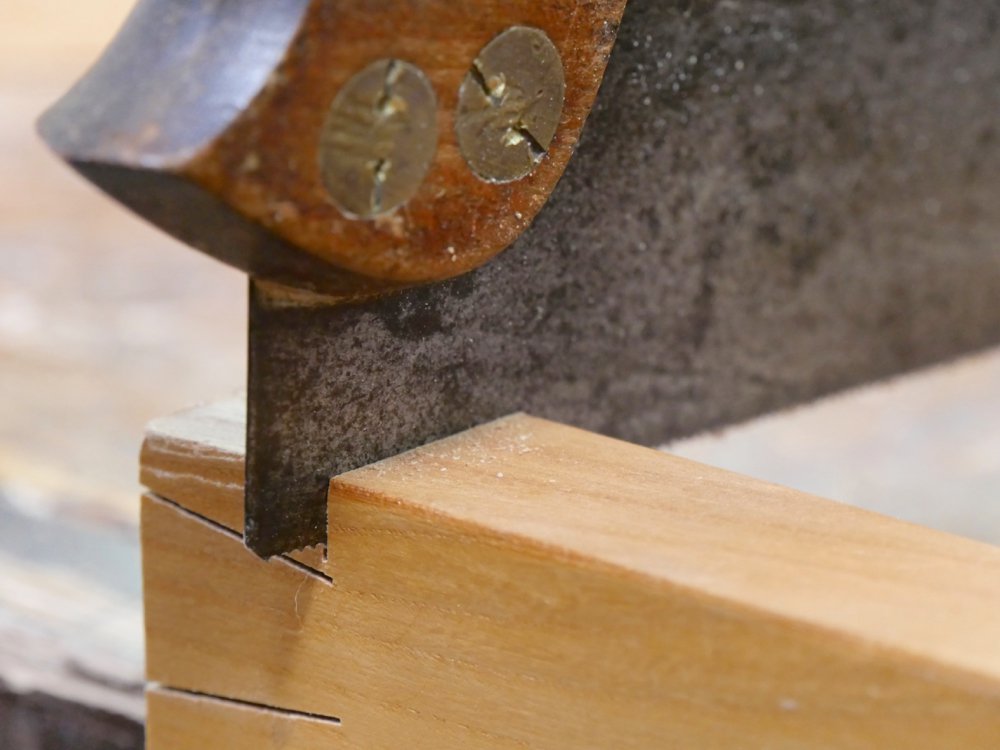
Taking a look at the majority of our joinery work, and joinery is very different than saw ripping and crosscutting boards, most joints have significantly more ripcutting to them than crosscutting. This is especially the case with the two most common of all joints, the mortise and tenon joint and the dovetail joint. The sides of dovetails for instance on a double dovetail will have four long facets along the grain and only two crosscut facets that we need the dovetail saw for. For this dovetail I cut 5 square inches in the ripcut but only .5 of a square inch in crosscutting. This is the case with tenon cutting too.
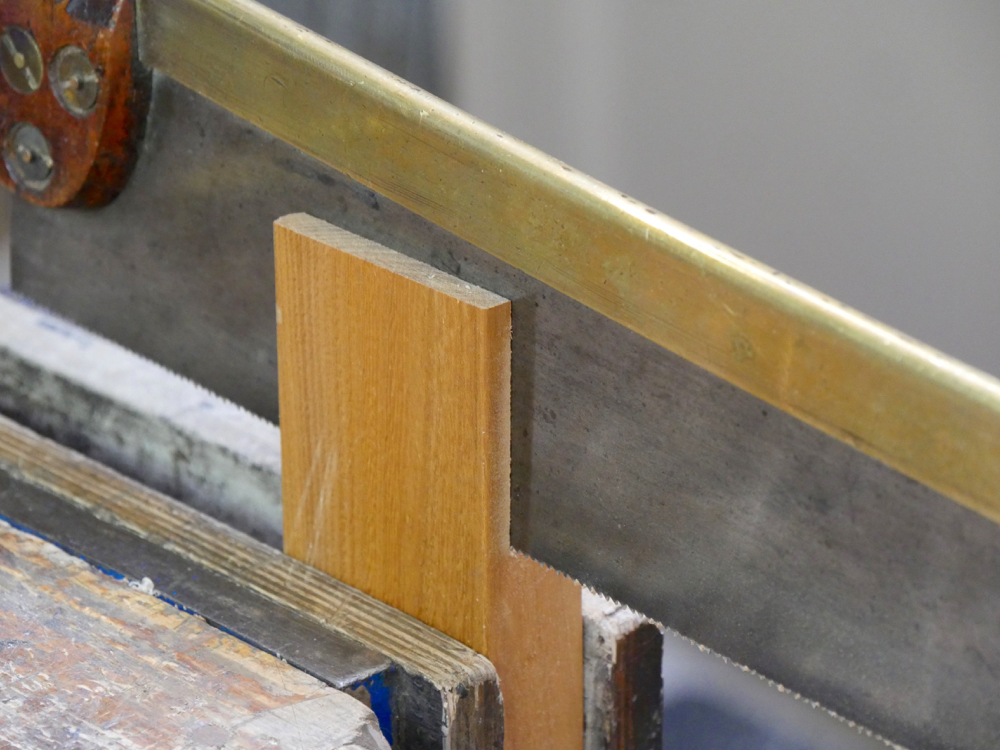
A tenon to the end of a coffee table rail as shown here has 6.18 square inches of long grain ripcutting to each side of a single tenon to form the cheeks using a tenon saw to cut them. Cutting a shoulder uses only .75 square inches of crossgrain shoulder cutting. So we see here that ripcut saws are valuable in joinery saws and that the smaller teeth cut perfectly well in the ripcut mode.
On the other hand if you were crosscutting wood to length on a large scale, which most people are not, there is a real case for a crosscut saw as the majority of your work might necessitate keeping such a backsaws to a crosscut pattern. So I think here I rest my case for sharpening the majority of joinery saws such as tenon and dovetail saws to a ripcut pattern and not a crosscut one.
In my view it is best to sharpen saws with larger teeth than 10 PPI (points per inch) to task, which means having say one 7 PPI saw for ripping and and another of the same tooth size for dedicated crosscutting. Mostly I choose this as a general trade pattern because the teeth are more commensurate to the wood grain we are cutting. Smaller teeth will readily crosscut and ripcut with the ripcut pattern as standard tooth pattern in joinery saws. The smaller the tooth, the less the saw needs to be dedicated to crosscutting. With larger teeth it becomes much more problematic and so we generally dedicate the saws to task. To sum up, saws with small teeth, 10 PPI and more, will readily ripcut and crosscut, whereas teeth 9 PPI and less struggle if not dedicated to cross- or ripcut patterns.
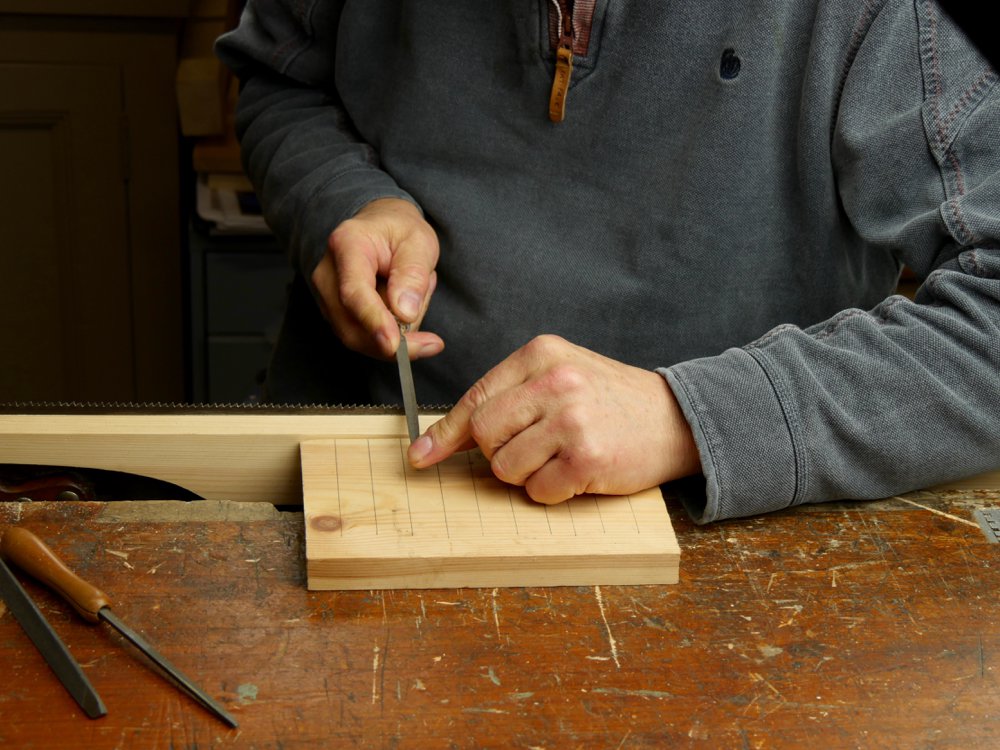
Now we have the logic we can look at the practice of the actual sharpening. Look out for Part II shortly.
Comments ()