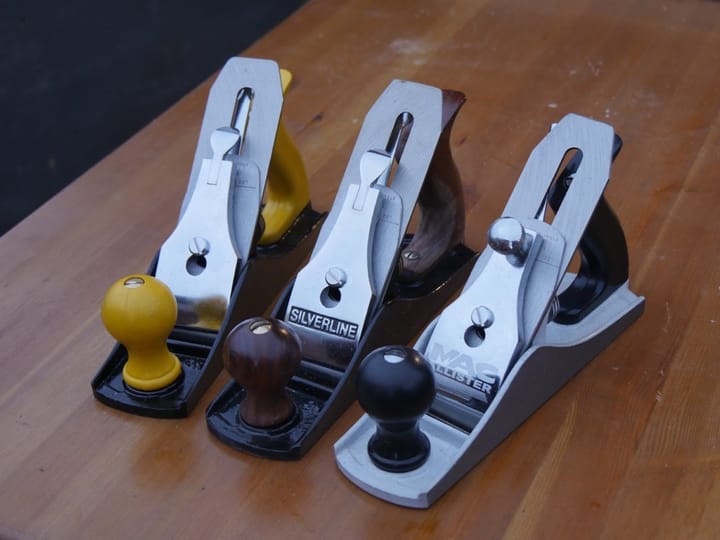
Import planes-Part III
Lever-cam lockdown out of sync

This might seem innocuous, or even not apparent at all, but in the context of functionality this little adjustment assister makes a huge difference to the plane and especially so for the setting of the lever cap in relation to the pressure it applies to the cutting iron assembly. I first used the term cutting iron assembly 20 years ago to describe the united cap iron to the cutting iron as it best describes both parts as a unit. Since then someone enlightened me that therm is a common phrase. So wherever you see me use this term this is what I am referring to. On all of the commonly used bench planes the lever is refined to an elliptical shape so that when the cam-shaped lever is pressed into action from its loosed state the cam lifts the lever cap up from its zero pressure position to apply pressure at two points; one, directly beneath the lever cam near the top or upper end of the cutting iron and then, two, along the full length of the leading edge of the lever cap directly on the top of the hump of the cap iron. This then compresses the cap iron against the cutting iron and subsequently beds the whole onto the frog. The combination of all this effort counters any tendency in the cutting iron to chatter or vibrate under the forward thrust of the plane in the work.

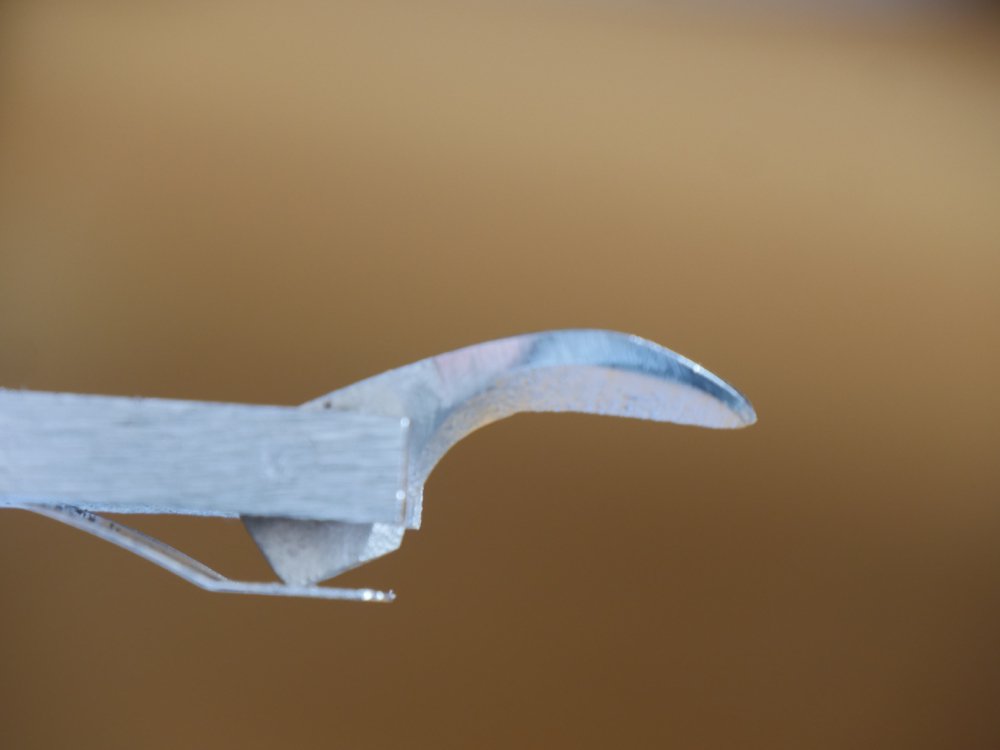
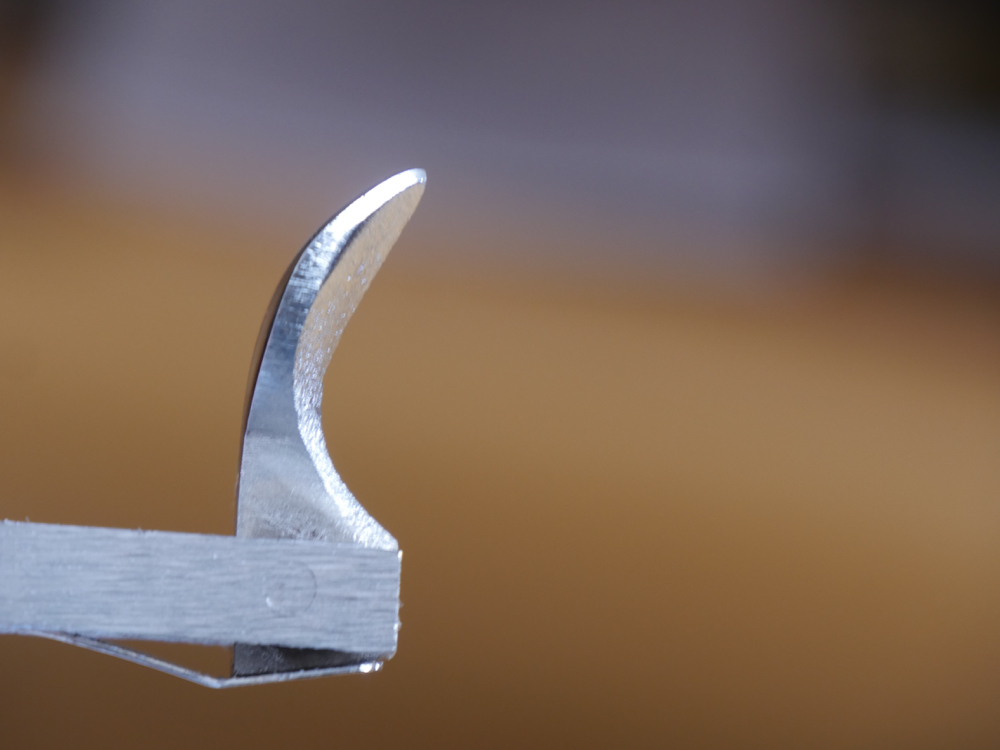

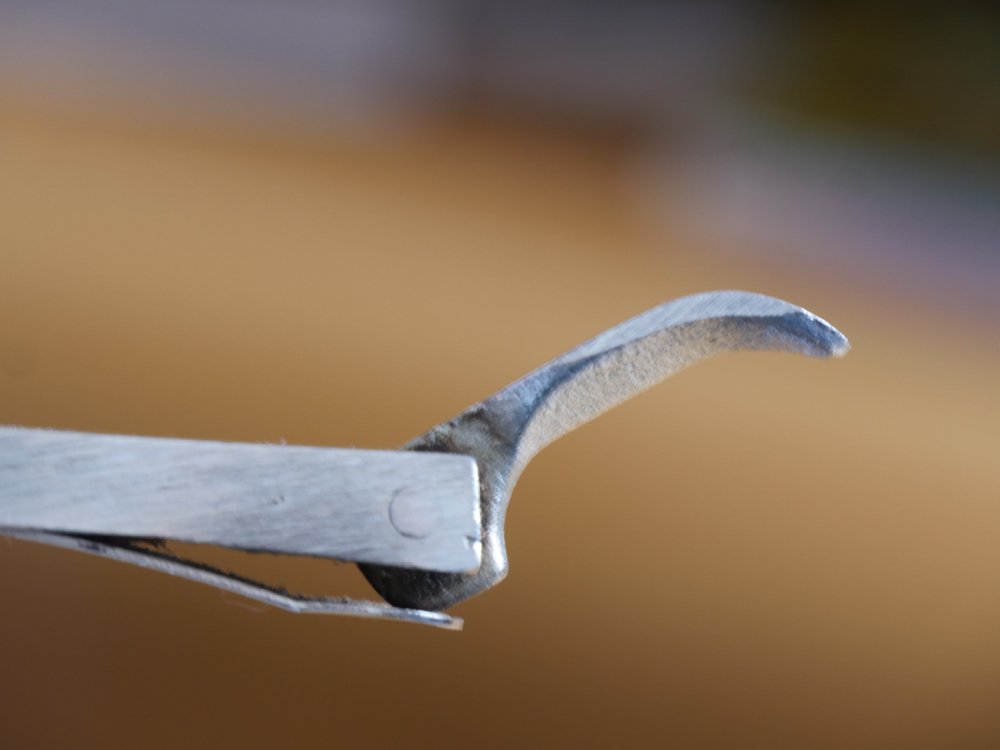

Back to the flaw in the B&Q lever shown in stages of opening above. The lack of creating an elliptical curve increases the distance from the centre pin to what is nearer a more 90° corner. This means that when you set the centre setscrew to adjust the pressure to the lever cam the distance needed is greater than when it makes the full arc to the lock down. With this hard corner creating high 'knuckle' point you cannot lock the lever all the way over without further loosening of the setscrew an extra half turn to allow for the added distance. When the full rotation is complete the cutting iron assembly feels somewhat firm but can be moved from side to side on the frog quite easily with the fingers and thumb either side. This then means that the setscrew must be set with a screwdriver 'after' the lockdown is complete and this then negates the function and therefor need at all for the lever cam because the convenience is completely negated.
Unfortunately any new woodworker and even seasoned hand tool users would be less current with the workings of the bench plane and feel that it was either a useless plane or a useless them. Neither of which is the case at all. These things happen in organisations like B&Q where things get so big the buyers and store staff get so distanced from the reality of equipment they have no clue of what they should be able to advise on. This is true in the factories too. I actually did not feel this plane was any different than what was produced in the UK Stanley factories over the last half century--poor metalworking standards, assembly line anonymity, unaccountable staff. Stanley does offer a better quality plane these days but what the long-term in-the-field or at-the-bench tests will show will not be apparent for a decade or two as will be the case with this plane too. Now as has been said in previous articles and blogs, we cannot blame the makers altogether because companies give them a price they will buy at and then the workers are forced to work for a minimum wage. These kinds of irresponsible dictates so malign the art and craft of work and workmanship and demoralise people working too.
The staff making the plane can become equally detached from how the plane should ultimately function when completed because that is not technically their job or their area of expertise but one of two things likely happened here. They are so lowly paid and on production that they simply cut out one step that they thought insignificant or they were never trained to shape it correctly in the first place. Personally, for so low a cost plane, I thought that the plane came out pretty well. I think with all of the fettling and such I would have this plane shaving well inside about 15 to 20 minutes, but I haven't got through everything yet, so when we make the video we will try to do it continuously unless that just doesn't work or some work is redundant and extends the length without reason.
To resolve this particular issue is simple enough. It is irksome that the work needs reconciling but we've been doing that to new Stanleys for half a century and more so what's the difference? Oh, by the by, I have had to fettle brand new high-end planes from time to time too.
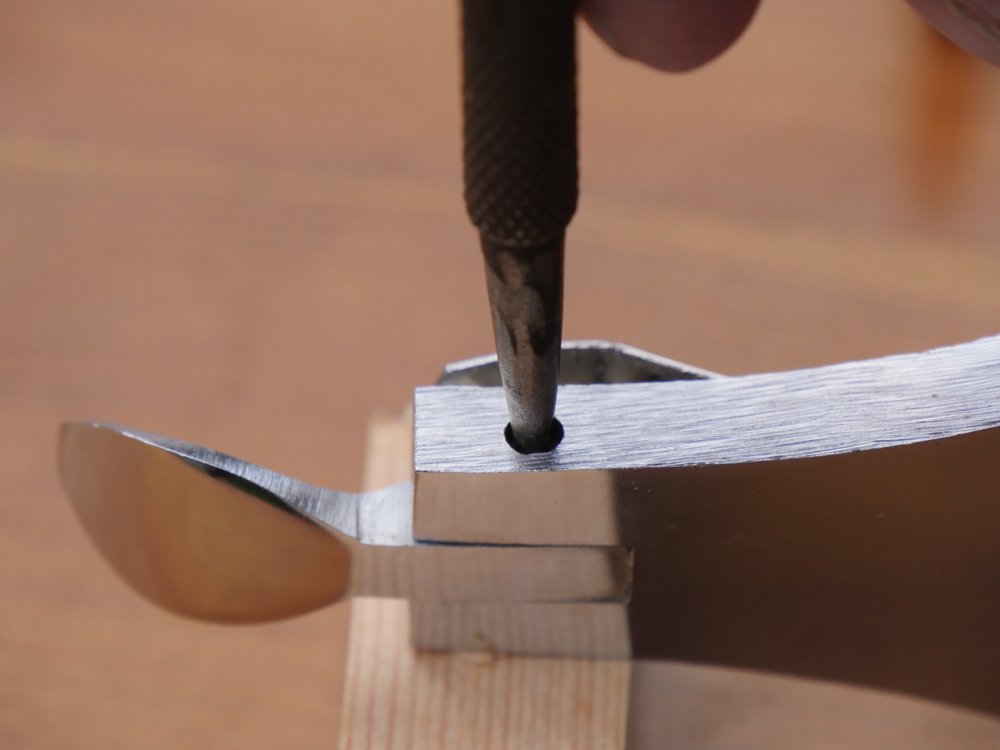
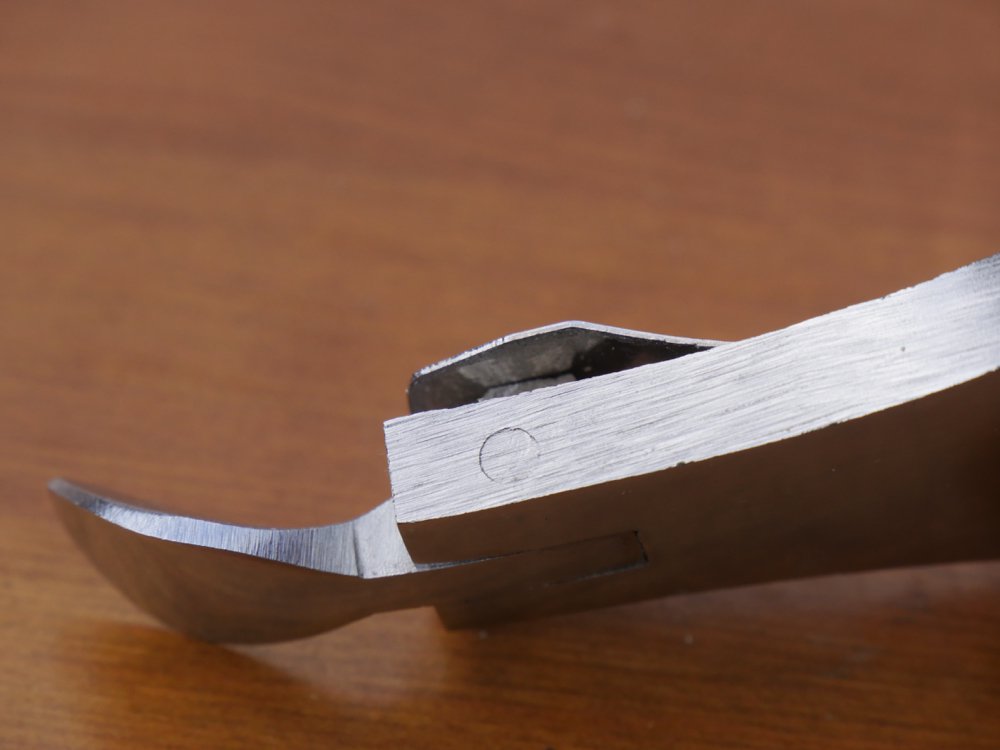
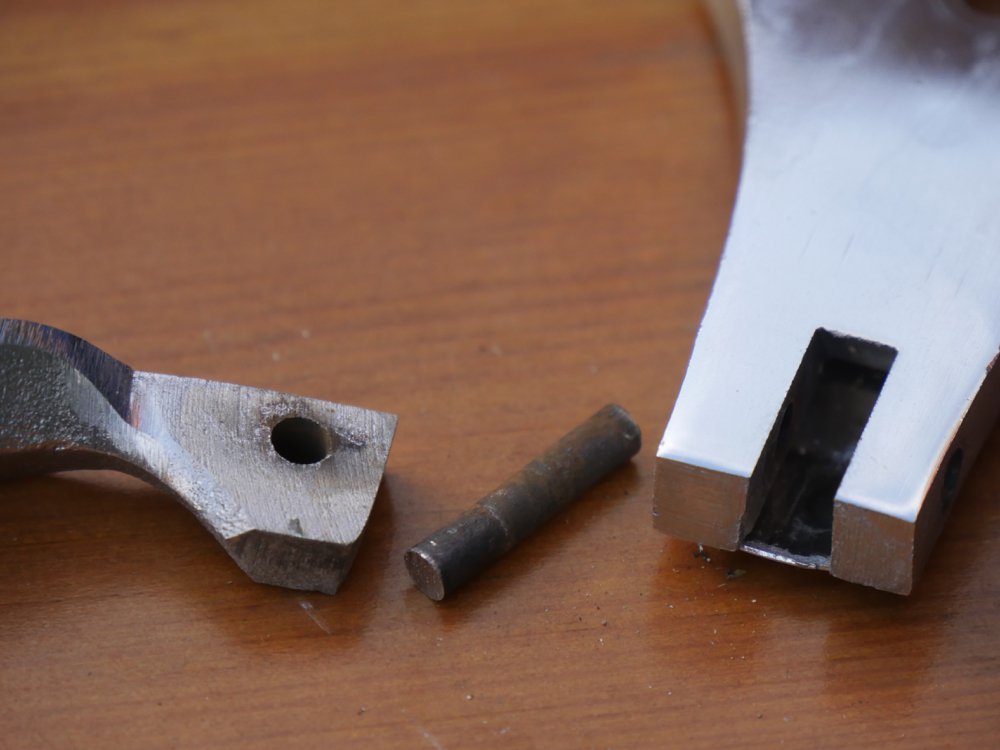
We first remove the pine with a nail set or drift of some type. A nail might work too.

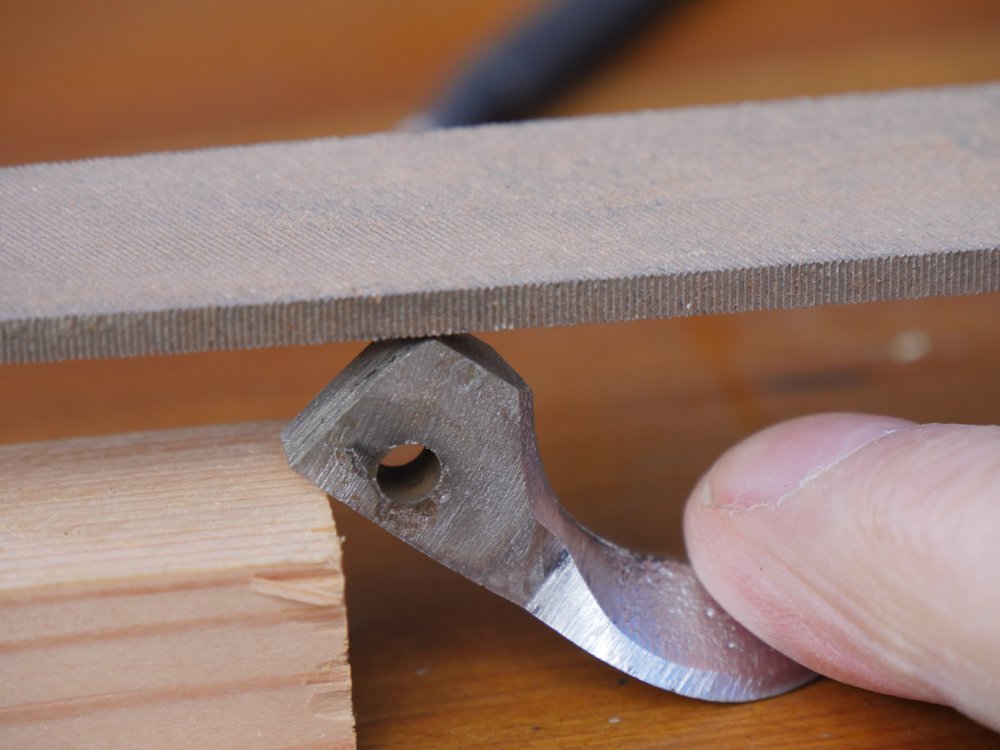
Now I take a flat file to it and remove the hard corner and make certain that the corner is removed sufficiently not to over extend the distance as it did previously. I should point out here that I have had this happen on new Stanley planes where the operator forgot to do this aspect of work.
The metal files readily, by the way. It only took 15 strokes with a flat file.

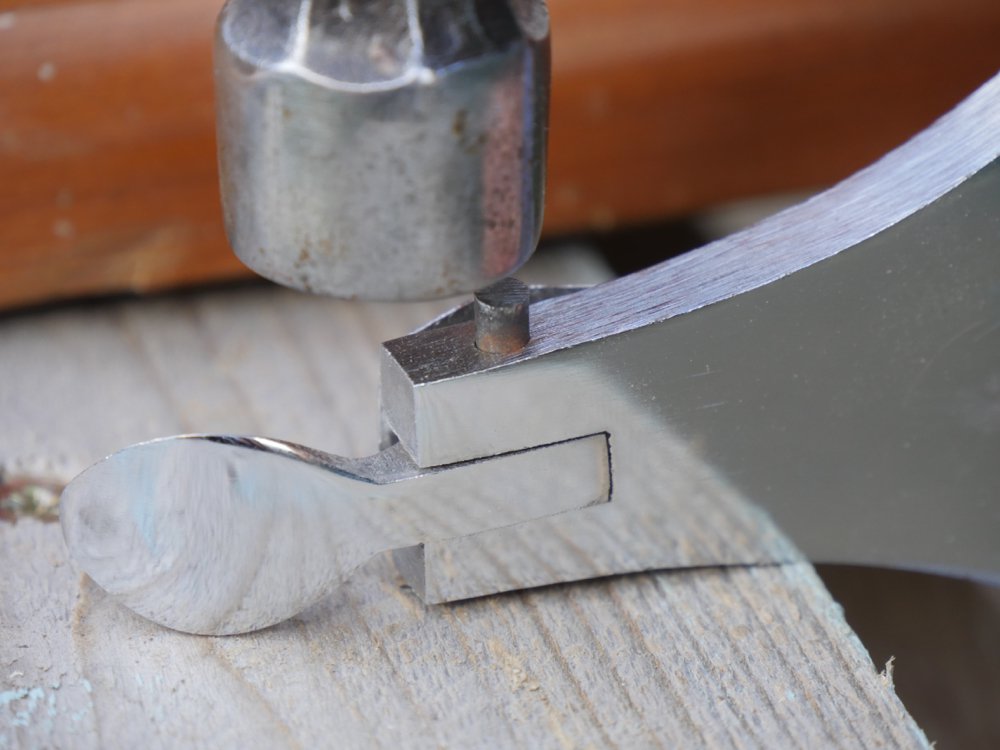
Reinstalling the lever cam is simply a question of insert the lever, locating the pin and tapping it home.
Once this work was done the lever cap worked as well as any I have used.
Comments ()