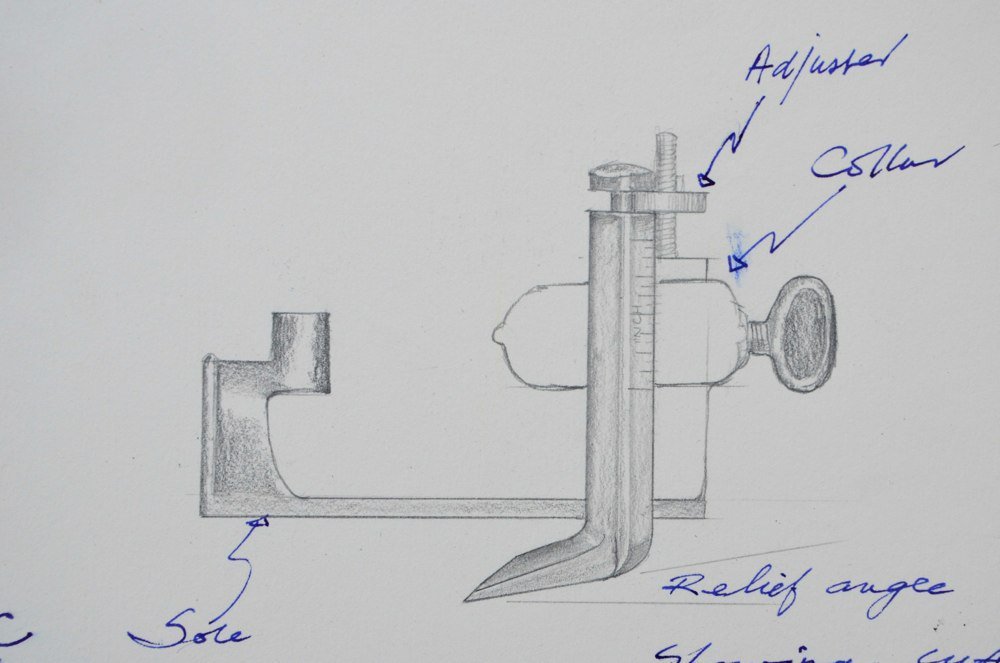
Routing the Past Developments

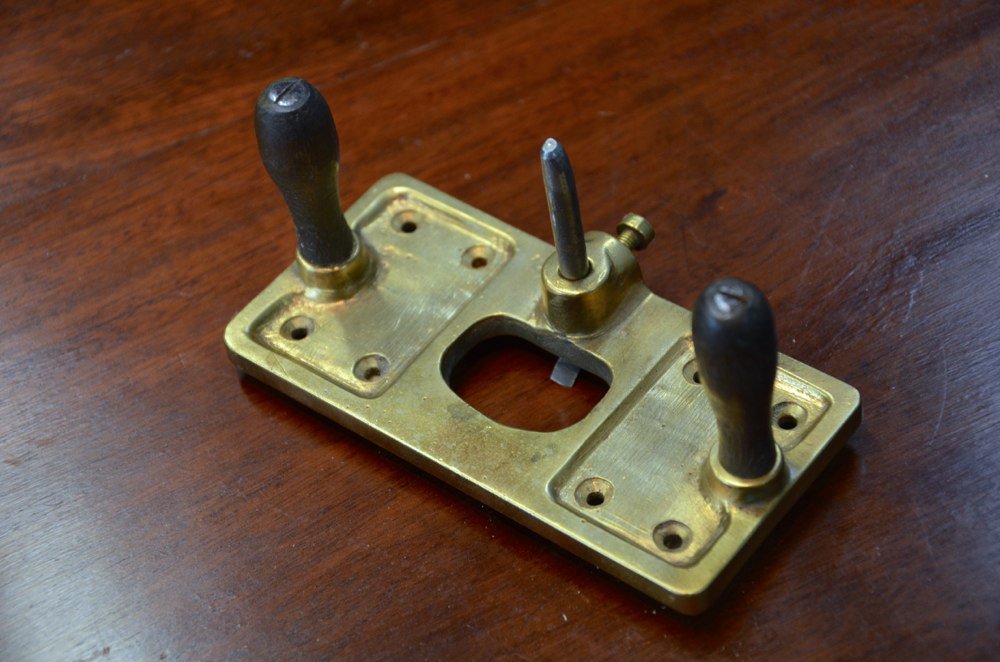
In the process of answering the question on pointed router cutters we continued on to undo any misunderstandings surrounding these essential planes. The plane remains one of the most essential tools for hand tool woodworkers and woodworking. The poor man’s router of course leaves you fully equipped should you need one not costing a fortune and not own one, but adjustability of depth of cut provides an added advantage and of course it’s often here that legalists try to lay down the law with regards to which one everyone should buy. I looked through my routers and counted around 20 before I stopped. The school itself takes up half of those so I don't feel bad at all. I have bronze ones and brass ones, Preston and Tyzaks, Records and Stanleys and then wooden home mades and manufactured wooden ones made by planemakers of the past. Some you tweak-pinch with your fingertips and tighten with brass wing nuts and then others have micro-adjusters with screw stems and knurled nuts. Those I don’t own I have used at some point or at least tried. Fact is, I love router planes and can’t imagine life without them.
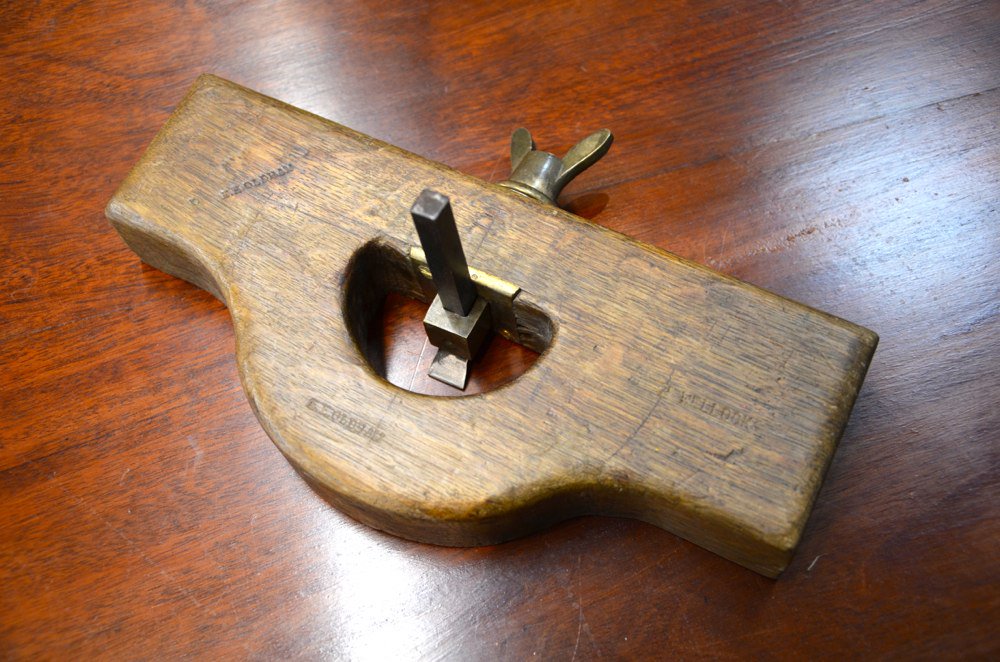
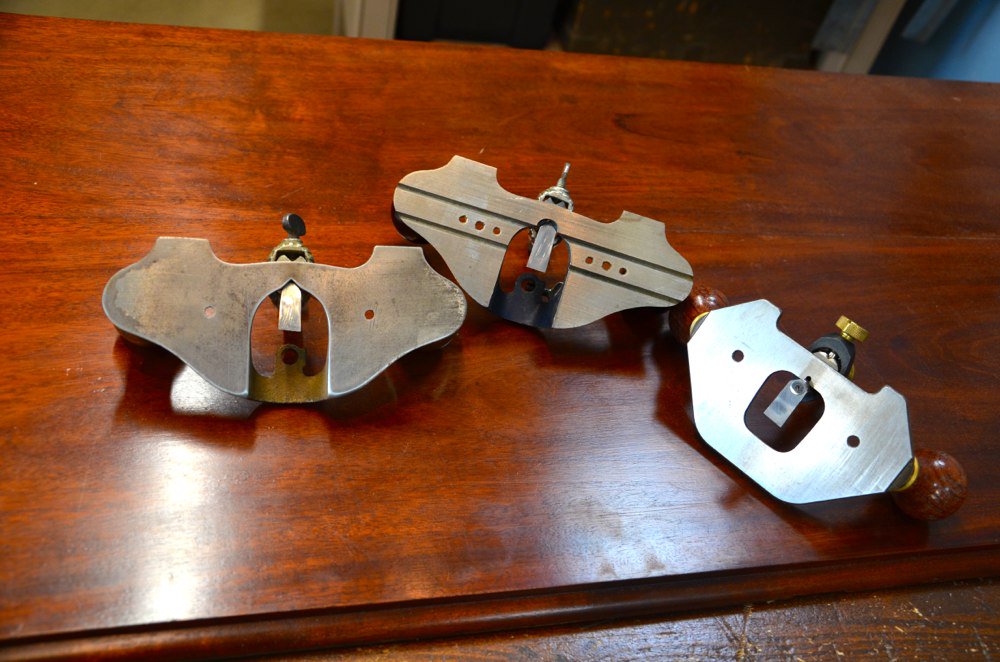

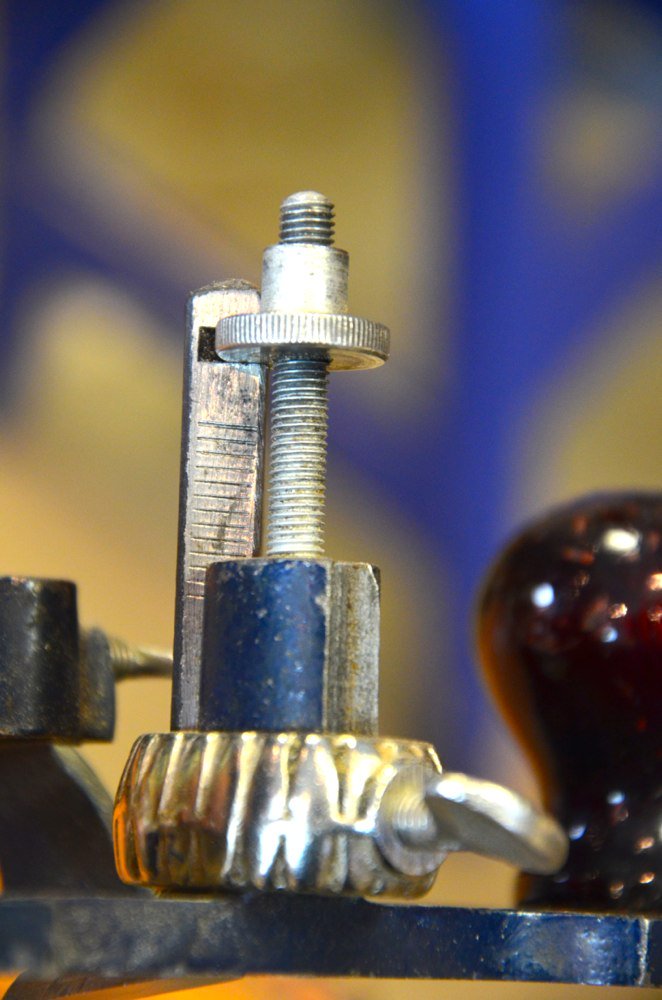
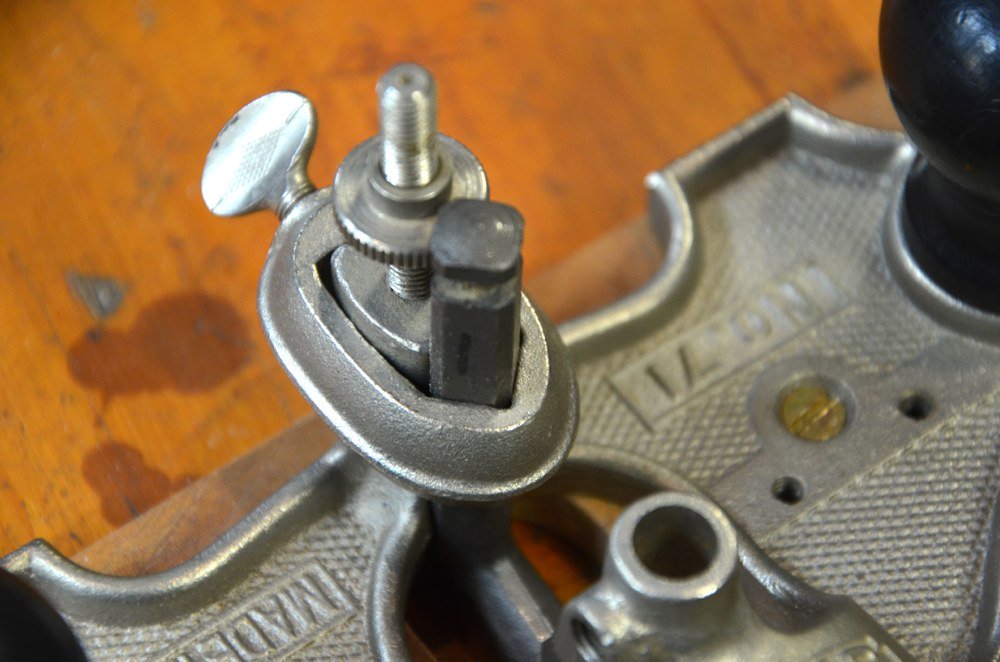
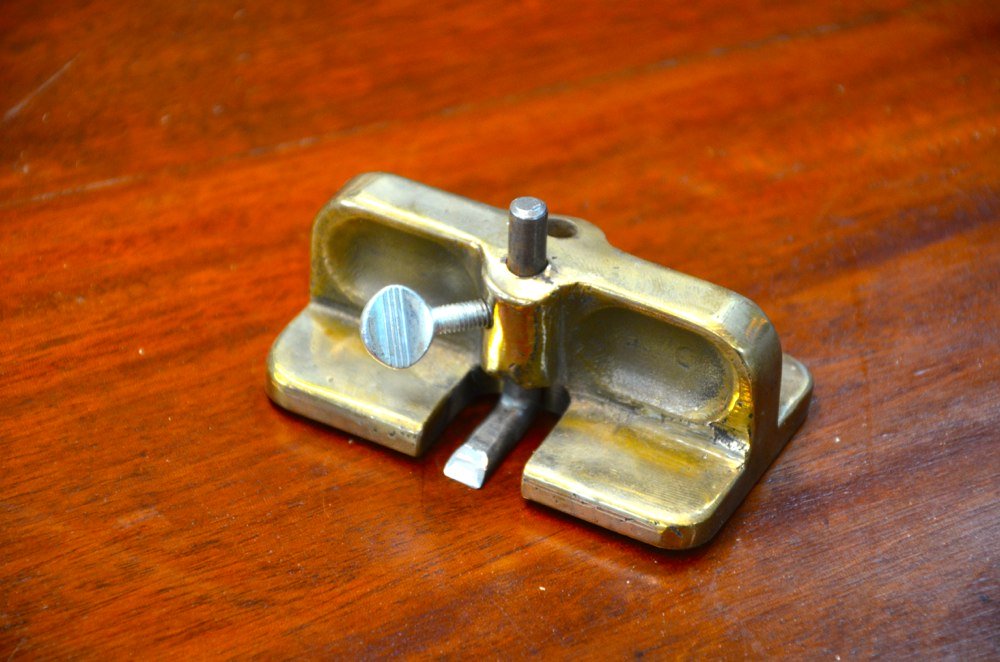
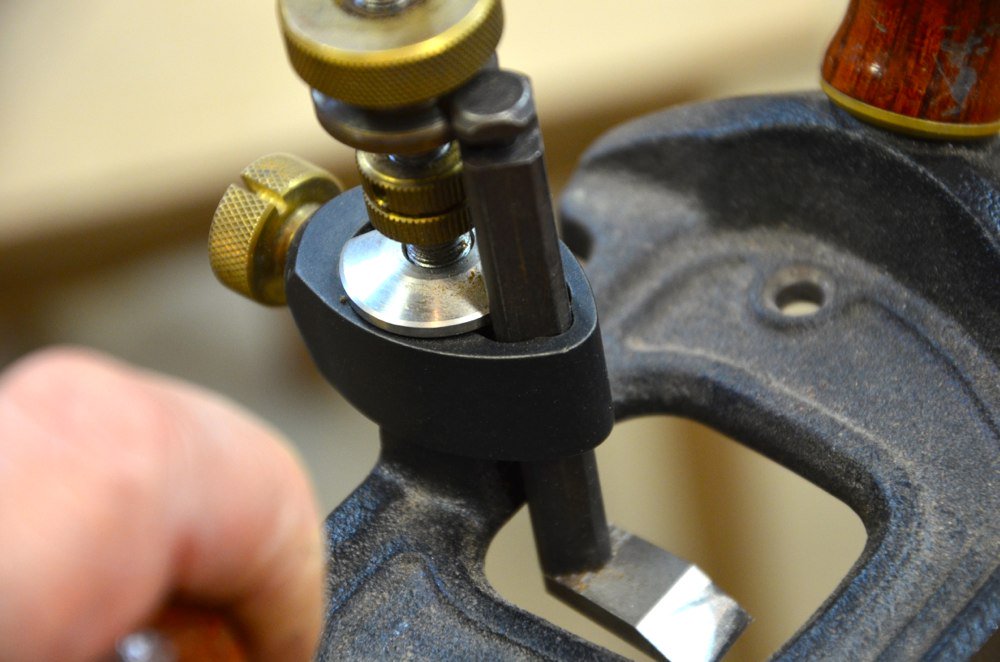
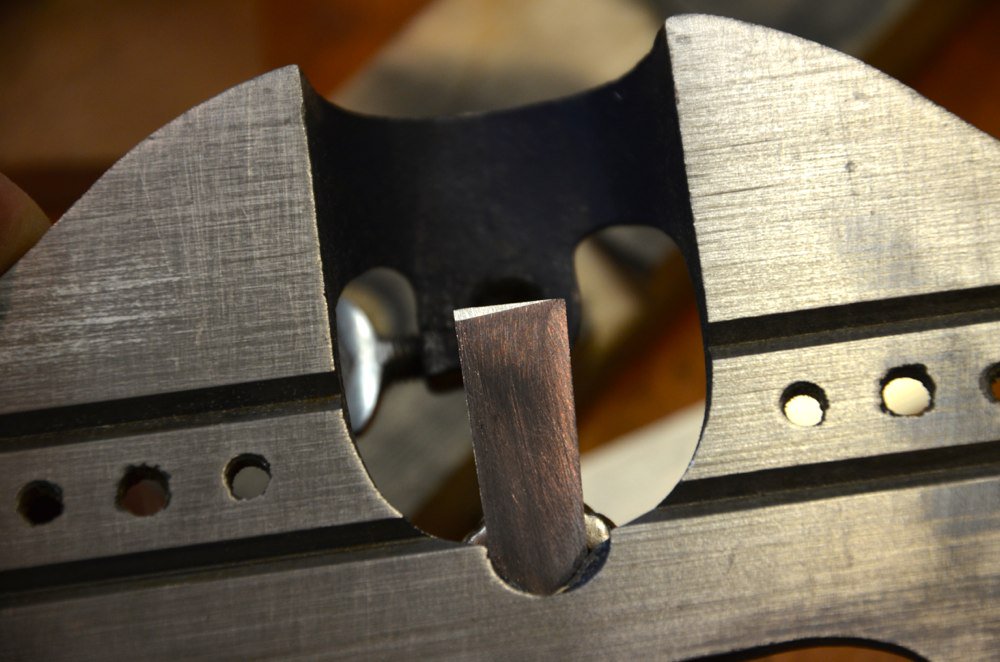
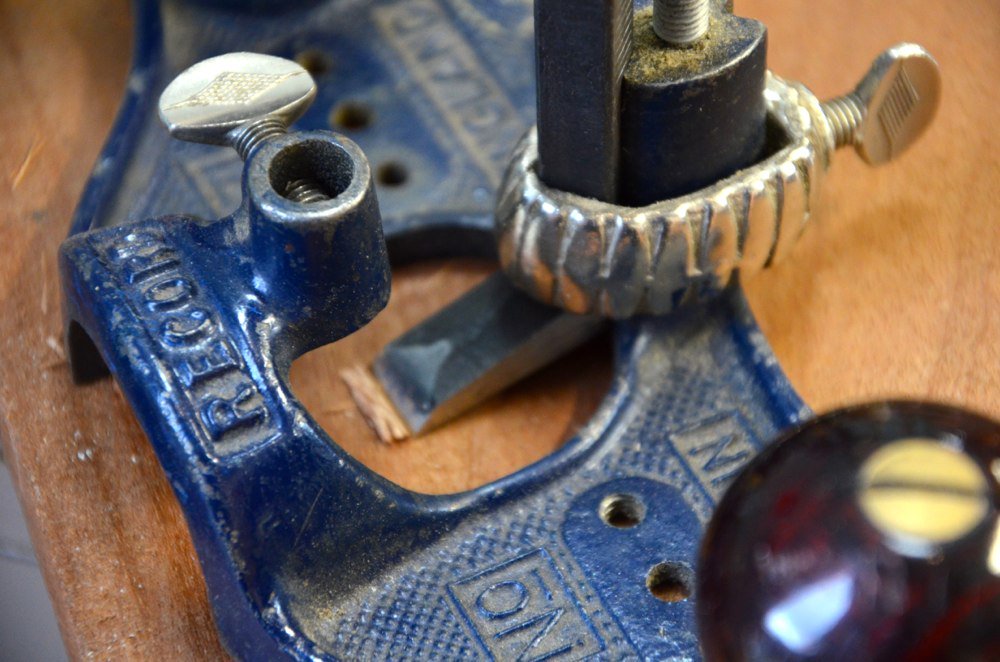
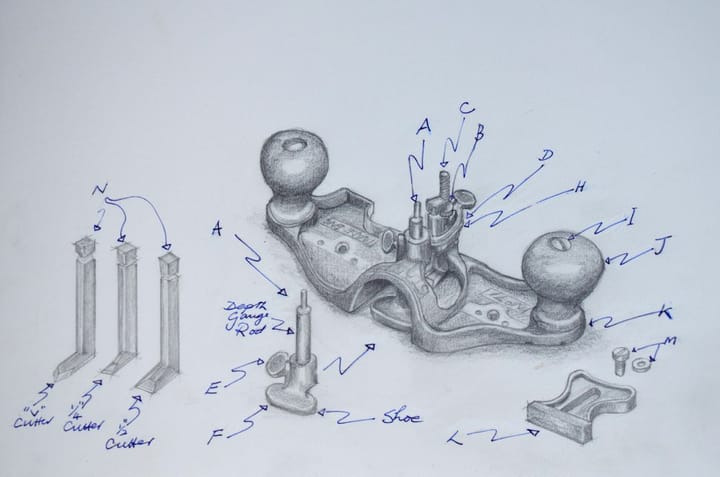
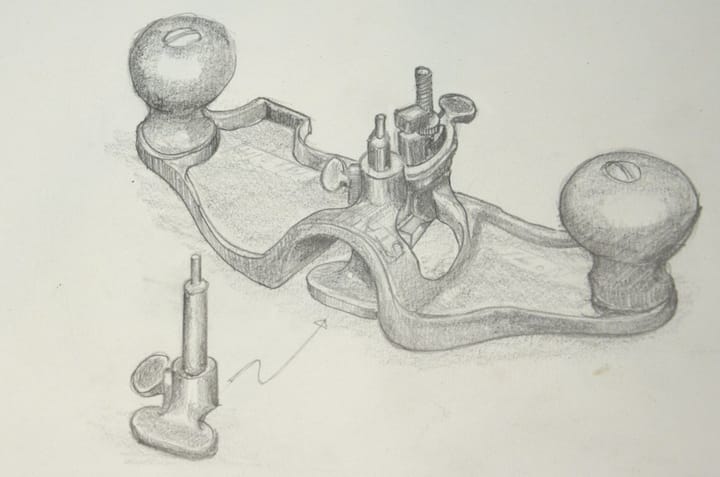
Modern makers have for the main part taken the basic shape of the old Stanley #71 and might be forgiven for then distancing themselves from creating an actual copy by changing some small features. The footprints of almost all the cast and engineered models is almost identical in shape and size and thereby are essentially the same as the old Stanley #71 and the Record #071. I have not found tighter tolerances in engineering to be of any great advantage, in fact, oftentimes the ‘stuck’ factor can be a little annoying and this is often due to those diminished margins. It's a small thing to take a file and fettle whatever's needed. One router I like the most is the Preston router of old, which was also made for a few years by Tyzak. I like the extra size of the platen and the positioning and overall height of the knobs, which gives optimal inline thrust directly at beside and at cutting iron level. That’s not too helpful because the prices have gone through the roof on eBay and anyone in bronze casting could make good money if they were to take that plane and replicate it. As can be seen here, almost all of the metal cast routers old and new use the Stanley mechanism which is a screw-threaded adjusting screw (C) that stands up from the cutter post (D) that then holds a knurled adjusting screw (C). Depending on the maker, the adjusting screw fits into a recess in the cutter (N) that lifts and lowers the cutting iron to the depth needed. A collar surrounding the whole assembly locks the iron to the cutter post. Dead simple and very effective. Until you get used to all metal routers they can seem a little awkward and especially so when it comes to loading the cutting iron into the collar and locating it into the screw nut adjuster, but you get used to it and so you load it more readily.
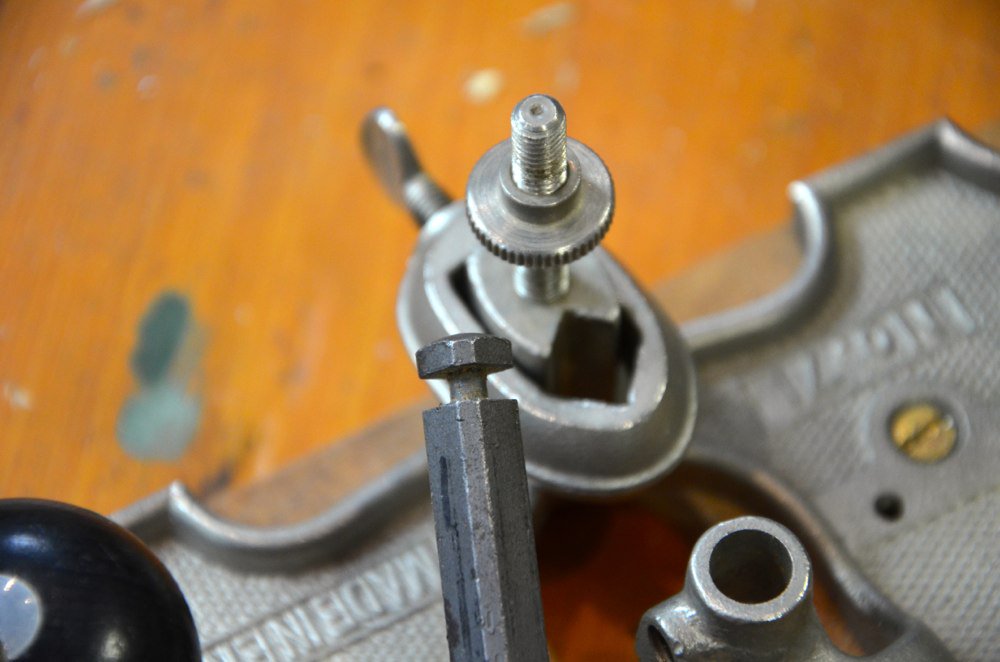
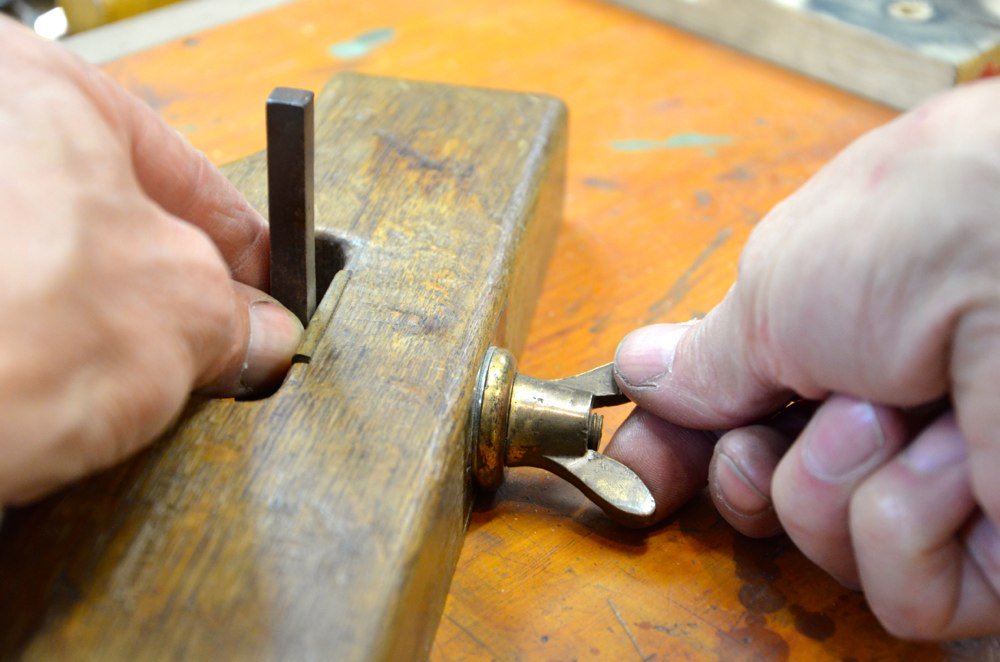
The Preston router presents the cutter to the wood from a square shank facing squarely to the work forward and so too both of the Lie Nielsen routers. More clearly, the stem of the cutter is square on and slots into vertical, forward-facing channels in the cutter post. This works fine as long as there is no slop in the engineering and of course Lie Nielsen are known for their tight engineering tolerances in making tools. My Tyzak has a little lateral play in the channel and though when locked it is immoveable, I must be conscious not to allow the cutter to misalign to the sole as this leads to slight steps in recesses I might be cutting as I move the plane across from side to side cuts. For dadoes this would generally be fine, but for inlays and such, where unevenness telegraphs through the thin veneer, it would not be acceptable. This leads me to a development in the Stanley version I think many might not see or understand at first glance. Veritas saw it and adopted it in their design. The cutting irons in the Record and Stanley models presents the stem of the cutter at 45-degrees and the advantage of this is the automatic locking of the corner of the cutter into a channel that always ensures a vertical alignment of the stem and thereby guarantees that the underside of the cutting iron, when sharpened accurately, aligns parallel to the sole of the plane. In the same way as fettling a regular plane iron or chisel needs flattening and polishing out only once, so too the cutter for the router. Any subsequent sharpening is usually done on the bevel alone. Working the bevel evenly and carefully presents the cutting iron parallel to the surface and it's here that I would stress the value of taking care not to tilt the iron on the bevel as this alters the alignment of the very cutting edge in its presentation to the surface of the wood.
It stands to reason that you cannot present the cutter to the work without a relief on the underside of the cutter. If the underside were level it would ride the surface of the wood. Stanley and Record have quite an angle here. Others are less.
Because of the relief, the front cutting edge of the cutter is affected by the top bevel of the cutter, so too much tilt lifts or lowers one side of the actual cutting edge. If we could present the underside of the cutter squarely and parallel to the underside of the plane to the surface of the wood we could skew all we want and not affect the presentation.
The best way to level the top bevel of the cutter is to start with the underside of the cutter first. Load the cutter into the plane and set the iron as close to level with the sole. We want a fractional protrusion of a thou or so. Though it is not necessary at all, if you are bothered that the surface could be marred, and mine have never been thus affected straight on the abrasive, use masking tape to cover the sole as a barrier if it worries you. Or you could put card stock on the abrasive too.
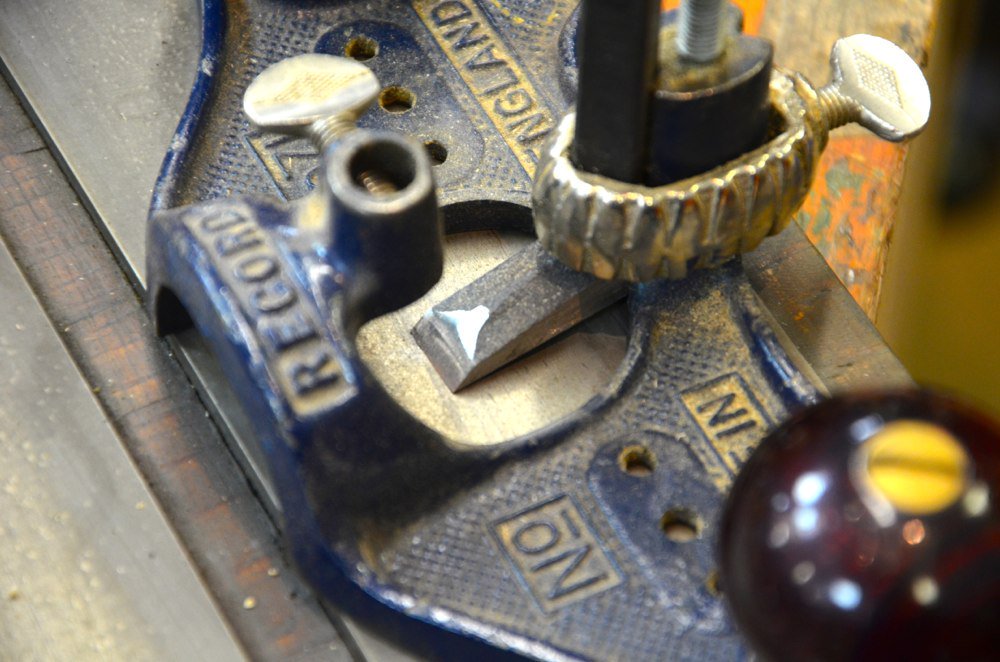
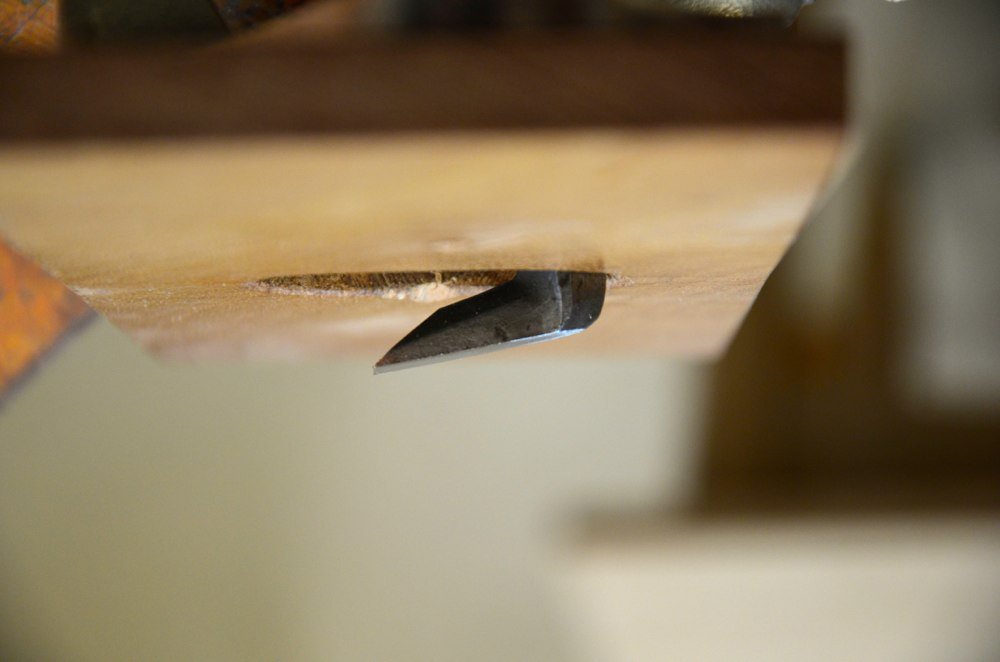
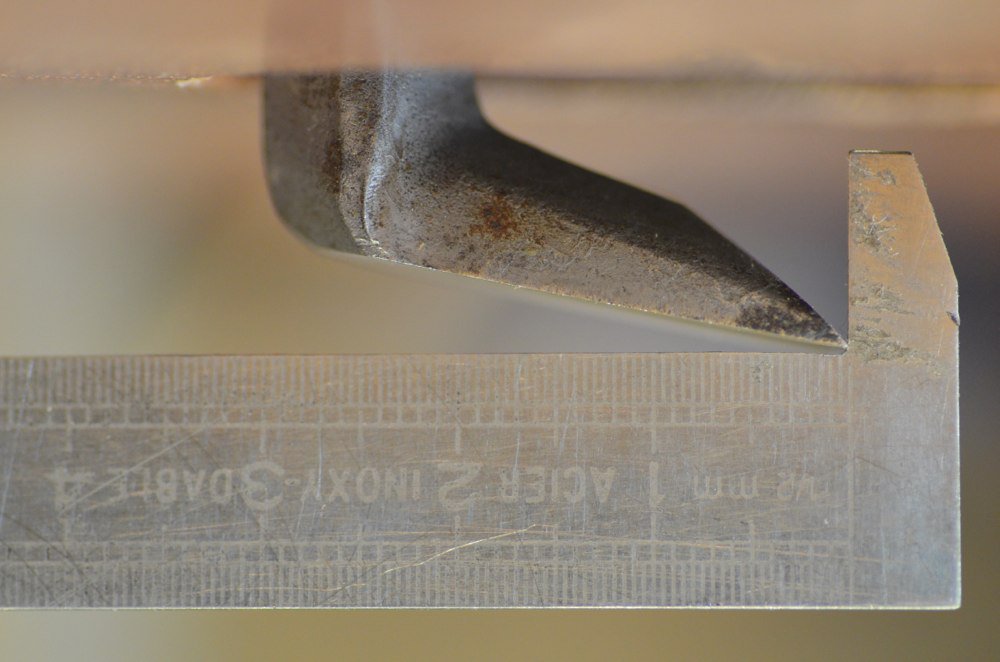
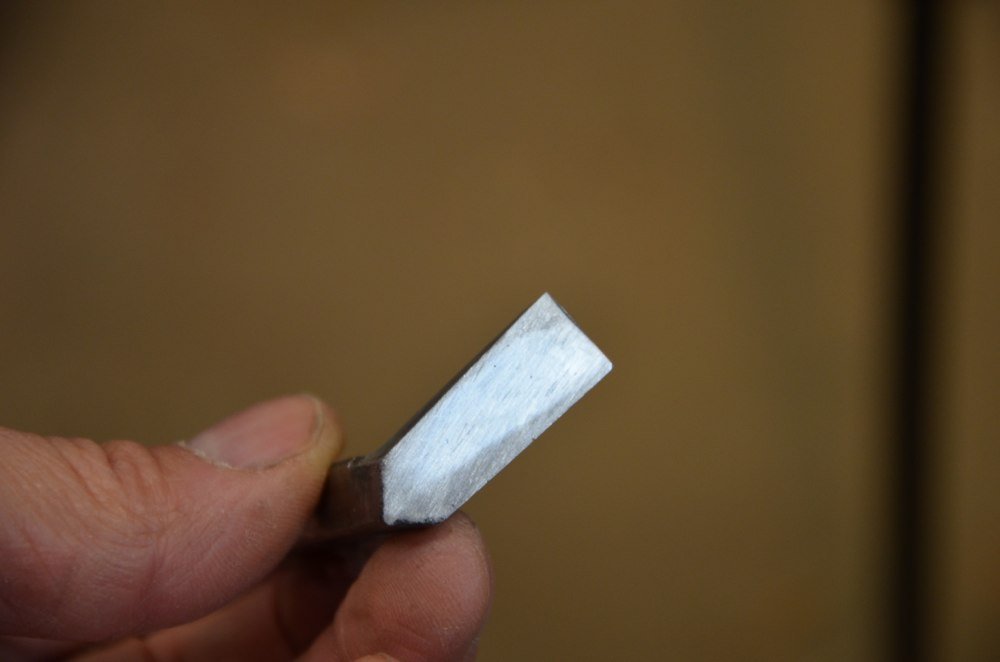
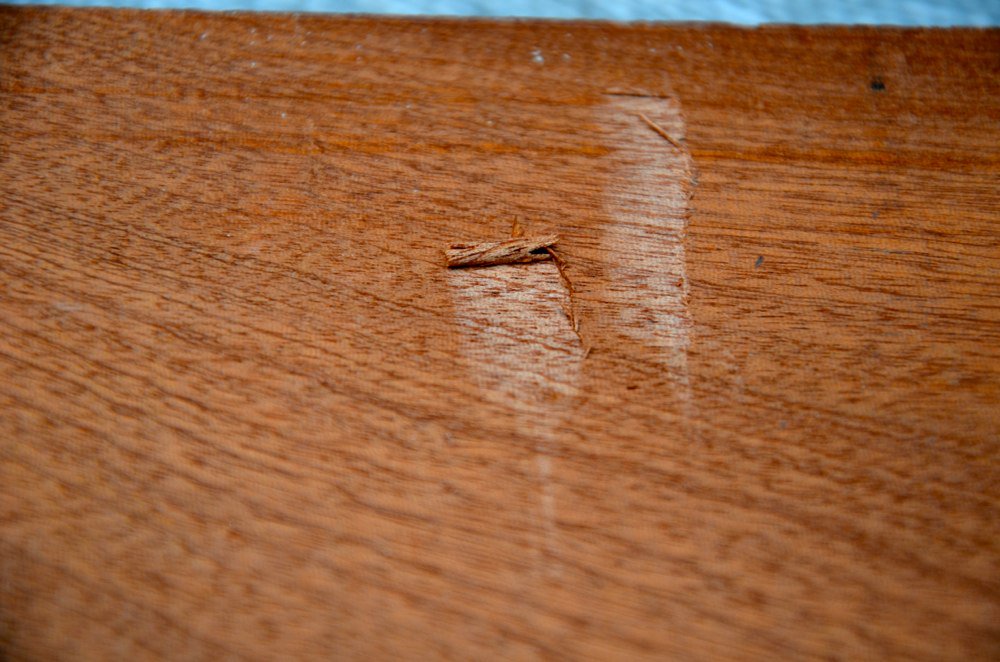
Here I first offered the plane blade to the wood so that I could check for the alignment of the blade to the sole. You can see that the blade takes a deeper cut on the right.
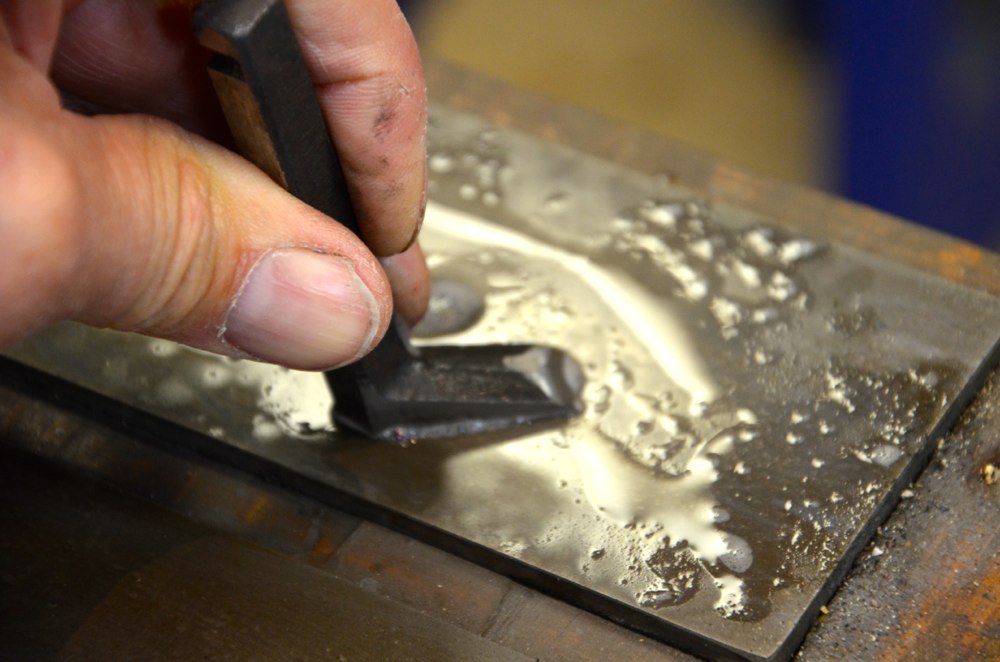
I now take the plane and place it carefully on the abrasive plate, in this case diamonds, and swivel it lightly on the surface.
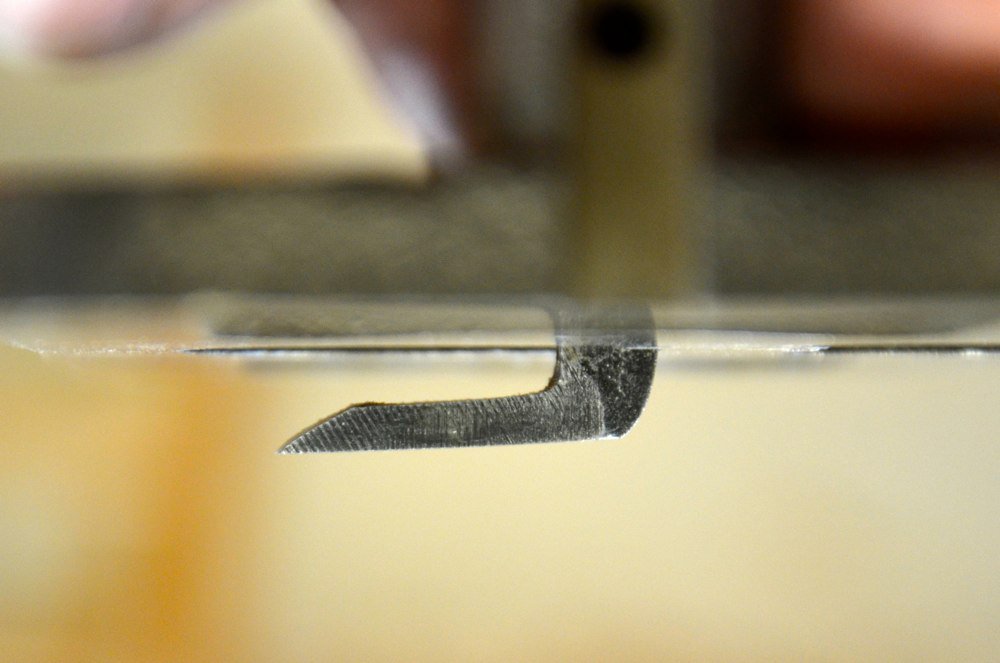
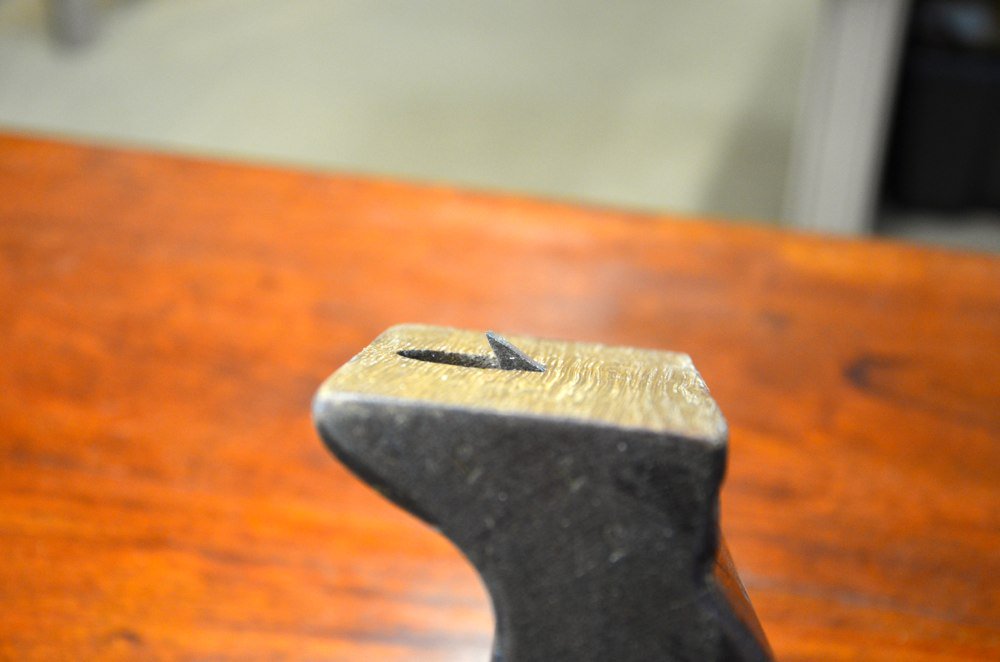
The goal is to provide a registration face to the underside of the cutter, just to use the light from abraded steel to act as a guide and not so much to reshape it unless it has been badly shaped before. As soon as the iron traces the abrasive, lift it from the surface and look at the underside of the cutter. A white line should appear on the cutter right by the cutting edge. If the line is narrow and parallel, the cutter is aligned well and presented correctly and all further sharpening and remedial work can be carried out. Notice in the picture above that the white lines of abraded metal reflect out of squareness in two directions. The actual cutting edge and the new minor bevel we created. This means that somewhere between these two lines is the square across point we want to abrade to.
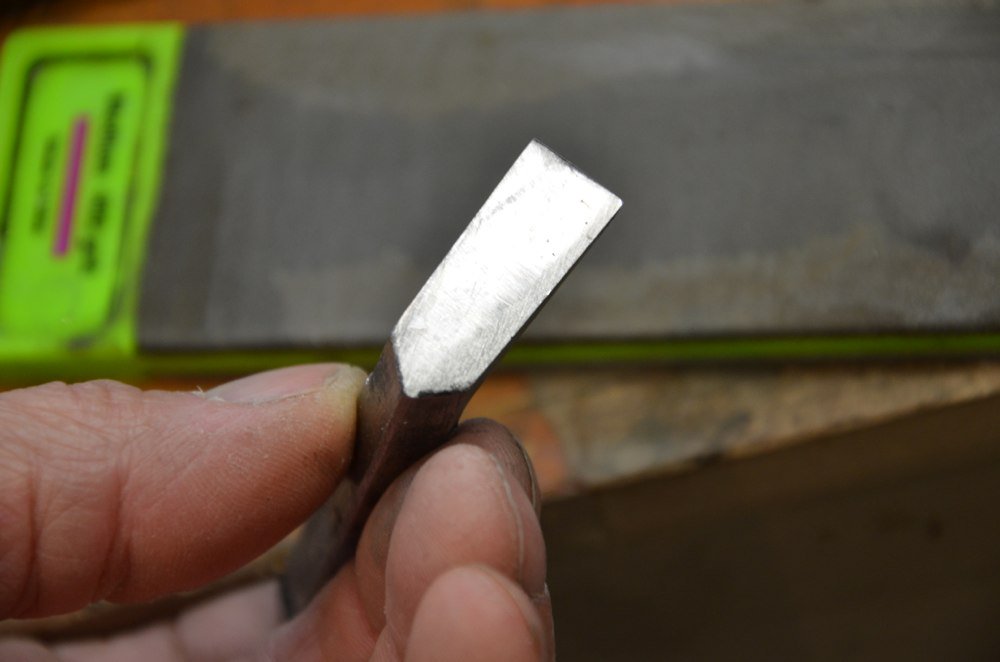
Placing the underside on the abrasive will now flatten the surface dead flat and this can be polished out to say 800-grit.
Now it's looking square.

Once this is done you must work on the top bevel only and it will not usually be necessary to work on the underside ever again. The top bevel is always awkward but holding the blade sideways and rubbing the bevel along the abrasive plate now refines the bevel and you can sharpen to any level you prefer. Most router work can be finished at 800-grit even for the finest work.
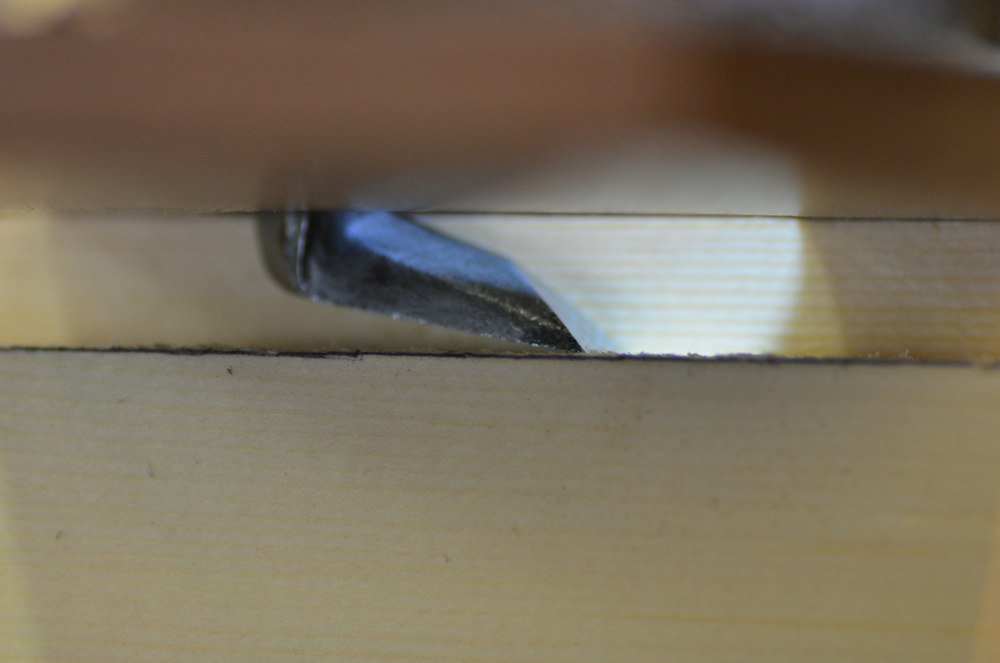
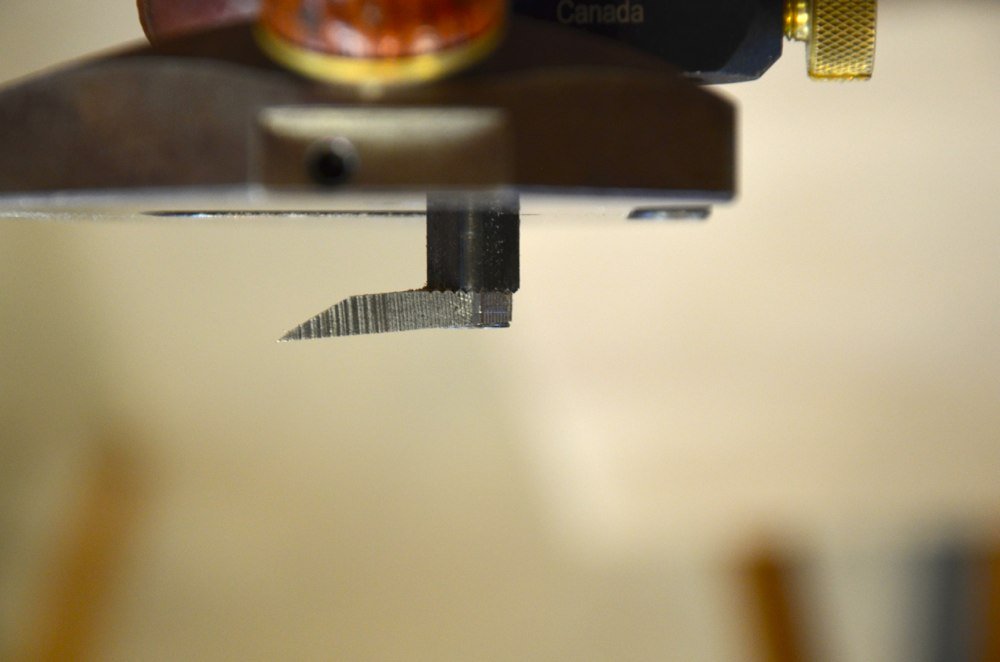
Testing out after this work is simply a question of working it on the surface if the wood.
Adjustment by adjusters and tap tapping
With regards to mechanical adjusters, it is always assumed that improved engineering and mechanical adjusters improved our lot, but more and more my experience has proven this not be true.
Mechanical threads do ease adjustment but pinched adjustment on some more primitive routers work just fine too.
You can pinch to a thou easily and in actuality I find they are equal to more elaborate routers.
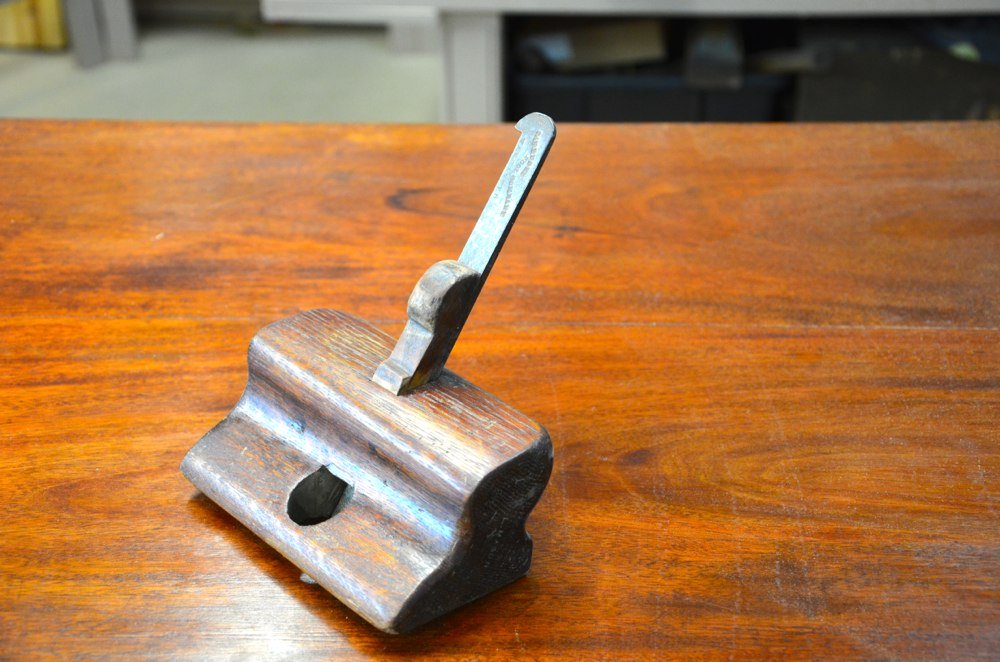
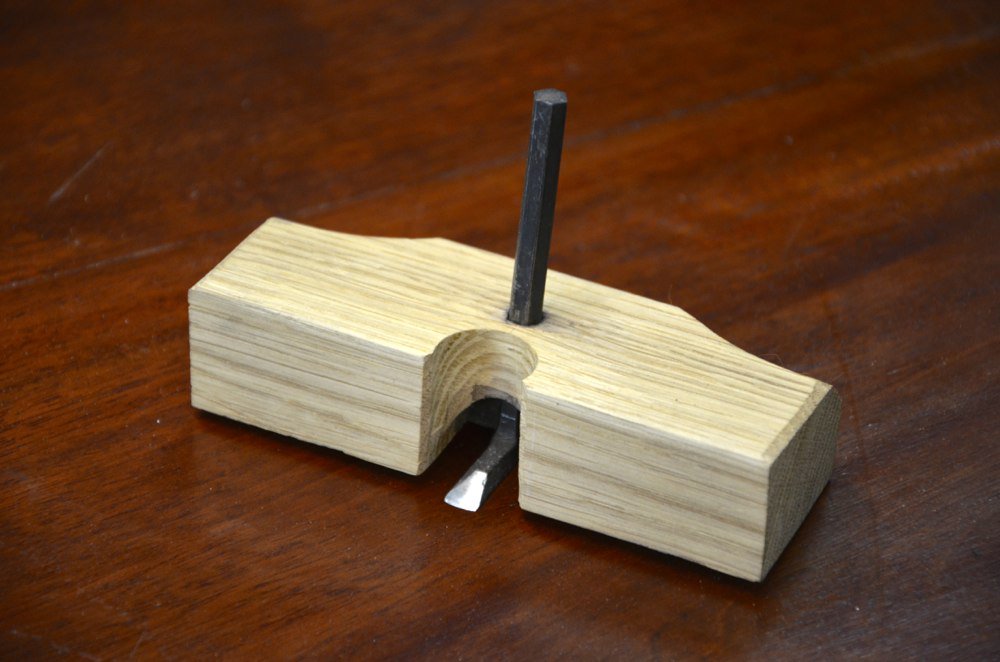
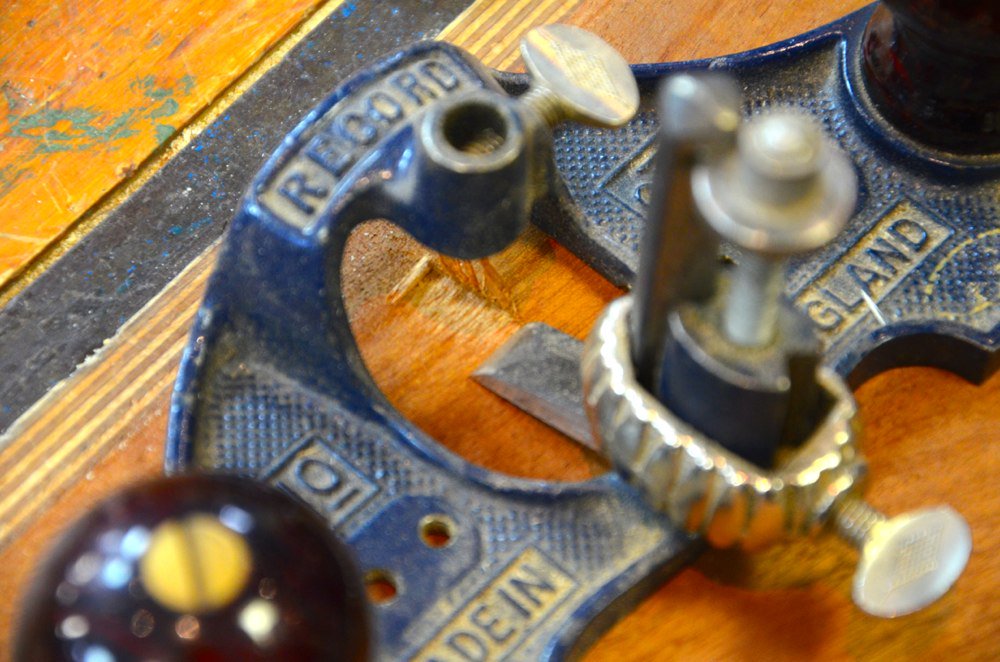
The router referred to disparagingly as the ‘old woman’s tooth’ or ‘hag’s tooth’ is a router that houses a plough plane iron instead of a purpose made shoe-type cutting iron. Above is the one I first used as an apprentice and through my journeyman years. They work fine but rarely give the type of clean surface we might want for veneer inlay and so on. These are adjusted by the same hammer-tap tapping method used generally on wooden-bodied planes on the iron or plane body. These too are effective and practical in general carpentry and joinery.

Comments ()