Teething Troubles? Retoothing Your Tenon Saw
Recutting Teeth Commercially Can be Prohibitively Expensive - Do It Yourself
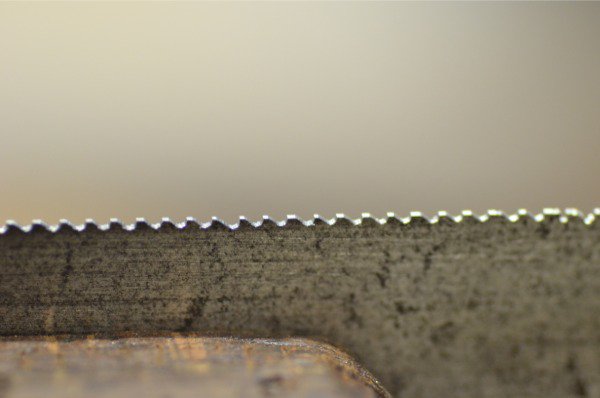
A tenon saw passed to me today showed sad neglect and poor sharpening resulting in some small teeth varying between 16-18-ppi in one section and then 12-ppi just three inches further on. Surprisingly the saw did cut, but with difficulty and with sporadic progression quality ranging from bad to worse. Correcting this type of flawed filing is about impossible with a saw file alone. It needs a recut and that means sending it off and having it recut by a saw recutting machine. This machine punches out the teeth mechanically and guillotine fashion with sheer cutting to whatever size you desire for the saw. On the other hand you could use a junior hacksaw with fine teeth, a Bahco XX slim 4” saw file and 14 ppi hard frame saw or hacksaw blade to guide you. Oh, you also need a 10” single cut mill file.
The Simplicity of DIY - Don't be Intimidated
I have several methods for recutting teeth and they all work. This is one of the best I’ve come up with yet and you end up with a saw that cuts above the rest and up with the very best of the best without doubt.
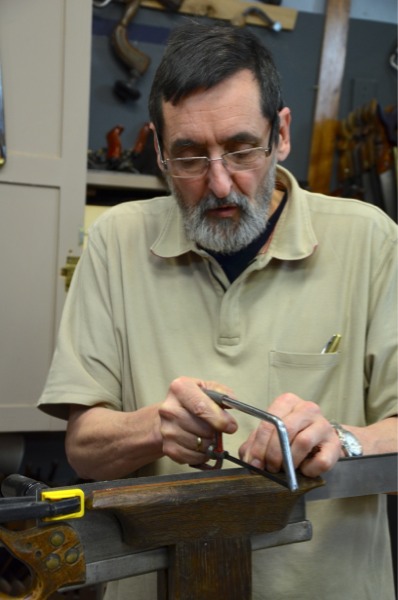
Retoothing in a home shop usually takes about half an hour or so. That’s if you have no or little experience. Locking the saw in a vise that secures the saw near to the edge gives good support for confident strokes along the length of the saw across the topes of the teeth. it’s best and easiest to remove every tooth all the way down to the bottom of the lowest gullet; starting with a clean sheet. If the saw plate is rusted at all it is best to remove all rust now and not after recutting and sharpening. 250 grit is enough to remove it.

With the plate anchored, file off the teeth until a straight and even edge remains.
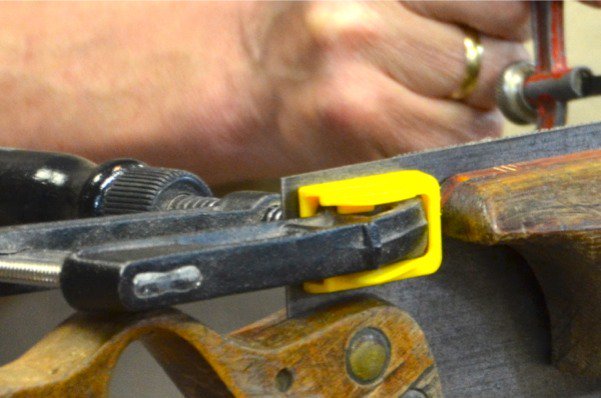
Clamp the 14-ppi saw blade alongside the plate with the guide saw teeth just barely protruding above the edge of the plate edge. The tips of these teeth serve to align the file and set the distance between teeth exactly.
Take the junior hacksaw and run the blade against the front of the saw teeth with two or three strokes from one end of the saw to the other. The cuts should be square across. Even pressure and equal length strokes ensures evenness in depth of cut. It’s not necessary to go to the bottom of the gullet. Angling the saw a little will give a rake to the tooth that you want. 10-degrees or so works well. Filing will finalize actual shape and size soon.
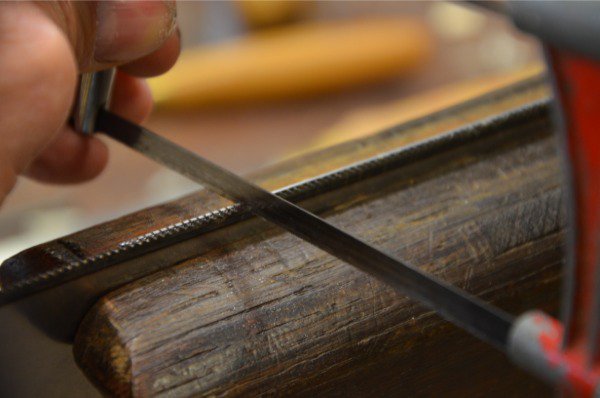
With the teeth positions defined and the hacksawing done, remove the guide and place the file in the first saw kerf. The top face of the triangular file should be aligned level and flat. File down evenly and half way into the face of the first tooth. This will reduce the width of the top flat to for the first tooth. Do the same to the second kerf until the first tooth you just passed is almost formed and a narrower light band is reflecting off the top flat. This then continues for the first 14 kerfs; the first inch. For the next inch roll the file slightly so that the top face leans forward by a few degrees.
From here on you can roll the file forward slightly more and keep a consistent pitch all the way through to the end of the saw. This time you will be filing the back of the tooth and only glancing the front of the adjacent tooth to polish the face with lighter strokes.
It is up to you whether you shape the whole tooth to the bottom of the gullet or not. I suggest you take only a couple of strokes rather than full depth. These file strokes are dead square across the plate and the file is always leveled across the edge too with every file stroke you take. Full forming can take place when the deeper depth is achieved.
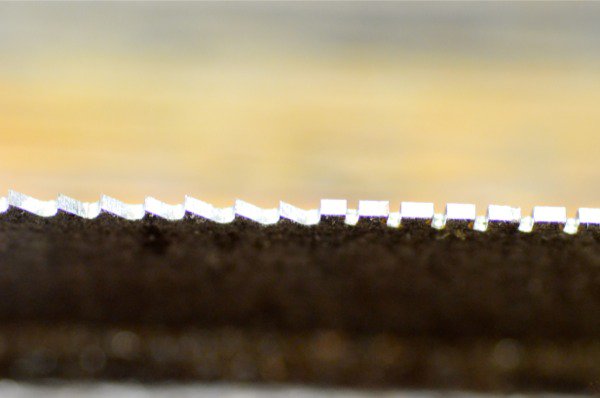
The next stage is simply filing before and aft’ each tooth. If you file the front of the teeth perpendicular, that is upright, so that the face is vertical, then the cut from the tenon saw will be aggressive. A rake to the tooth front of 10-degrees gives a good balanced cut that’s progressive and effective without being difficult to push into and through the strokes in the cut. File either side of each tooth as equally as possible and close in on the flat top until the shine disappears with the final stroke. The tooth will be sized and uniform and the teeth will be sharp. All that’s left now is to set the teeth.
Comments ()