Questions Answered - Fitting Chisel Tangs to New Handles
Question:
I have many such chisels that I’ve picked up here and there, I’m a passable turner and fancy turning my own handles but tang fitting and step drilling are arcane mysteries to me. Where would one learn such practices?
Answer:

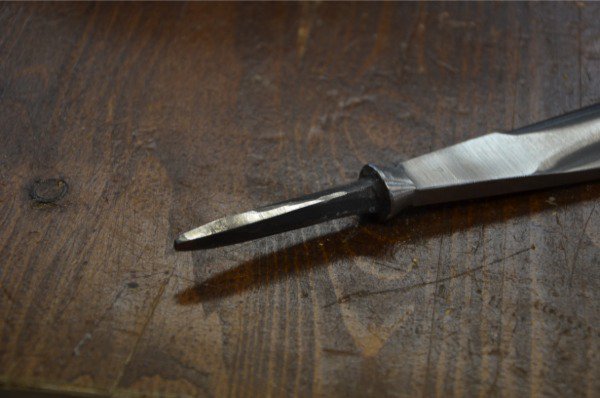
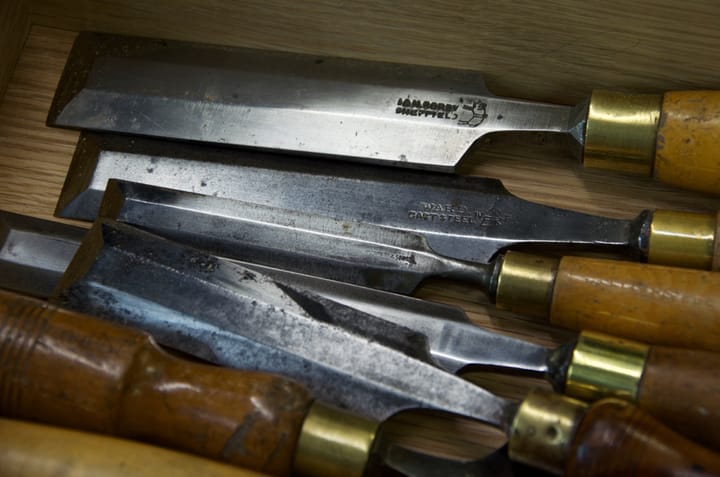
Right here. I am often asked how to fit a chisel handle to tanged chisel but the problem now is that not all tangs are at all traditional. With the Ashley Iles gouge John just repaired the split handle of, the tang was parallel and square and was centred in a round, slightly undersized hole in the wood. That being so, the four corners of the tang bite onto the wall of the hole and forcing the chisel handle down onto the tang meant that the tang was force-driven into the walls. It's a bit crude but it works fine. You can see the different tang type above here. This has become common in more modern makers but most of the chisel handles that need replacing will be the older abused types from the ages when skill and craftsmanship were respected.

Traditional tangs will need new handles because of age and abuse in more modern times when people know no different. In times past the blacksmith heated the tang and burned the tapered, tang-shaped hole square into the handle but left the tang 1/4” from the shoulder of the chisel. With the tang slowly quenched and cooled so as not to be too hard, he then drove it onto the tang so the pointed tang was effectively 'nailed' into the end of the hole. Now this process is a bit awkward in a woodshop with wood, chips and fluffy shavings and my insurers might find a case for arson in there somewhere. Step drilling on the other hand works differently than both of these methods methods but we end up with a well fitting tang. The important thing here is to get the hole centred in the handle so that the chisel or gouge aligns perfectly from side to side and front to back. Here are the steps we used to replace Johns handle.
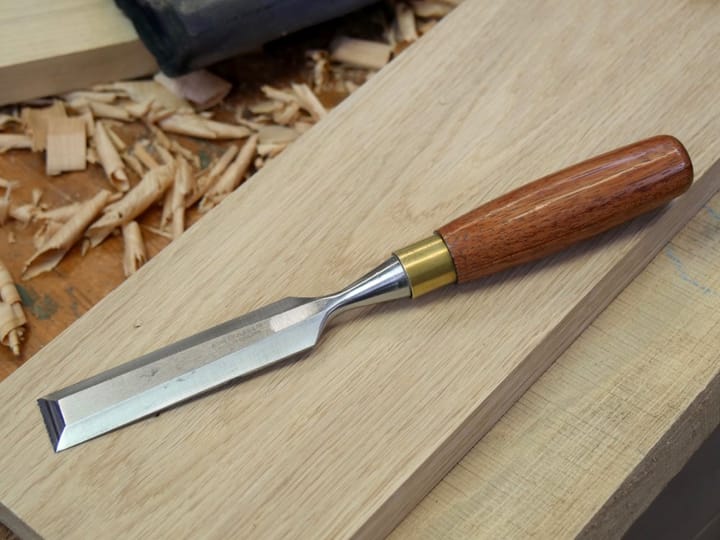
First off we reground the square tang shown above to a more traditionally shaped tapered one. Not conventional but it worked fine.
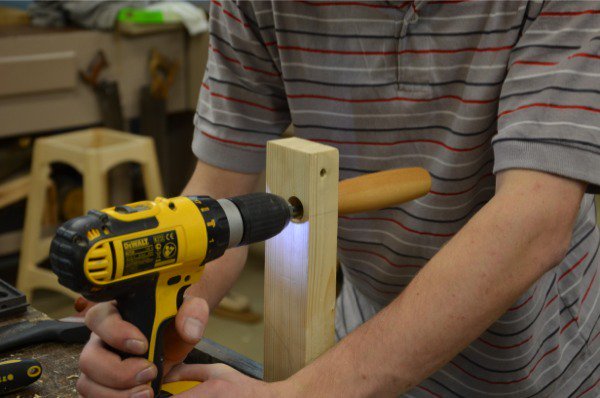
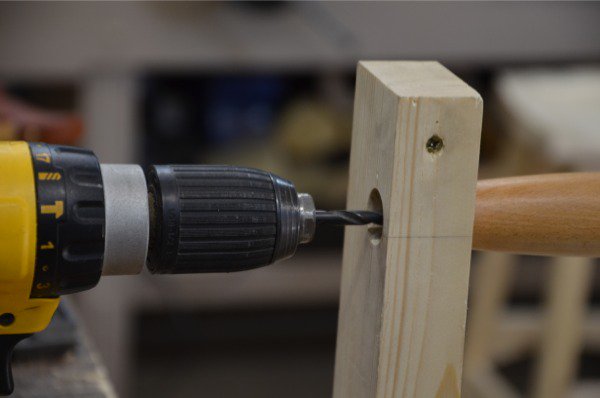
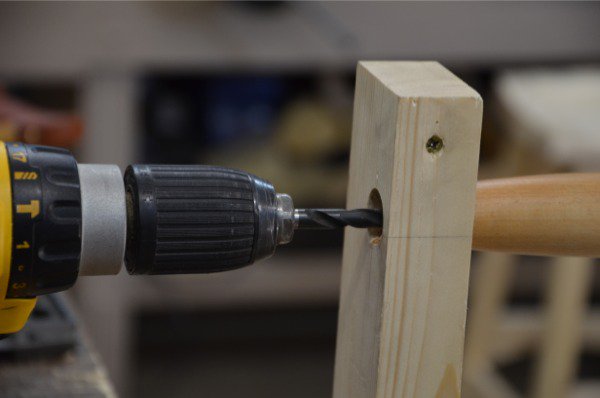
It’s hard to drill holes freehand but it can be done. Sometimes I drill freehand and sometimes I take out the risk by jigging up for it. In this case it’s easy. When one of my Dewalt cordless drills stands on its base the bit aligns parallel to the bench top. That means that when I push the drill forward it is drilling perfectly straight. The difficulty in free handing is aligning both vertically and horizontal. Using the bench and the drill means I only have to align one way. Aligning myself from the back of the drill makes it easy to centre the drill into the handle and keep it equal as I enter more deeply. A piece of one-by in the vise simplifies the job. Anchor it in the vise so that the end of the board is a couple of inches above the centre of the drill chuck and drill a 1/16th inch hole an inch or so in from one of the outer edges. Now use a brace and bit the diameter of the ferrule or near to using the hole you drilled as a pilot hole to draw the bit into the hole. Drill from both sides for a clean cut to both sides. Now, down from the top end of the board, saw a kerf into the centre of the hole. This kerf allows a screw through the side to tighten the hole onto the ferrule and the handle being drilled. Drill a 3/16” hole through the side to the saw kerf. Pass a screw into the hole, locate the handle in the hole the full width of the ferule and cinch up the screw. You can see the screw head in each of the images. This should align the handle nicely but check yourself as you cinch the screw. John found it best to pull the drill toward him because he felt he could see the handle more fully. If you can align more from behind the drill and slightly above it so you can see over it you will get perfect alignment.
Now the drill alignment height is perfect we are ready for step drilling a series of diminishing sized holes. The main tang of the chisel at the base and by the bolster will likely be somewhere around 1/4” square or something like that. If that were the case, drilling a 1/4” hole means the corners will bite into the wall of the hole. You must vary these sizes according to the tang you have on a specific chisel. The first hole I suggest you drill is the one that goes the length of the tang minus say a 1/4”. So if the tang is 2" long drill 1 3/4” .
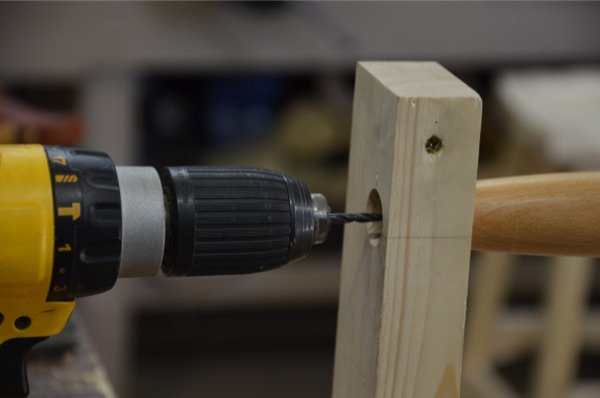


The first hole is 1/8”. The next hole is a little bigger, 5/32” usually works. This hole goes somewhere around 3/4 of the depth to 1 5/8”; not hard and fast. The next hole is 3/16” and goes half way at 7/8” and the last one is the size best suited to the thickness of the square of the tang at the base and in my case is 1/4”. This hole goes to a depth commensurate to the length of the thick section of start of the square; usually this will vary but 1/2” should work.

Offer the tang into the hole and tap it into place gently to see and feel how it seems to seat in the hole. You may need to adjust the holes in the stepped diameters if the bolster is a long way from seating to the end of the handle inside the ferrule. I like the bolster to be about 1/4”. This then means that the pointed end will ‘nail’ into the bottom of the small dia hole and the square section at the base will bite into the walls. This stops the chisel or gouge from turning in the hole when being worked as a finished tool.
Comments ()