Making Your Own Shellac From Scratch
Making shellac is a simple process whereby we dissolve the flakes of shellac we buy into 190-proof denatured alcohol which we either buy through license here in the UK or we use Methylated spirits, which is denatured alcohol with an added violet colouring and any of a number of other additives that make the Meths undrinkable and even poisonous to prevent the misuse of it as an alternative cheap intoxicant. Methylated spirits and Denatured Alcohol are one and the same Ethanol, which is used universally as an industrial solvent for creating products used in finishing, dyes and more and also for making and thinning finishes like shellac. The main additive used in Methylated Spirits is Methanol, hence the name Methylated Sprits. Adding methanol to denatured alcohol doesn’t alter the chemical properties of the alcohol apparently.
I use a glass jar or a plastic bottle to mix my shellac in but it has a shelf life so mix only what you will use in a few months. No more than six I would say. Whatever you mix, make sure there is enough room for the shellac flakes plus some for shaking during dissolution.
Denatured alcohol - Methylated Sprits is highly flammable
Denatured alcohol in any form and with any additive that makes it Methylated spirits is highly flammable. Never try heating it on an open flame or even have the product near any kind of direct or indirect open flame.
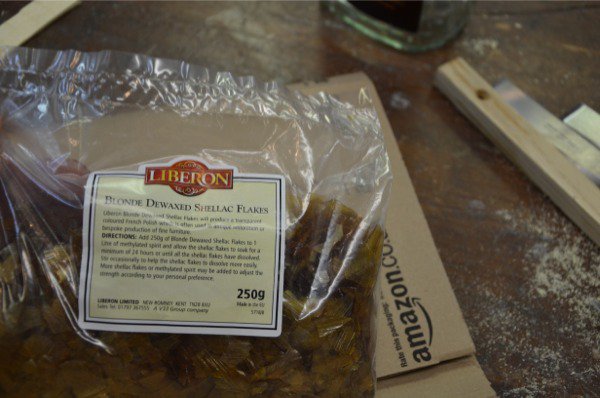
You can buy shellac made ready for dissolving in different forms such as pearls, flakes or pre-crushed flakes. The shellac can be in different forms depending on what you want. In its natural condition, shellac is a dark amber coloured. Sometimes we want the dark amber and other times, in my case most of the time, we want the shellac bleached and dewaxed. That being so, we buy bleached and dewaxed shellac which simply means what it says. The shellac is less waxy and can be colourless or clear. French polishers use both the natural colour of the shellac and blond or clear and then also degrees of colour for their work and this is usually governed by the colour of the wood they are polishing. Light woods such as maple or cherry will turn amber with full coloured shellac flakes. If you do not want this as a colour you must use bleached shellac.
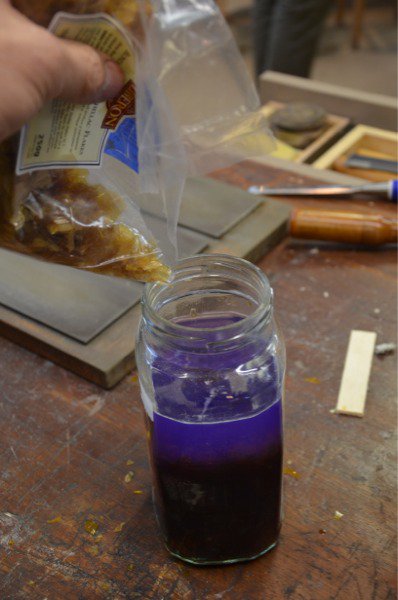
Add the shellac flakes or pearls into the liquid and shake regularly to agitate the mixture, which speeds up the dissolution process exponentially. Leave it stand long enough between shakes, about half an hour or so usually. Depending on the conditions of the shellac manufacture, the shellac may need straining through cloth to remove contaminants.
You can make different cuts to suit your needs. I generally use premixed shellac for everyday work, but there is no doubt that home mixed shellac is indeed best. Whether you make your own or buy it ready mixed, shellac can be thick or thin and this depends on the ratio of denatured alcohol to the pound weight of shellac used. Hence we use the term ‘cut’ because when we mix shellac with the solvent we create different viscosities to work the shellac at different stages in our work. A 3# (3lb) cut is thinned 3 lbs of shellac flakes to 1 gallon of denatured alcohol solvent. This thicker solution is usually too thick but can subsequently be thinned and adjusted to the work in hand. A more general cut is a 1# cut. I find it satisfactory to make a heavier mix and thin down as needed but a 1# cut is good for padding on and a 2# cut is good for brushing on.
Remember to use dewaxed shellac as a primer coat painted finishes as the paint will not adhere well to waxy shellac.
Mixing Your Own Shellac
Pound cuts seems a little archaic when most of the world uses a metric system of weights and measures and perhaps we should simply go by quantity ratios of liquid to weight or measure quantity by volume. It’s not a critical thing, in fact it’s fairly open to do that or whatever you want. Here in the UK we generally mix 250g of shellac flakes to a litre of Methylated spirits. You then add additional flakes or meths to thicken or thin the viscosity to suit the task. My usual is to mix a heavier mix and then thin to task or cut the thicker mix and rebottle in different strengths. That way you have no down time waiting for shellac flakes to dissolve.
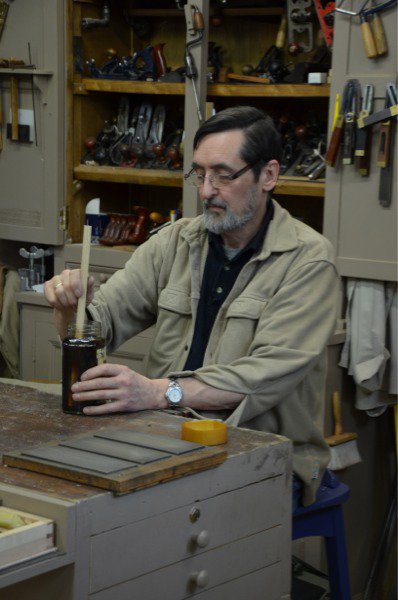
Mixing the shellac flakes is simply a matter of dissolving them and this usually takes 24 hours and sometimes more, depending on the temperature usually. If it’s too cold it takes longer and you can use warm water baths to increase the temperature or other heat sources such as radiators. Remember, no open flames of any kind or hot plates. This stuff is as said highly flammable. You can stir the flakes or shake them in the solution periodically. I shake them generally and then let it stand to express air in the mix before I use it. I usually shake whenever I remember, but generally every half hour works well. This will halve the dissolution time.
Don’t get too caught up in the thickness of the shellac too much. You can always readily thicken or thin your product and you can always use whatever you mix. If it’s too thick it’s more difficult to use that’s all.

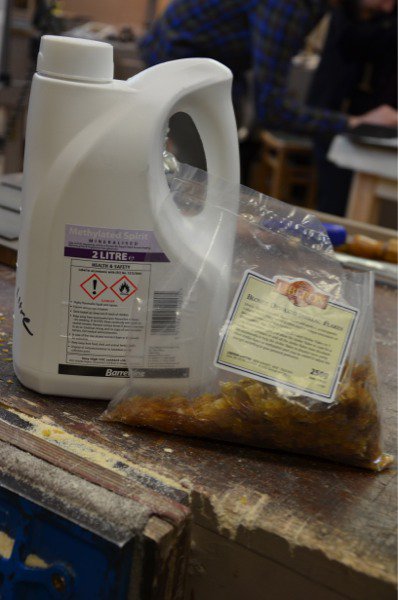
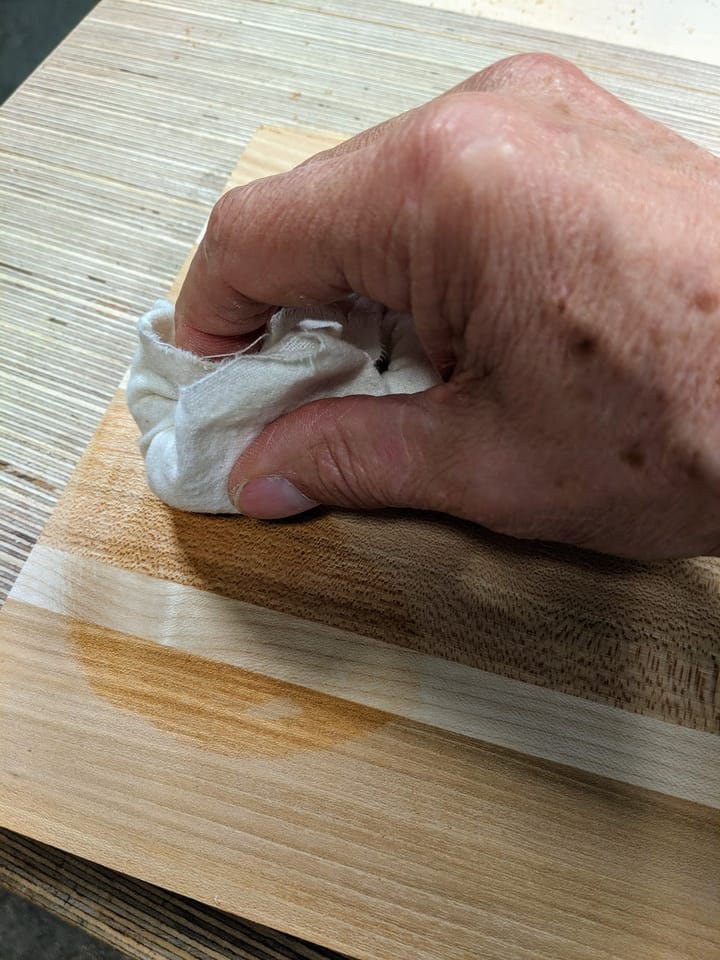
Today I mixed some shellac. A 21/2# cut. I wanted to take the steps you might take so I ordered Liberon Shellac Flakes online via Amazon and then some denatured alcohol in the form of Methylated Spirits from another online supplier. The flakes I ordered were dewaxed blond shellac flakes that basically give me two things in one - one, the naturally occurring wax is drastically reduced allowing me to use it under other finishes and, two, the removal or lightness of colour means I can use it on all woods without changing the colour of the wood. Especially is this important on light coloured and white woods If I do need to change colour I prefer to use dyes on the wood and not in the finish.
Some people say not to shake but stir; I do both and have done for years. What I do not generally do is shake immediately before use. If you shake, leave it to stand for a minute before using to allow bubble to dissipate and let the mix settle.
Ready to Use Products Might be Deceptive
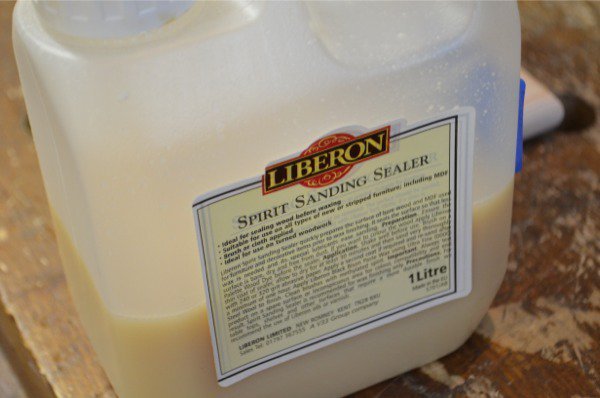
Many companies make products from shellac and describe them as something different to one another. Spirit sanding sealer, sanding sealer and sealer and sand or sanding coat are usually one and the same in that they are shellac flakes diluted in denatured alcohol. The difference can be the viscosity of the liquid. Thin or thick means that one will flow more quickly and end up with a thinner coat with quicker drying and thicker residue after evaporation, which is the actual shellac coat left after drying and curing. You don’t need a thick coat for a sealer so a thinner coat works well. After sanding the surface will feel super smooth. This is the nature and property or characteristic of shellac. This coat will seal the surface and freeze any surface (end-grain) fibres that might be detached or what we call ‘open’ at one end. This initial application will usually raise the grain slightly, which is actually something we want to happen now rather than later. Subsequent coats of shellac, varnish or other finish types can be built on this foundation and they generally will not raise the grain further.
Let’s look at Other Products
It’s not unusual to see a product line made by finish manufacturers that give the impression you might need two, three or more products to develop and establish a good finish on a project. Often they start with sanding sealer followed by some kind of body-build shellac as another and then perhaps a product entitled French Polish as yet another. All of these products simply put are shellac based and thinned or thickened by more or less flakes of shellac or denatured alcohol .Other names you will come across are button polish, button shellac, amber shellac, bleached shellac, dewaxed shellac and others are names that might further confuse the issue. In general these are all quite simply shellac-based products. Bleached shellac as an instance is simply shellac which has the naturally occurring amber brown colour bleached out to make it clear when applied and dried. Other colours such as blonde, amber shellac have only part of the colour removed and are usually made to a distributors specs to supply us with shades we choose according to the approximate shade we want for particular pieces we are working on. Depending on the company, many colours are available, but, if the shellac you have is dark and needs adjustment you can create your own changes by adding clear shellac to lighten the colour. All shellac-based products can generally be mixed.
This mix looks like its ready after two hours but don't be deceived. Keep agitating for 24 hours. the suspension of flakes may not be visible. Shaking helps to disperse equality throughout the solution and the end result is completely dissolved shellac.

As the colour of shellac is often different between manufacturers and distributors, it’s best to look at the products suppliers description and colour charts. Button shellac is usually a deeper, richer, brown shellac used for joinery, panelling and furniture making and restoration where darker timbers were used.
White polish on the other hand is a shellac made from colourless translucent lac that dries clear and we use this when we don’t want to change the colour of the wood being treated or woods that are naturally white or blond such as sycamore, maple, white ash, alder and birch. The colour range is quite diverse ranging from garnet, ruby, orange, amber, light amber, brown, rust and many more.
Surface Coverage
As a general guide, I find that surface coverage is usually about one litre of shellac to 10 square metres of surface. Thicker solutions can mean less coats, especially if spraying on the finish as a heavier coat.
Cost of Self Mixes
It may or may not prove cheaper or more convenient to make your own shellac from scratch but what you do get is a known product. Using exactly denatured alcohol or methylated spirits with shellac flakes means you are getting what you put into it. Buying brand names means they may well have added other additives to the denatured alcohol that they feel improve the drying qualities or, more importantly to them, the shelf life, which they want to be as long as possible because of stock-in-store quality. Buying as I did I ended up paying a little more than buying a premix, but then I made my mix thicker for further cutting with DA as needed. All in all I probably ended up at the same price. I have found that the self mix dries quicker and applies better. The overall appearance to me seems better too.
Comments ()