Spoon making - Carving out the bowl
Today I want to take two generally divided worlds of spoon making and unite them. Instead of seeing the axe-cut knife-cut spoon making as a splinter group from the world of woodland crafts, we engage them with other tools like the bow or frame saw, bevel-edged chisel, spokeshave, gouge and scraper; tools more generally associated with bench work that generally demand anchoring the workpiece atop a bench or in the bench vise. Instead of definitive separates subdivided as woodland craft and bench craft, we join the two seamlessly together in unity and so increase capability through greater diversity. This then means that those living in East Manhattan can pick up a log pack from the gas-n-go or grocery store and not try finding a forest or woodland when they just just got home from work. The offcuts in some cabinet shop or even the lumber store can be a ready supply too. Instead of craftwork becoming exclusive by virtue of geographic limitations, time constraints, tool limitations, wood shortage suddenly its open to any and all. Remember! You can carve beautiful spoons from a spruce two by four or a broken mahogany table leg!

Working from a half round limb means I have plenty of thickness for my spoon blank but when I use cut boards I am looking for wood about 3/4” thick, and I would say that’s about minimum for this size of spoon. My width is about 3” but can be less as the overall width of this spoon is 2 3/8” and 10” long. Almost any wood will work but remember not all woods will split if you are splitting logs. This is a practical size for a general cooking utensil of this type - ones used for stirring, mixing and serving. On the one hand I have my half limb and on the other a uniform cut blank parallel in thickness and width.
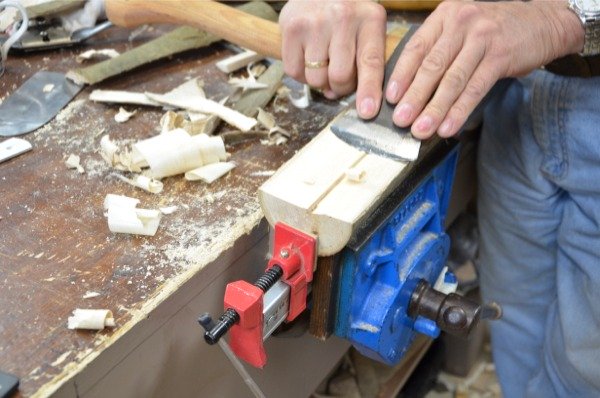
The limb section can be housed in a clamp locked in the vise as shown. This is highly effective when working with uneven shapes like the half round of a log like this. Quite awkward on the benchtop using dogs and such. It’s also safe because the uneven underside is registered to the bench top and the vise jaw in a sort of cradled fashion while the clamp locks the blank securely and immovably from either end.
The square and squared off blank fits nicely in the vise and as long as you have a good vise there should be no issue with scalloping out the bowl of the spoon. You can also use clamps on picnic tables to anchor your wood. In fact, any heavy table will work with clamp,s so don’t feel excluded or discouraged from what we are doing just because you may think or others say you must have a shaving horse, special axes and so on. For this aspect of woodworking, many ways will work for you. Be inventive, but be safe.
I want to start with making a spoon from the half limb. My limb anchors just fine in the vise. If your log is very wide, go ahead and split some off of the sides to a suitable width. Usually 1/2” (12mm) wider than the spoon bowl. In this case I planed off the surface undulations but that’s not absolutely necessary. It does make it easier to show you where my template lines are though.
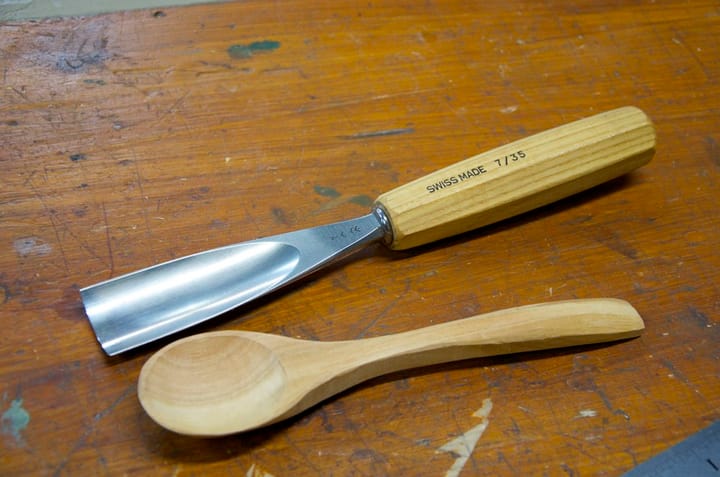
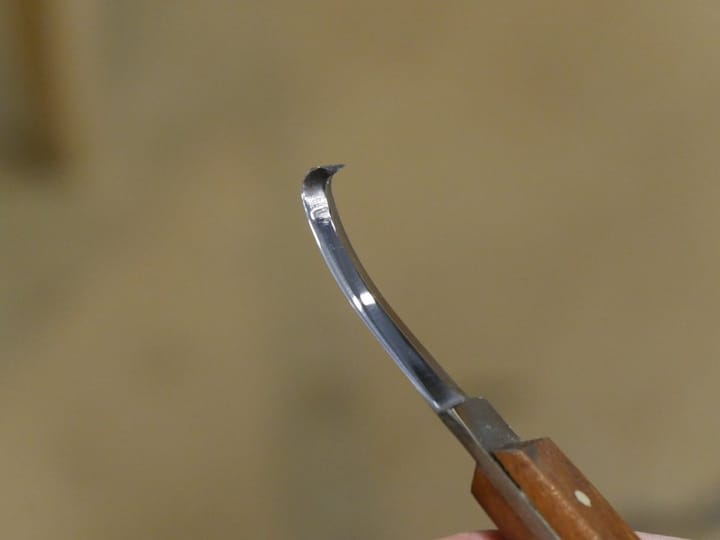
We will use the bowl gouge I spoke of in the past that I bought from Highland Woodworking here. It's a gouge made by Hirsch, a #7 sweep straight gouge 1 1/2" (37mm approx) wide and I think that it's the best gouge for the job and also the best gouge I have ever used.

I have made my templates from sign plastic and this makes it rigid to draw around, but a paper pattern works just fine too.
Making the scalloped bowl
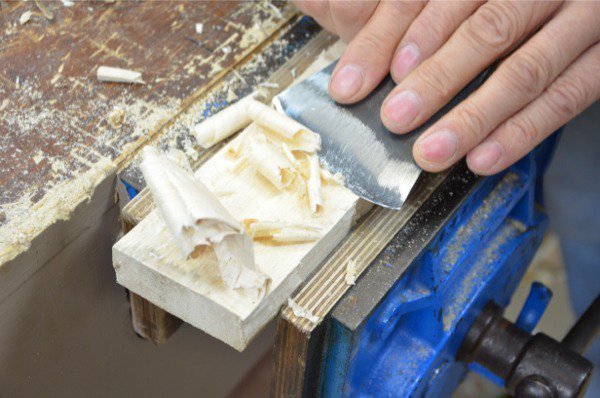
You can carve out the convex bowl before or after you rough shape the spoon. Removing the bulk of the waste wood around the back of the spoon and along the sides of the spoon handle can be done using several ways. Here are three ways that I find practical. I think that the axe is the least safe in general because of the sharpness and size of the tool cutting edge and the fact that your left hand can at times be close to the cutting edge. You alone can judge your skill level for this aspect of work.
Method 1 - Stop cut
To use the stop cut method we saw down the sides of the blank to the guide lines with a saw and use a 1” wide chisel to split off the waste.
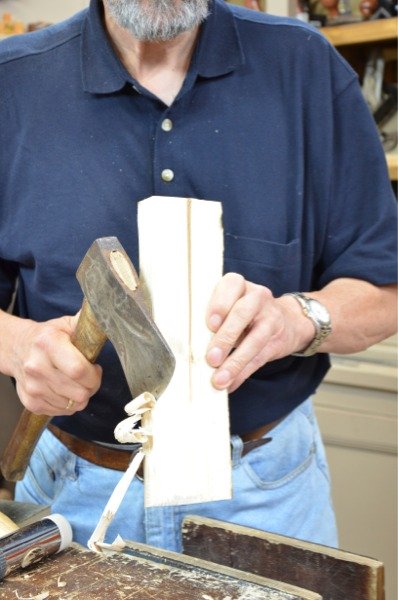
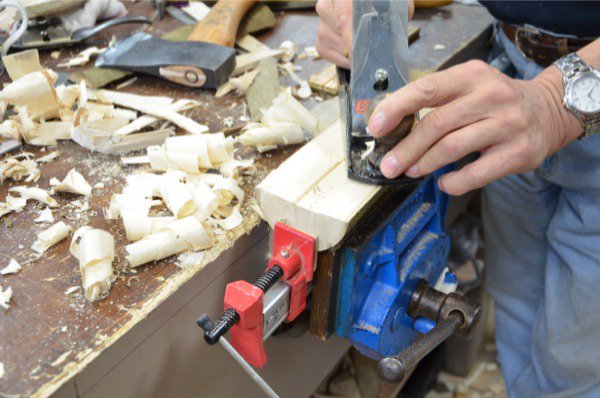
Method 2 - Axe cut
We chop waste wood from the sides to the lines and split off the waste wood using the hand axe
Method 3 - Bow saw or coping saw
We cut along the lines in sections to remove the waste
When to carve out the bowl
I prefer to carve out the bowl before I begin shaping the rest of the spoon. Somehow the bowl sets the parameters for the rest of the shaping and of course all other shaping surrounds the bowl and aligns the handle. What we are about to do is rough-cut the spoon from the main body of wood and not shape and round anything beyond that. I also like to have the bulk of wood surrounding my scalloping; so that I have the mass of wood counteracting the mallet blows and to generally support the work.
Sometimes I will rough out the spoon blank before scalloping and especially will I do this if I use the axe method for roughing out. For gouge work it is definitely better to begin with the bowl first. I just want you to consider the steps, try different ways and decide for yourself which way you prefer after trying them out.
Knife work with dried wood?
Carving the bowl and back using knives, and especially the curved hook knife, works best with green wood but not nearly so well with dried out stock as with kiln-dried wood. The grain fibres respond very differently to the cutting edge and of course in most woods suited for spoons, the dried wood is many times harder and therefor much harder on the cutting edge and on the hands. Because of this, we should recognise that these two wood conditions separate out the tooling methods we choose. Knives and axes work well on green wood, especially well, and you can indeed use these tool types on dry wood, they are much less effective and especially is this so on harder, dense-grained woods. On the other hand, gouges, spokeshaves, saws, chisels and scrapers work at their peak on dried wood, though I think that the gouge works acceptably on green wood too.
Laying out
Regardless of whether you cut the bowl first or not, it’s good to lay out the spoon shape on the blank and this includes the bowl part. I usually use a centreline on my templates to guide the position of the bowl itself. The centreline enables me to mark the alignment of both templates onto my blank so I then have perfect alignment. Remember that having parameters is important for young people and also new woodworkers or those new to shaping wood with methods they have never experienced before. Eventually they will probably want to freehand their work, but starting out is different.


After first drawing around the template, I then mark from the template centreline a centreline onto my spoon blank at either end. Joining these two points gives me a line to align my bowl template. I centre the bowl template on the centreline and adjust the bowl template to equidistant the bowl evenly in relation to the main spoon position on the blank.
Starting to cut
Assuming you will carve your first spoon by carving out the scalloped bowl first, let’s scallop the bowl using the gouge. A centreline across the axis of the bowl ellipse helps you to center the opening cuts. Gouging the bowl is basically six chopping cuts in three equal steps from each end of the bowl.
The eye
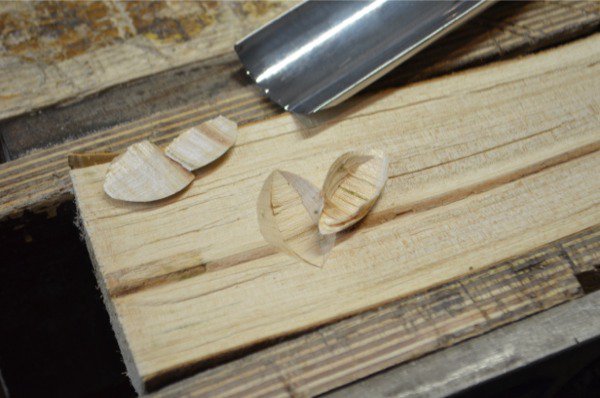


The first two opening cuts with the gouge make what looks like an eye in the dead centre of the spoon. Chop down from one side of the centreline as shown, about 1/2”, and then do the same from the other side to meet in the centre. On the last chop, lever and the mid section will pop out.


Extending the distance from these first opening cuts to a distance about one third the way along, repeat the same steps. These cuts undercut the first eye, but take care not to strike too hard and go too far into the end grain. Change ends and come from the opposite direction, in toward the centreline. This then makes the second, larger eye.

For the final heavy cuts we follow the outline of the bowl we drew from our bowl template. Cut just inside the template line and let the gouge scallop the actual bowl shape. Rotate the gouge and change direction as needed to take a full half scallop down into and toward the centreline, but with the first half stop well short of the half way line. Driving too far will split fibres on the other half and that can extend into the wanted wood.

Do the same from the other end and remove the whole.
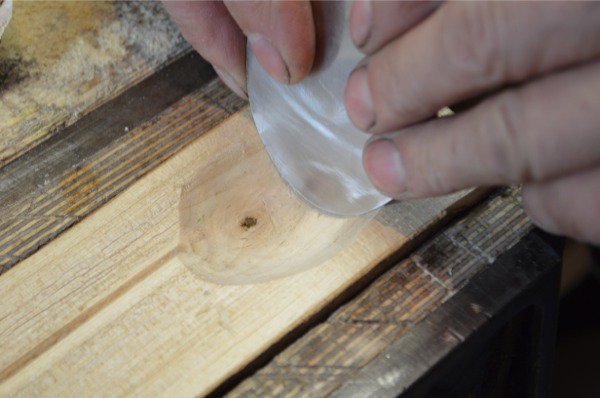
Usually you will need to do some further refining to the bowl. Do this by using a paring action from the high points of the bowl rim down into the basin. Working from both ends works best, but you can also work the wood across the grain carefully to remove the awkward center part of the basin area. I generally do as much gouge work as I can before engaging the round scraper.

With the scraper, scrape out the bowl working from the high points down to the low points until any and all undulations are removed.
I will try to do a quick blog on making this shaped scraper. It's really simple to make by hand with a hacksaw and flat mill file and sharpening is a snap too.
Comments ()