How to Build a Workbench – Leg Frame Mortises (part5)
NOTE:Just so you know, this is an older workbench series. Paul has a newer Workbench series. If you are interested in the updated version of Paul’s workbench please click the button down below. This page links to a cutting list, tools list, FAQS and much more.
Click here to go to the workbench page
Chopping the mortise holes
I have chopped mortise holes by the thousands for nearly 50 years. I think that proper mortise chisels, register chisels and even the lighter weight firmer chisels are too heavy and counter the weight of the mallet or chisel hammer.

Throughout my five decades of working wood every day I have used only regular bevel-edged chisels. That's also all I ever saw my mentors use throughout my apprenticeship. Other woodworkers and gurus of woodworking will challenge this, but I find them fast-cutting, highly efficient and economical, but, equally important, inexpensive. Based on that, I now offer this and a method of chopping mortises where the two go hand in hand. As I said, it’s worked for me for five decades and I have found no other method that works as well for me. Try it and see how you feel.
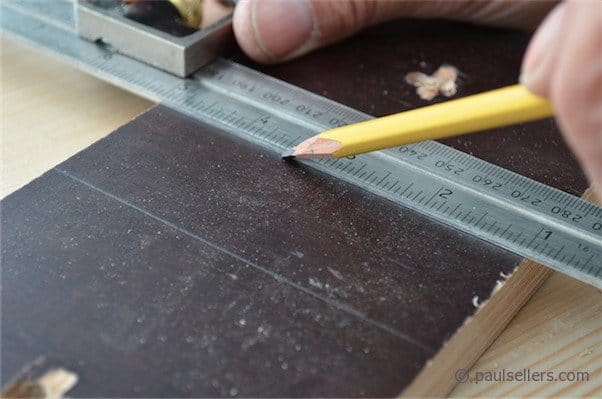
Firstly, make certain your chisel is sharp enough to chop mortise holes. I sharpened up at the beginning and chopped all the holes with no need for further sharpening.
With the hole delineated, I start at one end and begin with a gentle chop against the line, taking care not to drive the chisel too hard and move my limit line.


Notice that the bevel travels in the direction I am traversing in. This is critical with the first-level pass. The first chop barely penetrates. Maybe a millimetre deep. The second chop is about 2-4mm from the first and each subsequent chop about but not necessarily the same. The chop is dead perpendicular. Now as the chisel cuts it drives an angled cut commensurate to the bevel of the chisel, which consequently displaces the severed fibres into the developing mortise hole. At this point you will notice that the mortise hole is deepening with each subsequent chop. By the time I have traversed from one side of the mortise to the other I have deepened to about two inches.


In the second phase I turn my chisel around and start about one third along. This time, instead of the chisel being perpendicular, the actual bevel is perpendicular. This places the fulcrum of the bevel deep in the hole and enables me to lever the waste away from the mass. Each chop moves along at the same distance of about 2-4mm. This takes me to about 2” deep and parallel to the surface. From here I repeat to the opposite side so that I meet somewhere in the middle of the mortise.

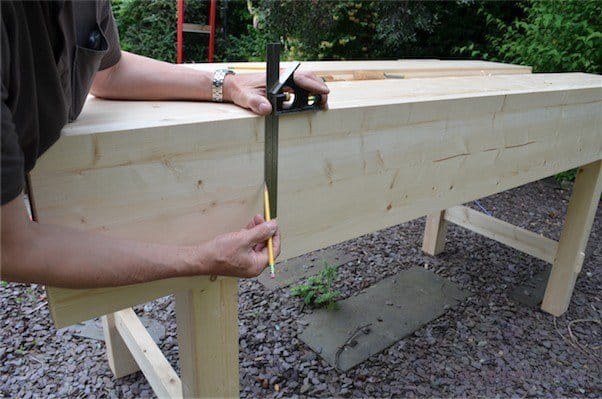
Both top and bottom mortise holes on the legs are through-mortises rather than stopped. The top and bottom mortises differ in that the top mortise hole is what we call a haunched mortise. This is a simple step down in the mortise that allows total enclosure of the tenon on all four sides yet allows the tenon to be constrained across the full width of both of the tenon shoulder lines. This typically prevents any distortion in the rail and prevents cupping, but generally this is an overkill. It is easier to cut two shoulder rather than three and even a hanunched tenon os actually quicker once you get it down.
If you want only one vise in the bench then both leg frames are identical and can be developed in the same way. In my case I want a tail vise at one end and so I have lowered the top rail by two inches. This allows the vise screw thread to pass over the top rail and under the bearer without structurally weakening the rail and the bench.


So, with both mortises cut, I now mark the walls of the haunch area.I can either use the mortise gauge at the same setting I used for the main mortise or mark them with pencil lines as shown. I used a chisel to mark the depth of 1/2". Now I cut the walls of the haunch section of the mortise using a handsaw, down to the depth line. I chisel out the waste with the ½” chisel.


The top mortise hole with the haunch recess now looks like this.
Tenons next; two types, one with roundovers, the other a haunch.
Comments ()