How to Build a Workbench – Preparing the Aprons and Legs (part3)
NOTE:Just so you know, this is an older workbench series. Paul has a newer Workbench series. If you are interested in the updated version of Paul’s workbench please click the button down below. This page links to a cutting list, tools list, FAQS and much more.
Click here to go to the workbench page
The workbench
I suppose we could call this making a garden bench

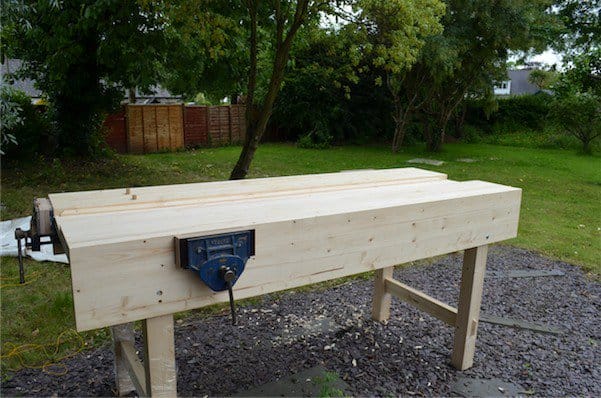
Having planed my bench top section, all the seams are nice closed and with no gaps and my bench tops came out with no twists or cambers and bows. Had they been twisted I would have to plane out any discrepancies. Now it makes a useful and weighty work surface for all of my subsequent work and I can feel the certainty I hope that you feel as you start creating the various parts that ultimately result in a whole and complete workbench.
There is more planing to do and I did that first thing. Soon we will get on with the joinery, but cleaning up the surfaces and squaring the edges and ends are steps we do first, as the square and gauges we use for layout register against these surfaces and accuracy is critical to good joinery and good tight, well-fitting joints.
Planing the bench aprons

Today I surface planed my apron pieces to remove any unevenness and smeared glue etc. I mark the face I want for the outside with the ‘f” (face) mark. I sighted along the corner for straightness and marked that with the ‘face edge’ mark ’/\’ and used the straight edge to register my square against for subsequent layout end squaring and so on. Also, I checked that the overall lamination was parallel as I think that it’s important though not absolutely essential.


With the outside face planed smooth I squared the ends and cut the board to length. A panel saw will work best for this or even a hard-point crosscut saw if that's what you have.

I leaned the board against the saw horse and planed the endgrain

Using a #4 bench smoothing plane trims up and smooths the saw cuts quickly and also chamfers the corners. I take only a couple of light passes for this.
The legs


Because we are using machined stock, the legs should be close to parallel even though we have surface planed them a little. Any uneven areas must be removed and then the leg can be planed level where the two edges of glued up assembly come together.


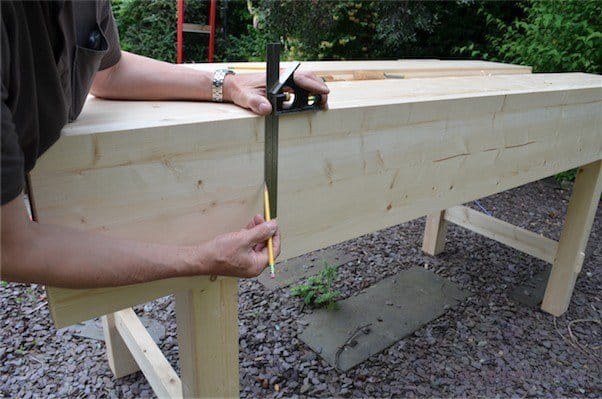
I plane one of the flat faces first and check it for straightness. This need not be a drawn out process. I mark the face with the ‘f’ mark and then plane the adjacent face straight and flat and check for square by registering the stock of my square against the previously planed face. I use the ‘face’edge’ mark ‘/\’ to mark this face as shown. Typically we use a marking gauge registered against these two faces to ensure that the opposite faces are parallel. In this case and this type of project it is not so critical unless you have removed a lot of material to remove twist or defect to straighten out poor stock. In this case, check by measuring and plane accordingly.
With the legs squared and planed, I determine my overall length to cut them to length. In my case, where my bench height is 38” overall, I deduct the finished thickness of my top, 2 ¾”, and also 1 ¼” for my bearer to establish my overall length. My leg length is 34”.


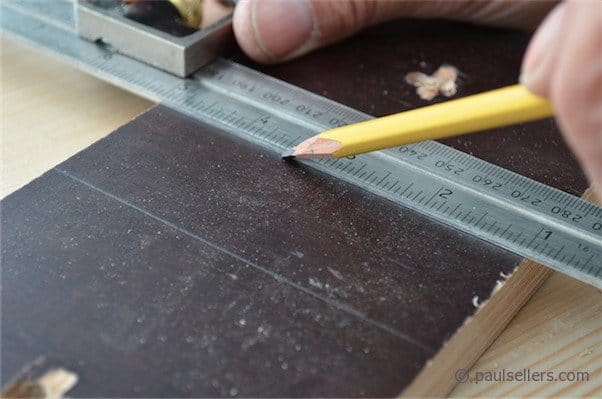
I first removed ½” from one end by squaring a line onto two adjacent faces using the pencil and square.


My panel saw quickly cuts away the waste. I then chamfer the bottom edges of the leg with the smoothing plane, and also along the leg for the bottom 12 inches. These two steps prevent the outsides of the leg from splitting if the benches are pulled along a hard floor such as concrete or a sweeping broom. From here I measure along the leg for my second cut at 34” and do the same but this time with no chamfering needed.

Now we have our stock planed and perfected we are ready to create the joinery and soon assembly begins. I had a pretty fruitful day really. I planed and trued all of my stock and made all of my mortise and tenons for the leg frame assemblies. That was great fun. In fact I am grateful for the fact that even though I have made and sold at least a hundred such benches and used the same style made from the same or similar materials for the different schools I have started through the years, I have never lost interest in making and teaching others to make them.
Through-tenon with roundovers
Now here is what you can look forward to next. This should be fun, but now is time to hone and fine tune your #4 or 4 1/2 Stanley smoothing plane (the best planes ever designed bar none) because we will be refining the work all around as we go. I will be sanding the bench with a Dewalt random orbit sander after all is finished but before assembly, for the main part.
Comments ()