How to Build a Workbench – Apron Recesses (part11)
Cutting the housings
NOTE:Just so you know, this is an older workbench series. Paul has a newer Workbench series. If you are interested in the updated version of Paul’s workbench please click the button down below. This page links to a cutting list, tools list, FAQS and much more.
Click here to go to the workbench page
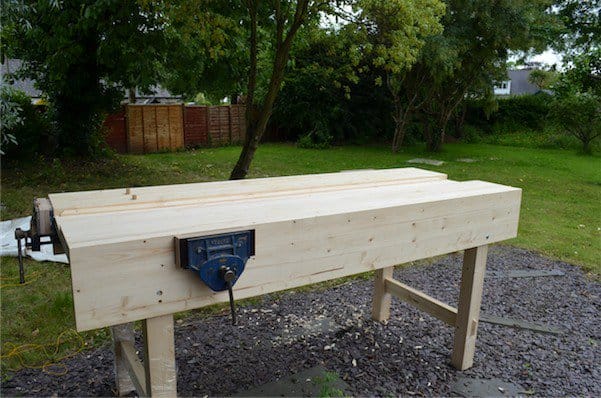
I have seen many (and even had to work on) low-grade benches without aprons. Admittedly they were assembly products shabbily made by workers who knew nothing about much beyond earning a living, and so I didn’t expect much at all. Aprons are critical to a good bench in many ways not the least is the absolute unwavering rigidity essential to a hand tool workbench.
Imagine the benchtop sections glued permanently to the aprons and you begin to see them more like a rigid length of angle-iron anchored at the extreme edges. A perfect harmony of parts. On this bench you can chop mortises and pound just about anywhere along its length with zero flex and bounce back—dead rigid. For someone like me who doesn't like having to move to over-the-leg positions to reduce inefficiency it's an absolute. This bench does it all.

On my benches I don’t rely only on the housing dado. I want something that locks and continues to lock the legs into the apron housings and never turns lose. I also want my bench to be disassembled for moving from time to time. A wedged housing dado resolves the issues. The idea came to me when I needed to build 15 benches that could be dismantled and shipped to another venue on tour or simply moved from an upstairs workshop to a downstairs workshop. The doorways were narrow and so too the stairs and the lift (elevator US) was a mere 6'8" by 3' by 4'.By adding a simple wedge to the inside of the legs, at each of the joints, I could guarantee the lateral stability absolutely essential to a hand tool woodworking bench. The more it racks the more rock solid the wedges seat in each of the joints and there lies the increased success of what was already a truly solid and functional bench.
Knock-down benches often have faults but these benches have been tested by hundreds of students over the years so include this feature and enjoy a good bench. When I have made benches in the past, I found that even with glue and screws or bolts, shoving them across uneven floors carelessly or regularly can rack the joints, break the glue line and weaken the rigidity of the bench. Including the joint around the leg area is quick and simple with a handful of basic tools and eliminates this problem. Imagine, a mallet, a 1” chisel and a very simple poor man’s router.


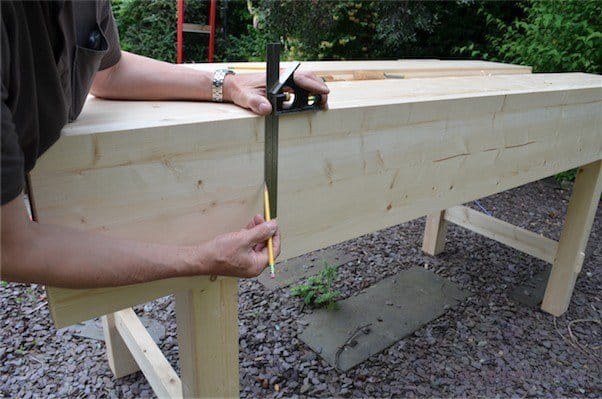
The drawings show the position of the recesses, one to each end of both aprons as exact opposites. You will measure the recess by following the measurements. You will make the wedge to suit later. It’s best to layout the joint with the square and pencil, so that you can fully visualise where you will be cutting. Begin by squaring the line 9" from the end of the apron as shown This housing dado goes from the bottom edge of the apron board up and in my case stops 2 13/16" from the top edge.


Stand the leg frame onto the apron and against the first line to establish the exact line for the leg itself, in my case just under 4". Now I measure and add 1" to the bottom and 1 1/2" at the top and join the lines. This is my wedge allowance.
See drawing above an image here:


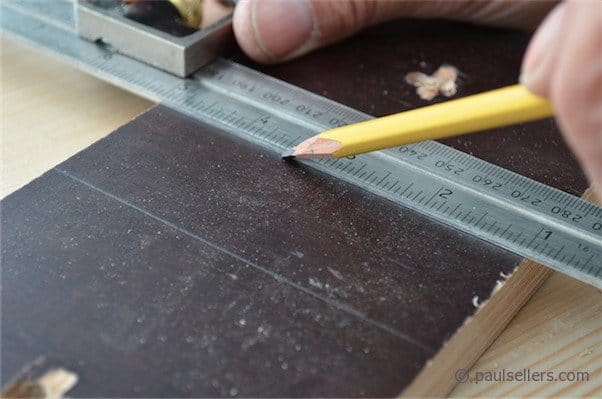
Square the lines onto the bottom edge and then run a gauge line set to 5/8” between the lines. To keep parallel to the bench top you can either use a marking gauge or set your square to 1/16” more than the thickness of your benchtop. That way the apron will stick past the main benchtop by 1/16” and you can plane it level after the apron is glued to the benchtop.


With the layout completed, use the knife and square to establish the first knifewall. Take care that the square doesn’t slip and give a false line.

Chisel into the knifewall with the 1” chisel slightly inclined towards it. This establishes the exact line for the bench leg.

Deepen the wall with vertical chops along the length and alternate between vertical and horizontal cuts, down to the 5/8” depth line established by the gauge.


The second knifewall is angled. Use the square as a straight edge and repeat the cutting as you did for the square knifewall. Continue as above until you reach the depth line.

You must now remove the waste from between the walls, which is simple and straightforward. Start near the surface, about ¼” down and chop away the waste. Take care not to cut downwards and forfeit the exact depth you need across the surface.


If you cut down to about 1/16” above the gauge line, you can then use the router or the poor man’s router to establish the final depth.
Three more to go and you are done. Then we can start assembly!! Whoohoo!!
Comments ()