How to Build a Workbench – Fitting the Well Board (part13)
NOTE:Just so you know, this is an older workbench series. Paul has a newer Workbench series. If you are interested in the updated version of Paul’s workbench please click the button down below. This page links to a cutting list, tools list, FAQS and much more.
Click here to go to the workbench page
I realise that these posts are long, but we are invading the worlds of make believe benches, stepping off of the conveyor belt to fantasyland and getting into real woodworking again. To do that we have to have a real working bench that no one can really criticise as being useless, amateurish, fanciful, indulgent or stupid. Time was when a workbench was something you worked on; you cut with a saw on it, chopped on it, chiselled into it even. Sometimes you miscut and gouged it, maybe even once or twice a day. Rusty saws got derusted on it and old planes were restored and sharpened on it. I know we all have different paradigms, but my bench is a working, worked on, worked with, worked in, worked from bench. More polished and highly refined workbenches don’t really work to well for me. My chisels commonly slip and saws catch the bench corners as I work, with or without care, with or without bench hooks. I'd rather be concerned about my furniture and perfecting it than my workbench. Let’s get going.
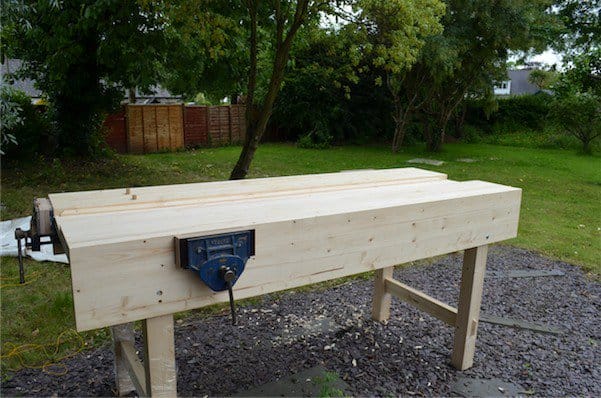
Fitting the well board
For me and hundreds of thousands of joiners and cabinetmakers before me, the well is critical. I spoke earlier of its intrinsic value to the wellbeing of my tools and my work.

Before we can actually fit the well between the two benchtops we must fix the benchtops to the bearers. At the moment they are only anchored at the lower portion of the aprons. They could be open at the top of the housing dadoes where you cannot see too well. Two long clamps, cinching the two opposites together will give good seating between the apron and the leg frame.

First check that the ends of the benchtops line up by checking with a straightedge. With the benchtops and aprons clamped against one another, drill a hole large enough the take the whole shank of the 5/16" (8mm) bolt through the bearer. 5/16" is large enough.

Angle it if need be, so that you have good access and the drill chuck is not impaired. Drilling through the bearer first prevents parallel threading that typically keeps the two components apart and therefore prevents proper seating. This gap results in inefficient transfer of force to the legs during benchtop chopping. It’s good to get it right.

I clamped my benchtop down before cinching up the lag bolt. 2 ½” x 5/16” lag bolts are a good size to go through the bearer and into the benchtop. Drill a 5/16” hole through the bearer and then a 3/16” pilot hole into the benchtop. This will ease the bolt and prevents undue stress in the wood.


With all of the lag bolts and washers in place, remove the clamps. We are now ready to fit the well board to the first benchtop. I checked my benchtop for straightness when I surface planed it previously. Offering the well board to one side will show where if necessary you need to plane. Plane the edge until it fits tightly to the benchtop and than mark the opposite side from underneath.
To do this, tighten two clamps on the apron, one at each end and place the wellboard on edge so that it sits above the benchtop. Clamp one end of the wellboard to the apron and plane as needed.
Now you must plane off the excess width until it fits in between the two bench tops. I find it best to create a slight taper fit so that the underside has a measure of lead-in. Technically, the well need not be tight. It will more than likely shrink anyway. But I prefer to start out tight. The internal well corners will be covered by corner mould.

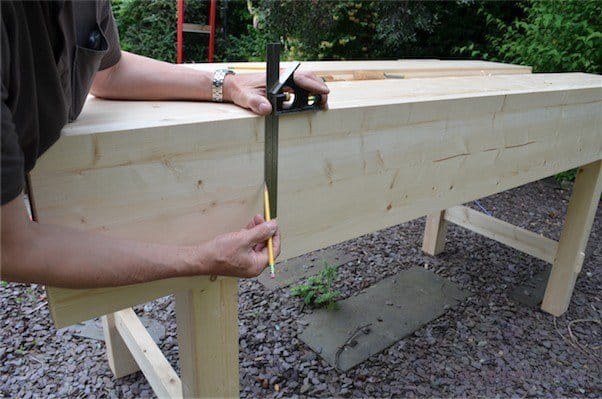
With the wellboard fitted I cut the board to length but first checked that the bench was square and that the benchtop lined up from side to side using a straightedge across the two ends. In my case the bench was dead square and leveled and both ends lined up perfectly. If it is not square, remember that clamps out of parallel can clamp a unit like this out of square so you can actually use them in counter position to pull them into square too. You must first make certain that the bench frames are still level and out of twist with one another. It’s simply a question of packing up beneath one leg as necessary.


I dropped my wellboard in place, letting it overhang at each end, and used a straightedge to create the knifewall I need to cut the board to length. Do this to both ends simultaneously. Now tap the wellboard beyond the end so you can access the cut. There is no need to knifewall the under side as we will be bevelling this later. Do the same to the other end and you are ready to plane the ends. Work from either side so that there is no broken fibre on the outcut. This is also a good time to remove the arris by planing. Two strokes should be enough.
Cutting the housing dado over the bearer.

Now we must tap the wellboard back in position, flushing the ends with the benchtops.


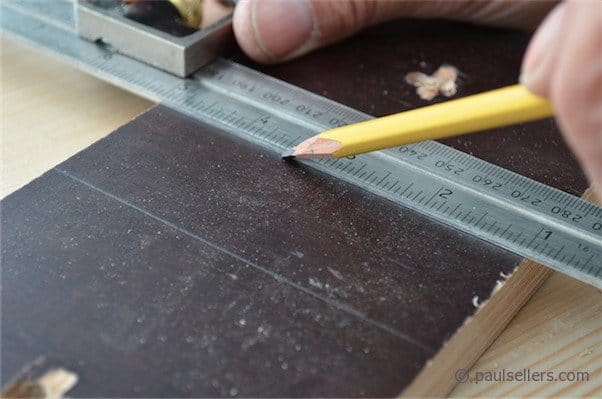
Use a knife to cut either side of the bearer underneath and remove the wellboard. Mark the depth of the housing with a marking gauge or you can use the router to do this also. You want to leave 1” of material on the topside. In my case it is 5/8” deep. This depends on the thickness of your wellboard.
Chisel out the recess as you did previously for the apron housings. This time you can work the housing dado from both sides, so mark both sides for depth.

I used a saw to cut the walls of the housing dado. You can use either the 1” chisel or the handsaw or tenon saw.

With the housing dadoes cut, I used the same gauge setting as for the housing dadoes to mark the depth for my chamfer. Clamp the board to the benchtop to do this.

Place the board in place and drill and screw the board to the bearer from underneath as you did for the benchtops.


Comments ()